The older we get, time seems to go by more quickly with every passing year. There are always things to do, places to go and people to see. Finding time to decorate your home can be a struggle, but there are shortcuts you can take to express your personal style.
The creative process begins with a trip to your favorite craft or home furnishing stores. Look for items that will complement your existing décor, or anything that draws your attention in a good way. Think about ways you could put your own stamp on this item.
What does it need to match your style? Could you change the color? How about adding some beads or fringe? A glue gun or sewing machine can work wonders. With a few simple alterations, you can turn a store-bought item into a semi-homemade craft project to be enjoyed and admired for years to come.
Seashell Wall Art
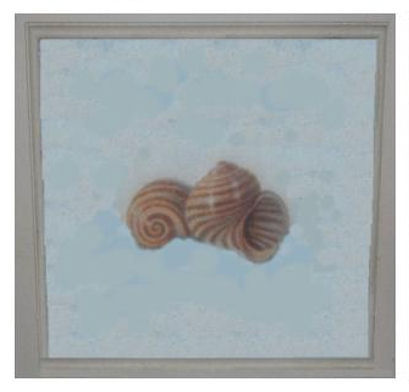
These nondescript plaques were purchased at Marshalls. The plain gray frames had the image of one or two seashells printed in the center on a blue and white background, but lacked personality. Collected during several vacations, seashells and starfish were glued around the perimeter of each plaque. Memories of fun family days at the beach are celebrated in this fun and easy way. Crafting Tips: Glue guns can create long stringy bands. Apply glue to back of a shell, and then wipe the tip to break any strands of glue that may have formed.
Seashell Wall Art – Original:
Seashell Wall Art – Updated:

Seashell Wall Art – Updated:

Green Man & Green Lady Wall Art
These Design Toscano wall plaques bring nature indoors with their layered warm green leaves. The expressive faces are unexpected and playful, but the colors are a bit flat. Using a metallic paint pen, gold highlights were applied to each plaque. The gold accents, on the leaves, faces and birds, catch the light and perfectly complement the faux wall finish. The whites of the eyes and the lady’s lips were brightened with fresh color. Crafting Tips: Paint pens can be finicky. With the cap tightly in place, shake the pen well before use. When priming the pen, press the pen tip down slowly upon scrap paper. Do not prime the pen directly upon your project because a large amount of paint can unexpectedly overflow. If you get paint on your hands, there’s no need to use harsh chemicals to remove it. Simply use a little coconut oil. Rub it on you skin and wipe off with paper towels.
Green Man – Original Plaque:

Green Man – Highlighted Plaque:

Green Lady – Original Plaque:

Green Lady – Highlighted Plaque:

Foxy Santa Figure
Purchased at A.C. Moore, this holiday fox came dressed in a red & tan coat and scarf with black boots. Two obvious things were missing: a hat and a bushy tail. The hat was crocheted using matching tan and red yarns. Faux fur from Joann Fabric Store was hand sewn, and stuffed with polyester filling to create a long luxurious tail, for which foxes are known. The tail was safety pinned in place to ensure a strong attachment. The fur concealed the pins. Now there is no doubt this cute little fox is ready to guide a sleigh or make you smile in appreciation for your Christmas décor. Crafting Tip: While working with faux fur, be sure to tuck in all the raw edges, because they will shed profusely.
Plush Fox Figure – Original:

Plush Fox Figure – Stylish & Festive:

By taking a few easy steps, you can transform a store bought item from Ho Hum to Wow with very little effort.
Happy Crafting!