Paper Flowers: Roses

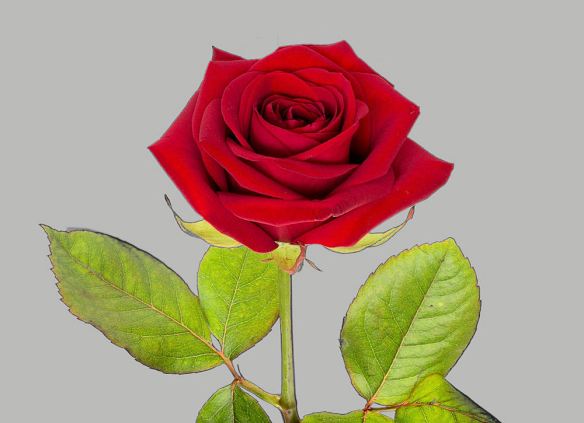
Red Rose

Welcome to part 2 of this paper flower tutorial. Roses are probably the most popular flower. This paper variety is easy to make, and many of the steps are the same as the Water Lily we made in part 1. Let’s try this together.

Inspiration – Red Rose
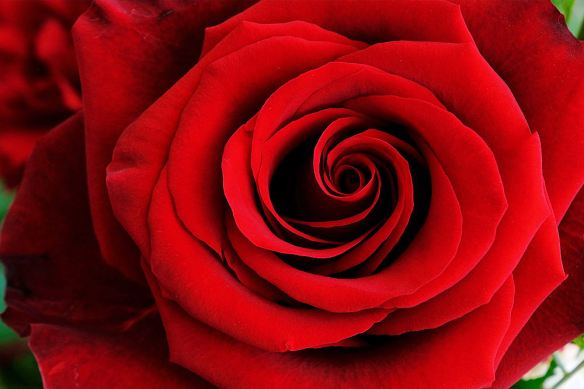
Red Rose

Supplies

Rose Supplies

Supplies:
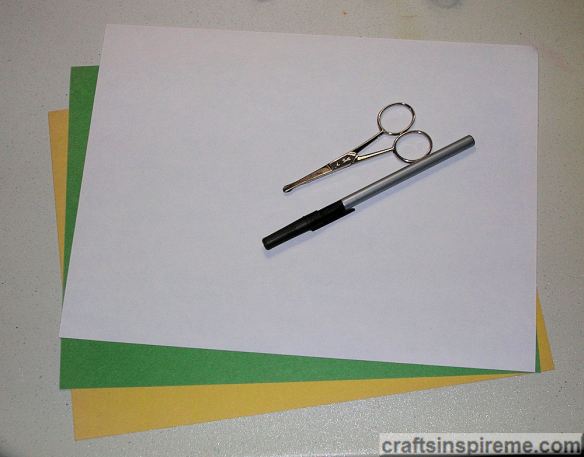
Construction Paper – 9” x 12” sheets in red & green
Stick Glue & Craft Glue
Scissors, Pencil & Ruler

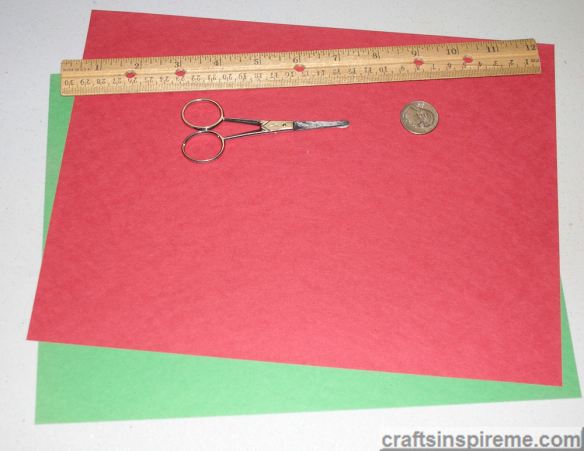
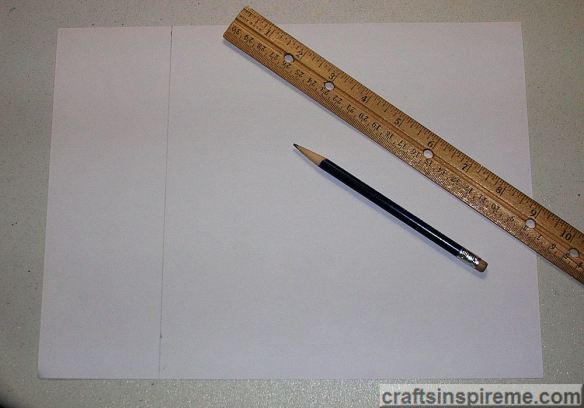
Measure & Cut White Paper into a 9” x 9” Square
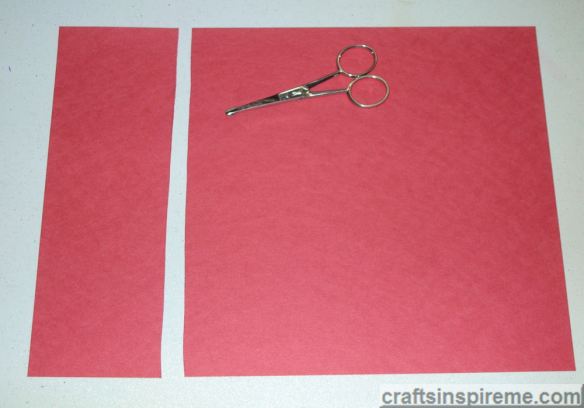
Cut 9x9 Red Square

The original sheet size is 9” x 12”. Cut 3” off the length, making a 9” x 9” square.

Fold Paper in Half
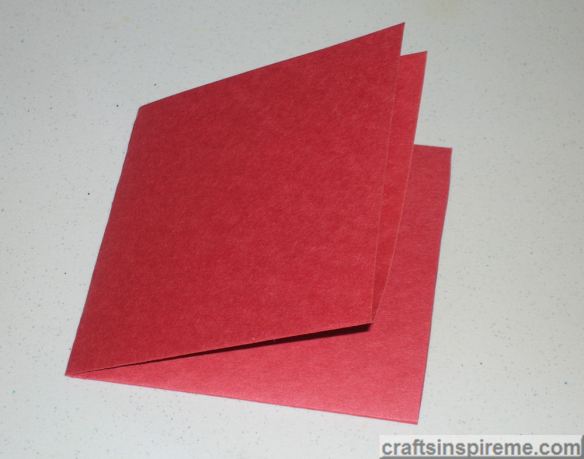
Fold in Half & Fold again

Fold the paper in half and then fold it in half again, creating a smaller square.

Draw Guidelines
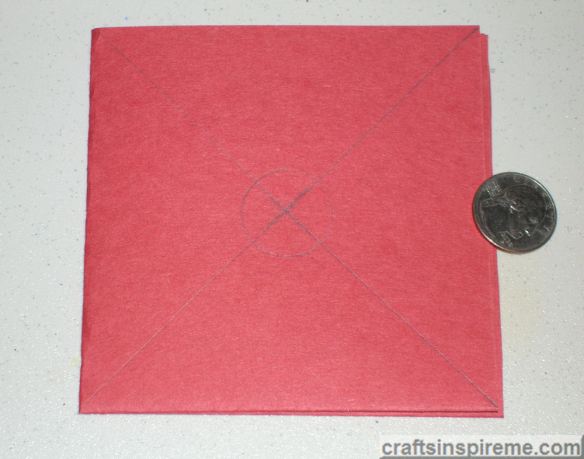
Draw an X & Trace Coin

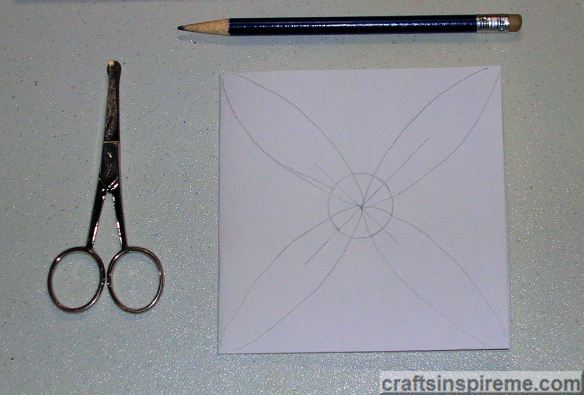
Draw an “X” from corner to corner across the square. Trace a 1” coin (I used a quarter) in the center of the square.

Petal Experiment #1:
Draw Flower Petals
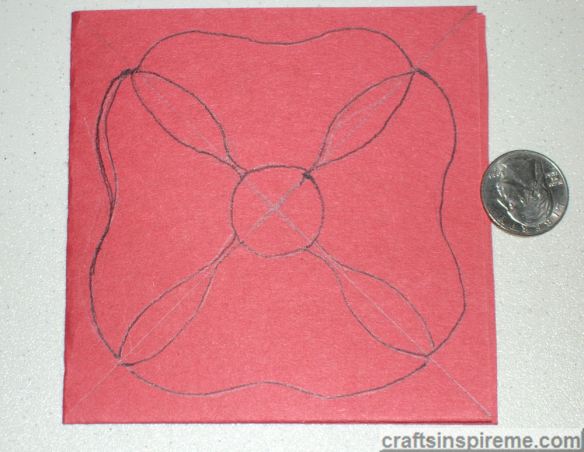
Draw Flower Petals

Lightly draw one petal in each quadrant, narrowing toward the center of the flower as shown.

Cut Out the Flowers
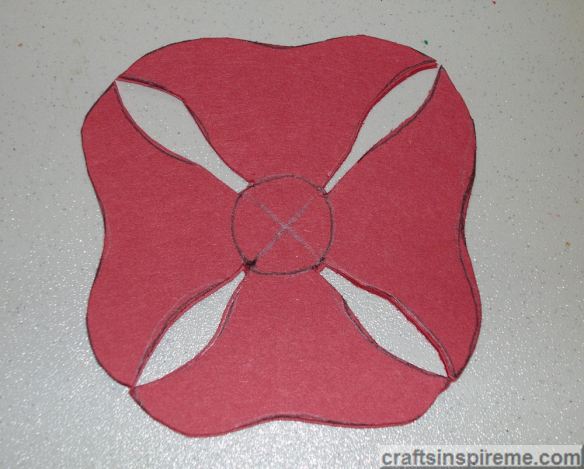
Cut Out Flowers

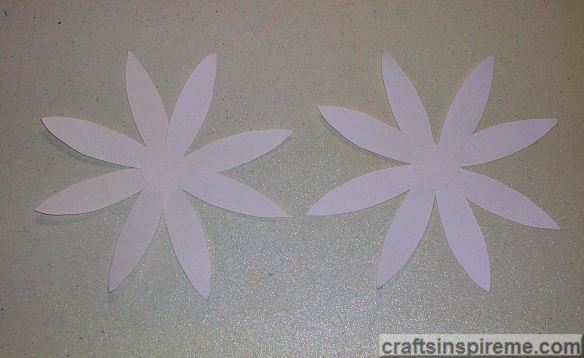
Carefully cut out the flowers, for a total of four. In the photo above, the flowers are stacked one on top of the other with four petals each. Please save the paper scraps for a future step.

Create a Support Ring for the Petals
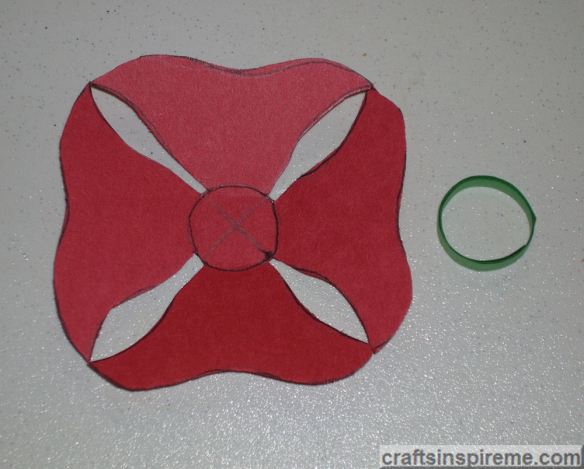
Make Green Support Ring

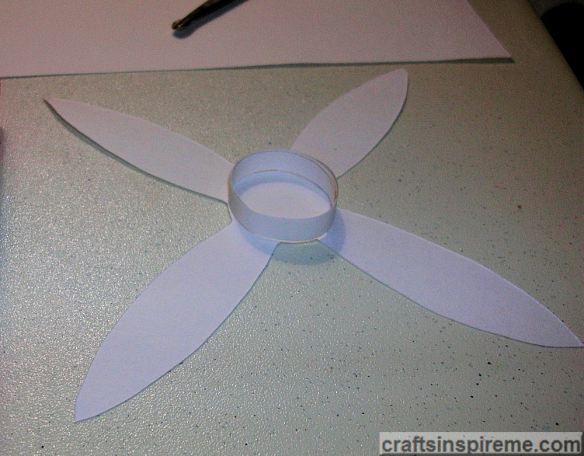
Cut a 9” long x 1/4″ high green strip to form a circle around the center of the flower. Glue the ring together using stick glue. Test-fit the first flower inside the ring. Upon doing this, I realized the petal shape would not work. This led to the next experiment.

Petal Experiment #2:
Reshape the Petals
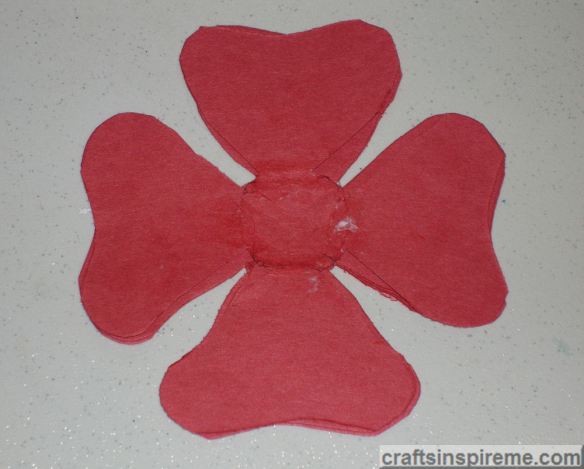
Reshape Flowers

Using scissors, round the ends of the petals, creating a four-leaf clover shape.

Test-Fit a Flower in the Support Ring
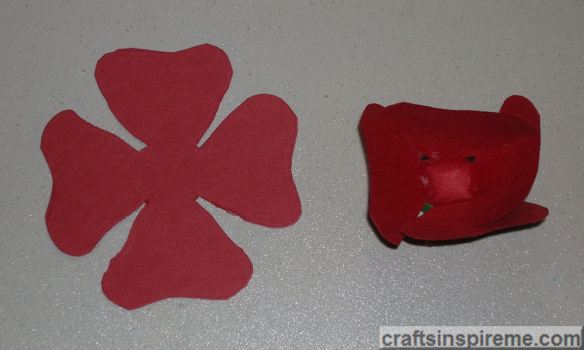
Test Flower Support Ring

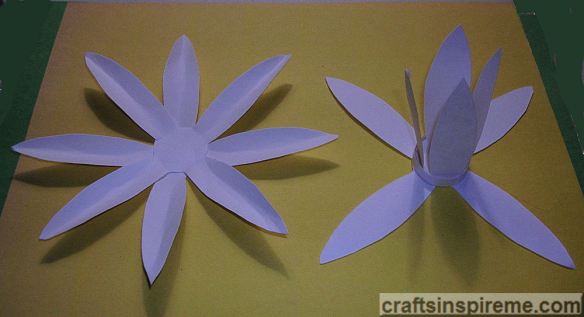
This new shape works well in forming the layers of the rose. On the right is a test-fit of the first flower inside the green support ring.

Glue the Ring to the Base
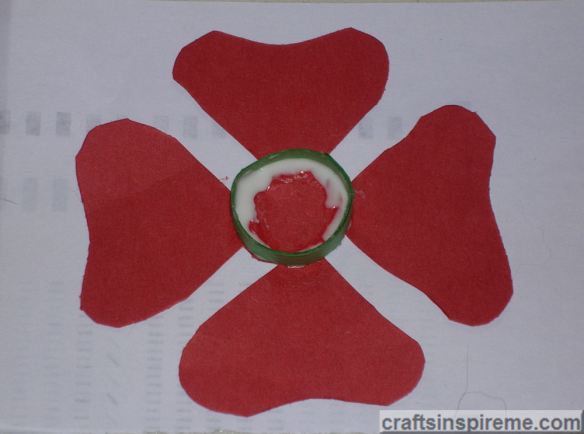
Glue Ring to Base

Using craft glue, attach the ring to the base flower.

Glue First Layer Inside Ring
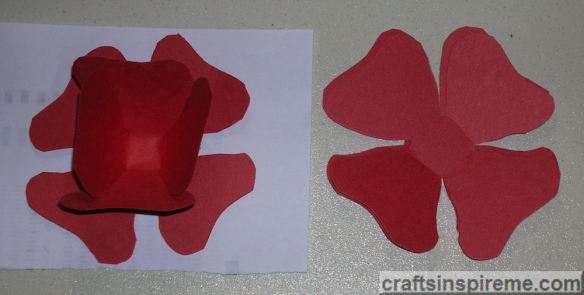
Glue Flower Inside Ring

Add craft glue to the center of the ring and push the flower down inside it. Turn the flower so the petals do not overlap.

Conceal Support Ring at Base of Flower
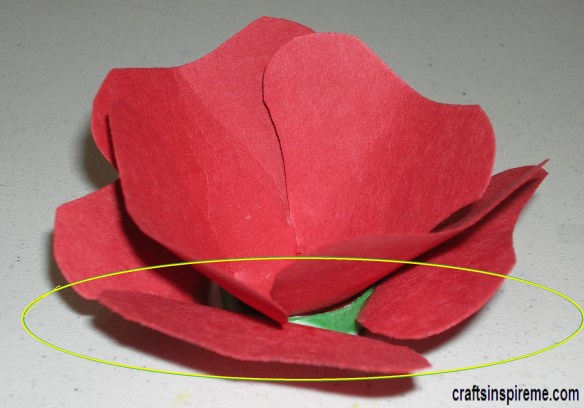
Conceal Ring & Curl Petals

Bend each of the four bottom petals up to cover the support ring. Glue in place with craft glue. After they dry, adjust petals as desired.

Top View of Rose in Progress
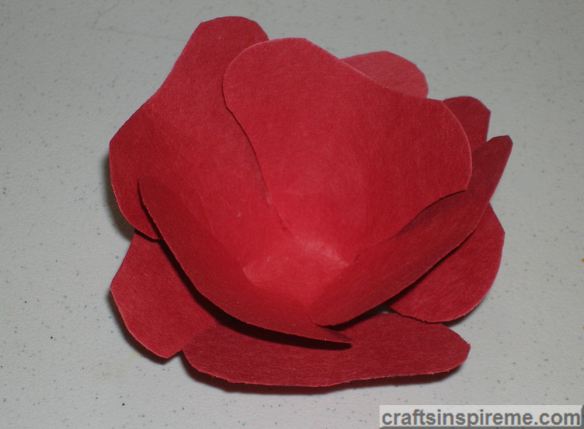
Top View Rose Progress

The petals form a pretty frame around the center of the flower.

Create the Flower Center
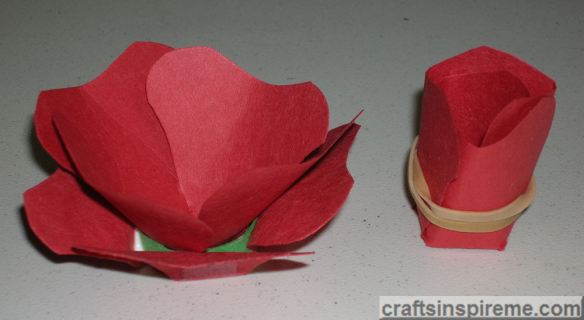
Create Flower Center

Create the center of the rose, shown on right, by bending the petals upward around the center, using a rubber band to temporarily hold its shape. Adjust the interior petals as needed for desired appearance. Most roses have a spiral center. Glue the petals together so they will stay in place after the rubber band is removed.

Test-Fit Flower Center
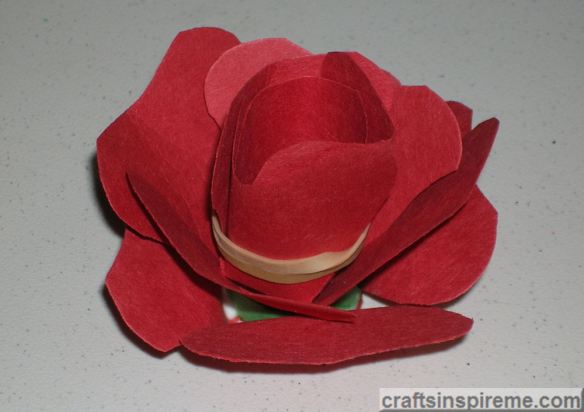
Test Fit flower Center

Set the new flower center in place and apply craft glue to the bottom. Allow glue to dry and then carefully remove rubber band.

Progress Photo
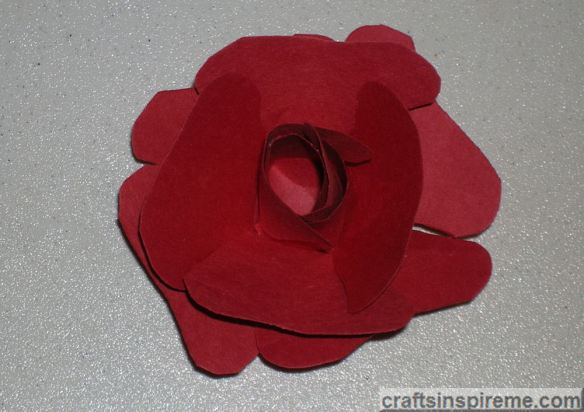
Progress Photo

Just to recap, this rose now consists of three layers – bottom, middle, and center. We still need petals to fill in around the center, and some at the base.

Use the Last Flower
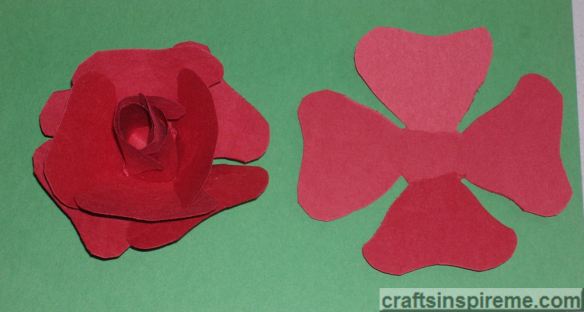
Use Last Flower

Glue the last flower to the bottom of the rose. Be sure to turn the flower so the petals will not overlap with the previous layer.

Leftover Paper Scraps
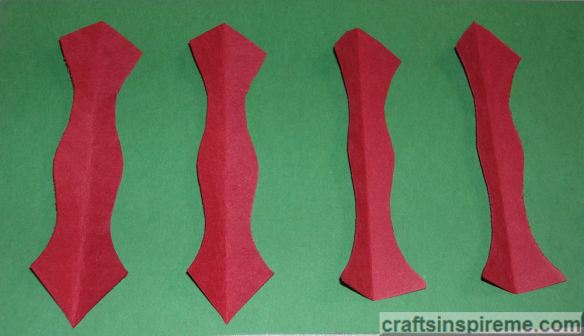
Leftover Paper Scraps

These paper scraps are leftovers from cutting the roses.

Round the Ends
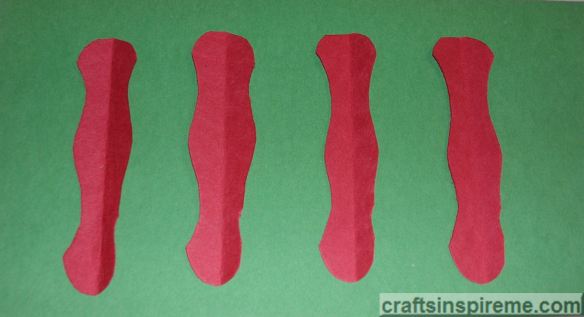
Round the Ends

Stack the four pieces on top of each other and then round both ends. Cut them in half for a total of eight petals, which we will use to fill in the center of the rose. The rounded ends are the tops of each petal.

Complete Flower
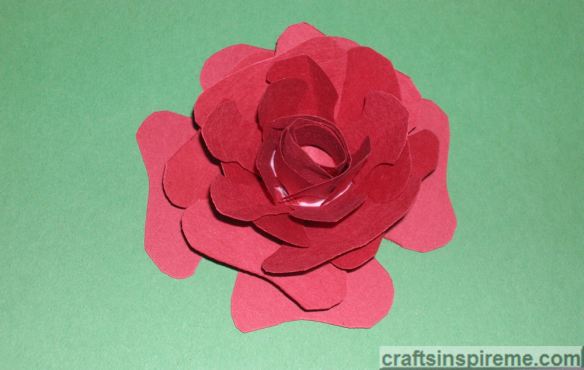
Complete Flower

Add a little craft glue to the bottom of each petal and insert each around the central flower core. This completes the red portion of the rose. Now we need a few leaves.

Creating the Leaves:
Inspiration – Red Rose with Leaves
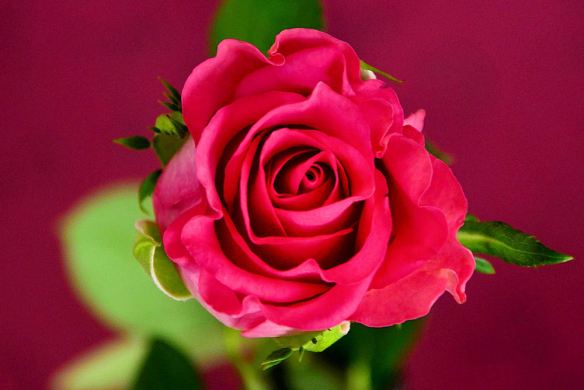
Red Rose with Leaves

We are going to make the small leaves, which wrap the rosebud before it opens.

Draw Guidelines
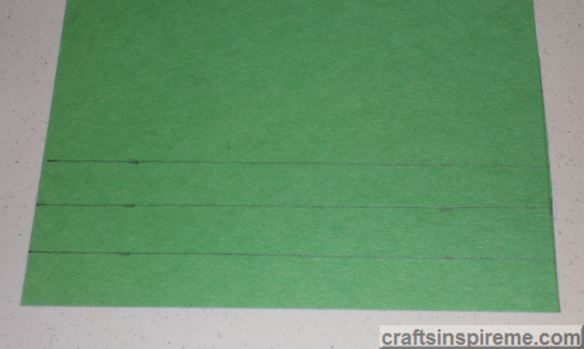
Guidelines for Leaves

Measure 1/2″ x 9” long strips and draw guidelines on green paper.

Accordion Fold the Paper
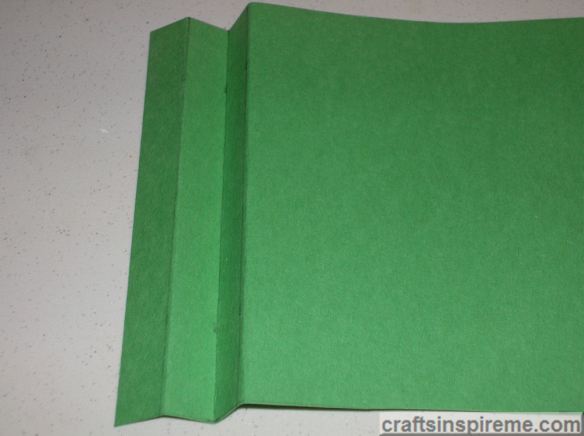
Accordion Fold Paper

Simply fold the paper accordion-style to create three layers of paper.

Draw the Leaves
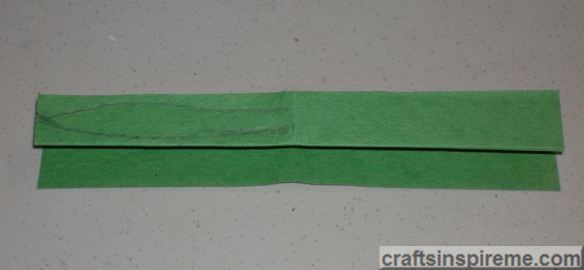
Draw Leaves

Draw a long, pointed leaf on half the folded green construction paper, as shown above. Fold the paper in half again and cut out the leaves for a total of six.

Fold the Leaves
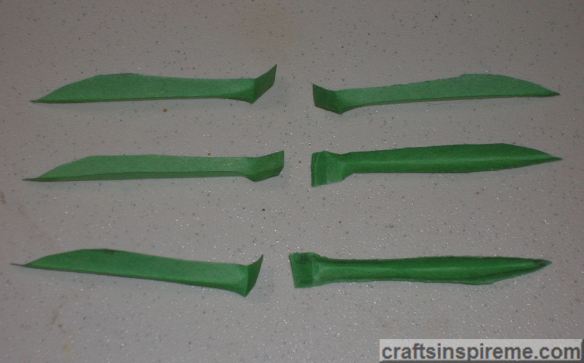
Cut and Shape Leaves

Fold each leaf lengthwise and then bend approximately 1/2″ of the bottom to attach to the underside of the rose.

Glue on the Leaves
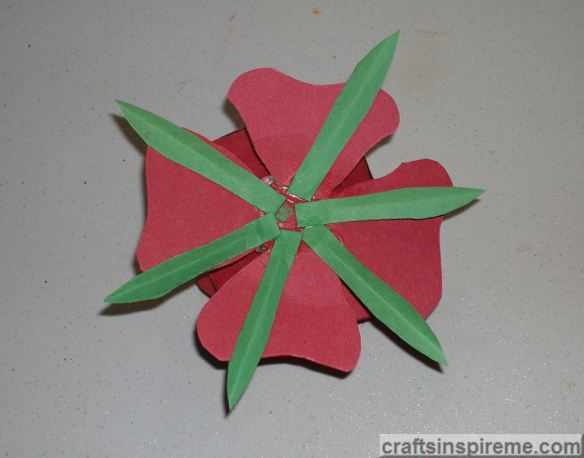
Attach the Leaves

Using craft glue, attach each leaf creating a star pattern on the bottom of the rose.

The Completed Paper Rose
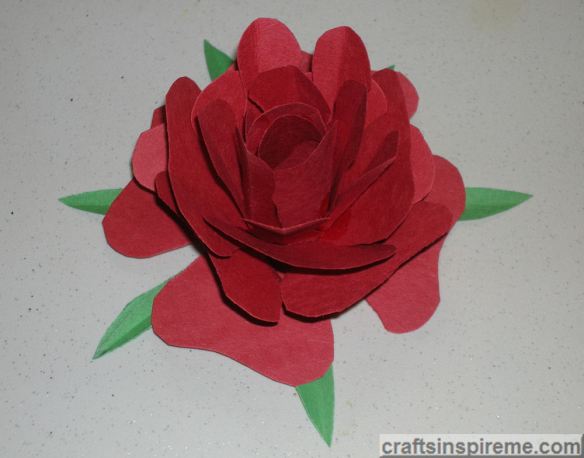
Completed Paper Rose

This completes our project, a bold and beautiful rose. You can place these on a table or attach them to a wall. If desired, you can paint skewers green and glue one to the bottom of each rose to create a lovely bouquet, which never needs watering. I hope you enjoyed learning how to make paper flowers and will give it a try. Good Luck!

In case you missed it, here’s a link to part 1, Paper Flowers: Water Lilies.

Thanks for Reading & Happy Crafting!
Paper Flowers: Water Lilies

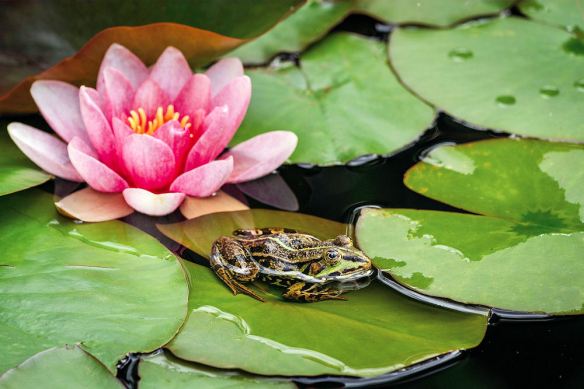
Pink Water Lily & Frog

A fellow blogger and dear friend, Elvira, requested a post about making paper flowers. She wants to use them as dining table decorations as well as mementos for her guests to take home. This post teaches how to make paper Water Lilies and will be followed by a separate post on making paper Roses. Let’s try this together.

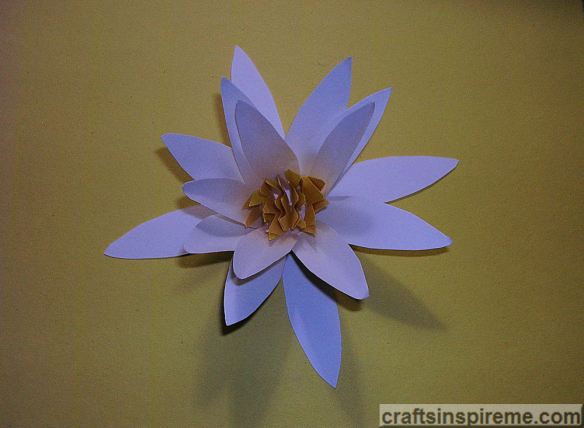
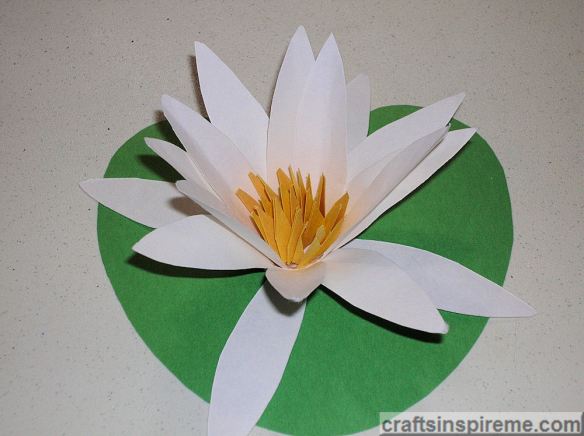
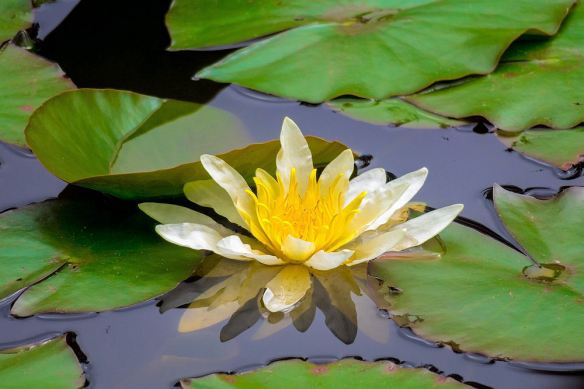
Inspiration – White Water Lily

White Water Lily

Supplies

Construction Paper & Scissors

Supplies:
Construction Paper – 9” x 12” sheets in white, green & yellow
Stick Glue & Craft Glue
Scissors, Pencil & Ruler

Measure & Cut White Paper into a 9” x 9” Square

Cut White Sheet Square

The original sheet size is 9” x 12”. Cut 3” off the length, making a 9” x 9” square.

Fold Paper & Draw Guidelines

Fold Paper 2x Draw Petals

Fold the paper in half and then fold it in half again, creating a smaller square. Trace a 1” coin (I used a quarter) in the center of the square. Lightly draw four petals diagonally, extending from each corner to the center of the circle as shown.

Cut Out the Flowers

Cut Out Flowers Total 4

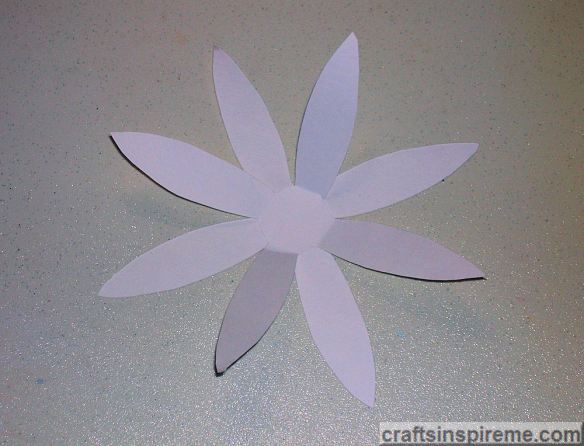
Carefully cut out the flowers, for a total of four. In the photo above, each flower has two separate layers, with four petals each.

Add First Layer to Base Flower

Add Layer 1 to Base Flower

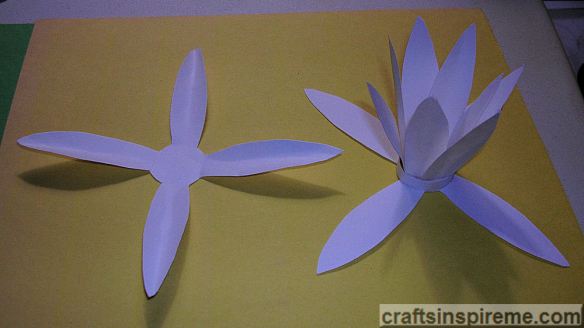
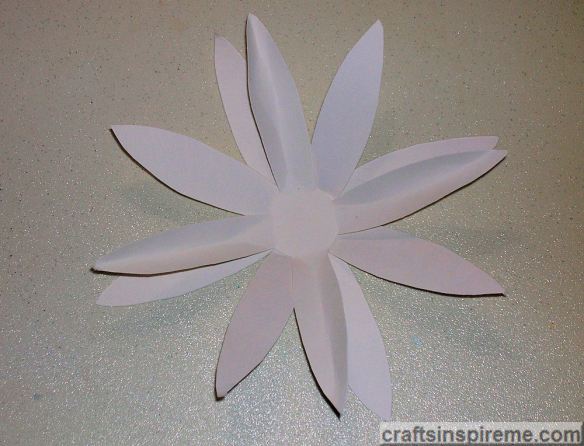
Place one flower on the table and then add another on top. Turn the flower so the petals do not overlap.

Add Second Layer to Base Flower

Add Layer 2 to Base Flower

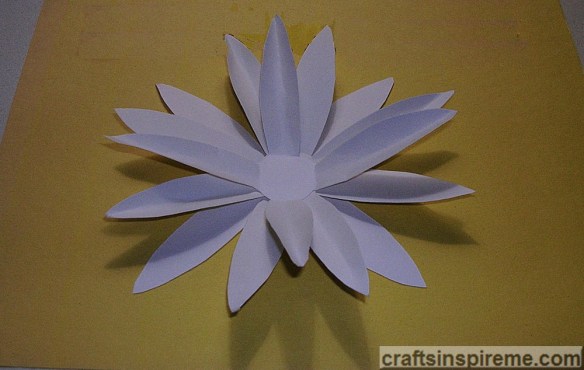
Place another flower on top, ensuring petals are spread out as shown.

Add Third Layer to Base Flower

Add Layer 3 to Base Flower

Place the last flower on top. This allows you to see the fullness of the flower prior to assembling it. If you prefer, you could glue these together as is and skip down to the section describing how to create the flower center. I want the lily to have a strong three-dimensional presence, which is achieved in the following steps.

Create a Support Ring for the Petals

Make Ring & Glue to Base

Cut a 9” long x 1/4″ high white strip to form a circle around the center of the flower. Glue the ring together using stick glue. Now use craft glue to attach the ring to the base flower.

Glue First Layer Inside Ring

Glue Layer 1 inside Ring

Add craft glue to the center of the ring and push the flower down inside it.

Glue Second Layer Inside Ring

Glue Layer 2 Inside Ring

Glue the next flower inside the ring, ensuring the petals do not overlap with the previous layer.

Glue Third Layer Inside Ring

Glue Layer 3 Inside Ring

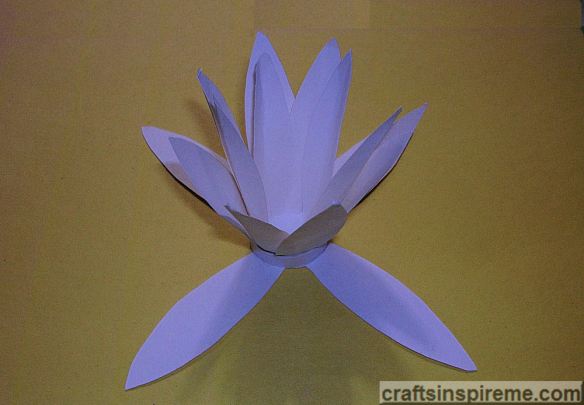
Glue the last flower inside the ring. You can crease some petals or curl them with your fingers.

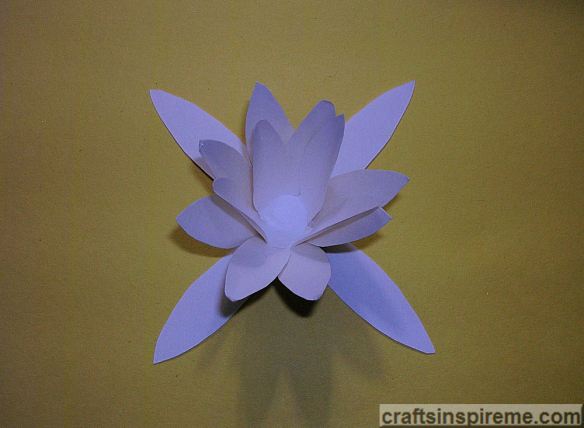
View of Flower from Above

Flower View from Above

The petals form a pretty frame around the center of the flower.

Create the Flower Center

Cut Flower Center

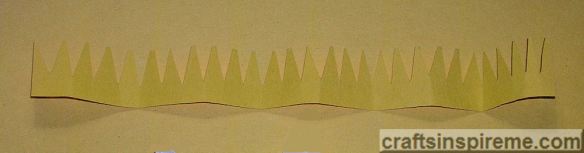
To create the flower center: cut a 9” long x 1” high strip of yellow paper. Cut triangles along the top, ensuring you do not cut the lower half. Accordion fold the strip.

Glue Yellow Center Inside Flower

Glue in Yellow Center

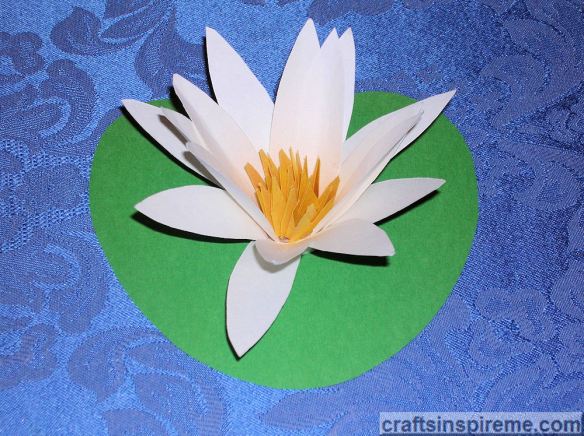
Hold the accordion folded yellow strip in the center and adjust it to fill the space. Glue with craft glue. You will probably have to hold it until the glue begins to set.

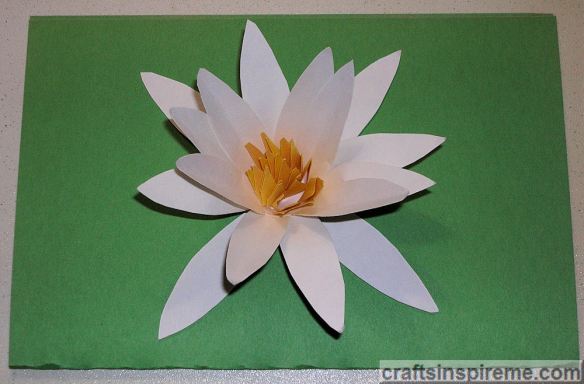
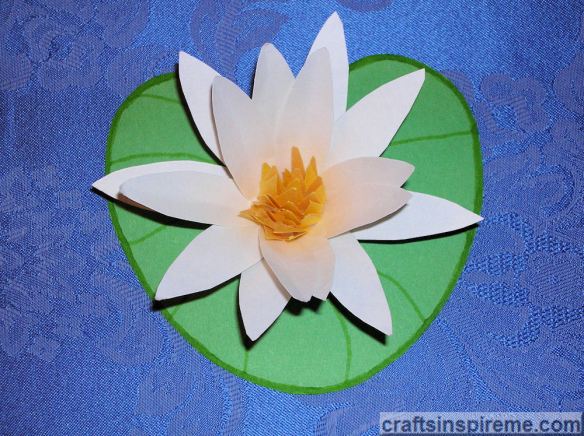
Water Lily Against Green Background

Flower Against Green

Lilies and lily pads drift upon the surface of the water. Next, we will make a lily pad.

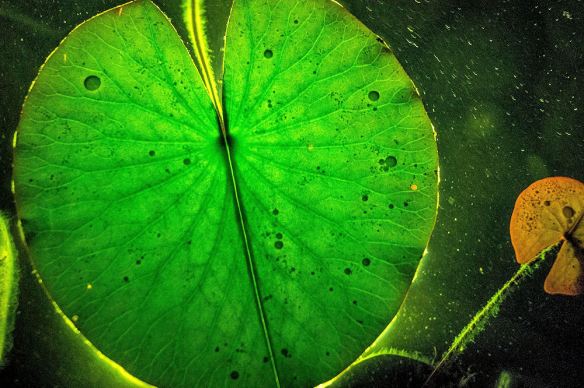
Inspiration – Lily Pad

Lily Pad

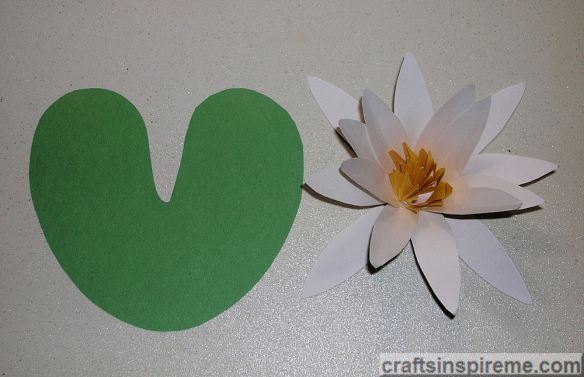
Create a Lily Pad

Cut out Lily Pad

Using a half-sheet of green construction paper, draw and then cut out a lily pad.

Water Lily on Lily Pad

Flower on Lily Pad

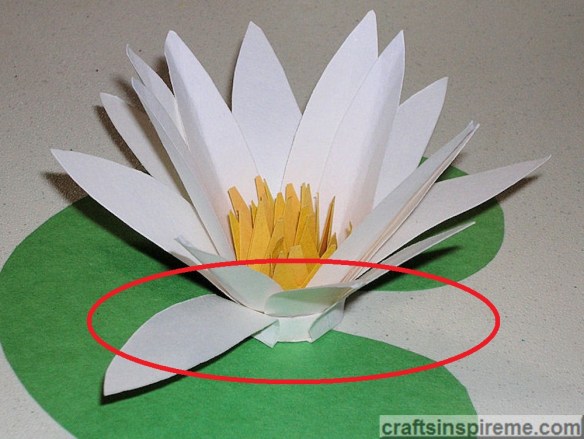
Conceal Support Ring at Base of Flower

Fold & Glue Base Petals to Cover Ring

Bend each of the four bottom petals up to cover the support ring. Glue in place with craft glue. After they dry, adjust petals as desired.

Finished Lily Against Blue Background

Flower & Lily Pad on Blue Cloth

A blue tablecloth creates the illusion of water.

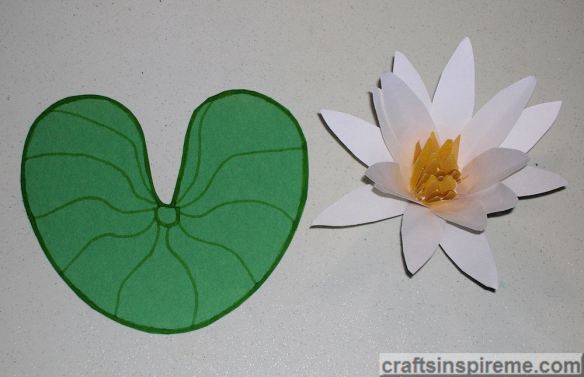
Add Details to the Lily Pad

Draw Lily Pad Details

Using a green marker, add a small circle on the lily pad and contour lines extending out to the edges. Outline the perimeter too. Although it’s not necessary, you could add some creases to the lily pad to create even more dimension.

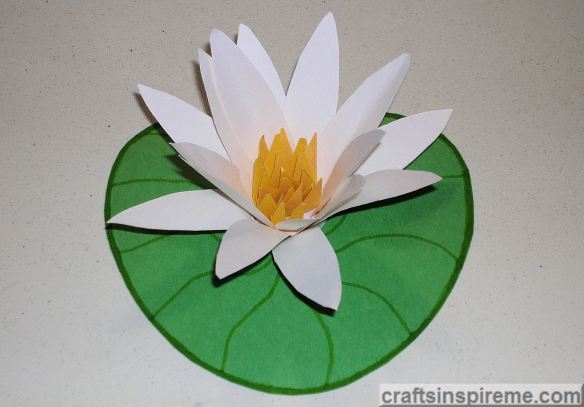
Water Lily on Finished Lily Pad

Lily on Lily Pad

Completed Project

Finished Water Lily

I hope you have enjoyed learning how to make paper water lilies. Your tablescape will be festive and your guests will be surprised by your creativity. These are easy to make and so much nicer than store-bought decorations. You could also use them as place cards by writing each guest’s name on the lily pads.

Thanks for Reading & Happy Crafting!
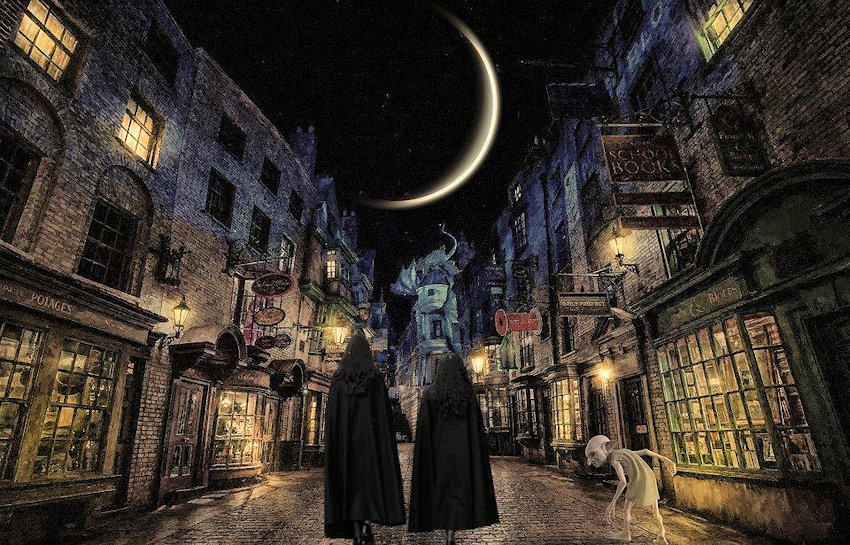
Harry Potter’s Magical Creatures

Diagon Alley
Lots of crazy things have been happening in the news lately. Wouldn’t it be nice to wave a magic wand to restore order once again to our lives?  I suppose the next best thing is delving into a magical book or watching a movie about everyone’s favorite teen wizard, Harry Potter.

Harry Potter Owl & Griffin
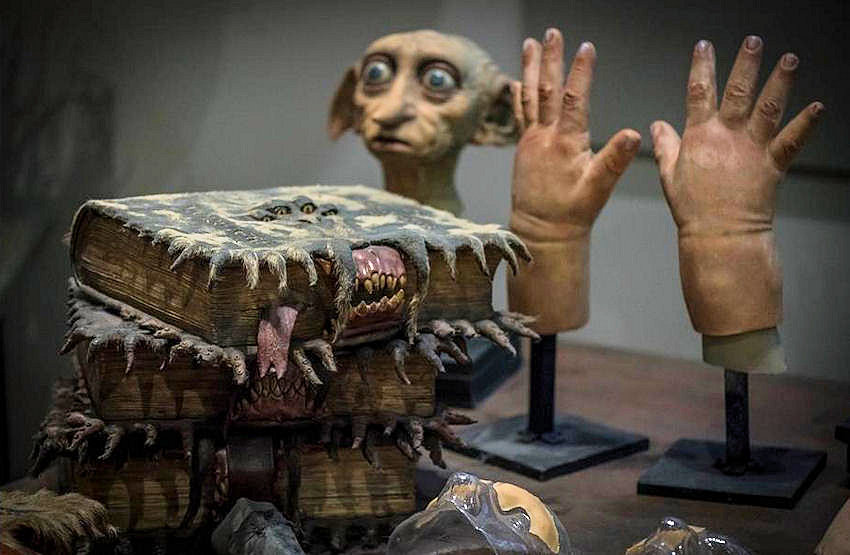
While I appreciate all the characters created by J.K. Rowling, I must admit my favorites are the mysterious, magical creatures that inhabit that fantasy world.  Whether real or imagined, each is endowed with exceptional powers and abilities – some for good and others not so much.

Harry Potter Goblin & Dragon
Don’t you just love goblins for balancing the books and dragons to keep it interesting?

Fire Breathing Dragon
Fire-breathing dragons are awesome, but perhaps we need to find something a little less flammable? lol

Harry Potter Monster Book
Every Harry Potter fan dreams of living in his magical world. You have read the books and seen the movies, but to experience it in the real world, you’ll need to make the trip to Universal Studio’s Wizarding World of Harry Potter. If travel isn’t on your agenda, perhaps you could bring a piece of Harry’s world into your own.

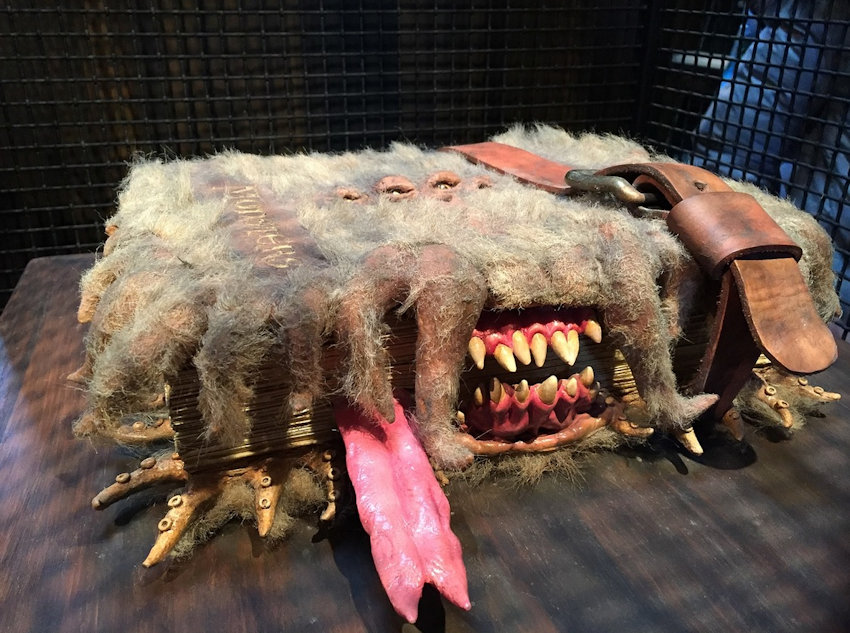
Harry Potter Monster Book
You can’t be a wizard without a few enchanted books. Who could forget the ferocious monster book? Ever wondered if you could make one?

How to Make a Monster Book Fit for a Wizard:

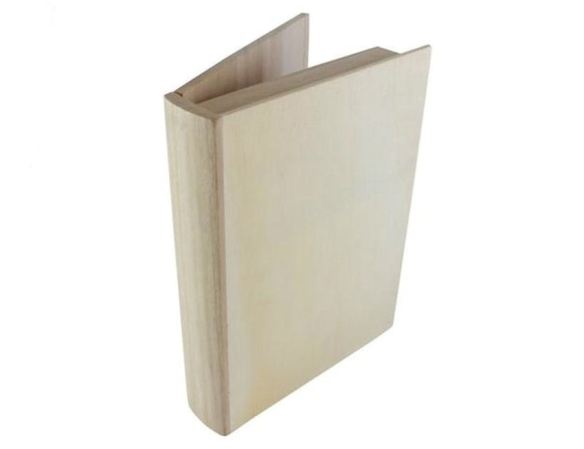
Raw Wood Book Box
Unfinished Wood Book Box
The moon and the stars must have aligned to make your wish come true with the discovery of this wooden book box, available through Michaels for $6.49. It’s the perfect size and thickness, and offers a strong foundation for building a monster book. As a bonus, there’s a secret compartment inside for storing your favorite spells (recipes), magic charms (office supplies), or wizardly collectibles.

Supplies:
Wooden Book Box (9.75″ x 7.5″ x 2.88″)
Black Paint – brush on Acrylic or spray paint
Sharpie Metallic gold marker – medium point
Vampire Teeth
Faux fur
4) Packing peanuts
4) Glass marbles – orange
1) Bottle fabric paint – black
1) Bottle fabric paint – white
1) Leather or vinyl belt
Glue gun
Scissors
Paintbrush

Book Box Painted Black
Book Painted Black
Paint the box black, inside and out. This dark color will make a great contrasting background for the gold paint applied in the next step.

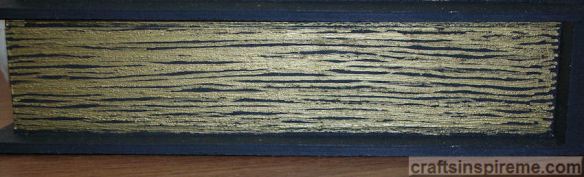
Gilded Pages
Gilded Pages
To create the appearance of gilded pages, draw horizontal lines along all three sides of the book, using a Sharpie metallic gold pen. Don’t worry about crooked lines. Pages in old books become crinkled and curled. Imperfect lines will provide an aged look.

Toothy Expression
Attach Teeth
The next step is attaching teeth. Center the mouth as shown. The large fangs are from Fire Mountain Gems, and the smaller teeth are actually clear quartz crystal chips, painted to match. To simplify this step, purchase vampire teeth at a Halloween store or Amazon.

Hair Club for Monsters
Fur Cover
Faux fur from JoAnn Arts & Crafts is the perfect color and texture for this monster. Cut the piece large enough to allow a hem on all four sides. Be sure the fur will not interfere with the operation of the hinges. Please note: the raw edges of fur shed like crazy. Once they are hemmed and attached to the book the shedding stops. (Yeah!)

Faux Fur
Trim & Hem Fur
The sides could be hand sewn, but these hems were made with a glue gun.

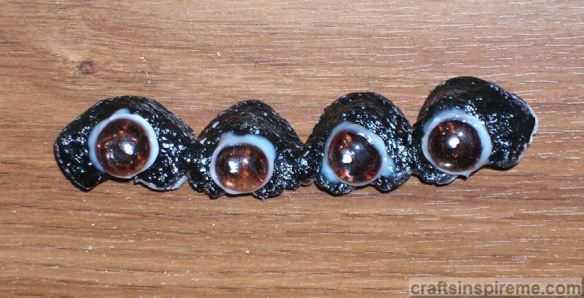
Shaped & Glued Packing Peanuts
Packing Peanuts as Eye Sockets
I decided this monster would have four eyes. To make the eye sockets, use four packing peanuts. Each peanut is pinched in half and glued to hold its shape. Glue the four together end to end as shown.

Painted Black
Painted Packing Peanuts
Paint the foam with black fabric paint. Use a toothpick to keep the paint off your fingers.

Orange Glass Eyes
Marble Eyes
I found four orange glass marbles with red streaks resembling bloodshot eyes. Each was glued into the sockets, and outlined with white fabric paint. A white dot was added to each marble to give it that creepy glint in the eye appearance.

Final Assembly
Attach Eyes & Fur
Attach the eyes to the fur, and then secure the fur on top of the box.

Accessorize
Finished Monster Book
Last step: Wrap an old leather belt around the book to keep your monster under control.

For diehard Harry Potter fans with model building and wiring skills, there is one more step that would take this monster book to the ultimate level: mechanization!  Hide a motor inside the box to operate remote controlled wheels and hinges for the jaws.  Unleash the beast!  lol

Congratulations!  You’re now the proud owner of your very own Monster Book.  Be sure to keep it on a short leash because we all know how much it loves to shred – shoes, feet, paper – anything within reach.  For decades, kids have been telling their teachers, “The dog ate my homework!”  With a monster book as a pet, this excuse might be believable!

Do you have a favorite Harry Potter creature?  Please share your thoughts in the comments section.  Until next time…

For more Harry Potter crafts, please check out this post: “Abracadabra – Hermione & Harry’s Magic Wands.” 

Thanks for Reading & Happy Crafting!
Painting with Stickers

Paint by Sticker Cat

Ever heard of “Paint by Numbers?”  If your answer is yes, you probably recognize the style of this long-haired cat, but there is a new twist.  Now, instead of applying paints, you apply stickers. 

“Paint by Sticker Cats”

Over the last several years, “Paint by Sticker” and “Color by Sticker” books have been produced in an interesting range of themes for everyone from kids to adults.  Let’s see how it works:

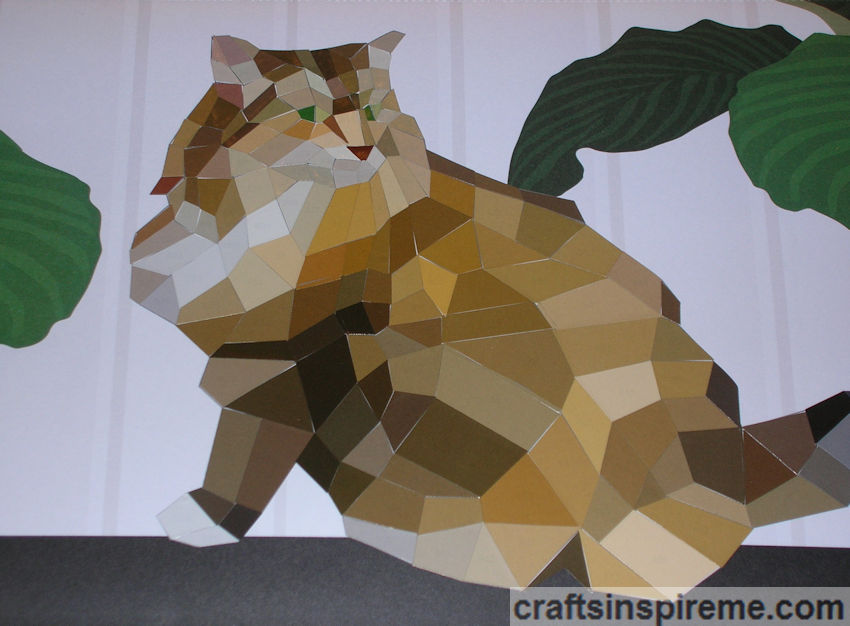
Kitten Close Up – Before

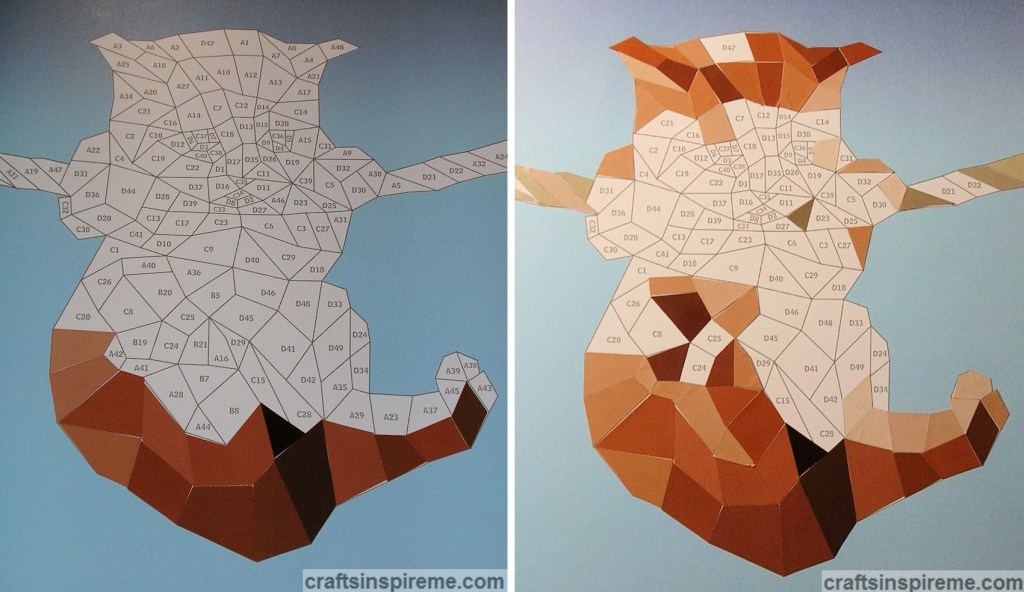
I chose an adorable kitten.  As you can see, the image has been broken up into varying size pieces, and each one has a corresponding sticker with a unique letter & number combination. 

Kitten Close Up – After

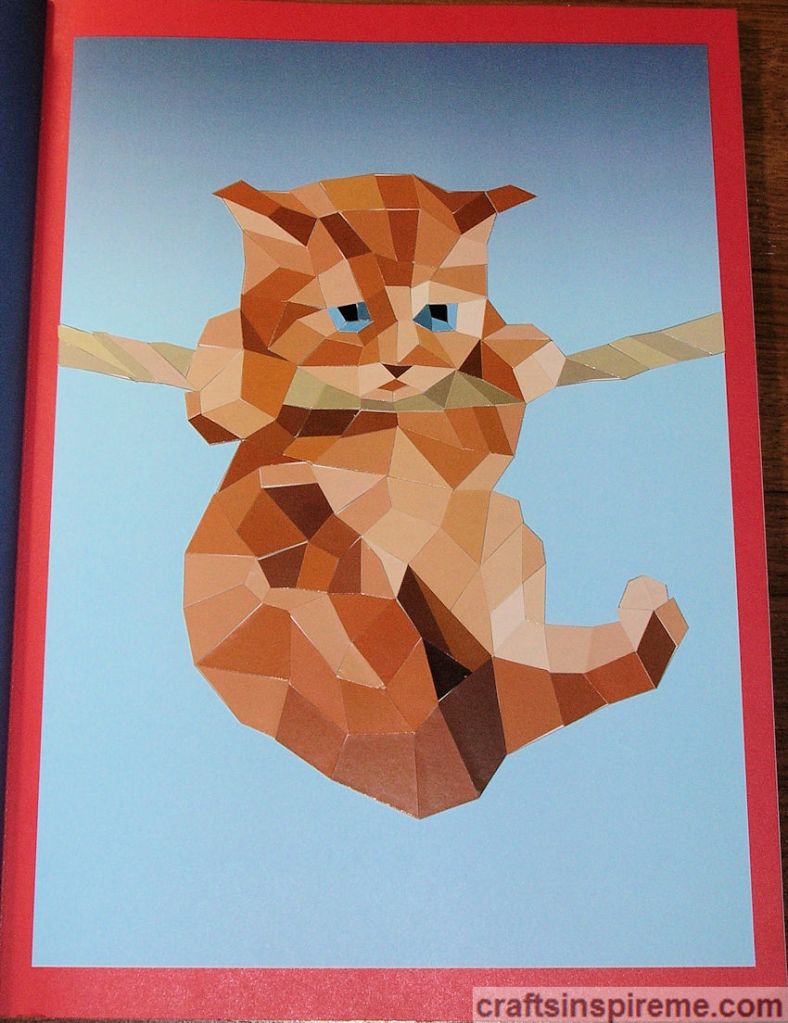
After all the stickers have been applied, this is the finished kitten. 

Sticker Pages 1 & 2

The “Paint by Sticker Cats” book contains twelve cat images, and each has two corresponding pages of stickers, divided into four sections (A, B, C, D) with unique numbers. 

Close Up Detail of Sticker Page 2

The front of the book contains large finished images so that you know exactly how the completed image will look.  All pages are perforated for easy tear out.  This will save you a lot of time flipping back and forth. 

Apply Stickers – Sections B & A

Start anywhere you like.  I chose Section-B stickers and applied all as shown above left.  Make sure the stickers fit against each other to prevent the white background paper from showing. 

Apply Stickers – Sections C & D

Apply the remaining stickers from Sections C & D. 

Finished Kitten Image

Pros:
Portable; No tools; No supplies; No fumes;
No clean up; No batteries; Inexpensive;
All ages; Fun; Easy; Colorful;
Frame-worthy artwork;

Cons:
Struggle to peel & stick a few of the smallest stickers (may need tweezers)
Tiny print may require reading glasses

Summary:
Each of the images are broken up into pieces like a jigsaw puzzle, however this puzzle tells you exactly where each piece goes by using a unique letter and number combination.  How easy is that? 

All the artistic challenges have already been worked out.  Along the way, you may learn enough about light and shadow, color placement, composition, etc. to apply this knowledge to your future drawing and painting projects. 

And when finished, you will have a frame-worthy piece of art. 

Thanks for Reading & Happy Crafting!
Froggy Went A-Courting

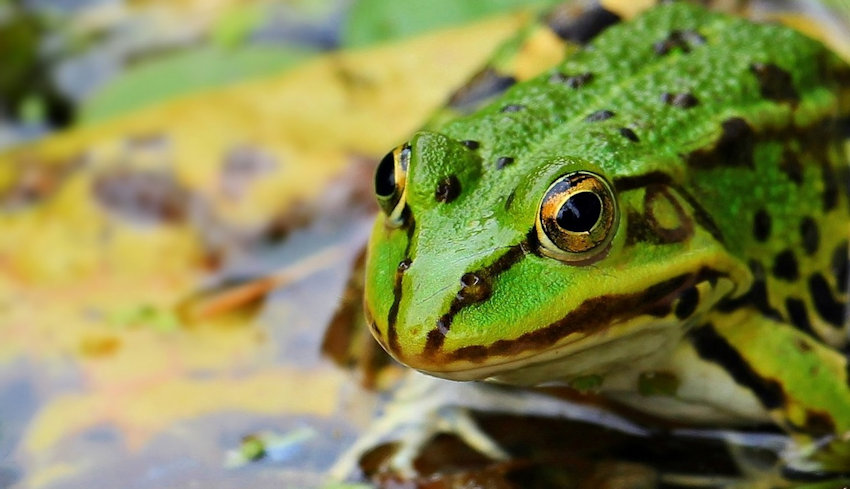
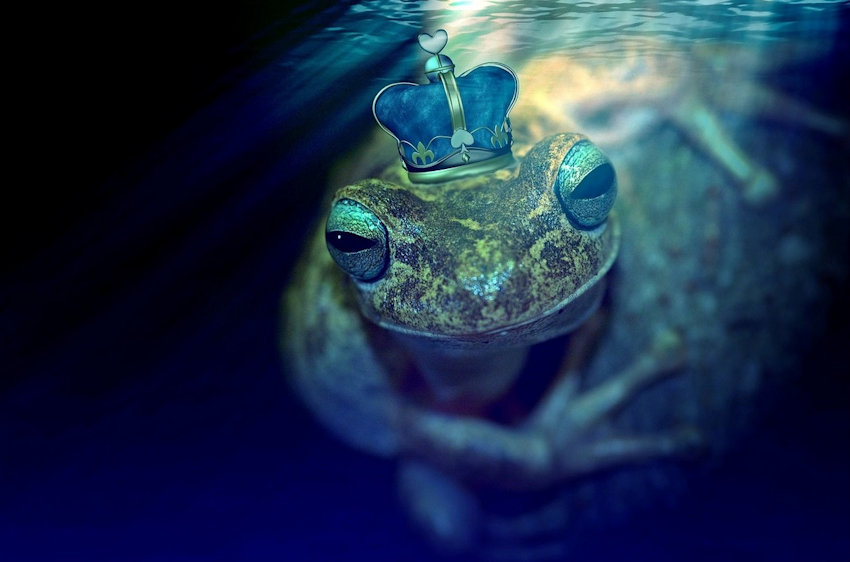
As a kid, I remember reading a book about a courting frog, which is still popular today.  And who could forget the story of the Frog Prince?  To this day, my mom kisses every frog figurine, ornament, or pendant, just in case it turns into a prince.  Nothing so far, but she remains hopeful.  This week we will be painting a frog in search of a mate.  We will start with a couple of photos for inspiration:

Inspiration

This frog has great patterns, nice mixture of greens and browns, and cool eyes. 

Inspiration

The spotted pattern on this frog would be easy to duplicate. 

How to Paint a Resin Frog:

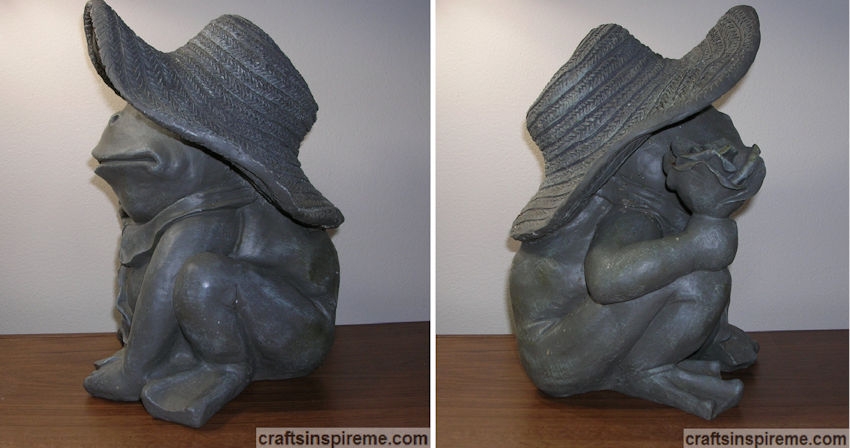
Original Gray Resin Frog – Front

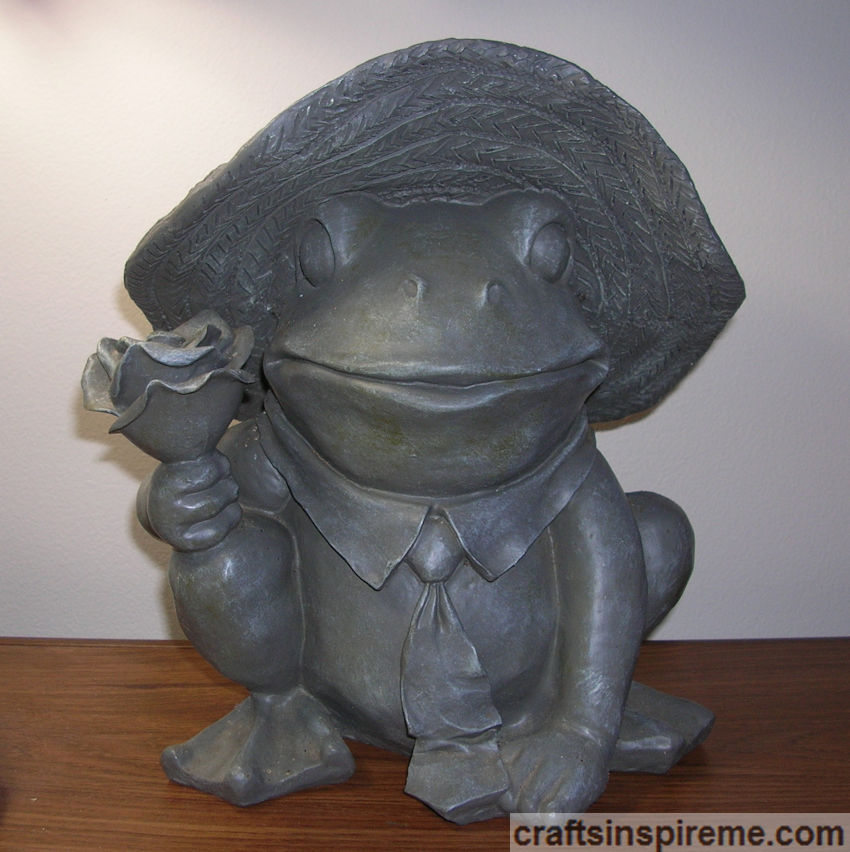
Talk about having a case of the blahs!  This cute little frog has some nice details, such as the collar, tie and the intricately carved rose.  We have been using it as a doorstop for years, and we never gave it a second thought.  That changes today. 

Original Gray Resin Frog – Profiles

The sculptor did an amazing job defining the frog’s body from head to toe, including adorable, webbed feet.  The rose has layer after layer of petals with curled edges like a living bloom. 

Original Gray Resin Frog – Back

The textured straw hat has been accurately rendered and will need to be carefully painted to maintain its integrity.  Be sure to apply a thin coat of paint, or those details may be lost. 

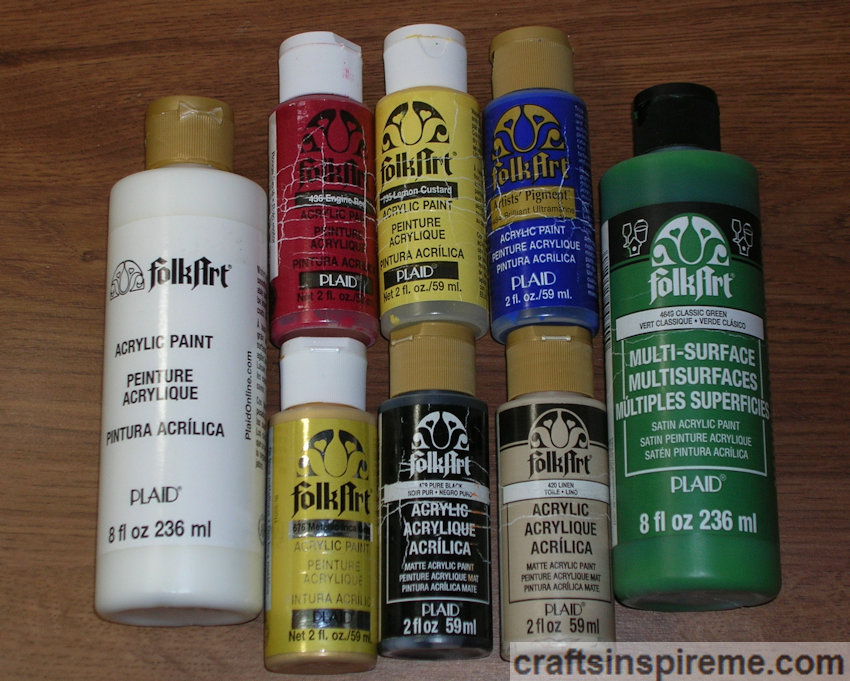
Supplies

Supplies:
Resin Frog (11” high x 10” wide x 8” deep)
Acrylic Paints – white, red, yellow, blue, green, metallic gold, black, & tan
Small detail paintbrush and thicker brush for base coats
Clear Spray Paint – gloss or matte finish

Note: If you choose to blend several paints to create a special color, be sure to make enough to complete the project because it is difficult to duplicate.  To keep wet paint fresh on a palette or dish for later use, cover the surface with plastic wrap. 

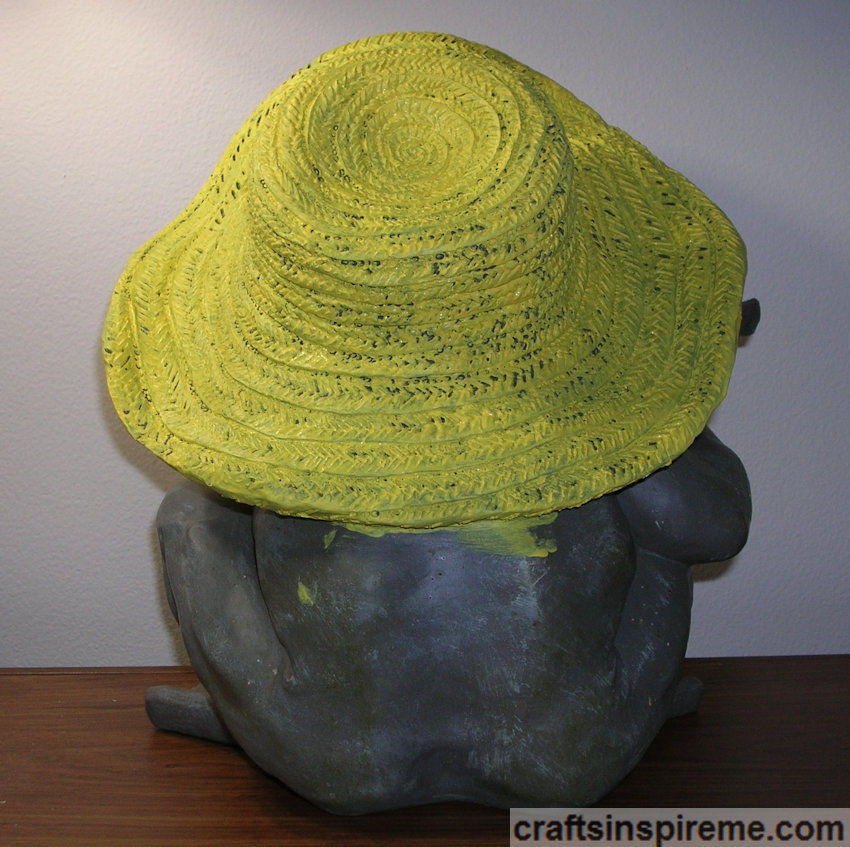
Painted Straw Hat – Front

Paint the straw hat yellow, one rough coat to preserve texture.  My mom painted the hat.  And yes, she kissed the frog too!  (lol)

Painted Straw Hat – Back

As you can see the straw texture is still visible. 

Painted Frog – Front

Paint the frog’s entire body green.

Painted Frog – Profiles

You will need to use a fine brush in areas close to the hat to prevent green paint from marring the yellow. 

Painted Frog – Back

Be sure to paint green all the way around, even in the tight curves and at the edges of the collar, tie and rose. 

Painted Collar & Tie

On the first attempt, the collar was painted white.  I decided the contrast between the green and white was too harsh and should be softened. 

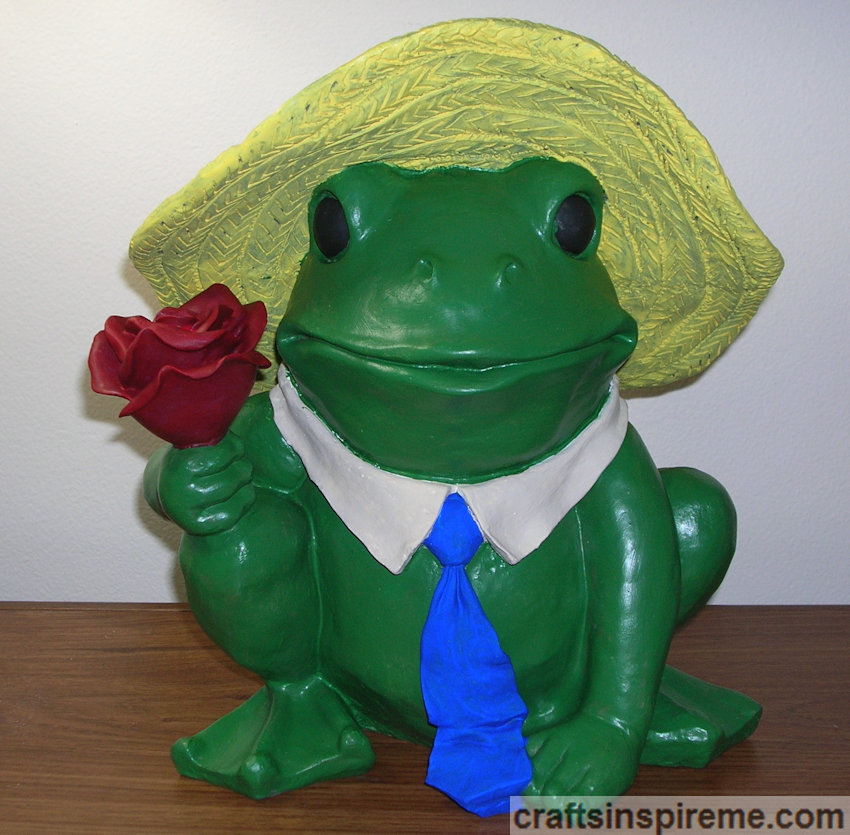
Repainted Collar & Rose

The collar was repainted tan, which has a much softer effect.  Paint the tie blue and the red rose.  The pupils are painted black and will be completed in the next step. 

Completed Painting

Finish the eyes by outlining them with metallic gold.  I experimented with a patterned iris, but he looked scary instead of cute, so I repainted the black.  Add white highlights to give this little guy twinkles in his eyes.  Look over the frog and touch up any areas as needed. 

Frog Ready for his Close-Up

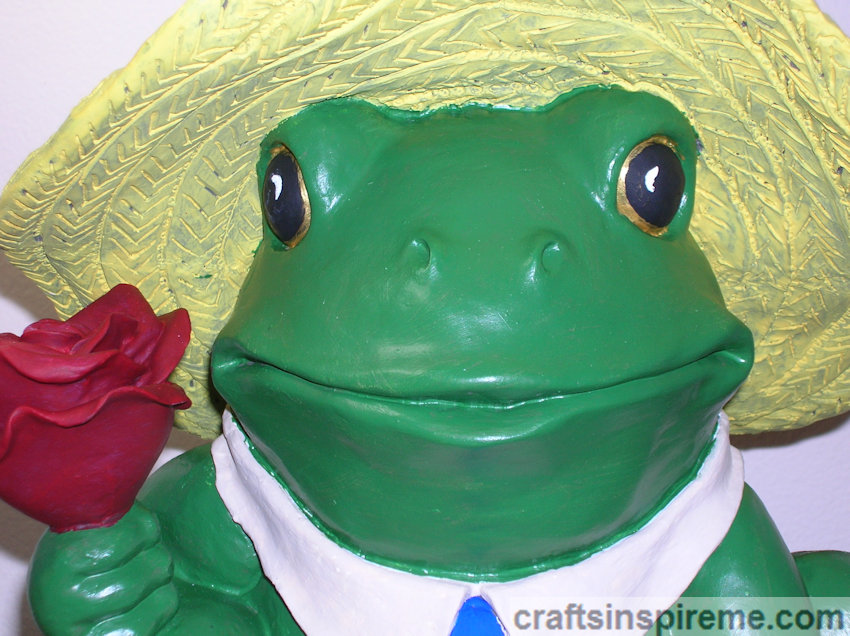
This is the close-up of our leading man.  All he needs now is to find the love of his life.

Clear Coat Protection

To protect the acrylic, I recommend sealing the paint with two coats of clear spray paint.  Notice how much richer the colors become after being sealed. 

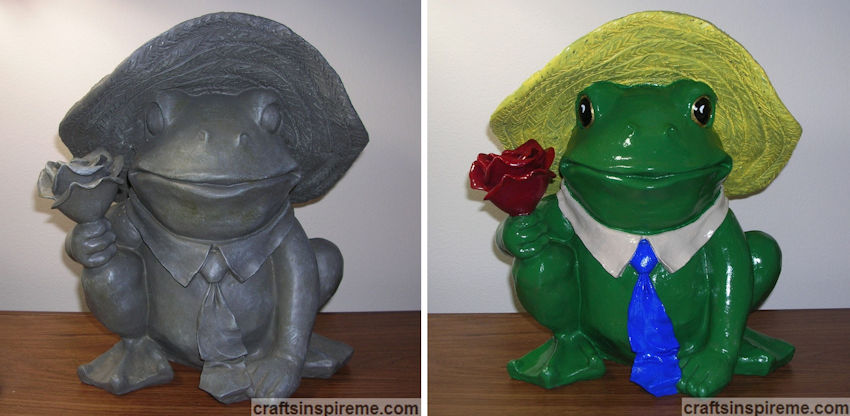
Frog Before & After

This froggy’s makeover is complete!  He went from bland gray to fashionably colorful in a few easy steps. 

Frog Royalty

If one day in your travels, you encounter a frog like this one, it might just be worth risking a kiss to find a true frog prince or princess.  Good luck painting your next project, and I hope you find that special someone! 

Thanks for Reading & Happy Crafting!
Flower Power

Multicolor Flowers

Arranging flowers is like painting a masterpiece.  Instead of paints on canvas, you place fresh-cut or silk flowers and leaves in a vase, bottle, or bowl.  Before you begin, you have some decisions to make.  What colors will you choose?  How will you create visual interest?  Do you prefer balanced or abstract designs?  What will be your focal point(s)?  Do you have a container in mind?  Would you like to include a few accents, such as berries, or butterflies?  Feel overwhelmed?  Below are several pointers on flower arranging to help you get started. 

Complementary Colors:

Orange & Blue

Complements Orange & Blue

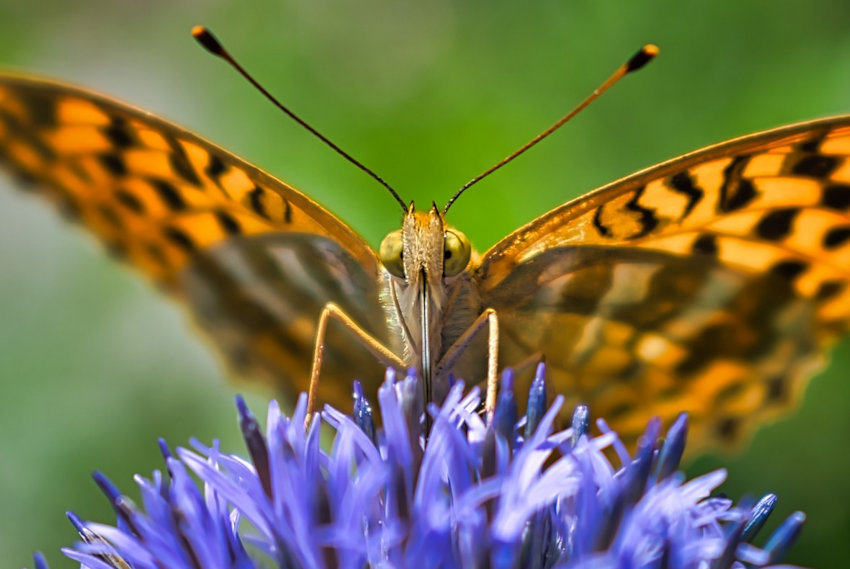
Complementary colors provide maximum contrast.  They say opposites attract.  Maybe that is why this orange butterfly found a blue flower irresistible. 

Yellow & Purple

Complements Purple & Yellow

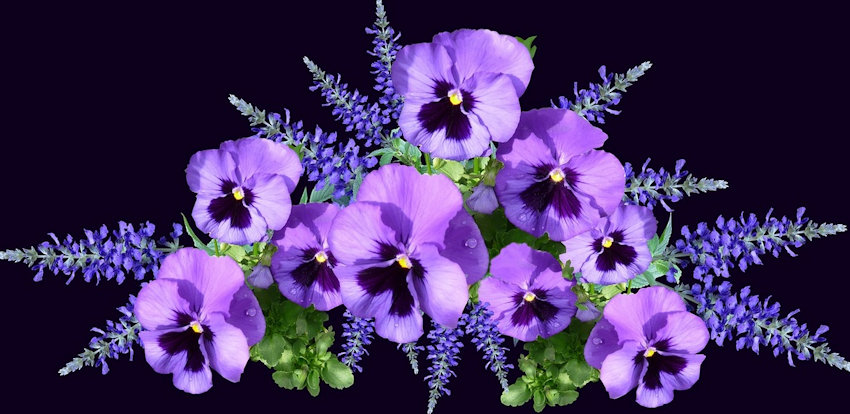
Yellow shines brilliantly alongside its complement, purple.  This combination is associated with spring as well as Easter. 

Red & Green

Complements Red & Green

Red immediately grabs your attention.  Set against green it really pops.  Although red and green are hallmarks of Christmas, they are perfect any time of year, especially with other accent colors, as shown in the above photo. 

Exotic Focal Points:

Bird of Paradise

Exotic Bird of Paradise

While you are selecting flowers for a new arrangement, consider your focal point(s).  A few exotic flowers bring bold colors, shapes, and textures to your design. 

Dahlias

Exotic Dahlias

Dahlias offer amazing variety.  Check out the gorgeous pink and white dahlia in this photo.  Many people believe the ombre-effect was manmade, but Mother Nature thought of it first. 

Hibiscus

Exotic Hibiscus

Although hibiscus is a readily available flower, the rich, blended colors and delicate details appear to be hand-painted by Mother Nature. 

Monochromatic:

Pinks

Monochrome Pink

Monochromatic designs do not have to be boring.  Choose a variety of flowers in shades of your chosen color and arrange them in a visually pleasing way. 

Purples

Monochrome Purple

Dramatic contrasts in color as well as shape are the keys to this arrangement. 

Multicolor:

Tulips

Mulicolor Tulips

Jewel-tone tulips stand on their own as an easy and attractive centerpiece.

Assorted Flowers

Multicolor Flowers

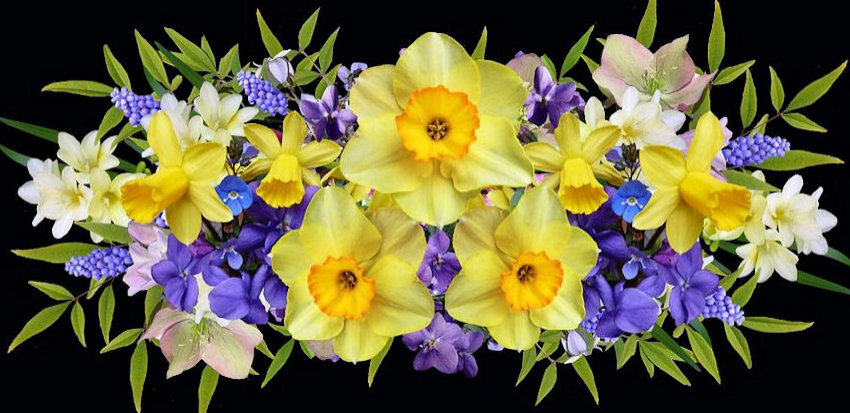
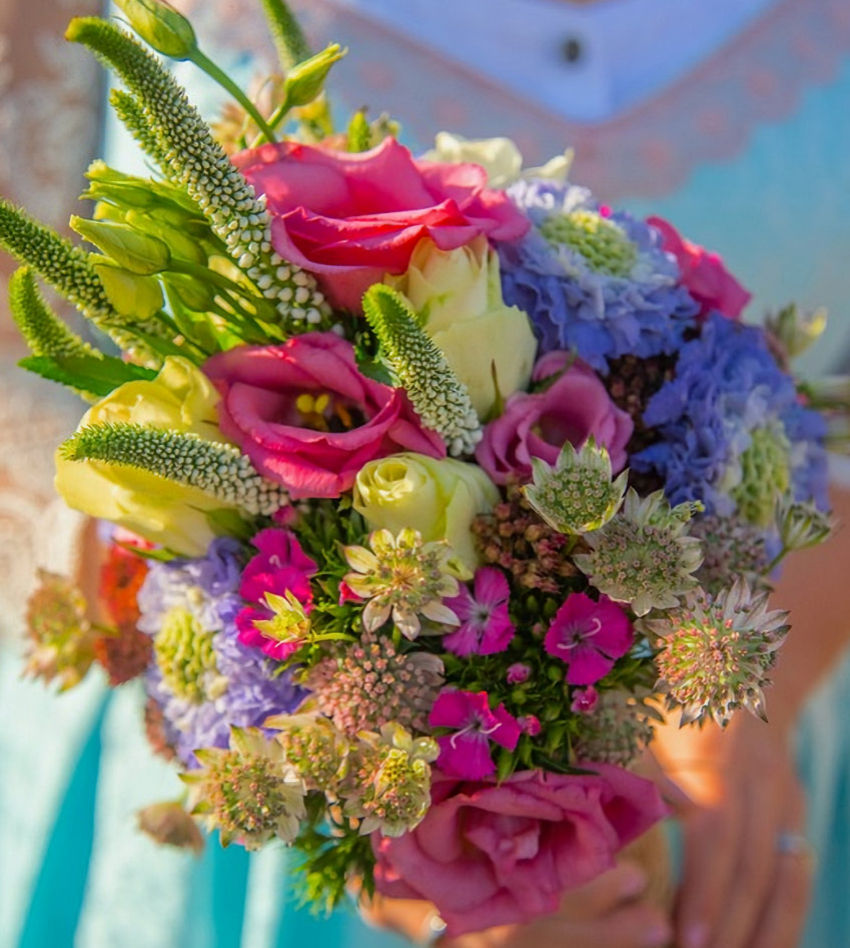
Pastel colors and small-scale blooms blend harmoniously in this lovely springtime bouquet. 

Floral Design Balance:

Symmetry

Symmetry Asymetry Heart

This arrangement has elements of symmetry and asymmetry.  The heart shape and three roses are symmetrically balanced, while the assorted perimeter flowers are asymmetrical and yet still fit within the overall heart shape. 

Asymmetry

Asymmetry

This asymmetrical centerpiece is an abstract art lover’s dream. 

Floral Accessories:

Cute Critters

Accessorize Birds & Flowers

You might want to include a few well-chosen characters to adorn your floral creations, including birds, butterflies, ladybugs, geckos, and fairies. 

Bouquet Holder

Accessorize Heart Bouquet

Give a floral bouquet an upgrade with a special themed holder, such as this heart for Valentine’s Day, which can be paired with a vase, and reused for years to come. 

Ribbons & Twigs

Accessorize Ribbon Sticks

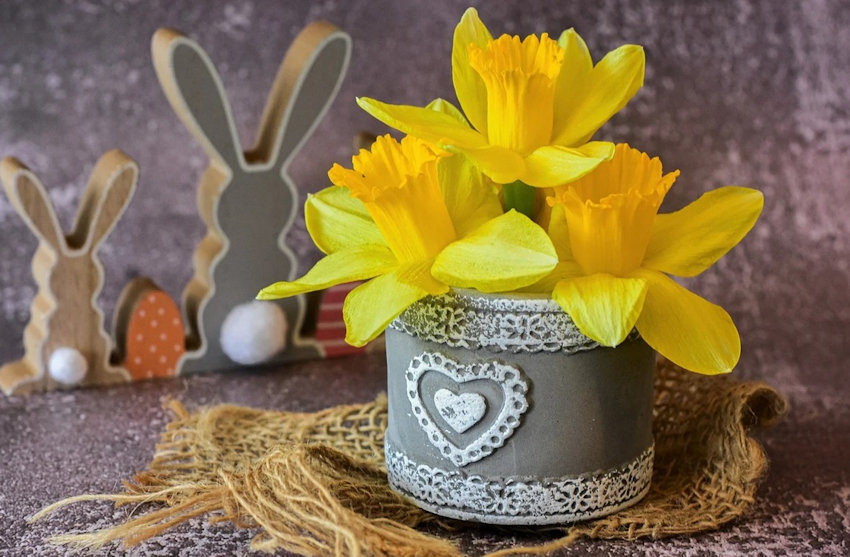
The bright yellow daffodils contrast well with purple ribbon, woven with other blooms upon a twig base.  In autumn, pinecones, and berries are attractive additions. 

Floral Display Containers:

And the Envelope-Please

Accessorize Ribbon Sticks

Flowers look beautiful no matter how you choose to display them.  For the cute arrangement above, you need to “think inside the box!”  An envelope-shaped box is a sweet surprise and wonderful conversation starter. 

Martini Glass

Container Martini Glass

A new use for an old friend – this martini glass, with an extra-long stem, is a great idea for providing floral beauty, while still enabling guests to see each other across the table. 

Old Fashioned Ceramic Jar

Container Simplicity

For country chic, choose the simplicity of a ceramic jar filled with a few fresh cut blooms.

Water Bowl

Container Bali Floating Flowers

Who needs a vase when you have a water bowl?  A floating mandala design sets a relaxing tone.  If you are having a party, each table could have a unique floating centerpiece to show off your creativity. 

Floral Design Influences:

Religious

Bali Design

This Balinese flower offering exhibits many of the design principles discussed in this post including symmetry, focal point, all six complementary colors, multicolor flowers, and a unique flat design display.  A large outdoor table, in a shaded area, offers a great opportunity for a flat floral centerpiece. 

Cultural (Before & After)

Tropical Rain Forest Before&After

Tropical flowers grow in abundance in Hawaii and are an integral part of their cultural history and traditions.  This beautiful arrangement has a nice selection of exotic flowers, but two elements throw off this design: 1) The red roses do not belong in a tropical arrangement.  2) The metallic silver vase is too contemporary.  To fix it, add more red ginger and anthuriums, and use a Hawaiian drum to conceal the vase, unifying this Polynesian theme. 

Architectural

Architectural Floral Design

A large interior space requires an equally strong floral display, and this one meets that challenge.  These organ pipes have strong vertical lines, multiple levels, sculptural scrolls, and decorative arches, which are echoed in the grooved, scalloped urn, tiered flowers, curled leaves, and bell-shaped flowers.  High contrast of complementary colors can be found in the purple flowers with bold yellow centers, and the blue flowers against the tall orange-red stalks.  Exotic lilies serve as focal points, drawing the eye in toward the rich lush greens and purples and pulling your attention upward, much like the heavenly organ music floating upon the air. 

Sculptural

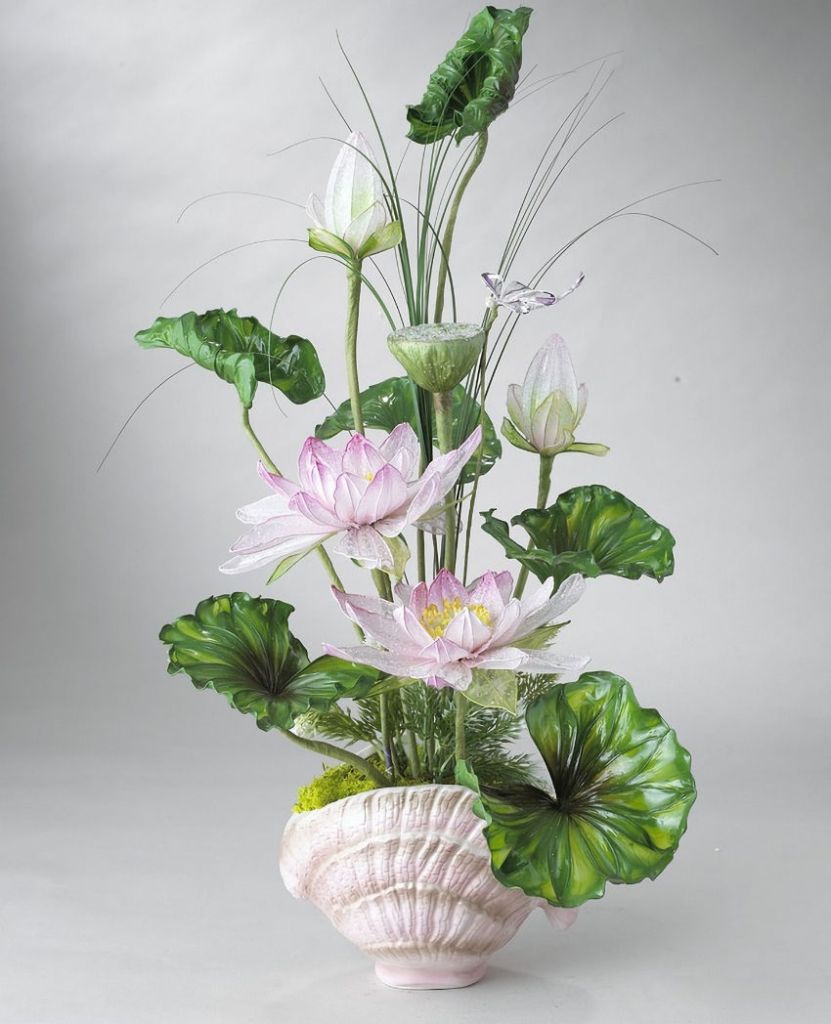
Sculptural Floral Design

Seashells and lotus blossoms automatically make you think of water.  Beginning at the top, invisible water flows diagonally, from leaf to leaf, making its way back and forth across the arrangement until it reaches the bottom, only to begin the journey anew.  Textures in the seashell are repeated in the leaves.  Whether you spend the day at a pampering spa or have a luxurious soak in the bathtub at home, this soft color palette and gentle flowing movement soothes away your cares bringing peaceful relaxation to body and mind. 

Take your time finding inspiration, developing ideas, and planning your design.  Choosing flowers and creating a unique floral display will shine with your artistic flair.  Enjoy the process and best of luck! 

Thanks for Reading & Happy Crafting!
Alpacas versus Ewoks

Alpaca & Ewok

On a scale of 1-10, who is the cutest – an Alpaca or an Ewok? 

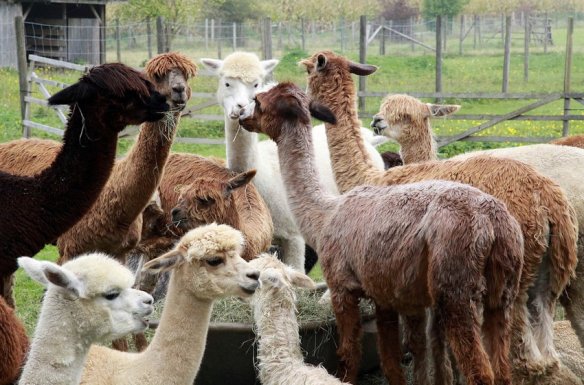
Multicolor Alpacas

My apologies to all the Star Wars fans, but this week our craft project is all about Alpacas. 

Baby Alpaca

This baby alpaca looks so soft and cuddly like a stuffed animal. 

Adult Alpaca

Adults have long shaggy fur, which is used to make yarn for blankets, sweaters and other garments. 

White Alpaca

Some have monochromatic fur, such as the one pictured above. 

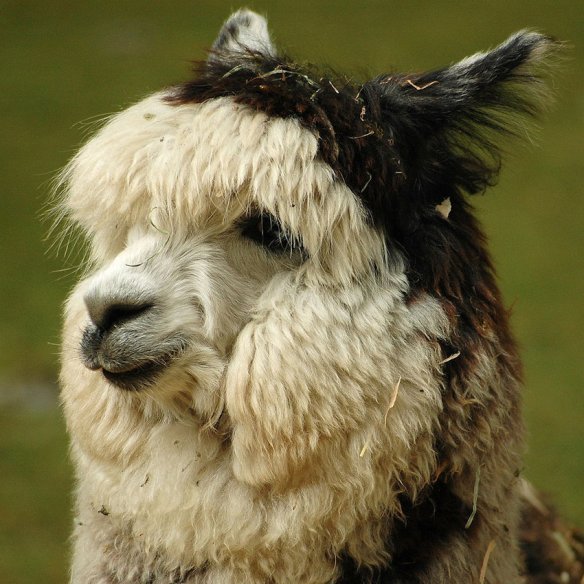
Brown & White Alpaca

Alpaca fur tends to be thick and plush in a variety of shades and a few fashion-forward combinations.  Whatever your preferences, you can’t go wrong applying those creative choices to this fun project. 

How to Paint a Wooden Alpaca:

Raw Wood Alpaca

Alpaca Raw Wood

Thick wood has been cut out in the shape of an alpaca.  Both sides and all the edges will need to be painted.  Due to the raw nature of the wood, it may require a little sanding, especially along the edges. 

Supplies

Alpaca Paints
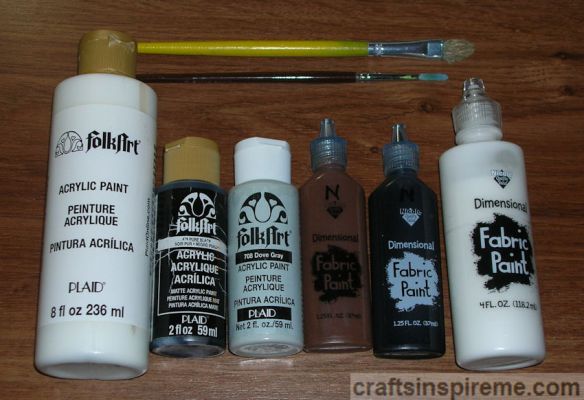
  • Supplies:
    Wooden Alpaca (6-1/4” high x 4-1/2” wide x 1-1/2” thick)
    Acrylic Paints – gray, white, black
    Bottles Fabric Paint – brown, white, black
    Paintbrushes
    Sandpaper
    Black Sharpie Marker or pencil

Paint Base Color

Alpaca Gray Paint

Using acrylic gray paint and a brush, paint both sides of the body and all the edges. 

Paint Accent Colors & Draw Eye Detail

Alpaca Gray & White Paint

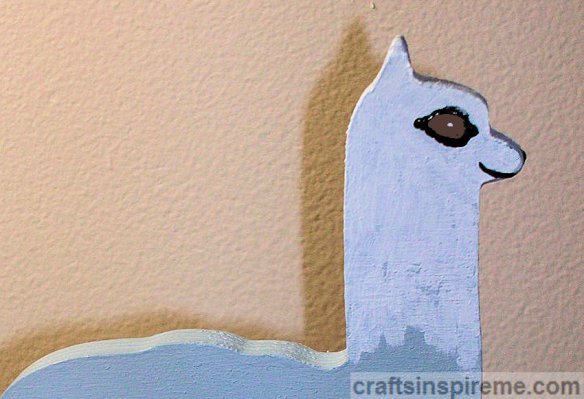
Apply white acrylic paint with a brush on the head, neck, lower legs and tail.  With a pencil or marker, draw the eyes. 

Define Facial Details

Alpaca Facial Details Painted

Using a combination of acrylic and fabric paints, add the eyes, nose and mouth. 

Textured Fur Detail

3D Paint Leg Fur Detail

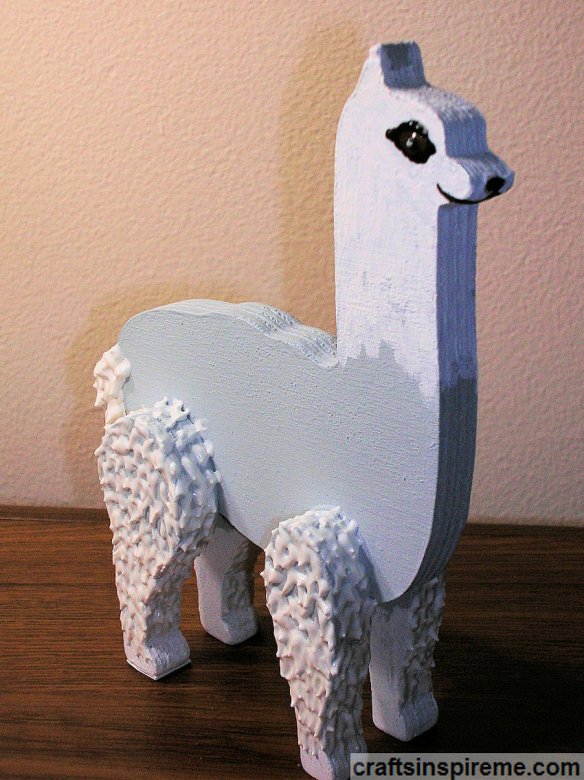
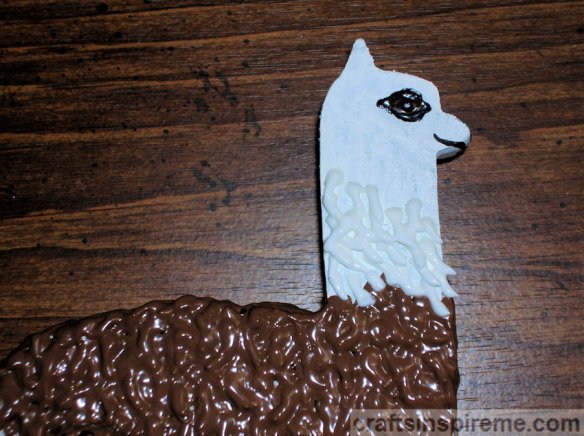
Creating thick, three-dimensional fur is easy with fabric paint.  You must start at the BOTTOM and work your way up using short downward strokes.  Keep the placement and stroke size random, layering new fur over the previous sections as you work your way to the top.  Allow the paint to dry overnight because it shrinks as it dries.  Repeat this process until you achieve the desired appearance. 

Paint White Textured Fur

3D Paint Fur Legs & Tail

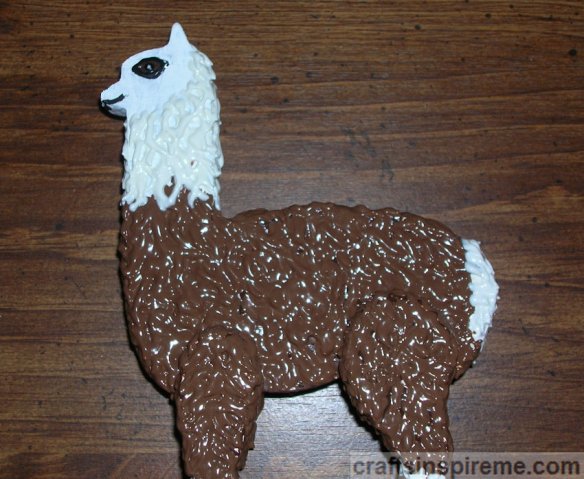
This photo shows the completed white fur on the legs and tail.  Repeat this process on the other side. 

Note: To achieve a very thick fur coat, you may need several bottles of fabric paint. 

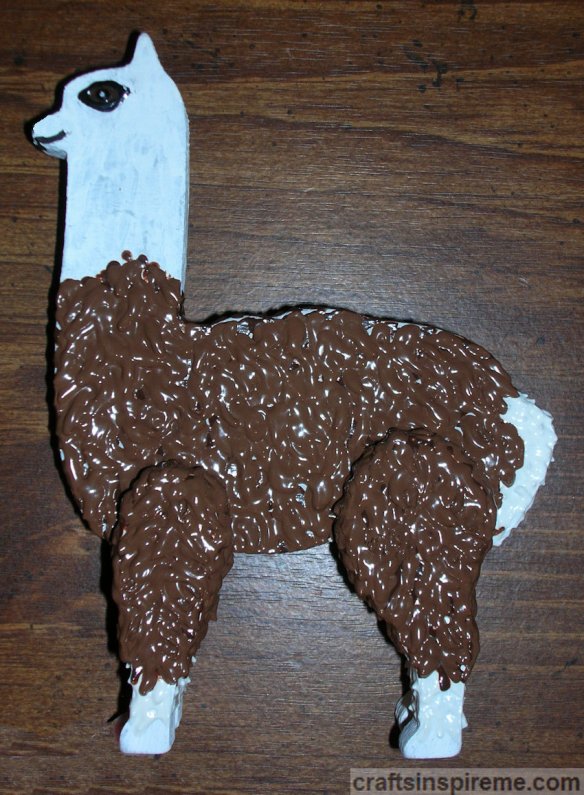
Paint Brown Textured Fur

3D Paint Fur Torso

Apply brown fabric paint on the torso, and upper legs, using the same textured process described above. 

Paint Additional Layers of Textured Fur

3D Paint Fur Layers Torso

Repeat the painted fur process as many times as needed to create a thick fur coat. 

Paint White Textured Fur

3D Paint Fur Neck

Once again using the white fabric paint, start creating the fur at the bottom of the neck and work upward. 

Paint Additional Layers of White Textured Fur

3D Paint Fur Neck & Tail

Repeat the process to achieve desired thickness.  Remember to thoroughly cover the edges too.  You may also want to add more fur on the tail as well for a bushy effect.  Allow time for the paint to dry between coats so that you can see which areas need more work. 

Finished Alpaca

Finished Alpaca

Congratulations!  You are now the proud parent of an adorable alpaca! 

Finished Details

Finished Alpaca Details

As you can see in this photo, the fur continues up over the top of the head, including bangs on forehead. 

Alpaca – Before & After

Alpaca Before & After2

We started with a plain wood figure, and with little effort and patience during drying times, this cute alpaca is ready to adorn your home or be given as a gift.  Either way, smiles are sure to follow. 

Thanks for Reading & Happy Crafting!
Seeing Spots

Cheetah

Ever wonder how many spots a cheetah has? I wish I could tell you, but I lost count during this week’s project. a painted wooden cheetah.

Inspirations:
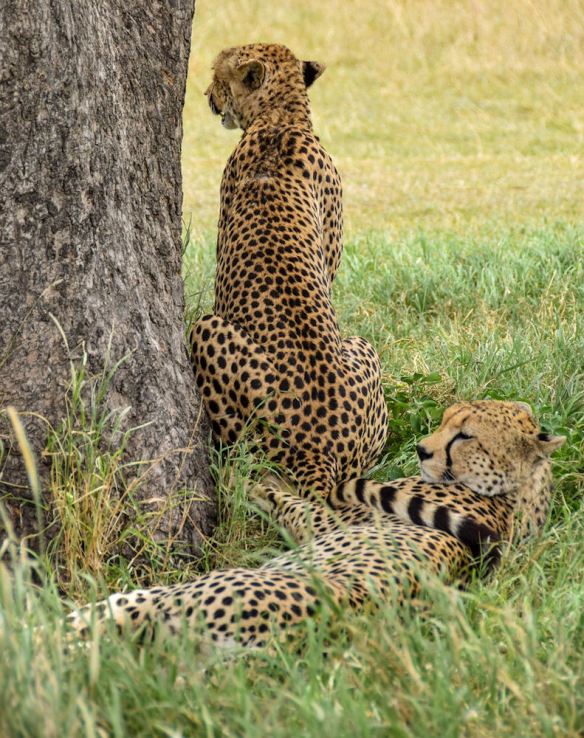
Resting in the Shade

Cheetah Resting in Shade

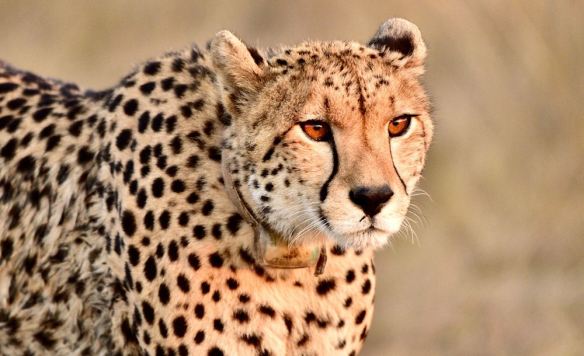
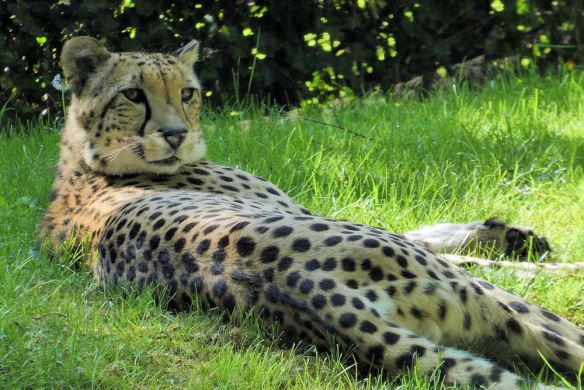
Look at that gorgeous coat! It’s beautiful but also serves as camouflage. The black tear-like markings help these stealthy predators by cutting the sun’s glare.

Mother & Cubs

Cheetah with Cubs

Their long muscular legs and bodies make cheetahs the fastest land animals. They often stand on trees and rocks for better views of their hunting grounds.

Keeping a Lookout

Watchful Cheetah

It’s important to stay alert. You never know when the next meal might come along.

Supplies:
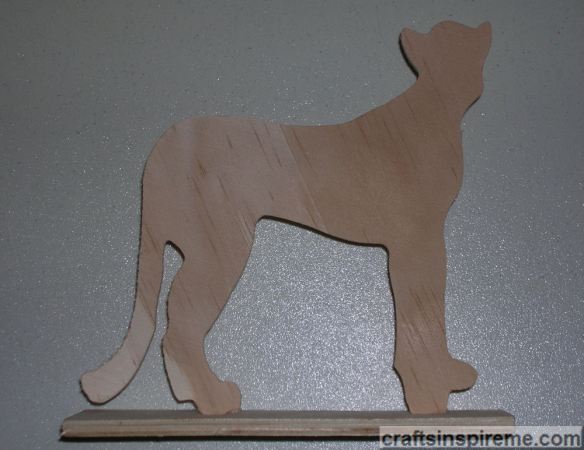
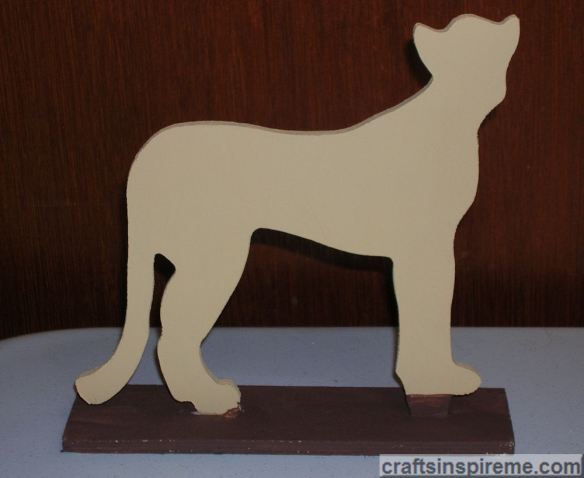
Raw Wood Cheetah

Raw Wood Cheetah

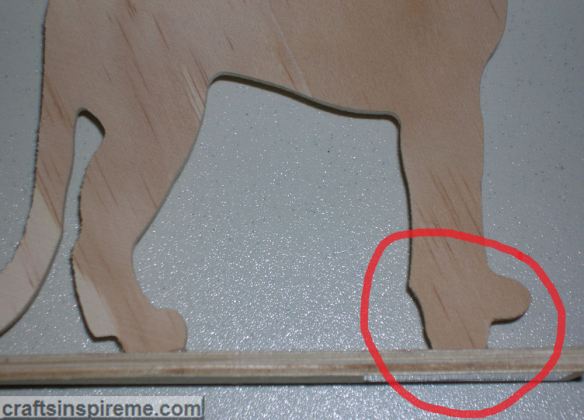
Closeup – Raw Wood Cheetah’s Feet

Close Up Raw Wd Cheetah

Do you notice the problem with his front feet? If you are familiar with music from the 1970’s, you’ll know the rock group Kiss. Their costumes always included platform boots and apparently this cheetah is a fan! lol  This odd design choice will be corrected in a later step.

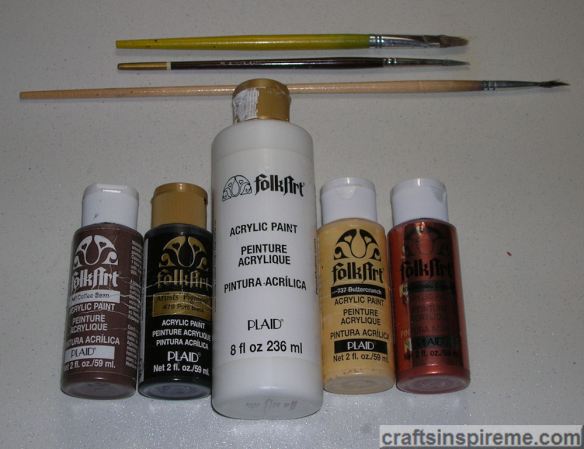
Acrylic Paints

Acrylic Paints

How to Paint a Wooden Cheetah:
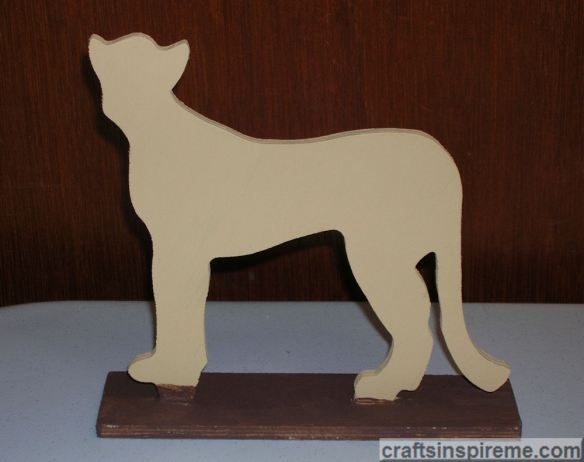
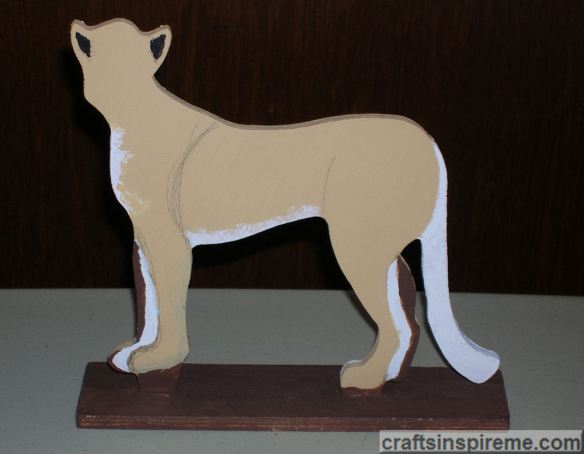
Paint Base Coats on Cheetah & Stand – Front View

Cheetah Painted Front

Be sure to paint all surfaces, including the edges.

Paint Base Coats on Cheetah & Stand – Back View

Cheetah Painted Back

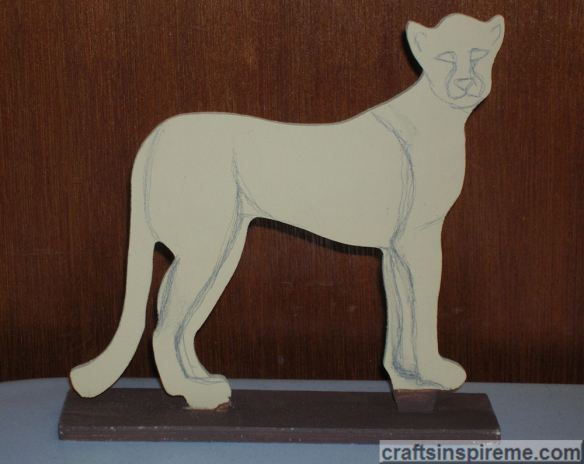
Draw Details on the Body and Face

Cheetah Drawn Details

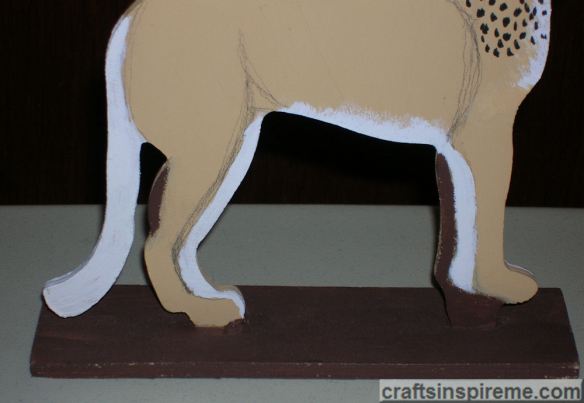
Defining the legs on the front and back is a bit of a challenge. You’ll notice there is extra wood at the edges, which should have been trimmed off. Instead, we will paint it brown in a later step so that it is less noticeable. Add the facial details too.

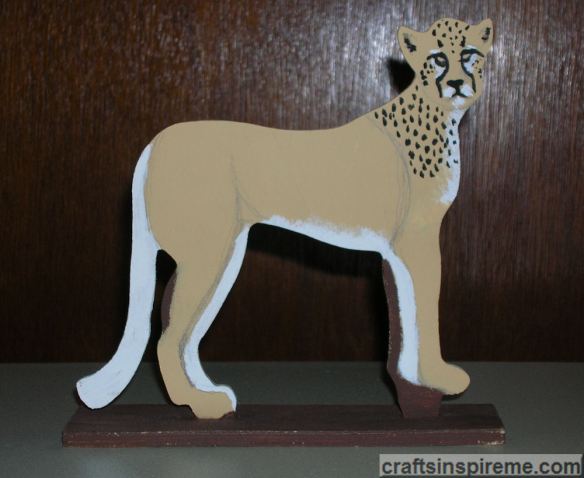
Paint the Details – Front View

Cheetah Painted Details Front

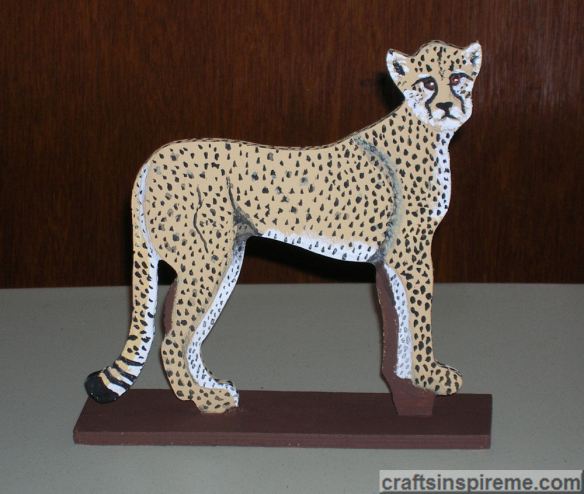
The tail, belly, inner side of each leg, and areas on chest and face are white with black spots. The rest of the coat is tan or golden with black spots. The facial details bring this figure to life.

Closeup – Legs

Cheetah Closeup Paint Details

As noted previously, the excess wood on the legs is painted brown to blend into the background.

Paint the Details – Back View

Cheetah Painted Details Back

Paint the Spotted Coat – Front View

Cheetah Painting Coat Front

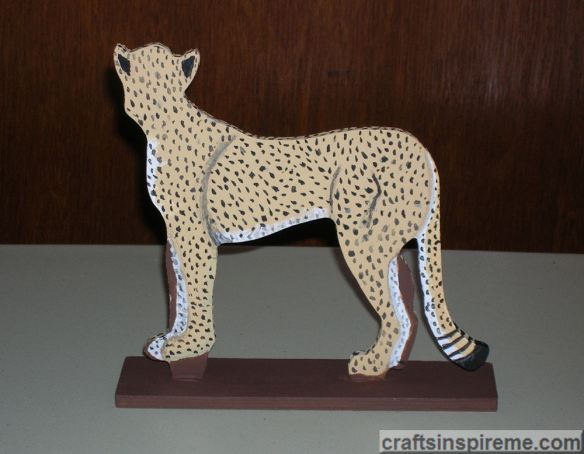
The tip of the tail is solid black with a few stripes above it. Spots cover the remainder of the body.

Paint the Spotted Coat – Back View

Cheetah Painting Coat Back

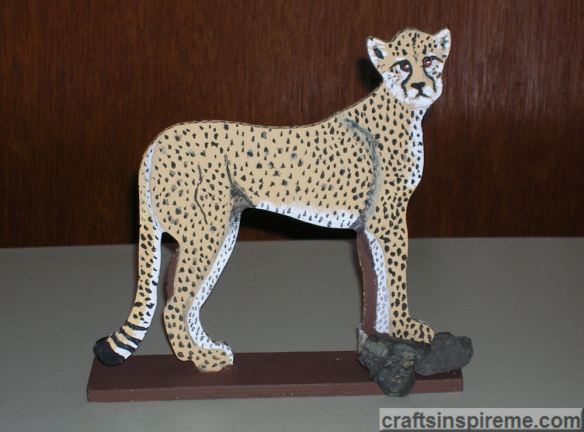
Completed Cheetah – Front View

Added Stones to Stand Front View

Glue stones to the base, beneath the front feet, to correct the issue noted in the sixth photo and to create the illusion the cheetah is scoping out his surroundings.

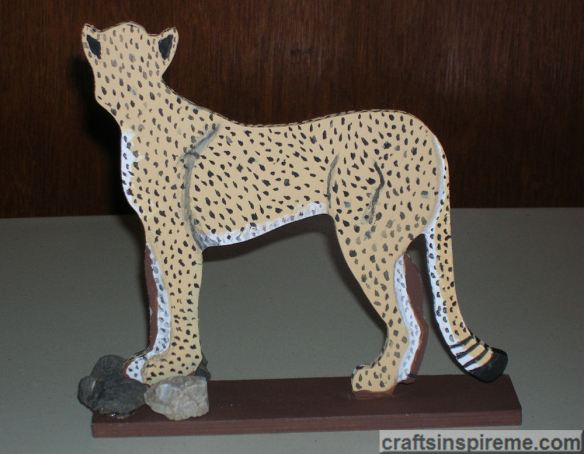
Completed Cheetah – Back View

Added Stones to Stand Back View

I hope you enjoyed this post and are inspired to begin your next creative project.

Thanks for Reading & Happy Crafting!
Quick-Change Artist

Halloween & Christmas Dogs

Christmas Day has come and gone. It’s time for all those year-end sales. As you browse, you may find some decorations for next year. I like to find ways to get two holidays for the price of one.

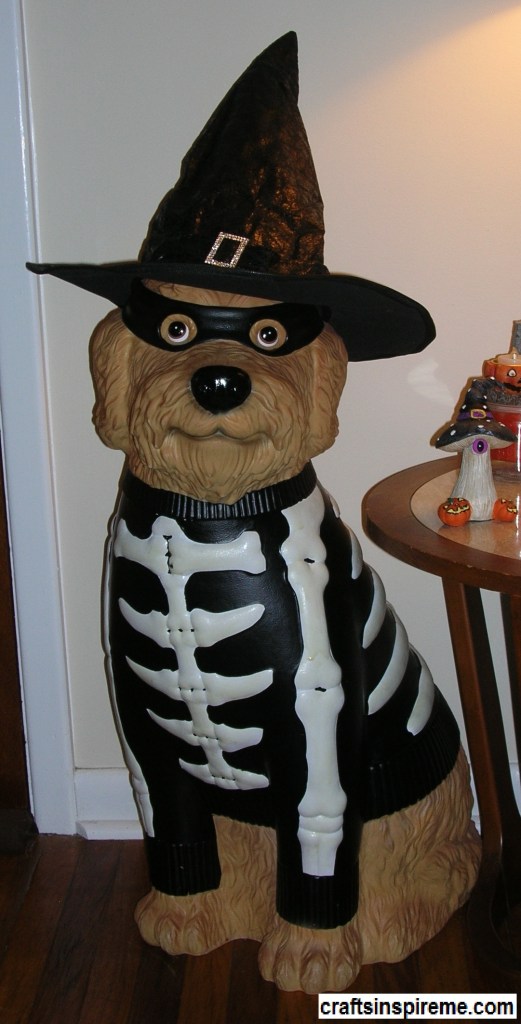
Big Dog – Halloween

Big Dog Halloween

Big dogs have been trending for the last two years. I bought this masked Halloween skeleton dog and added a Witch’s hat as a bit of whimsy. In a few easy steps you can transform him into a Christmas dog.

How to Transform Halloween to Christmas:
Add a Cardigan Sweater

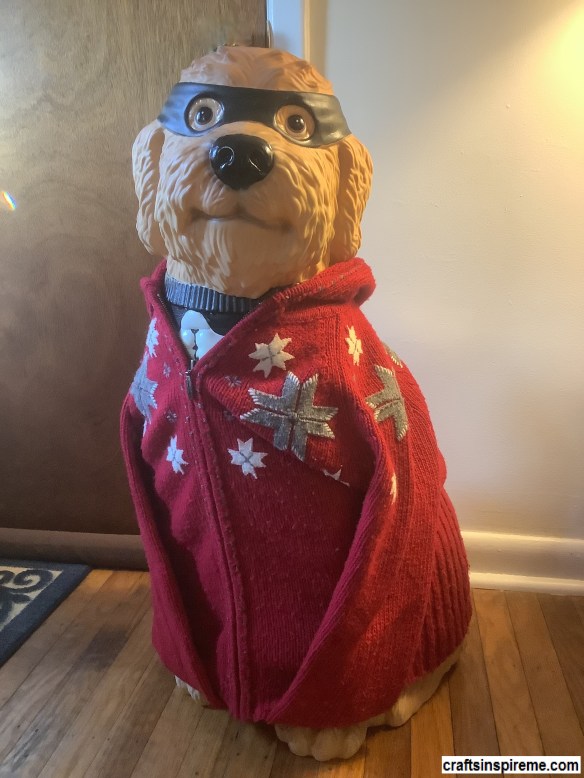
Snowflake Sweater

Cover the skeleton costume with a cardigan sweater. Pin the sleeves to align with the front paws so it looks like he is wearing it.

Add a Winter Scarf

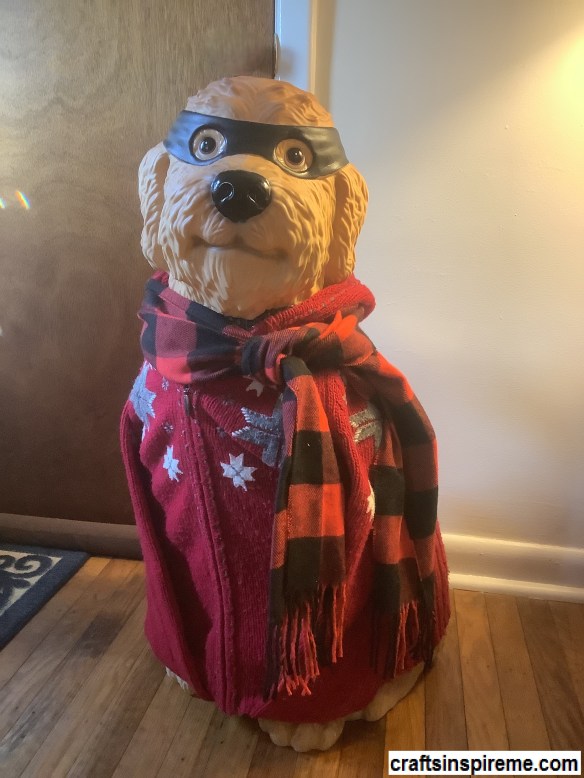
Winter Scarf

This scarf looks cute and covers the neckline of the black sweater beneath.

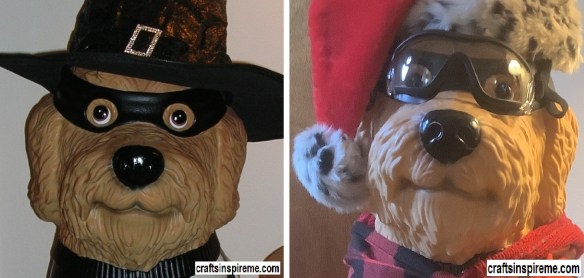
Add a Pair of Ski Goggles

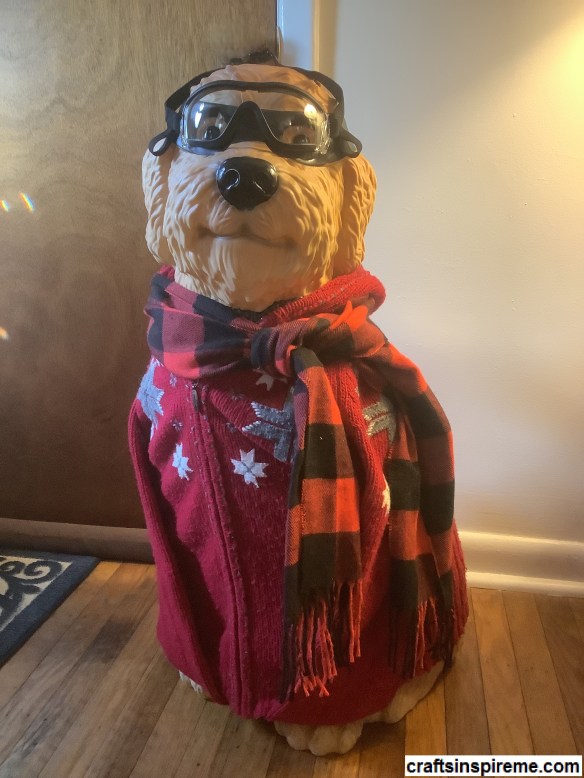
Dog Ski Goggles

Believe it or not, they do make goggles for dogs! There are two straps, one around the head and the other around the muzzle. This dog’s head is quite large, so rather than exchange for a larger size, I cut off the muzzle strap and set the goggles in place.

Big Dog – Christmas

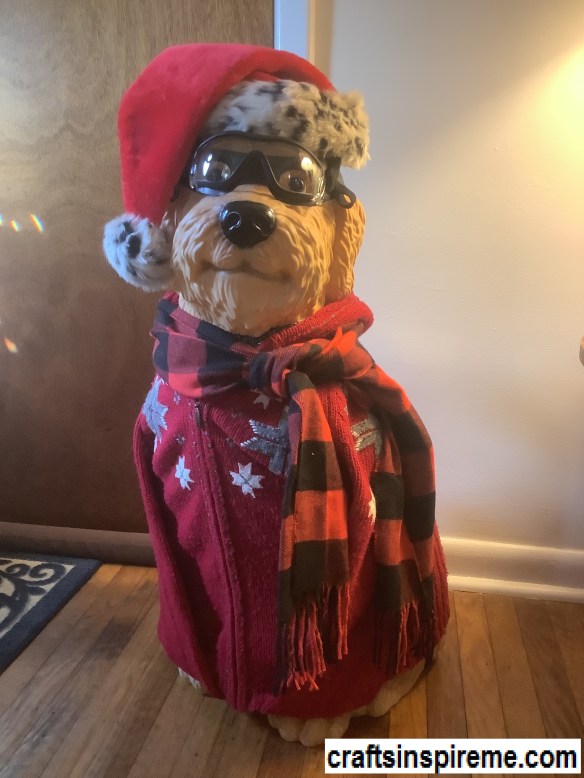
Big Dog Christmas

The adorable Santa hat completes the transformation, while holding the goggles in position. If you want to keep him out all winter, you could easily swap out the hat and he’s ready for the ski slopes. I hope you enjoyed this project and a wonderful holiday season.

Thanks for Reading, Happy Holidays & Happy Crafting!
Forever Green

Snow Covered Pines
What I miss the most during the colder months are the beautiful colors in nature. The winter sky is so gray, the trees are dormant, and the flowers temporarily disappear for a long winter’s nap. Evergreens defiantly retain their glorious shades of green regardless of the weather. To brighten your home decor, you can add a little evergreen and it will never need to be watered.

How to Paint Wooden Pine Trees
Lighted Tree Close Up
This painted craft is very easy to complete in a short amount of time and it’s great for beginners too!

Raw Wood Trees
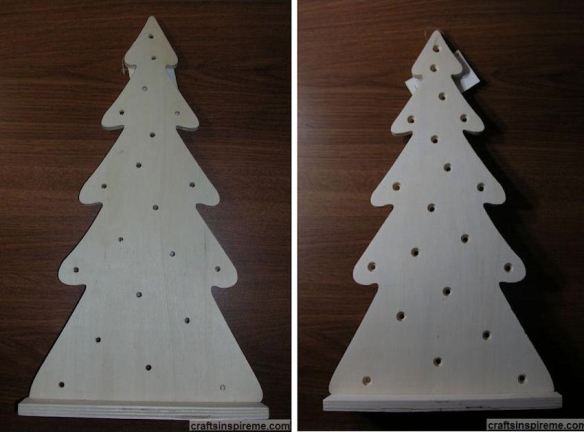
Raw Wood Trees
As with all raw wood, a little sanding may be required, especially along the edges. The pre-drilled holes are for lights in a later step.

Supplies
Painted Tree Supplies
Supplies:
Wooden Pine Tree (17” high x 9” wide x 1/2” thick) (Base is 9” wide x 2” deep)
Acrylic Paints – green, white
Paintbrushes
Sandpaper
String of 20 lights

Apply Green Paint
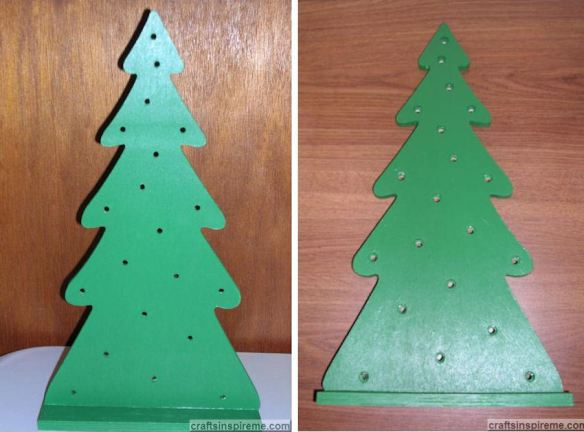
Painted Green Trees
Paint each tree green, ensuring both sides, all the edges and the base are painted.

Define the Branches with Snow
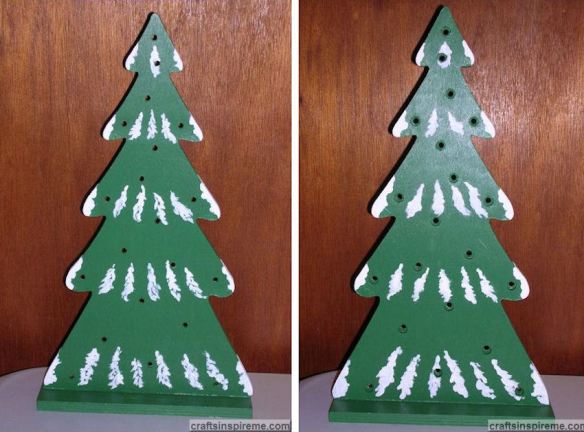
Painted Snow Trees
In nature, snow gathers on the branches. To give these trees a more three-dimensional appearance, add patches of white paint to imitate Mother Nature.

Tree Lighting
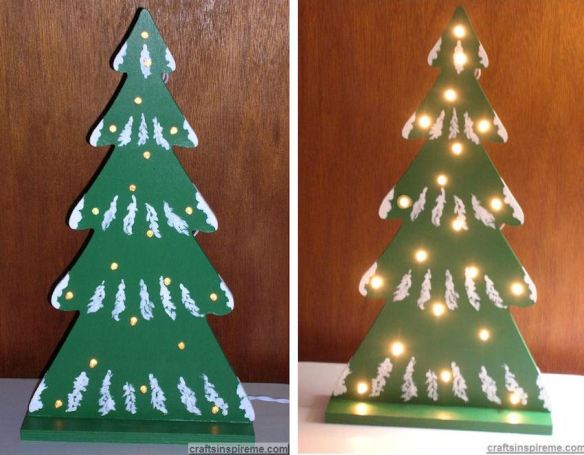
Trees with Inserted Lights
Those pre-drilled holes were made to hold a strand of twenty white lights. The lights can only be pushed through from one side of the wood frame. You may need to secure the last light at the bottom with a piece of tape to keep it from pulling out from the weight of the electrical cord.

Finished Trees (with and without camera flash)
Lit Trees
All you need to do now is choose a spot to display your handiwork and plug in those lights. I place my trees in the living room windows to enhance the rest of the outdoor decorations. When the holidays are over, they can remain on display throughout the winter.

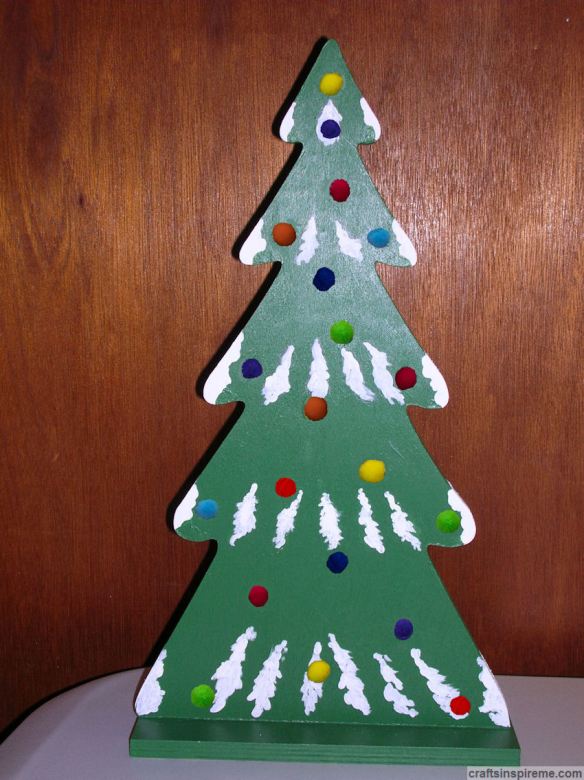
Pom Pom Alternative
Pom Pom Tree
As an alternative to lights, you can turn a simple pine tree into a Christmas tree by gluing on multi-color pom poms as ornaments.

I hope you enjoy this project and have fun decorating your home for the holidays.

Thanks for Reading & Happy Crafting!