Forever Green

Snow Covered Pines
What I miss the most during the colder months are the beautiful colors in nature. The winter sky is so gray, the trees are dormant, and the flowers temporarily disappear for a long winter’s nap. Evergreens defiantly retain their glorious shades of green regardless of the weather. To brighten your home decor, you can add a little evergreen and it will never need to be watered.

How to Paint Wooden Pine Trees
Lighted Tree Close Up
This painted craft is very easy to complete in a short amount of time and it’s great for beginners too!

Raw Wood Trees
Raw Wood Trees
As with all raw wood, a little sanding may be required, especially along the edges. The pre-drilled holes are for lights in a later step.

Supplies
Painted Tree Supplies
Supplies:
Wooden Pine Tree (17” high x 9” wide x 1/2” thick) (Base is 9” wide x 2” deep)
Acrylic Paints – green, white
Paintbrushes
Sandpaper
String of 20 lights

Apply Green Paint
Painted Green Trees
Paint each tree green, ensuring both sides, all the edges and the base are painted.

Define the Branches with Snow
Painted Snow Trees
In nature, snow gathers on the branches. To give these trees a more three-dimensional appearance, add patches of white paint to imitate Mother Nature.

Tree Lighting
Trees with Inserted Lights
Those pre-drilled holes were made to hold a strand of twenty white lights. The lights can only be pushed through from one side of the wood frame. You may need to secure the last light at the bottom with a piece of tape to keep it from pulling out from the weight of the electrical cord.

Finished Trees (with and without camera flash)
Lit Trees
All you need to do now is choose a spot to display your handiwork and plug in those lights. I place my trees in the living room windows to enhance the rest of the outdoor decorations. When the holidays are over, they can remain on display throughout the winter.

Pom Pom Alternative
Pom Pom Tree
As an alternative to lights, you can turn a simple pine tree into a Christmas tree by gluing on multi-color pom poms as ornaments.

I hope you enjoy this project and have fun decorating your home for the holidays.

Thanks for reading & Happy Crafting!

Gingerbread Dreams

Gingerbread Cookies
Gingerbread cookies are a favorite treat any time of year. Decorating gingerbread is a great activity for the whole family. For a real challenge, why not try designing, building and decorating a gingerbread house? Before we look at some finished houses, let’s take a closer look at a few of the important details.

Decorating Gingerbread
Piping Icing
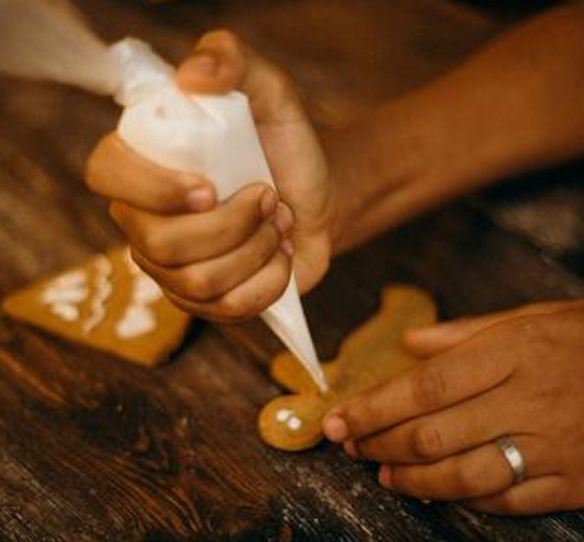
Whether decorating cookies or building a gingerbread house, the first skill you will need is piping icing.

Piping is the Key
Candy CloseUp
From the smallest detail to the walls and roof, royal icing is the edible glue that holds everything together.
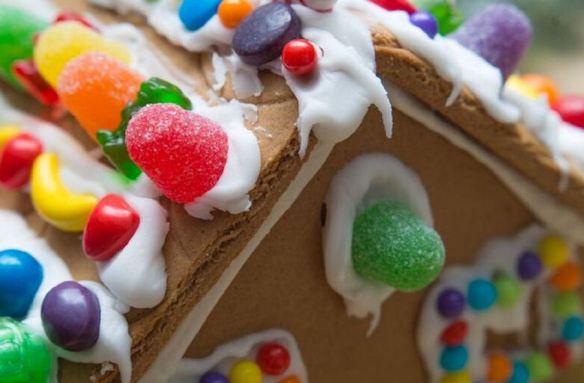
Candy Decor
Gingerbread Roof Close Up
Any type of candy will do. If you tend to nibble while you work, you might want to have extra candy on hand so that you don’t run out before the project is finished. (lol)

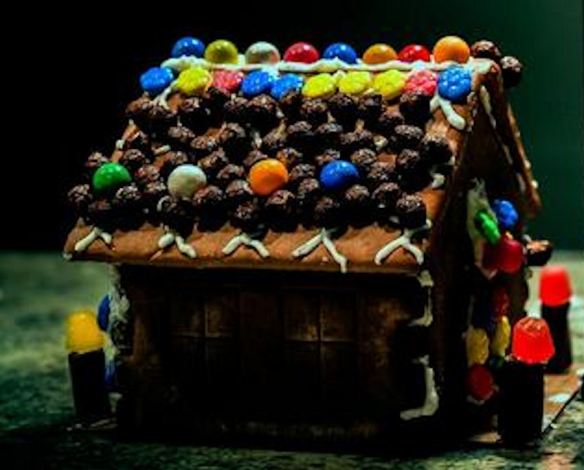
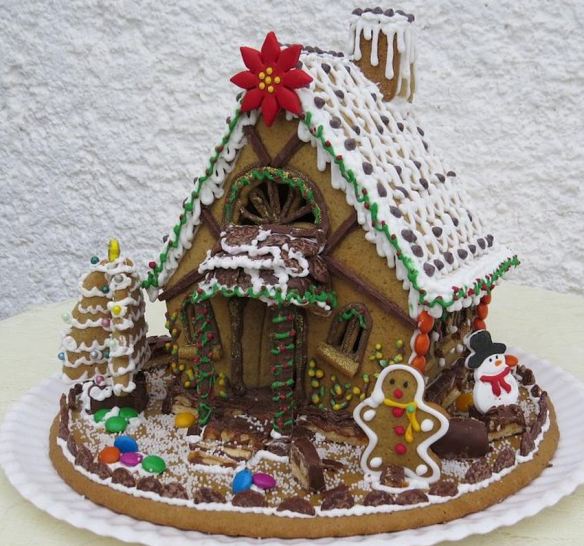
Architectural Details
Architecture Details
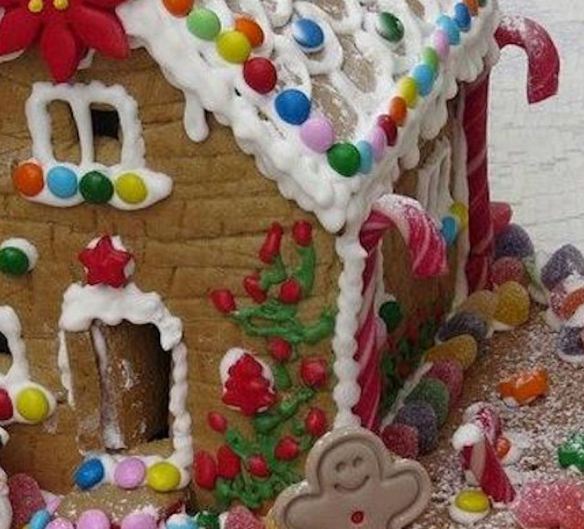
This budding architect has carefully defined the details: candy cane columns; stamped brick wall pattern; piped & candied landscaping, door and window trim; M &M roofing; and candy accents.

Festive Elf
Festive Elf
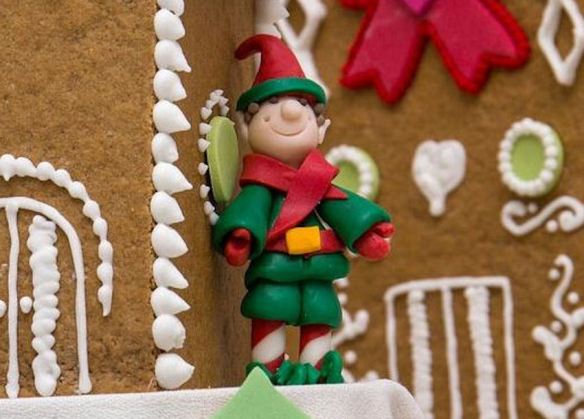
Don’t forget to have fun with your creation.

Be Adventurous
Adorable Snowman
Let your imagination run wild. Come up with interesting details. This artist darkened the windows to add depth and carved wood grain into the door. Make your project as unique as you are.

Humorous Little Details
Rooftop Cat
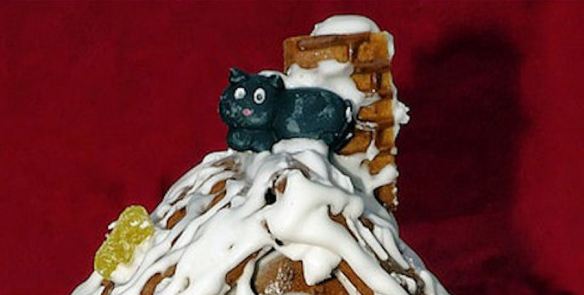
Be sure to include the unexpected, such as this fondant cat on a snow-covered roof.

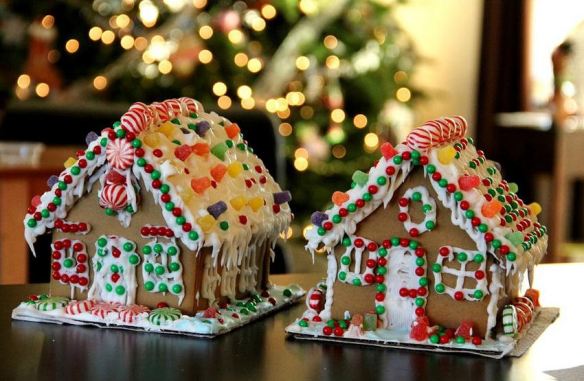
Miniature Gingerbread Houses
Cookie House
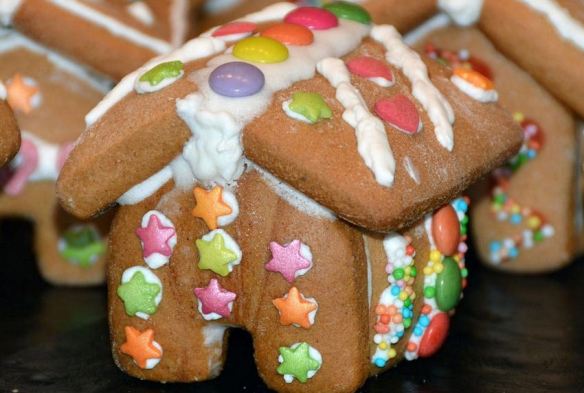
There’s nothing wrong with starting small. This house was made entirely from gingerbread cookies. It’s quick and easy to put together and can be used as ornaments, or as gifts for visitors. You could even pipe names on each one as edible “place cards” at the table.

Chalet
Gingerbread Chalet
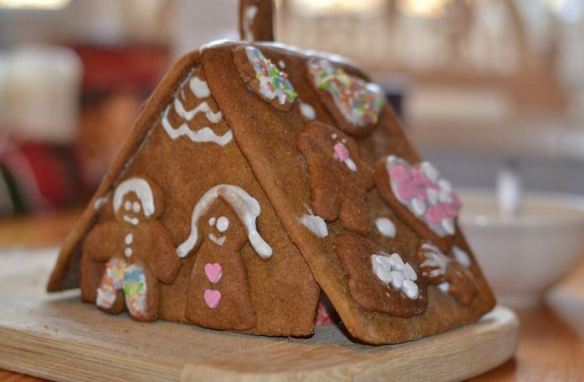
Instead of candy, decorated gingerbread cookies adorn this simple A-frame house.

In the Doghouse
Gingerbread Doghouse
Icing is the main decoration on this adorable doghouse, with only a few candy accents.

A Bright Idea
Lighted Cottage
This cottage may be small, but it has two interesting qualities that make it really stand out: 1) LEDs provide a soft glowing interior. 2) The reflective high gloss tray resembles ice or water. As an alternative to lights, you could place sheets of fruit roll ups over the inside of the windows and doors to create a cozy glow.

Accessible Design
Decorating for Everyone
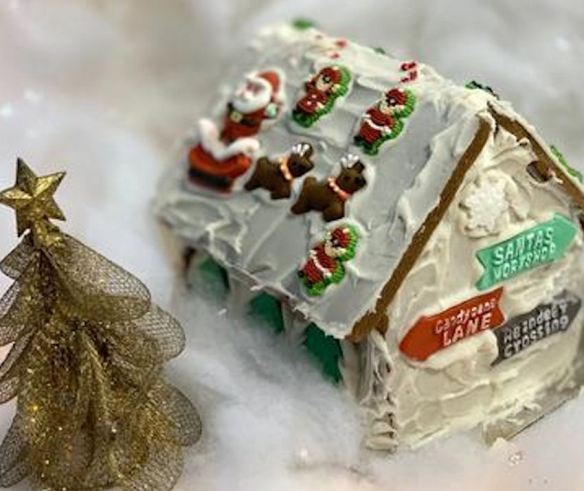
Holding a piping bag and defining tiny details can be difficult, if not impossible, for those with limited mobility. Decorating can be made easy by simply spread icing with a spatula over all the walls and roof. Place decorations wherever desired, and the icing will hold them in place.

Log Cabin Village
Log Cabins
These gingerbread houses remind me of the colonial log cabins in Valley Forge National Park. Instead of candy, piped icing was used throughout the design, with a sprinkling of sugar snow.

The North Pole
North Pole Village
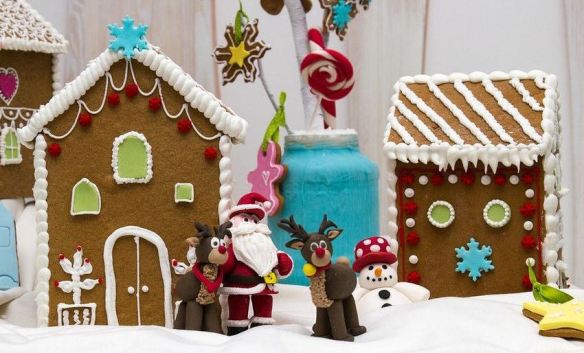
Leave it to Santa to create a quaint village, where even the North Pole is edible!

Cabin in the Woods
Cabin in the Woods
Like something from a fairy tale, this cute little snow-scene has a soft pink and blue color scheme complemented by a welcoming fire glow from inside.

Cozy Chalet
Cozy Chalet
Almond cookies adorning the roof and chocolate door & chimney set this chalet apart.
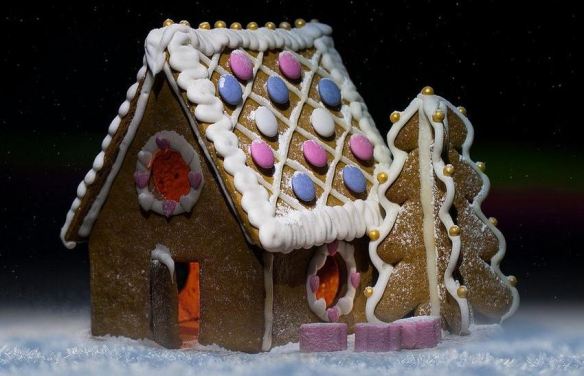
Midnight Cabin
Midnight Cabin
The contrasts between light and dark give this gingerbread house a spooky feel like something you might see in a dark lonely forest. The gumdrop posts appear to be glowing, while the almost obscured windows make you wonder what might lurk inside.

Gingerbread House Kits
You could make gingerbread houses from scratch, but kits, which include all the candy, walls, roof, and icing, are a great place to start for beginners.

A Grinchy Christmas
Grinchy Home
The Grinch gets an upgrade from his old cave home to this perfect gingerbread tribute to Dr. Seuss. From the whimsical tree to the asymmetrical door, the spirit of the story comes to life before our eyes.

Angelic Lace
Angelic Lace Cottage
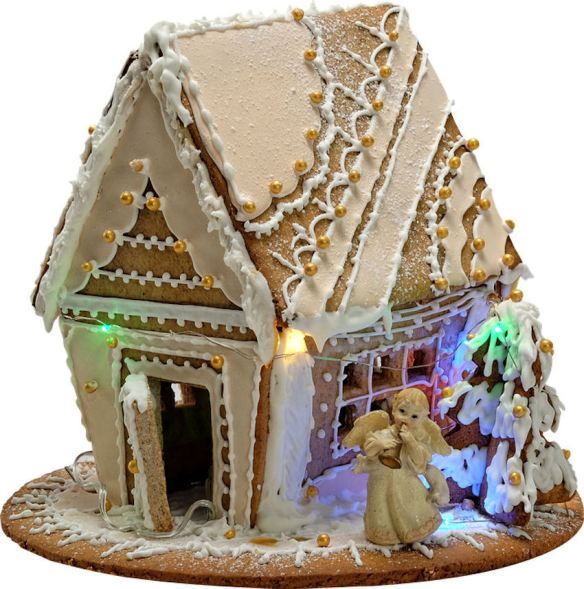
Delicate lace-like patterns harmonize with tiny gold dragées, while mini string lights illuminate the tree as well as the interior. A very steady hand is required to keep the lines soft and fluid.

Guiding Light
Lighted Church
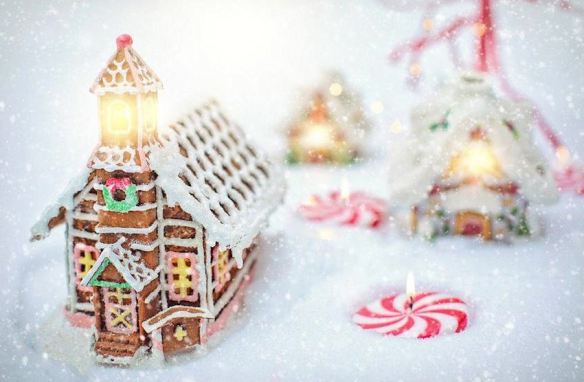
Gingerbread can be made into any type of building including castles, churches, and lighthouses. If you can imagine it, anything is possible.

Chocolate & Gingerbread Cottage
Chocolate Fairy Tale Cottage
You seldom see chocolate decorations on gingerbread, but this artist has done a wonderful job combining the two into an exquisitely detailed showstopper.
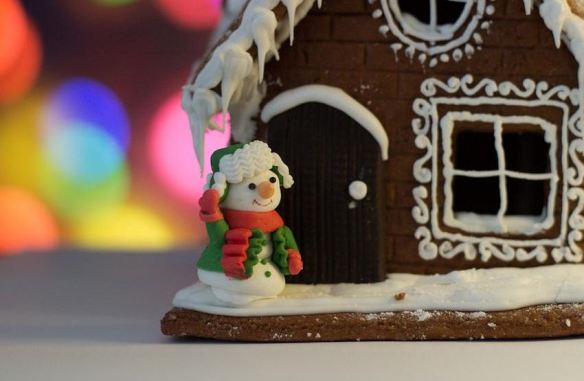
Feast for the Eyes
Wintry Dream
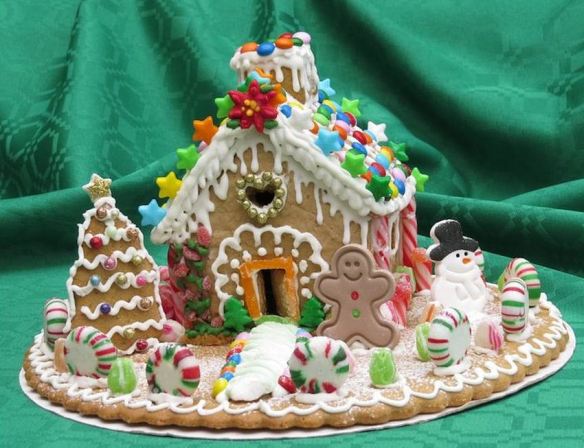
There’s a lot going on here, but it’s beautifully balanced. The snow drips from the roof and the evergreen tree is decorated with colorful balls and a star on top. The upright pinwheel candies make a lovely border, while the cheerful gingerbread man and his snowy friend are sure to please. Every detail in this sentimental gingerbread home was made with love to warm the heart.

Your Reward
Eating Gingerbread
What is the best part about decorating gingerbread? Eating it! After all that hard work, you deserve a tasty treat. If you don’t have the heart to munch on your creation, have a few decorated cookies on the side as a reward for a job well done. I hope you are inspired to give gingerbread building a try. Good luck and remember you can always eat your mistakes. (lol)

Thanks for reading & Happy Crafting!

This Little Piggy Gets a Makeover

Flying Pig
We’ve all heard the expression, “when pigs fly,” implying impossibility. Well, the craft stores may be closed, but we won’t let that stop us from expressing our creativity!

Flying Pig Front
Sometimes you find your next art project in the most unlikely of places! I found this cute little winged pig at the local Rite Aid Pharmacy! Although it’s fine the way it is, I thought it would be nice to add some color. Break out your brushes and acrylic paints because we’re going to give this little piggy a makeover! In my excitement to get started, I had already painted the eyes when I realized I hadn’t taken a “Before” photo. In its original state, there was no color at all.

Flying Pig Back
Here’s a photo of the back. The wings are so cute.

Piglet
Before we get started, I found a photo of this piglet for inspiration. Please feel free to choose any colors you like. The mix of colors on the spotted pig featured at the top of this post would make a great color scheme as well.

Piggy Paints
To complete this project, you will need several acrylic paints and two paint brushes (1 large & 1 small). Clear spray paint is optional.

Painted Pig Details
Paint the details first, including the hooves, eyes, tongue, and the inside of each ear.

Closeup Facial Details
Here is a close up of his smiling little face. The eyes are painted brown, with black pupils and a dot of white in each eye to create a lively expression.

Pink Pig Front
Because the black hooves seemed to be too much contrast, I changed the color of the hooves to tan. In doing so, the eyes become the focal point. Mix white and fuchsia together to create the desired shade of pink, and use it to paint the entire body, except for the end of the snout, which is unpainted.

Pink Pig Back
Here is the back photo. The wings are also unpainted. If you like a challenge, you could come up with a unique scheme for the feathers, possibly using iridescent colors. To protect the acrylic paints, the entire statue was sprayed with clear spray paint.

Piggy Before and After
Before                                                             After

This fun and easy project is inexpensive and can be completed in a very short amount of time. All drug stores have a seasonal section, which is marked down after every holiday and at season’s end by as much as 50% -75% off. There are some great options for adults as well as kids.

Thanks for reading! Happy Crafts!

How to Make a Painted Wooden Snowman

Snowman Closeup Photo

The solstice officially marked the start of winter. The long range forecast here in the northeastern U.S. calls for cold temperatures, but less snow. That could be a problem for those outdoor-enthusiasts, who love cross-country skiing, ice skating or simply building a snow fort in the backyard. It wouldn’t be winter without a snowman or two. Why not build a snowman that will never melt? This is a simple, inexpensive project for the whole family. I made two snowmen to display in my living room windows.

Unfinished Wood
It all starts with unfinished wood snowmen, purchased at AC Moore.  The perimeter holes are for lights in a later step.

Snowmen Painted White
Spray paint all sides, edges and base with white paint.

Painted Details
With an artist’s paintbrush, add the details (buttons, eyes, and a smile) with black paint.  Instead of painting the details, you could hot glue round and square plastic buttons, and draw the smile with a Sharpie marker.

Hats Scarves & Carrots
Accessorize with hats and scarves. If you enjoy crocheting, you can quickly create this fashionable look with whatever color yarn you have on hand. Bright red is a great seasonal color, and reads well from a distance. If needlework is not your thing, craft stores have snowman building kits and accessories. For the nose, I created the look of a carrot by squeezing a foam, packing peanut into the correct shape, and painting it with bright orange acrylic paint.  Use hot glue to attach carrot nose.

Stick Arms
Making the arms is as easy as collecting a few sticks from your yard, and attaching them to the sides. You could glue them in place. I decided to use self-stick Velcro instead, because I wanted the arms to be removable for easy storage.

White Lights
Those pre-drilled holes around the perimeter were made to hold a strand of twenty white lights, also available at AC Moore. Crafter Tip: The lights can only be pushed through from one side of the wood frame. You may need to secure the last light at the bottom with a piece of tape to keep it from pulling out from the weight of the electrical cord.

Lights at night
I turned off the flash on my camera to give you an idea of how these cute little snowmen look when lit at night. When the holidays are over, these snowmen can remain on display throughout the winter to bring a little whimsy to your home’s decor. The lights are very bright, and can be easily seen by passersby.

As an additional aside, I made these snowmen two-sided. Because they are standing on a windowsill, they can be seen from inside and outside. The lights can only be seen from the front, but seeing that smiling face when I walk by the window makes me smile too.

Happy Crafting!

A Kid Friendly Thanksgiving

Kids Playing
From a child’s point of view, Thanksgiving dinners can be really dull. All that hugging and kissing from relatives they never knew they had, and then they have to sit at the dreaded “Kids’ Table.” Borrrring! With a few creative changes, even the kids will be thankful at your next holiday meal.

Friendly Competition – Hunting for Treasure
Speckled Eggs
For those living in warmer climates, fresh air, a little exercise, and some friendly competition could be just the right combo to entertain the kids. Everyone has heard of an Easter egg hunt. Start a new tradition by having a Turkey egg hunt. Plastic eggs are easy to come by, and tiny toys or candies can be hidden inside. If you can’t find eggs, write numbers on brightly colored rubber balls, where each number corresponds to a prize.

Children Love Coloring
A Child Coloring
Coloring Option 1: Instead of using a standard tablecloth, cover the kid’s table with a thick sheet of paper. Banner paper, which is sold in 24” x 75 ft rolls, can be spread across the tabletop and secured in place. Sharpened, soft-lead, colored pencils will enable young guests to doodle to their hearts’ content.

Coloring Books – Staying in the Lines…or not
Coloring Book
Coloring Option 2: Coloring books come in many themes and sizes, with age-appropriate challenges, and perforated pages for easy tear out. Crayons are great for the younger kids, while the older ones will appreciate colored pencils or markers. The finished drawings can be presented to all the guests. Prizes are optional. Crafter Tip: To ensure markers do not damage your table, use a vinyl table cover.

Video Games
Video Games
If your kids love video games, this will keep them occupied for hours. You might have to pry them away for dinner. Adults are hooked on gaming as well, so this could be an activity for guests of all ages.

In terms of food that will appeal to children, you may want to consider the following suggestions as either appetizers or as the kids’ main course.

Chicken Nuggets are a Food Favorite
Chicken Nuggets
Finger foods are so much easier to handle and no utensils are required.

Creatively Wrapped Mini Hot Dogs
Pigs in Blanket
Also known as Pigs in a Blanket, these mini hot dogs have been wrapped in Pillsbury Crescent rolls. Note the bottom row is decorated as mummies, which you may have seen on television. With a few minor adjustments – add a ketchup beak and a jagged edge above and below the face – the top row resembles baby turkeys hatching from eggs. See photo below for a simpler wrap. (Crafter Tip: Use mayonnaise for the eyeballs. The pupils can be made with pepper or mustard.)

Simply Wrapped Mini Hot Dogs
Pigs in Blanket
Pigs in a Blanket are easy to make and easy to eat.

Macaroni & Cheese
Mac And Cheese
Any kid’s menu would be incomplete without Mac & Cheese. Better make extra because as you know adults love it too!

Making dessert a memorable occasion requires very little effort… and don’t be surprised if the adults want to join in the fun.

Fanciful Ice Cream
 Ice Cream
This dessert is sure to make everyone smile, and it’s incredibly easy. All you need is a sugar cone, a single scoop of ice cream, sliced fruit and a few M &M’s chocolate candies. Mint leaves and a flower are optional garnishes, or use additional pieces of candy instead.

Decorate Your Own Cookies
Gingerbread Cookies
Kids are naturally creative. Feed their artistic ability with a basket of plain cookies, tubes of icing and candies like the ones shown below.

Mini Candies, Marsh Mallows & Rainbow Colored Sprinkles
Candies
Sweet confections, perfect for cookie decorating, are “glued” in place with icing.

Cookie Party Favors
Cookie Bag
Decorated cookies can be eaten then and there, or wrapped in plastic bags to take home. Wilton sells special bags as party favors, but simple zip lock bags will work just as well.

Dinner parties require a lot of planning, great food, and our family and friends. Don’t forget to include a few perks for the little ones. When the kids are happy, everyone is happy.

Happy Crafting!