Halloween Decorating Tips

Pumpkins by CandlelightOne of my favorite holidays is Halloween. It brings back such happy memories of dressing up as a child, and the excitement has continued as an adult. Apparently many people agree, because Halloween has become the second biggest holiday of the year. Decorating your home is a fun activity for the whole family. Here are a few ideas for inspiration:

Halloween Wreath
Halloween WreathGreet your guests at the front door with a boldly decorated Halloween wreath. The humorous witch’s legs were the inspiration for the purple and black color scheme with accents of orange and white. The wire wreath frame was wrapped first with tissue paper to add bulk, and then fabric for color and texture. The witch’s legs came mounted on a dowel, which was secured to the frame. A metallic garland conceals the dowel and an owl was tied in the center using matching ribbon. The witch’s hat, ghosts, pumpkins, and spiders complete the design.

Spider Web Placemat
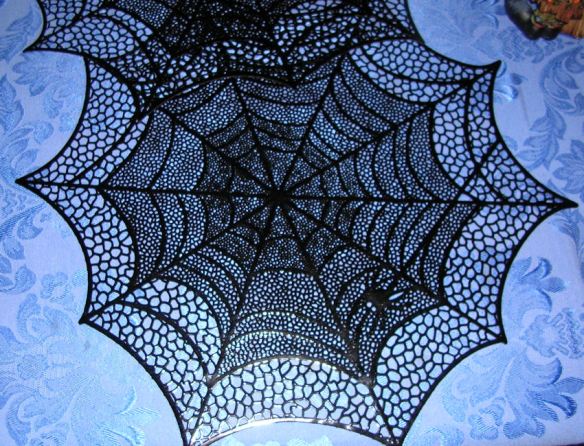
Spider Web Placemat

Pumpkin Placemat
Pumpkin PlacematSetting a Spooky Table – Whether you are having a Halloween party, or want to spice up your breakfast table, an inexpensive solution is layering placemats. Laser cutting technology has produced beautifully detailed, lace-like products with both style and durability. A Spider Web placemat (from Wegmans) was layered with a Metallic Finish Pumpkin placemat (from AC Moore) to create this lively place setting. The blue tablecloth peeks out from underneath like a midnight sky and creates great contrast to the orange and black. As alternatives, you could use a yellow tablecloth (think full moon) or green tablecloth (think forest).

Arachnophobia? No Problem with this tablecloth.
Spider Table CoverHalloween themed tablecloths can be difficult to find and pricey, especially for large dining room tables. There’s an easy alternative. Measure your table, and go to a fabric store, such as Jo Ann Crafts. It’s amazing to see some of the scary patterns that have been developed over the last several years. The semi-sheer fabric in the photo above is layered over a gold tablecloth I already had. If you prefer an opaque table cover, there are ghosts, skeletons and witches. Oh My! Some fabrics have entire haunted scenes emblazoned across the surface suitable for covering tables, or as wall hangings. There’s no need to hem the edges. It’s Halloween – a few ragged edges only adds to the haunted house vibe.

Inside Out Pumpkin
JackolanternGlowing Illusion Pumpkin – We are all accustomed to seeing the typical orange pumpkin with an interior that is either candlelit or dark & shadowy. That color scheme has been turned inside out by painting the outside black and the inside fluorescent orange. When placed near any light source (lamp, ceiling light, or sunlight), the result is a scary glowing pumpkin without the need for electricity or batteries. I can’t tell you how many times well-meaning co-workers have warned me about the company’s strict no candle burning policy, until they see for themselves that it’s completely empty. It’s easy to fool the eye with this illusion.

Pumpkins for All Seasons
Craft PumpkinCraft Pumpkins – If you have ever decorated your yard with live pumpkins, you probably lost a few, if not all, to squirrels, slugs or other hungry critters. Craft pumpkins look like the real thing, but are made of foam or resin, which is not on the menu for wildlife. These pumpkins are ready to display as is, or they can be carved or painted with exterior paint. Craft pumpkins are for indoor and outdoor use, inexpensive, will last years, and are nice for Thanksgiving too.

To the Bat Cave! (which in this case is a Chandelier)
Bats & OwlBats – A cluster of bats hanging over your table will surprise and delight party guests. The faux fur bodies are a simple tube shape with a slightly larger, rounded end and ears for the head. The owl in the center is from Pier 1, and the pumpkin garland is from AC Moore.

Bat Making Instructions:
Supplies:
Brown or black faux fur (from Jo Ann Crafts)
Shiny black fabric (for wings)
Fishing tackle
Sewing needle and black thread
Foam filler or batting
Cardboard (for pattern making)

Bat Wing & Body Patterns
Bat PatternsMake patterns for the body and wings as follows:
Draw a thick capital letter “T” on cardboard – vertically 6” x 2”; top of “T” is 4”x 1” thick.
Carefully cut it out. This will be the pattern for the bat’s body.
Draw a bat wing on cardboard, approximately 9”x4. Cut out wing. Now flip it over, trace onto cardboard, and cut it out for the other wing.

Finished Bat
Finished BatUsing the body pattern, cut out two pieces of faux fur for the front and back of each bat.
Sew the fur by hand, leaving the bottom open for filling later.
Trace each bat wing pattern onto shiny black fabric and cut out both wings.
Hand-sew the wings on either side of the body; fill it with foam or batting and stitch closed.
Remember bats hang upside down, so add fishing tackle on the bottom of each bat for hanging from a chandelier or wall sconce.

Please click here to see part 2 of this Halloween decorating article.

Happy Halloween & Happy Crafting!

Eye Candy & Memories – Creating Collages

Camera Collage
A collage is a themed grouping of images artfully arranged on poster board or mat board. This clever piece has a camera “lens” in the center of photographs placed in concentric circles. Although it’s a visually interesting composition, the individual photos would be difficult to view, especially since the majority are sideways or upside down.

Butterfly Collage
Themes can include anything from vacations, family photos, nature’s beauty, or anything else that inspires or brings you joy.

Water Lilies Collage
The first rule of collage making is…there are no rules! Anything goes! The background can be white or any color you prefer. You may want to overlap the images in a freeform design, or divide the board into a grid, showcasing each individual photo.

Postcard Collage
When you travel, you often collect magazines and postcards as souvenirs, which typically end up stuffed in a drawer. Why not create a collage? Every time you walk by you’ll relive your vacations.

Fabric Elephant Collage
Collages don’t have to be limited to photographs. Here’s an example of a fabric collage in the shape of an adorable elephant. The blue mat board complements the fabrics and brings a cheerful element to this playful character.

Seashell & Feather Collage
You could also use silk flowers, leaves, feathers, or seashells. When using heavier materials like seashells, be sure to use a strong backer board for support.

Duck Collage
If you prefer more organization, the geometric precision of a grid can be created using a T-square or a ruler and triangles. In the above example, white space around each photo defines the composition.

Travel Collage
For a freeform collage, lay the photos out upon the board, make adjustments until you’re satisfied with the arrangement, and then glue the photos down one at a time with Elmer’s Glue Stick.

French Sightseeing Collage
Usually poster board, mat board, or collage board serve as backing, but you could also use a wood plaque, a shadow box frame, or a framed slate board. Whatever you choose will personalize your creation. If you plan to frame the finished collage, be sure to select a board size that will fit into a standard frame.

Seasonal Fall Collage
Scrapbooking paper can be used to add colors, patterns and textures (e.g. faux wood grain), to an otherwise plain background. You could also hand paint details.

Collage Frame
If cutting out pictures and gluing them down seems like too much work, the simplest and quickest way to create a collage is by using a collage frame. Place a few photos in the frame and your done. No muss or fuss!

Scrapbook Vision Board
If wall space is limited or you prefer a more portable option, a scrapbook collage (vision board) can be developed over time. As your dreams and goals come true, there are plenty of additional pages for future inspirations.

How to Make a Collage / Vision Board

A vision board is a collage with goals and dreams to be manifested into your life. It gives you a daily reminder to focus your thoughts upon making your dreams come true.

Supplies:
Photos, postcards, color copies
Scissors
Elmer’s Glue Stick (All Purpose is permanent, or the Washable formula is adjustable)
Poster Board or Mat Board
Poster Frame (optional)

Magazines
Collect brochures, magazines, photos, and color copies of your wishes and dreams. Carefully cut out the pictures. It’s fine to have an assortment of various sizes, because these will fit together like puzzle pieces with overlapping edges. Lay the images upon your board. Move them around until you feel the composition is coming together. Think about the colors, contrasting textures, and patterns. It’s okay to have empty spaces.

Preliminary Vision Board
This photo is a progress shot showing the initial photo layout. Glue each image in place. Now fill in the gaps with smaller photos or inspirational words.

Completed Vision Board
Layers were added to enrich the composition, which completely covered the background. After leaning this vision board against a wall for a few weeks, it was inspirational, but the poster board was starting to bow. I had a new 24” x 36” gold metal poster frame, and decided to use it for the vision board to protect the images behind glass and to give it a more finished look, ready to hang upon the wall. I had to add approximately 8” to the length of the poster board on the right side to fit the oversized frame. Additional images were then added to blend with the existing. Now that it is framed, this simple project has become an attractive piece of art.

What kind of collage are you thinking about making? Do you have a theme in mind? Please share your ideas in the comments section.

Happy Crafting!

Spring Cleaning the Craft Studio

Organized Art Supplies
Spring is a wonderful time for renewal. We all like getting a fresh start. To that end, I decided the Crafts  Inspire Me website needed some freshening as well. Please check out the new “Crafts by Topic” page. It is divided into categories, similar to the departments found in a craft store, to make it easier to find the types of projects that most interest you. Here is a small sampling:

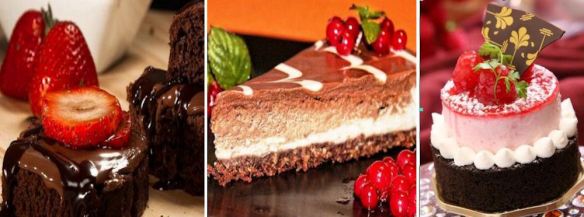
Baking & Candy Making

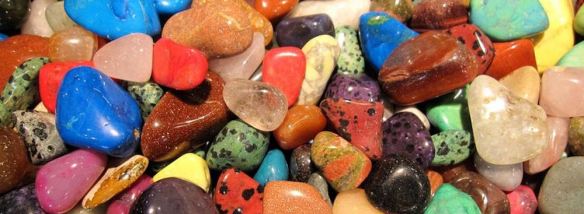
Beaded Jewelry & Gemstones

Floral & Home Decor

To see the new Crafts page, please click here. You will also find a new page entitled, “Color Theory,” which contains information on the magnificent variety of colors in this world, and their effects on our daily lives.   I hope these changes will inspire and entertain you. Please let me know what you think in the comments section. In case you missed a recent post, there is also a “How To Projects” page with complete instructions for all kinds of creative projects. As always, questions and suggestions for future projects are welcome. Thanks for reading.

Happy Crafting!

Save Room for Dessert

Assorted Desserts
There’s a reason they say: “Life is short. Eat dessert first.” It really is the best part of the meal. Now that spring has arrived, there will be plenty of entertaining opportunities. Why not offer to bring dessert? Many people don’t realize that craft stores have large baking departments with specialty pans, cake decorating tools, glassware, cake plates, fondant and many other useful tricks of the trade to make your desserts the hit of the party.

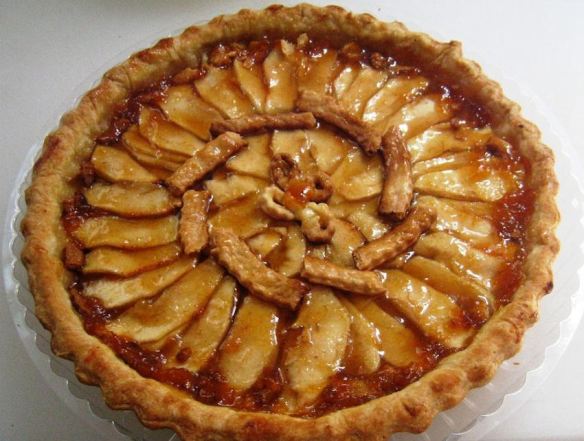
Apple Pie
Apple Pie – Hot apple pie a la mode is a favorite any time of year. Layering the apple slices across the top in a creative spiral design adds to the visual appeal.

Birds Nests
Chocolate Birds Nests – Kids and adults love the taste of Rice Krispie Treats but these have a wonderful springtime chocolate twist. Simply follow the recipe using chocolate rice cereal.  Drop spoonfuls into cupcake wrappers and shape into nests. For the finishing touch, place a few malted milk eggs or jellybeans on top as eggs.

Brownie
Brownies with Heart – Everyone has a recipe for brownies. To make them extra special, bake them in a specialty pan with individual compartments. Cut out a paper heart and set in on top, and then sprinkle with powdered sugar. It’s so much more impressive than the usual square cut brownie.

Caramel Flan
Caramel Flan – This delicious egg custard has a caramel glaze poured over the top.

Raspberry Cheesecake
Raspberry Cheesecake – Any flavor of cheesecake is a delicious choice year round.

Chocolate Fudge Cake
Chocolate Fudge Cake – This chocolate lover’s dream has a thick layer of chocolate fudge icing, chocolate filling and a chocolate graham cracker crust. Yummy!

Chocolate Roll
Red Velvet Roll – Moist rich chocolate cake filled with vanilla cream and topped with chocolate shavings, coffee beans and a dusting of chocolate powder – Who could resist?

Chocolate Truffles
Chocolate Truffles – To make these decadent truffles, you will need to fill the candy mold one layer at a time. Form the outer shell by coating the mold with chocolate. Next add the filling. Popular favorites are hazelnuts, butter cream, peanut butter, caramels, chocolate liqueurs and cream fillings. A piping bag can be used to make filling easier. Refrigerate the mold to allow the filling and chocolate to solidify. The last step is adding another layer of chocolate to fill any remaining voids and seal the top of the mold. Refrigerate and carefully un-mold. If you want a more colorful treat, dip each truffle in melted chocolate and then dip in candy sprinkles.  Your candy making skills will be the envy of all your guests.

Cookies
Assorted Cookies – Dress up your next batch of cookies by using fanciful cookie cutters, and embellishing with icing, sprinkles, nuts or dipping chocolate.

Cupcakes
Cupcakes – These are easy to make party favorites and kids love to help with decorating.

Fruit Tart
Fruit Tart – This is a beautiful, eye-catching dessert. It’s all about the pattern and colors. The brightly colored plate creates the perfect frame for this artistic piece.

Fruit Yogurt
Yogurt Parfaits – What could be easier than mixing yogurt and fresh fruit?

Muffins
Muffins – Decorative paper wraps add pizzazz to simple muffins and cupcakes. Use a piping bag to apply whipped cream icing and top with a few berries and a sprig of mint.

Raspberry Vanilla Pudding
Raspberry Vanilla Pudding – While this may appear fancy, it’s easy to make. You’ll need an empty egg carton to hold the glass dishes at an angle. Mix the pudding, pour it into the tilted dishes and refrigerate. Puree raspberries and pour onto the firm pudding. A little whipped cream, a few chocolate pieces, a fresh raspberry and a mint leaf complete this visually intriguing dessert.

Strawberry Cream Puffs
Cream Puffs – Two dessert favorites in one: cream puffs and strawberry shortcake.

So many delicious choices! What’s your favorite? The only challenge in making dessert is preventing your family from devouring it before the guests arrive. Oh well, you can always make extra just in case.

Happy Crafting!

What’s New in the Studio?


It’s that time again. You’re in a creative mood but aren’t sure where to start. The endless possibilities can be overwhelming. Sometimes it’s easier to look at a wide assortment of completed projects, to see if anything piques your interest. Below are photos of several projects for your review. When you find one you like, click on the link above the photo for a complete list of easy to follow instructions. Enjoy!

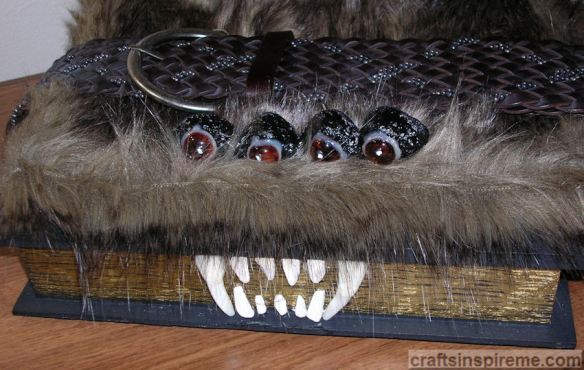
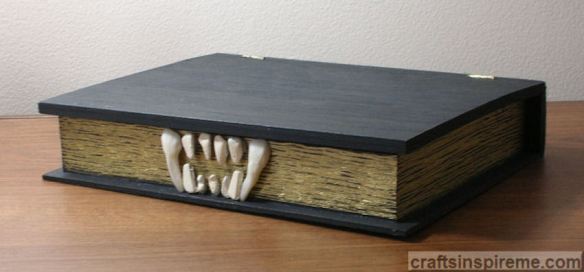
Harry Potter Monster Book

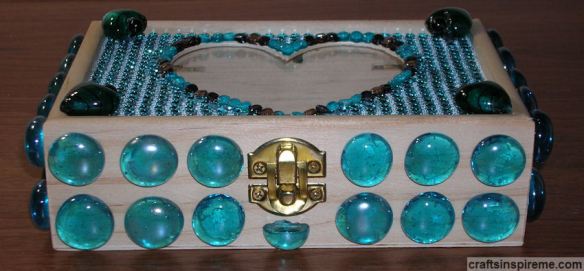
Bejeweled Box
Jeweled Box

Suncatchers
Mirror with Applied Suncatchers

For additional photos and instructional links, please click here to visit a new page on our website called “How to Projects.” From time to time, new projects will be added, so please stop by to see what’s new in the studio.

Happy Crafting!

In Search of Inspiration?

Inspiring Hot Air Balloon
Everyone knows inspiration can strike at any time. Sometimes it’s obvious, such as a sunset or a pretty vista. Other times it’s a subtle feeling. Occasionally inspiration sneaks up on you when you least expect it, but there are some very frustrating times when it seems nowhere to be found. Below are a few examples of project inspirations to get your creative ideas flowing:

Artwork on a Case of Beer inspired…Cold Beverage Coasters.
Cold Beverage Coasters
These coasters were easy to make. Cut out the artwork and laminate each piece. Seal the edges with black duct tape. Glue each coaster to a cork backing and you’ll have a nice little gift for the beer lover in your family.

A festive Fox Toy inspired…Santa Claws Guiding his Sleigh.
Foxy Santa
In this case it was the missing items, namely a tail and a hat, which inspired this Santa Claus centerpiece. Foxes are known for their thick, beautiful tails. Who knows why the manufacturer neglected to provide one? It was easy enough to fix with a little faux fur. The hat was an obvious necessity, since the fox was already decked out in Santa’s finest coat, pants and boots.

Love of Chocolate inspired…Homemade Crispy Chocolate Caramel Bars

Who doesn’t love chocolate? It’s amazing how tempting a little piece of chocolate can be. These candy bars are so easy to make. I’m inspired to make a batch right now, but I better finish this post first! For instructions, please click here.

An ornately decorated Easter Wreath inspired…an Ocean Wreath.
Ocean Wreath
The colors, textures, and intricate details were eye-catching and beautiful, but an Easter wreath has a very limited time frame. By switching to the aquatic theme, the wreath can be displayed throughout the spring and summer. For instructions to make this ocean wreath, please click here.

For more inspirational project photos, please click here to visit the new Inspiration page on our website.

I hope these photos will inspire new project ideas. Magazines, online searches, and a visit to the craft store are also great resources. With an infinite supply of inspiration and a few well-chosen supplies, you will be on your way to creating your next masterpiece.

Good Luck & Happy Crafting!

Wizarding World of Harry Potter – Monster Book

Harry Potter Monster Book
Every Harry Potter fan dreams of living in his magical world. You have read the books and seen the movies, but to experience it in the real world, you’ll need to make the trip to Universal Studio’s Wizarding World of Harry Potter. If travel isn’t on your agenda, perhaps you could bring a piece of Harry’s world into your own. You can’t be a wizard without a few enchanted books. Who could forget the ferocious monster book? Ever wondered if you could make one?

Unfinished Wood Book Box
The moon and the stars must have aligned to make your wish come true with the discovery of this wooden book box, available through Michaels for $5.99. It’s the perfect size and thickness, and offers a strong foundation for building a monster book. As a bonus, there’s a secret compartment inside for storing your favorite spells (recipes), magic charms (office supplies), or wizardly collectibles.

How to Make a Monster Book Fit for a Wizard:

Supplies:
Wooden Book Box (9.75″ x 7.5″ x 2.88″)
Black Paint – brush on Acrylic or spray paint
Sharpie Metallic gold marker – medium point
Vampire Teeth
Faux fur
4) Packing peanuts
4) Glass marbles – orange
1) Bottle fabric paint – black
1) Bottle fabric paint – white
1) Leather or vinyl belt
Glue gun
Scissors
Paintbrush

Book Painted Black
Paint the box black, inside and out. This dark color will make a great contrasting background for the gold paint applied in the next step.

Gilded Pages
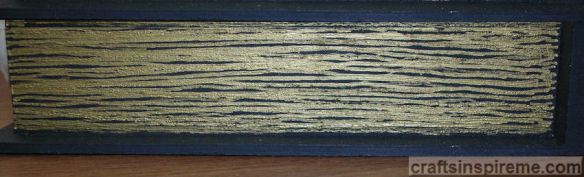
To create the appearance of gilded pages, draw horizontal lines along all three sides of the book, using a Sharpie metallic gold pen. Don’t worry about crooked lines. Pages in old books become crinkled and curled. Imperfect lines will provide an aged look.

Attach Teeth
The next step is attaching teeth. Center the mouth as shown. The large fangs are from Fire Mountain Gems, and the smaller teeth are actually clear quartz crystal chips, painted to match. To simplify this step, purchase vampire teeth at a Halloween store or Amazon.

Fur Cover
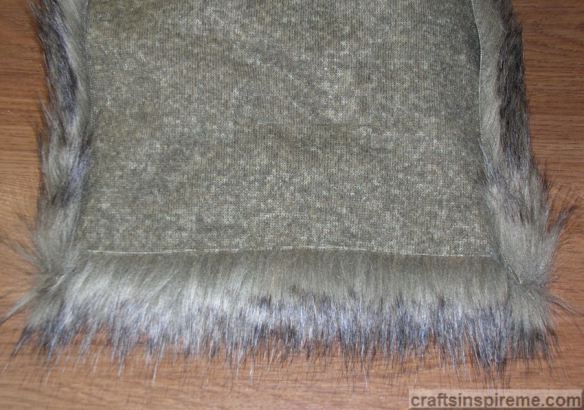
Faux fur from JoAnn Arts & Crafts is the perfect color and texture for this monster. Cut the piece large enough to allow a hem on all four sides. Be sure the fur will not interfere with the operation of the hinges. Please note: the raw edges of fur shed like crazy. Once they are hemmed and attached to the book the shedding stops. (Yeah!)

Trim & Hem Fur
The sides could be hand sewn, but these hems were made with a glue gun.

Packing Peanuts as Eye Sockets
I decided this monster would have four eyes. To make the eye sockets, use four packing peanuts. Each peanut is pinched in half and glued to hold its shape. Glue the four together end to end as shown.

Painted Packing Peanuts
Paint the foam with black fabric paint. Use a toothpick to keep the paint off your fingers.

Marble Eyes
I found four orange glass marbles with red streaks resembling bloodshot eyes. Each was glued into the sockets, and outlined with white fabric paint. A white dot was added to each marble to give it that creepy glint in the eye appearance.

Attach Eyes & Fur
Attach the eyes to the fur, and then secure the fur on top of the box.

Finished Monster Book
Last step: Wrap an old leather belt around the book to keep your monster under control.

Congratulations! You’re now the proud parent of your very own Monster Book. Be sure to keep it on a short leash because we all know how much it loves to shred – shoes, feet, paper – anything within reach. For decades, kids have been telling their teachers, “The dog ate my homework!” With a monster book as a pet, this excuse might actually be believed!

Do you have a favorite Harry Potter creature? Please share your thoughts in the comments section. Until next time…

Happy Crafting!

Creative Holiday Gift Wrapping

Whats in the Box?It’s the night before Christmas, and little feet tiptoe toward the tree for a sneak peek at the presents. We may not have done this, but we thought about it a lot. It’s human nature to wonder -What’s inside the box?

Whether you are celebrating Christmas, Hanukkah, Kwanzaa, etc., you’re going to give gifts to lots of people, and those gifts need to be boxed, bagged, or wrapped in an attractive fashion.

Last Minute Checking All the Details

Colors & PatternsIf your name is Mrs. Claus, you probably don’t need help wrapping gifts.

Santa’s Secret Gift Stash

All Wrapped UpIn fact, Mrs. Claus probably has a gift-giving closet that looks like this one. For the rest of us, there’s still a lot of shopping to be done and presents to be wrapped. Department stores typically offer gift wrap, but it can be pricey. Many retailers have eliminated this service and the gift boxes as well. Shopping malls offer gift wrapping, but the lines can be very long. Fortunately there are lots of solutions to make your gifts look beautiful.

Gift Bags & Boxes

Gift BagsGift bags are probably one of the best inventions of all time. They’re sold just about everywhere, including the food stores, so when you’re running around last minute a gift bag is easily on hand.

Accessorized Cloth Gift Bags

Cloth Gift BagsThese burlap bags are dressed up with the addition of berries and glitzy red ornaments.

Red & White Fabric Gift Bag

Cloth Gift BagThis red and white gift bag has a built-in drawstring.

Fabric Gift Bags with Metallic Polka Dot Patterns

Amazon Gift BagsAmazon provided these festive gift bags, which my family passes back and forth for various occasions all year long. Unfortunately there’s no way of knowing which color you might receive, and some items are wrapped in paper instead of a bag.

Velvet-Lined Metal Box

Metal BoxA metal box is an intriguing way to package a gift.

Collectible Porcelain Box

Porcelain BoxPorcelain boxes come in a variety of shapes and colors for every occasion. These are perfect for jewelry or other small items, and can also be used to conceal a cash gift.

Glass Jar Adorned with Silver Heart

Glass JarFor the baker in the family, this fluted glass jar and lid will hold your gift now, and will be perfect for holding baking ingredients in the future. It could also be used as cookie jar.

Bath & Body Gift Basket

Gift BasketGift baskets filled with the recipient’s favorites is always a welcome surprise. You can purchase a roll of colored cellophane wrap or use regular plastic wrap to cover the entire basket, and tie a bow on top.

Gift Box Tower

Stacking Printed BoxesSome stores provide colorfully printed boxes, which are suitable for gifts any time of year, and can be stacked and tied with a pretty ribbon.

Gift Boxes – Lids Wrapped Separately

Wrapped LidsWhen using standard wrapping paper, you can always wrap the lid separately. By doing so, the box can be reused for years to come.

Accessorized Gold Box

Floral StemA floral pine cone stem and some ribbon were all that was needed to complete this package.

Matching Gift Tags

Gift TagsDon’t forget to add a gift tag. Some people save the pictures, from last year’s holiday cards, and use them as gift tags on this year’s presents.

Dress up Gift Wrap with Ornaments

Ornaments
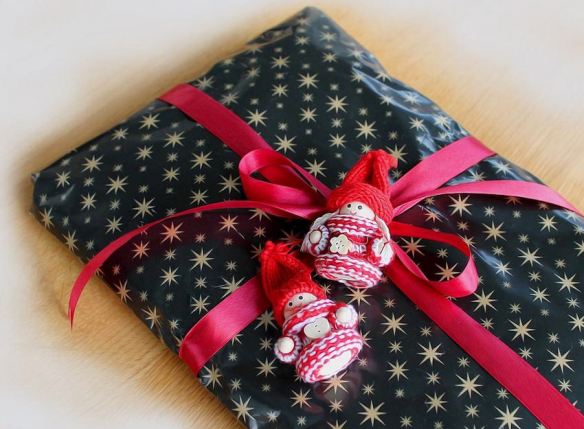
Standard green wrapping paper perks up with the addition of bright red ribbon and two adorable ornaments.

Recycled Paper with Greens from the Backyard

Pine Cone GreensFor an all-natural look, recycled paper can be used, with twine instead of ribbon, some evergreen and a pine cone from your backyard.

Fancy Metallic Paper & Coordinating Ribbon

Silver BowA silver bow makes a statement on this aqua and silver wrapped gift.

Fanciful Paper with a Statement Bow

Big BowA glittering gold bow makes the perfect topper for this dancing reindeer package.

Metallic Paper with a Pom Pom Bow

Specialty BowsA 3-dimensional snowflake has sprung to life from this pretty wrapping paper.

Glittering Paper, Ribbon & Bow

BlingFor a glamorous look, combine sparkling red paper, gold studded ribbon, and a shiny gold bow.

Coordinated Paper & Ribbon

Matching Ribbon & PaperThis perfectly coordinated metallic ribbon and paper is suitable for gifts any time of year.

Pretty Paper with Flower-Shaped Bow

Floral Paper & BowSometimes a really great topper steals the show. A bow like this one will be appreciated for sure, with its petal-like layers in full bloom and wisps of green ribbon leaves peeking out beneath. There’s a very interesting pattern of wildlife, holly sprigs, and guitars intertwined among the curvilinear vines.

As they say, it’s the thought that counts. With a few creative choices, gift wrapping can be a pleasure, instead of a chore.

Happy Holidays & Happy Crafting!

Baking for the Holidays

Cookie Cutters & Dough
As the weather turns colder, my thoughts turn to baking. The scent of home baked cookies wafting through the air is sure to be followed by the thumping footfalls of my family as they bound down the stairs in search of something sweet from the oven. I have to admit I love it too and have sampled more than a few of my own creations.

In addition to satisfying your family, baked goods make great gifts for guests, neighbors, co-workers, and friends. Below are several ideas for inspiration.

Gingerbread Cookies
Gingerbread Cookies
These charming gingerbread cookies are served on an equally adorable pinwheel candy plate. They’re easy to make, or you can buy plain ones and apply your own colorful candy and icing decorations.

Gingerbread Houses
Gingerbread Houses
Everyone loves home baked goods. How about baked goods that require no baking at all (at least on your part)? Gingerbread kits come in a number of varieties, such as cookies, houses, and villages, and include all the necessary candies, icing, and yes the baked gingerbread too. The whole family will enjoy building and eating their creations.

Traditional Christmas Cookies
Decorated Christmas Cookies
Decked out in green, red and white icing, these cookies celebrate Christmas in the sweetest possible way.  If you have a long list of people to bake for, get the whole family involved with the decorating to speed up the process in this fun activity.

Assorted Butter Cookies
Gourmet Butter Cookies
Butter cookies are finger licking good. If you are pressed for time, many bakeries offer ready-made cookie platters to share with your friends and family or give as gifts.

Fancy Cookie Cut Outs
Fancy Jelly Filled Cookie
This elegant cookie looks professionally made, but it’s actually quite easy to make yourself. All you need are two cookie cutters – one large round with scalloped edges, and the second in the shape of a swan or any design you prefer. Layer two large cookies on top of each other, with strawberry or raspberry filling, to make this sandwich cookie. The bottom cookie is solid, while the top cookie has a swan cut out in the center. Shake powdered sugar on top for a beautiful bakery finish.

Iced Snowman Cookies
Snowmen are seasonal favorites. These individually wrapped cookies would make great party favors for your guests. If you have extra, they’re popular items at the school bake sales. Of course that assumes your family doesn’t finish them off first. (lol)

Holiday Cookie & Candy Platter
Homemade cookies & candy go hand in hand. This creative assortment tantalizes the taste buds. Should I have a cookie first or dive into the chocolates? There are plenty of candy mold designs suitable for any occasion, and new flavors in candy melts will please the most adventuresome candy aficionados.

Assorted Homemade Breads
Breads are delicious any time of year. With so many recipes and the ease of baking, anyone can make homemade bread in less than an hour. Crafter Tip: Many types of bread need to be fully cooled, and sometimes refrigerated before slicing. To prevent crumbling, be sure to follow the recipe instructions.

Christmas Petits Fours
Christmas Petit Fours
Petits Fours are the perfect marriage of cake and candy. Fondant icing is actually candy used to cover bite size cubes of yellow, sponge or pound cake. While the fondant is still wet, decorations can be applied using piped icing, or a sprinkling of either candy or nuts. As an added burst of flavor, jelly or butter cream can be spread over the cake prior to applying the fondant.

Snowman Cupcakes
Snowman Cupcakes
These snowman and snowlady cupcakes are almost too cute to eat. The bodies are standard size cupcakes, and the heads are mini cupcakes. Coconut is the perfect substitute for snow. Oreos become top hats for the gentlemen, and piped icing details create all the smiling faces and earmuffs for the ladies.

Hanukkah Donuts
Hanukkah Donuts
It wouldn’t be Hanukkah without deep-fried jelly donuts sprinkled with granulated sugar.

Cranberry Rhubarb Pie
Cranberries play a large part in many holidays. There’s cranberry sauce as a side item with your meal, cranberry garlands and sprigs as decorative touches, and cranberry muffins and pies.

Whether you bake everything from scratch, or supplement your desserts with store-bought items, the holidays are a time of sharing, especially at mealtime. Enjoying the seasonal flavors with loved ones is something we all have in common. Please read “Holiday Food Presentation” for ideas on displaying your culinary creations.

Happy Holidays & Happy Crafting!

Holiday Food Presentation

Raw Food
Hosting Thanksgiving dinner for family and friends? As you know, it’s one of the most stressful holidays of the year. The house needs to be cleaned, guest rooms prepared, and recipes tested for side dishes, hors d’oeuvres, entrees and desserts.

Turkey Dinner
It is said presentation is everything. Once the food is prepared, how will it be served? Are you planning to have a sit down dinner or buffet style? Is one main table enough or do you need a separate table for the kids? Do you have enough serving platters, bowls, and utensils? Food should not only taste good, but it needs to look appealing as well. Capture your guests’ attention and stimulate their appetites with these food presentation ideas.

Dining with an Incredible View
If your home has an outstanding view – ocean, lake, mountains, forest, garden, cityscape, etc. – seize the opportunity to showcase the view and your fabulous food by placing your table accordingly.

Dual Purpose Decor
Ceramic Pumpkins
This dining table centerpiece features a trio of ceramic pumpkins with matching leaf-shaped appetizer plates. Be sure to have plenty of coordinating coasters on hand to protect your fine wood surfaces.

Happy Hour – Beer & Cocktails

Food Becomes Art
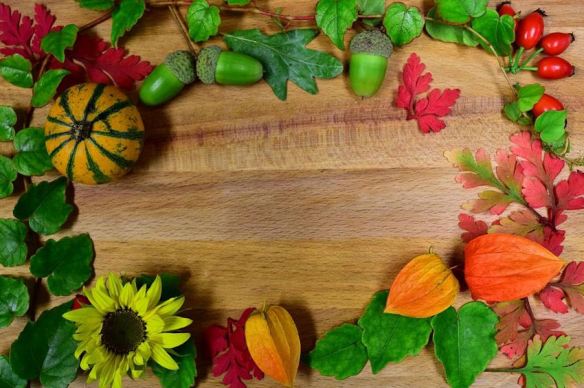
Food Becomes Art
These acorns, berries, and leaves have been artfully arranged upon the beautiful wood grain of a large cutting board. This would be a perfect setting to serve a dish of appetizers in the center.

Finger Foods
Appetizers

Fancy Appetizers
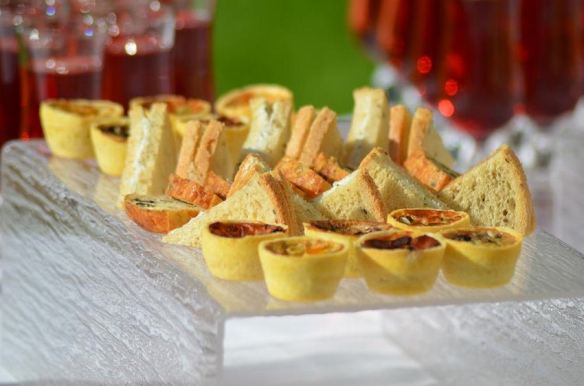
Fancy Appetizers

Natural Serving Pieces
Everyone knows you can eat pumpkins, but why not use them to serve soups and dips?

Make Your Own Salad Bar
Salad Bar

Store-Bought Salad Platter
With so many dishes to make, sometimes it’s just easier to let your local grocery store prepare a few items to save you time, while still making an impressive dish. If you want your guests to think it’s homemade, place the plastic store plate on top of a larger serving platter, and conceal the plastic rim with a vegetable garnish as shown.

Casual & Stylish Family Buffet

Meat & Potatoes with a Twist
Thick cuts of beef are layered over sprigs of green herbs and topped with baby golden potatoes on this hearty platter.

Food Safety for Chargers
You’ll notice in this photo that a charger is mistakenly being used as a serving platter for a chicken dinner. Food Safety Tip: These resin or metal plates are for decorative use only – they are NOT FOOD SAFE. Food should not come into direct contact with the charger. Instead, set another smaller plate on top to hold the food (especially hot items), or line it with aluminum foil, plastic wrap, a paper doily, or wax paper.

Veggies Galore
Veggies Galore

And let’s not forget the most anticipated part of the meal…

The Desserts
The Dessert Table
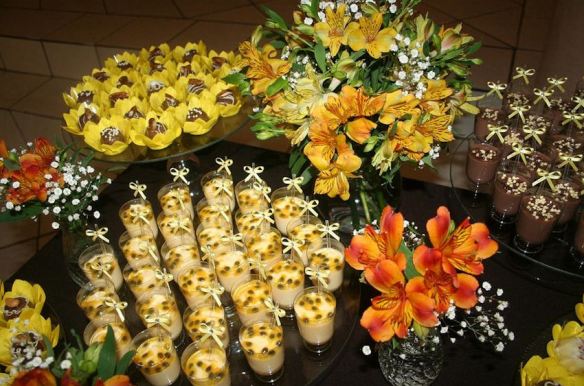
Besides the delicious choices, there’s a lot going on in this set up. Chocolate truffles have been placed in the center of cheerful yellow silk flowers. Chocolate mousse and vanilla bean custard are adorned with confectionary sprinkles and topped with tiny yellow bows tied to spoons. Cake stands have been used to achieve varying heights. Autumn flowers in a mixture of glass jars and bowls create the perfect balance in this inviting and delectable presentation.

Multi-Tiered Dessert Display
Dilemma: Which confection to try first? Solution: I’ll have one of each please!

Desserts by Mother Nature
Carved fruit is a real attention getter. Carving kits or the right knife make it easier to create a breathtaking display that’s almost too pretty to eat…almost.

Dining by Candle Light
Don’t forget to consider the lighting for your guests’ dining pleasure. There’s a reason why many restaurants have dimmed lighting and lit candles upon the tables. The warm, cozy ambiance stimulates your appetite and invites you to relax and enjoy.

Traditional Holiday Fare
We eat with our eyes first. With creative planning, having a dinner party can be an enjoyable and successful event for everyone, including the hosts. Choose your menu, set the stage, and let the curtain rise on a spectacular meal to the resounding cheers of your guests. You’ve got this!

Happy Holidays & Happy Crafting!