The Basics of Decorative Painting

Paint Brushes
In a post a few weeks ago, faux finishing was discussed with several painting options and instructions for sponge painting. Faux finishing is part of a larger category called decorative painting, which includes stenciling, murals, and custom painted details.

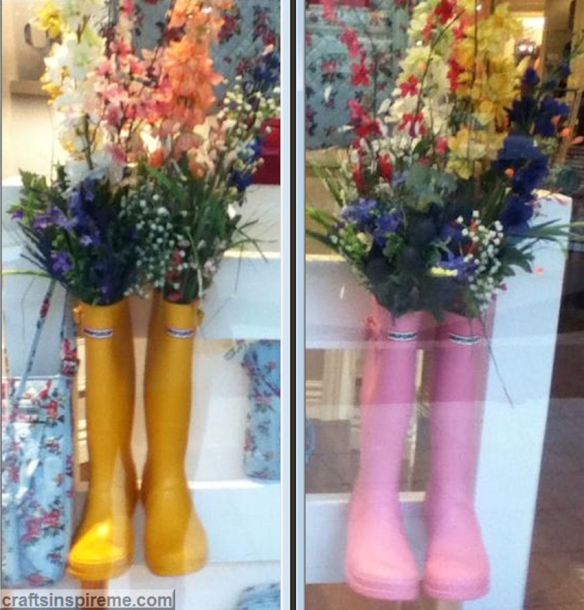
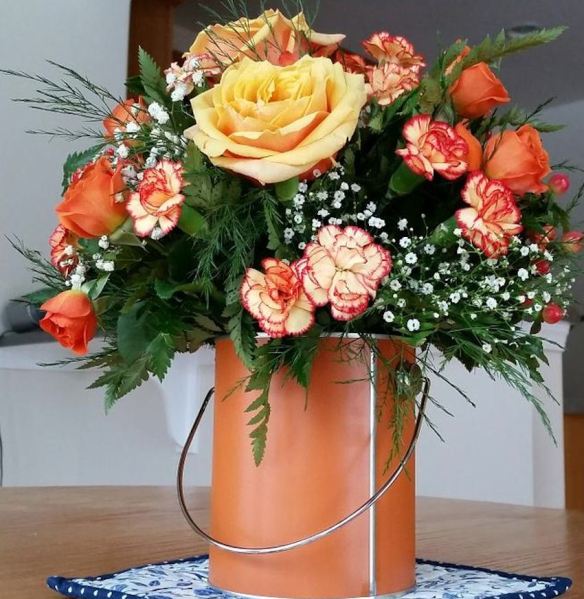
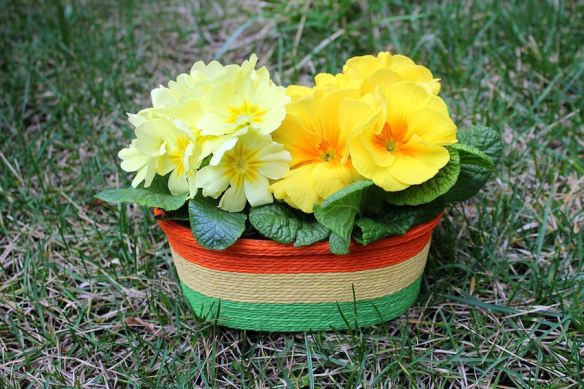
At it’s most basic, decorative painting can be as simple as painting vines on a flowerpot. Be sure to use weatherproof paint, not only to protect it from rain and sun, but also from watering the plants.

Stenciled Butterflies & Vines
Stenciling
Stenciling is a fairly easy process. Choose a plastic stencil, a few paints, and some sponge brushes. Painter’s tape is great for holding the stencil in place while you work, painting one color at a time. Crafter Tip: Stenciling on a textured wall is not recommended. The bumpy texture can cause the colors to bleed, and the designs may appear stretched or irregular.

Antiqued Wood Chair with Painted Floral Seat Back
Furniture presents the challenge of durability. Paint alone is not enough. Crafter Tip: Consult a specialist, or research what types of paints and sealants to use to ensure your designs will withstand every day wear and tear.
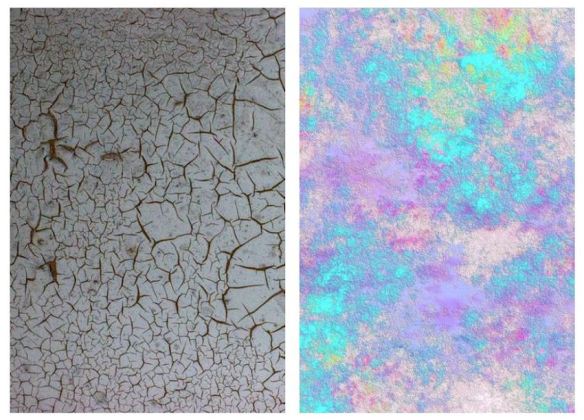
Stippling
Stippling
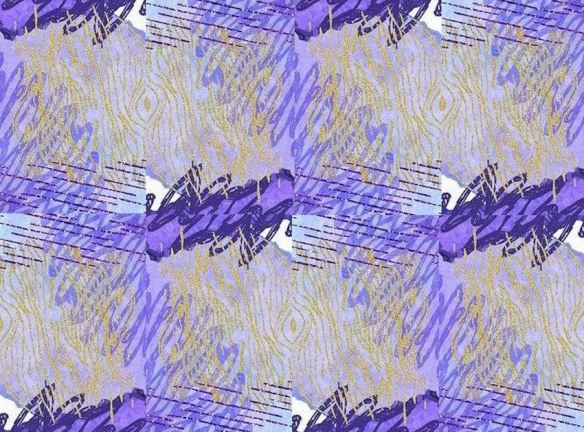
This is an example of stippling layered over a multi-color background. The base coat is created using sponges or brushes to blend the colors together. Stippling consists of little dots to create light and dark areas by changing the density of the dotted pattern.
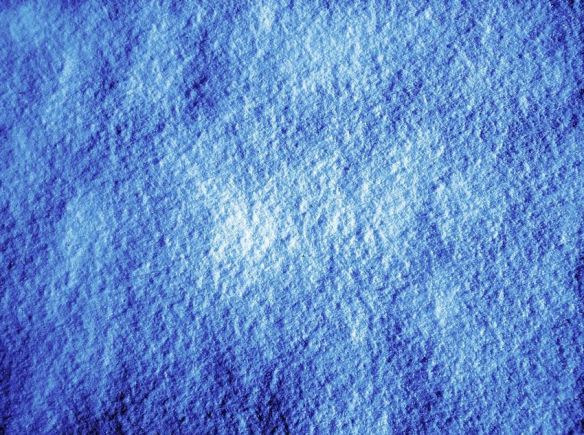
Watercolor
Watercolor
In this technique, water-based paints are thoroughly mixed with water and blended together while still wet. It’s important to remember that you will want to start out with light washes of color and gradually build up to the darker areas. If you get too dark too fast and don’t like the results, you will need to start over.

Layered Techniques
Mixed Media
Here we see an interesting mix of free-hand painting, stenciling, and stamping. Pressing painted corrugated cardboard against the surface created the parallel lines.

Now if you’re really feeling ambitious, here are some amazing painted murals:

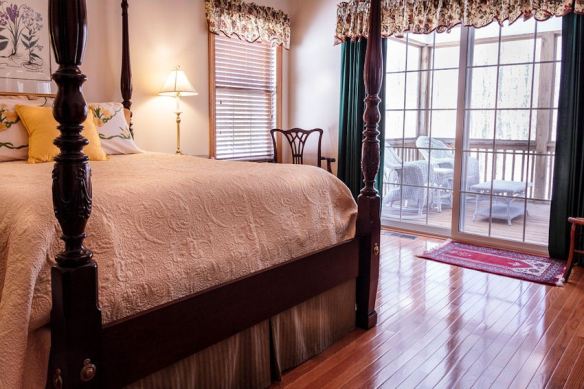
Floral Wall Mural with Metal Butterflies
This bead board paneled wall was painted green as a background color, and then the flowers and vines were added. Crafter Tip: Even though you are painting a mural, you don’t have to paint everything yourself. There are plenty of wall art options, which will coordinate with your painting, such as these sculpted metal butterflies, the perfect complement for this gardener’s retreat.

Tinkerbell Wall Mural
Disney characters are sure to be childhood favorites. The flowers and vines in this mural can be painted by hand or stenciled. Crafter Tips: In lieu of using a paintbrush, delicate details can be made using a fine tipped paint pen. If Tinkerbell seems a bit beyond your skill set, purchase a Disney decal, or wallpaper version and adhere it to the wall after the mural is complete. It will save you time, and from a distance, no one will ever know.

Ocean-Themed Exterior Wall Mural
The old block wall in this photo has been given new life through wall art. Because of the large scale, and dependence upon the weather, the artist used a paint sprayer to speed up the process. With the overall design blocked out, the details can be added using a combination of a fine spray nozzle and paint brushes. Crafter Tip: Using a paint sprayer will certainly give your arms and upper body a workout. You won’t need to go to the gym that day!

Asian Water Dragons Mural on a Porshe
Vehicle painting is a specialty in itself. Painted details can include logos, initials, stripes, and full-size murals. Crafter Tip: Vehicle painting is best left to the pros. Manufacturers’ new vehicle warranties will most likely become void if the body paint is altered.

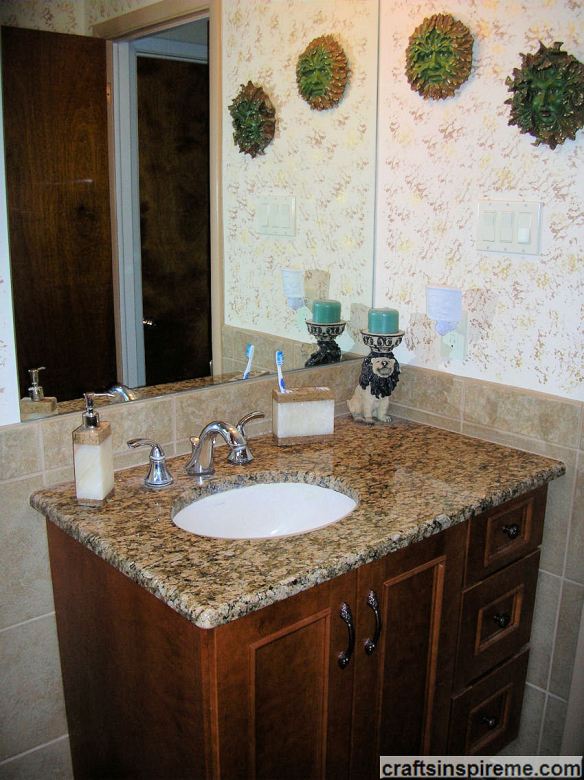
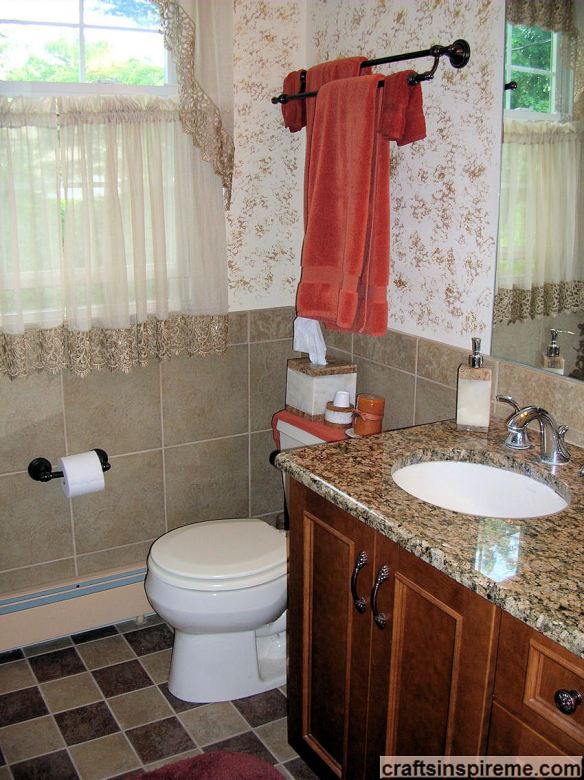
How To Decoratively Paint a Powder Room

Fleur-de-lis Powder Room
Powder Room
Fleur-de-lis design was made using an ink stamp, which was purchased from the scrapbooking department at Michael’s craft store.

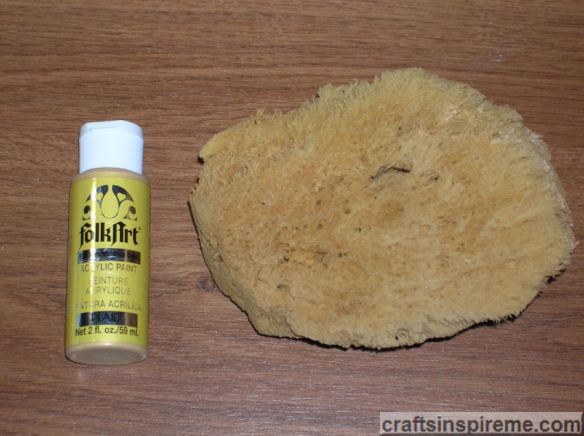
Acrylic Paints, Ink Stamp & Fan Brush
Powder Room Paints
To produce more consistent imprints, paint was applied directly upon the stamp using a small flat brush. The stamp was then pressed against the wall, spacing the pattern by eye. All the brown fleur de lis designs were completed first, and then the stamp was cleaned in preparation for the green paint.

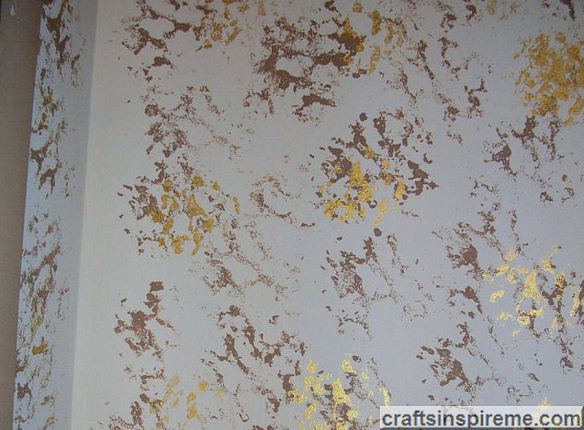
Create a Fleur-de-lis Pattern
Painted Powder Room

Fleur-de-lis Detail
Powder Room Paint Detail
Using a fan brush at the four corners, brush strokes were applied with the contrasting metallic paint color.

For continuity and consistency of the design, it is probably best to have one person working on a project. However, if your friends or family would like to help, assign a particular design element to each person to be completed throughout the project. Using the fleur-de-lis project as an example, one person could do all the stamping while another applies the flourishes at the corners.

Crafter Tip – Future Decorative Paint Removal
I once had a painter in my home to give estimates on a few small projects. I had recently finished a mural in one of the bedrooms, and as we walked by, the painter said, and I quote, “Do you know how much Kilz it would take to cover that?” Although I was appalled at the idea, it certainly gave me food for thought. At some point in the future, how could I easily cover over painted designs without filling the house with toxic fumes? The answer is simple: paint over it using the same paint used to create it. There was an acrylic midnight blue design (Folk Art Brilliant Ultramarine) painted across the upper half of one wall. White acrylic paint (Folk Art Wicker White) was brushed over the dark paint. Just to be sure, a second coat was applied. The painter was stunned to see how well it covered. The new wall paint was a pale blue, covered in only one coat, and there were no toxic fumes. To protect the air quality in your home, be sure to select low odor paints, with low or no VOCs (volatile organic compounds).

Thanks for reading & Happy Crafting!

Halloween Magic – How to Make a Bewitching Centerpiece

Witch Flying Across Full Moon
The movie Hocus Pocus is celebrating its 27th Anniversary, inspiring witch themed costumes and decorations. Whether you’re having a Halloween party or simply decorating for the fun of it, a centerpiece is a must for the coffee or dining tables. Below are step-by-step instructions and photos for building your own, one piece at a time.

Witch Boots
The Inspiration – As with all creative projects, the first requirement is a source of inspiration. This pair of witch’s boots is sold at Michaels. Although smaller than expected, it still has a spooky vibe. The style varies slightly, but all are black with a silver spider painted on each side. Having a pair of boots is nice, however it’s one piece and can’t be separated. If you prefer a more humorous impression, many stores sell individual witch boots painted in bright, fanciful colors and patterns.

Witch Boots
Step 1. Witch’s Boots – Centered upon this coffee table, these boots look quite sparse, but we’ve only just begun.

Witch Boots with Floral Stems
Step 2. Floral Stems & Owl – For color and texture, the key to this design is choosing strange looking plants in autumn, Halloween colors. Here we have added leafy vines with plush mini pumpkins, and orange lanterns. Bend the stems as needed to adjust the height. Crafter Tips: Do not cut the stems because you may need to adjust the height at the end when the arrangement is complete. (You may not need to cut them at all, simply conceal the bent stems inside the boots). The owl, made from twigs, was already mounted on a long stick for easy placement.

Witch Boots with Pumpkin
Step 3. Jack-O-Lantern – Orange and black – the perfect color combo for Halloween. This resin pumpkin includes optional lighting. High contrast and a brilliant punch of color lend visual interest to this asymmetrical composition. Instead of a pumpkin, you could use a round platter or globe, resembling the full moon, or a light color witch’s broom to contrast with the dark boots.

Witch Boots with Pumpkin & Owl
Step 4. Ceramic Owl – Contemporary details with an eerie presence make this owl a perfect addition by contributing color, light, and texture. Moss green and tan coordinate with the autumn vines and leaves. Feather-like half moon slits in the body of the owl allow light to pass through and the opportunity to insert mini lights inside with the battery pack underneath, wrapped in black fabric. Crafter Tip: Ensure the battery pack’s on/off switch remains accessible.

Add Decanter
Step 5. Decanter – No witch-themed display would be complete without a few unknown potions brewed with magical spells. The clear glass decanter, with four separate chambers and claw-like stoppers, provides much needed height and color on the left end of the display. A little food coloring and water becomes a scary cocktail of witch’s potions. The green color was chosen to coordinate with the other green elements. Alternatives: You could create a grouping of different size bottles or apothecary jars with strange contents inside; or add a book of “spells” and candles to capture the spooky aura. Crafter Tip: Experiment with various objects and colors, being sure to balance the composition.

Add Rat & Snake
Step 6. Rat & Snake – Now we need a few creepy crawlers to stir up our primal fears. A rat on top of the pumpkin seems like a natural choice, and the snake has the added bonus of implying movement, as it appears to slither along the tabletop among the objects in the centerpiece. A trip to a Halloween or craft store is sure to have plenty of options, including spiders, worms, skeleton bones, and the like. A few spider webs might kick up the spooky factor another notch.

Candle Stick
Step 7 Orange Candle & Metal Candleholder – To add height and a pop of color on the left end of the centerpiece, add an orange candlestick in a dark metal candleholder. Although the base of the holder is plain, it provides an opportunity which we will take advantage of in the next step. The candle had been stuck in a box for years, which caused the wax to curve. This works great in a Halloween project, where crooked lines are more desirable than straight ones.

Add Spider
Step 8. Orange & Black Spider – I never thought I would say these words, but this spider is actually quite beautiful. The camera flash tends to wash out the brilliant colored stripes upon the spider’s body, which is covered in tiny orange and black glass beads. The large size and imposing ready-to-strike posture are just what this display needed.

Add Witch's Hat
Step 9. Witch’s Hat – The pumpkin’s toothy grin becomes the witch’s face by the simple addition of a classic black hat, which frames the pumpkin’s face, adds character, and ties all pieces together into a unified Halloween theme.

Finished Centerpiece Illuminated
Step 10. Illumination – This is the finished centerpiece with optional lights turned on inside the owl and pumpkin. It’s spooky fun just like the movie, Hocus Pocus.

Designing a Halloween centerpiece is an enjoyable process for stretching your creative muscles. Start with one piece as an inspiration and decorative items you may already own. Find different ways to use existing items by looking at things in a whole new way with your theme in mind.

Happy Halloween and Happy Crafting!

Who’s Behind The Mask?

Red Feathered MaskIt’s hard to believe we are in the month of October already. Thoughts of my favorite time of the year, Halloween, come to mind. I suppose I’m just a big kid at heart. Dressing up was so much fun. Deciding what to be for Halloween was a major accomplishment. Sometimes the costume was store bought (e.g. Snow White, Peter Pan), while other times we made our own (e.g. Gypsy, Witch).

Purple & Gold Mardi Gras Mask
Purple Gold MaskAll you really need is a great mask. Craft stores sell a variety of white masks to decorate any way you please. In terms of comfort, the quarter masks are an easy solution, as opposed to latex masks, sold in Halloween stores, which can be very hot to wear.

Red Sequined Mask and White Floral Mask
 Red & White Masks
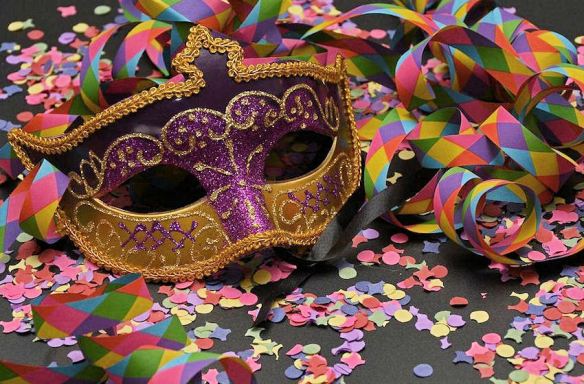
Masks can be decorated with a particular theme in mind or for holiday celebrations, such as Carnival, Mardi Gras, New Year’s Eve, and the Chinese New Year. Each finished mask is a beautiful work of wearable art.

Turquoise & Gold Feathered Mask
Turquoise & Gold Feathered MaskI look at this mask and think of Aqua Man, the Marvel Comic’s super hero. It is also reminiscent of the Philadelphia Mummer’s Parade. The rich details and vibrant colors are real showstoppers.

Red, Black & Gold Long Nose Joker Mask
Red, Black & Gold Long Nose Joker MaskThis mask has a devilish quality about it. Practical jokes are sure to follow.

Black & Gold Opera/Theater Masks
Black & Gold Opera/Theater MasksMusical notes and gold braided trim adorn these fanciful masks.

Antiqued Cat Mask
Antiqued Cat MaskPerky ears and delicate patterns make this mask a favorite among cat lovers.

Blue & Gold Asian Mask
Blue & Gold Asian MaskA lovely combination of two arts – mask making and fan decorating.

Assorted Feathered & Bejeweled Masks
Assorted Feathered & Bejeweled MasksThis assortment of masks is ready to be worn in celebration or displayed as artwork and party decor.

Black & Gold and All White Feathered Masks
Black & Gold and All White Feathered Masks
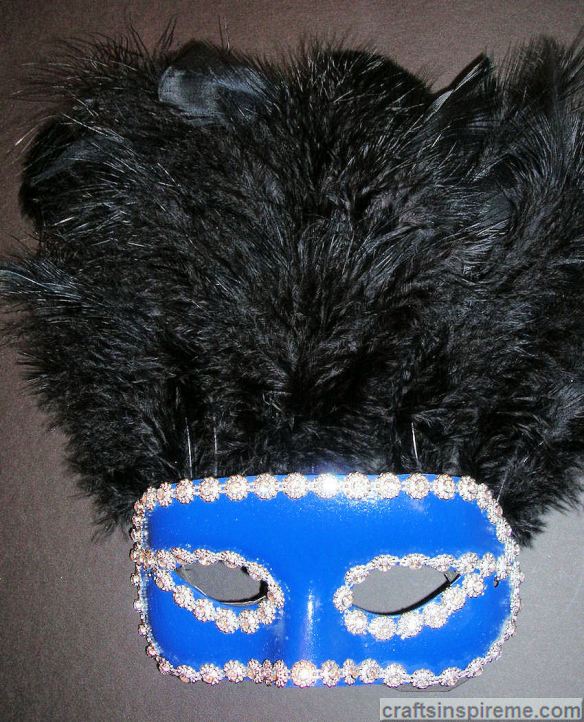
Feathered masks tend to be the most flamboyant.

Red & Black Harlequin Mask
Red & Black Harlequin MaskThe visual impact of this red, black and gold mask is enhanced with light catching glitter and thick gold trim. A few faux gemstones are the perfect finishing touch.

Ornate Venetian Masks
Ornate Venetian MasksMasks made to celebrate the Carnival of Venice are among the most elaborately decorated with lavish brocade fabrics, ribbons, crystals, intricately hand painted designs, and touches of gold or silver leaf. This centuries old technique has influenced artists world wide, and is highly valued among collectors.

For a more practical, down-to-earth approach, below are the instructions to complete your own decorated mask.

How To Make Your Own Mask
Your project starts with a visit to the craft store. The mask you choose will be the most important decision because it determines the range of decorating possibilities.

Plain White Quarter Mask – Ready for Decorating
Plain White Quarter Mask – Ready for DecoratingMost craft stores have several style options. Because this was a first attempt at decorating a mask, this simple white quarter mask was chosen.

Mask – Painted Blue and Outlined with Rhinestones
Blue Mask with Rhinestones
The mask was spray-painted royal blue. Fabric stores have beaded and rhinestone trims perfect for mask decorating. The rhinestones twinkle in the light, calling attention to the wearer’s face with an emphasis on the eyes. As shown, the mask is ready to wear, but let’s take it to the next level.

Black Feathers on a Foam Backer
Mask with Feathers
This mask was made as a wall decoration, so the back will not be seen. (If you plan to wear your mask, simply glue the feathers directly onto the back of the mask, and line it with felt for comfort.) To make the wall art, trace the mask onto a sheet of black foam, which is used as mask liner to hold and support the feathers. The eyes and lower shape of the mask are cut out using an X-Acto knife.

The Opposite Side of the Foam Backer
Feather Backing
This photo shows the wrong side of the foam sheet used as a liner or backer board for the feathers. The bottom of the foam and eye openings line up perfectly with the blue mask, but the upper portion of the foam extends upward like a crown to support the feathers.

The Finished Black Feather Mask
Finished Feathered Mask
Luxurious black feathers and sparkling rhinestones stand in sharp contrast to the rich royal blue on this completed mask.

Take a walk on the wild side. Dress up, stay in character, and most importantly have fun. Mask making isn’t just for kids. It’s for the child within all of us!

Thanks for reading & Happy Crafting!

Why Just Paint? Faux Finish.


Faux finishing is a great, inexpensive way to transform a room and can be easily done over a weekend, and sometimes in a few hours with minimal effort.

There certainly is no shortage of ideas and inspirations for faux finishing including: retail stores, restaurants, shopping malls, magazines, books, websites, videos, craft and paint stores. Instructional videos can be found on YouTube, but don’t forget to check paint manufacturers’ websites as well.

You may already have many faux finishing tools in your home without even realizing it. Paint can be applied using rolled up plastic wrap or fabric; synthetic sea sponges; brushes, sponge rollers; and trowels. Application methods include dabbing, rolling, splattering, brushing, and glazing. Additional supplies and advice are available through local craft stores, and home improvement or hardware stores.

                          Faux Marble                                               Faux Metal
Faux Marble and Faux Metal
Faux Marble has a mottled background and white veining applied using a feather.

Faux Metal is created using a specialty iridescent metallic paint applied on the diagonal for a hammered metal appearance.

                       Crackle Finish                                      Faux Venetian Plaster
Crackle Finish and Faux Plaster
Crackle Finish involves painting a background color first, followed by a special antiquing medium, which cracks as it dries, revealing the color beneath for an aged, weathered look.

Faux Venetian Plaster has color and texture applied at same time with a trowel, which is a two step process, followed by a drying period, and sanded afterward to create a soft sheen finish.

Textured Wall Paint
Textured Wall Paint
Textured Wall Paint is probably the easiest faux finish to apply. No special skills are required. If you can use a paint roller, you can texture a wall. After it dries, the wall will resemble the texture of plaster, and the softness of wallpaper. With a bold punch of color, it can be used as an accent wall in a living room, dining room or master bedroom.

Textured Wall Paint
Textured Paint
Faux Plaster can be created simply by applying a thick layer of paint and using assorted “tools” to texture the surface while the paint is still wet.  Additional layers can be applied for greater texture and depth.

Faux Wood Grain over an Abstract Background
Faux Wood Grain
Faux Wood Grain requires the use of a stencil.  Paint the base coat first in a light or medium color.  When it has dried, go over it with the stencil using a darker color to simulate the natural wood grain, or try using metallic glitter paint as shown above.

These faux finishing techniques are not limited to walls. The same processes can be applied to ceilings, furniture, and just about any other surface.

How To Faux Finish A Room
Research faux finishing ideas and installation methods. Choose your design. Choose the paint colors. Having several color combinations is fine because the first step will help you narrow down the choices. Purchase the paints and corresponding application tools required for your chosen faux finish.

Trying something new for the first time can be a stressful experience. What if you make a mistake? What will you do if you fail halfway through the project? If the paint colors looked great in the store, why do they look so different in my home?

Sample Board
Paint Sample Board
Crafter Tip – Sample Boards are your best friends.
You need to experiment with your color schemes and methods of paint application. The simplest solution is creating a sample board. Sample boards give you a chance to get your feet wet, so to speak, without the overwhelming feelings that can come when faced with full-size wall or an entire room. Hone your skills on the sample boards. With proven skill and newfound confidence, you’ll be ready to take on the full project. Keep your sample board handy for reference while you are painting.

24” x 36” poster board is an easily manageable size. Another option is foam board, also known as foam core, which consists of two pieces of poster board with a piece of foam sandwiched in between for strength. The ability to pin inspirational photos is an advantage of foam core over standard poster board.

Gold Metallic Paint & Synthetic Sea Sponge – (2nd paint color, taupe, not shown)
New Bath Paint
For the technique demonstrated in the bathroom below, first paint a coat of the background wall color on the sample board, and let it dry. Apply each group of colors on different areas of the sample board, being careful to label or make note of colors used. Feel free to experiment with various brush and or sponge techniques. Let the paints dry.

Faux Finish Close Up Detail Sponge Painting
Sponge Painting Detail
Now lean the sample board against a wall in the room to be painted. It is important to see the colors under the existing natural and artificial lighting. Begin the elimination process. Some will be very obvious missteps for one reason or another. A few usually rise to the top of your list. At this point, you can do some additional testing. You may want to create another sample board with larger samples of your top picks.

Sponge Painted Bathroom

Sponge Painted Bathroom
Once you have decided, it’s time to tackle the faux finishing of all the walls in that room. Take your time, and remember it doesn’t have to be perfect. The beauty of hand-applied finishes is the variation and artistry. If you are using multiple colors, apply one color at a time, and then repeat the process.

You can do this!

Thanks for reading & Happy Crafting!

Thank You!

Fireworks
With many thanks to all of you, I have reached an important milestone: 400 Followers. Thank you to all my readers and followers for liking, commenting, and sharing this creative journey with me. I am so grateful for each and every one of you.

Inspiration
I enjoy visiting your websites to read your amazing articles, which in turn inspire me to keep writing and sharing as we encourage and support one another. As human beings, we are all connected and WordPress makes it easy to stay in touch across the miles and throughout the days.

Winding Path
Together we look forward to what the future holds, knowing we always have companions along the way.

Thanks for Visiting
Thanks for reading & Happy Crafting!

All Tied Up In Knots

The Last Stitch in a Granny Squares Afghan
Granny Squares
Crocheting is a fun and easy way to make blankets, garments, scarves, hats, toys, and anything else you can imagine. Whether you are sitting in a waiting room, passing the time on an airplane flight, or watching the kids during after school sports, crocheting is a very portable craft. All you need is yarn and a crocheting needle, which are both easily carried in a tote bag.

Crocheted Floral Design
Crocheted Flower
Whatever your learning preference, crocheting lessons are available in abundance. Formal classes are offered through craft and fabric stores, as well as sewing centers, but most people learn to crochet from family members or friends eager to share their craft. If you prefer a more social, group-learning experience, many churches have knitting and crocheting clubs. Another option is the local high school evening program, and of course the Internet features how-to videos for beginners and experts.

Zigzag Crochet Stitch
Zigzag Stitch
This afghan only has two colors, but you can use as many as you like.

Shell Crochet Stitch
Shell Stitch
There are a multitude of stitches to choose from, including the single and double crochet, the zigzag, the shell, and the popcorn stitch.

Rainbow Yarn
Rainbow Afghan
Yarn selections are amazing– textured, soft or bold colors, ultra soft, bulky versus fine gauge, heather, fiber content (acrylic, wool, cotton, nylon), ombre, and metallic. Manufacturers label their products with recommendations for needle gauge, and uses for each type of yarn.

Ombre Yarn
Ombre Baby Blanket
Blankets make great housewarming and baby gifts. For the college and professional sports enthusiast, team colors and logos can be incorporated into the design.

Luminaries
Luminaries
A beautiful crocheted cover really dresses up this otherwise ordinary glass jar luminary.

Placemats & Table Runners
Fine, silky yarns, produce lacey crocheted textiles.

Home Decor
African Violet
African violets can be tricky to grow, but this plant will never need water or special plant food. In fact the only thing it needs is a place of honor on your table.

Crocheted Top
Crocheted Top
Crocheted apparel, such as skirts, tops and dresses have become very popular. Depending upon the openness of the weave, a matching fabric lining may be required.

Beaded Shawl Detail
Beaded Shawl Detail
You can easily change the look of a crocheted item by: combining different stitches; changing the needle size or tension; using novelty yarns or multiple colors; the addition of beads and fringe.

Toy Turtle
Turtle Doorstop
Some of the more unusual crocheted items are stuffed animals, baby toys, handbags, pillows, and slippers. Craft stores have free downloadable project ideas with full instructions on their websites.

Toy Dog
Black & White Toy Dog
This adorable pup is perfect for babies because it’s soft, easy to handle, and there are no dangerous parts or pieces.

Riding in Style
Crocheted Bicycle
If you’re really ambitious, and have a great sense of humor, you might consider updating your exercise equipment with the playful patterns and colorful whimsy of crochet. You probably weren’t going to use it anyway, so you might as well transform it into a work of art and wonderful conversation piece.

Thanks for reading & Happy Crafting!

Say It With Flowers

Soup Tureen with Lilacs
Lilacs Soup Tureen
Flowers have been used for centuries to decorate, commemorate and celebrate the moments of our lives. Whether you choose fresh cut or silk flowers, the artfully arranged blooms are both a challenge and a triumph for the dedicated crafter. The caption beneath each photo, shown below, expresses the sentiments of each floral centerpiece.  What do your flowers say about you?

Yellow & Pink Rain Boots with Gladiolas and Wild Flowers
Rain Boots as Vases
Playful Humor– Filled with long-stemmed, summertime favorites, these adorable boots present a delightful surprise. Using a waterproof product as a vase is the ultimate irony. Let it rain! We’ll go barefoot.

Crafter Tips: Artificial flowers come in bouquets, picks (short stems), long stems, and garlands. Types of containers are only limited by your imagination. Use what you have – lots of items in your home could be used as floral centerpieces, including a bucket, basket, toy truck, and wagon.

Glass Bowl with Orange & Purple Tulips
Spring Fever – For a few shorts weeks every year, we are treated to a vast array of candy colored tulips. Fanned out in alternating heights and colors, this asymmetrical centerpiece commands attention. The small leafy greens add texture, and conceal the stems in the clear glass bowl.

Crafter Tips: When arranging flowers, you’ll want to take into consideration the size of the container, the overall shape of flowers (height & width), contrasting light & shadow, colors, textures, and patterns. Where will it be displayed? Do you have a particular occasion or theme in mind? (Seasons of the year, holidays, tropical garden, day at the beach, etc.)

Water Pitcher with Purple Lilacs & White Sweet Alysse
Abundance – A painted floral motif adorns this antique fine china pitcher, spilling over with delicate pastel blossoms. As a vessel for water, it projects a sense of fresh cut flowers, even if the flowers are artificial.

Crafter Tips: Wire cutters, from a craft or home improvement store, will make the process much easier. Some silk flower stems are made to easily bend and break to the length you want, but don’t count on it.  If cutting the wire is too difficult, bend the stem and hide it with the foliage. Secure flowers using: ties, glue, green florist tape, or by poking the stems into a foam base. Use vines, moss, leaves, or other material to conceal the foam and stems as needed.

Paint Can with Peach Roses & Carnations
Monochromatic Magic – Sometimes a single color can really pack a punch. The lush green leaves offset warm peach flowers in a variety of shapes and sizes. The paint can, an interesting choice, has been covered in coordinating gift-wrapping paper. The white babies breath adds softness to this warm floral palette.

Crafter Tip: You’ll be amazed at the beautiful selection of floral accessories, such as butterflies, birds, glass marbles, candles, and LED lights. The sky is the limit for to what you can achieve.

Black Stiletto Pump & Evening Bag with White Alstroemeria
Girls Just Wanna Have Fun – A chic study in black and white, this impressive display is sophisticated and sassy. The textured metal chain and sleek stone surface contrast with the soft white petals. Obvious question: What happened to Cinderella’s other shoe?

Wicker Basket with Purple Lilacs
Impromptu – Easy and carefree, it looks like you just came inside from the garden with a treasure trove of heavenly scented lilacs. For silk blooms, a few drops of essential oil will scent the air, and you’ll enjoy these flowers all year long.

Tea Cup & Saucer with Pink Flowers
Floral Teacup
Clever – Delicate flowers in a china teacup make a great gift or perfect centerpieces for a bridal shower or afternoon tea. After a party, your guests will be competing over who gets to take home the centerpieces.

Grapevine Tricycle with Blue & White Orchids
Floral Tricycle
Child’s Play – Fragile green vines weave their way around this grapevine tricycle. The glass hurricane in the back creates a soft glow when light hits the yellow flower centers. Feel like a little kid again while you admire this playful beauty.

Watering Can with Purple Flowers
Casual – You know you have green thumbs when flowers burst forth from your watering can! Like you favorite pair of denim jeans, there’s a relaxed, easygoing vibe suitable for every day. No special tools or items are required, and you can easily swap out the flowers whenever you like.

Driftwood & Flowers
Floral Driftwood Centerpiece
Coastal Drama – An interesting piece of driftwood combined with thoughtfully placed flowers become a sculptural piece of art for your table.

Tree Bark & Exotic Flowers
Flowers & Tree Bark
Woodland Drama – The rough, textured bark contrasts beautifully with the delicate purple petals of a single flower stem in this elegantly simple design.

What Lies Beneath
Flowers Underwater
Unexpected Pleasure – At one time or another, we have all had the experience of putting flowers in a vase. In this example, the vase disappears as the submerged white flowers reach toward the light at the surface. Clear glass marbles anchor the stems and also reflect light for a touch of sparkling glamour.

Orchids in the Spotlight
Lit Orchid Centerpieces
Romantic Ambiance – Lighting is the key element in creating nighttime drama. Soft, diffused light glows from within each frosted glass vase, as orchids spill over the top, receiving the full star treatment, lit brilliantly from below by LEDs. The resulting ambiance is both dreamy and romantic.

So much can be said with flowers. Whether it’s a birthday, an anniversary, or an intimate dinner for two, flowers have a great way of setting the mood with playful exuberance, heartfelt devotion, or the excitement of infinite possibilities.

Thanks for reading & Happy Crafting!

Celebrating 100th Post

100th Post
Today marks a very important milestone – my 100th post! It has been a wonderful experience, and I thank all my readers and followers for taking this journey with me. Below are photos and links to each category of arts and crafts covered to date. Please take a few minutes to peruse your favorites.

Baking & Candy Making

Beaded Jewelry & Gemstones

Color Theory
Color Theory

Floral & Home Decor
Floral & Home Decor

“How To” Projects
How-to Projects

Inspiration
Inspiration

Miscellaneous Crafts

Painting – Decorative Techniques
Decorative Painting

Seasons & Holidays
Seasons & Holidays

Wood Crafts
Wood Crafts

Please let me know, in the comments section, if you have any suggestions for future arts and crafts topics. I am looking forward to the next 100 posts. This achievement would not be possible without all of you! Thank you!!

Thanks for reading & Happy Crafting!

Creative Stress Relief III

Stressed Man
Stressful times help us focus upon the most important parts of our lives: family and friends. Together we will get through these difficult times. Each day, set aside a little time for yourself to relax and do something that brings you joy. Here are a few creative ideas:

Watch Making:
Watchmaking

Mask Making: – costume masks, wall art
Mardi Gras Mask
Purple & Gold Mask

Sewing: – clothing, home furnishings, costumes, stuffed animals & dolls
Clothing
Clothing

Home Furnishings
Home Furnishings

Quilting
Quilting

Costumes
Halloween Costumes

Stuffed Animals, Dolls & Accessories
Doll & Bear

Blacksmithing: – tools, weapons, fences, light fixtures, ornamental hardware, furniture
Tools & Weapons
Blacksmithing

Wrought Iron Railings, Gates & Fences
Wrought Iron Gate

Wrought Iron Furniture
Wrought Iron Table

Container Gardening: – decorative flower pots, planters, window boxes
Contemporary Glass with Rainbow Pebbles, Seashells or Sand
Glass Pots & Colorful Pebbles

Painted Rope-Wrapped Pot
Rope Wrapped Pot

Creative & Humorous Gardening & Art
His & Hers Garden Pots

Specialty Painting & Finishes: – egg painting, stenciling, Venetian plaster, tromp l’oeil, murals
Egg Painting
Egg Painting

Stenciling
Holly Stencil

Crackle Finish & Venetian Plaster
Crackle Finish and Faux Plaster

Tromp l’oeil
Mountain Path

Murals
Ocean-Themed Exterior Wall Mural

Basket Weaving:
Basket Weaving

Aromatherapy: – essential oils, body care, cosmetics
Perfumes & Diffusing Oils
Essential Oils, Air Freshener & Perfumes

Body Lotion, Scrubs, Cosmetics
Body Lotions & Scrubs

Massage Oils & Relaxing Sprays/Sachets/Balms
Lavender Massage Oil & Sachets

Last But Not Least:
Take a Nap
Cat Nap

When all else fails…take a nap! Stress relief is just one nap away. It’s also a great source of inspiration as well.Creative Stress Relief

For more crafting opportunities, please read the first two parts in this series: “Creative Stress Relief” and “Creative Stress Relief II.”

Thanks for Reading & Happy Crafting!

Creative Stress Relief II

Stressed Woman
With so many chaotic events occurring in the world and constant demands on our time, it’s more important than ever to find enjoyable ways to relieve the stress through creativity.  Let’s take a look at a few crafts and hobbies for inspiration:

Fabric Painting: – hand painting, 3-D painting, tie dye, silk screening
Hand Painting
Fabric Painting

3-D Painted & Appliqued
3D Painted Fabric

Tie Die
Tie Dye TShirts

Craft Kits: – stepping stones, latch hooks, ornaments, suncatchers, soap, needlepoint
Stepping Stones
Stepping Stone Dragon Fly

Christmas Ornaments
Rainbow Sequin Ornament

Suncatchers
Suncatchers

Homemade Soap Bars
Soap Bars

DIY Holiday Decorations: – ornaments, wreaths, home décor, wall art, centerpieces
St. Patrick’s Day
Ceramic Irish Bear

Easter
Easter Duck & Bunny

Halloween
Finished Painted Pumpkins

Thanksgiving
Gourds Pumpkins Wreath

Christmas
Traditional Style Meets Contemporary Flair

Papier-mâché: – sculpture, figurines, masks, piñatas
Sculpture
Papier Mache Tiger

Piñatas
Dragon Pinata

Hair Accessories: – headbands, barrettes, floral crowns, scrunchies
Beaded Headbands
Beaded Headbands

Floral Crowns
Wild Flowers Crown

Photo display: – decorative frames, albums/scrapbooks, vision boards/collages, plaques
Decorative Picture Frame
Sea Shell Plaque

Photo Albums/Scrapbooks
Photo Album

Vision Board/Collage
Travel Collage

Decoupage Plaque
Finished Plaque

Still haven’t found the right craft for you?
Please read parts one and three in this series, “Creative Stress Relief,” and “Creative Stress Relief III.”

Thanks for Reading & Happy Crafting!