

In search of the perfect Christmas ornament? Found it!
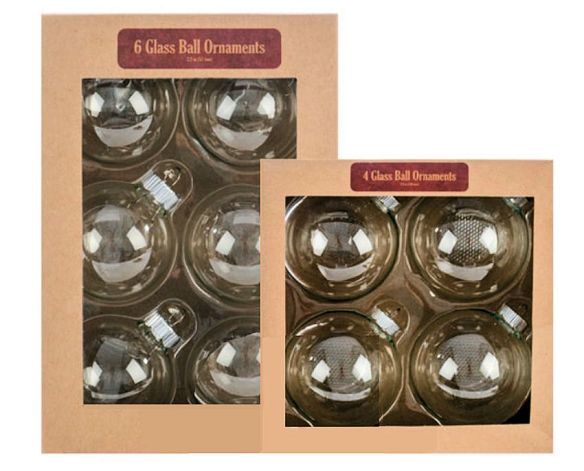
If you haven’t found what you were hoping for, create it yourself! These clear Christmas balls don’t look like much in the box, but let your imagination soar and you’ll be amazed at what you can accomplish.

Metallic trim, fabric paint, glitter, and self-stick rhinestones are just a few of the possibilities to transform those plain plastic or glass balls into treasured ornaments for the tree.

At its most basic, color is usually the first decision. Plastic balls usually only come in clear but glass ones come in clear as well as assorted solid colors. To add color to a clear ball you have two options: 1) Apply paint to the exterior using a roller; 2) Pour paint inside the ball, drain the excess and allow it to dry upside down overnight. Applying paint on the inside preserves the reflective sheen on the exterior.

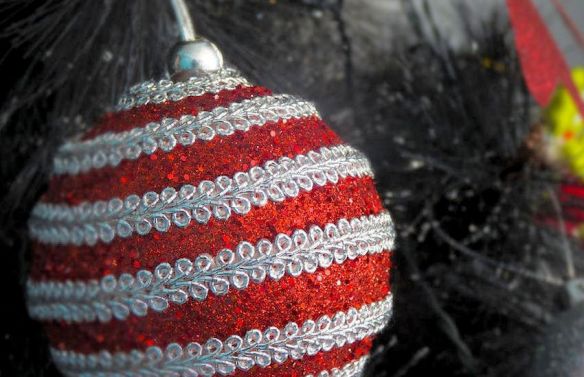
Ribbon and glitter provide sparkle and attractive patterns on these red ornaments.

Create a geometric pattern of your choice using glue and then roll the ball in glitter. After it dries, lightly brush off the excess and it’s ready to hang upon the tree.
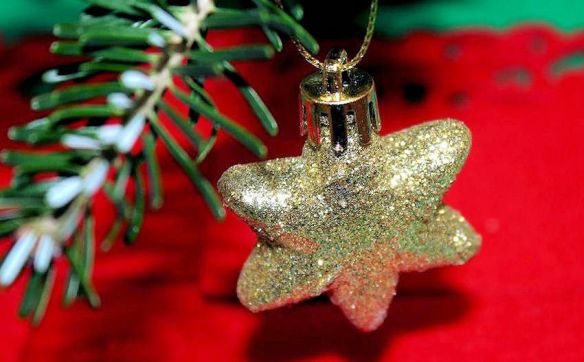
This star got its sparkle by applying a layer of glue over the entire surface of the ornament and then rolling it in gold glitter.
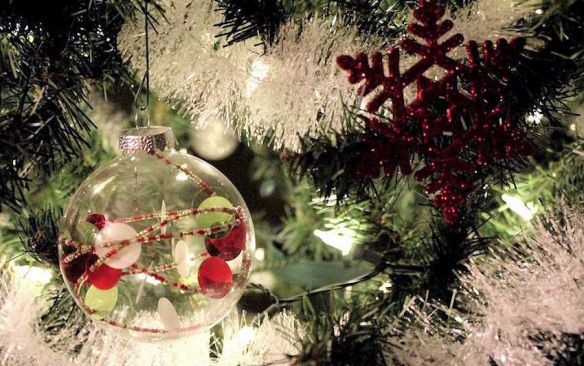
You can fill clear ornaments with anything small enough to fit through the top, including beads, leaves. confetti, ribbon, seashells, sand, and flower buds.

Create texture using fabric paint. After the paint dries, spray the entire ball white and follow it with a spray of textured spray paint for a snow-covered effect.

This snowman was hand painted onto a red ball. If painting is not your strong suit, purchase self-adhesive decals from the paper crafting section to achieve the same look.

Maybe you prefer a little glitz and glam. If so, sequins are your best bet.
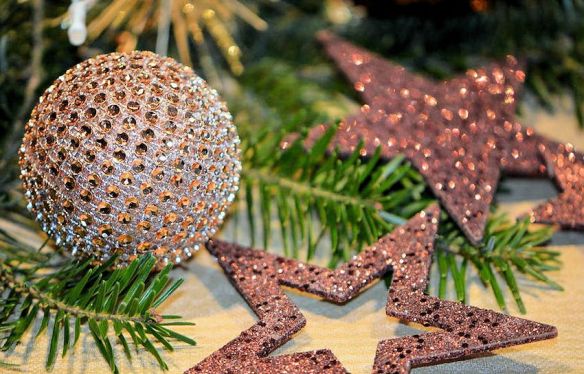
Silver & gold are a very popular color combination. Paint a metallic silver base layer. For the stars, apply glitter while the paint is still wet. Self-stick gold rhinestones were applied to the ball after the paint dried. As an alternative, you could use rhinestone studded trim to wrap the Christmas ball.
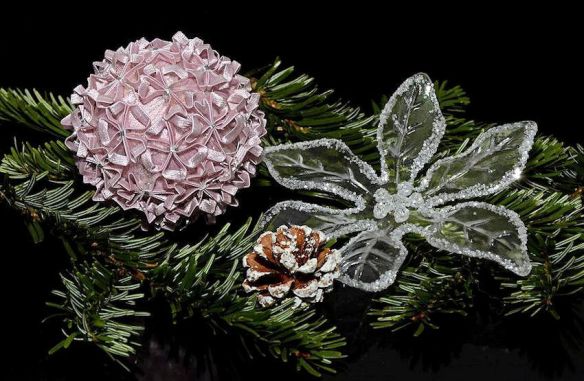
Ribbons and flowers make beautiful tree ornaments. If you like the look of snow, you can add crystals to the edges of flower petals as shown above. The Christmas ball is adorned with tiny bows.
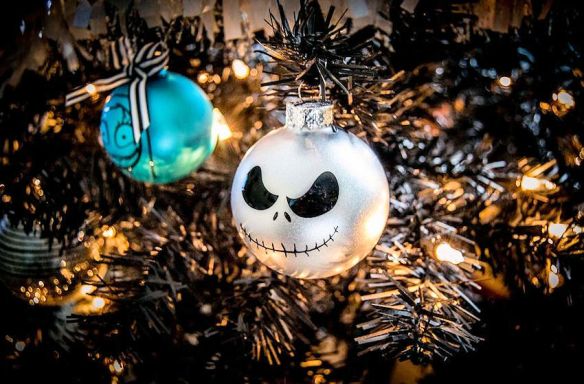
If you love Tim Burton’s movie, Nightmare before Christmas, these two familiar characters will bring a sense of mischievous humor to your tree. Use metallic paint for the base coat applied with a roller to avoid brush marks. Use a black Sharpie pen for the details.

Glitter, patience, craft glue and a very steady hand are all required for this challenging delicate pattern. To simplify the process, use fabric glitter paint, which provides color, glitter and three-dimensional patterns in one easy step.
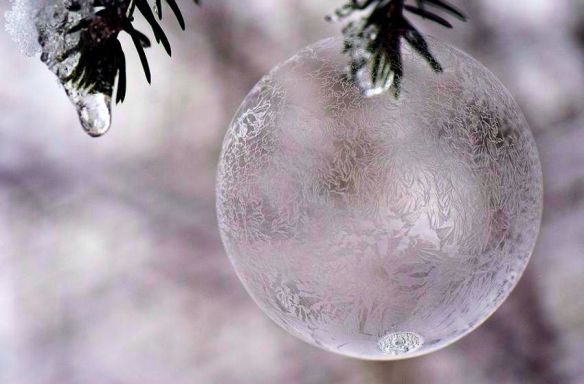
A few quick sprays of snow in a can will create this icy looking Christmas ball.
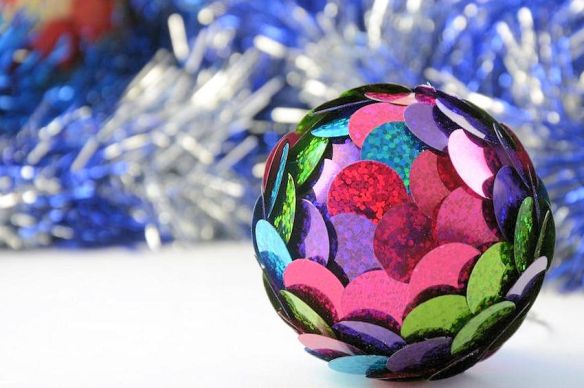
Overlap large no hole sequins, also known as paillettes, to create this flower-shaped ornament.

Spice up a plain gold ornament with silver glitter vertical stripes.

Use gold glitter fabric paint to create this forest of evergreen trees and stars in the sky. For extra texture, apply additional glitter to the trees while the paint is still wet.
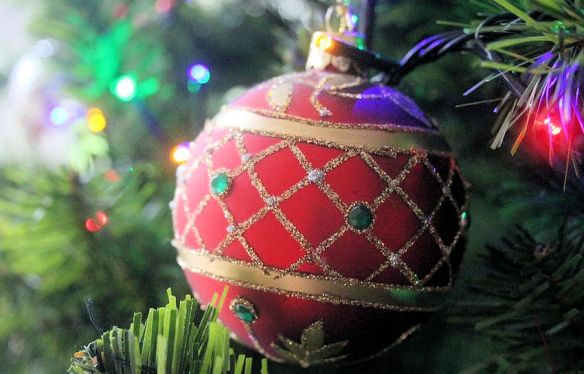
This ornate pattern could be created a couple different ways. The simplified version could be achieved using a metallic gold sharpie pen. Another option is using gold ribbon for the thick horizontal lines, followed by thin glue and glitter. Green rhinestones are glued at the intersections as shown.
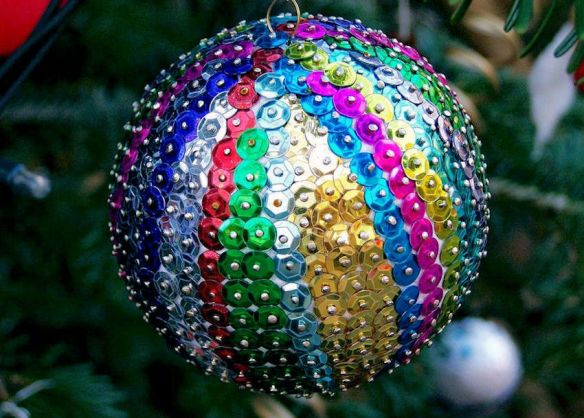
This rainbow ornament was made using a styrofoam ball, sequins and lots of pins.
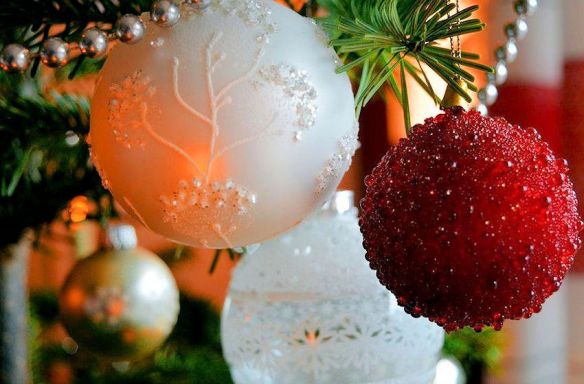
Red beads in several sizes provide rich juicy looking color. The white ball has a combination of fabric paint, powdered “snow” and some scattered tiny silver sequins.
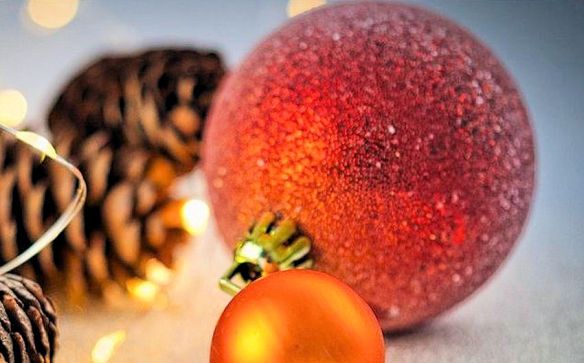
An ombré paint technique followed by the application of clear snow crystals gives this ornament the look of a frosted peach.
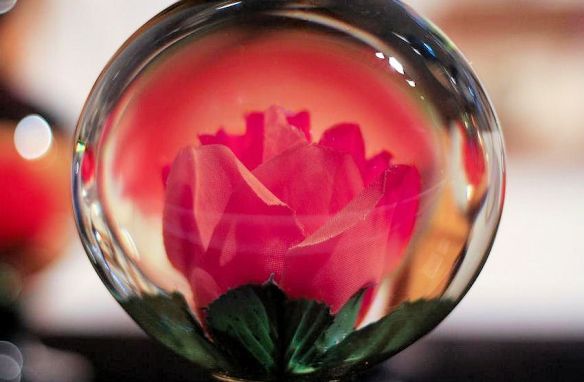
Silk flowers inserted inside the clear glass ball appear to bloom. To keep the flower in place, you may need to apply a small drop of clear glue using an extra long cotton swab or skinny craft stick.
Mosaic ornaments are quite beautiful. You could also use seashells or pompoms to create a similar look without the need for cutting any pieces to fit.
Rows of tiny sequins and braided white trim form the pattern on this striped ball.

These three-dimensional holly designs were created using fabric glitter paint, followed by loose glitter while the paint is still wet. It may require two coats to build up the thickness on the outer edges of the leaves. The inner sections of the leaves have green glitter. Glue red or green rhinestones on as berries.
The holidays are an excellent opportunity to exercise your creative muscles. By designing your own ornaments, you’re guaranteed to have a uniquely stylish Christmas tree featuring some of your best work. As your collection grows, they’ll become heirlooms with a lifetime of memories. Enjoy the creative process. You’ve got this!
Merry Christmas, Happy Holidays & Happy Crafting!

Love these. Thanks for sharing
LikeLiked by 1 person
These are beautiful. Love the rainbow sequin one 😀
LikeLiked by 1 person
Thanks for reading and commenting. Have a great week and enjoy the holidays!
LikeLike
Thanks for reading and commenting. Have a great week!
LikeLike
Oh my goodness – so many beautiful ideas!!!
LikeLiked by 1 person
Thanks! I enjoyed your recent posts on nature’s ornaments and the blue lantern is just beautiful! Thanks for reading and commenting. Have a terrific weekend!
LikeLike
nice pics
LikeLiked by 1 person
Thanks!
LikeLike
These are beautiful! My favorite is the all white textured one.
LikeLiked by 1 person
Thank you! Have a great week!
LikeLike
Wow! Beautiful and amazing share! I love Christmas time, I like all the christmas spheres, great colours. Really I enjoy your blog, very creative. Wishing you the best, take care. Elvira
LikeLiked by 1 person
Thanks for your kind words! I always enjoy hearing from you! I have been busy decorating for Christmas. There are so many memories tied to each decoration. Take care!
LikeLike
Thank’s, it is always a pleassure.
I am glad with you, enjoy hearing from tou too!
Exactly, so many memories…
Take care.
Elvira
LikeLiked by 1 person