
Bath Time for Baby

All babies are cute, but baby elephants are so expressive like the one above having the best day ever!
Baby Nuzzles Mom

Standing beside their watchful mothers, they look so small and somewhat fragile.
Baby’s First Steps

With those big floppy ears, it’s easy to imagine them taking flight, playfully floating upon the breeze and coming to a landing in our love-filled hearts. Let’s bring some of that joy into this week’s project.
How to Paint a Wooden Baby Elephant:
Raw Wood Elephant
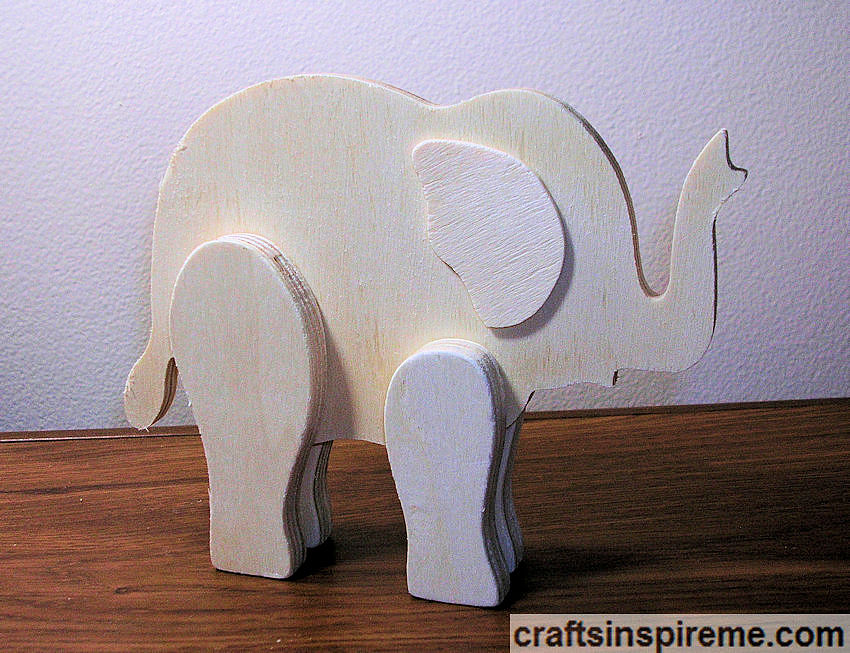
In previous painted wood projects, the animals had feathers, scales, or fur. Elephants present a unique challenge: wrinkles. I must admit this took much longer than expected as I progressed through a series of trial and error to achieve the desired appearance by layering. Let’s get started…
Supplies
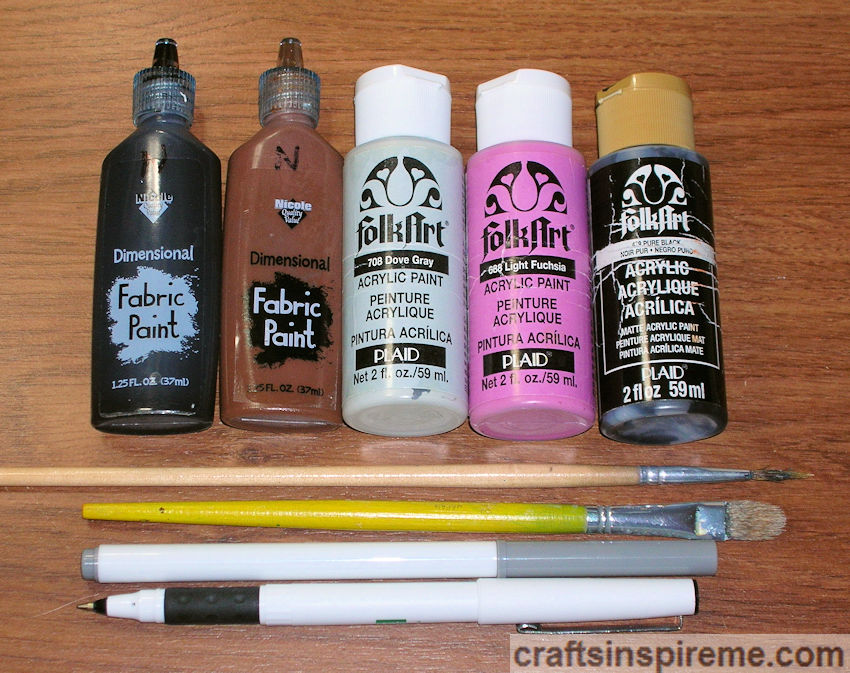
Supplies:
Wooden Elephant (5” high x 6-1/4” wide x 1-1/4” thick)
Acrylic Paints – Gray & Black, (Pink is optional)
Paintbrushes
Markers – Gray
Pens -Black Fine Point
1) Bottle fabric paint – Brown
1) Bottle fabric paint – Black
1) Bottle fabric paint – White (not shown)
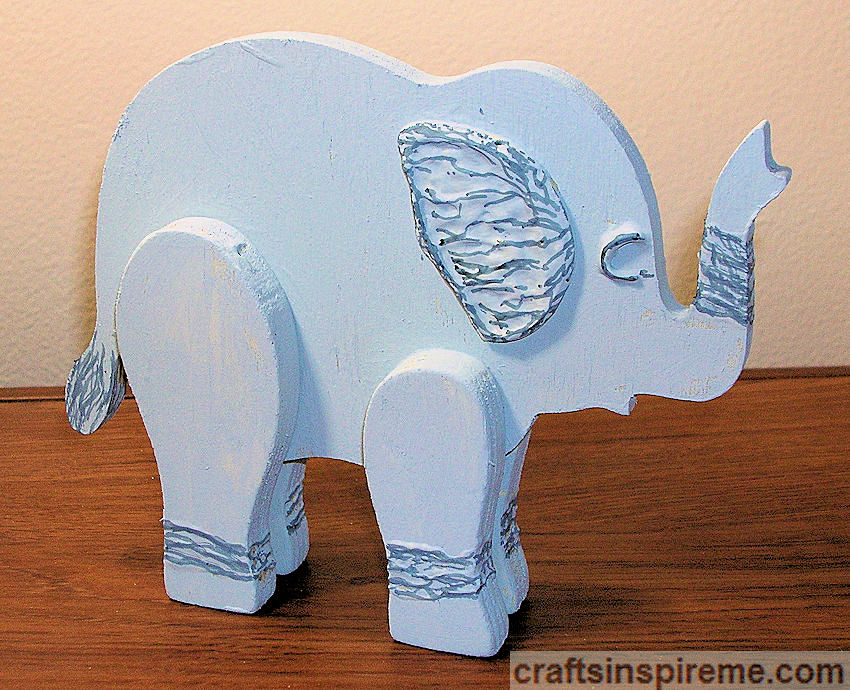
Texture Building

Start building texture with three-dimensional fabric paint. I used white, but any color will do because we will paint over it in a later step. Draw both eyes with a pencil. Thicken and shape the ears and outline the eyes with fabric paint.
Paint the Body

Paint the body gray, including both sides and all the edges.
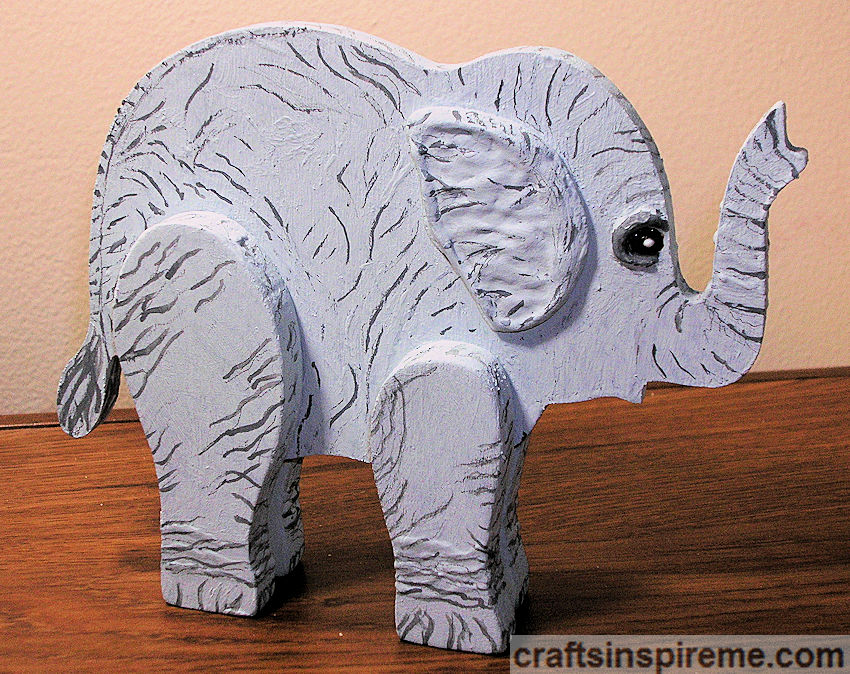
Draw Details with a Marker
Define the wrinkles using a gray marker.
Add More Wrinkles

After viewing numerous photos, I added wrinkles all over the body using a marker but immediately regretted it. I should have followed my own advice: Draw or paint what you feel, not what you know.
Repaint the Body

A fresh coat of paint gives us a clean slate to try again and allows the marker lines to lightly show through, which is great for the next step.
Cautiously Draw Wrinkles

Using a pencil, slowly add details in key areas to imply overall wrinkles. Build up the eyes with brown fabric paint.
Trace with a Marker
With a gray marker, trace the wrinkles and outline the eyes. Finish building the eyes up with brown fabric paint and allow it to dry. Add pupils and a white spot in each to bring them to life.
Trace with Fabric Paint
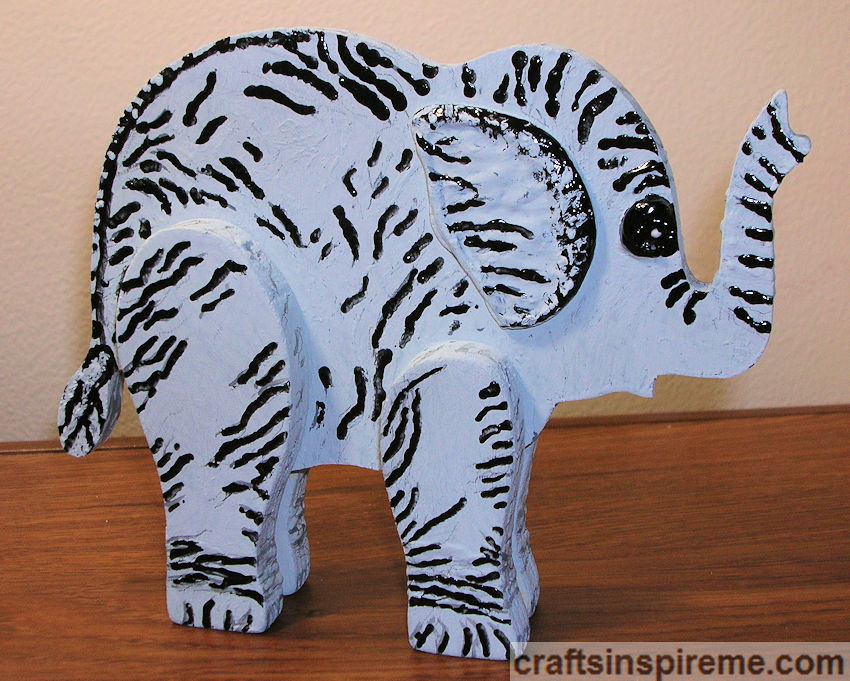
Retrace the wrinkles with black fabric paint. You are probably thinking, “Here she goes again. Jumping in with both feet,” and you are correct. The difference is this time … I like it! Don’t worry about too much contrast because we will tone it down in the next step. Develop the eyes with the same fabric paint.
Repaint & Create More Texture

By repainting the body with gray paint, the raised wrinkles recede, becoming part of the thick skin. Next, mix black and gray acrylic paint to create a darker gray. Dip a cotton ball in the new dark gray paint and dab it on a piece of scrap paper to remove the excess. Lightly dab the cotton ball all over the body to create new subtle layers of texture. Repeat as needed.
Trace with a Marker
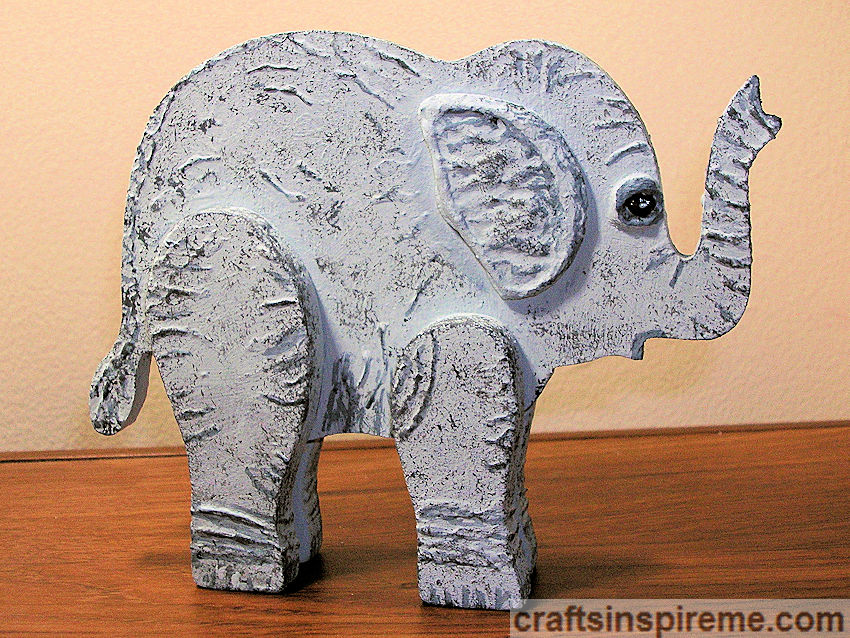
Retrace the wrinkles, ears, and eyes with gray marker. Add lines around the mouth and tip of trunk. At this point you could stop, but I wanted to add a few little details to make this elephant look like a baby. For that we need a little inspiration.
Adorable Baby Elephant

Three things stand out: eyelashes, the pink inside of the mouth, and peach fuzz hair running along the spine from top of the head to the tail. Markers or paint will work nicely for the first two details, but the third requires a special ingredient…
A Longhair Cat

Yes, I am recommending the use of cat hair for an art project. I must say it is the oddest ingredient I have ever used. Longhair cats require daily brushing, so collecting soft hair is no problem. (lol)
Completed Baby Elephant
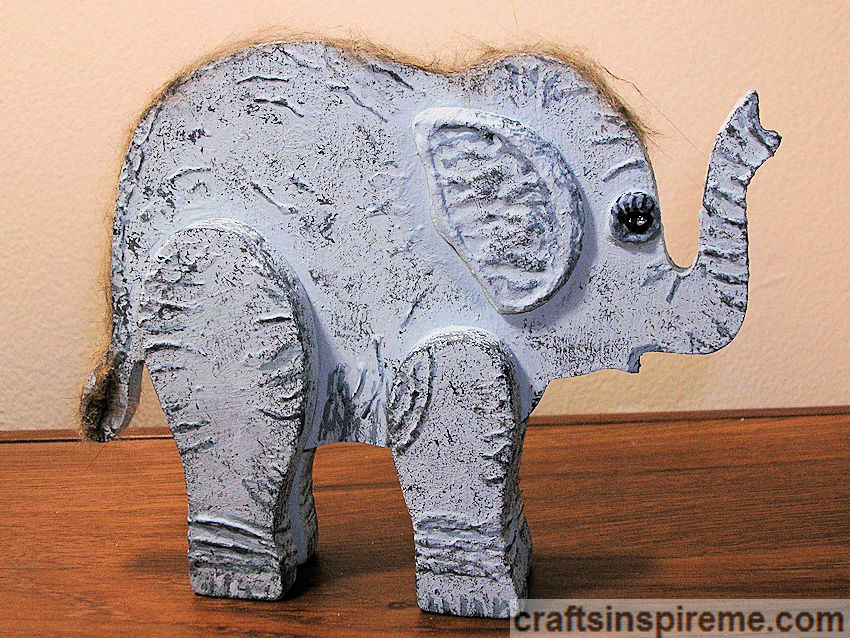
Glue on the hair with Elmer’s glue. Adjust and trim the hair as needed. Add eyelashes with a fine point black pen and paint the inside of the mouth pink.
Closeup of Elephant’s Face

Although these details are minor, I think they provide softness and a “cuteness” factor to this baby elephant, just like his living counterparts.
Baby Elephant – Before & After

This completes our project. Persistence pays off. Experimentation is a tremendous help in solving artistic problems. If you are not happy with the results, let it sit for a day or two and the inspiration will come to you just when you need it most.
Have you faced any artistic challenges like wrinkles? Have you used an unusual item, such as cat hair, in an arts and crafts project? Please share your ideas in the comments section. Thanks for joining me. Good luck with your future works of art.
Thanks for Reading & Happy Crafting!

Excellent job! You have really added dimension to the wooden elephant! I have never used cat hair in a project, but that was a great idea. I do have a cat, so if I need cat hair, I’m good. 🙂 Very nice job.
LikeLiked by 1 person
Amazing job with the details! Great idea to use cat hair for the head. So cute! Elephants are such wonderful beings that feel like we do.
LikeLiked by 1 person
Thank you so much! Have a great week!
LikeLiked by 1 person
Thanks for the compliments! I am so glad you enjoyed it. I love your intuitive comment about elephants! All the best!
LikeLike
Wow! Wonderful! I love elephants! Those are amazing and you did a beautiful artistic work! Looks so cozy and lovely! Poor little sweet cat, LOL. Thank’s for share your creativity.
I always enjoy visit your great blog! Thank you for your kindness and support.
Have a relaxing time!
LikeLiked by 2 people
Really lovely photos. Thank you very much for sharing. I wish you a wonderful time.
LG Marie
LikeLiked by 1 person
Thank you so much for your support and friendship. I really appreciate it! All the best!
LikeLiked by 2 people
Thank you for your kind words and for visiting my blog. Have a great weekend.
LikeLiked by 1 person
You are welcome, dear friend.
It is always a pleasure! Friends are for support each others. All the best for you too!
Have a lovely time!
LikeLiked by 2 people