It’s All in the Details

Detailed Floral Wood Carving
We deal with so many details every day. I thought it would be fun to take a look at some craft photos to demonstrate how small changes can make such a dramatic difference. Let’s go!

Acrylic Painted Rabbit
Painted Bunny Face
This cute rabbit has blended fur colors, but a rather blank expression.

Acrylic Painted Rabbit with 3D Details
Bunny Face 3D Details
The 3D paint creates facial depth, and provides a twinkle in eyes filled with personality.

Acrylic Painted Flamingo
Flamingos are so colorful and unusual. The color scheme captures the essence of the bird but lacks the textured feathers.

Acrylic Painted Flamingo Layered with 3D Texture
Now he appears to be staring back at you while he proudly shows off his brightly colored plumage.

Two-Tone Green Man
Green Man Original
Mother Nature’s counterpart doesn’t look very happy, does he?

Two-Tone Green Man with Metallic Gold Highlights
Green Man Gold Accents
After brightening the whites of his eyes, he had his “hair” highlighted and now he looks rather pleased with himself.  lol

Black & White Photo vs. Colorized Photo
Black White Photo vs Colorized
The black and white portrait is nice, but look how soft, warm and romantic the second photo is thanks to the addition of color and dreamy special effects.

Metallic Silver Octopus
Octopus Monotone
Metallic silver is an odd choice for such a fluid sculpture of a living animal.

Full Color Octopus with 3D Details
Octopus Full Color
A vibrant new color scheme brings this blue ringed octopus to life, and the three-dimensional suction cups add texture as well as a more realistic approach to this wriggling octopus.

Gnome House vs. Bamboo Tropical Hut
Gnome House Original vs Tropical Hut
Originally this little house was part of a collection of gnomes. A bamboo pattern combined with a few brightly colored silk flowers transformed it into a tropical hut for an ocean-themed centerpiece.

3D Painted Celtic Cross
Celtic Cross Green & Black
Celtic designs are famous for their knot work. The three-dimensional green paint contrasts nicely with the black background and textures the entire surface.

3D Painted Celtic Cross with Metallic Gold Accents
Celtic Cross Gold Accents
The introduction of three-dimensional gold accents brings a bit of sparkle and opulence to the design.

Acrylic Painted Seahorse with 3D Accents
Seahorses are known for their brilliant colors and textured bodies. The 3D paint adds a bit of texture along the contours of the body and upon the spiny back.

3D Painted Seahorse
3D Painted Seahorse
By using only 3D paints, the entire seahorse springs to life in glorious color and texture.

Fashionable Snowman
Fashionable Snowman
No snowman is complete without a few knitted accessories.

Fashionable Snowman with Lights
The addition of lights not only adds sparkle, but also enables him to shine at night in any window to complement your exterior decorations.

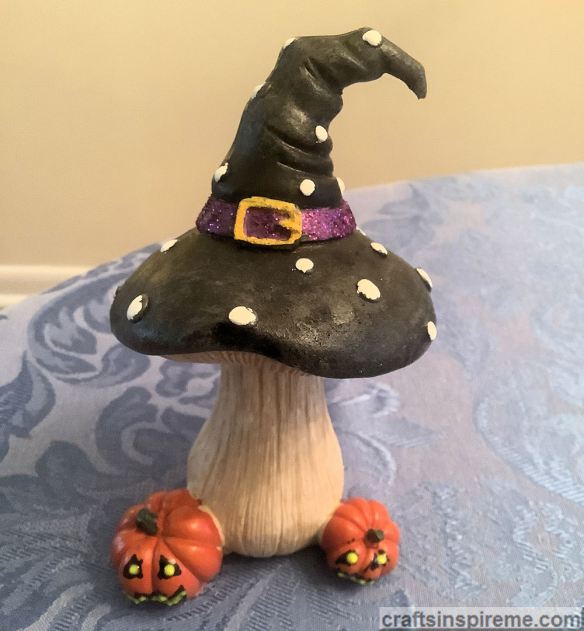
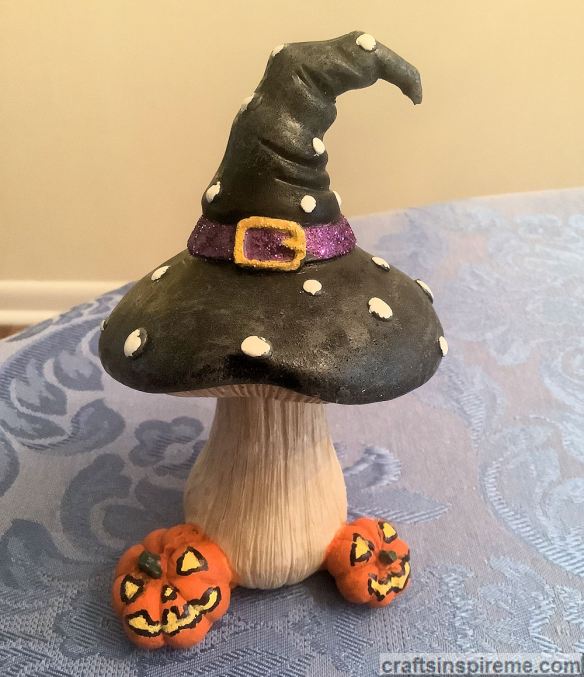
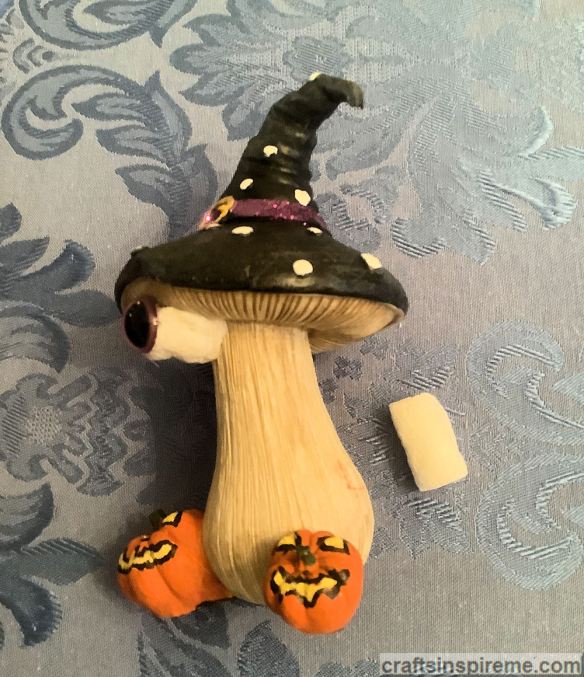
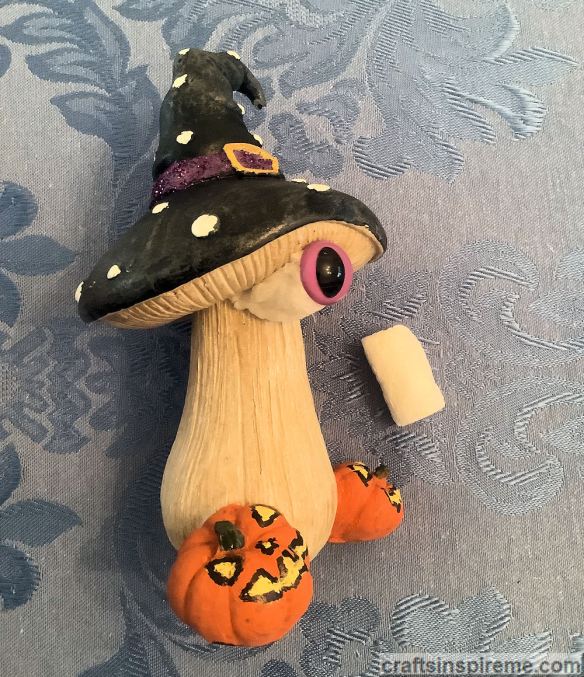
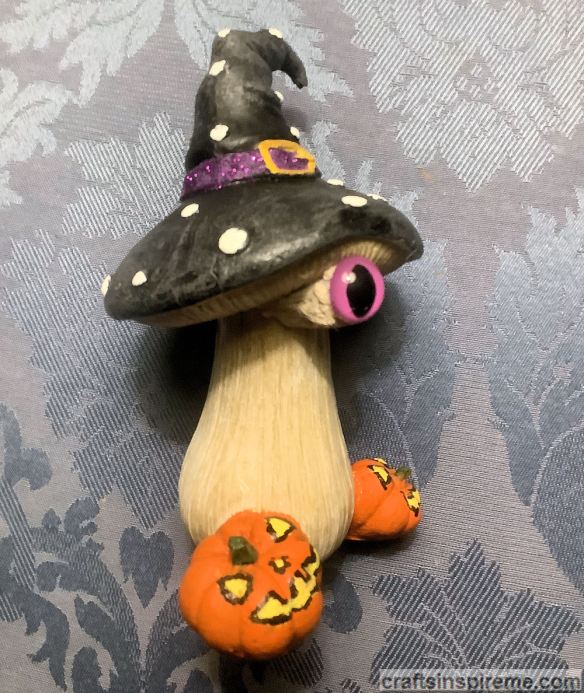
Halloween Witch vs. Christmas Elf
How can a Halloween decoration become one of Santa’s helpers? The answer lies in accessories! Cover the hat and tuck in the hair, add a scarf and candy cane and voila you have a Christmas elf.

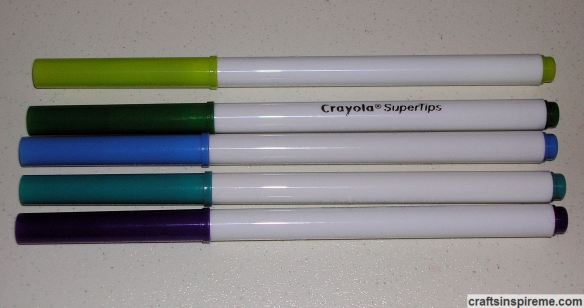
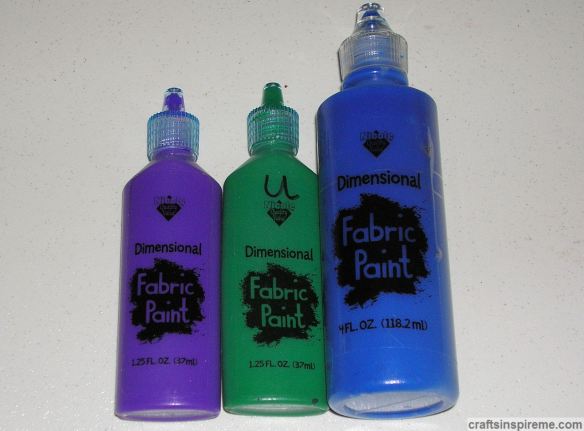
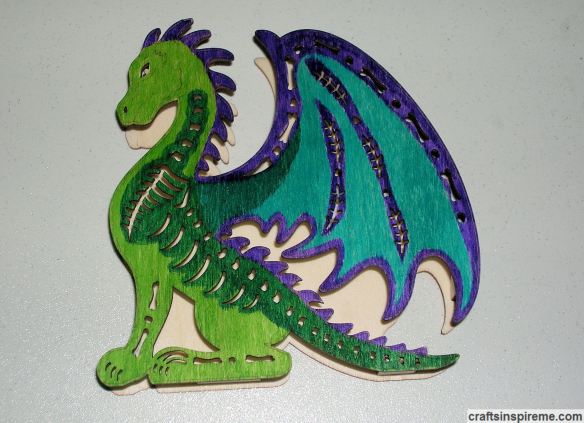
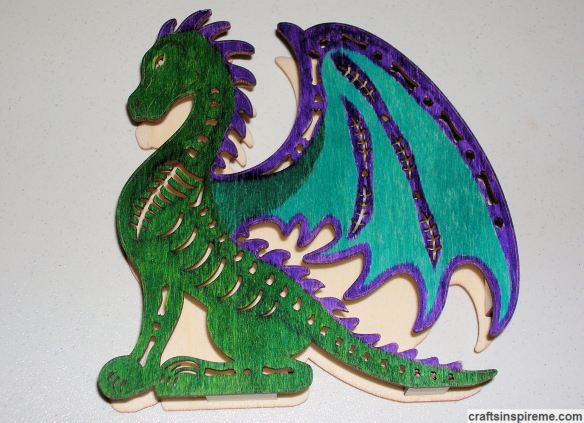
Instructions for most of these items can be found on the “How To Projects” page.

It is said: “Beauty is in the eye of the beholder.” Little details have a strong influence over our perceptions, but sometimes we become so accustomed to our surroundings that we barely notice. Look at your home from a new perspective. Check out those little details to see if something could use a touch of color, a bit of whimsy and a little tender loving care. You’ll be glad you did!

Thanks for reading & Happy Crafting!

He’s a Real Swinger

Ghost Swing

With a title like that, you’re probably looking for a good time. And that you will have, but probably not in the way you were expecting. Lol Today we’re going to talk about skeletons and swings.

Skeleton & Pumpkin

Halloween is a skeleton’s favorite holiday.

Skeleton Romance

Love at first sight does not require sight. Even after death love lives on.

Skeleton Lounging

They like to lounge around on Sunday afternoons.

Funny Skeletons

Skeletons can be silly and have a playful sense of humor.

Swing

What could be more fun than riding a swing? The idea of skeletons and swings inspired our next project.

How to Make a Skeleton Swing:

Halloween Sidewalk Edging – (lightweight plastic)

Swing Seat

I bought this at the dollar store. It is supposed to be used as spooky edging along your front sidewalk or to serve as a perimeter fence around a Halloween graveyard display. This works great as a seat swing, and I kept the stakes for their menacing appearance.

Large Link Chains – (lightweight plastic)

Swing Chains

This dungeon-like chain also came from the dollar store. A note of caution, these fake chains are only for show and cannot hold any weight. Compensate for this by using heavy twine, as you will see in the following steps below.

Assembled Swing

Assembled Swing

Tie chains to each side of the seat using heavy twine. As mentioned above, you will need to add support, and this depends upon the type of skeleton you choose. To prevent the chains from pulling apart: tie heavy twine to each side of the seat and weave it through the chains to the top and then tie it together so it can be placed over a branch or slid onto a wall-mounted flagpole.

Human Skeleton on Swing

Human Skeleton on Swing

Human skeletons have a loop at the top of the skull, which will support the full weight. He will appear to be riding the swing if you clasp his hands upon the chains, allowing the seat to simply lean against his backside. You may need to adjust the chain length to accommodate his height. For a humorous touch, you could add a baseball cap or a fashionable scarf around the neck.

Dragon Skeleton on Swing

Dragon on Swing

Here’s another skeleton option, and as you know I love dragons, so I returned the human skeleton to the store and chose this dragon instead.

Finished Dragon Swing

Finished Dragon Swing

To protect the dragon’s animatronic eyes, jaws and sound effects, I opted to keep the swing indoors and hung it from an existing plant hook in the ceiling. To reinforce the swing to hold his weight, I attached additional twine to the four corners of the seat. I also tied his feet to the seat to ensure he stays firmly in place. Everybody loves this new addition to our Halloween décor. I think he likes it too!

I hope this project will inspire you to think outside the box with your Halloween decorations. Please let me know your thoughts and ideas in the comments.  

Thanks for Reading! Happy Crafting! And I hope you have a very Happy Halloween!

Halloween Costumes – Variations on a Theme 2

Pumpkin Cat

Welcome to part two of this costume post. What do you want to be for Halloween? This playful celebration is for “kids” of all ages. Become the actor you always wanted to be. Let’s continue our exploration of characters and costumes…

Medusa:
Legendary Monster

Medusa Legend

Mesmerizing Beauty

Medusa Beauty

Mother Nature:
Tranquil Beauty

Mother Nature Tranquil

Powerful Protector

Mother Nature Queen

Nurturing Creator

Mother Nature Nurturer

Queens:
Ethereal

Fantasy Queen

Cold as Ice

Ice Queen

Evil

Evil Queen

Pumpkins:
Playful

Pumpkins

Creepy

Pumpkin Skull

Terrifying

Pumpkin Monster

Scarecrows:
Funny

Scarecrow

Frightening

Scarecrow Frightening

Steampunk:
19th Century Retro

Steampunk

Futuristic Glam

Steampunk Futuristic

Mad Hatters:
Playful

Playful Mad Hatter

Twisted Beauty

Beautiful Mad Hatter

Vampires:
Sexy & Unpredictable

Vampire Sexy

Dark & Foreboding

Vampire Gothic

Werewolves:
Cute

Wolfman Kid

Fierce

Wolfman Adult

Trees Creatures:
Dark & Unnerving

Treeman

Ferocious

Tree Monster

Group Costumes:
Not All Who Wander Are Lost

Group Lord of the Rings

Who Ya Gonna Call?

Group Ghostbusters

The Family That Plays Together Stays Together

Group Ghosts

Halloween is a time to let your inner child come out and play. I hope this post has helped you to find inspiration for your next costume. Please let me know your favorites in the comments.

Thanks for Reading! Happy Halloween & Happy Crafting!

Halloween Costumes – Variations on a Theme

Cute Ghost with Pumpkin

Deciding what you want to be for Halloween is an exciting occasion. It may require makeup, masks, accessories, and/or full costumes. There are also a variety of options for the type of character you want to portray. For example, you could be Casper the Friendly Ghost versus the Ghost of Christmas Future. This two-part series will look at some of the possibilities.

Aliens:

Fashionable Little Alien

Star Wars Jawas

Star Wars Jawas

Predator

Alien Predator

Wildlife:
Monarch Butterfly

Monarch Butterfly

Cat Woman

Woman as a Cat

Panda Storyteller

Panda

Bigfoot

Bigfoot

Character Combinations:
Rock & Roll Alien

Rock & Roll Alien

Anime Witch

Anime Witch

Skeleton Warrior

Skeleton Warrior

Warrior Princess

Warrior Princess

Couple’s Monster Costumes:
Frankenstein’s Monster & his Bride

Frankenstein Monster & Bride

Dracula & the Countess

Vampires

Zombie Bride & Groom

Zombie Bride & Groom

Day of the Dead:

Day of the Dead
Day of the Dead

Ancient Egyptian:
Egyptian Princess

Egyptian Princess

Egyptian Pharaoh

Egyptian Pharaoh

Fairies:
Fairy Queen

Fairy Queen

Woodland Fairy

Woodland Fairy

Goddesses:
Atlantis Goddess

Atlantis Goddess

Greek Goddess

Greek Goddess

Zen Goddess

Zen Goddess

Warriors:
Spartan Warrior

Spartan Warrior

Tribal Warrior

Tribal Warrior

Viking Warrior

Viking Warrior

As you can see, there are lots of opportunities to express your creativity. Personalize your character, and remember attitude is as important as the costume. Please let me know your favorites in the comments and stay tuned next week for part two of this post as we continue our exploration of costumes.

Thanks for Reading! Happy Halloween & Happy Crafting!

Skeletons Like Makeovers Too

Eerie & Otherworldly
Spooky Cemetery Skeleton
No Halloween display would be complete without a skeleton or two. Each one has its own personality.

Unexpectedly Playful
Funny Skeletons

Culturally Festive
Day of the Dead

Bone-Chilling & Terrifying
Snake Skeleton
Every year manufacturers introduce new items to thrill, amuse or frighten avid Halloween fans. With a few easy steps, you can personalize store-bought skeletons to express whatever style or attitude you desire for your Halloween décor. Here are a few ideas to get you started:

Fierce Makeover:

Deep Sea Fish Skeleton
Original Fish Skeleton
This skeleton is based upon a real life deep-sea fish called an Anglerfish. To attract prey, a bioluminescent fishing lure is cast in front of its head and in no time, those strong jaws snap shut as vicious teeth make short work of consuming the meal. Check out the illuminated photo below.

Illuminated Deep Sea Fish Skeleton
Original Fish Skeleton Lit
As a Halloween decoration, it certainly is more unique than the usual offerings. When lit, the lure is bold yellow and the stomach has an eerie purple glow. While he does have a menacing appearance, I think we can do better! I really like the purple glow but when the lights are turned off, the bones are a neutral color without any contrast. In other words, he needs an upgrade!

Fish Skeleton Paints
Fish Paints
Supplies:
Deep Sea Fish Skeleton (8” high x 17” long x 5” wide)
Acrylic Paints – linen, metallic periwinkle blue, & black (not shown)
Paintbrushes

Fish Tail – Before
Fish Tail Before

Fish Tail – After
Fish Tail After
Paint the tail and tips of the spine with metallic periwinkle blue. Notice how the bones stand out against the metallic blue. The reflective quality of metallic paint contrasts well with matte finish bones.

Fish Head & Fins – Before
Fish Head Before

Fish Head & Fins – After
Fish Head After
Paint the eyes black. Paint the webbing of the fins and crevices around the eyes with periwinkle blue. The fleshy, darker contrast makes the eyes look meaner in a zombie-like fashion. Linen paint can be used to touch up unwanted marks on the head.

Finished Fish
Finished Fish
The individual bones in the tail and fins really show up now, resembling creepy skeletal hands for seizing prey or curious trick-or-treaters. See fish 2025 updated version below.

Illuminated Finished Fish
Finished Fish Lit

Portraits – Before & After
Before & After Portrait
The first photo is the original fish and the second is the finished makeover. The purple glow now extends across the entire body. With a ferocious expression and intimidating attitude, this Anglerfish is ready to strike, perfect for a Halloween scare.

Fish Update 2025

Angler Fish Revisited
Sometimes I like to live with a finished craft for a while to ensure I’m satisfied. I decided this fish needed a meaner look, which required additional painting. I think I accomplished my mission. What do you think?

Fantasy Fashion Makeover:

Spider Skeleton
Original Spider
Spiders often have a very creepy aura and you could certainly go in that direction. This lucky lady prefers a haute couture makeover and we know just how to bring it!

Spider Skeleton Paints
Spider Paints
Supplies:
Spider Skeleton (6” high x 8” long x 13” wide)
Acrylic Paints – metallic blue sapphire, metallic copper, & pure black
Paintbrushes

Spider Head & Feet
Spider Black & Copper Paint
Darken the eyes with black paint, and paint the facial details and feet with metallic copper. Feel free to experiment with the colors.

Spider Joints & Spine
Spider Metallic Blue
Turquoise and brown are a very fashionable color combination, making metallic blue the perfect complement to the copper. This bejeweled spider is ready to make her debut on the fashion runway! lol!

Finished Spider Pulling Wagon
Spider Drawn Carriage
Why not show off her new look by participating in a Halloween parade with a few friends?

Fairy Tale Makeover:

Frog Skeleton – Before
Original Frog Skeleton
This little guy has a heartwarming smile. I believe we can add a little more charm.

Frog Skeleton Paints
Frog Paints
Supplies:
Frog Skeleton (3-1/2” high x 5” long x 4-1/2” wide)
Acrylic Paints – metallic peridot green & pure black
Paintbrushes

Frog Skeleton – After
Finished Frog Skeleton
Sporting his new color, he’s bound to win hearts and maybe even garner a few kisses for luck. Who knows – maybe he will turn into a prince?

I hope you enjoy these fanciful skeletons and apply these ideas to your Halloween décor..

Thanks for Reading! Happy Halloween & Happy Crafting!

Bewitching Mushrooms

Mushroom Centerpiece

Mushrooms have been trending this year in everything from apparel to home décor. Nature is filled with magical wonders and what better time to tap into that magic than Halloween? This fun project is fun and easy for everyone.

Original Mushroom Decoration

Original Mushroom

I purchased this cute figurine at Wegmans. The shape of the mushroom cap lends itself perfectly to becoming a witch’s hat.

Supplies

Supplies

For this project you will need acrylic paints, brushes, a black sharpie marker, and a toothpick for tiny touch-ups. You will also need a stuffed animal eye. (You’ll see why below.)

Paint Jack-O-Lantern Faces

Painted Jack-O Lanterns

Painted faces give these pumpkins personality. I didn’t like the low placement of the faces, so I repainted them to start over.

Repaint Pumpkins

Repainted Pumpkins

The new orange paint creates a new blank canvas.

Paint Yellow Jack-O-Lantern Face Details

Painted Yellow Face Details

Yellow paint creates the inner glow typically found in Jack-O-Lanterns.

Outline Face Details in Black

Black Outlines

Using a black Sharpie marker, outline the face details for a carved appearance.

Add a Purple Eye

Add an Eye

The addition of a purple eye is both cute and creepy.

Create Eye Socket with Packing Peanut

Create Eye Socket

Instead of a human eyeball, I decided to give this magical creature a tube-shaped eye socket using flattened packing peanuts.

Side View of Eye Socket

Side Detail

The packing peanut texture coordinates well with the mushroom stem.

Side View of Eye Socket

Side Detail

Finished Bewitching Mushroom

Finished Mushroom

The eye socket was painted beige to blend with the stem.

Side View of Finished Mushroom

Side Details

Side View of Finished Mushroom

Side Details

I hope you enjoyed seeing this bewitching mushroom. It makes a great addition to your Halloween décor and creates an element of the unexpected. As you know, I love Halloween and would love to hear about any of your Halloween-themed projects.

Thanks for Reading! Happy Halloween & Happy Crafting!

Hand Painted Potholder & Oven Mitt

I have always loved ancient Egyptian art and architecture. The symbolism, the colors, and the powerful portrayals of the gods and goddesses is fascinating. Bast (aka Bastet) is the ancient Egyptian cat goddess.

Egyptian Wall Art

Egyptian Wall Art

Ancient Egyptian symbols often include the lotus flower, and this color palette is used throughout their artwork.

The Goddess Squeak

I can’t explain why but my brother’s cat, Squeak, has a royal vibe. As queen of the household, she struts around the house looking for attention and spends a lot of time resting on the kitchen counter on top of dish towels or oven mitts.

3-Dimensional Fabric Paints

My love of ancient Egyptian art combined with this pampered cat to inspire a new craft: painted oven mitts & potholders. Special Note: because fabric paint is heat sensitive, avoid direct contact with hot pots and pans. This project is more decorative, serving as art for the kitchen.

Original Potholder

This plain potholder could use some love.

Painted Lotus Potholder

This eye-catching lotus flower is just what it needed.

Original Oven Mitt

Gray is a very popular color, but we can do better.

Painted Cat Goddess Oven Mitt

Here we see the goddess, Bast, posing in front of the Giza pyramids.

Close-Up of Painted Cat Goddess

The gold collar is perfect for a goddess, including the Ankh and Eye of Horus symbols. I painted the cat’s eyes metallic gold to catch the light and create a glow amid the dark black fur.

My brother and his cat love these. They also make a great place for a quick nap – for the cat, not my brother. Lol

I hope you will be inspired to add some decorative details to your homes. Anything can serve as your canvas. What will you create next?

Thanks for Reading & Happy Crafting!

It’s a Fire Truck!

Fire Truck

Aside from stating the obvious, I’m sure you’re wondering where I’m going with this post. I have a funny family story to share…

When my brother and I were little, my mom took us to a department store to buy Christmas presents for her. Inside the store was a life-size Santa’s workshop, which looked like a log cabin with fake snow and icicles hanging from the roof. Parents brought their children to purchase gifts for individual family members, with the help of a store employee. To a kid, this was such a cool idea.

A salesperson walked each child around, helped select a gift, and wrapped it up to be placed under the Christmas tree. I went in first and found a lovely pair of earrings for my mom. I felt very proud of myself, shopping just like the grownups did.

While my mom and I waited, my younger brother went inside. For some reason, he was taking a very long time to choose a gift. When we discovered why, we were hysterically laughing. My brother did his very best to convince the salesgirl that my mom wanted a shiny red fire truck for Christmas! And being a thoughtful boy, he said he could play with it when she wasn’t using it!

Ever since, whenever someone receives a present that is really for the gift giver, we call it a “fire truck.”

Fire Ladder Truck

So, on that special occasion, when you open your gifts, if you see something that reminds you of this post, just smile, say thanks and think… Fire Truck! lol

Thanks for Reading & Happy Crafting!

Forest Dragon

Baby Dragon

The mysterious legends of dragons have been a fascination for centuries. appearing in ancient and modern texts, maps, as well as artwork and architecture around the world. Some may say dragons are pure fantasy, but shown below are several dragons alive today. This week’s project, a colored/painted LED dragon, is easy to complete and suitable for all ages and skill levels.

Inspirations:
Komodo Dragon

Komodo Dragon

Australian Seadragon

Australian Seadragon

Green Iguana

Iguana

Supplies:
Raw Wood LED Dragon

Raw Wood Dragon

Magic Markers

Magic Markers

Acrylic Paints

Acrylic Paints

3-Dimensional Fabric Paints

Fabric Paints

How to Color/Paint a Wooden Dragon:
Apply Dark Blue Marker

Dark Blue Marker

Color the wing details and spines running down the dragon’s back and tail.

Apply Aqua Marker

Aqua Marker

Fill in the wings with magic marker. Don’t be afraid to experiment. You can always change it, as you will see in a later step.

Apply Lime Green Marker

Lime Green Marker

Apply Dark Green Accents

Dark Green Marker Accent

I didn’t like lime green and dark green together and changed it in the next step.

Apply Dark Green Marker

Dark Green Marker Body

Apply Dark Blue Marker

Lt Blue Marker Wings

Cover the original aqua wing with dark blue. I liked the color, but it appeared to be rather dull for such a magical beast. At this point, if you are satisfied with your dragon, you could stop. I like to experiment with different paints, as you will see below.

Paint Wing Metallic Light Blue

Metallic Blue Painted Wings

Paint Face and Body Details Metallic Green

Metallic Green Painted Accents

Paint Spines Metallic Purple

Metallic Purple Spines

Paint the spines metallic purple. Add facial details with green 3D paint. Paint the eye metallic blue and outline it in 3D green paint.

Add Textured Scales with 3D Paint

Dk Green 3D Scales

To make tiny scales, dip toothpicks in 3D green paint and lightly touch the wood surface creating a textured pattern.

Add Wing Veins with 3D Paint

Dk Green 3D Wing Details

Finished Dragon

Finished Dragon

Paint the wing veins blue and outline the spines with 3D purple paint.

Finished Dragon Close Up

Dragon Close Up

Dragon LED Lights Lit

Lit Dragon

Dragon Nightlight

Dragon LED Nightlight

This completes our dragon. It’s fun, colorful and functions as a night light too. I hope you enjoy it and feel inspired to explore the many creative options for your next project.

Thanks for Reading & Happy Crafting!

The Post I Didn’t Want to Write

Smokey with Catnip Toy

I truly struggled to write this post. Every time I thought about it, even as I am typing now, my eyes fill with tears. I suppose some small part of my brain hopes that if it isn’t written down, it might not be true.

Smokey in Playpen

Last Sunday, Smokey was having the best day ever, sitting on the deck watching wildlife, supervising the cooking of dinner on the grill, and feasting on a steak dinner. The next morning, he died. It was a shock to everyone, including the vet. He had been doing so well. How could he be happy one minute and gone the next?

Smokey Burrowing under Comforter

I want to thank everyone for their well wishes and prayers. Right now, Smokey is burrowing under God’s comforter or floating on a cloud watching over us.

Hug your furry friends! The joy and love they bring to our lives will live on forever in our hearts. Thanks again for your support!