There are all sorts of Halloween themes and characters to help us celebrate this imaginative holiday. Every year you decide what costume to wear, so why not choose a style for your decorations? Each of the photos below shows Naughty on the left and Nice on the right. At the end are exemplary displays to inspire your Halloween décor.
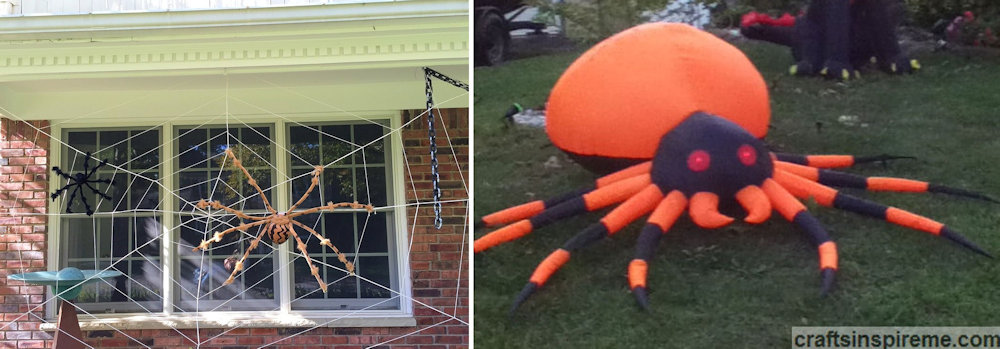
Spiders
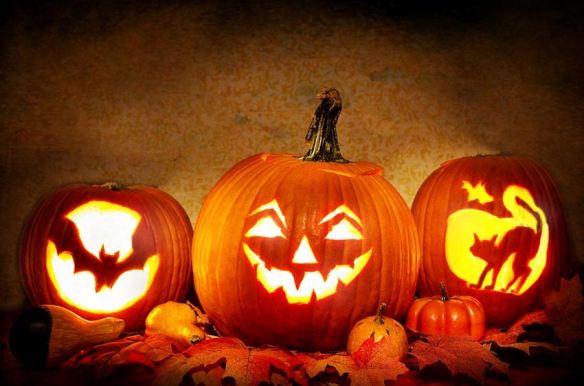
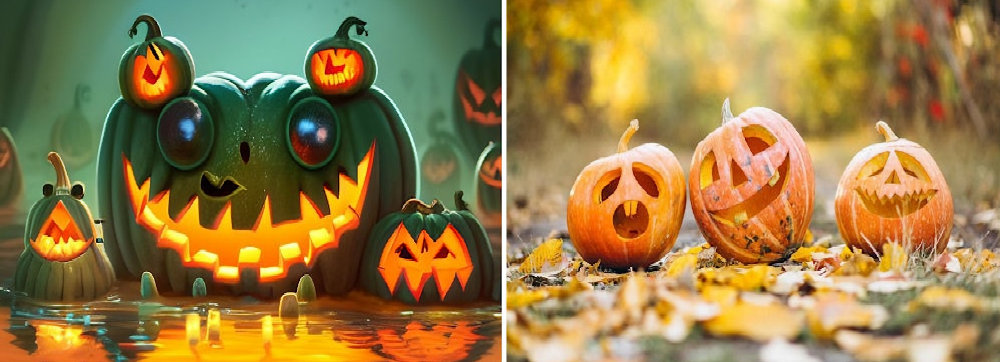
Jack-O-Lanterns
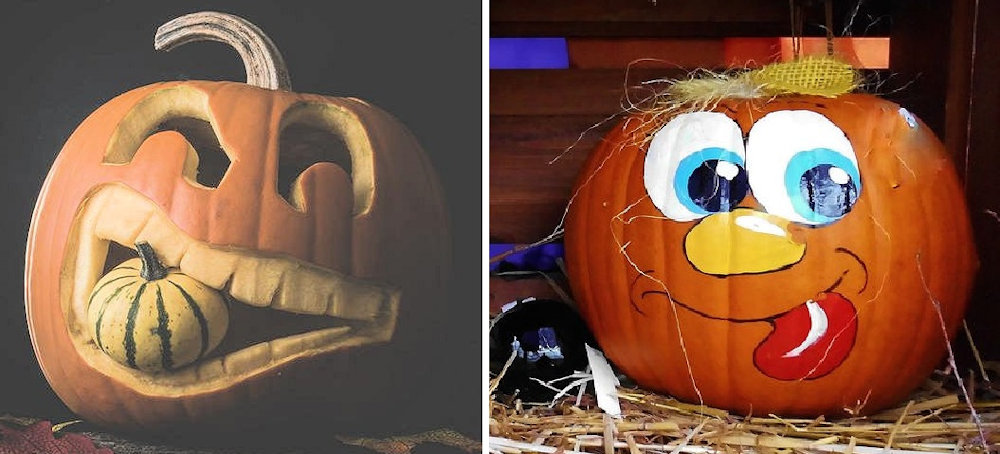
Pumpkin Pals
Spooky Pets
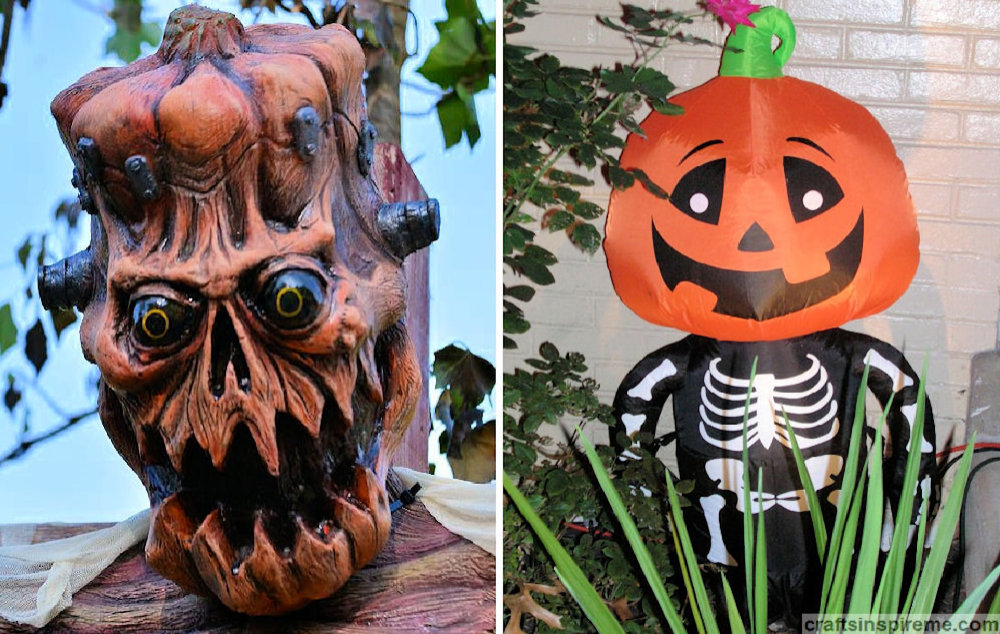
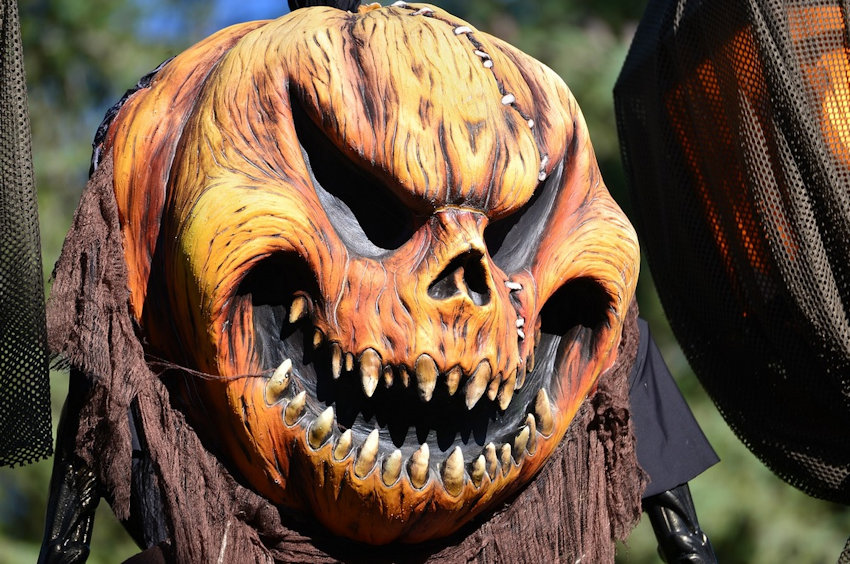
Pumpkinhead Monsters
Pumpkin Trios
Ghostly Trios
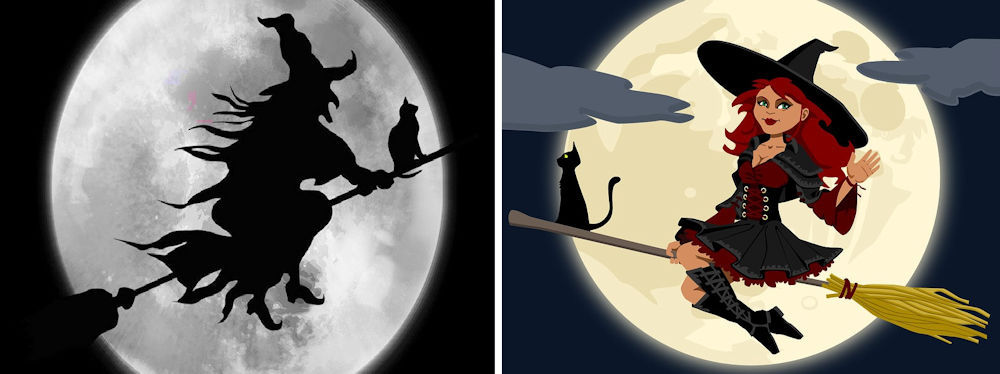
Flying Witches
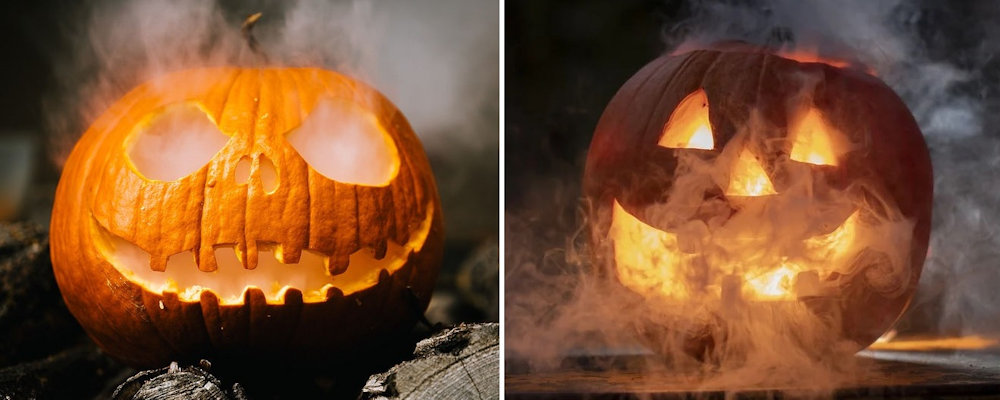
Pumpkins in the Fog
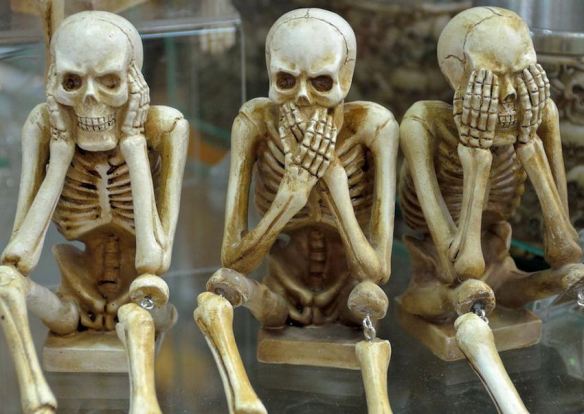
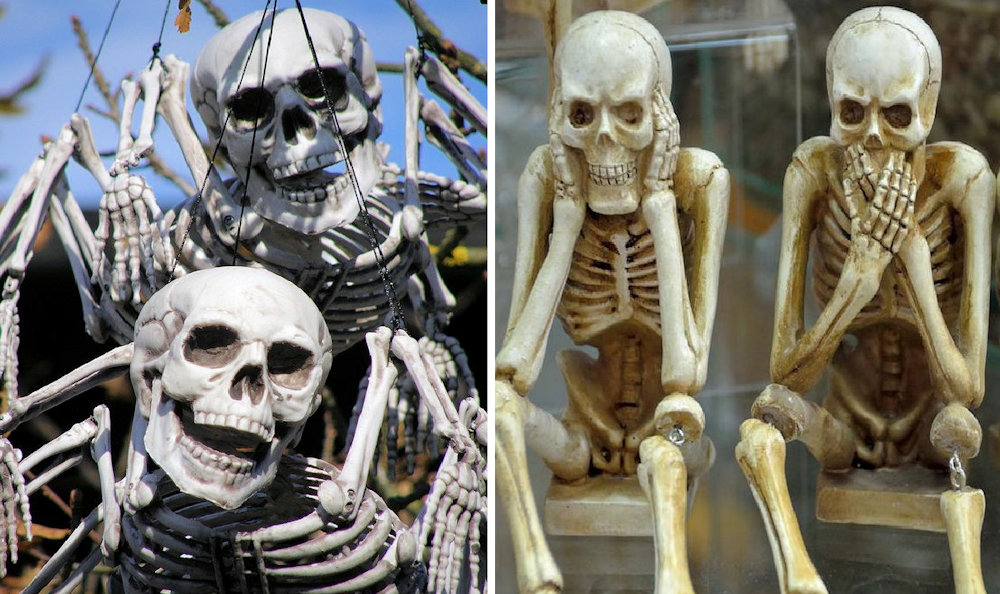
Skeletons
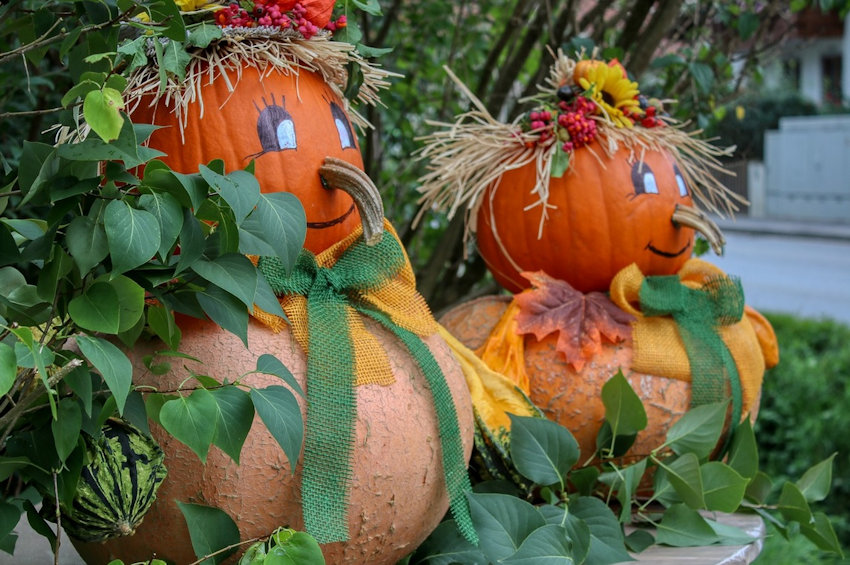
Scarecrows
Pathway Lights
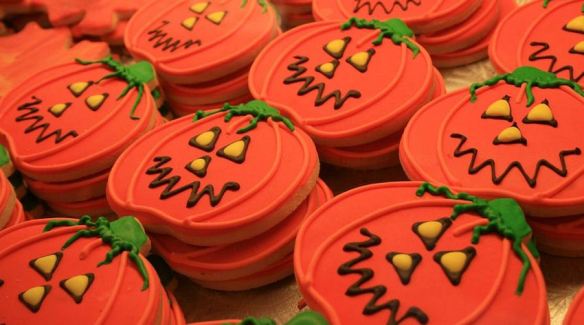
Pumpkin Personalities
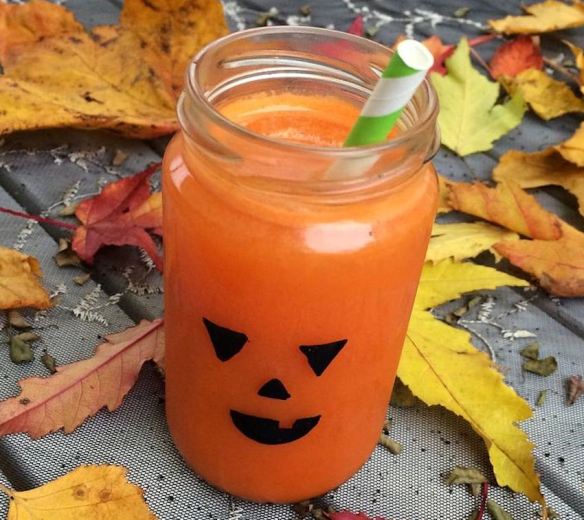
Halloween Beverages
Day of the Dead
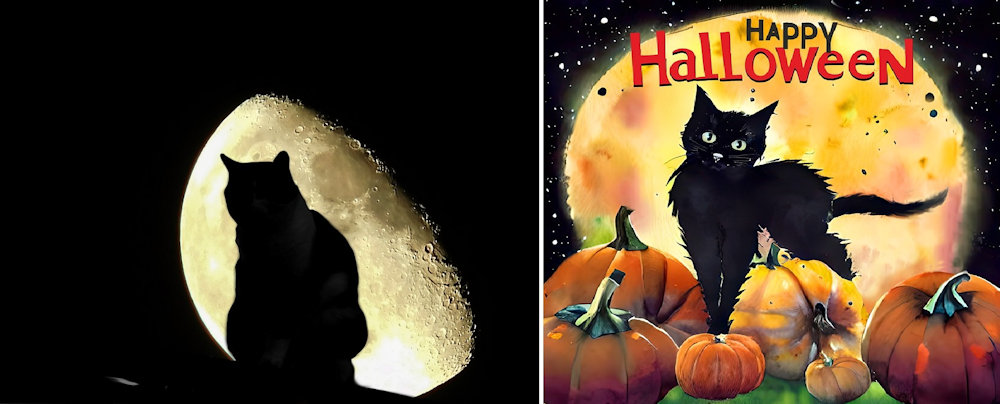
Cats & Full Moons
Pumpkins & Vines
Halloween Displays:
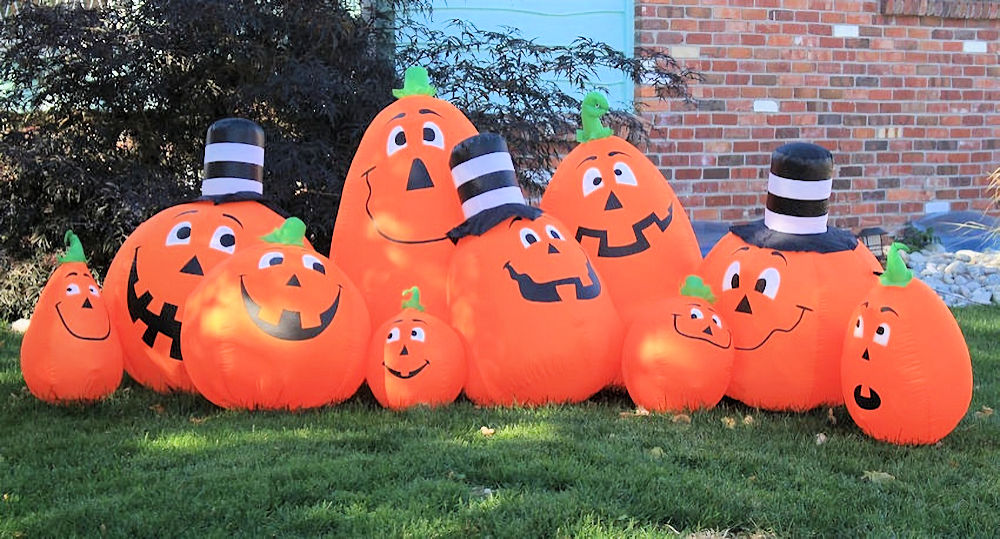
Nice – Pumpkin Patch Family
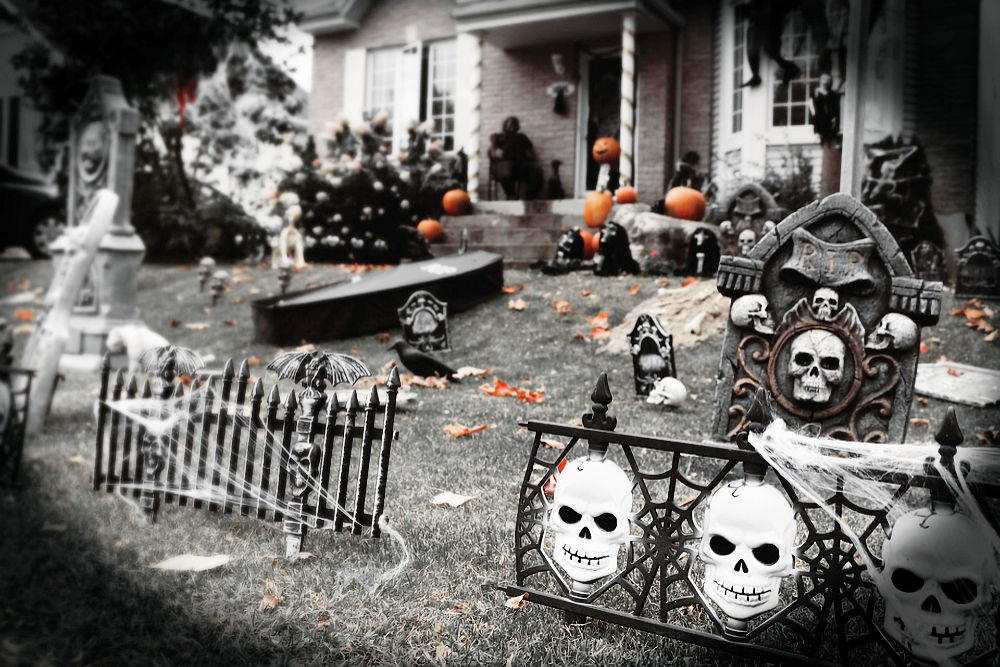
Naughty – Graveyard
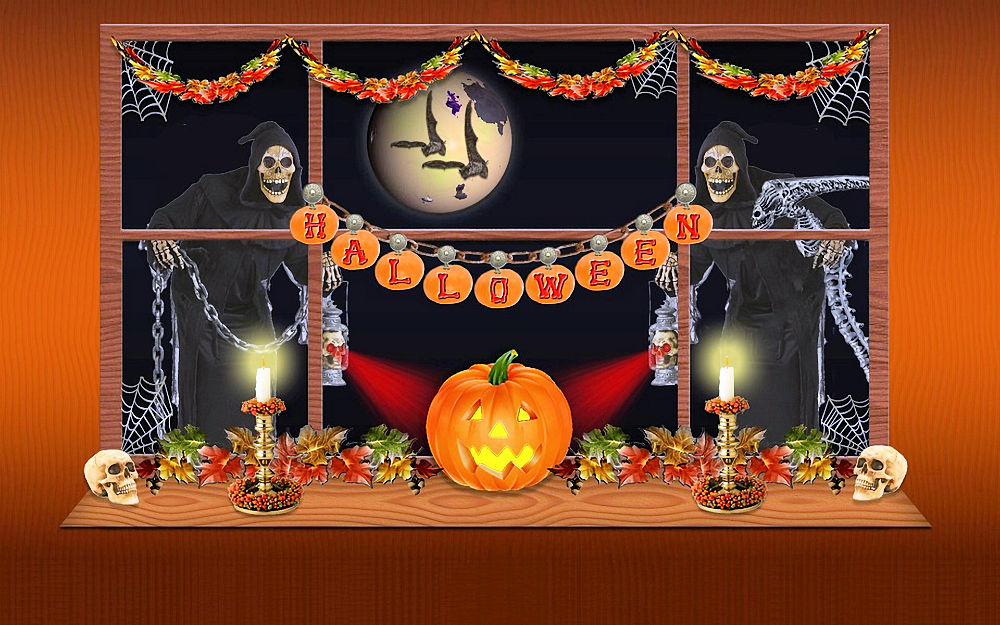
Naughty & Nice – Interior & Exterior Display
Naughty & Nice – Ghostly Pumpkin Family
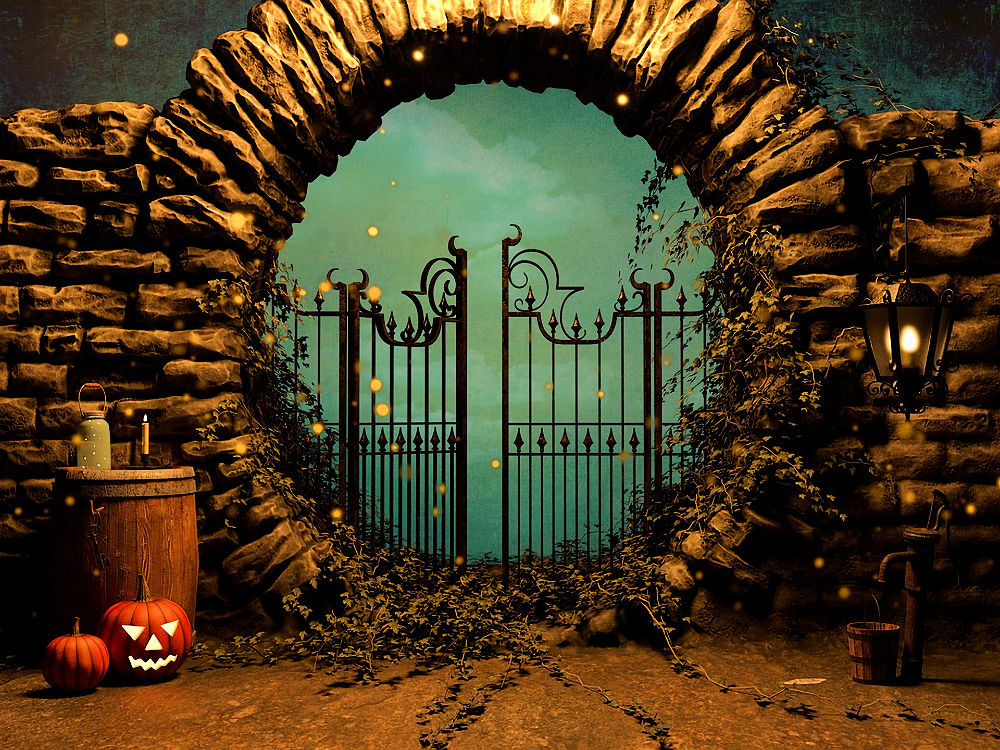
Naughty & Nice – Gated Entry
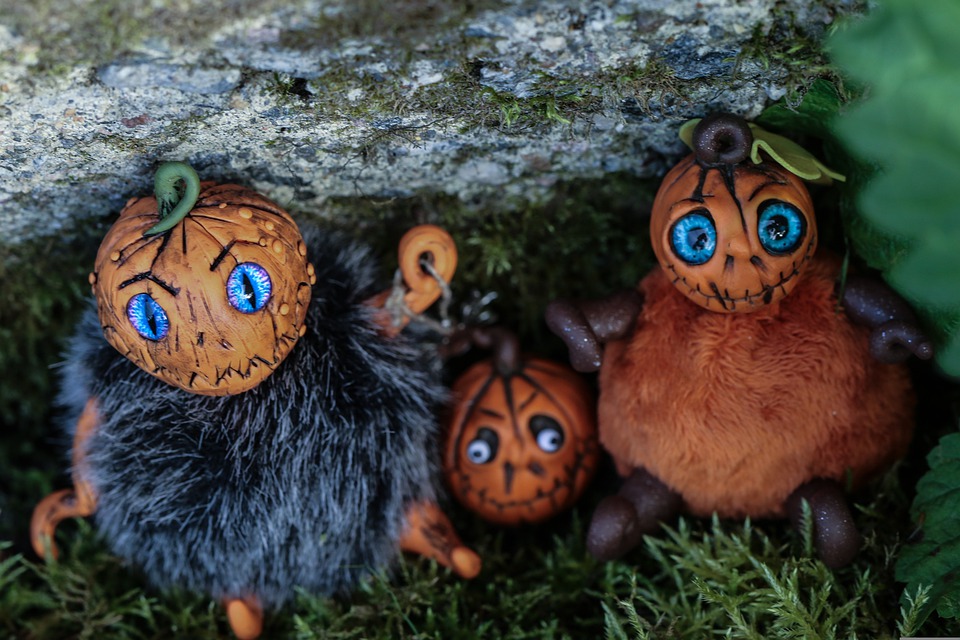
Naughty & Nice – Pumpkin Creatures
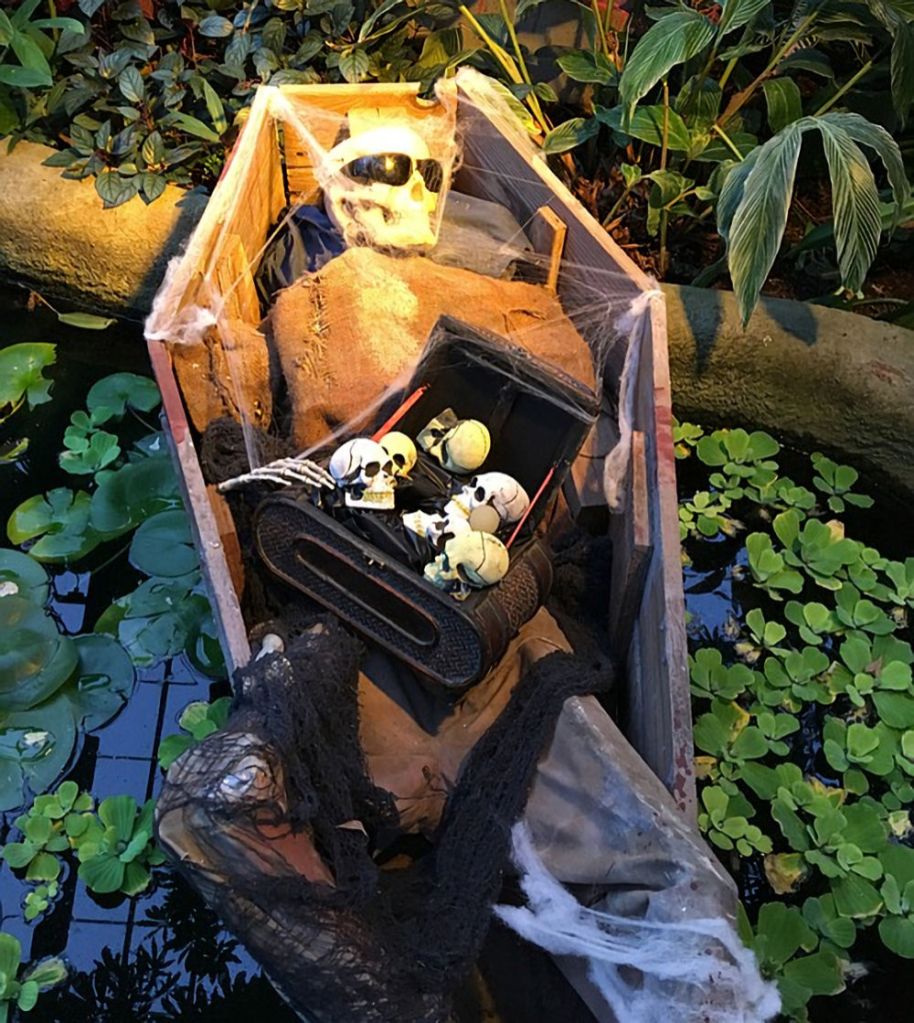
Naughty & Nice – Sunbathing Skeleton
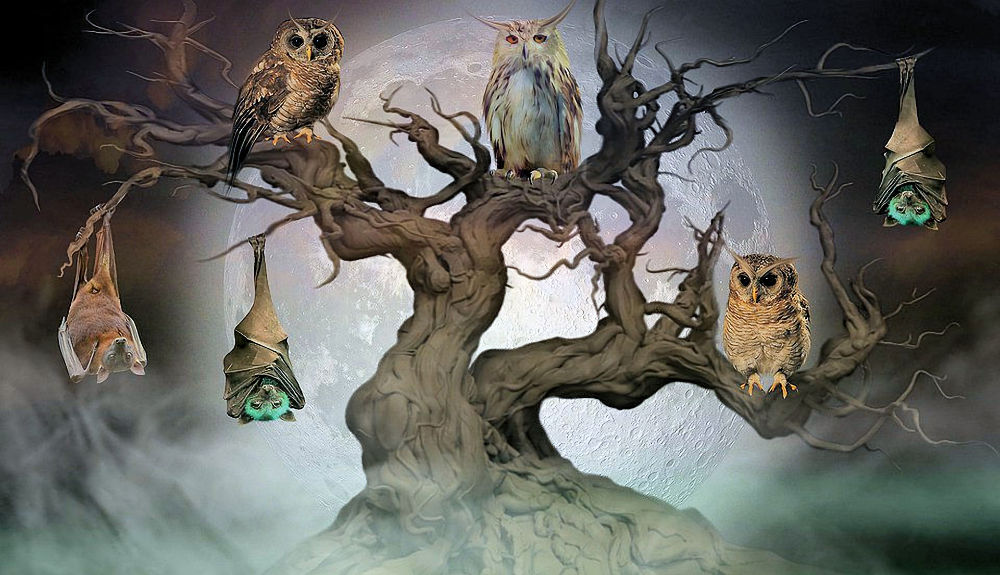
Naughty – Watchful Tree
I hope you have found some ideas to awaken your Halloween spirit. (Pun intended.) Now, you have a decision to make … What will it be – Naughty or Nice? I look forward to reading your answers in the comments section. Thanks for reading!
Illuminated by candles, jack-o-lantern carving is believed to date back to 19th century Ireland. Much like gargoyles, the frightening carved faces were meant to keep evil spirits away, while also celebrating Halloween and the end of the harvest, also known as Samhain.
Mr. & Mrs. Squash
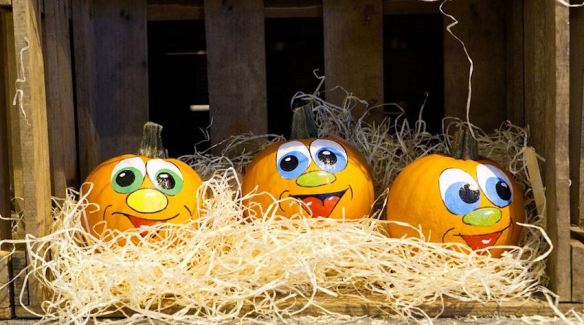
If carving is not in your skill set, painted or hand drawn designs can be applied to real or artificial pumpkins with very little effort. Because they are not carved, they will last throughout the fall, including Halloween and Thanksgiving.
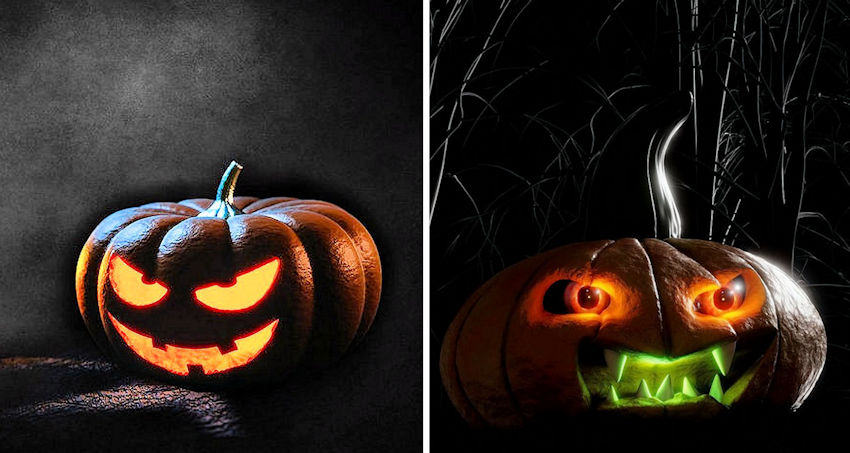
Basic Carving
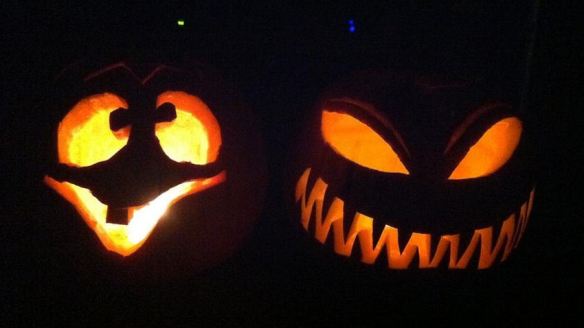
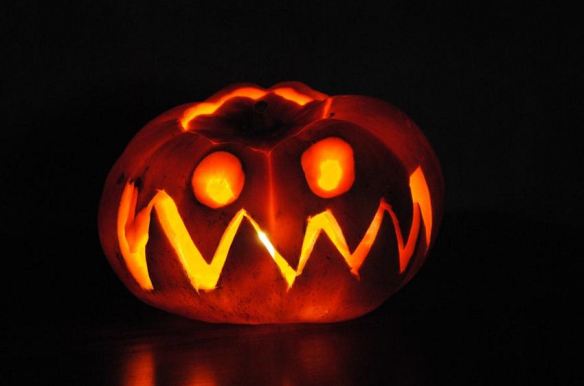
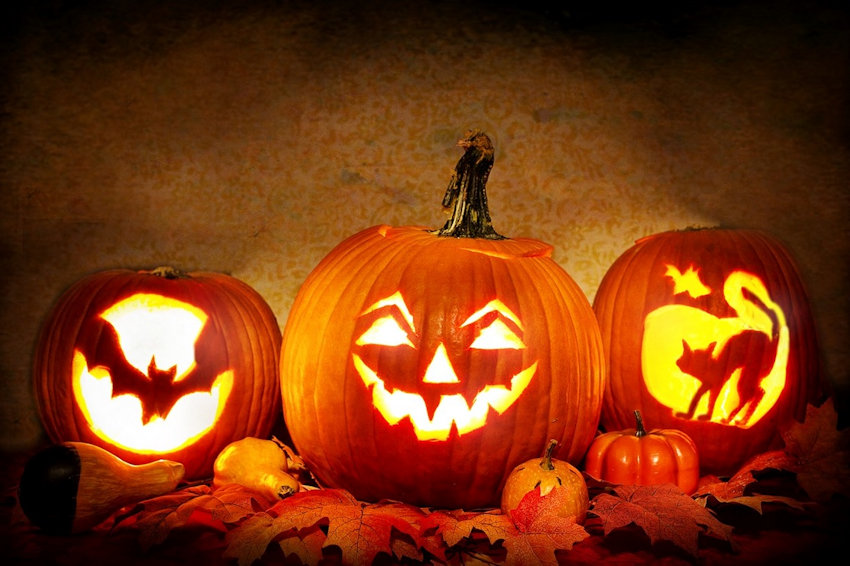
Most carved pumpkins have eyes, a nose, and a mouth. The shapes and angles determine the expression. The nubby teeth, in the left photo, create a friendly face for young children. On the right, glowing light and mysterious fog take a simple carving to the next level.
Accessorizing
This fashionable character is camera-ready for the next Tim Burton film. The black-outlined carvings are an unusual touch, and the hat gives this pumpkin lots of personality.
Devilishly Handsome
This carved pumpkin owes its devilish good looks to the absence of a nose. That one little detail, plus the intensity of the light within, gives him a more ghoulish appeal. The orange skin has been removed from the teeth to create a fiery translucency.
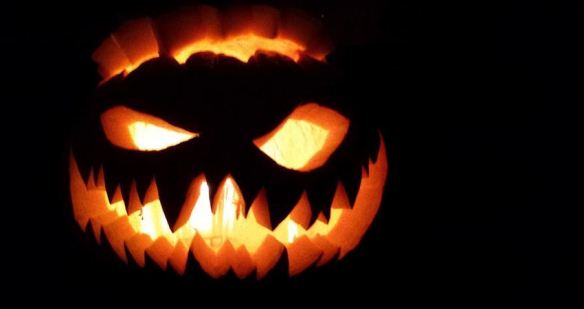
Fierce and Fabulous
Jagged teeth, angled eyes and an eerie glow make this pumpkin a formidable character.
Glowing Eyes in the Darkness
Visitors won’t stay long in the presence of these disembodied faces. LEDs produce high intensity light, which flicker like candles and may also change color.
Sinister Intentions
Choosing a short squat pumpkin sets the stage for these menacing characters. The one on the left appears to be glaring and possibly snickering at viewers. The other has fleshy, bloodshot eyeballs highlighted in a creepy orange light. Glow sticks produce softer, otherworldly light in a variety of colors.
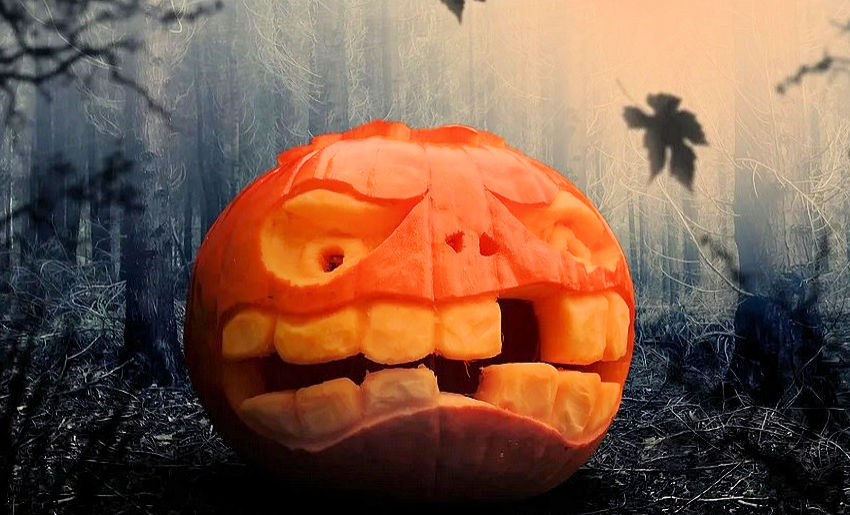
Anger Management
Maybe the tooth fairy forgot to leave him money, or perhaps his dentist is on vacation. We may never know why he is so angry, but the message is loud and clear!
Good Mother or Cannibal?
Wild animals often carry their young by the scruff of the neck. Since the teeth are rounded, and the little one does not look frightened, I think she is a mother protecting her baby. What do you think?
Sweet Kitten
The soft rounded features on this gentle kitten create an adorable expression.
Feral Cat
This adult feral cat hisses in warning, driving everyone away.
Monsters Under the Bed
Most children believe there is a monster under the bed or hiding in the closet. This monster reaches out to grab passersby if they get too close.
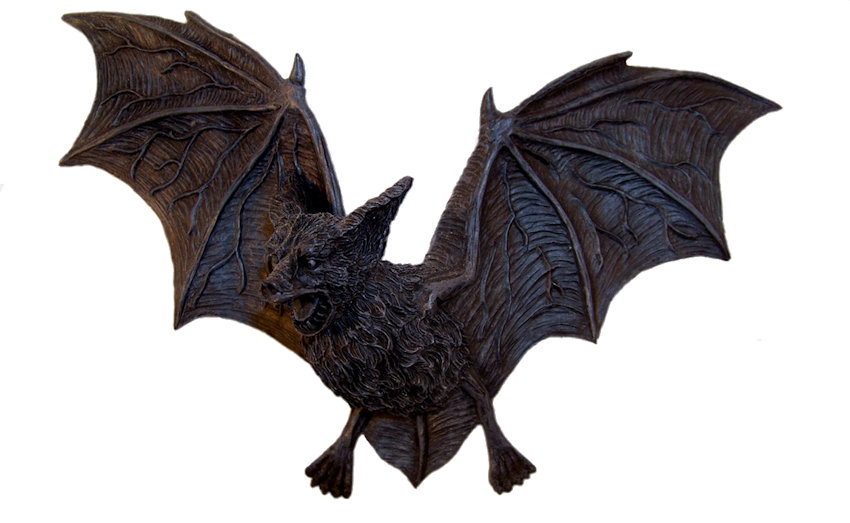
Playful Bat
This cute bat reminds me of the movie, “The Little Vampire.” The orange skin had been peeled off the bat to create bold contrast and to achieve a translucent effect when lit.
Things that Go Bump in the Night
Vampire bats, black cats and scary faces are all traditional Halloween decorations.
Nightmare before Christmas
Tim Burton fans will recognize Jack Skellington, the Pumpkin King. The stitched mouth and curved brow lend an ominous quality to his expression.
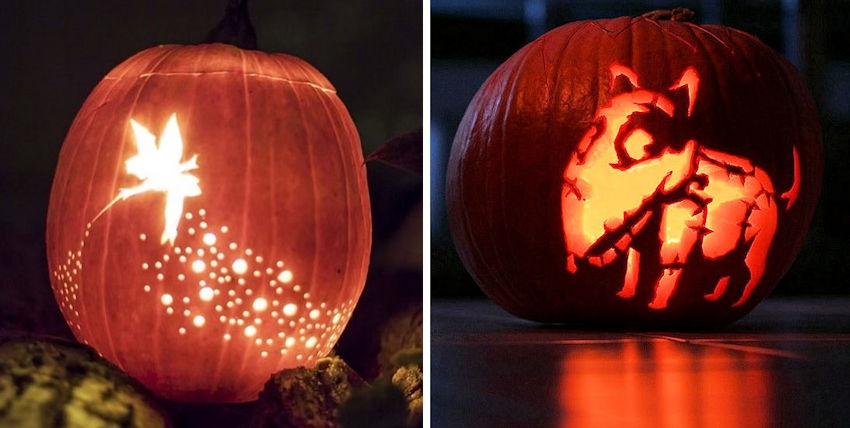
Tinkerbell & Frankenweenie
Disney’s Tinkerbell and Tim Burton’s Frankenweenie are sure to charm your guests.
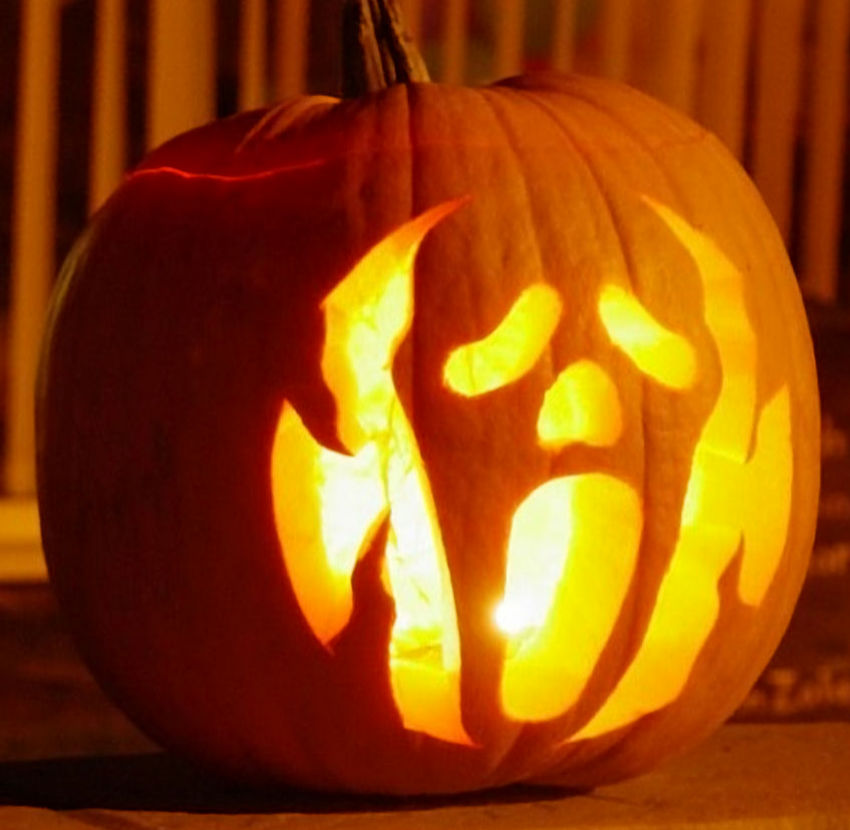
Ghostface
From the Scream movie franchise, this disturbing face may haunt your dreams.
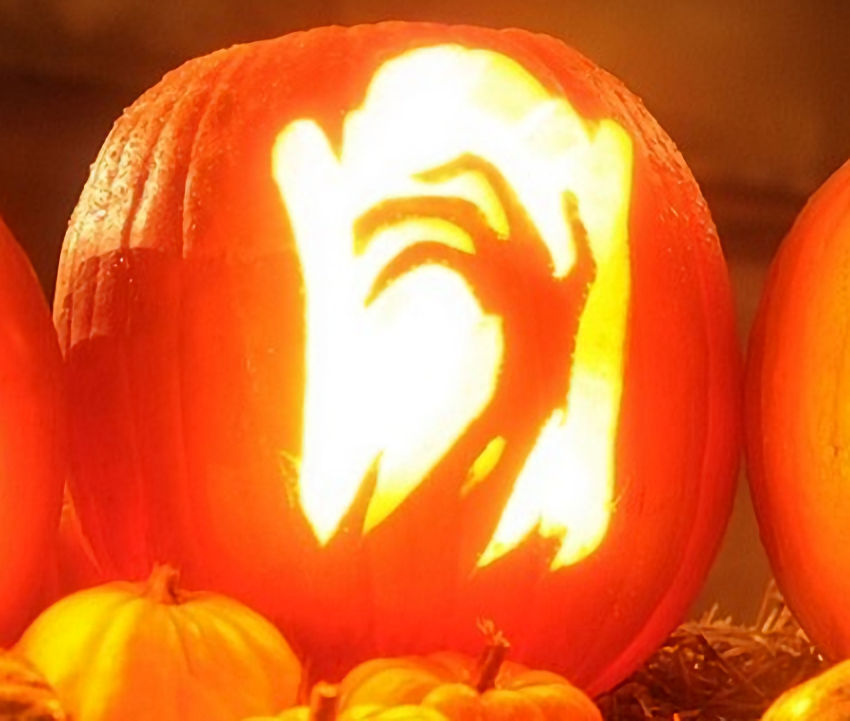
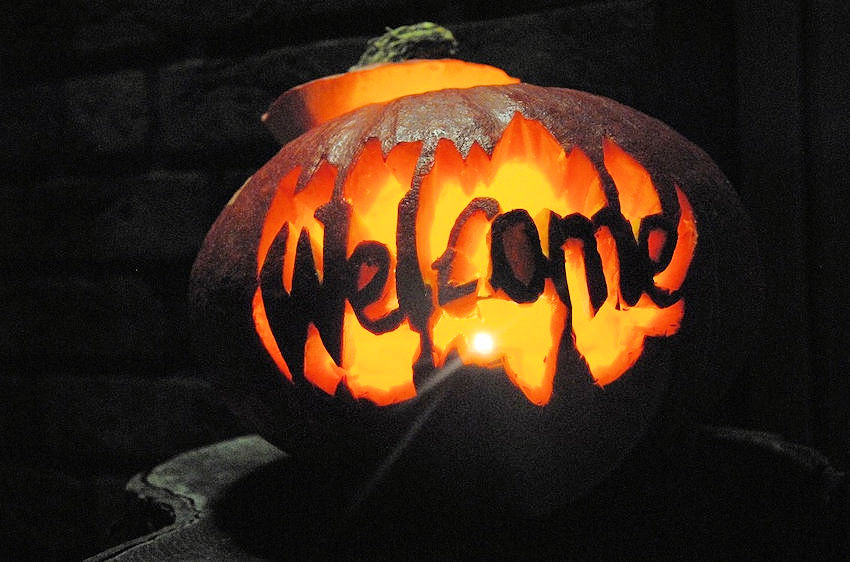
Mixed Message
It says welcome, but the jagged cuts look more threatening to me, as if to say, “Get out!”
Day of the Dead
The intricate details of this skull are remarkable. The orange is the perfect background to contrast with this floral skull, a perfect specter for the Day of the Dead.
Monsters Inc.
I am not sure what kind of monster this is, but my what big teeth he has!
Gourd Creatures
These creepy critters have human faces, with thick vines for arms and legs. The wide-eyed stare and twisted fingers look menacing, as if they might spring forward upon unsuspecting viewers.
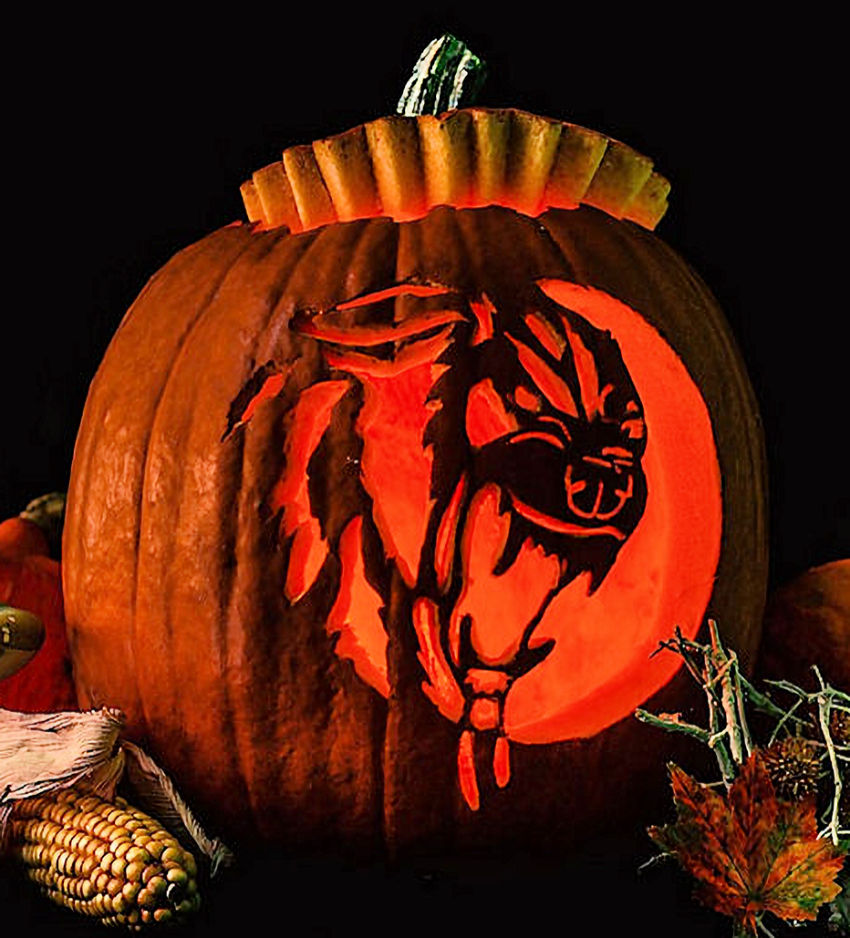
Fire Breathing Dragon
This dragon was carved from pumpkin, and the artfully arranged flowers and leaves resemble flames. This multi-layer composition offers textures and fine details, harmonized by the many shades of orange.
Let’s Go Wildcats
To create the delicacy of this fierce wildcat, a piece of pumpkin was carved lying flat. The finished cat was reattached to the round opening, and any cut lines were carefully concealed.
Halloween Wishes
I hope you have found a few inspirational ideas for your Halloween pumpkins. Which design is your favorite? Do you like to carve or paint your pumpkins? Please let me know in the comments. Thanks for reading!
When it comes to Halloween decorating, skeletons are featured favorites.
T-Rex Skeleton
Terrifying dragons and dinosaurs are a few of the latest décor entries.
Saber Tooth Tiger Skeleton
Wild dogs and Sabre Tooth tigers are sure to follow.
Close-Up Rooster Skeleton
What about ferocious chickens? Ferocious may be a bit of a stretch, but “cocky” is a well-earned title.
Confident & Cocky
At a farm near my home, I saw a defiant rooster face off against a slow-moving minivan. That bird crowed at the top of his lungs. I wonder if roosters use curse words. The bird won the battle of wills! Apparently, roosters always have the right of way. lol.
Unpainted Rooster Skeleton
There are many Halloween bird skeletons, including vultures, crows, ravens, and ducks. When I saw this rooster, I knew I had to do something to make him stand out in a crowd.
How to Paint a Rooster Skeleton:
Inspiration
A rooster’s crown and wattle tend to be red, but anything goes for the feathers.
Inspiration
Because my favorite color is blue, I chose inspirational photos accordingly, but you can choose whatever colors you prefer.
Supplies
Supplies:
Rooster Skeleton (12-1/2” high x 11-1/2” long x 7-1/2” wide) sold at JoAnn Crafts
Acrylic Paints – red, black, metallic sapphire blue, & metallic periwinkle blue
Paintbrushes
Painted Head Details
Brush red paint onto both sides of the two most recognizable traits of roosters, the comb and wattle. Darken the eye sockets with black paint.
Unpainted Rooster Tail
As you might imagine, roosters are very proud of their plumage. Those tail feathers should be bold and colorful to make their presence known and to impress the ladies!
Painted Tail – Option 1
Paint the tail black, which tends to be the most common tail feather color.
Painted Tail – Option 2
Paint the tail a combination of metallic green and metallic blue.
Painted Tail – Option 3
Paint the tail metallic blue. I love the iridescent blue feathers shown in the two inspirational photos. What bothered me about the skeleton was the five bones in the tail, which resemble a metallic hand.
Defining the Tail Feathers
Carefully apply a line of black paint down the length of each tail bone and angled short strokes to create a feathered appearance.
Side by Side
Minimally painted head details versus fully defined tail feathers. If you are satisfied with your results, you could stop at this point. Additional steps below will give the rooster a more frightening appearance.
Painted Eye Detail
Outline both eyes with red paint. This changes the entire expression with a few easy strokes.
Eerie Glow from Within
Paint the inside of the ribs with metallic periwinkle paint. Many Halloween skeletons come with LED lights hidden inside to illuminate the rib cage. This one did not come with lights, but the metallic paint produces a similar visual effect.
Joint Details
Add red on each of the ball joints for the wings and the knees.
Unpainted Rooster versus Completed Rooster
As you can see, this rooster has come a long way from its humble beginnings. At a distance, you can easily recognize it, and the extra painted details catch the light, drawing your attention to this demanding and amusing creature.
For more ideas, please click here to read last year’s post on skeleton painting.
Have you wondered what it would be like to be a superhero, a celebrity, or a movie monster? Halloween opens the door to adventure. The stage is set, the orchestra is warming up, and an audience of admirers eagerly awaits your arrival. Who or what will you be? Let us find out together…
Basic Costume Building Blocks:
Mask
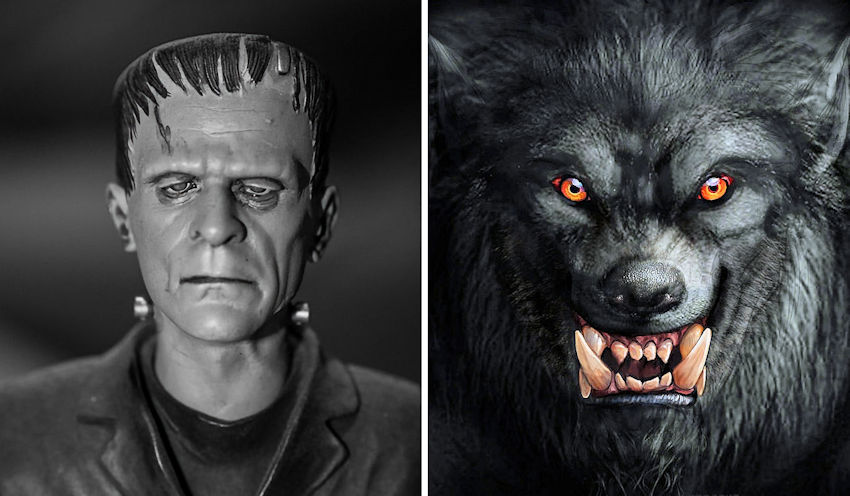
Sometimes all you need is a great mask! Frankenstein’s Monster & the Wolfman are classics. Monster gloves would be nice additions to complete the look. The only downside is that masks can be hot to wear. Be sure to apply character-appropriate makeup to stay in character without it.
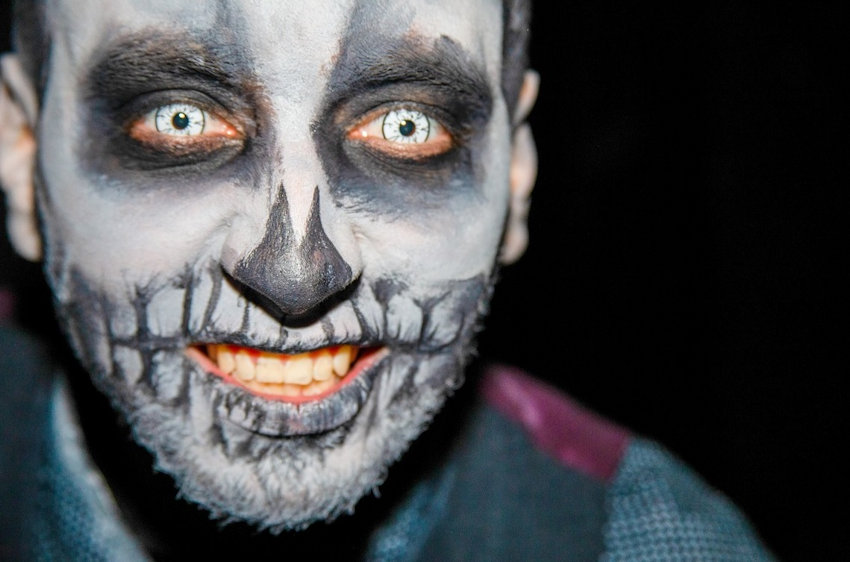
Makeup
Makeup tutorials make it easy to create any character. Be sure to read the makeup labels before you buy to avoid skin irritation. To elevate the creepiness factor, the man in the photo above is wearing white monster contacts in his eyes.
Costume
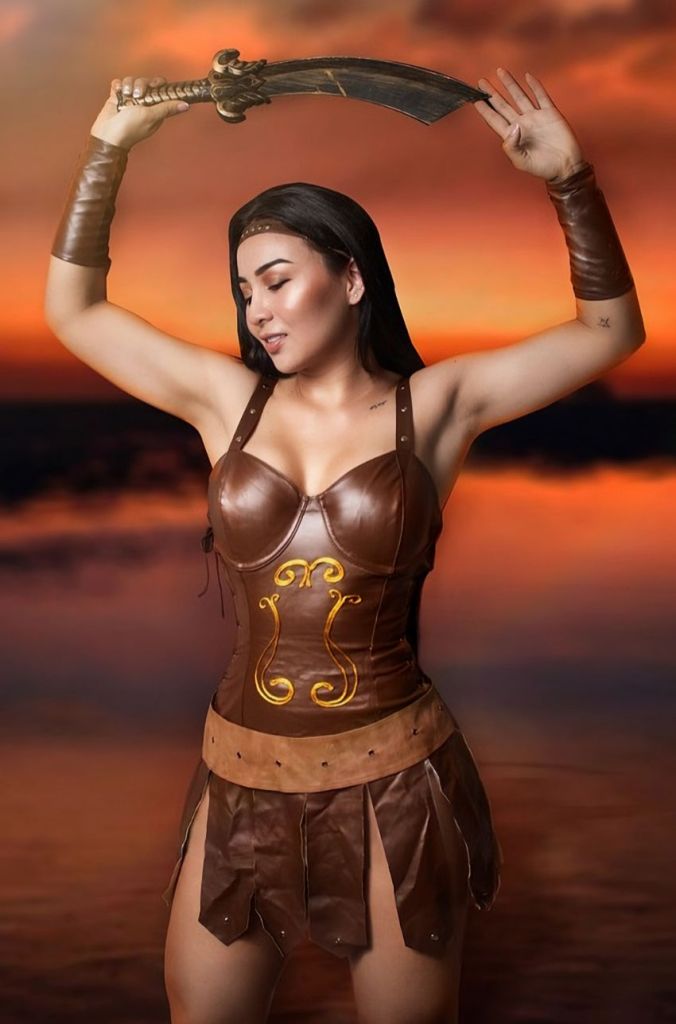
Whether you prefer DIY or readymade, the key to your success is a great costume. Like the idea of “one and done?” All you need is a one-piece dress to become Zena Warrior Princess. Confidence is an absolute necessity! The boots, wristbands, and a weapon are optional.
Accessories
When creating a character, never underestimate the importance of accessories. Can you imagine Indiana Jones without his hat and whip? Without fangs, Count Dracula is just a guy in a tuxedo. (lol)
Attitude
Musketeers cloak themselves in courage, honor, and dedication to their king. Think about how your character thinks, speaks, and acts and then exhibit those traits. Have fun with it!
Cast of Characters:
Mermaid
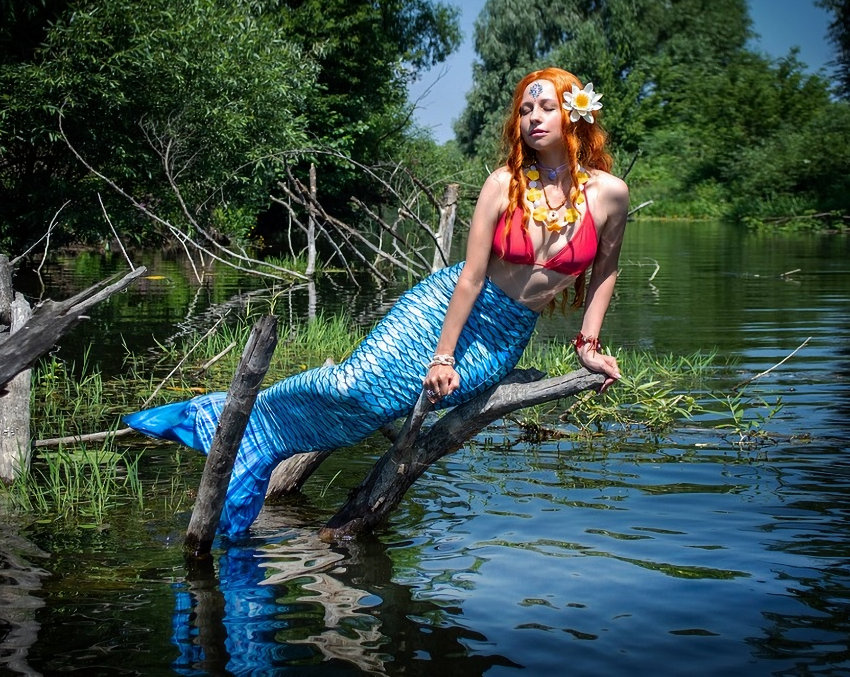
If you own a bikini top, you are halfway to a mermaid costume. All you need is the tail. Make sure you can comfortably walk and adjust the tail as needed.
Butterfly
This sexy ensemble requires a one-piece black swimsuit and butterfly wings. Antennae are optional. For a less revealing version, wear a black jumpsuit or top with leggings.
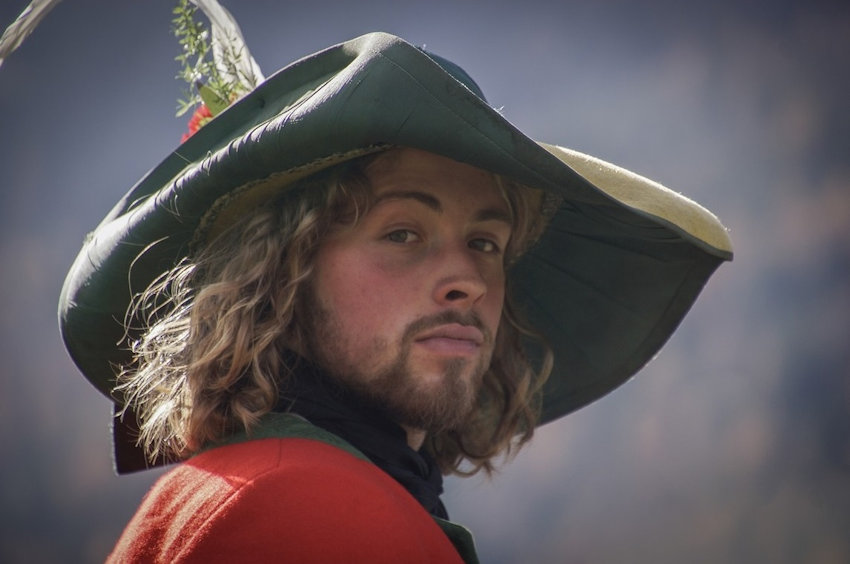
Scarecrow
The Scarecrow from the “Wizard of Oz” is a classic favorite. All this costume requires is a great hat and handfuls of straw. Any plaid shirt will work, and do not forget to smile and move as the actor did in the original movie.
The Joker
This is a perfect recreation of the 1960’s television version of the Joker, played by Cesar Romero. Although he is a criminal, this early version of the character is amusing and lighthearted compared to his diabolical present-day counterpart.
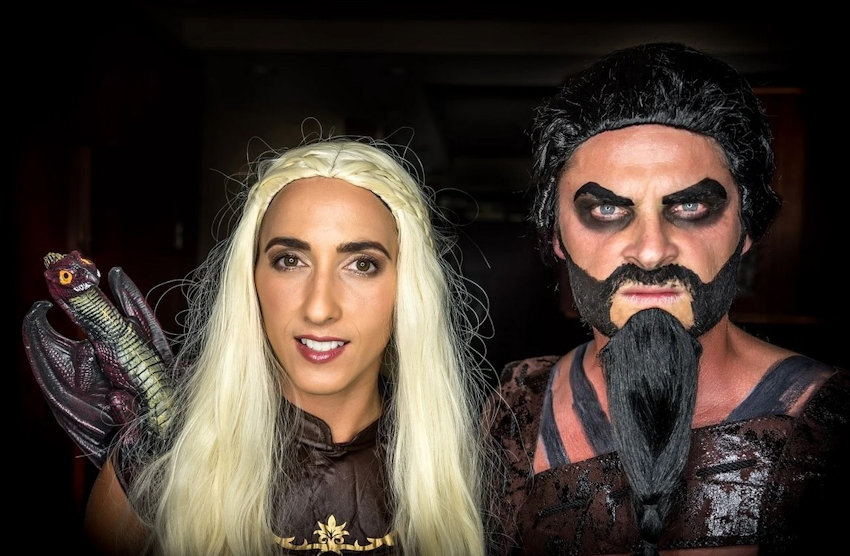
Game of Thrones
True to the “Game of Thrones” characters, this couple successfully combined, costumes, makeup, attitude, and accessories, including the little dragon looking over her shoulder.
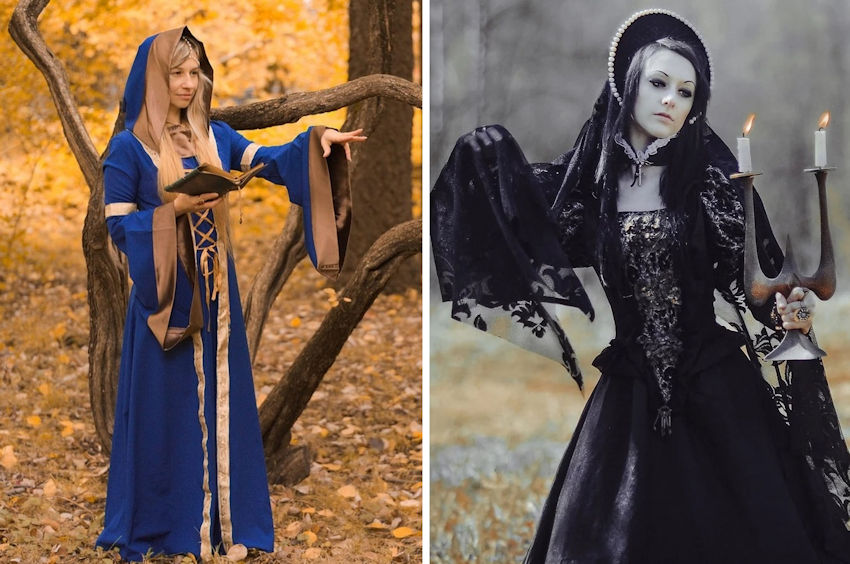
Medieval Sorceress & Gothic Witch
In the Wizard of Oz, whose side are you on – Glenda the Good Witch or the Wicked Witch of the West? Actors enjoy playing the villain to break out of their comfort zones in favor of a walk on the wild side.
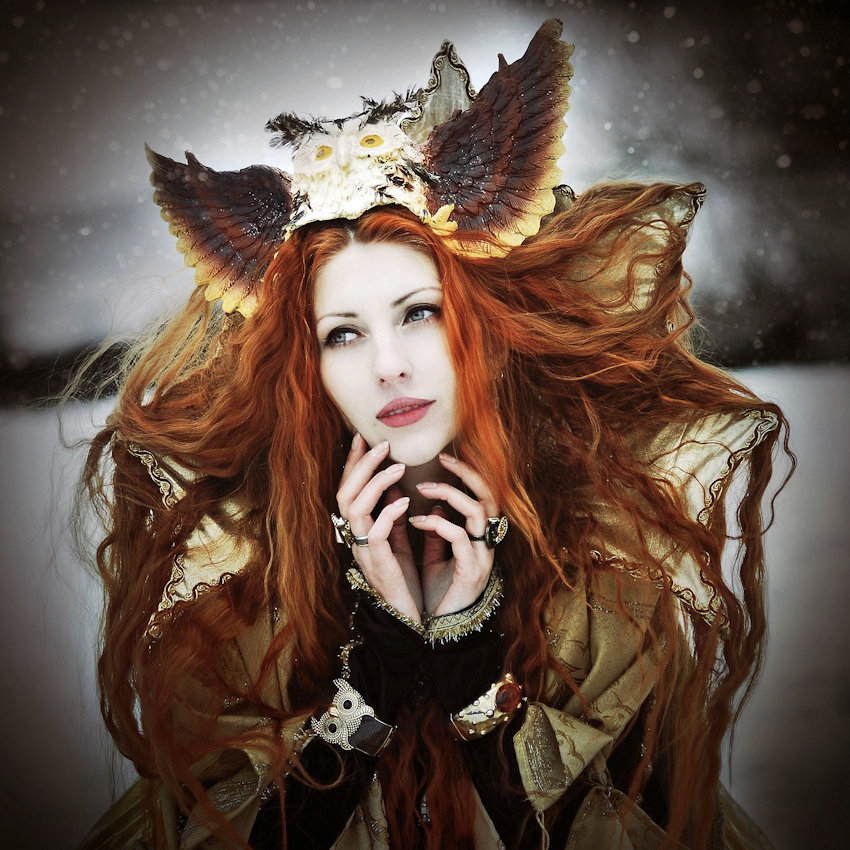
Fantasy Owl Woman
You might want to create a completely original character, such as this owl woman. Like a living sculpture, she is beautiful and intriguing.
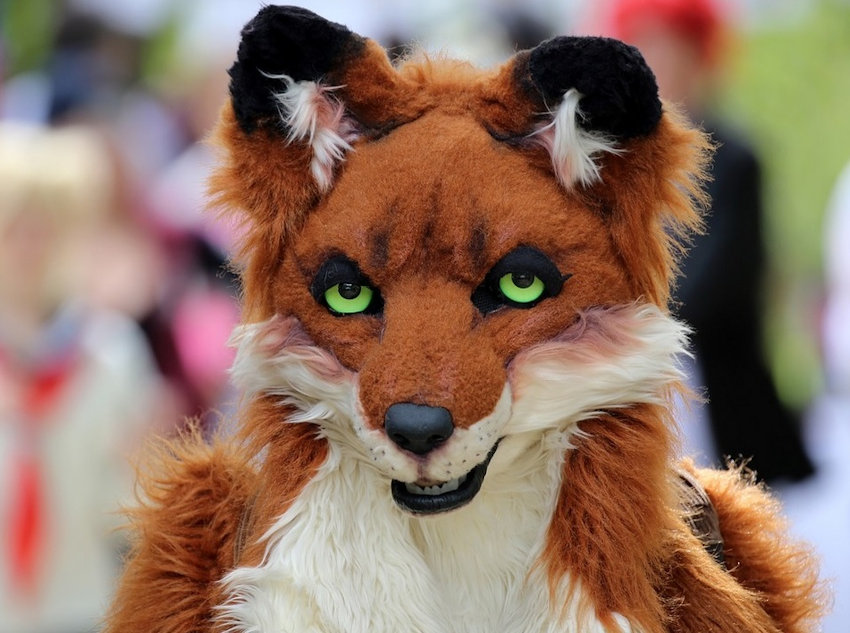
Red Fox
Those mesmerizing green eyes draw you in for a closer look. The details are incredible. The mask blends seamlessly with the costume, and the eye openings are cleverly hidden in the corners of the fox’s eyes. It is utterly amazing workmanship.
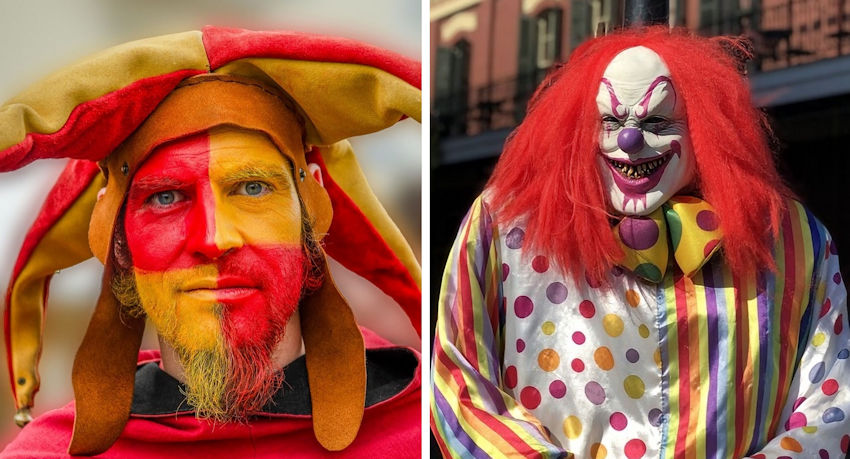
Court Jester & Evil Clown
If you want to be a clown, you have a decision to make…Will you be an amusing entertainer like a court jester? Or terrifying like Pennywise in Stephen King’s “IT”?
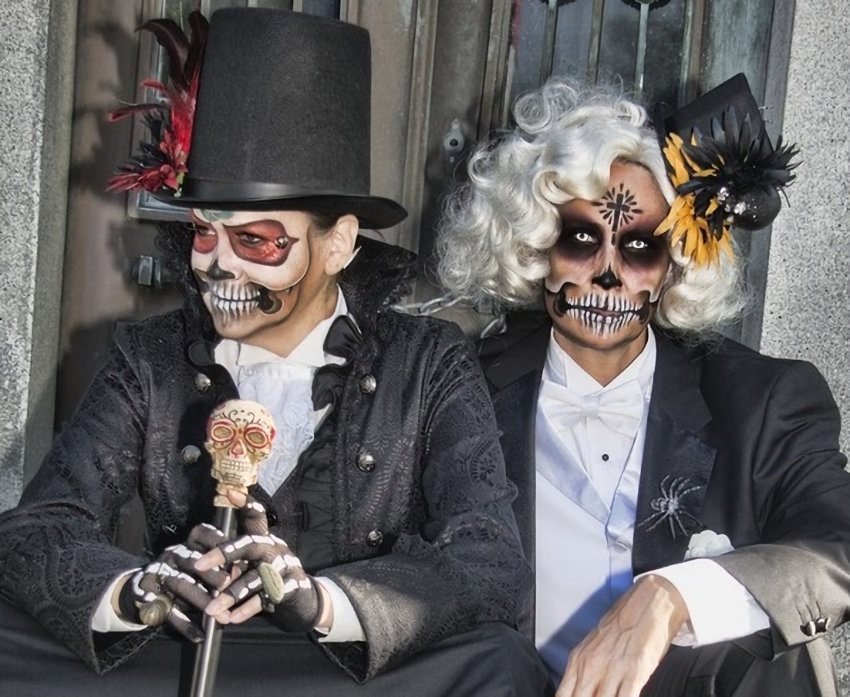
Skeletons
There is an extraordinary level of anatomical detail in the skeleton makeup. Look at those teeth! And the half-masks are an illusion achieved through expertly applied makeup! The white contacts, worn by the skeleton on the right, produces a piercing cold stare that feels uncomfortable, even from the photo.
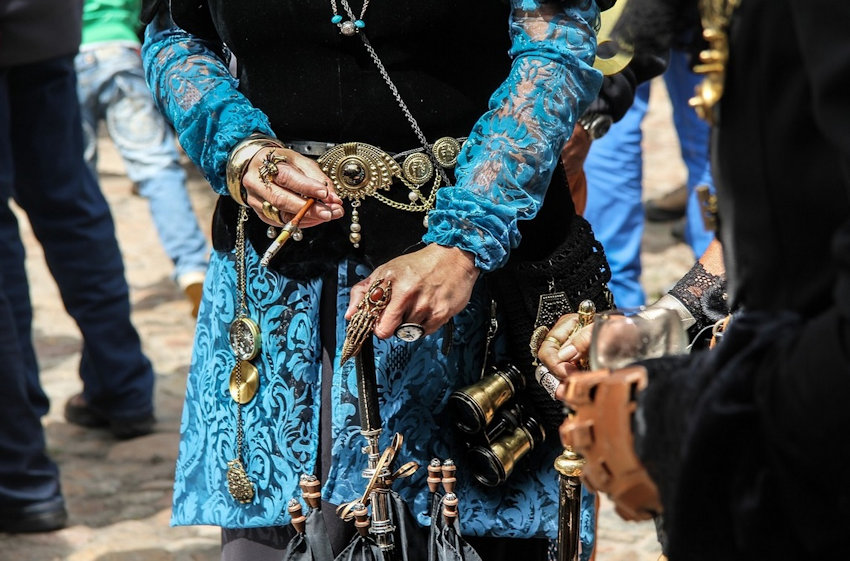
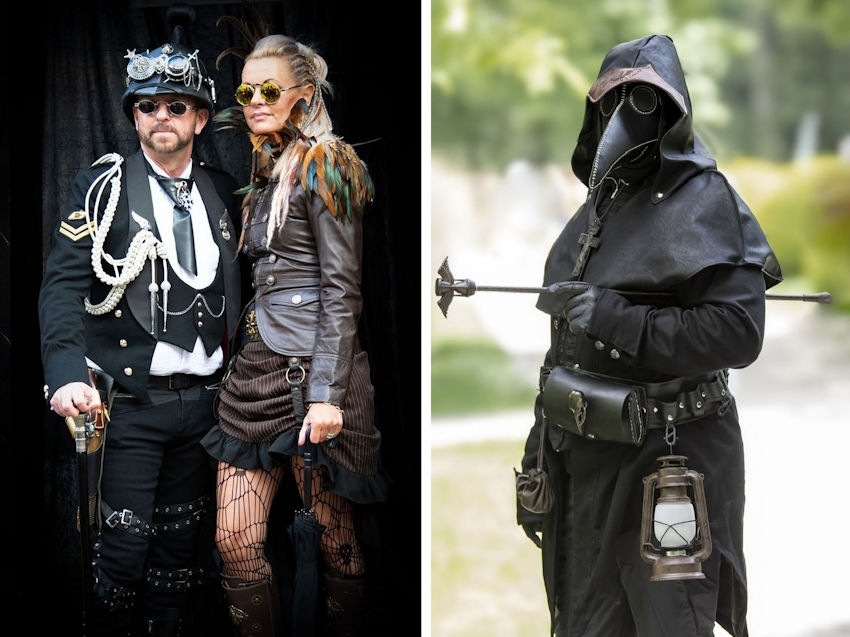
Steampunk & Plague Doctor
The secret to a steampunk costume is incorporating metallic details, such as studs, chains, gears, and anything else inspired by 19th century mechanization. The Plague Doctor on the right is terrifying! How could he be a medical professional? He does not appear to be human!
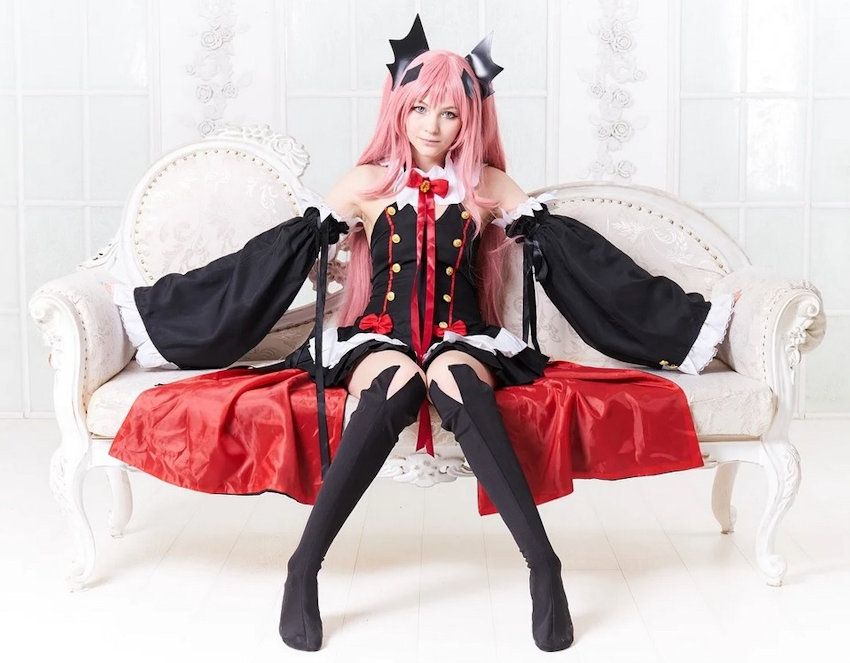
Anime
Every detail of this costume, from the bows in her pink hair to the tips of her knee-high boots, is a shining example of anime.
Fantasy Princess
This costume is so beautifully coordinated. The color of the faux fox stole matches the colors in her dress. Intricate gold patterns are repeated on her dress, her jewelry, and the beads in her hair.
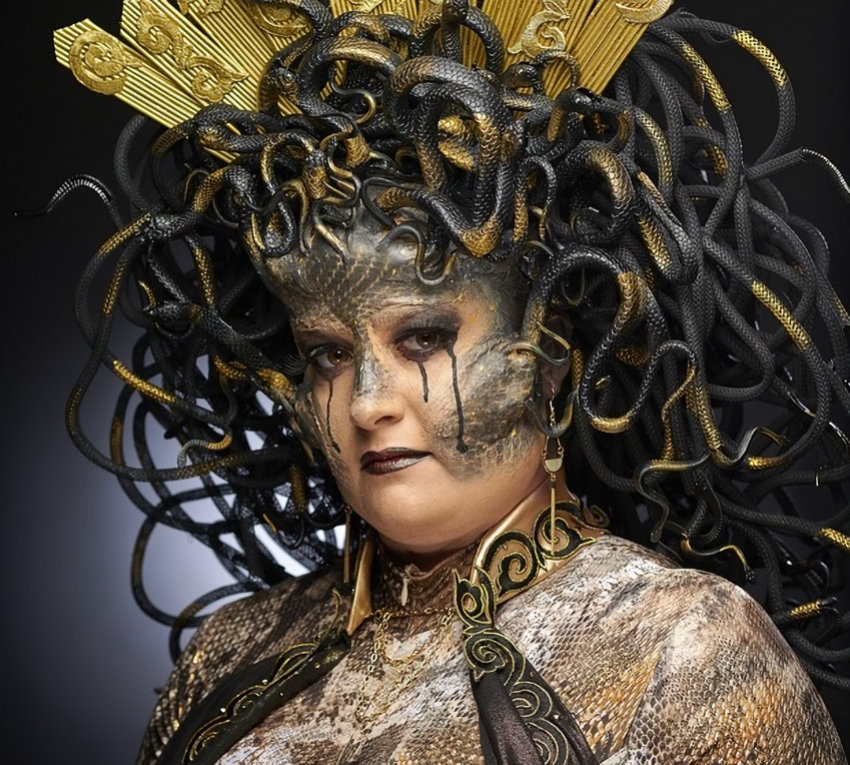
Medusa
Medusa have never looked so fierce and fabulous. Wriggling snakes form the headpiece, topped by a golden crown. The python print dress has snakelike scroll design accents. Special effects snakeskin patterned makeup creates the illusion of snakes emerging from her cheeks and forehead. Yikes!
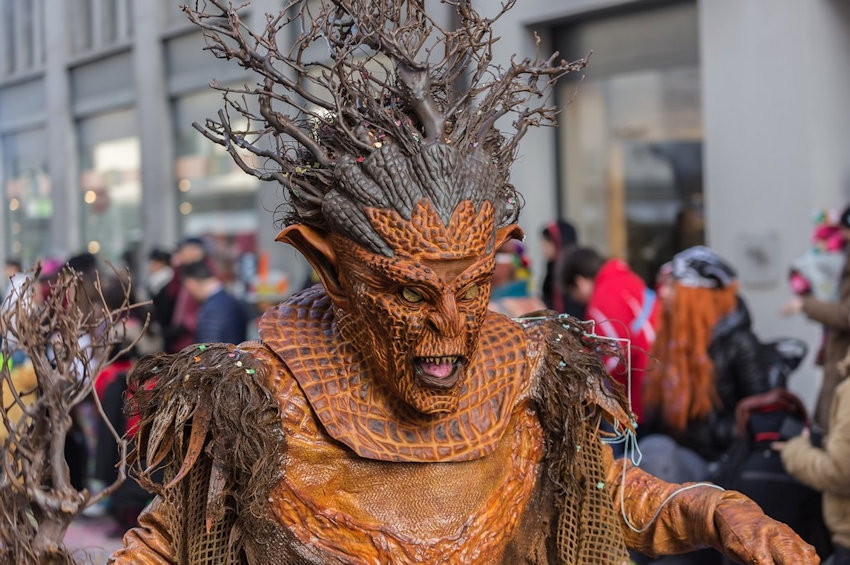
Reptilian Tree
What do you get when you combine a human, a reptile, and a tree? You get a fascinating creature covered in gnarly roots and raised scales, with a disturbing face and mysterious, unknown intentions.
Samurai Warrior
Psychological battles begin long before any physical confrontations. With this fear-inducing costume, potential opponents will choose to flee rather than trying their luck.
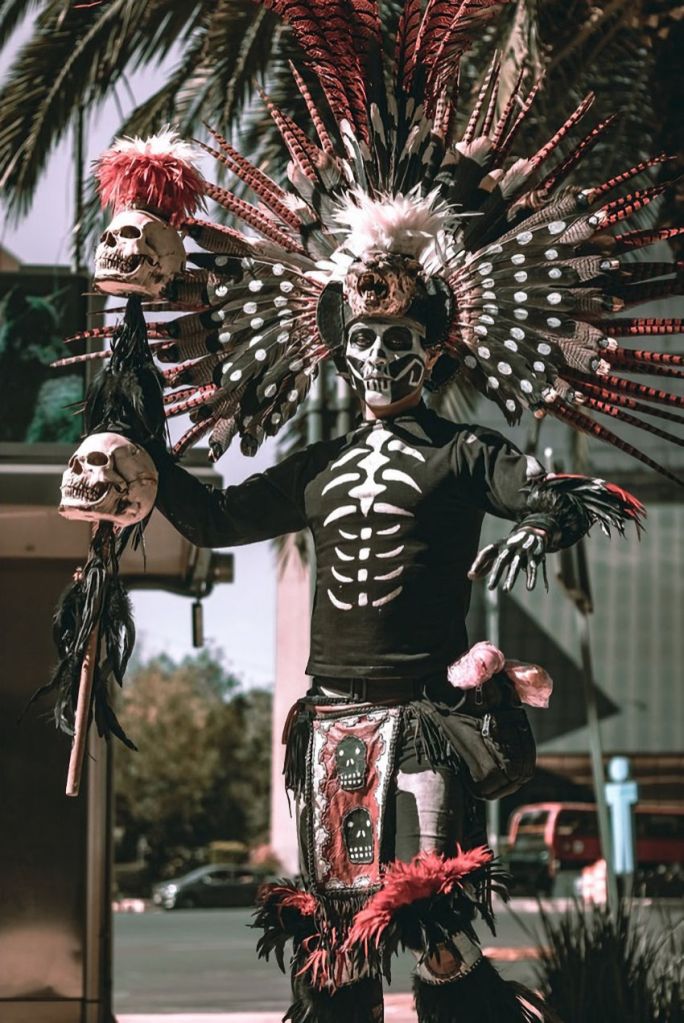
Day of the Dead
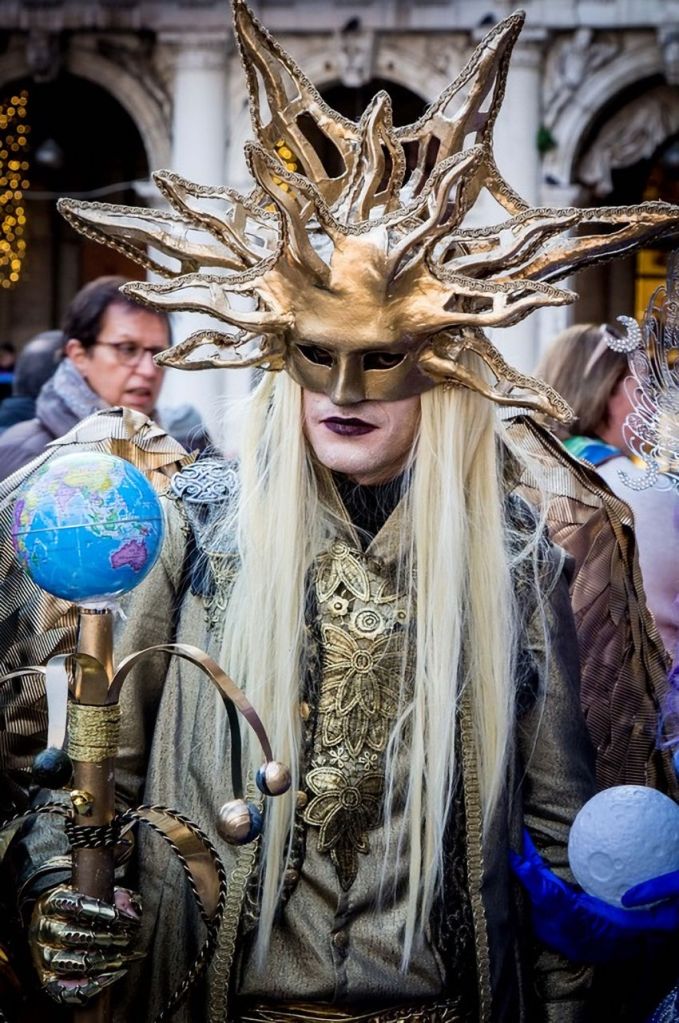
When it comes to Day of the Dead costumes, this man must be royalty. The elaborate feathered headdress, staff with life-size human skulls, and tricolor palette ensure he will stand out in a crowd.
Maleficent
This vengeful fairy has great magical powers and a commanding physical presence. The raven sitting atop her staff is a reminder of her connection to nature as protector of the moors. Is she thinking of something witty to say or deciding what to conjure up next? We are probably better off not knowing.
Lord of the Rings: Orc
Tolkien would be proud of this battle-ready orc. The distressed piecemeal garments, weapon in hand, hidden dagger in his boot, and defiant stance are hallmarks of this malevolent Lord of the Rings character.
Amazon Warrior
At first, the soft feminine garments and feathered headdress might lead you to believe she is a vulnerable native princess. But you would be wrong! The multi-pronged weapon, metal-studded glove, and cold calculating stare hint at the powerful fighting capabilities of this formidable Amazon Warrior.
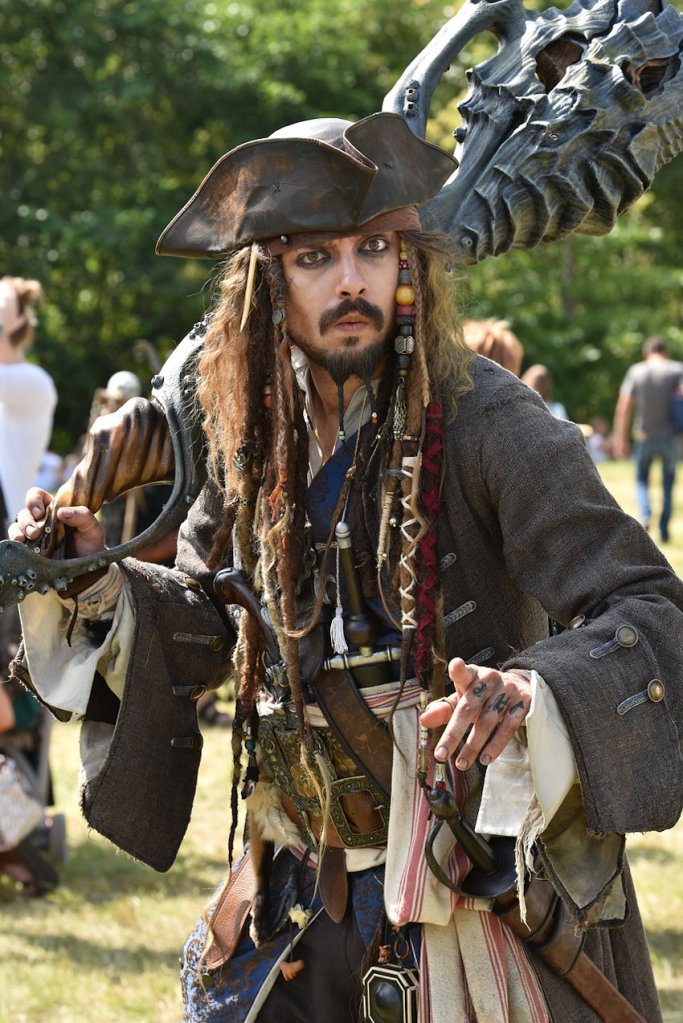
Captain Jack Sparrow
Captain Jack Sparrow is one of the most recognizable characters in the world, which means you need to get the details correct. Check out the tattooed fingers, the braided beard, and the weather-worn hat! All of Jack’s quirky mannerisms and facial expressions have been incorporated into this authentic performance. I wonder how often people request his autograph. Outstanding work!
Venetian Sun
In the “Masquerade” scene in Andrew Lloyd Webber’s Phantom of the Opera, the cast sings, “Look around there’s another mask behind you.” During the Venetian Carnival, just when you think you have seen the most exquisite costume ever made, a better one pops up behind it, leaving you awestruck.
Cosplay
Do you enjoy making your own costumes? Most of the extraordinary costumes shown in this post are from the world of Cosplay. There are competitions for best handmade costumes, and these people are incredibly talented. They take costumes to the ultimate level, often equally the wardrobes created for multimillion dollar films. It is fascinating to see, even if you are not into DIY. Enjoy!
For many, Halloween is the most wonderful time of the year. People go all out decorating their homes, and there is always something new to thrill and delight. Let’s look at some decorating ideas for designing the Halloween display of your dreams…or should I say nightmares?
Creatures of the Night:
Bats
Bats certainly have a way of making humans squirm. Keep your visitors on their toes by hanging bats upside down from tree branches, lightly swaying in the breeze on invisible fishing tackle.
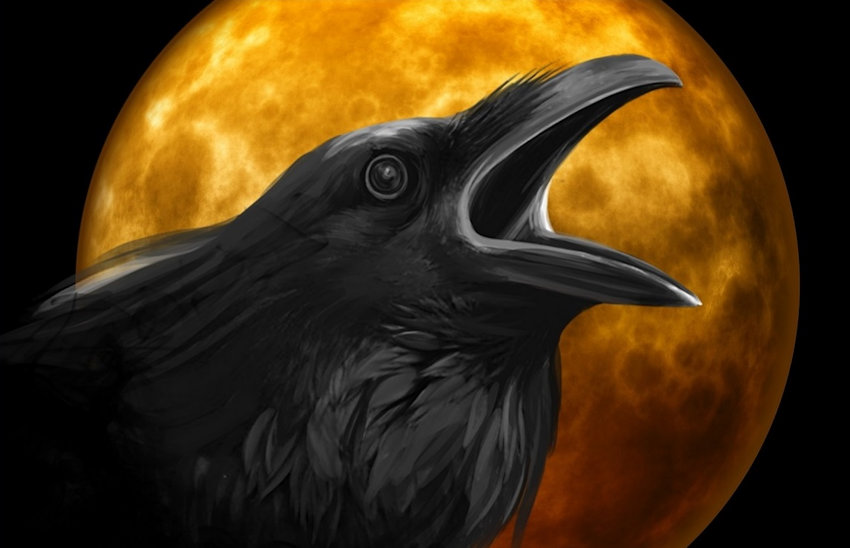
Crows
A crow’s habit of feeding upon dead animals and loud calls are bound to cause a shiver or two. Mount a couple crows on tombstones or in a prominent spot, such as atop a wall or the edge of your roof.
Owls
This predator silently soars across the night sky, seeing all with his glowing eyes. There are some motion-activated owls that turn their heads and hoot.
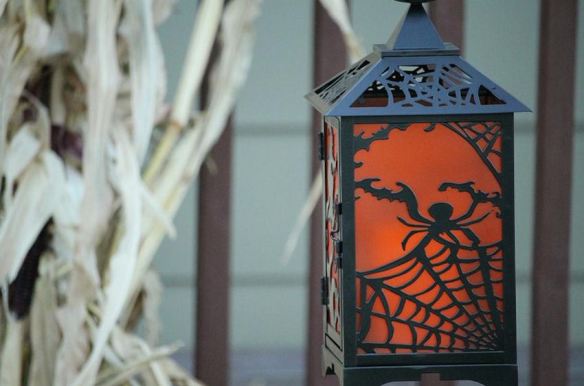
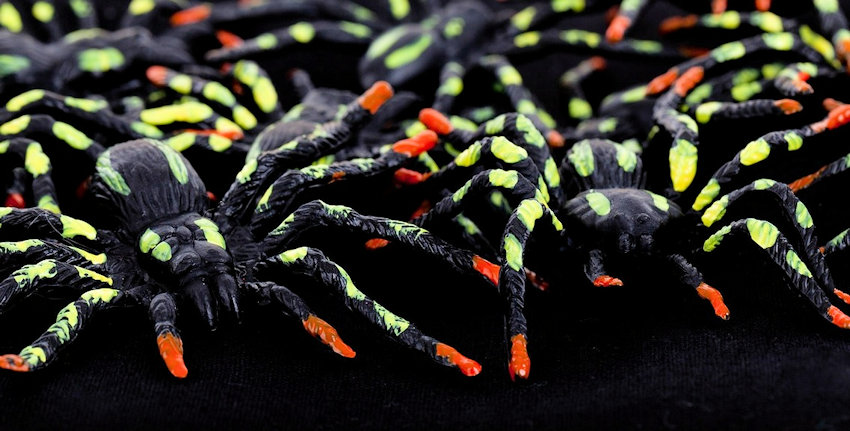
Spiders
Most people instinctively shy away from spiders. The tarantula-sized spiders shown above are painted with glow-in-the-dark paints. Place them along porch railings or on the outer edge of steps. You also might want to have several crawling up a wall near the front door.
Dragons & Black Cats
Many people are superstitious about black cats. When lit from behind, cat silhouette yard stakes have an eerily realistic appearance. Inflatable dragons glisten and change colors, while animated dragons have glowing eyes, frightening sound effects and “breath fire” courtesy of a fog machine.
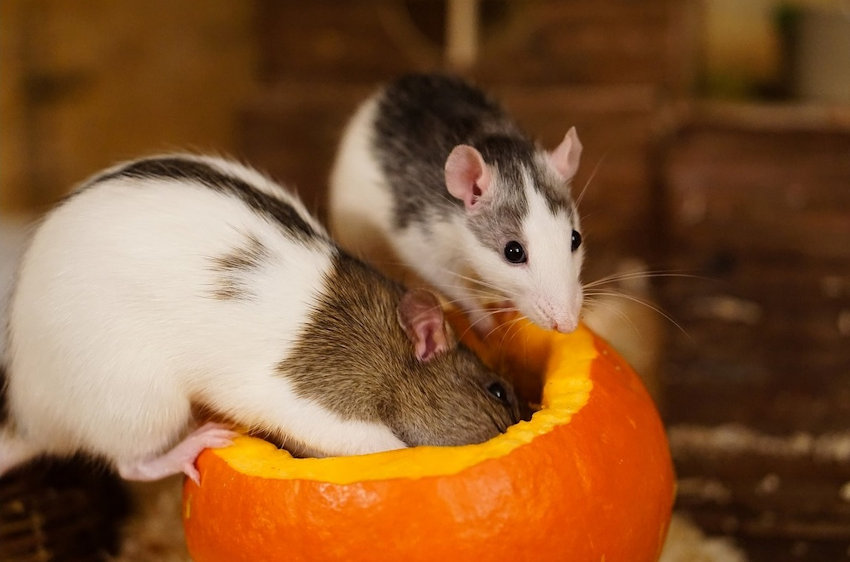
Rats
Sewer rats are bound to cause a few goosebumps. Just like the photo above, place a few rats on or around pumpkins to create a creepy atmosphere.
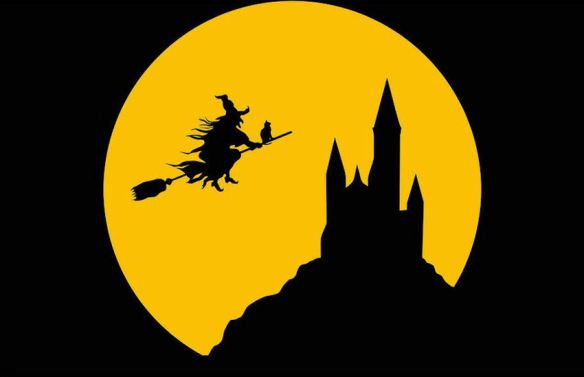
Witches
If you want to charm your guests, witches are sure to please. Life-size, motion-activated witches greet visitors with glowing eyes, casting spells, and stirring cauldrons. For a more humorous effect, a wall or tree-mounted crashing witch on a broom is sure to make everyone smile.
Headless Horseman
“The Legend of Sleepy Hollow” is a classic. Although you probably won’t have a horse on the lawn, you could create a dummy with a glowing pumpkin head. New this year is an animated life-size headless horseman holding an axe in one hand and a talking pumpkin in the other.
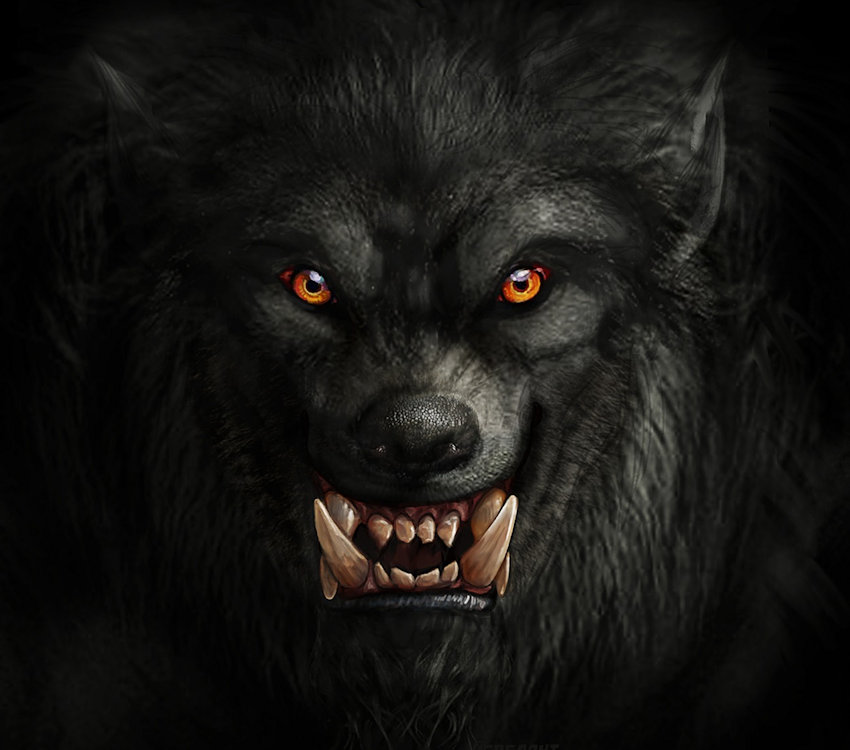
Legendary Movie Monsters
Wolfman, Frankenstein’s Monster, Count Dracula – so many possibilities. You could make a dummy by stuffing an old shirt and pair of slacks and buy a rubber mask to create your monster. If you or a family member are budding actors, dress up in costumes to unnerve visitors on Halloween night.
Zombies
“The Walking Dead” has been a popular television series for years, spawning a zombie craze in movies, merchandise, and Halloween décor. If horror is your goal, zombies are the go-to characters.
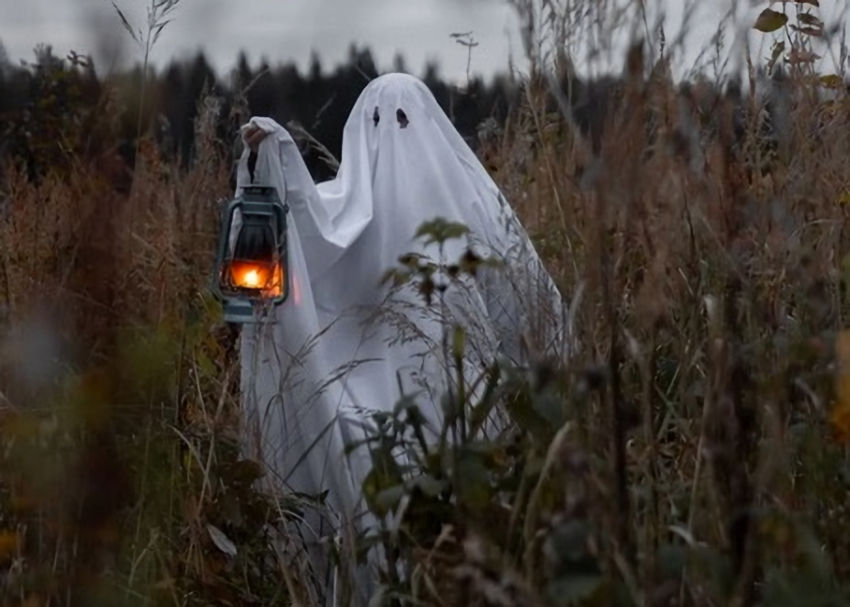
Ghosts
Ghosts can serve as props or as live action creatures. Halloween night, if you really want to keep trick or treaters on edge, place a life-size ghost among your yard decorations. Go outside several times wearing an identical costume to stir up chills and thrills as you move across the lawn. Kids love theatrics like this and will return every year to find out what you will do next.
Scary Props:
Carved Pumpkins
Pumpkins are a Halloween staple. Depending upon your preferences and skills, you can carve or paint designs to frighten or amuse your guests. If you have had trouble in the past with squirrels eating fresh pumpkins, buy craft pumpkins, which can be carved and displayed for years to come.
Tombstones
With tombstones, draped in spider webs, and scattered bones, this haunted cemetery is ready for visits from the living.
Coffin & Skeletons
If you like working with wood, you could build a coffin and reuse it with different monsters each year. If the weather cooperates, or if you have a covered porch, a cardboard coffin can be easily made. Skeletons and skulls can be frightening or funny. It’s all up to you.
Kid Friendly Scarecrow
Scarecrows are easy to make and inexpensive to buy. Secure them to tree trunks, or place a few on a bale of hay with pumpkins and a few crows for a bit of humor.
Frightening Scarecrow
This horrifying scarecrow will keep crows, as well as people, at a distance. The vicious teeth are an unexpected and unsettling detail.
Spider Webs
Our brains tell us that where there are webs, there are spiders. Drape webs over bushes and railings. A bag of plastic spiders has great impact or buy one large spider to instill fear.
Lighting:
Halloween String Lights
Pumpkins, Bats, Skulls, Witch Hats, and Ghosts are just a few of your string light options. Some are the plug-in variety, but for more flexibility there are also battery-operated versions.
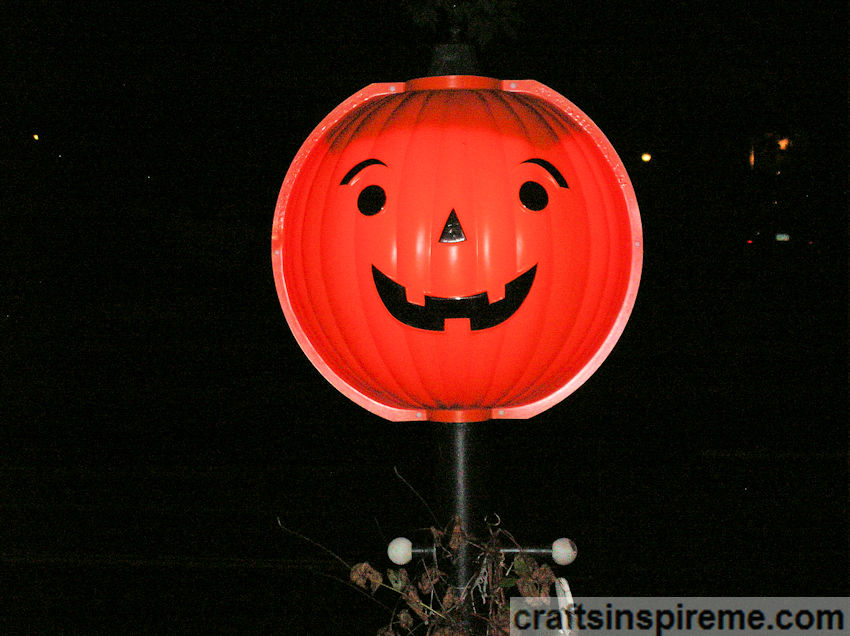
Pumpkin Lamppost Cover
This lamppost cover is an easy way to show your Halloween spirit, and it acts like a beacon attracting Trick or Treaters like moths to a flame.
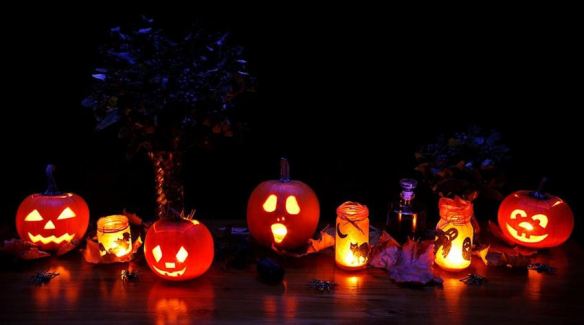
Luminaries
Luminaries are easy to make by simply drawing Halloween designs, such as cats and bats, with Sharpie markers on glass jars. For lighting, burn tealights or use battery-operated candles.
Special Effects:
Spooky Sounds & Fog
Sound is an often-overlooked element in Halloween displays. Howling wolves, dragging chains, maniacal laughter, growling monsters, and high-pitched shrieks are among the many scary soundtracks. Fog provides additional layers of Halloween ambiance.
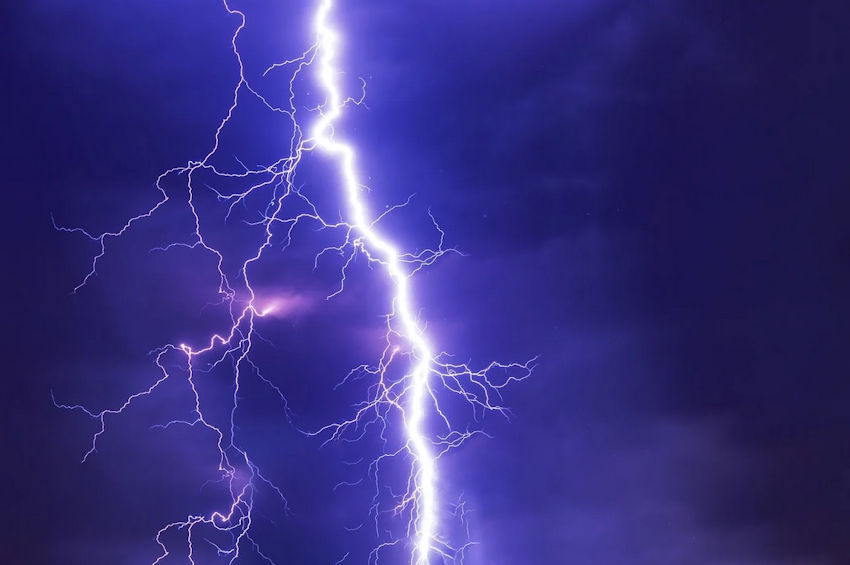
Lightning & Thunder
Conjure up the perfect storm by using theatrical spotlights, which project lightning bolts upon your house, accompanied by claps of thunder.
Setting the Scene: Finished Halloween Displays
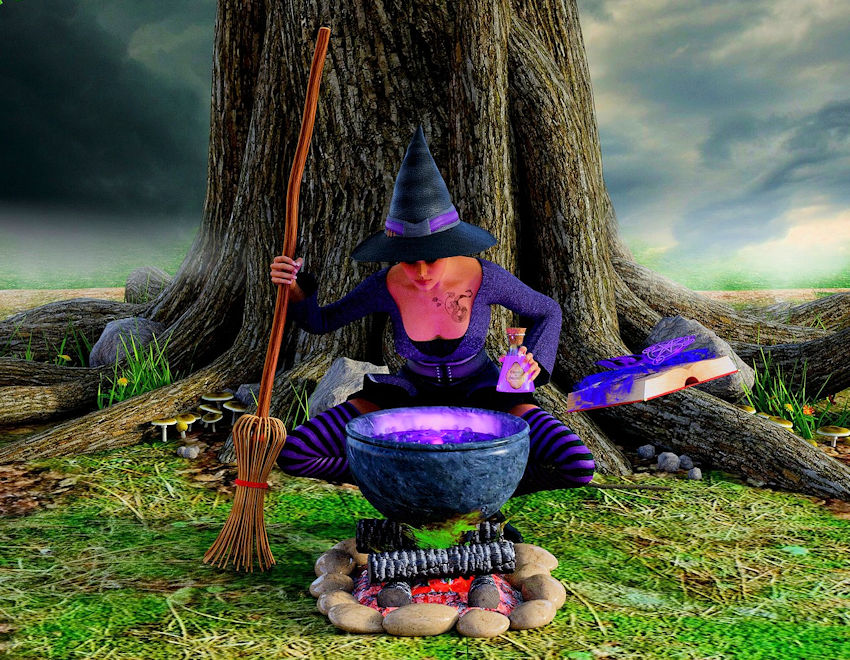
Witch’s Brew
Wondering what it would be like to have a close encounter with a witch? A cauldron, bubbling over with glowing fog, rests upon a flickering faux fire. With an ancient broom, a book of magic spells and a bottle of her latest potion in hand, this witch chills and thrills guests of all ages. Live action will astound visitors. All you need is a costume and have a few clever “incantations.”
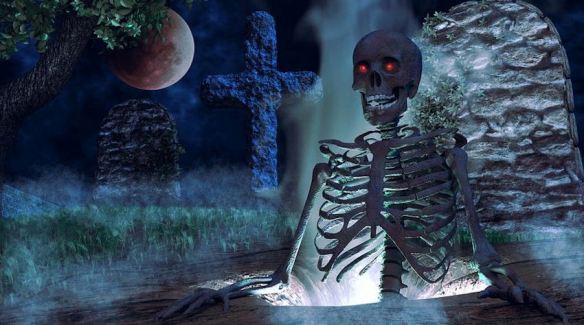
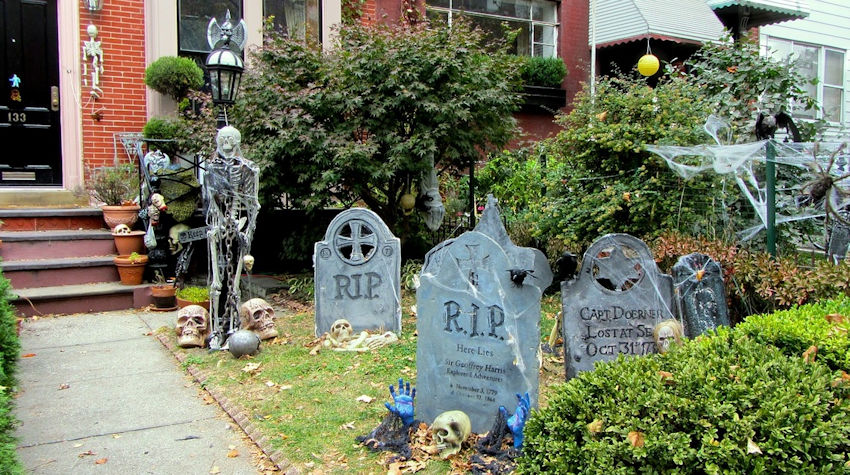
Haunted Graveyard
How do you create a haunted graveyard? Start with tombstones, and then add a red-eyed skeleton climbing out of an open grave, bathed from below by an eerie yellow light, as ghostly apparitions take shape in wisps of fog. An orange moon in the nearby tree completes this otherworldly scene. Michael Jackson’s “Thriller” would be the perfect theme song for this frightening display.
Comical Family Fun
Is it possible to celebrate Halloween in a kid-friendly way? A pumpkin family reunion is a good place to start. Trick or Treaters can pose for selfies with this cheerful, welcoming display. At night, the bright orange glow will intrigue everyone, drawing them nearer for a closer look.
If You Build It, They Will Come
Want to attract attention? Consider your desired theme and select a fascinating focal point, such as the gigantic cat in the above photo. With colors, shapes, textures, and proportions in mind, continue adding props and characters, creating a multi-layered composition to delight viewers. Viewers will discover something new each time they see it. Having a few characters spring to life would be the cherry on top of this theatrical masterpiece.
Trunk or Treat
Are you participating in a community trunk or treat event? Don’t forget to decorate your car. There are Halloween decorations made specifically for trunk or treating. If your furry best friend rides along, a pet costume would be adorable, and the kids will love it!
Halloween brings out the kid in all of us. Do you have a favorite decoration? Have any suggestions to share with readers? Please note your thoughts in the comments section. Thanks for reading and sharing.
The movie Hocus Pocus is celebrating its 27th Anniversary, inspiring witch themed costumes and decorations. Whether you’re having a Halloween party or simply decorating for the fun of it, a centerpiece is a must for the coffee or dining tables. Below are step-by-step instructions and photos for building your own, one piece at a time.
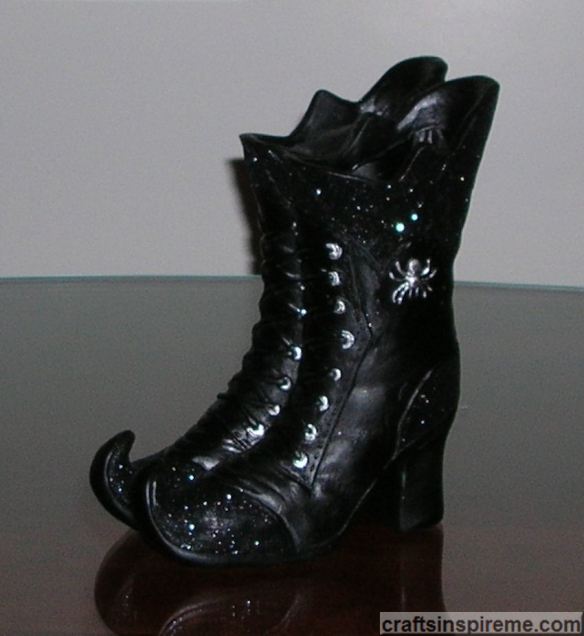
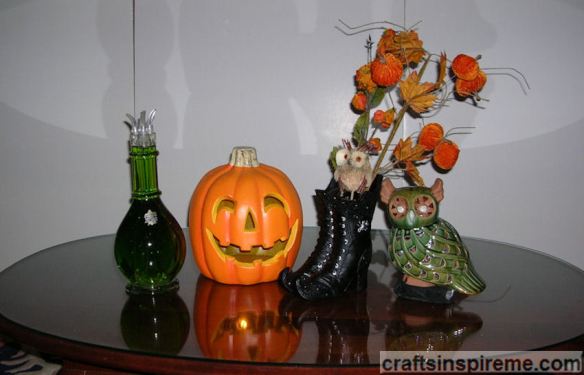
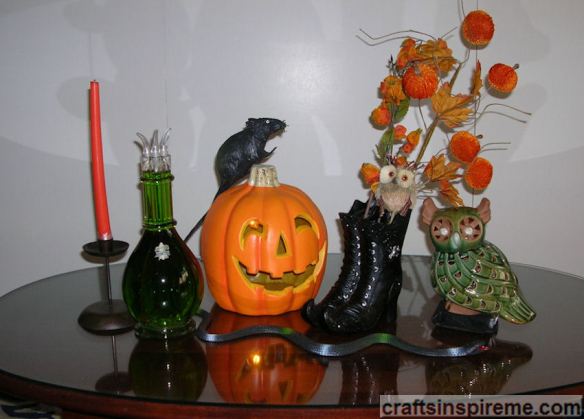
The Inspiration – As with all creative projects, the first requirement is a source of inspiration. This pair of witch’s boots is sold at Michaels. Although smaller than expected, it still has a spooky vibe. The style varies slightly, but all are black with a silver spider painted on each side. Having a pair of boots is nice, however it’s one piece and can’t be separated. If you prefer a more humorous impression, many stores sell individual witch boots painted in bright, fanciful colors and patterns.
Step 1. Witch’s Boots – Centered upon this coffee table, these boots look quite sparse, but we’ve only just begun.
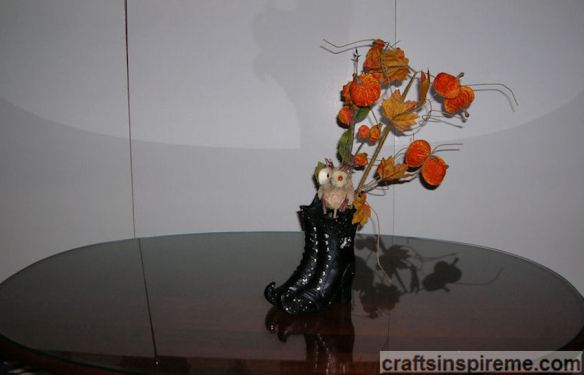
Step 2. Floral Stems & Owl – For color and texture, the key to this design is choosing strange looking plants in autumn, Halloween colors. Here we have added leafy vines with plush mini pumpkins, and orange lanterns. Bend the stems as needed to adjust the height. Crafter Tips: Do not cut the stems because you may need to adjust the height at the end when the arrangement is complete. (You may not need to cut them at all, simply conceal the bent stems inside the boots). The owl, made from twigs, was already mounted on a long stick for easy placement.
Step 3. Jack-O-Lantern – Orange and black – the perfect color combo for Halloween. This resin pumpkin includes optional lighting. High contrast and a brilliant punch of color lend visual interest to this asymmetrical composition. Instead of a pumpkin, you could use a round platter or globe, resembling the full moon, or a light color witch’s broom to contrast with the dark boots.
Step 4. Ceramic Owl – Contemporary details with an eerie presence make this owl a perfect addition by contributing color, light, and texture. Moss green and tan coordinate with the autumn vines and leaves. Feather-like half moon slits in the body of the owl allow light to pass through and the opportunity to insert mini lights inside with the battery pack underneath, wrapped in black fabric. Crafter Tip: Ensure the battery pack’s on/off switch remains accessible.
Step 5. Decanter – No witch-themed display would be complete without a few unknown potions brewed with magical spells. The clear glass decanter, with four separate chambers and claw-like stoppers, provides much needed height and color on the left end of the display. A little food coloring and water becomes a scary cocktail of witch’s potions. The green color was chosen to coordinate with the other green elements. Alternatives: You could create a grouping of different size bottles or apothecary jars with strange contents inside; or add a book of “spells” and candles to capture the spooky aura. Crafter Tip: Experiment with various objects and colors, being sure to balance the composition.
Step 6. Rat & Snake – Now we need a few creepy crawlers to stir up our primal fears. A rat on top of the pumpkin seems like a natural choice, and the snake has the added bonus of implying movement, as it appears to slither along the tabletop among the objects in the centerpiece. A trip to a Halloween or craft store is sure to have plenty of options, including spiders, worms, skeleton bones, and the like. A few spider webs might kick up the spooky factor another notch.
Step 7 Orange Candle & Metal Candleholder – To add height and a pop of color on the left end of the centerpiece, add an orange candlestick in a dark metal candleholder. Although the base of the holder is plain, it provides an opportunity which we will take advantage of in the next step. The candle had been stuck in a box for years, which caused the wax to curve. This works great in a Halloween project, where crooked lines are more desirable than straight ones.
Step 8. Orange & Black Spider – I never thought I would say these words, but this spider is actually quite beautiful. The camera flash tends to wash out the brilliant colored stripes upon the spider’s body, which is covered in tiny orange and black glass beads. The large size and imposing ready-to-strike posture are just what this display needed.
Step 9. Witch’s Hat – The pumpkin’s toothy grin becomes the witch’s face by the simple addition of a classic black hat, which frames the pumpkin’s face, adds character, and ties all pieces together into a unified Halloween theme.
Step 10. Illumination – This is the finished centerpiece with optional lights turned on inside the owl and pumpkin. It’s spooky fun just like the movie, Hocus Pocus.
Designing a Halloween centerpiece is an enjoyable process for stretching your creative muscles. Start with one piece as an inspiration and decorative items you may already own. Find different ways to use existing items by looking at things in a whole new way with your theme in mind.
It’s hard to believe we are in the month of October already. Thoughts of my favorite time of the year, Halloween, come to mind. I suppose I’m just a big kid at heart. Dressing up was so much fun. Deciding what to be for Halloween was a major accomplishment. Sometimes the costume was store bought (e.g. Snow White, Peter Pan), while other times we made our own (e.g. Gypsy, Witch).
Purple & Gold Mardi Gras Mask All you really need is a great mask. Craft stores sell a variety of white masks to decorate any way you please. In terms of comfort, the quarter masks are an easy solution, as opposed to latex masks, sold in Halloween stores, which can be very hot to wear.
Red Sequined Mask and White Floral Mask Masks can be decorated with a particular theme in mind or for holiday celebrations, such as Carnival, Mardi Gras, New Year’s Eve, and the Chinese New Year. Each finished mask is a beautiful work of wearable art.
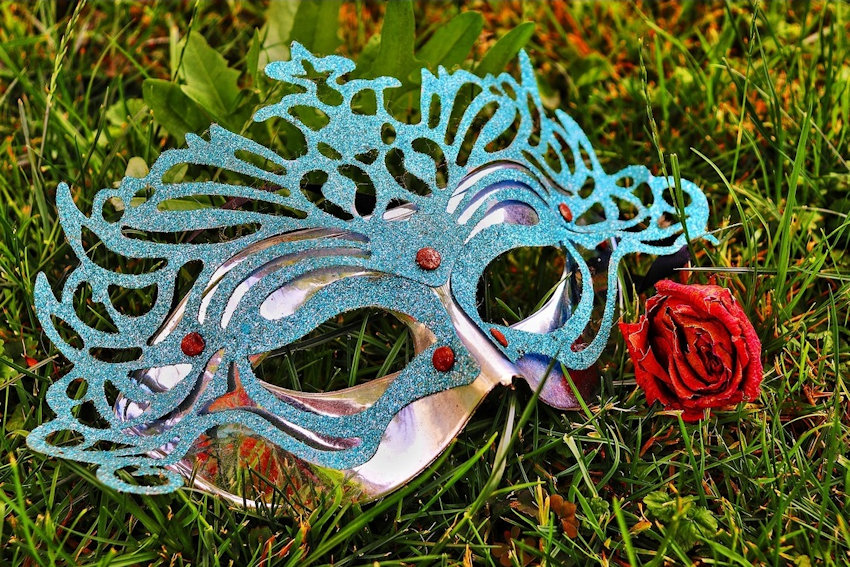
Turquoise & Gold Feathered Mask I look at this mask and think of Aqua Man, the Marvel Comic’s super hero. It is also reminiscent of the Philadelphia Mummer’s Parade. The rich details and vibrant colors are real showstoppers.
Red, Black & Gold Long Nose Joker Mask This mask has a devilish quality about it. Practical jokes are sure to follow.
Black & Gold Opera/Theater Masks Musical notes and gold braided trim adorn these fanciful masks.
Antiqued Cat Mask Perky ears and delicate patterns make this mask a favorite among cat lovers.
Blue & Gold Asian Mask A lovely combination of two arts – mask making and fan decorating.
Assorted Feathered & Bejeweled Masks This assortment of masks is ready to be worn in celebration or displayed as artwork and party decor.
Black & Gold and All White Feathered Masks Feathered masks tend to be the most flamboyant.
Red & Black Harlequin Mask The visual impact of this red, black and gold mask is enhanced with light catching glitter and thick gold trim. A few faux gemstones are the perfect finishing touch.
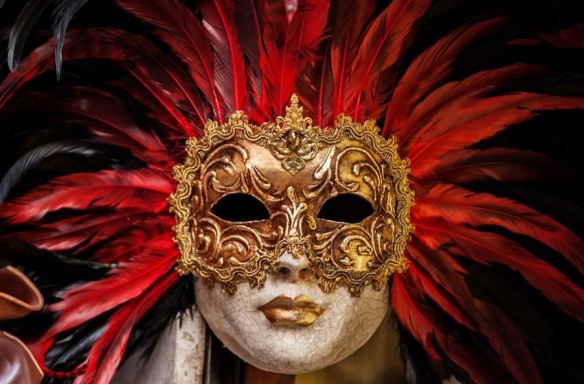
Ornate Venetian Masks Masks made to celebrate the Carnival of Venice are among the most elaborately decorated with lavish brocade fabrics, ribbons, crystals, intricately hand painted designs, and touches of gold or silver leaf. This centuries old technique has influenced artists world wide, and is highly valued among collectors.
For a more practical, down-to-earth approach, below are the instructions to complete your own decorated mask.
How To Make Your Own Mask
Your project starts with a visit to the craft store. The mask you choose will be the most important decision because it determines the range of decorating possibilities.
Plain White Quarter Mask – Ready for Decorating Most craft stores have several style options. Because this was a first attempt at decorating a mask, this simple white quarter mask was chosen.
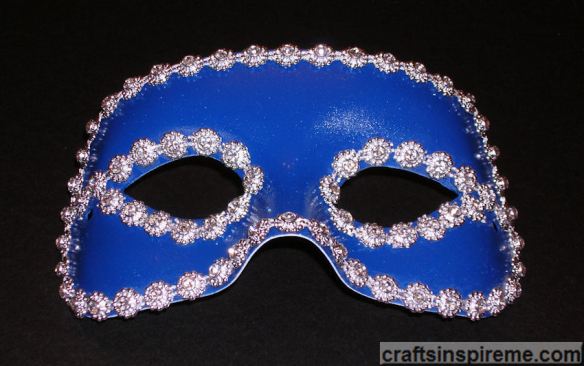
Mask – Painted Blue and Outlined with Rhinestones
The mask was spray-painted royal blue. Fabric stores have beaded and rhinestone trims perfect for mask decorating. The rhinestones twinkle in the light, calling attention to the wearer’s face with an emphasis on the eyes. As shown, the mask is ready to wear, but let’s take it to the next level.
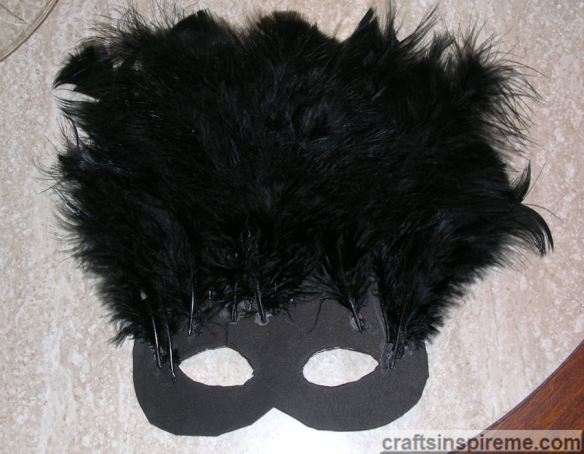
Black Feathers on a Foam Backer
This mask was made as a wall decoration, so the back will not be seen. (If you plan to wear your mask, simply glue the feathers directly onto the back of the mask, and line it with felt for comfort.) To make the wall art, trace the mask onto a sheet of black foam, which is used as mask liner to hold and support the feathers. The eyes and lower shape of the mask are cut out using an X-Acto knife.
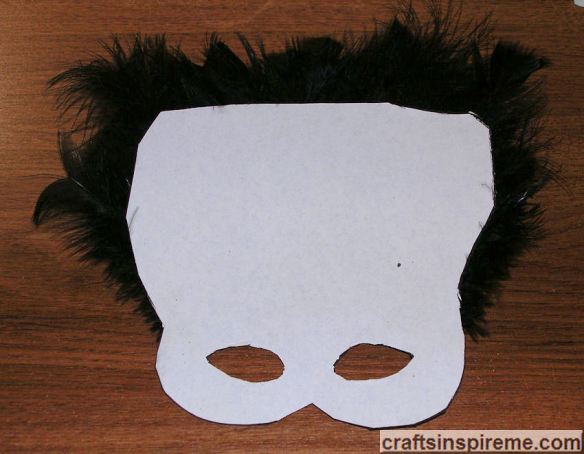
The Opposite Side of the Foam Backer
This photo shows the wrong side of the foam sheet used as a liner or backer board for the feathers. The bottom of the foam and eye openings line up perfectly with the blue mask, but the upper portion of the foam extends upward like a crown to support the feathers.
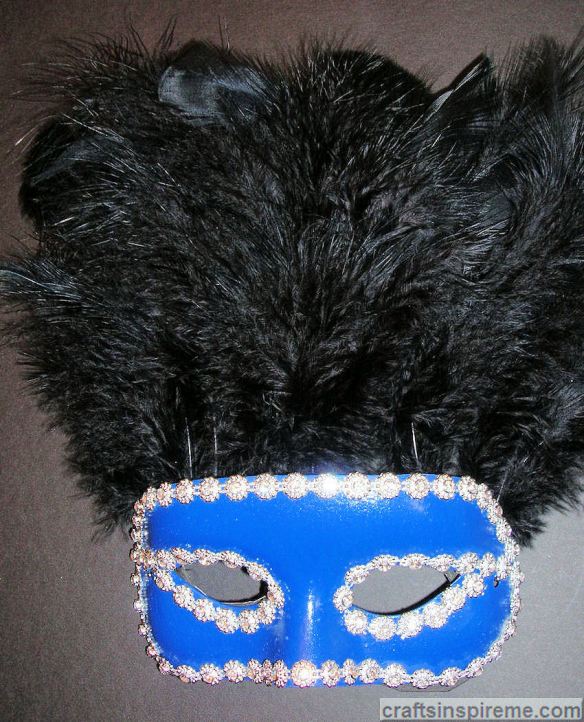
The Finished Black Feather Mask
Luxurious black feathers and sparkling rhinestones stand in sharp contrast to the rich royal blue on this completed mask.
Take a walk on the wild side. Dress up, stay in character, and most importantly have fun. Mask making isn’t just for kids. It’s for the child within all of us!
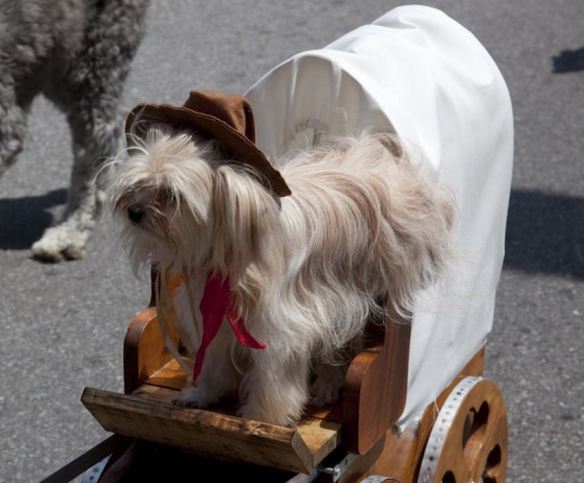
Every Halloween, you decorate your home and dress in costume, but don’t forget to include your furry friends. You could make the costume yourself. Scissors and some old sheets will do the trick. Or it may be easier to buy from crafts stores, Halloween stores and of course online too. Below are several pets “hamming” it up for the camera in their Halloween’s finest costumes. Enjoy!
Leading a parade in a covered wagon is a tough job, but this cowboy is up to the task.
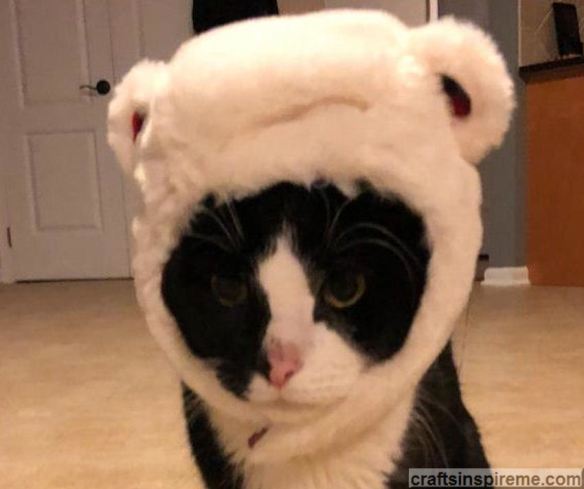
What a difference the right hat can make!
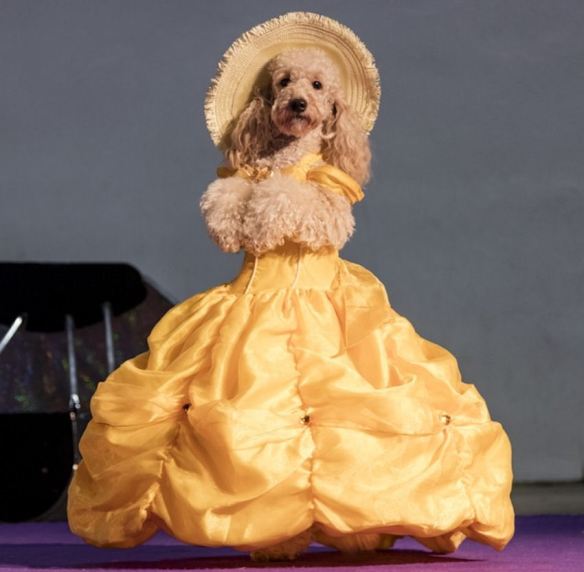
This cute poodle will be the belle of the ball in her elegant evening gown.
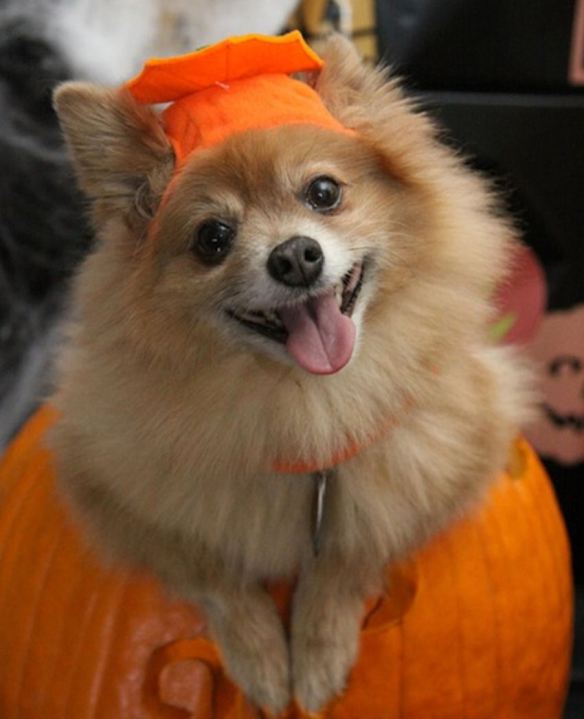
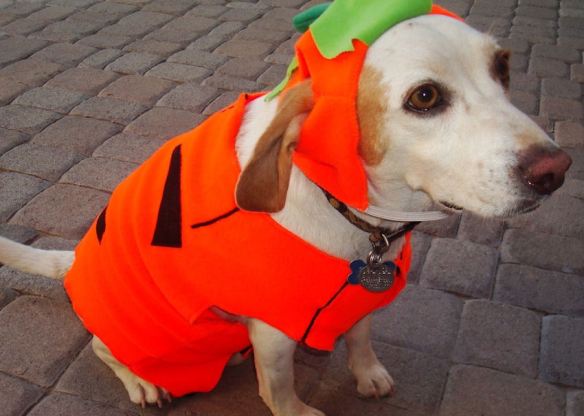
The best pumpkin in the patch has a very cheerful personality.
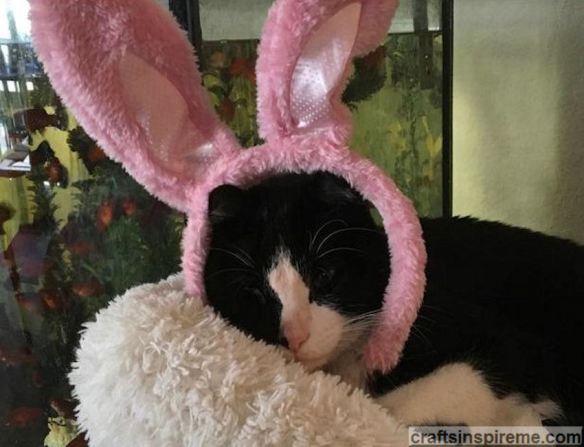
It may be Halloween but you can still dress up as the Easter Bunny.
Larger dogs like to celebrate too.
Who says cats don’t like water? This handsome boy is ready to sail the seven seas.
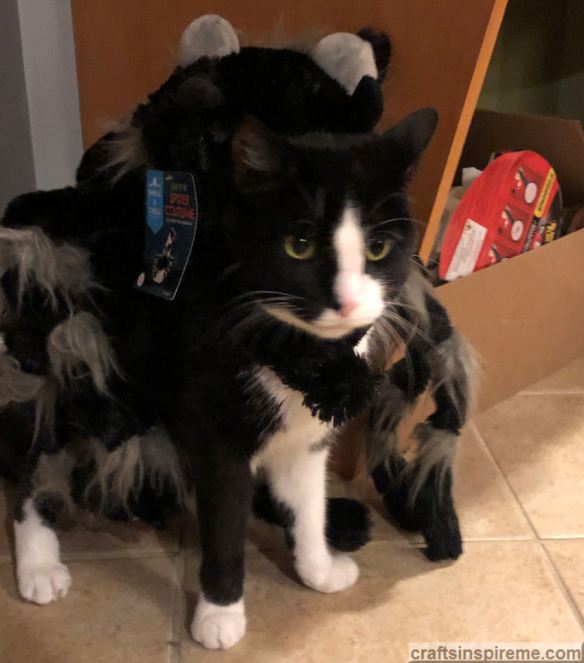
Arachnophobia is a very common fear, but this little guy is just adorable.
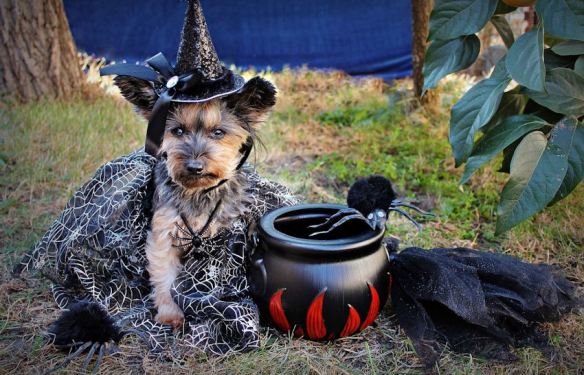
Something magical is always brewing with this bewitching little lady.
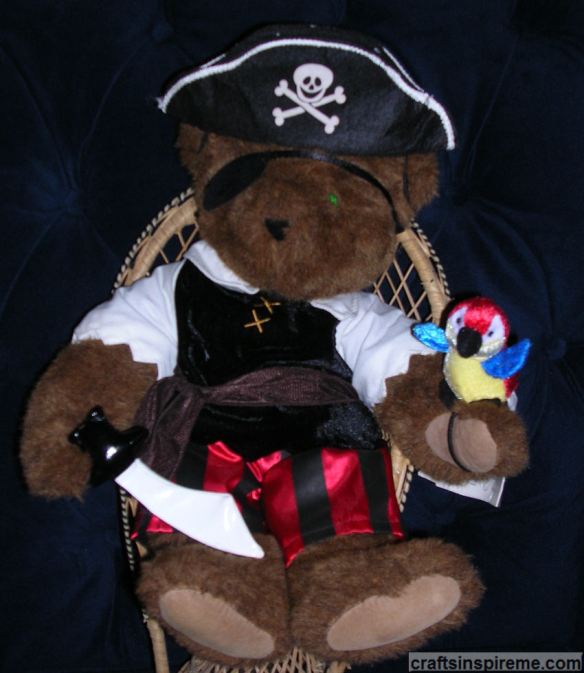
Don’t have a pet? No problem! Put a costume on your favorite stuffed animal. This Vermont Teddy Bear is wearing a Build A Bear pirate costume, which included the eye patch, sword and parrot. How cute is that? These costumes will fit any 10” to 14” plush animal of your choice.
The family that plays together stays together, including our pets. With everyone in costume, you won’t be able to resist taking pictures to commemorate the occasion.
It just wouldn’t be Halloween without a few carved pumpkins, also known as Jack-O-Lanterns. Patterns are readily available online, or you can flex your creative muscles by coming up with your own designs. What does your pumpkin say about you? Here are a few ideas to get you started.
From the goofy to the spooky, there’s something for everyone.
There are numerous options for lighting your pumpkins: Lit candles flicker in the breeze. LEDs produce high intensity and sometimes color-changing light. Glow sticks give off softer, otherworldly light. Spotlights and flashlights light up the face while also creating some eerie dark shadows inside the pumpkin.
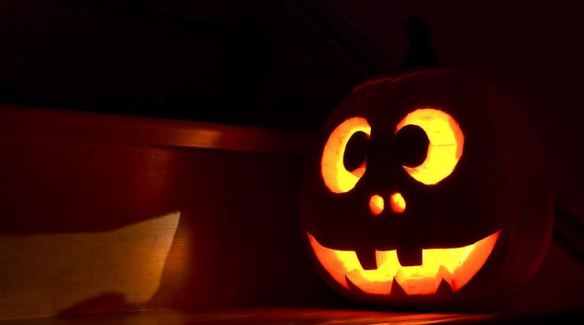
Even pumpkins have moments of surprise and awe. I wonder what he sees?
Little details make all the difference. This carved pumpkin owes its devilishly good looks to the absence of a nose. That one little detail, plus the intensity of the light within, gives him a more ghoulish appeal.
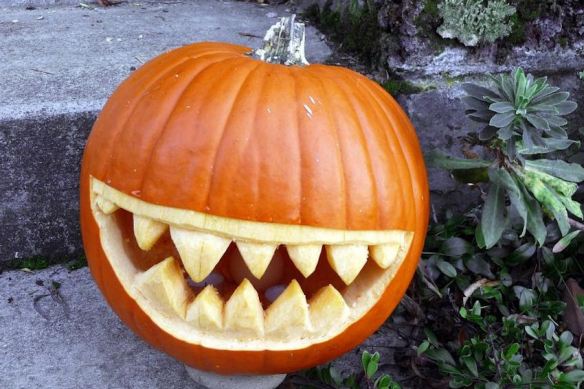
This one brings a whole new meaning to the name “Jaws.” After carving the teeth, the orange skin around the perimeter of the mouth was removed to reveal the white flesh beneath. If that seems like too much work, you could use a white Sharpie marker to define the mouth.
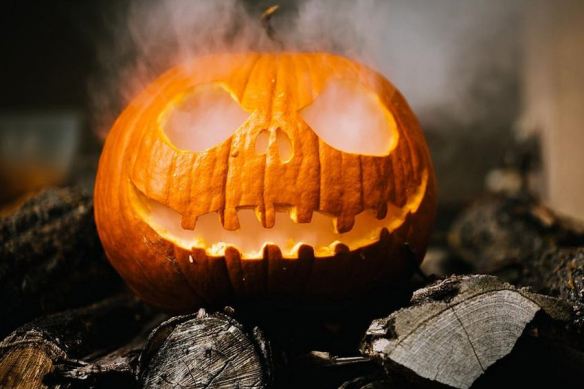
Nightmare Before Christmas is a very popular Halloween movie and decorating theme, and this pumpkin doesn’t disappoint. A little dry ice, or a fog machine takes the spooky vibe to a whole new level.
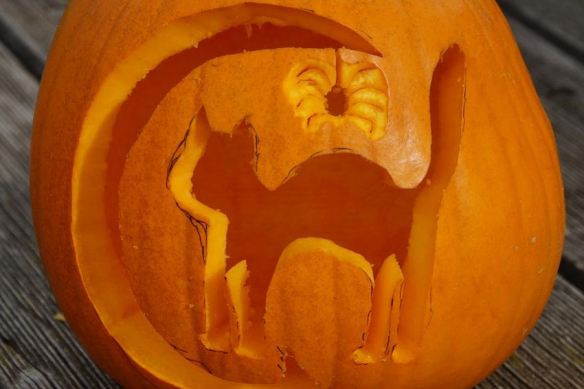
Cat lovers will appreciate this creative design. Black cats and spiders are staples in Halloween décor.
This frightening character has menacing eyes surrounded by flames above and below.
This ghoulish ghost is another Tim Burton inspired design from his nightmare movie.
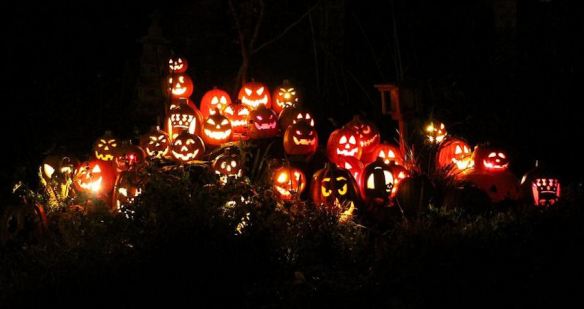
It’s Happy Hour for Jack-O-Lanterns only! Honestly, if I saw a gathering like this in my backyard, I would probably run away! It looks like a scene from a Steven King movie.
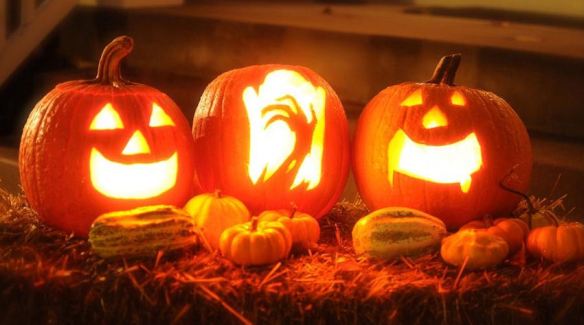
Pumpkin carving isn’t for everyone. There’s also nothing wrong with displaying your pumpkins “as is” with the added bonus of being able to keep them on display for Thanksgiving too.
If you like to paint, you could paint designs on real or artificial pumpkins. These decorated pumpkins can be accomplished with a few Sharpie markers, and they will last longer than the carved variety.
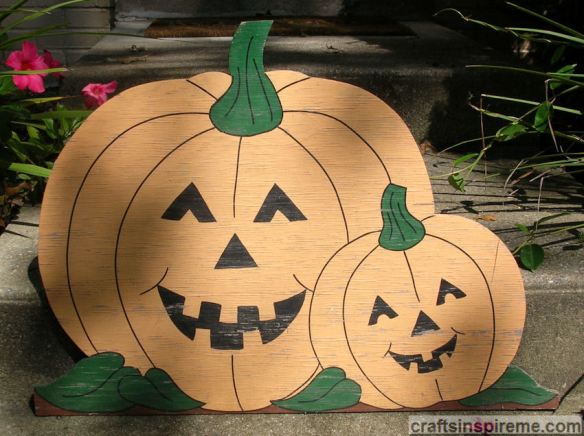
Another great option is painting a wooden plaque like the one shown above. It can be used for years and is very inexpensive to make. Over time, the sun, wind and weather can take their toll. Whether you are painting a brand new pumpkin, or giving a makeover to an existing one, the steps are the same.
How to Paint and /or Repaint a Wooden Outdoor Halloween Decoration:
Supplies:
Wooden Pumpkin Decoration (30” high x 22” wide x 1/2” thick)
Orange Outdoor Spray Paint – OR – Orange Outdoor Acrylic Paint (See Step 2)
Outdoor Acrylic Paint – black, green & brown
Paintbrush
Sandpaper
Black Sharpie Marker
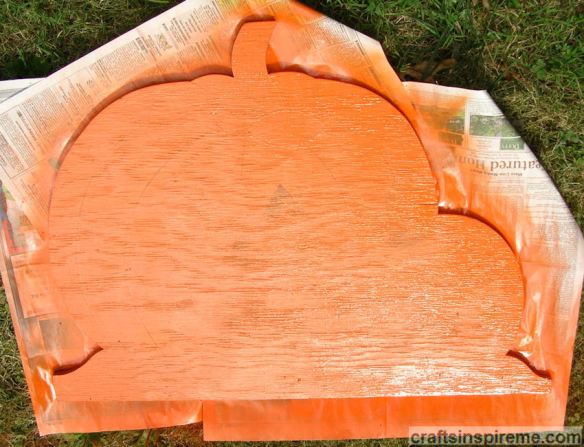
Step 1 – First you will need to clean off the dirt and debris, and lightly sand the surface and edges in preparation for paint.
Step 2 – You have two painting options here: Spray Painting versus Brush on Painting. For Spray Painting: Apply multiple coats of orange outdoor spray paint. To be honest, I’m not a fan of spray paint due to the toxic fumes. I also was not satisfied with the paint coverage. I’m not sure why, but the consistency was very thin like water.
For Brush on Painting: – Apply 3 coats of orange outdoor acrylic paint with a brush. Be sure to coat all the edges and the back of the plaque as well to protect and seal the wood from water damage.
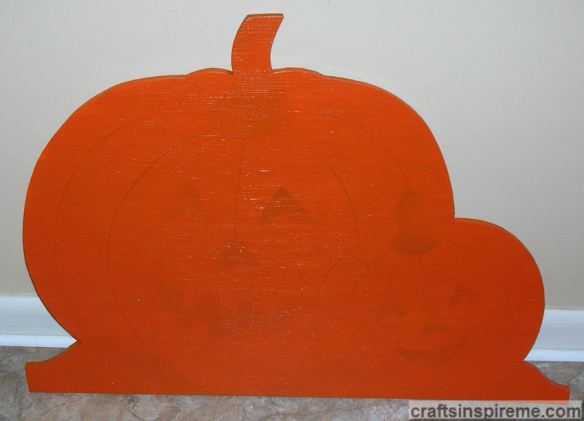
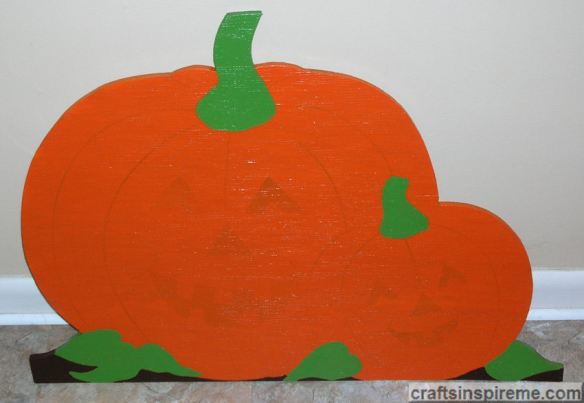
Step 3 – Add details such as stems, leaves, and the surrounding ground at the edges. You may want to outline the details first with a Sharpie marker.
Step 4 – Draw the faces and add curved lines to give the pumpkins a three-dimensional effect. Outline the leaves and stems in black to make them stand out better.
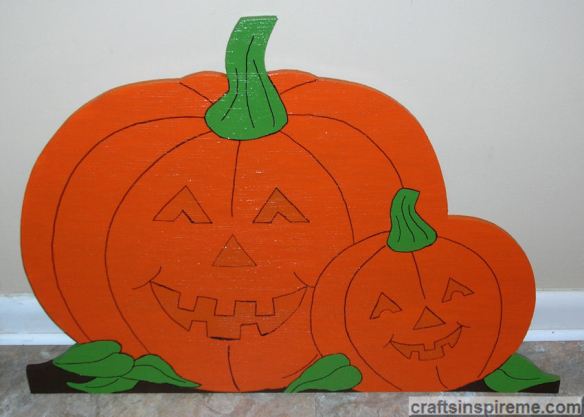
Step 5 – Fill in the faces with black paint.
After spending a day at the spa, these pumpkins have been renewed, rejuvenated, and are ready to greet your guests at the door. The choice of pumpkins is up to you. Whether you decide to use real, artificial, or any other material, the enjoyment and celebration of the holiday will always come through in festive style.
Spooky story telling around the campfire, frightful decorations haunting the yard, and fanciful costumes excite and delight, as bags are filled with candy and laughter drifts upon the air. Halloween will soon be here. Celebrate this popular holiday and dance like nobody’s watching! First you’ll need a few decorative ideas to set the stage for your celebration. Let’s get started…
Many people enjoy the warm summer nights by candlelight. With Halloween approaching, transform your lanterns into Halloween décor by adding a few decals to the glass.
Lighting is so important to setting the mood. Carved pumpkins can be lit with standard candles or opt for the battery operated flameless variety. Luminaries can be made from glass jars and decals or simply draw a design with Sharpie markers.
Tombstones and skeletons are a Halloween classic. This one has a more menacing appearance with its glowing red eyes and the bright light from below, giving the impression he’s climbing out of his grave.
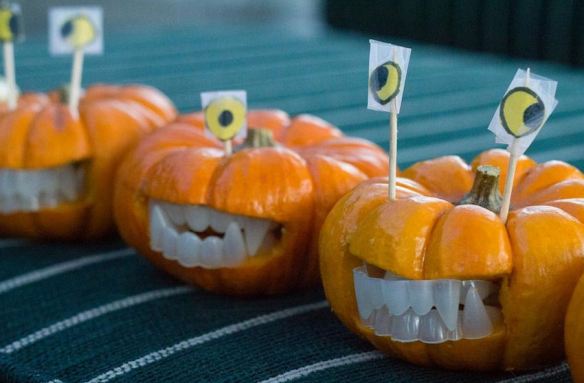
If elaborate carving seems a bit too daunting, these mini pumpkins will make you smile. Cut out a rectangle in the front, large enough to fit plastic teeth as shown above. Draw eyeballs or use olives as an alternative. Attach the eyes with toothpicks and you have silly extraterrestrial pumpkins to delight your guests. Green pumpkins would be even better!
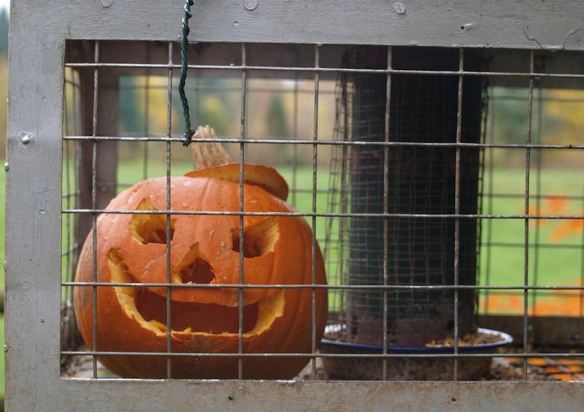
Do you have an old cage in your garage? People can’t resist looking, wondering what’s hidden inside. A glowing pumpkin in a dark cage will certainly keep them guessing. To kick the fear factor up, you could carve a big bite mark in the side or add some jagged claw marks.
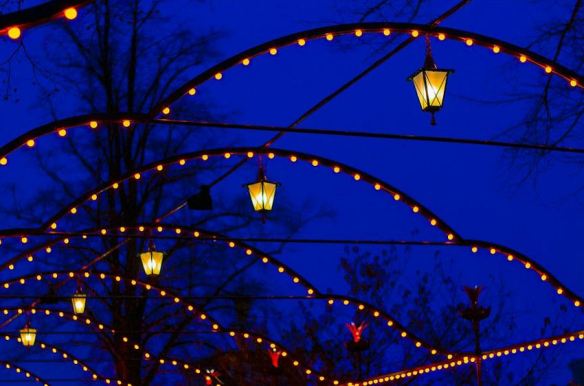
Strings of orange lights are perfect accents on decks and patios for railings, pergolas, and arbors. There is a wide variety of bulb shapes and sizes, and the LED strands will last a long time.
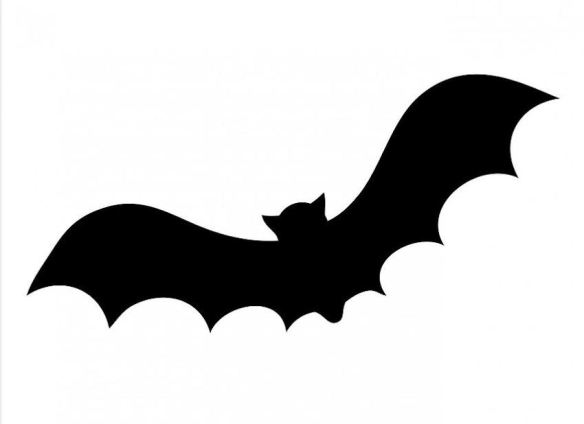
Silhouettes of bats, crows, spiders and more are readily available online. Print out several, cut them out and tape them inside your front windows. The lights in your home will provide the eerie glow they need to be seen every evening.
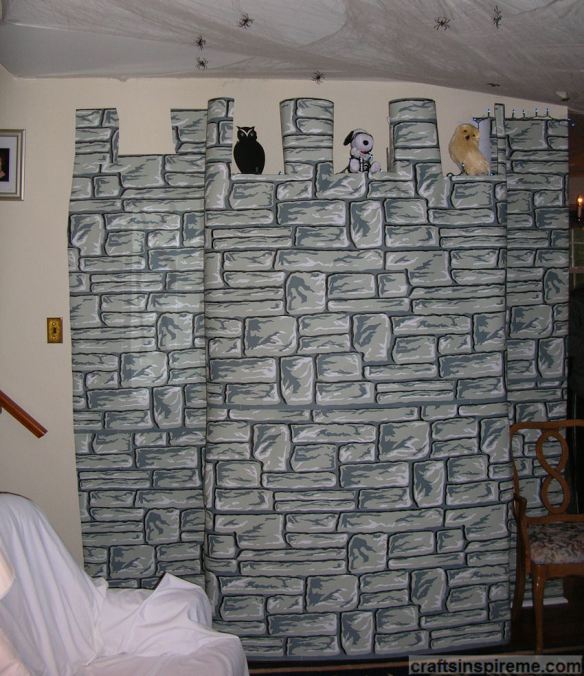
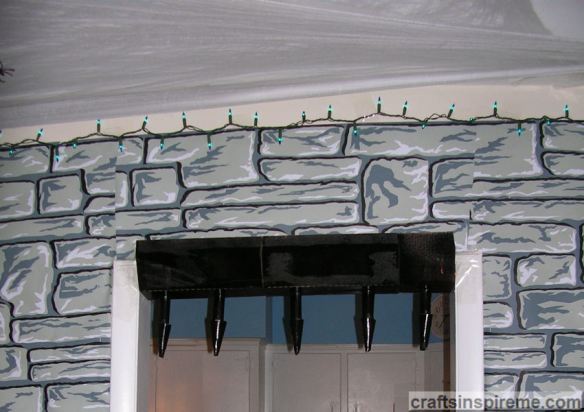
Having a party? Create a castle using a roll of pre-printed blocks. This one was “built” along walls and around a china closet. Crenulations were cut in the top for the true castle experience. Owls and other figures were perched on top.
It wouldn’t be a castle without a menacing gate. To make one, cardboard toilet paper tubes and a long box lid were shaped, assembled, and painted black.
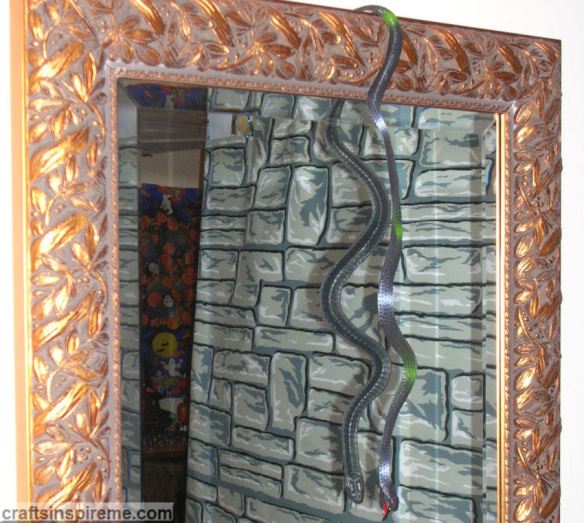
Seeing double? A rubber snake dangles from atop this mirror. At times it’s a little difficult to tell which one is the reflection.
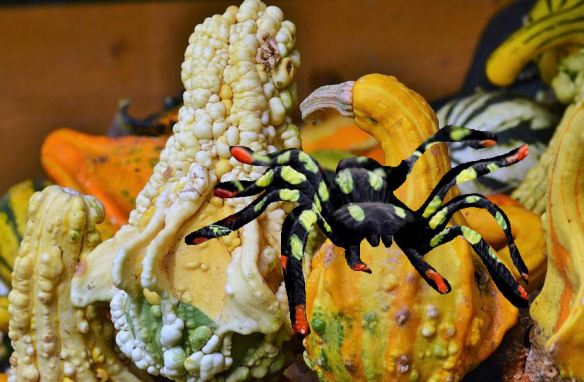
Strange gourds make their debut in the fall. Combine a few with rubber spiders, snakes, rats or any other creepy crawlers you care to include. Be sure to include a few critters on your food table as well. It will keep your guests on their toes.
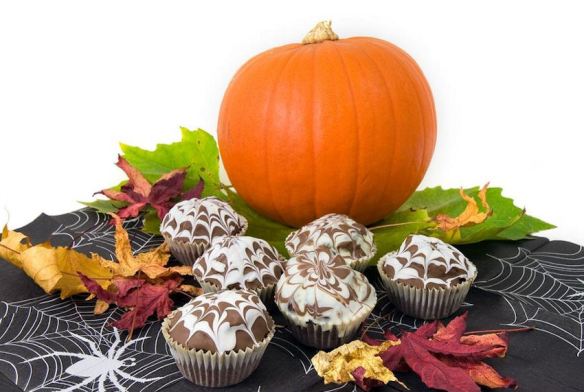
There are plenty of opportunities for Halloween themed food at your party.
Beverages can be served in cups and glasses decorated with festive faces, created with Sharpie markers or Halloween decals.
Spiders appear to have spun webs across this tabletop and over the cupcakes on this dessert table.
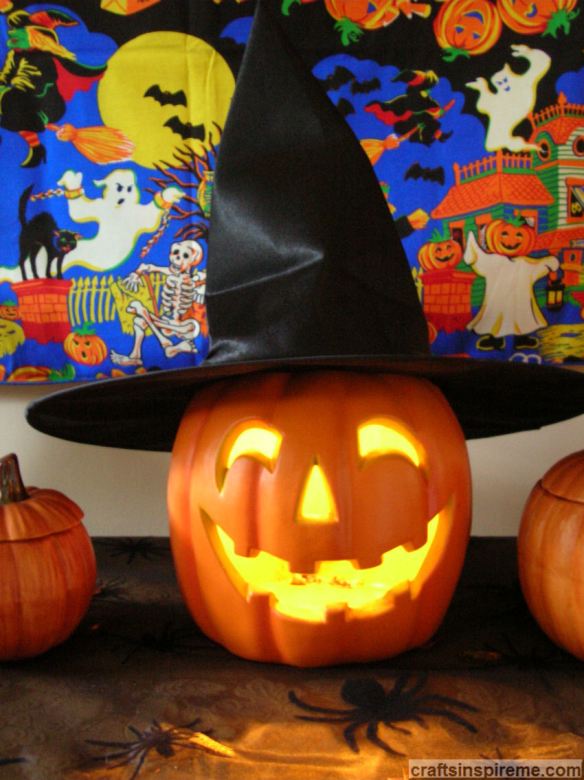
A simple pumpkin becomes a bewitching character with the perfect hat. A glow in the dark tablecloth can be used as a wall hanging.
Not all skeletons are scary. This clever homeowner has a wonderful sense of humor with this updated version of “Hear no evil – Speak no evil – See no evil.”
From kid-friendly Casper the Ghost to a nightmare on Elm Street, there’s Halloween décor for every party, home, or office. Over time you will collect an interesting collection of favorites. Decorating for Halloween is fun for the whole family, and you will enjoy your handiwork all month long.


 It’s hard to believe we are in the month of October already. Thoughts of my favorite time of the year, Halloween, come to mind. I suppose I’m just a big kid at heart. Dressing up was so much fun. Deciding what to be for Halloween was a major accomplishment. Sometimes the costume was store bought (e.g. Snow White, Peter Pan), while other times we made our own (e.g. Gypsy, Witch).
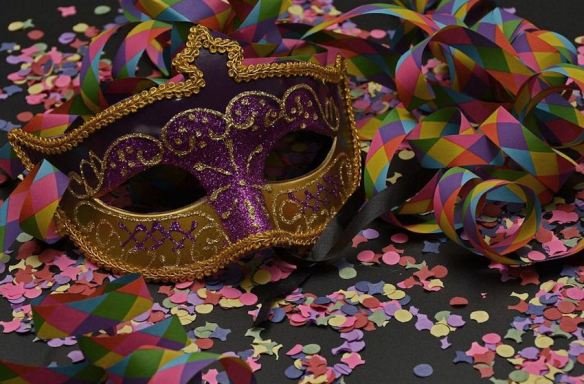 All you really need is a great mask. Craft stores sell a variety of white masks to decorate any way you please. In terms of comfort, the quarter masks are an easy solution, as opposed to latex masks, sold in Halloween stores, which can be very hot to wear.
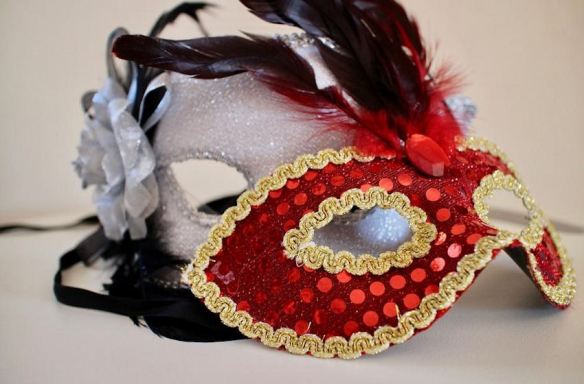 Masks can be decorated with a particular theme in mind or for holiday celebrations, such as Carnival, Mardi Gras, New Year’s Eve, and the Chinese New Year. Each finished mask is a beautiful work of wearable art.
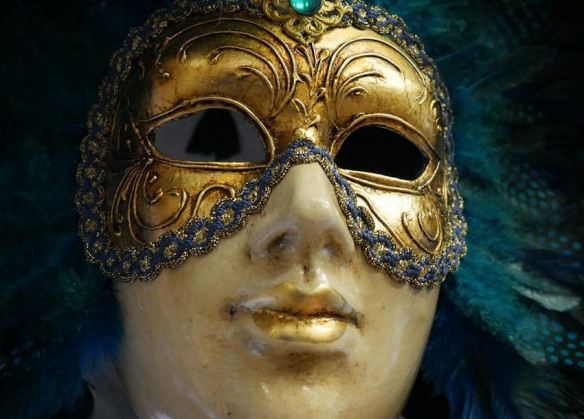 I look at this mask and think of Aqua Man, the Marvel Comic’s super hero. It is also reminiscent of the Philadelphia Mummer’s Parade. The rich details and vibrant colors are real showstoppers.
 This mask has a devilish quality about it. Practical jokes are sure to follow.
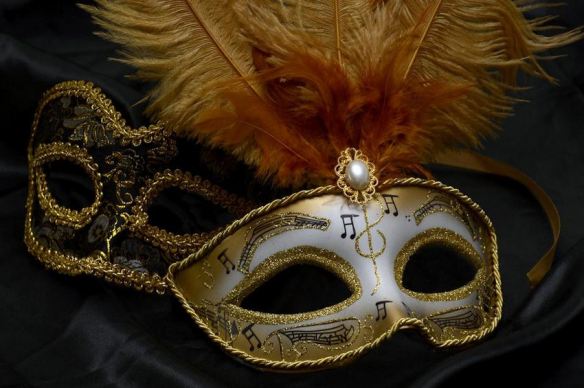 Musical notes and gold braided trim adorn these fanciful masks.
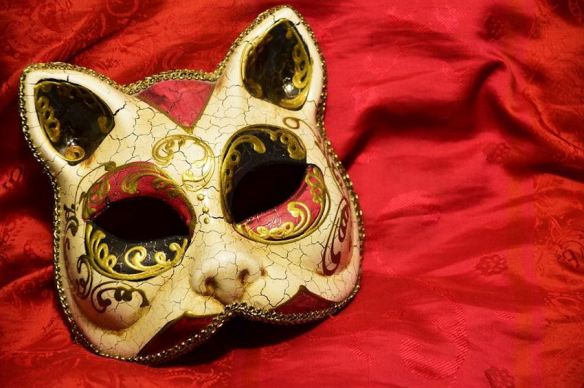 Perky ears and delicate patterns make this mask a favorite among cat lovers.
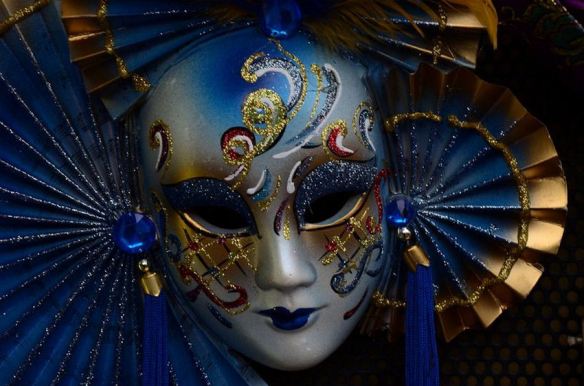 A lovely combination of two arts – mask making and fan decorating.
 This assortment of masks is ready to be worn in celebration or displayed as artwork and party decor.
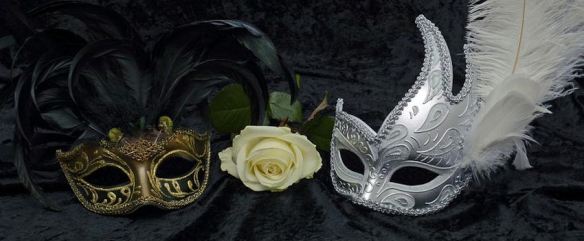 Feathered masks tend to be the most flamboyant.
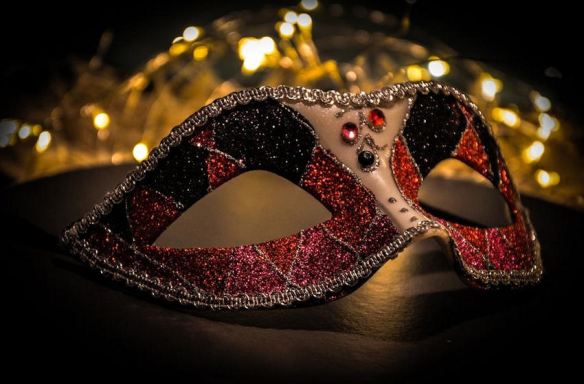 The visual impact of this red, black and gold mask is enhanced with light catching glitter and thick gold trim. A few faux gemstones are the perfect finishing touch.
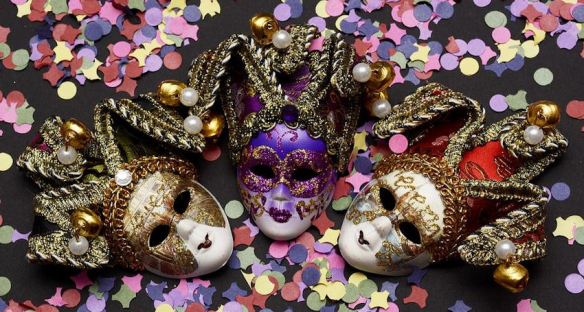 Masks made to celebrate the Carnival of Venice are among the most elaborately decorated with lavish brocade fabrics, ribbons, crystals, intricately hand painted designs, and touches of gold or silver leaf. This centuries old technique has influenced artists world wide, and is highly valued among collectors.
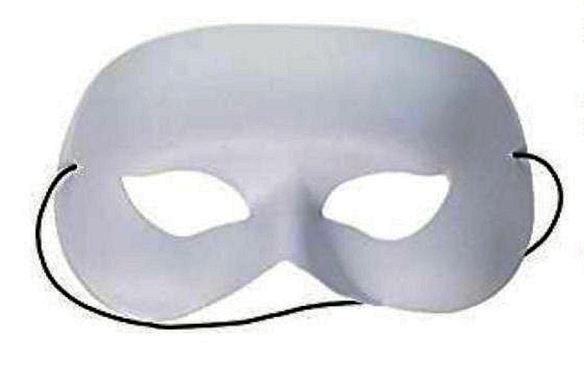 Most craft stores have several style options. Because this was a first attempt at decorating a mask, this simple white quarter mask was chosen.