Christmas Day has come and gone. It’s time for all those year-end sales. As you browse, you may find some decorations for next year. I like to find ways to get two holidays for the price of one.
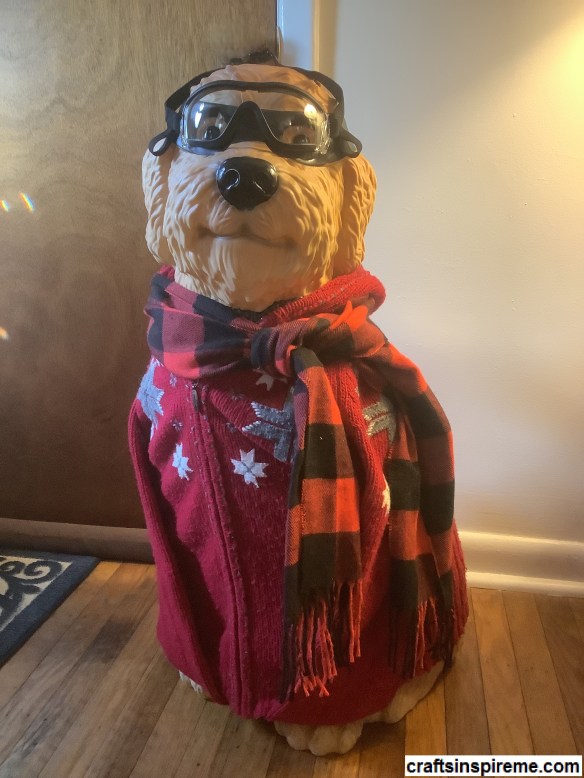
Big Dog – Halloween
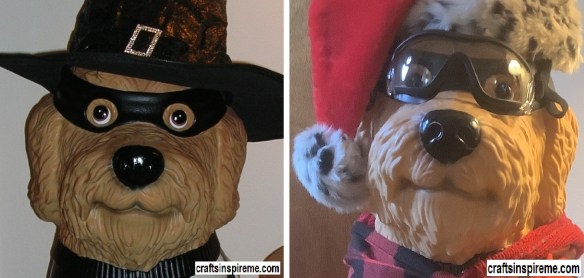
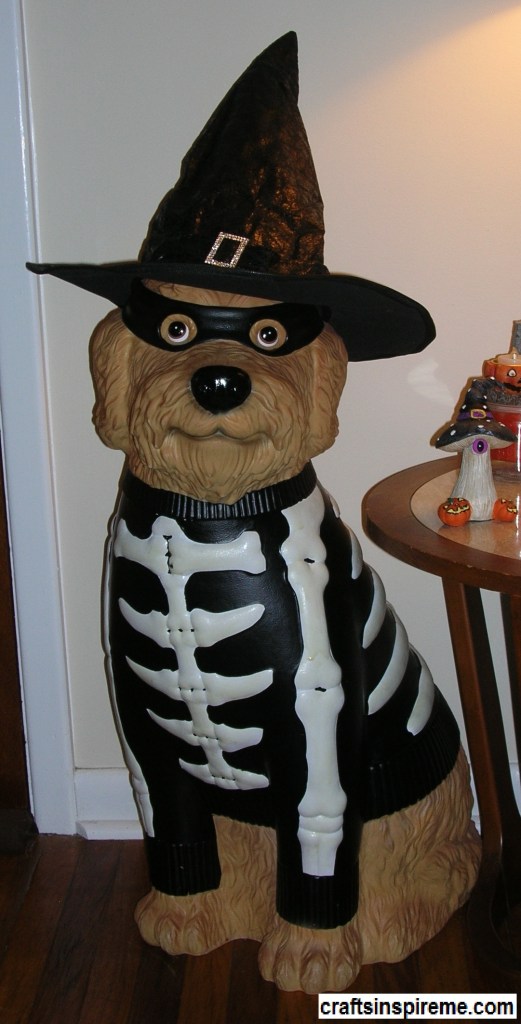
Big dogs have been trending for the last two years. I bought this masked Halloween skeleton dog and added a Witch’s hat as a bit of whimsy. In a few easy steps you can transform him into a Christmas dog.
How to Transform Halloween to Christmas: Add a Cardigan Sweater
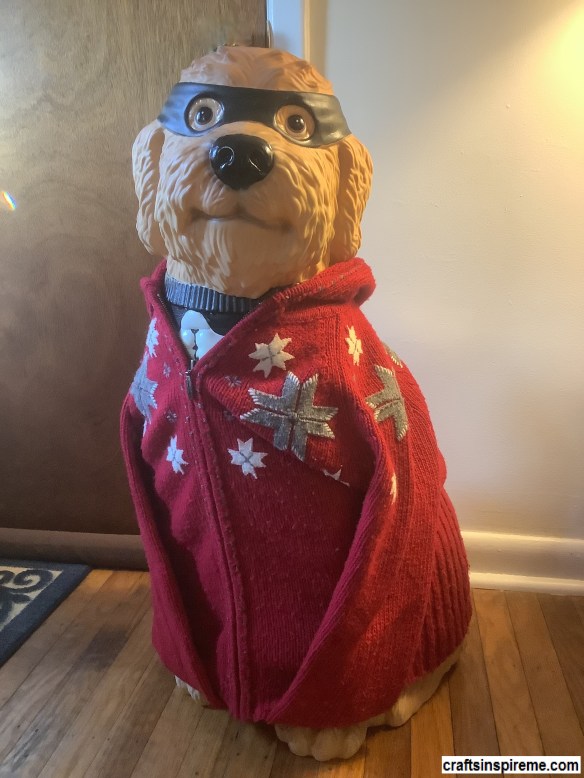
Cover the skeleton costume with a cardigan sweater. Pin the sleeves to align with the front paws so it looks like he is wearing it.
Add a Winter Scarf
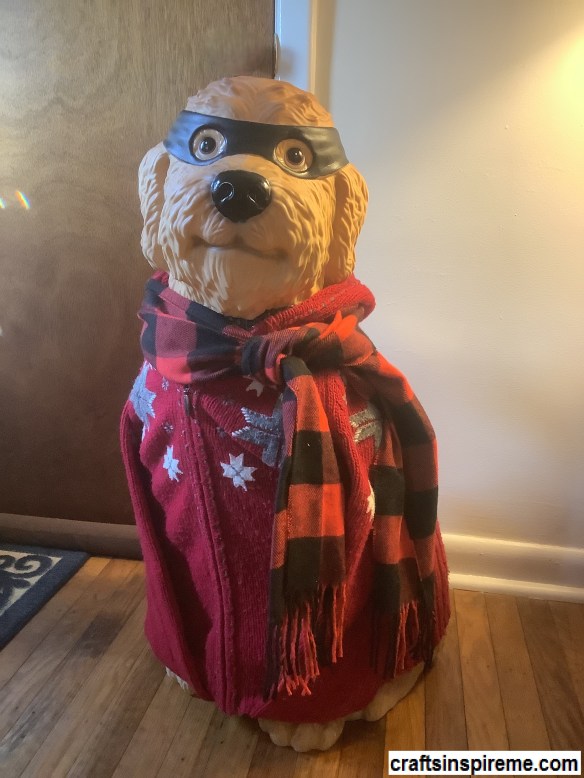
This scarf looks cute and covers the neckline of the black sweater beneath.
Add a Pair of Ski Goggles
Believe it or not, they do make goggles for dogs! There are two straps, one around the head and the other around the muzzle. This dog’s head is quite large, so rather than exchange for a larger size, I cut off the muzzle strap and set the goggles in place.
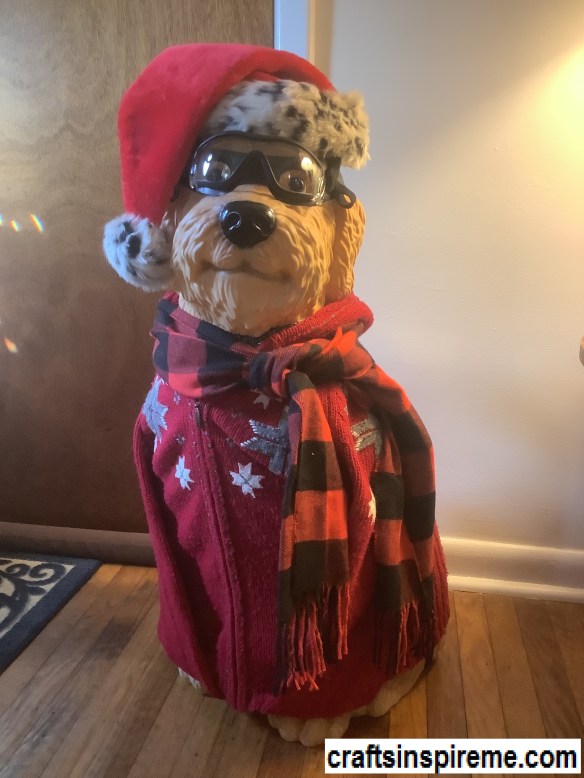
Big Dog – Christmas
The adorable Santa hat completes the transformation, while holding the goggles in position. If you want to keep him out all winter, you could easily swap out the hat and he’s ready for the ski slopes. I hope you enjoyed this project and a wonderful holiday season.
Thanks for Reading, Happy Holidays & Happy Crafting!
Wrapping gifts can be fun or stressful depending upon how many presents and how much time you have. I have posted previous articles on the typical gift-wrapping options, but this time I thought it would be nice to see several “outside the box” ideas. Let’s go….
Bottle & Jar Wrapping
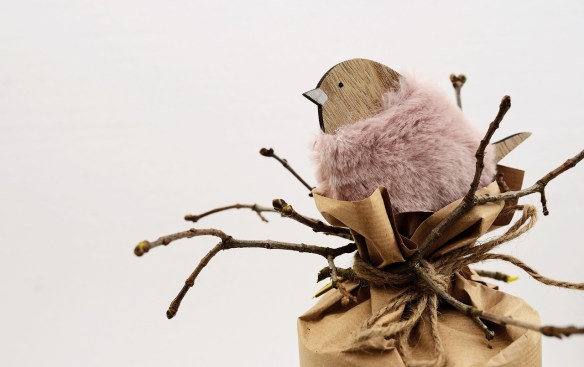
Bird’s Nest Bottle Topper
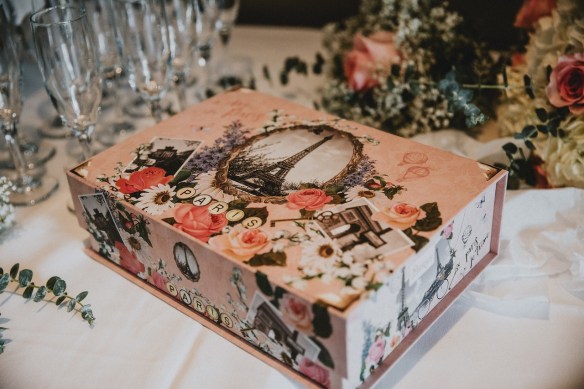
Homemade Chocolate Box for Candy
Homemade Chocolate Box for an Engagement Ring
Hinged Ornament for Gift Inside
Decorative Cigar Box
Cloisonne Box
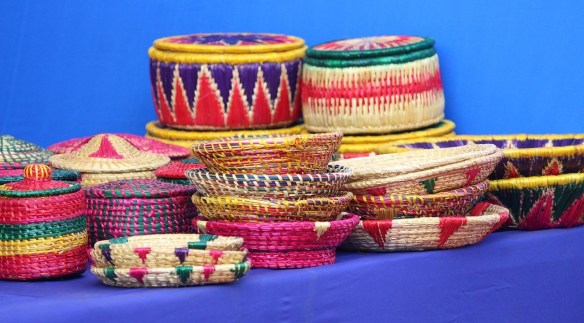
Hand Crafted Baskets
Specialty Flower Envelope
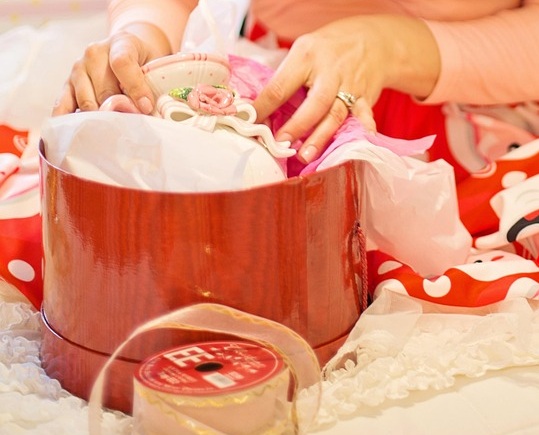
Hat Box
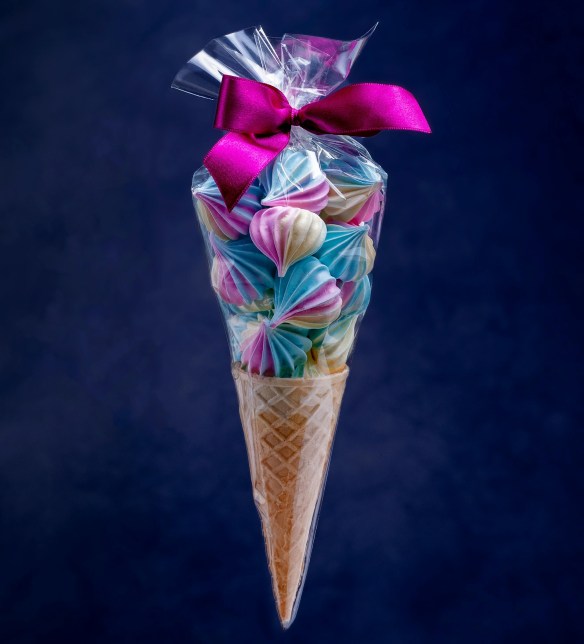
Ice Cream Waffle Cone for Homemade Candy
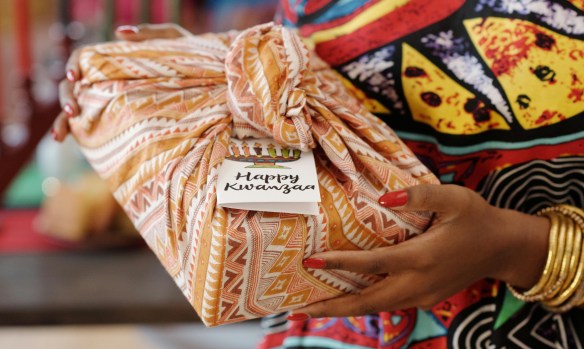
Kwanza Holiday Fabric Wrap
Novelty Lingerie Bag
Mug for Baked Goods or Candy
Multi-Compartment Container for Serving Baked Goods or Candy
Nested Dolls
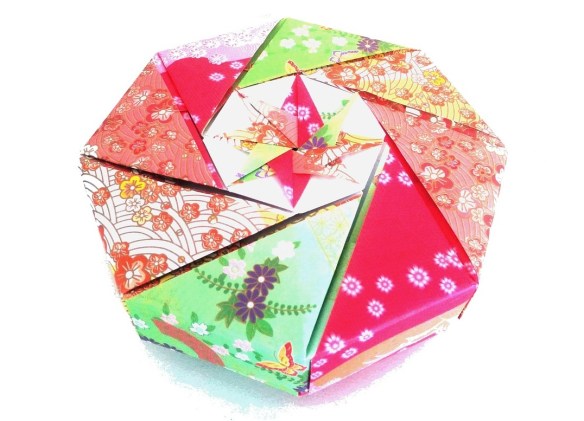
Origami Box
Puzzle Box
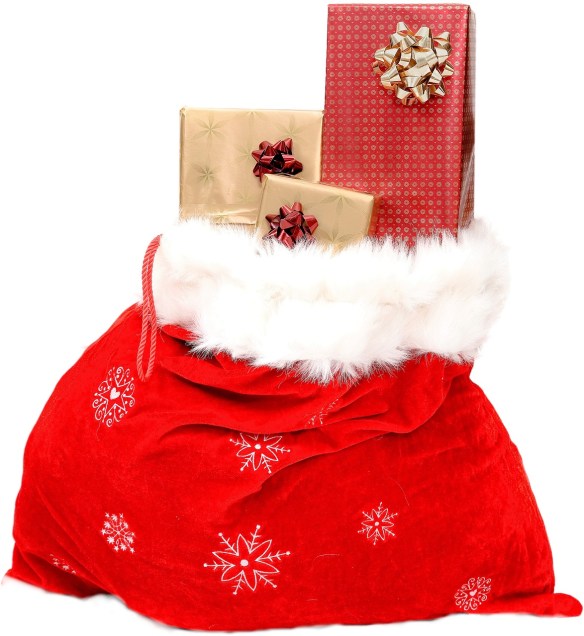
Santa Sack
Stuffed Animal with Zippered Compartment
Set the Stage – (e.g. Gnome on a Wall)
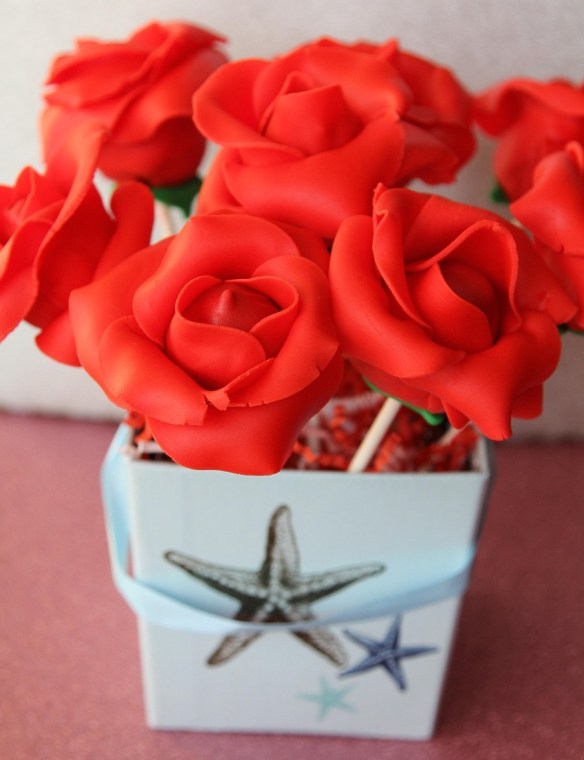
Decorative Take-Out Container with Edible Roses
Tissue Paper Wrap & Flower Topper
Mini Travel Trunk
Trinket Box
Umbrella Raining Money
This concludes our exploration of unusual gift wrapping/presentation ideas. Many of these can be reused, which is great for the environment. Please let me know your favorites. Have you come up with interesting ways to wrap gifts? Please share them in the comments.
Thanks for Reading, Happy Holidays & Happy Crafting!
What I miss the most during the colder months are the beautiful colors in nature. The winter sky is so gray, the trees are dormant, and the flowers temporarily disappear for a long winter’s nap. Evergreens defiantly retain their glorious shades of green regardless of the weather. To brighten your home decor, you can add a little evergreen and it will never need to be watered.
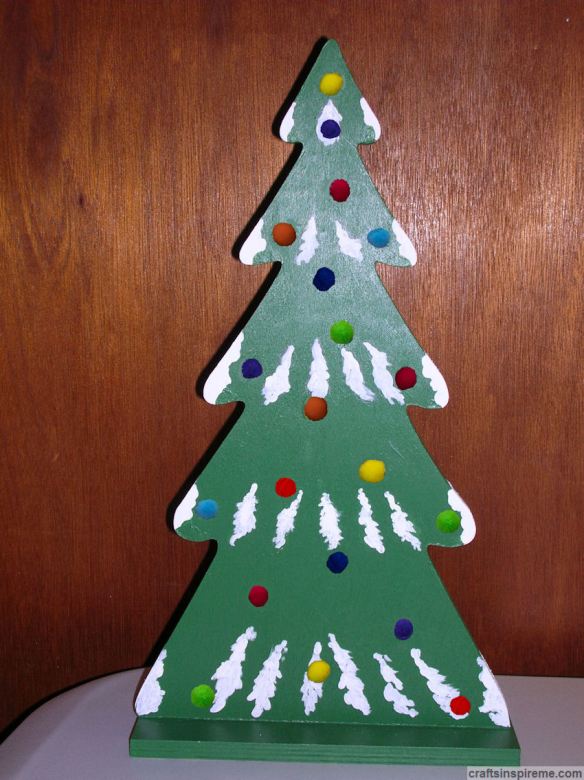
How to Paint Wooden Pine Trees
This painted craft is very easy to complete in a short amount of time and it’s great for beginners too!
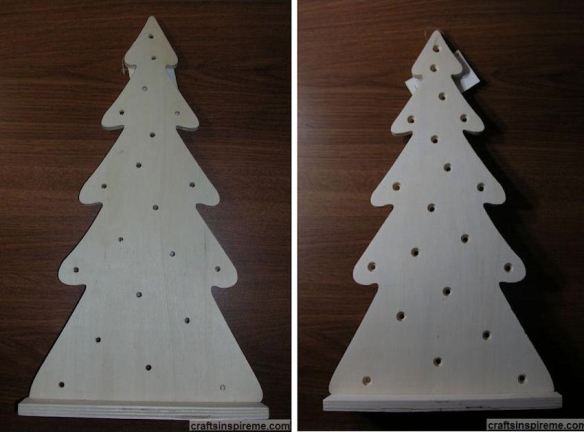
Raw Wood Trees
As with all raw wood, a little sanding may be required, especially along the edges. The pre-drilled holes are for lights in a later step.
Supplies Supplies:
Wooden Pine Tree (17” high x 9” wide x 1/2” thick) (Base is 9” wide x 2” deep)
Acrylic Paints – green, white
Paintbrushes
Sandpaper
String of 20 lights
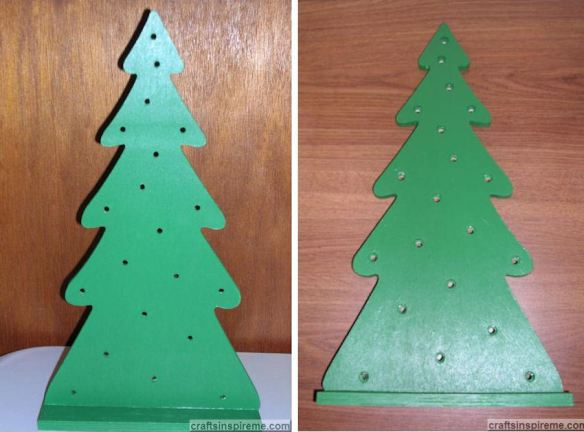
Apply Green Paint
Paint each tree green, ensuring both sides, all the edges and the base are painted.
Define the Branches with Snow
In nature, snow gathers on the branches. To give these trees a more three-dimensional appearance, add patches of white paint to imitate Mother Nature.
Tree Lighting
Those pre-drilled holes were made to hold a strand of twenty white lights. The lights can only be pushed through from one side of the wood frame. You may need to secure the last light at the bottom with a piece of tape to keep it from pulling out from the weight of the electrical cord.
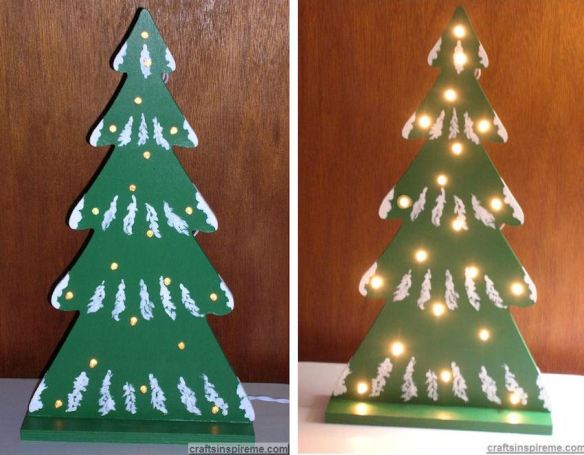
Finished Trees (with and without camera flash)
All you need to do now is choose a spot to display your handiwork and plug in those lights. I place my trees in the living room windows to enhance the rest of the outdoor decorations. When the holidays are over, they can remain on display throughout the winter.
Pom Pom Alternative
As an alternative to lights, you can turn a simple pine tree into a Christmas tree by gluing on multi-color pom poms as ornaments.
I hope you enjoy this project and have fun decorating your home for the holidays.
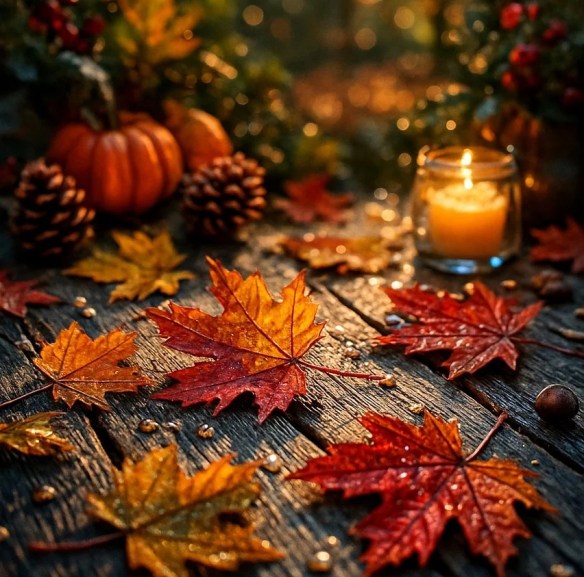
Thanksgiving Day is upon us. People travel far and wide to visit and dine with family and friends. The beauty of autumn inspires the color palette and flavors of this vibrant and entertaining holiday. Let’s look at ideas for décor and food for Thanksgiving Day.
Seasonal Home Décor: Welcome Flag
Pumpkins & Chrysanthemums
Pumpkin & Gourd Wreath
Fabric Pumpkins
Hand Blown Glass Pumpkin
Create bold contrasts to all the oranges & reds by using blues and greens.
Pumpkin Place Setting
Use a Sharpie marker to turn tiny pumpkins into seasonal place cards.
Pumpkin Paper Napkins
Besides using these for appetizers and dining, decorative paper napkins can be placed in bathrooms as disposable hand towels.
Cornucopia Centerpiece
Candles create a welcoming atmosphere, warm light and fragrance.
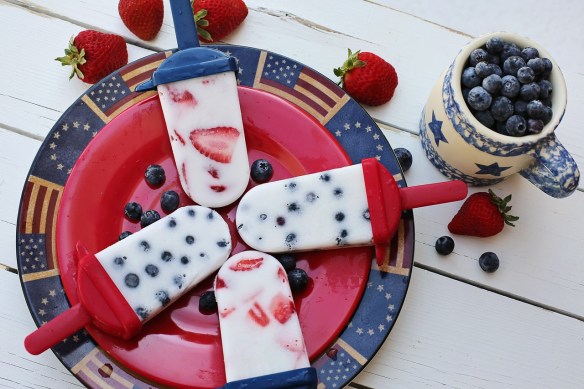
Seasonal Flavors: Cranberry Juice Cocktail
Cranberry is a great option for beverages, baked goods and of course cranberry sauce.
Spicy Mulled Wine
Butternut Squash Soup
Turkey & Stuffing
Sweet Potatoes
Although these are usually served as a side dish, sweet potato pie is a delicious dessert.
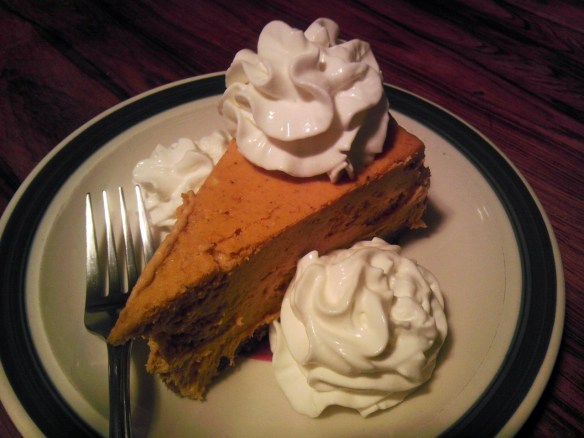
Pumpkin Cheesecake
Cinnamon Apple Pie
Pecan Pie
After Dinner Activities: Relaxation
If you ever felt a turkey “coma,” you know a comfortable recliner can be your best friend. Of course, a wide-screen television for watching football is also a must.
Family Challenge – Let the Games Begin
If you have leftover pumpkins from Halloween, you could start a new tradition competing for prizes in creative pumpkin design and/or carving.
Thanks for Reading, Happy Thanksgiving & Happy Crafting!
Did you know that many of your favorite candies can be made at home? Recipes for those shown below can be easily found online, and I have included tips for making these delicious treats. Let’s get started!
The Basics of Candy Making:
Milk Chocolate Candy Melts
Homemade candy usually begins with candy melts, which come in many flavors, including milk, white and dark chocolate, strawberry, mint, and caramel. Melting can be done on the stove or in a microwave.
Hand Dipping Chocolate
Question – What can you dip in chocolate? Answer – Everything from marshmallows and strawberries to Oreos, potato chips and Twinkies. Many candy confections require dipping as the final step.
Candy Molds
Simply pour melted candy into the mold and refrigerate. Candy molds are available in an extraordinary variety, including those for making solid chocolates, truffles, candy bars, hard candies, and lollipops.
Solid Chocolates:
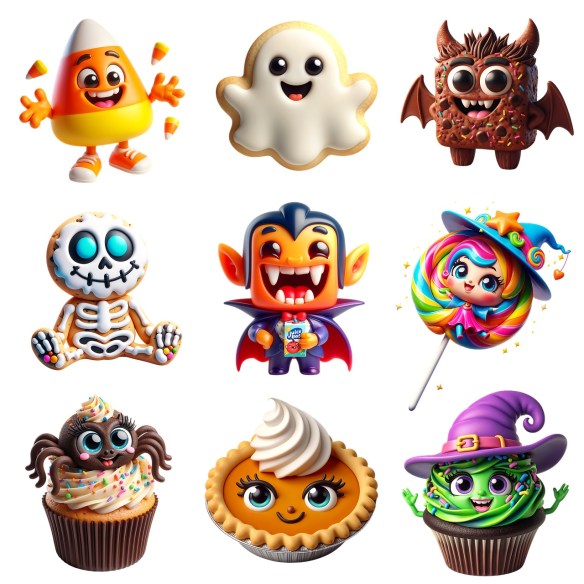
Halloween Candy
Solid chocolate candy is the best place to start for beginners. Seasonal candy molds are available for every holiday. You can change the color and flavor by choosing different candy melts.
Chocolate Lollipops
Colorful accents can be added to chocolate in two ways: Prior to pouring the melted chocolate, place small candies in the bottom of the mold, or hand-paint mold details with candy melts in alternate colors.
Filled Chocolates:
Rolos
To make Rolos, melt chocolate, and pour it into the mold, coating all sides and the bottom. Pour out the excess chocolate, add the caramel center, and top with more chocolate. Refrigerate, and enjoy.
Andes Mints
Andes Mints are made in shallow molds by alternating layers of dark chocolate and creamy mint filling.
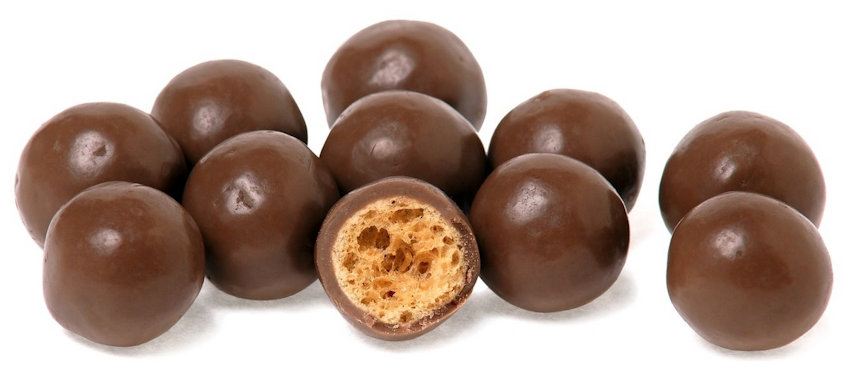
Malted Balls
Malted milk powder is the key ingredient in these poppable candies, which can be shaped by hand or with piping bag and then dip in melted chocolate
Peppermint Patty
Dark chocolate and peppermint extract are perfectly balanced. Shape the mint filling into balls, flatten them like coins, and then dip in chocolate.
Peanut Butter Cups
Peanut butter cups are made by coating the bottom and sides of the mold with chocolate. Add the peanut butter filling and seal the top with more chocolate. Refrigerate and enjoy this delicious combo.
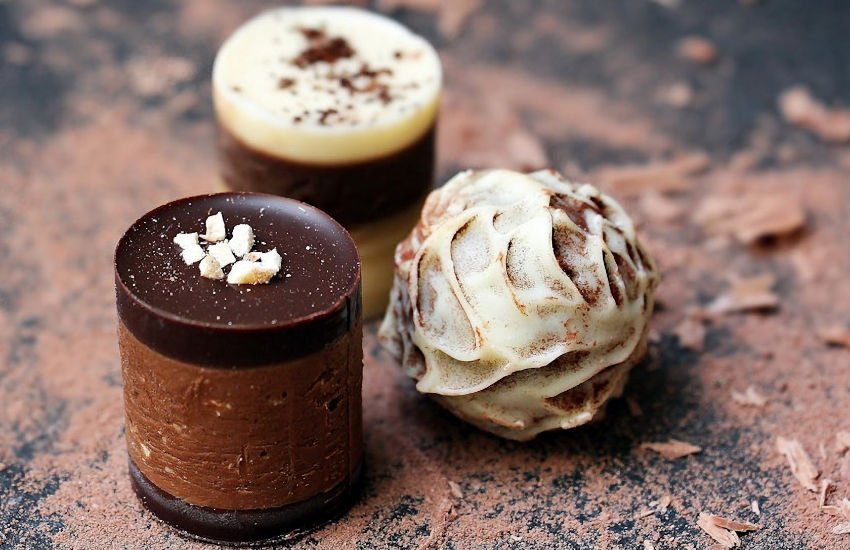
Chocolate Pralines
Chocolate pralines are a mixture of chocolate and cream with hazelnuts, almonds or pecans. Depending upon the recipe, you can drop spoonfuls onto parchment paper, or use candy molds.
Popular Candy Bars:
Hershey’s Chocolate Bar
Hershey bars have been favorites for ages. They are also the number one choice for making S’mores. Simply melt chocolate, pour into the mold and refrigerate.
Nestle Crunch
Mix melted chocolate with Rice Krispies, pour into mold and refrigerate. Yum!
Milk Way Bars
These candy bars can be made using molds, or a parchment lined pan. In a mold, layer chocolate, caramel, and chocolate marshmallow. Top it off with more chocolate and refrigerate. If using a lined pan, layer caramel and chocolate marshmallow. Refrigerate, cut into bars, and dip in melted chocolate.
Three Musketeers Bars
Pour melted chocolate into a mold to coat bottom and sides. Mix chocolate marshmallow filling, press it into a mold and then top it off with a layer of chocolate. Refrigerate, release from mold and dip in melted chocolate. These can also be made in an 8×8 pan lined with parchment paper.
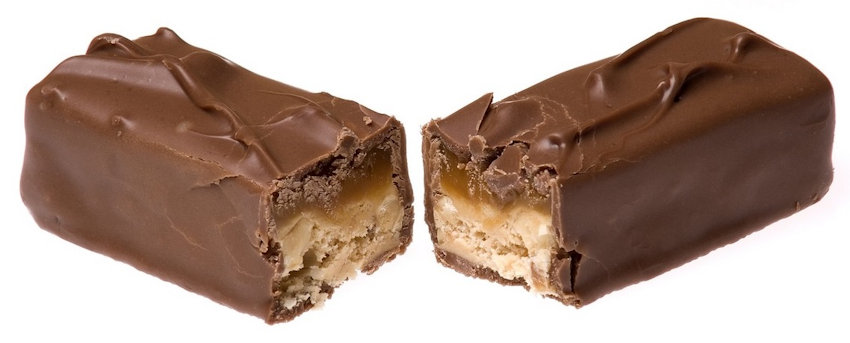
Butterfinger
Believe it or not, most recipes for homemade Butterfingers are made by melting candy corn and mixing it with peanut butter, which is pressed into a mold, and refrigerated. Dip in melted chocolate.
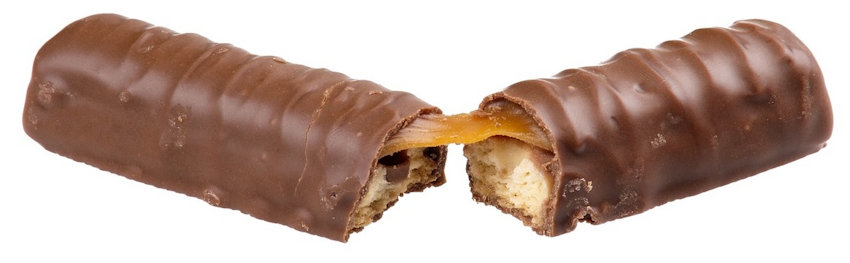
Twix Bars
For Twix bars, follow a shortbread cookie recipe and bake in a square pan. Allow it to cool and then cut into individual bars. Spread caramel over the top of each cookie and dip in melted chocolate.
Kit Kat Bars
Are Kit Kat bars your favorite? Dip crème filled vanilla sugar wafer cookies in melted chocolate. It’s easy and delicious!
Hard Candy & Lollipops:
Hard Candies
For homemade hard candies, most people use a cookie sheet instead of a mold. Change the flavor or color as desired. Flavors include various fruits, mints, and caramel.
Rock Candy
Rock Candy requires sugar, a jar, sticks, and lots of patience – it takes 1 to 2 weeks for crystals to form.
Swirled Lollipops
To make swirled lollipops, the warm candy mixture is worked by pulling and folding, creating ropes, which are twined together, and wrapped into spirals. Add sticks & enjoy.
Gummies:
Gummy Bears
Gummy bears appeal to kids and adults. They can be easily made at home with a gummy candy mold, and you can use fruit juice instead of sugar.
Presentation is Everything:
Chocolate Tulips
Just like bunches of fresh cut tulips, these multicolor chocolate blooms are haphazardly stacked in an eye-catching display to tempt your willpower.
Chocolate Tools
Creative chocolate molds, such as the ones used to make these tools, have strikingly realistic details, and the rectangular display resembles a toolbox. The chocolatiers have done an incredible job making these life-size “metal” tools, but I think the realism has been taken a bit too far. Although I know they have been dusted with cocoa powder for a well-worn appearance, rusty items do not appeal to my sweet tooth.
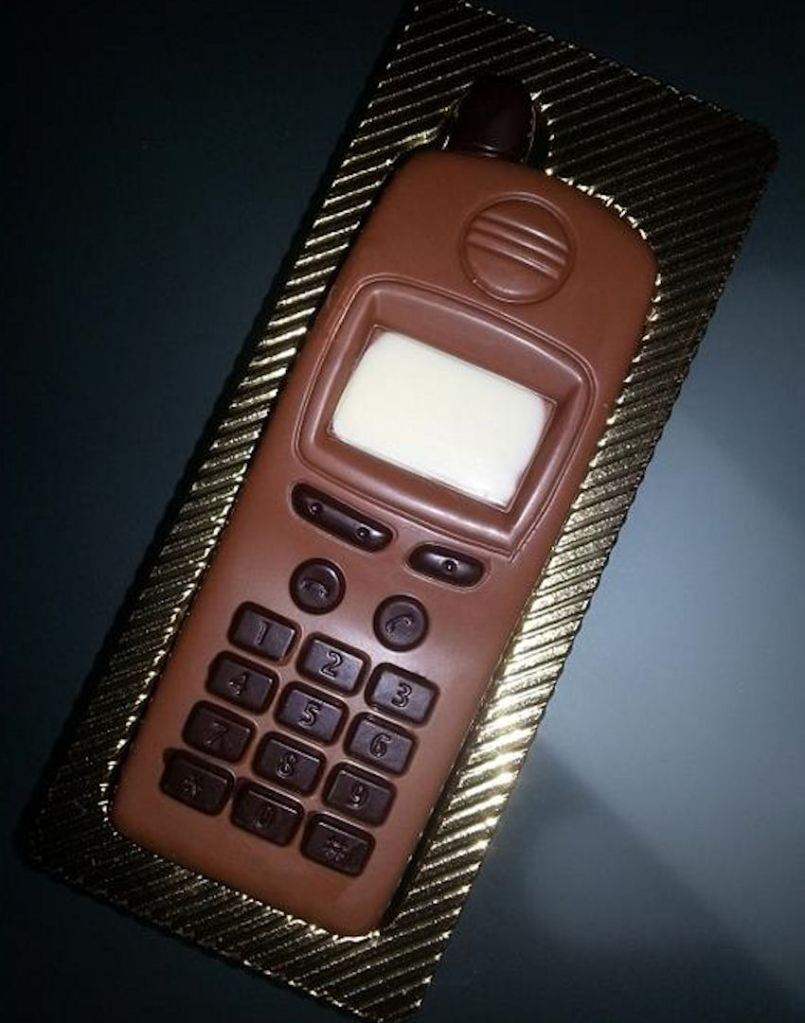
Chocolate Cell Phone
Want to know a stress reduction secret? Less technology and More chocolate! Remember, “stressed” spelled backwards is desserts! Enjoy!
Gingerbread cookies are a favorite treat any time of year. Decorating gingerbread is a great activity for the whole family. For a real challenge, why not try designing, building and decorating a gingerbread house? Before we look at some finished houses, let’s take a closer look at a few of the important details.
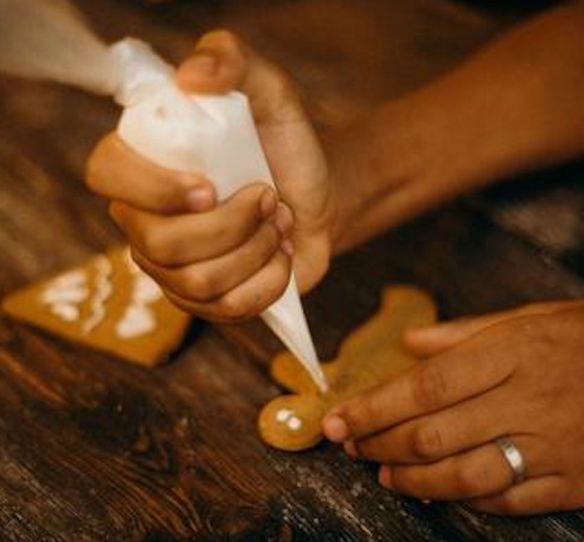
Decorating Gingerbread
Whether decorating cookies or building a gingerbread house, the first skill you will need is piping icing.
Piping is the Key
From the smallest detail to the walls and roof, royal icing is the edible glue that holds everything together.
Candy Decor
Any type of candy will do. If you tend to nibble while you work, you might want to have extra candy on hand so that you don’t run out before the project is finished. (lol)
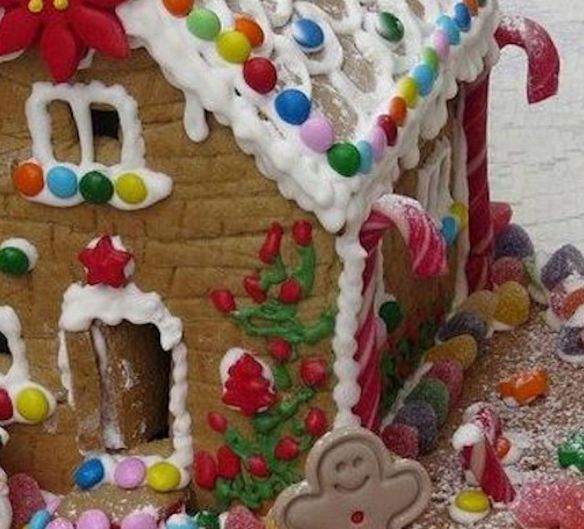
Architectural Details
This budding architect has carefully defined the details: candy cane columns; stamped brick wall pattern; piped & candied landscaping, door and window trim; M &M roofing; and candy accents.
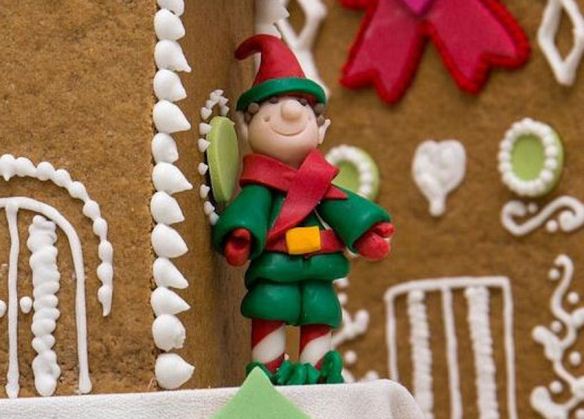
Festive Elf
Don’t forget to have fun with your creation.
Be Adventurous
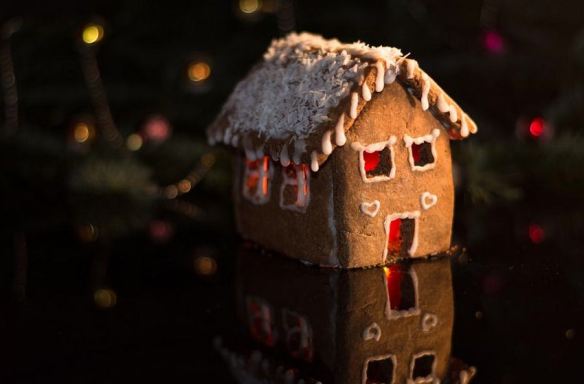
Let your imagination run wild. Come up with interesting details. This artist darkened the windows to add depth and carved wood grain into the door. Make your project as unique as you are.
Humorous Little Details
Be sure to include the unexpected, such as this fondant cat on a snow-covered roof.
Miniature Gingerbread Houses
There’s nothing wrong with starting small. This house was made entirely from gingerbread cookies. It’s quick and easy to put together and can be used as ornaments, or as gifts for visitors. You could even pipe names on each one as edible “place cards” at the table.
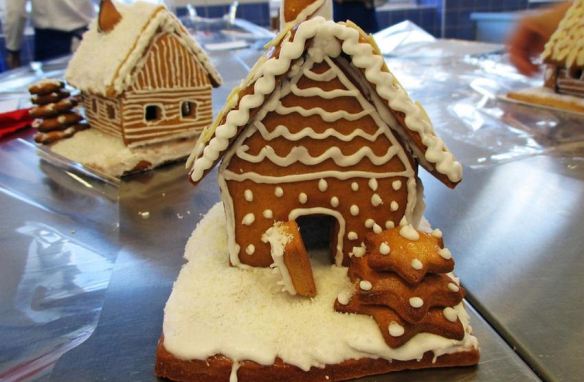
Chalet
Instead of candy, decorated gingerbread cookies adorn this simple A-frame house.
In the Doghouse
Icing is the main decoration on this adorable doghouse, with only a few candy accents.
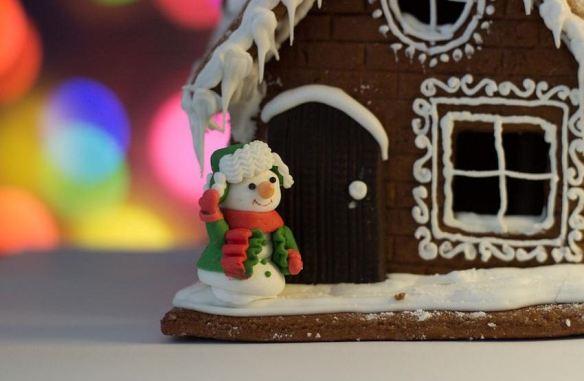
A Bright Idea
This cottage may be small, but it has two interesting qualities that make it really stand out: 1) LEDs provide a soft glowing interior. 2) The reflective high gloss tray resembles ice or water. As an alternative to lights, you could place sheets of fruit roll ups over the inside of the windows and doors to create a cozy glow.
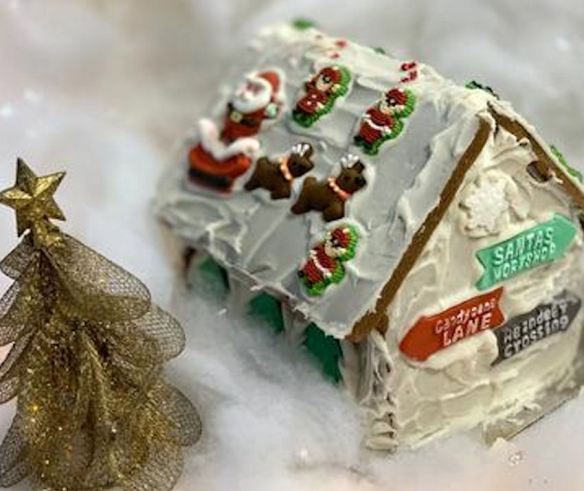
Accessible Design
Holding a piping bag and defining tiny details can be difficult, if not impossible, for those with limited mobility. Decorating can be made easy by simply spread icing with a spatula over all the walls and roof. Place decorations wherever desired, and the icing will hold them in place.
Log Cabin Village
These gingerbread houses remind me of the colonial log cabins in Valley Forge National Park. Instead of candy, piped icing was used throughout the design, with a sprinkling of sugar snow.
The North Pole
Leave it to Santa to create a quaint village, where even the North Pole is edible!
Cabin in the Woods
Like something from a fairy tale, this cute little snow-scene has a soft pink and blue color scheme complemented by a welcoming fire glow from inside.
Cozy Chalet
Almond cookies adorning the roof and chocolate door & chimney set this chalet apart.
Midnight Cabin
The contrasts between light and dark give this gingerbread house a spooky feel like something you might see in a dark lonely forest. The gumdrop posts appear to be glowing, while the almost obscured windows make you wonder what might lurk inside.
Gingerbread House Kits
You could make gingerbread houses from scratch, but kits, which include all the candy, walls, roof, and icing, are a great place to start for beginners.
A Grinchy Christmas
The Grinch gets an upgrade from his old cave home to this perfect gingerbread tribute to Dr. Seuss. From the whimsical tree to the asymmetrical door, the spirit of the story comes to life before our eyes.
Angelic Lace
Delicate lace-like patterns harmonize with tiny gold dragées, while mini string lights illuminate the tree as well as the interior. A very steady hand is required to keep the lines soft and fluid.
Guiding Light
Gingerbread can be made into any type of building including castles, churches, and lighthouses. If you can imagine it, anything is possible.
Chocolate & Gingerbread Cottage
You seldom see chocolate decorations on gingerbread, but this artist has done a wonderful job combining the two into an exquisitely detailed showstopper.
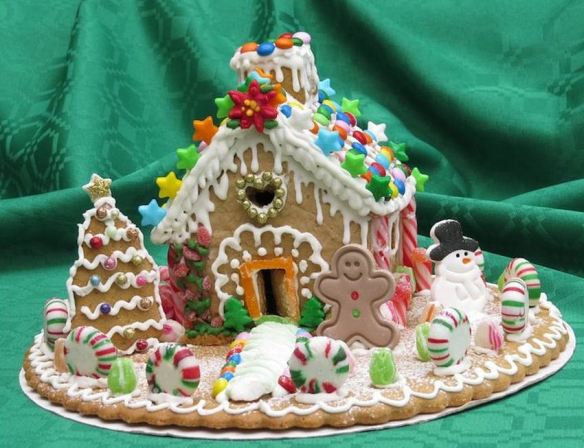
Feast for the Eyes
There’s a lot going on here, but it’s beautifully balanced. The snow drips from the roof and the evergreen tree is decorated with colorful balls and a star on top. The upright pinwheel candies make a lovely border, while the cheerful gingerbread man and his snowy friend are sure to please. Every detail in this sentimental gingerbread home was made with love to warm the heart.
Your Reward
What is the best part about decorating gingerbread? Eating it! After all that hard work, you deserve a tasty treat. If you don’t have the heart to munch on your creation, have a few decorated cookies on the side as a reward for a job well done. I hope you are inspired to give gingerbread building a try. Good luck and remember you can always eat your mistakes. (lol)
With a title like that, you’re probably looking for a good time. And that you will have, but probably not in the way you were expecting. Lol Today we’re going to talk about skeletons and swings.
Halloween is a skeleton’s favorite holiday.
Love at first sight does not require sight. Even after death love lives on.
They like to lounge around on Sunday afternoons.
Skeletons can be silly and have a playful sense of humor.
What could be more fun than riding a swing? The idea of skeletons and swings inspired our next project.
How to Make a Skeleton Swing:
Halloween Sidewalk Edging – (lightweight plastic)
I bought this at the dollar store. It is supposed to be used as spooky edging along your front sidewalk or to serve as a perimeter fence around a Halloween graveyard display. This works great as a seat swing, and I kept the stakes for their menacing appearance.
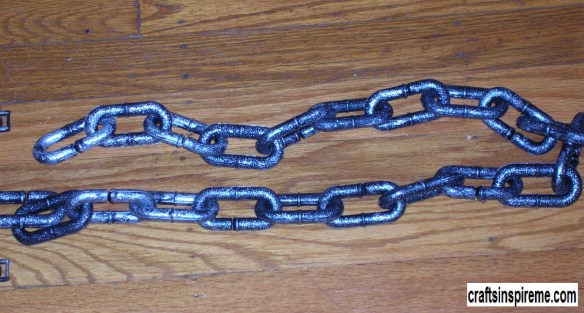
Large Link Chains – (lightweight plastic)
This dungeon-like chain also came from the dollar store. A note of caution, these fake chains are only for show and cannot hold any weight. Compensate for this by using heavy twine, as you will see in the following steps below.
Assembled Swing
Tie chains to each side of the seat using heavy twine. As mentioned above, you will need to add support, and this depends upon the type of skeleton you choose. To prevent the chains from pulling apart: tie heavy twine to each side of the seat and weave it through the chains to the top and then tie it together so it can be placed over a branch or slid onto a wall-mounted flagpole.
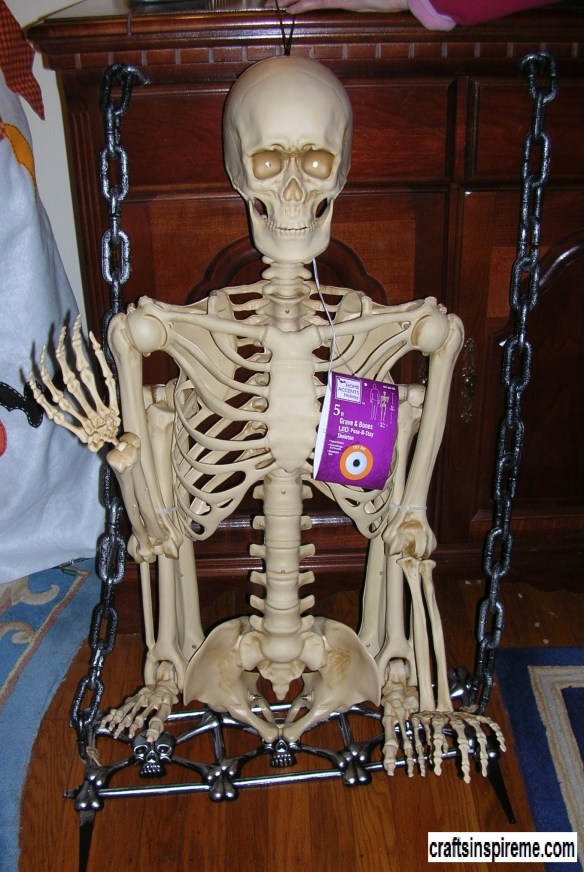
Human Skeleton on Swing
Human skeletons have a loop at the top of the skull, which will support the full weight. He will appear to be riding the swing if you clasp his hands upon the chains, allowing the seat to simply lean against his backside. You may need to adjust the chain length to accommodate his height. For a humorous touch, you could add a baseball cap or a fashionable scarf around the neck.
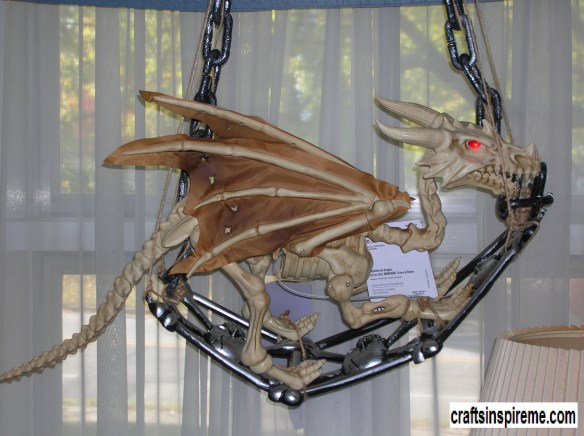
Dragon Skeleton on Swing
Here’s another skeleton option, and as you know I love dragons, so I returned the human skeleton to the store and chose this dragon instead.
Finished Dragon Swing
To protect the dragon’s animatronic eyes, jaws and sound effects, I opted to keep the swing indoors and hung it from an existing plant hook in the ceiling. To reinforce the swing to hold his weight, I attached additional twine to the four corners of the seat. I also tied his feet to the seat to ensure he stays firmly in place. Everybody loves this new addition to our Halloween décor. I think he likes it too!
I hope this project will inspire you to think outside the box with your Halloween decorations. Please let me know your thoughts and ideas in the comments.
Thanks for Reading! Happy Crafting! And I hope you have a very Happy Halloween!
Flowers and a heart-shaped box of candy are the traditional gifts for Valentine’s Day. While there’s nothing wrong with that, let’s see if we can find more creative ways to express love.
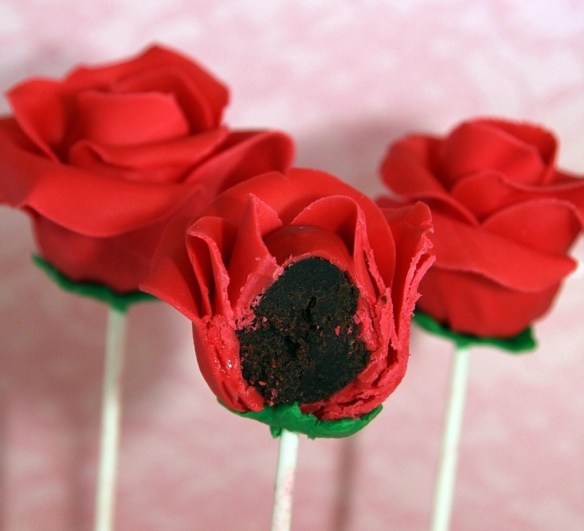
Floral-Themed Gifts: Rose Cake Pops
Cake pops are often dipped in chocolate and covered with sprinkles. In the photo above, the rich chocolate cake center was wrapped in modeling chocolate, creating edible roses.
Glass Flowers
Each delicate petal in this stunning centerpiece was skillfully handcrafted with glass.
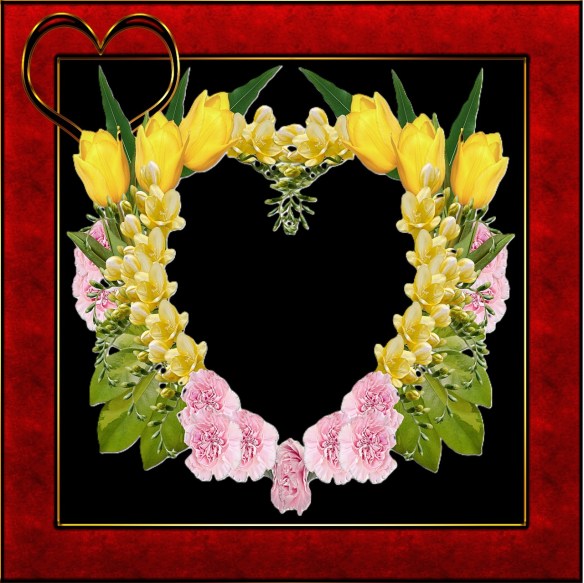
Floral Digital Art
Digital flowers provide infinite possibilities. A frame is the perfect finishing touch.
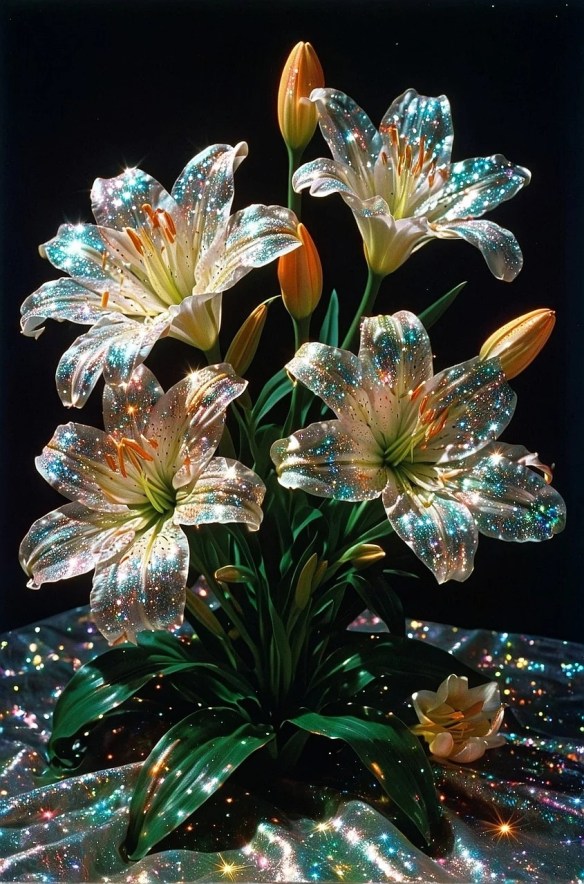
Fresh-Cut Rose Lilies Centerpiece
Are you familiar with rose lilies? These colorful, fragrant blooms have that wow-factor and are much less expensive than roses.
LED Floral Garden Lights
No green thumb is required for these pretty blooms. When the sun goes down, imagine the surprise of seeing a magical glowing flower garden.
Floral Painted Glass
One of the challenges of stained glass is working with sharp wire and glass, causing cuts in your hands. With painted glass, the problem is solved. You can have the look of genuine stained glass and none of the pain. Yeah!
Silk Chrysanthemums Centerpiece
Silk flowers have come a long way. These fool-the-eye chrysanthemums will look divine long after the typical roses have faded away.
Heart-Themed Gifts: Hand Blown Glass Heart
Glass blowing is an age-old art, and each is a one-of-a-kind masterpiece.
Nature’s Valentines Photography
Heart shapes appear everywhere in nature, including seashells, rocks, and animals too.
Twig Heart Wall Art
Whether you prefer hiking through a forest or walking on the beach, the treasures you collect along the way can be incorporated into unique and meaningful gifts.
Glass Mosaic Heart
Mosaic art can be created with glass, ceramic tiles, stones, seashells, etc. These intricate designs adorn walls, furniture, jewelry, or anything else you imagine.
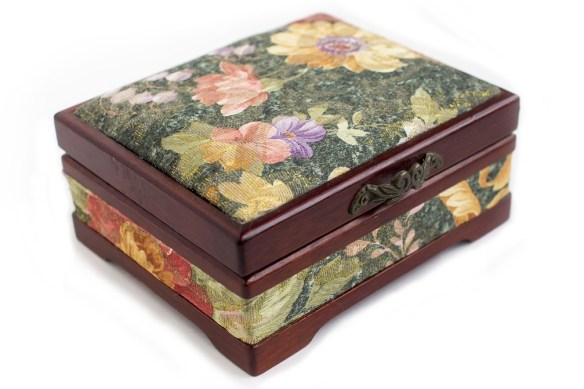
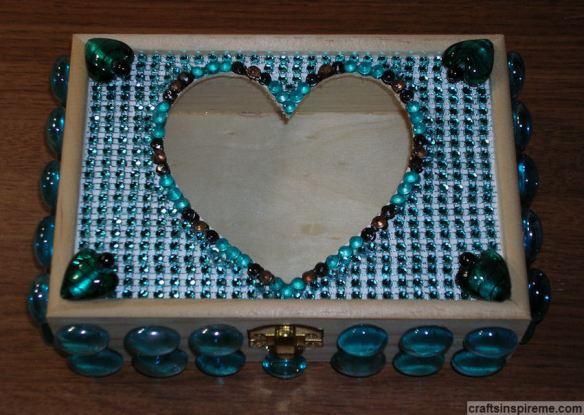
Wood & Glass Heart Box
Painted, stained or decorated wood crafts make great gifts.
Papercraft 3D Wall Art
Wall art, scrapbooking, and origami fall under the papercraft category. There was a time when paper was limited to matte or gloss finish. Today, there are metallic, iridescent, painted, and decorative papers to bring your design to life.
Writing: Musical Composition
Compose an original song.
Calligraphy
Heart-felt words of love are sure to be appreciated.
Write Poetry
Whether you write a single poem or a book, sharing your creative writing makes a thoughtful, memorable gift.
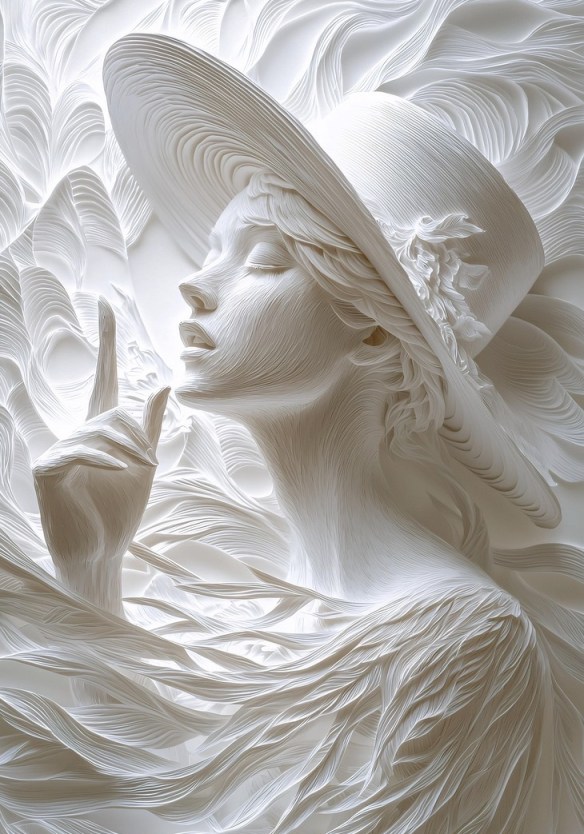
Miscellaneous Gifts: Paper Sculpture
If paper could make a wish, I suppose becoming a sculpture would be the ultimate dream come true. If you prefer digital art, a similar sculptural effect can be achieved using AI software.
Take a Class
Instead of flowers or candy, you and your loved one could take a class in flower arranging or candy making. As an alternative to expensive restaurants, learn how to cook a delicious dinner and mouthwatering dessert. Spending time together is a gift too.
Thanks for Reading, Happy Valentine’s Day, & Happy Crafting!
I couldn’t resist this photo of a kitten swatting a clock just before midnight on New Year’s Eve. Time flies so quickly. I don’t think this little guy could catch it, but that won’t stop him from trying. There are so many creative opportunities throughout the year. Let’s look at some of the possibilities for each of the major holidays:
New Year’s Eve/Day – Specialty Drinks
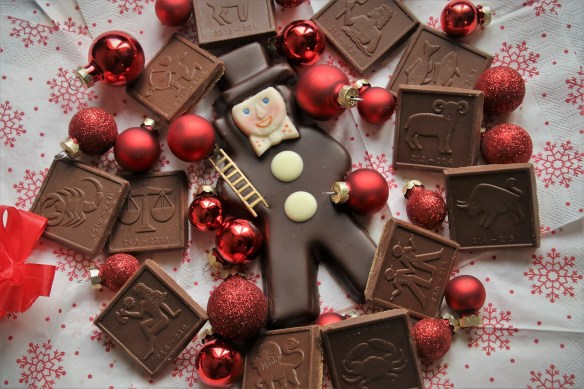
New Year’s Eve/Day – Homemade Zodiac Chocolates
Chinese New Year – Lanterns & Decor
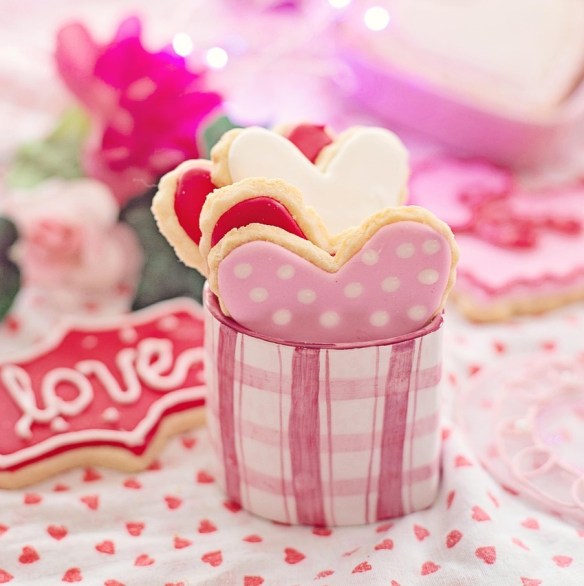
Valentine’s Day – Homemade Candy & Cookies
Valentine’s Day – Flower Arranging
St. Patrick’s Day – Flower Arranging, Jewelry, & Sewing
St. Patrick’s Day – Cookies
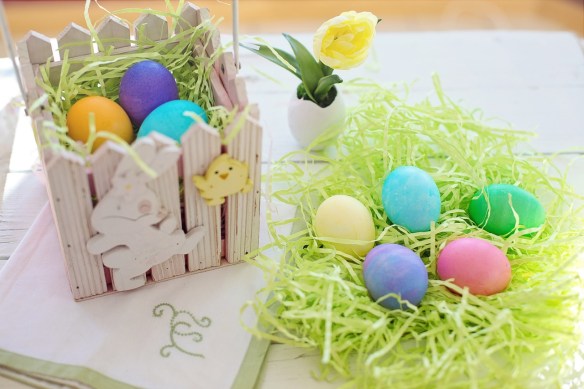
Easter – Dyed Eggs & Wood Crafts
Easter – Cookies & Ceramics
Cinco de Mayo – Hat Design, Beading & Embroidery
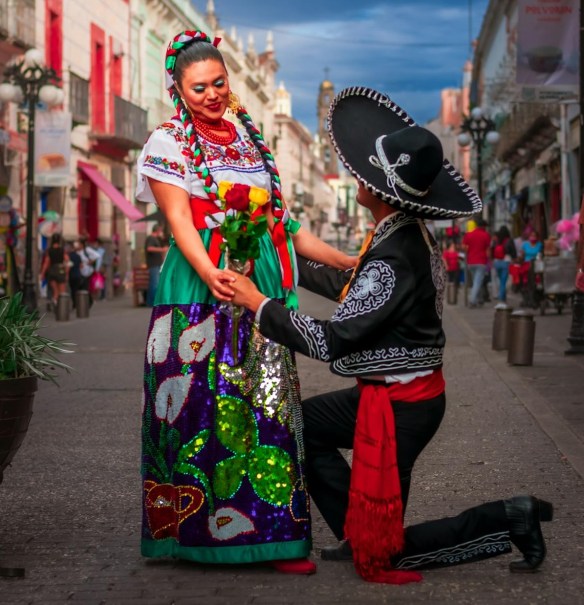
Cinco de Mayo – Costume Design, Sewing, Embroidery & Beading
Whether you make these holiday-themed crafts for yourself or give them as gifts, they are all wonderful ways to express your creativity. Don’t be afraid to try something new. You may discover talents you never knew you had.