Why Just Paint? Faux Finish.


Faux finishing is a great, inexpensive way to transform a room and can be easily done over a weekend, and sometimes in a few hours with minimal effort.

There certainly is no shortage of ideas and inspirations for faux finishing including: retail stores, restaurants, shopping malls, magazines, books, websites, videos, craft and paint stores. Instructional videos can be found on YouTube, but don’t forget to check paint manufacturers’ websites as well.

You may already have many faux finishing tools in your home without even realizing it. Paint can be applied using rolled up plastic wrap or fabric; synthetic sea sponges; brushes, sponge rollers; and trowels. Application methods include dabbing, rolling, splattering, brushing, and glazing. Additional supplies and advice are available through local craft stores, and home improvement or hardware stores.

                          Faux Marble                                               Faux Metal
Faux Marble and Faux Metal
Faux Marble has a mottled background and white veining applied using a feather.

Faux Metal is created using a specialty iridescent metallic paint applied on the diagonal for a hammered metal appearance.

                       Crackle Finish                                      Faux Venetian Plaster
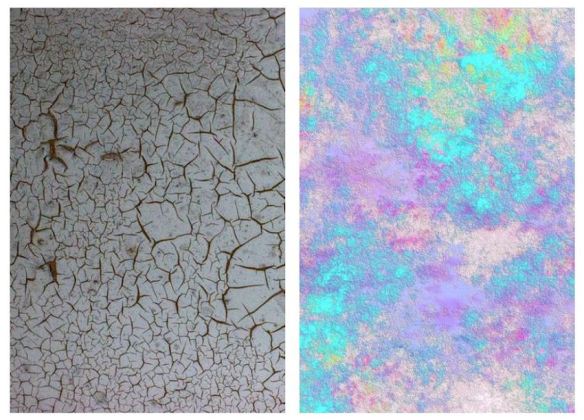
Crackle Finish and Faux Plaster
Crackle Finish involves painting a background color first, followed by a special antiquing medium, which cracks as it dries, revealing the color beneath for an aged, weathered look.

Faux Venetian Plaster has color and texture applied at same time with a trowel, which is a two step process, followed by a drying period, and sanded afterward to create a soft sheen finish.

Textured Wall Paint
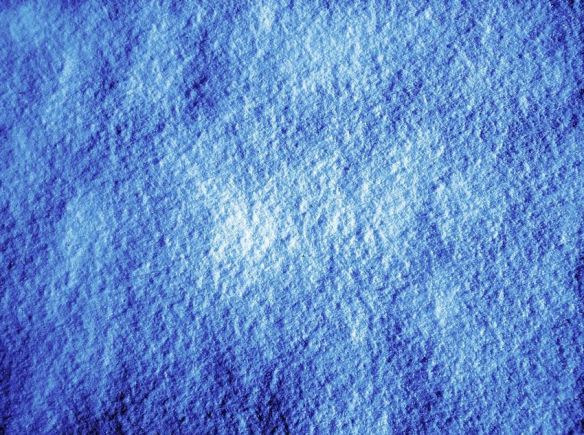
Textured Wall Paint
Textured Wall Paint is probably the easiest faux finish to apply. No special skills are required. If you can use a paint roller, you can texture a wall. After it dries, the wall will resemble the texture of plaster, and the softness of wallpaper. With a bold punch of color, it can be used as an accent wall in a living room, dining room or master bedroom.

Textured Wall Paint
Textured Paint
Faux Plaster can be created simply by applying a thick layer of paint and using assorted “tools” to texture the surface while the paint is still wet.  Additional layers can be applied for greater texture and depth.

Faux Wood Grain over an Abstract Background
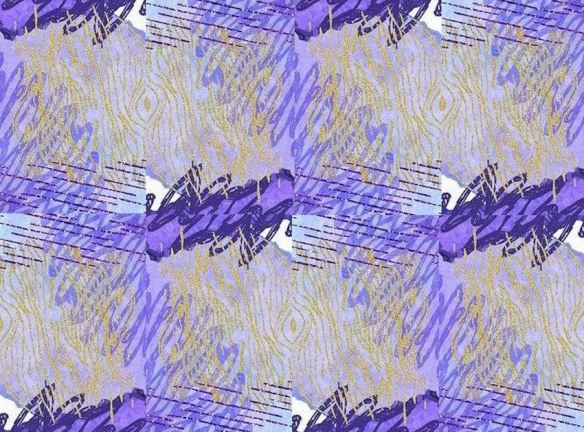
Faux Wood Grain
Faux Wood Grain requires the use of a stencil.  Paint the base coat first in a light or medium color.  When it has dried, go over it with the stencil using a darker color to simulate the natural wood grain, or try using metallic glitter paint as shown above.

These faux finishing techniques are not limited to walls. The same processes can be applied to ceilings, furniture, and just about any other surface.

How To Faux Finish A Room
Research faux finishing ideas and installation methods. Choose your design. Choose the paint colors. Having several color combinations is fine because the first step will help you narrow down the choices. Purchase the paints and corresponding application tools required for your chosen faux finish.

Trying something new for the first time can be a stressful experience. What if you make a mistake? What will you do if you fail halfway through the project? If the paint colors looked great in the store, why do they look so different in my home?

Sample Board
Paint Sample Board
Crafter Tip – Sample Boards are your best friends.
You need to experiment with your color schemes and methods of paint application. The simplest solution is creating a sample board. Sample boards give you a chance to get your feet wet, so to speak, without the overwhelming feelings that can come when faced with full-size wall or an entire room. Hone your skills on the sample boards. With proven skill and newfound confidence, you’ll be ready to take on the full project. Keep your sample board handy for reference while you are painting.

24” x 36” poster board is an easily manageable size. Another option is foam board, also known as foam core, which consists of two pieces of poster board with a piece of foam sandwiched in between for strength. The ability to pin inspirational photos is an advantage of foam core over standard poster board.

Gold Metallic Paint & Synthetic Sea Sponge – (2nd paint color, taupe, not shown)
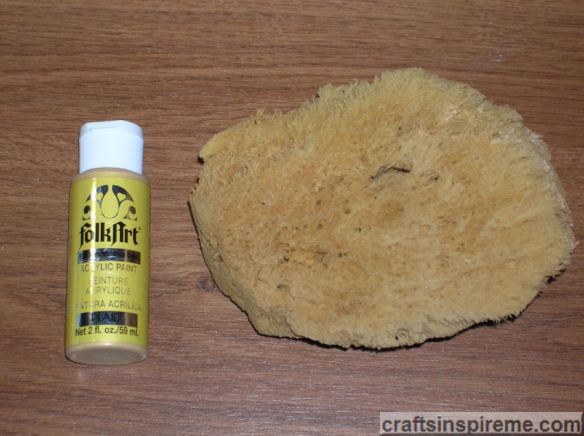
New Bath Paint
For the technique demonstrated in the bathroom below, first paint a coat of the background wall color on the sample board, and let it dry. Apply each group of colors on different areas of the sample board, being careful to label or make note of colors used. Feel free to experiment with various brush and or sponge techniques. Let the paints dry.

Faux Finish Close Up Detail Sponge Painting
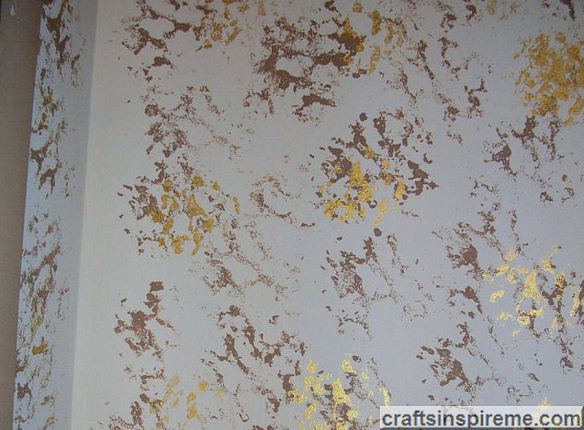
Sponge Painting Detail
Now lean the sample board against a wall in the room to be painted. It is important to see the colors under the existing natural and artificial lighting. Begin the elimination process. Some will be very obvious missteps for one reason or another. A few usually rise to the top of your list. At this point, you can do some additional testing. You may want to create another sample board with larger samples of your top picks.

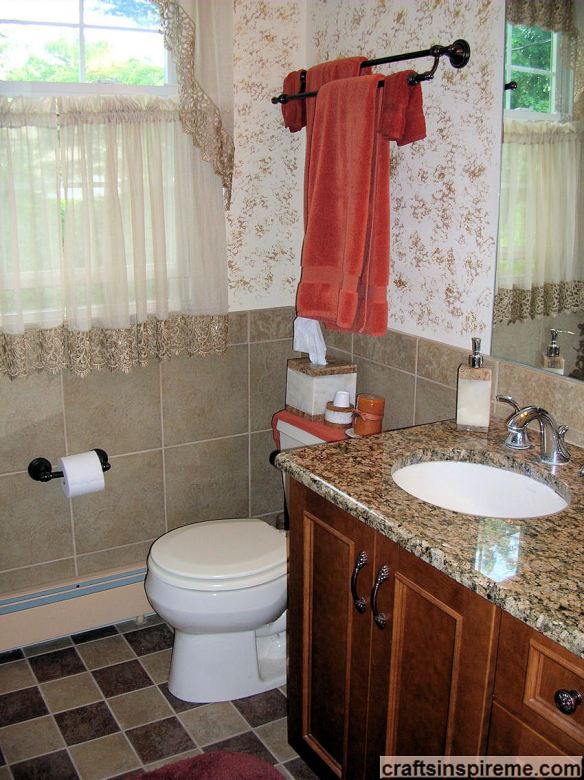
Sponge Painted Bathroom
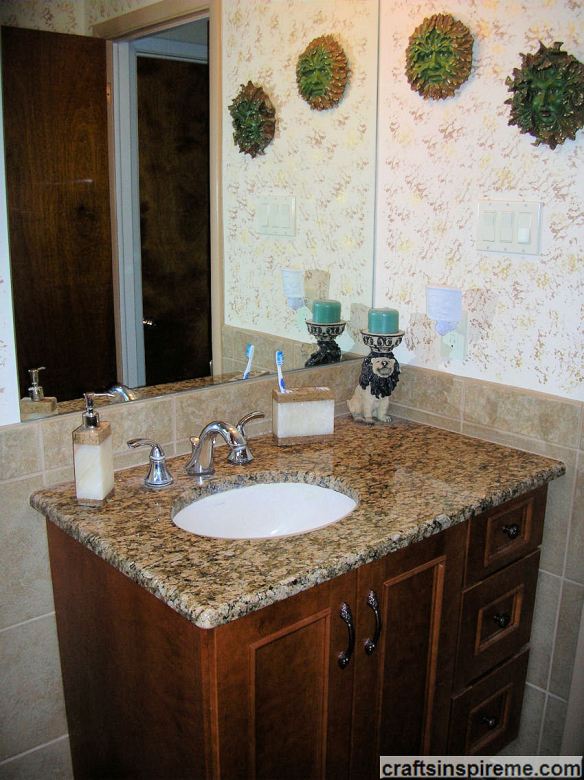

Sponge Painted Bathroom
Once you have decided, it’s time to tackle the faux finishing of all the walls in that room. Take your time, and remember it doesn’t have to be perfect. The beauty of hand-applied finishes is the variation and artistry. If you are using multiple colors, apply one color at a time, and then repeat the process.

You can do this!

Thanks for reading & Happy Crafting!

The Beauty of Woodcrafting

Wooden Heart Pendants
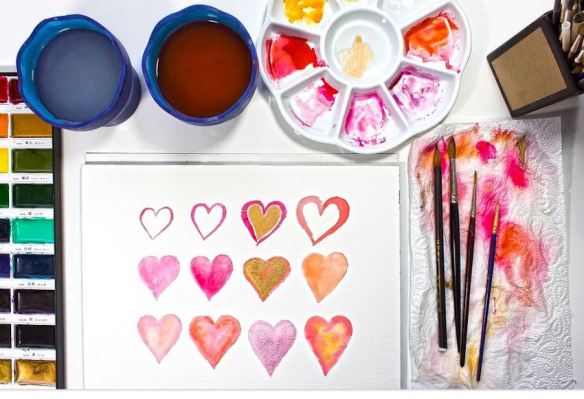
Painted Wood Hearts
Woodcrafts are a fun and inexpensive way to express your creativity. From birdhouses to toys and home décor, there’s something for everyone and these projects are great activities to do with the kids. With a few craft supplies and a little inspiration, you’ll be ready to create your next masterpiece. Here are a few ideas to get you started:

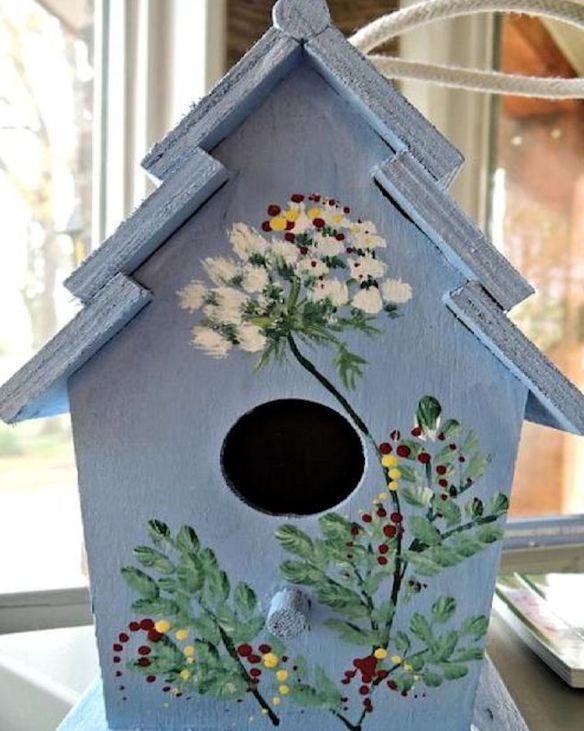
Blue Floral Birdhouse
Floral Birdhouse
Birdhouses are very popular, easy to complete woodcrafts. A quick coat of paint and a few freehand leaves and flowers were all that was needed to complete this project. A realistic looking feathered bird perched in front of the entrance would be a cute addition to this indoor decoration. Crafter Tip: For outdoor use, choose a birdhouse with an access door for easy cleaning.

Accessorizing A Birdhouse
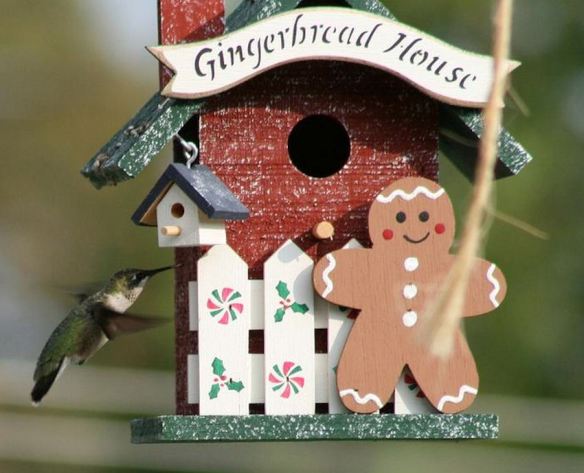
Gingerbread Birdhouse
This artist took woodcrafting to the next level by layering multiple wood decorations, upon a simple birdhouse frame, including a gingerbread man, festive white picket fence, signage, and a miniature birdhouse hanging from the roof. Enhancing a ready-made item adds personality, and unique design flare. Crafter Tip: It is helpful to keep sandpaper on hand. Most woodcrafts are ready to be painted or stained, but sometimes rough edges need a little attention before additional finishes can be applied.

Painted Carved Wood Birds
These colorful fellows have wire attached to their feet for easy attachment on branches, or stakes. Be sure to always use the appropriate type of paint (indoor versus outdoor) depending upon where you choose to display your creations.

Painted Wood Relief Plaque
Wood Relief Plaque
This three-dimensional plaque proudly adorns a two-tone raised panel on an exterior door. Similar plaques would be a great way for kids to express their personalities on their bedroom doors.

Purple & White Heart Wall Hanging
Purple & White Heart
Hearts are a favorite décor item. Instead of using the usual red or pink color scheme, this crafter chose a pretty purple and black floral scrapbooking paper with a touch of lace. Although they can’t be seen in this photo, be sure to paint the edges to match the background color prior to attaching the paper. Crafter Tip: As a more romantic alternative, the edges could be wrapped with coordinating ribbon or lace.

Toy Train
Toy Train
If you are looking for an absolutely effortless craft store project, you could purchase a few train cars, set it up at home and call it done. Natural wood grain is beautiful just the way it is. There’s really no need to do any painting, but if you feel you want to add just a little color, stickers from the scrapbooking department will work just fine. Crafter Tip: Or let your kids handle it and everyone wins.

Jeweled Box
Jeweled Box
To create this jeweled box, start by painting the exterior iridescent purple, which will peek through the beads. Apply large mirrored pieces first and establish mid-size purple beaded borders. Fill in the remainder with tiny seed beads. The inside could be lined with velvet or satin fabric. Crafter Tips: Use full strands of beads for borders to make the gluing process easier, and ensure they are glued firmly in place at the edges of the lid because they may loosen over time with wear and tear.

Welcome Sign & Lawn Decor
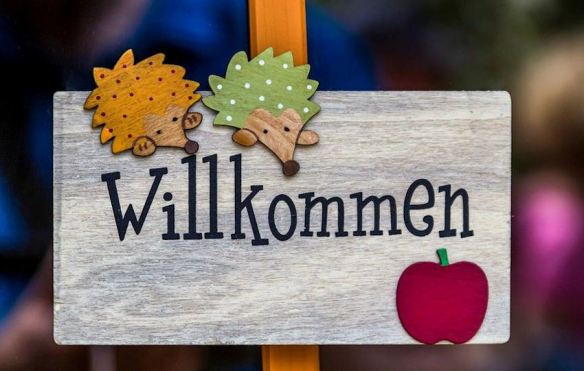
Welcome Sign
Part of your exterior décor may include “Welcome” signs, house number plaques, and humorous lawn ornaments such as garden gnomes and sheep. Large-scale seasonal items are also ready to paint, such as pumpkins and reindeer.

Personalized Wall Clock
Wall Clock
After staining this wall clock, a floral and checkerboard scrapbooking paper was applied along with self-stick black numbers. Craft stores carry kits, which include clock hands and the battery operated mechanism for the back. The unfinished clocks in several shapes and sizes are sold separately.

Floral Letters Wall Art
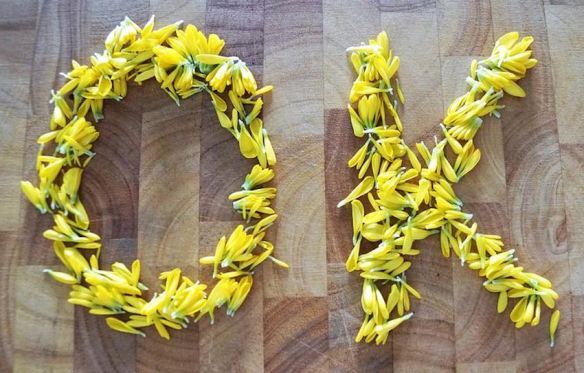
Letters have become popular wall art. Simply use your initials, or any words you like. In this photo, silk flower petals were glued on the top and sides of each letter. It’s super easy to do and ready to hang up. Crafter Tip: As alternatives, you could use mini pom poms, glass marbles, or self-stick gemstones.

Decorated “Home” Wall Art
A distressed paint finish in four different colors, a few sprigs of silk foliage, and a butterfly create a casual, welcoming message. Hanging an antique key enhances the warm feelings associated with “Home.” Crafter Tip: To achieve this distressed look, allow the paint to dry, and then use sand paper to “age” the letters.

Freestanding Inspirational Art
Wooden Owls
Whether you work in an office or from home, it never hurts to have a little inspiration to lift you spirits and bring a smile to your face. These cute little owls fit the bill, along with an empowering message too.

Wooden Serving Tray
Wooden Serving Tray
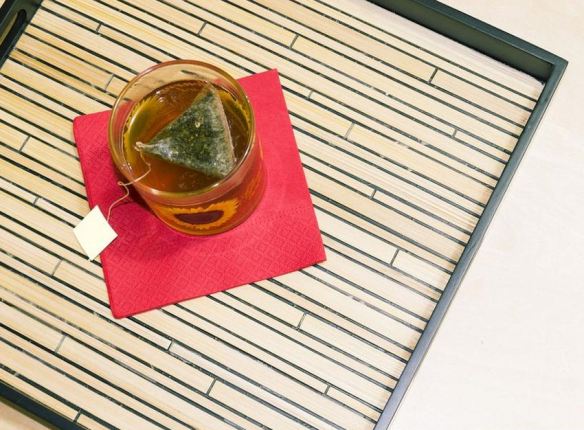
A plain wooden serving tray was spruced up with some spray paint, and lined with a bamboo placemat. If necessary, trim the bamboo to fit. The dark gray paint, which peeks through the wood slats, contrasts nicely with the light color bamboo. Crafter Tip: Pier 1 has a large variety of unusual placemats, which can be used for many crafting projects.

Please stay tuned for next week’s post featuring detailed instructions for painting woodcrafts.

Thanks for reading & Happy Crafting!

Celebrating 100th Post

100th Post
Today marks a very important milestone – my 100th post! It has been a wonderful experience, and I thank all my readers and followers for taking this journey with me. Below are photos and links to each category of arts and crafts covered to date. Please take a few minutes to peruse your favorites.

Baking & Candy Making

Beaded Jewelry & Gemstones

Color Theory
Color Theory

Floral & Home Decor
Floral & Home Decor

“How To” Projects
How-to Projects

Inspiration
Inspiration

Miscellaneous Crafts

Painting – Decorative Techniques
Decorative Painting

Seasons & Holidays
Seasons & Holidays

Wood Crafts
Wood Crafts

Please let me know, in the comments section, if you have any suggestions for future arts and crafts topics. I am looking forward to the next 100 posts. This achievement would not be possible without all of you! Thank you!!

Thanks for reading & Happy Crafting!
Trompe l’oeil – Painting Not Politics

Ruby Slippers & Yellow Brick Rd
In “The Wizard of Oz,” Judy Garland and friends danced their way along the yellow brick road. The next time you watch the movie, take a closer look at the scene when Dorothy meets the Scarecrow. You can see a line across the yellow bricks on the road to the left. This marks the bottom edge of a very large canvas, suspended from the ceiling, which provides the illusion that the road winds through the countryside and beyond. You may not know the terminology, but that is a perfect example of trompe l’oeil.

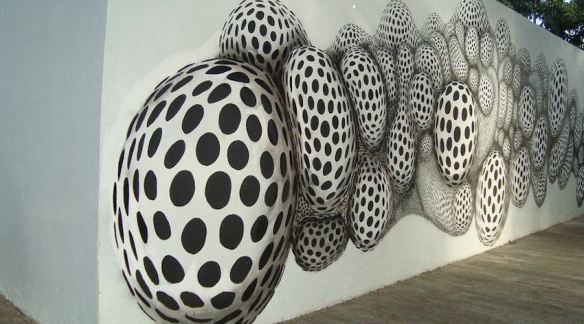
Polka Dot Eggs
Polka Dot Eggs
Translated into English as “fool the eye,” trompe l’oeil is an art technique used to create three-dimensional illusions. In order to fool the eye, the artist must excel at utilizing perspective, light and shadow, color, and scale. Each of these aspects lends another layer in a composition created solely to entertain and challenge human perception. In the above photo, I’m sure many pedestrians walk around the “protruding” polka dot eggs for fear of walking into one, but it’s actually a cleverly painted illusion.

Mountain Path
Mountain Path
The arched niche in this photograph is real, but the stone path, lavender flowers and mountain vista are painted illusions. Notice how well the path aligns with the opening of the arch, inviting you to begin an awesome hike through a beautiful landscape. The mist and snow covered peaks lend a chill to the air in this amazingly realistic scene.

Fluttering Fabric
Trompe l'oeil Facade Toronto
We’ve all seen window curtains fluttering in the breeze. This building appears to have the “curtains” on the exterior, held in place by four tacks. Including the windows and architectural details, none of it is real.

Waterfall Bridge
Waterfall Bridge
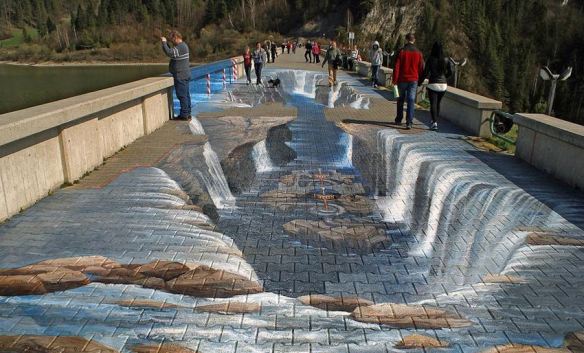
While some illusions evoke wonder and awe with their fanciful, storybook qualities, others tend to be appreciated from afar due to a projected sense of danger, particularly in regard to depth perception. Probably the most disorienting 3D illusions are located upon the floor. When you see what appears to be a gaping hole in the ground, you’re going to walk or ride around it. Notice the people in this photo are walking along the perimeter of the bridge, not down the center. Interestingly, the black dog in the background is not fooled by the illusion. Maybe dogs have a different way of sensing depth than we do. The water appears to pour in from both sides to become beautiful waterfalls plunging into a deep gorge below. Painted to resemble rushing blue water, a portion of the left side railing nearly disappears. It’s a shame the painted water doesn’t match the green color of the existing river to complete the illusion.

Town with a View
Town & Landscape
A first glance, it’s easy to see that the canyon view within the archway is a painting. However, everything you see, with the exception of the brown-framed window, is an illusion. The wooden bench, the sidewalk and even the trash can look real. I wonder how many people walk toward that bench to rest?

Old Fashioned Storefront
The proprietor of this store stands ready to serve his customers, while his wife sits nearby people watching. Epicerie is the French word for grocery store. This family-run business showcases fresh produce and vegetables in front of the store and upon shelves inside the store windows. The stacked merchandise, cast shadows, and event poster upon the wall add realistic touches to this beautiful artwork. It was clever of the artist to use the words on the store windows to advertise his or her painting business. Perhaps that is why they chose not to show reflections on the glass.

Charming Italian Restaurant
Restaurant
Romance meets fairy tales in the lovely formal gardens adorning the second floor of this popular Italian restaurant. White flowers follow the railing as if they are growing alongside the staircase. The open door at the top of the stairs teases the viewer to step “outside” to walk along the beautifully landscaped paths. The only downside to this mural is the unfortunate location of the air conditioning vents near the ceiling, which detract from the grand garden illusion.

Flower Boxes
Flowers
Petals and leaves appear to spill over a low wall from this imaginary window box. As with the previous photo, the vent locations are unfortunate, but in this case the artist has camouflaged them well.

Ornate Window Frame
Ornate Window Frame
Artisans, who trained a lifetime perfecting their crafts, constructed old world architecture. This simple wood framed window exudes that same Old World charm “sculpted” in paint. The ornate details, use of light and shadow successfully combine to give this window frame depth and a richness found only in some of the most prized buildings in Europe.

Deep Sea Diver
Deep Sea Diver
Treasure hunting on a pirate shipwreck in an underwater mine field is not for the faint of heart. This diver appears to have been successful in his search, but he’s not the only one interested. The 3D rendering has effectively created the illusion that the diver’s upper body leans out beyond the wall. The gold necklace is so real you could almost take it from his hand. An octopus tentacle reaches into the painting from our side in the real world – Yikes!

Architectural Details
Libreria Piccolomini Italy
The faux architectural details, such as the coffered ceiling, archways, and the ornate building in the background, visually expand the space.

Candlelit Bridge
Candlelit Bridge
It appears a section of this ultra contemporary bridge has collapsed, revealing an ancient chamber hidden below. This moody, mysterious scene is reminiscent of a Harry Potter film. As we peer into this strange stone-lined room, we are met with the vision of sands in an hourglass, which appear to have stopped flowing, and a burning candle, resting atop a pedestal. Wax drips down the sides and the flame flickers above the walkway surface. What other secrets lie hidden in the darkness? Should we dare to find out, or turn and run? I’m guessing most people would find another way to get to the other side.

Hailing a Taxi Cab
Hailing a Taxi Cab
What a phenomenal painting! The artist has an impressive grasp of perspective and the effects of light. Check out the shadows cast upon the brick wall by the man, the car, and the signpost. Nothing has been overlooked. Even the single orange balloon and string cast a shadow. A floating car would be a very cool way to travel with virtually no traffic. Descending could be problematic. I wonder if they give frequent flyer miles?

Trumpet Player
Trumpet Player
Let’s end on a high note! (lol) I think it’s safe to say that the trumpet in this amazing painting is a tripping hazard. It really looks as if it’s sticking right out of that wall. The only way to improve this illusion would be the relocation of the central air conditioning unit around the corner away from the painting.

Artwork tells a story in a universal language we can all understand. It evokes our emotions and challenges our senses. The next time you find yourself sidestepping around an optical illusion, remember you are as much a part of the artist’s composition as the paint itself.

Thanks for reading & Happy Crafting!
Crafts of Love – Valentine’s Day Gifts

Frogs in Love
Valentine’s Day is the perfect time to show your appreciation for the people you love.

Valentine's Cake
Celebrate with a Lady Finger Torte, Layer Cake, Cherry Cheesecake, Cupcakes, or Cake pops. Anything homemade is always appreciated. And if baking is not your specialty, buy one at the bakery, put it on your own serving dish and it will be our little secret! (lol)

Homemade Candy
Candy making is an easy process for everyone, even beginners. Start by melting chocolate wafers, called candy melts, which come in a variety of colors and flavors. Pour the chocolate into molds and refrigerate according to directions. You might also consider chocolate covering strawberries, nuts, graham crackers, or marshmallows. Present the finished pieces in a heart-shaped box or container.

Decorated Valentine's Cookies
Decorated cookies are eye-catching as well as delicious. Whether you choose homemade cookies or plain store-bought, add icing details, candy, or sprinkles to complete your festive designs.

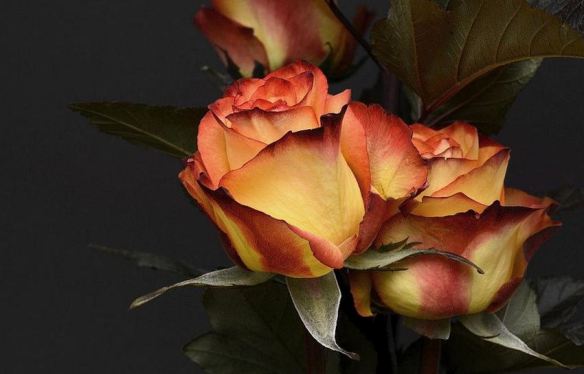
Roses
Fresh-cut or silk flowers can be arranged in a bouquet, vase, or heart-shaped wreath. You don’t have to go to the expense of buying roses because any type of flowers will be appreciated.

Bleeding Hearts Flowers
Live flowers in a hanging basket or pot are not only beautiful, but long lasting as well. The flowers shown have not been photo shopped. They really are heart shaped, hence the name “bleeding hearts.”

Glass Heart
A glass paperweight, suncatcher, or pendant is a beautiful option.

Heart Charm
You could also paint a wooden heart to be hung on a wall, included on a wreath, or as a charm on a gift package or handbag.

Jewelry
Beaded jewelry is easy to create. If you don’t have those skills, you can buy a readymade chain or cord and string over-size beads without the need for any tools.

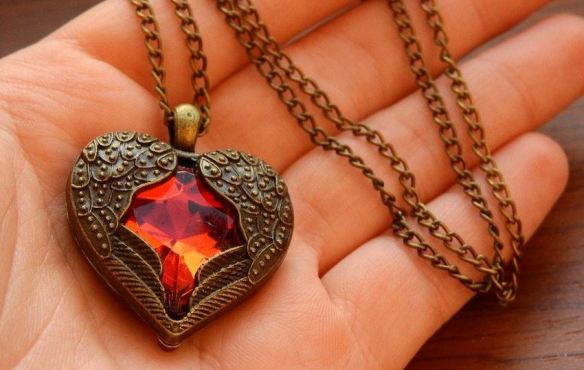
Winged Heart
You could also buy a heart-shaped pendant and add it to an existing chain or choose a new one.

Love Song or Poem
If you have a gift with words, write a song or poem on specialty paper to suit the occasion.

Painting
Artwork, such as painting, drawing, and photography, is a personal way to share your talent and show your affection at the same time.

Photo Album
A scrapbook is a thoughtful way to commemorate family memories and special events.

Vision Board
Create a vision board or photo album with inspirational travel brochures, activities and scenic pictures to build excitement for an upcoming vacation.

Candle Making
Candle making is simplified using a kit. There are multiple options including colors, shapes, sizes, and essential oils scents.

Romantic Dinner
You can’t go wrong with dinner for two. This is the perfect venue for candles, printed napkins on a pink or red tablecloth, and creative place settings to set the mood for a romantic evening.

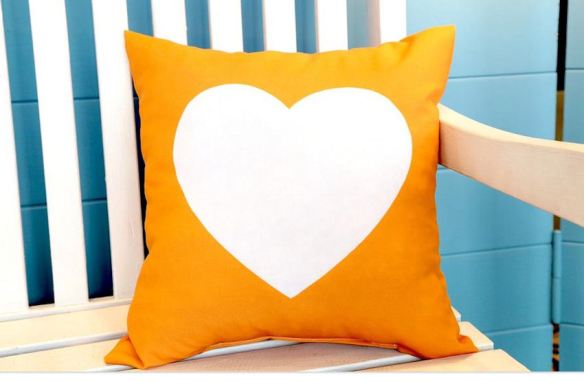
Heart Pillow
Sewing a pillow is a quick colorful project to coordinate with any décor.

Knitting
A knitted scarf, hat, gloves, or sweater will keep that special someone warm and cozy on a cold winter day, and it will be enjoyed for years to come.

Stuffed Animals
Who doesn’t love cuddly stuffed animals, especially teddy bears? If you are skilled with a needle and thread, you could make a bear with faux fur or buy one. There’s nothing like a big bear hug to brighten your day and chase away the blues.

Sunset at the Beach
It is said, “The best things in life are free.” Go to the beach, the mountains, a nearby park, or your own backyard. Any place will do to spend time together watching the sunset, enjoying a picnic or barbecue, or simply going for a walk hand in hand. Expressions of love don’t need to cost a lot, just a little creativity and a heartfelt message.

Happy Valentine’s Day and Happy Crafting!
How to Make a Painted Wooden Snowman

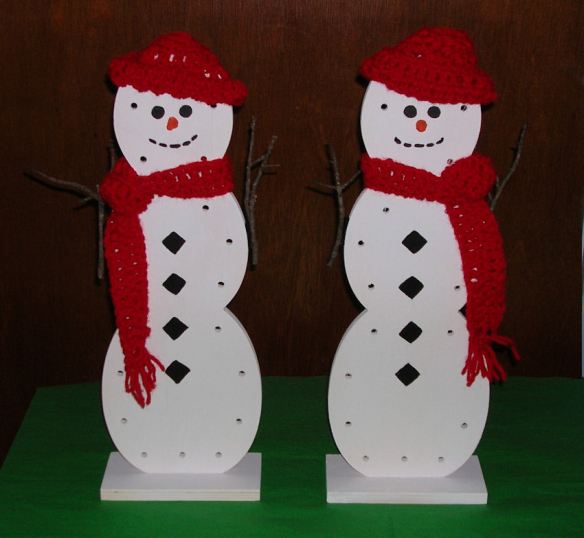
Snowman Closeup Photo

The solstice officially marked the start of winter. The long range forecast here in the northeastern U.S. calls for cold temperatures, but less snow. That could be a problem for those outdoor-enthusiasts, who love cross-country skiing, ice skating or simply building a snow fort in the backyard. It wouldn’t be winter without a snowman or two. Why not build a snowman that will never melt? This is a simple, inexpensive project for the whole family. I made two snowmen to display in my living room windows.

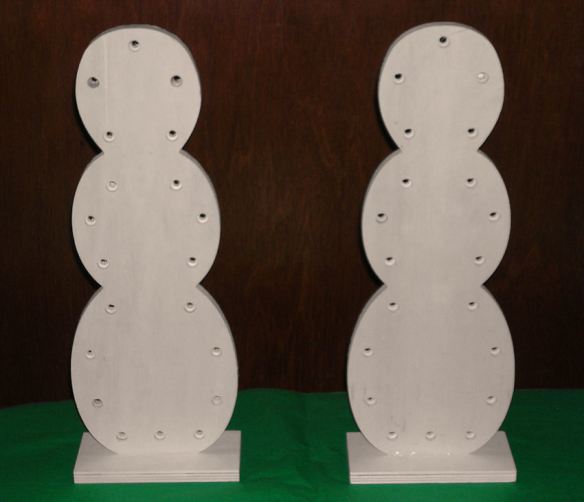
Unfinished Wood
It all starts with unfinished wood snowmen, purchased at AC Moore.  The perimeter holes are for lights in a later step.

Snowmen Painted White
Spray paint all sides, edges and base with white paint.

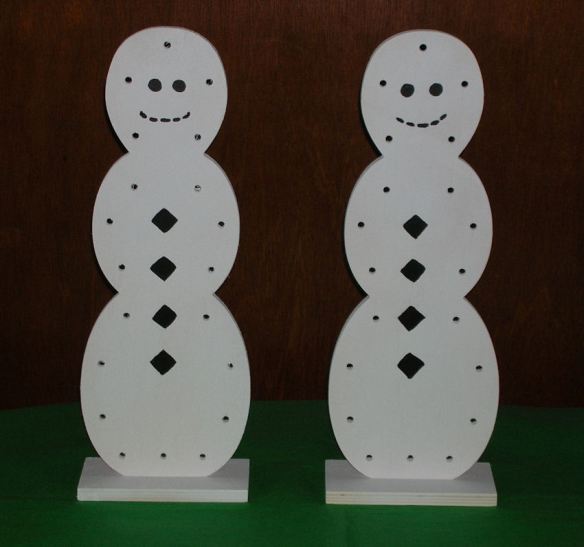
Painted Details
With an artist’s paintbrush, add the details (buttons, eyes, and a smile) with black paint.  Instead of painting the details, you could hot glue round and square plastic buttons, and draw the smile with a Sharpie marker.

Hats Scarves & Carrots
Accessorize with hats and scarves. If you enjoy crocheting, you can quickly create this fashionable look with whatever color yarn you have on hand. Bright red is a great seasonal color, and reads well from a distance. If needlework is not your thing, craft stores have snowman building kits and accessories. For the nose, I created the look of a carrot by squeezing a foam, packing peanut into the correct shape, and painting it with bright orange acrylic paint.  Use hot glue to attach carrot nose.

Stick Arms
Making the arms is as easy as collecting a few sticks from your yard, and attaching them to the sides. You could glue them in place. I decided to use self-stick Velcro instead, because I wanted the arms to be removable for easy storage.

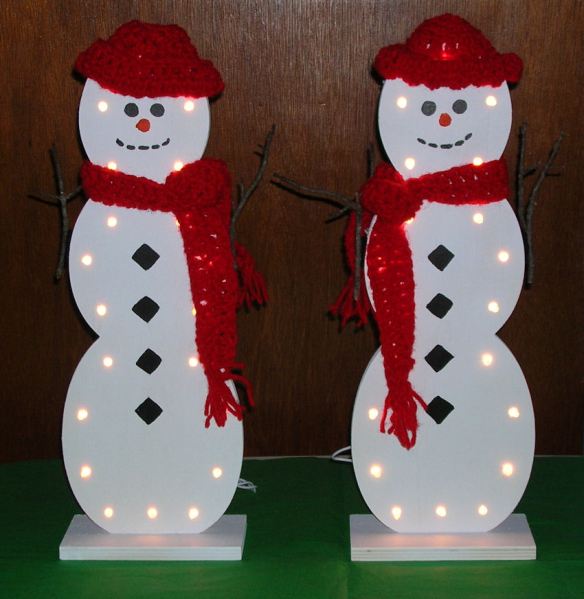
White Lights
Those pre-drilled holes around the perimeter were made to hold a strand of twenty white lights, also available at AC Moore. Crafter Tip: The lights can only be pushed through from one side of the wood frame. You may need to secure the last light at the bottom with a piece of tape to keep it from pulling out from the weight of the electrical cord.

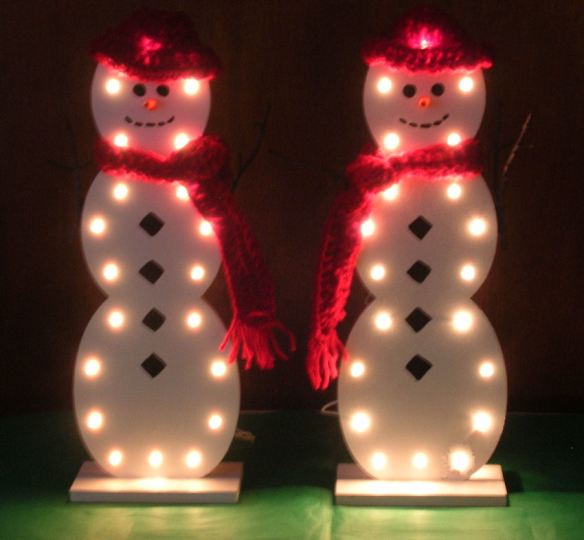
Lights at night
I turned off the flash on my camera to give you an idea of how these cute little snowmen look when lit at night. When the holidays are over, these snowmen can remain on display throughout the winter to bring a little whimsy to your home’s decor. The lights are very bright, and can be easily seen by passersby.

As an additional aside, I made these snowmen two-sided. Because they are standing on a windowsill, they can be seen from inside and outside. The lights can only be seen from the front, but seeing that smiling face when I walk by the window makes me smile too.

Happy Crafting!

Glowing Eyes in the Darkness: Jack-O-Lanterns

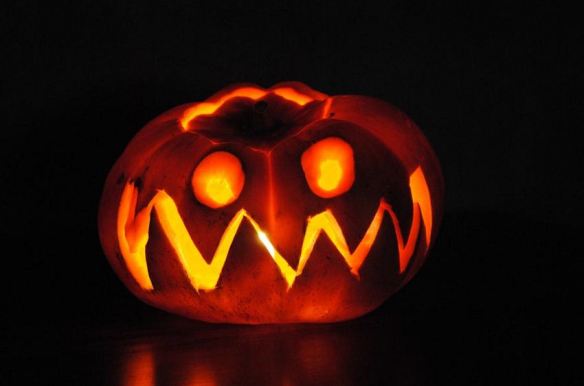
Spooky Pumpkin
It just wouldn’t be Halloween without a few carved pumpkins, also known as Jack-O-Lanterns. Patterns are readily available online, or you can flex your creative muscles by coming up with your own designs. What does your pumpkin say about you? Here are a few ideas to get you started.

Carved Pumpkins
From the goofy to the spooky, there’s something for everyone.

Pumpkin Trio
There are numerous options for lighting your pumpkins: Lit candles flicker in the breeze. LEDs produce high intensity and sometimes color-changing light. Glow sticks give off softer, otherworldly light. Spotlights and flashlights light up the face while also creating some eerie dark shadows inside the pumpkin.

Awestruck Pumpkin
Even pumpkins have moments of surprise and awe. I wonder what he sees?

Monster Pumpkin
Little details make all the difference. This carved pumpkin owes its devilishly good looks to the absence of a nose. That one little detail, plus the intensity of the light within, gives him a more ghoulish appeal.

Jaws Pumpkin
This one brings a whole new meaning to the name “Jaws.” After carving the teeth, the orange skin around the perimeter of the mouth was removed to reveal the white flesh beneath. If that seems like too much work, you could use a white Sharpie marker to define the mouth.

Jack Skelleton Pumpkin
Nightmare Before Christmas is a very popular Halloween movie and decorating theme, and this pumpkin doesn’t disappoint. A little dry ice, or a fog machine takes the spooky vibe to a whole new level.

Cat & Spider Pumpkin
Cat lovers will appreciate this creative design. Black cats and spiders are staples in Halloween décor.

Scary Pumpkin
This frightening character has menacing eyes surrounded by flames above and below.

Scary Ghost Pumpkin
This ghoulish ghost is another Tim Burton inspired design from his nightmare movie.

Pumpkin Happy Hour
It’s Happy Hour for Jack-O-Lanterns only! Honestly, if I saw a gathering like this in my backyard, I would probably run away! It looks like a scene from a Steven King movie.

Pumpkin carving isn’t for everyone. There’s also nothing wrong with displaying your pumpkins “as is” with the added bonus of being able to keep them on display for Thanksgiving too.

Painted Pumpkins
If you like to paint, you could paint designs on real or artificial pumpkins. These decorated pumpkins can be accomplished with a few Sharpie markers, and they will last longer than the carved variety.

Lamppost Pumpkins
Another great option is painting a wooden plaque like the one shown above. It can be used for years and is very inexpensive to make. Over time, the sun, wind and weather can take their toll. Whether you are painting a brand new pumpkin, or giving a makeover to an existing one, the steps are the same.

How to Paint and /or Repaint a Wooden Outdoor Halloween Decoration:

Supplies:
Wooden Pumpkin Decoration (30” high x 22” wide x 1/2” thick)
Orange Outdoor Spray Paint – OR – Orange Outdoor Acrylic Paint (See Step 2)
Outdoor Acrylic Paint – black, green & brown
Paintbrush
Sandpaper
Black Sharpie Marker

Faded Original Pumpkins
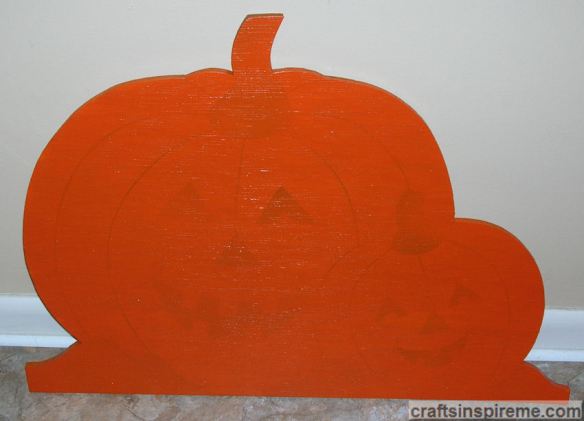
Step 1 – First you will need to clean off the dirt and debris, and lightly sand the surface and edges in preparation for paint.

Orange Spray Paint
Step 2 – You have two painting options here: Spray Painting versus Brush on Painting.
For Spray Painting: Apply multiple coats of orange outdoor spray paint. To be honest, I’m not a fan of spray paint due to the toxic fumes.  I also was not satisfied with the paint coverage. I’m not sure why, but the consistency was very thin like water.

Three Coats Acrylic
For Brush on Painting: – Apply 3 coats of orange outdoor acrylic paint with a brush. Be sure to coat all the edges and the back of the plaque as well to protect and seal the wood from water damage.

Green & Brown Details
Step 3 – Add details such as stems, leaves, and the surrounding ground at the edges. You may want to outline the details first with a Sharpie marker.

Black Lines
Step 4 – Draw the faces and add curved lines to give the pumpkins a three-dimensional effect. Outline the leaves and stems in black to make them stand out better.

Black Paint
Step 5 – Fill in the faces with black paint.

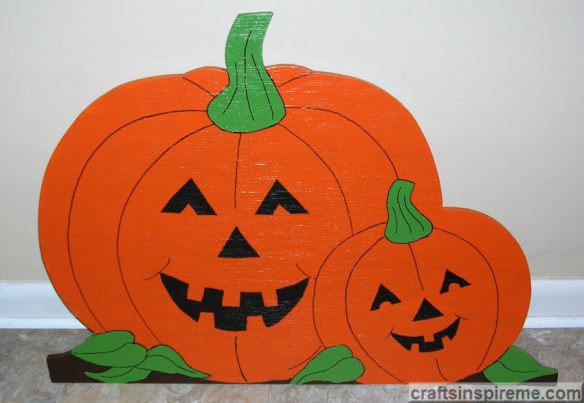
Before & After Pumpkins
After spending a day at the spa, these pumpkins have been renewed, rejuvenated, and are ready to greet your guests at the door. The choice of pumpkins is up to you. Whether you decide to use real, artificial, or any other material, the enjoyment and celebration of the holiday will always come through in festive style.

Happy Halloween & Happy Crafting!