A View from Above – Giraffes

One of the most easily identifiable animals upon the face of the earth is the giraffe.  There is nothing else like it – that long neck, towering legs and a fur pattern that resembles mosaics.  Giraffes are so tall, that the babies are born at a minimum height of six-feet tall to feed from the mother. 

Adult Giraffe

Each subspecies has unique fur patterns and colors.  There is a ridge on the forehead and two horn-like protrusions on top of the head. 

Giraffe Herd

Some have spots down the length of their legs, while others have solid tan or white below the knee.  For this project, you will need to look at giraffe photos and decide which pattern you prefer. 

How to Paint a Wooden Giraffe:

Raw Wood Giraffe

Raw Wood Giraffe

Both sides and all the edges will need to be sanded and painted.  Ensure the giraffe stands without wobbling.  If needed, restore balance by gluing pieces of thin cardstock to the bottom the feet. 

Supplies

Giraffe Paints

Supplies:
Wooden Giraffe (8-1/4” high x 4-1/4” wide x 1-1/4” thick)
Acrylic Paints – red, brown, orange, black, tan
Bottles Fabric Paint – brown, black
Paintbrushes
Sandpaper
Pencil

Sand & Paint Base Color
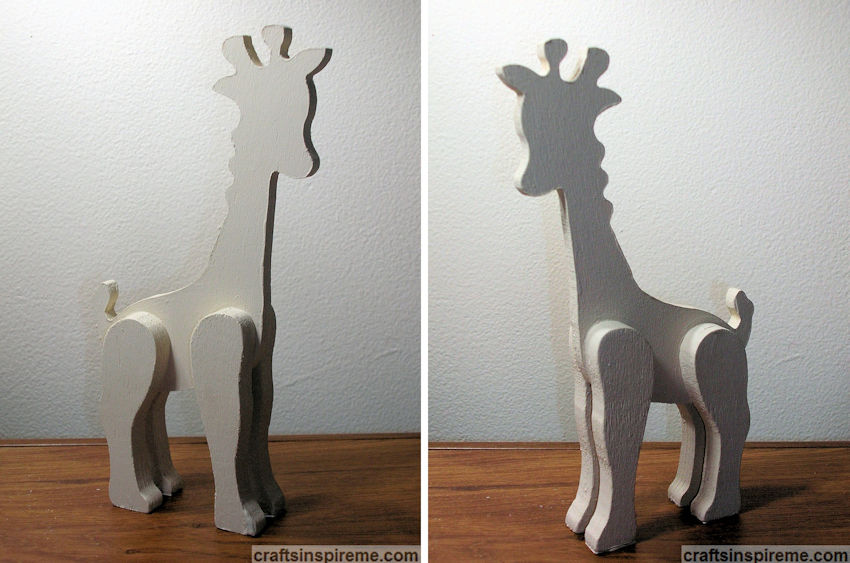
Sanded & Painted

After sanding, paint the entire body tan. 

Reference – Giraffe’s Face
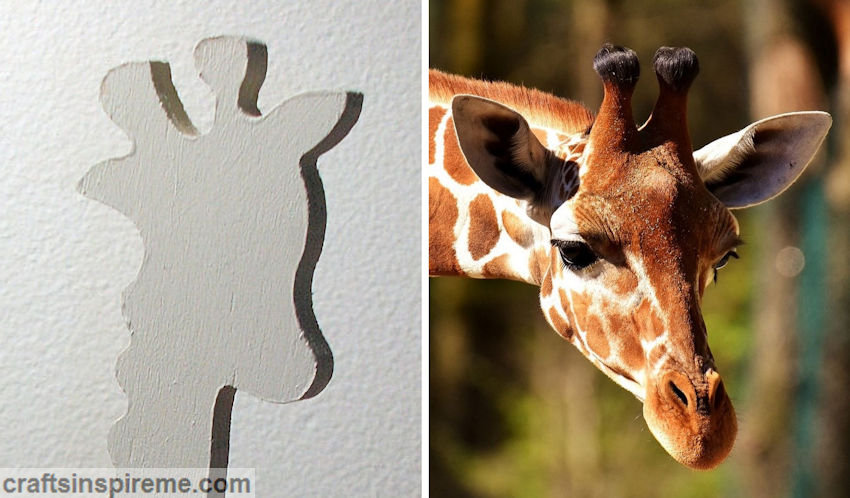
Giraffe Facial Close Up

I bet you didn’t expect to have a Giraffe anatomy lesson!  Typically, wood craft animals stand facing forward.  If you look at the close-up photos above, you will notice this giraffe is turning his head to the side.  This effects both sides of the head.  Both eyes need to be on the same side.  We will address the back of the head in a later step. 

Hand Draw Details

Draw Giraffe Details

Because this appears to be a baby giraffe, the facial features are cute but small, including the ridge between the eyes.  I began drawing some of the spots to understand what the layout should be.  To keep the pencil lines to a minimum, the remainder of the spots were freehanded with the paint brush. 

Mix Custom Paint Color
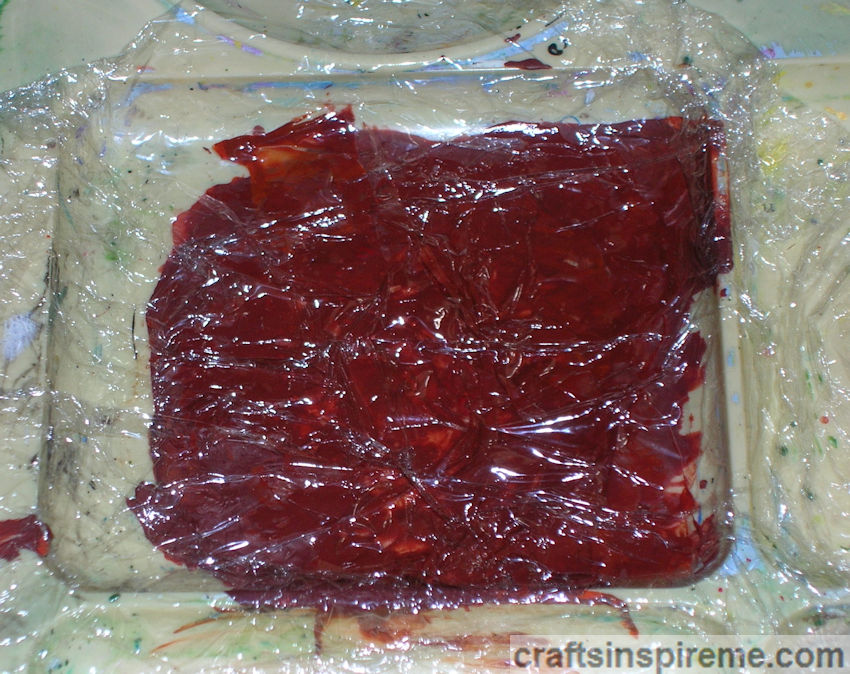
Plastic Covered Paint

Be sure to mix enough paint for the giraffe’s spots to last throughout the project.  To keep the paint moist on a paint palette, cover it with plastic wrap, ensuring the plastic is pressed down upon the paint surface and the edges are sealed.  You may need to moisten the paint, but the color will be preserved.  I created a reddish-brown by mixing brown, red and orange acrylic paints. 

Paint the Spots on the Neck

Painted Pattern

Use a fine brush for the spots.  Be sure to leave space in between, which resembles mosaic tile set in grout. 

Paint Spots – Right Side

Painted Body - Right

As you work your way down the body, the size of the spots diminishes.  Be sure to paint spots on the edges, including the front and back of each leg and the neck too. 

Paint Spots – Left Side

Painted Body - Left

For this step, the following areas will remain tan: the back of the head, the mane, the inside of each leg, the feet, and the tail. 

Defining the Details – Right Side
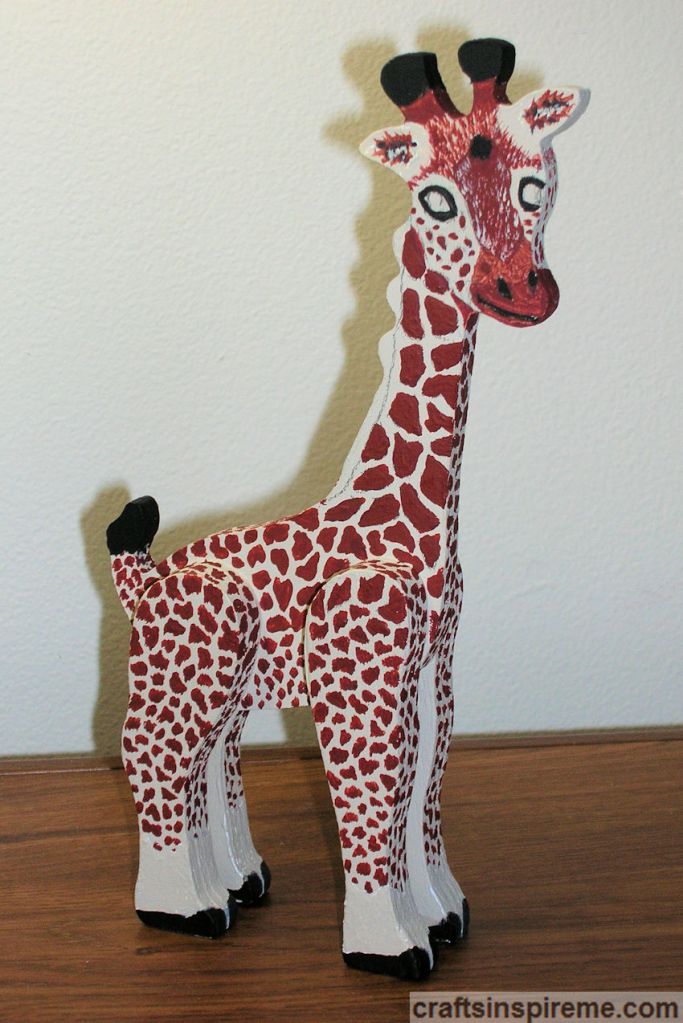
Painted Face Tail & Feet - Right

Paint the head and facial details, except for the eyes, which will be completed in a later step.  Paint the tail and hooves black.  The muzzle and fur between the eyes are darker, while the cheeks are lightly spotted.  The “horns” are a combination of black and brown. 

Reference – Back of Giraffe’s Head

Giraffe Back of Head

Figuring out the back of the head was difficult.  Because our giraffe is looking off to the side, you will only see a portion of the face. 

Reference – Back of Head & Mane
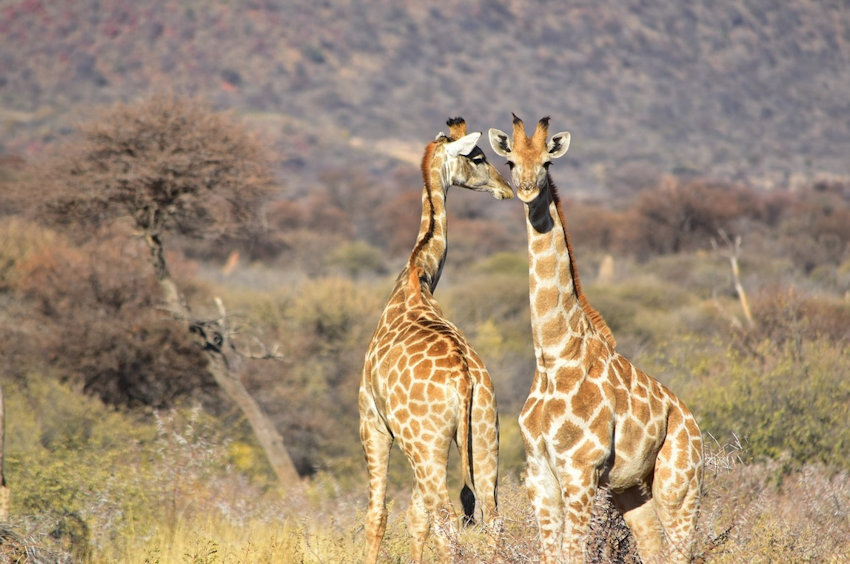
Giraffe Back of Head

When the giraffe moves his head and neck, the mane twists and turns. 

Reference – Back of Head & Mane
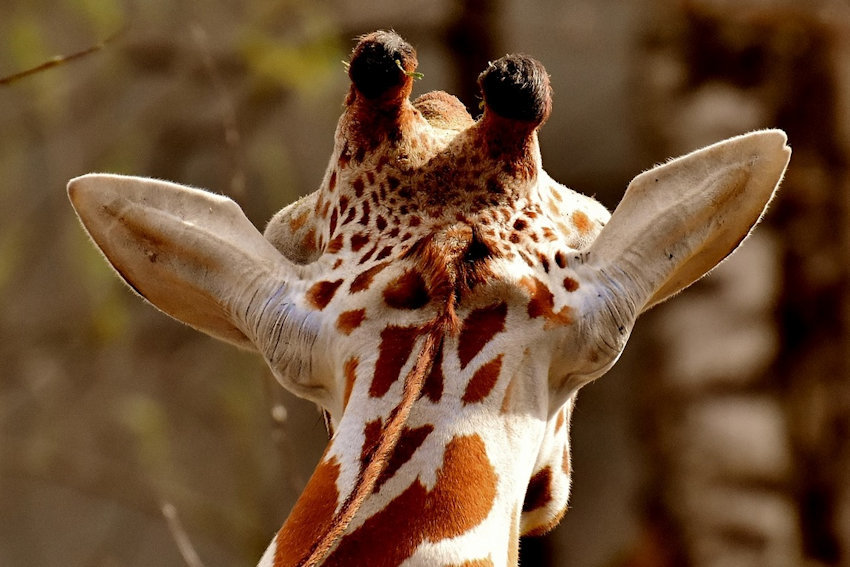
Giraffe Back of Head

There are no spots on the ears.  Notice how the mane twists as the neck shifts. 

Defining the Details – Left Side
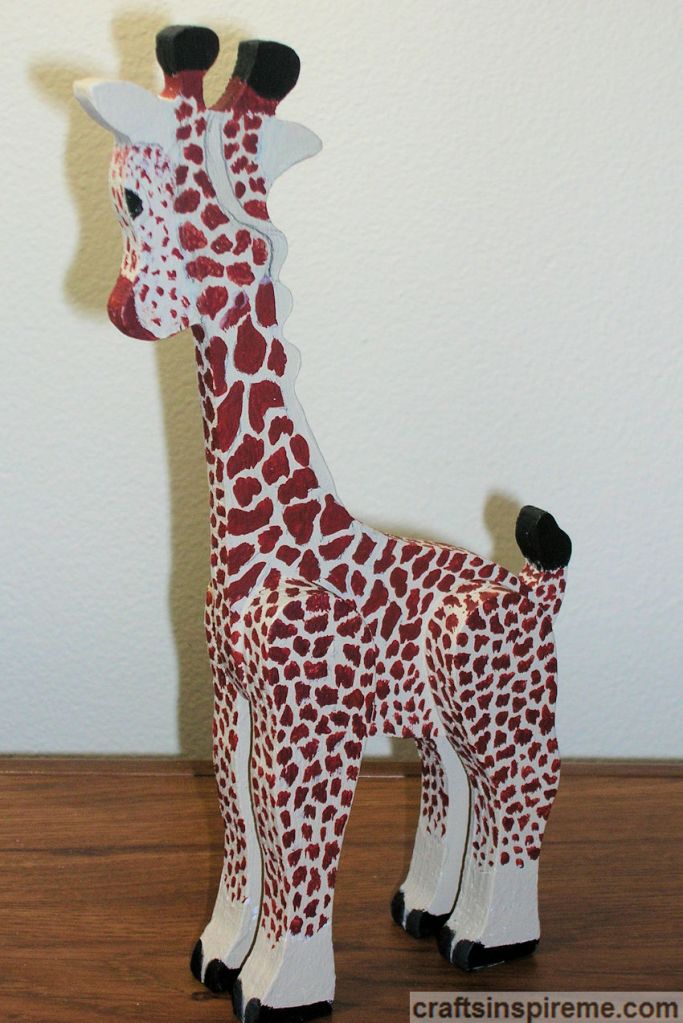
Painted Back of Head

Draw the details on the back of the head.  Be sure to show the twisting mane.  Paint all the details except for the mane. 

Paint 3D Details – Right Side
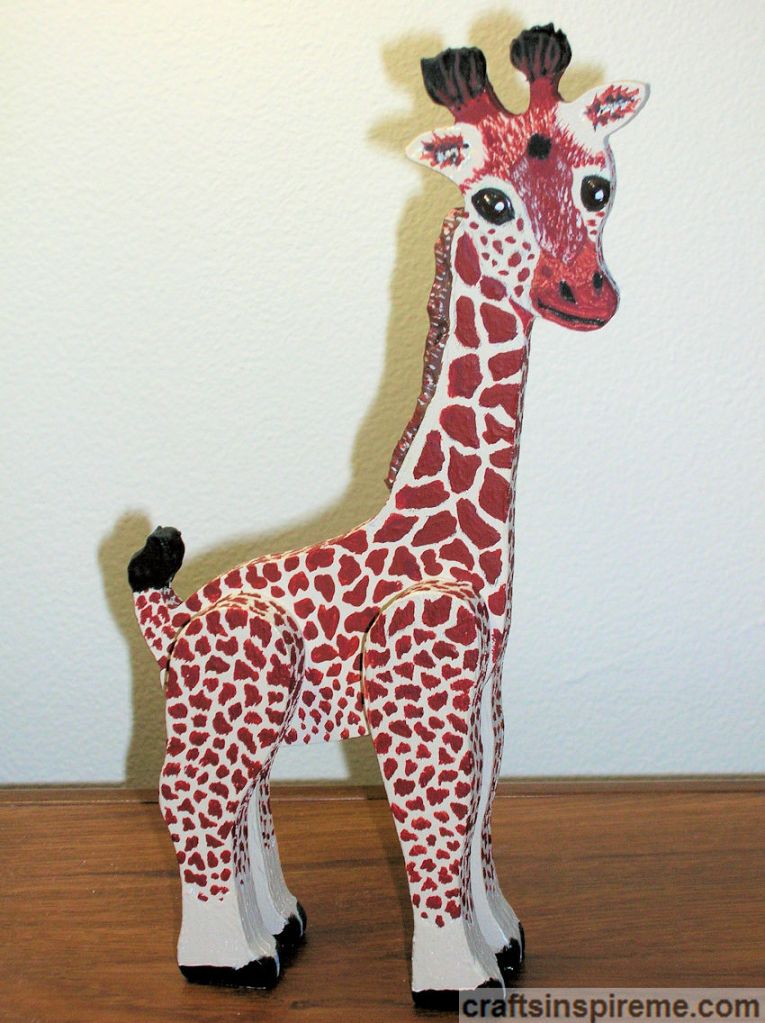
Finished Giraffe - Right

The eyes are painted with brown fabric paint for a 3D effect and outlined in black.  After it dries, add black pupils and white dots in the center to bring life to the eyes.  Using brown fabric paint, create a raised mane, centered down the entire length of the neck.  It will take two coats to make the furry mane to stand upright.  Create fur on the “horns” with black fabric paint. 

Paint 3D Details – Left Side
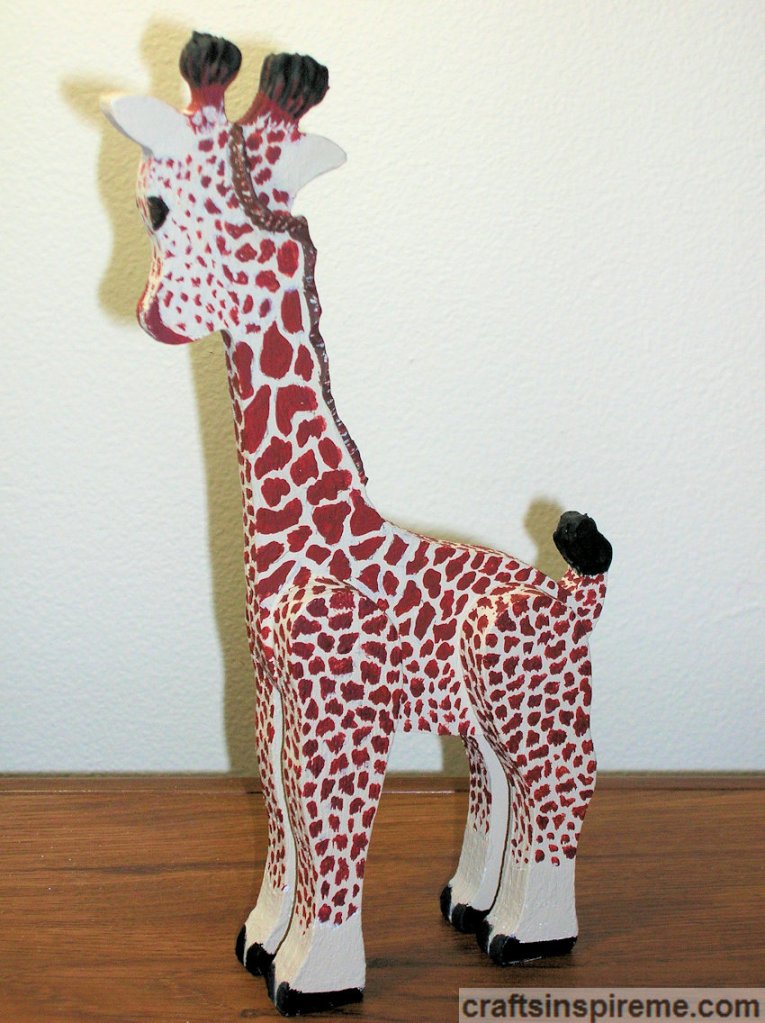
Finished Giraffe - Left

Paint the eye with brown fabric paint and outline with black.  Using brown fabric paint, complete the twisted mane on the back of the head.  Create fur on the “horns” with black fabric paint.  Allow it to dry overnight. 

Finished Close Up – Face

Finished Close Up - Right

The following steps apply to both sides: Because fabric paint is shiny, paint over the mane with brown acrylic and then highlight it with reddish brown and tan.  Paint the horns with black acrylic.  Some reddish-brown paint was brushed into the ears and up onto the furry horns. 

Finished Close Up – Back of Head
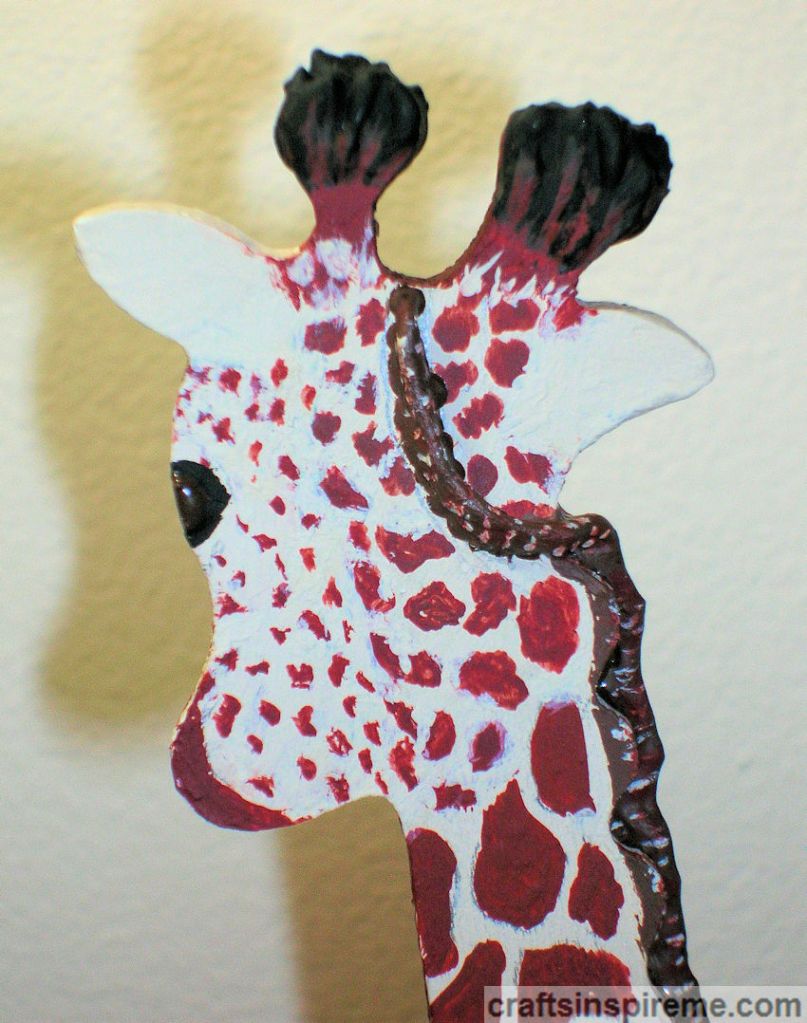
Finished Close Up - Left

Touch up any details as needed.  The spots on the left side of the neck, closest to the face, curve toward the face to give a three-dimensional roundness to the upper portion of the neck. 

Giraffe – Before & After
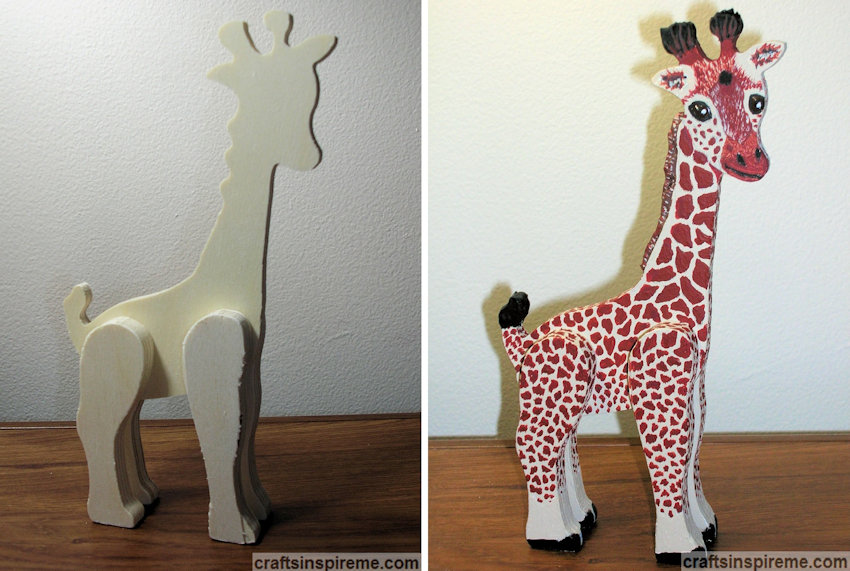
Before & After Giraffe

Here is a side-by-side comparison of the original raw wood giraffe and the fully detailed project at completion. 

I had a lot of fun painting this little guy.  Figuring out the anatomy was challenging and rewarding.  There are many wooden animal crafts waiting for good homes.  Check out your local craft stores or the internet to find one you will love.  Good luck! 

Thanks for Reading & Happy Crafting!

Decorating Easter Eggs

Dyed Eggs

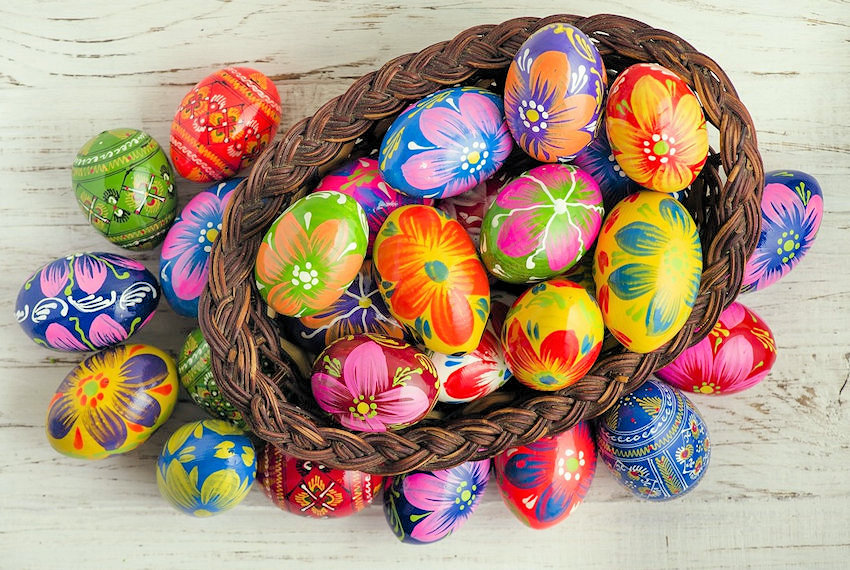
Dyed eggs are a staple of any Easter celebration. All you need is an egg dyeing kit and some vinegar, which makes it easily accessible for all ages.  Decorating doesn’t have to be limited to dye and farm fresh eggs. Options include paints, fabrics, markers, ribbons, and appliques, while the eggs can be wooden, foam, or plastic, just to name a few. Let’s look at a variety of decorated eggs to get your creative juices flowing. 

Painted Broken Eggs

Broken Eggs

Crackle Finish Egg

Crackle Finish Egg

Pierced Eggs with 3D Painted Accents

Pierced Eggs

Fabric Wrapped Eggs with Decorative Trims

Fabric Covered Eggs

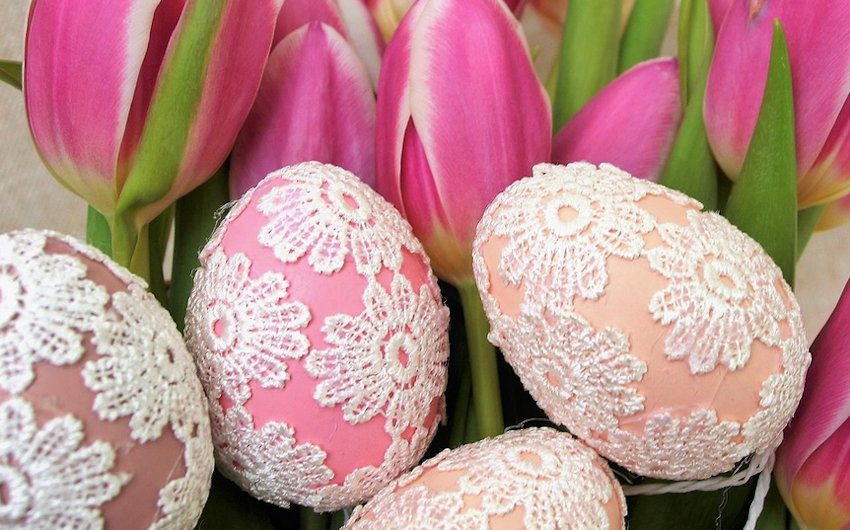
Dyed & Lace Appliqued Eggs

Lace Decorated Eggs

Scrapbooking Eggs

Scrapbooking Eggs

Quilled Egg

Quilling Egg

Decoupage Egg

Decoupage Fairytale Egg

Multicolor Marker Egg

Marker Egg

Illustrated Egg

Hand Drawn & Colored Egg

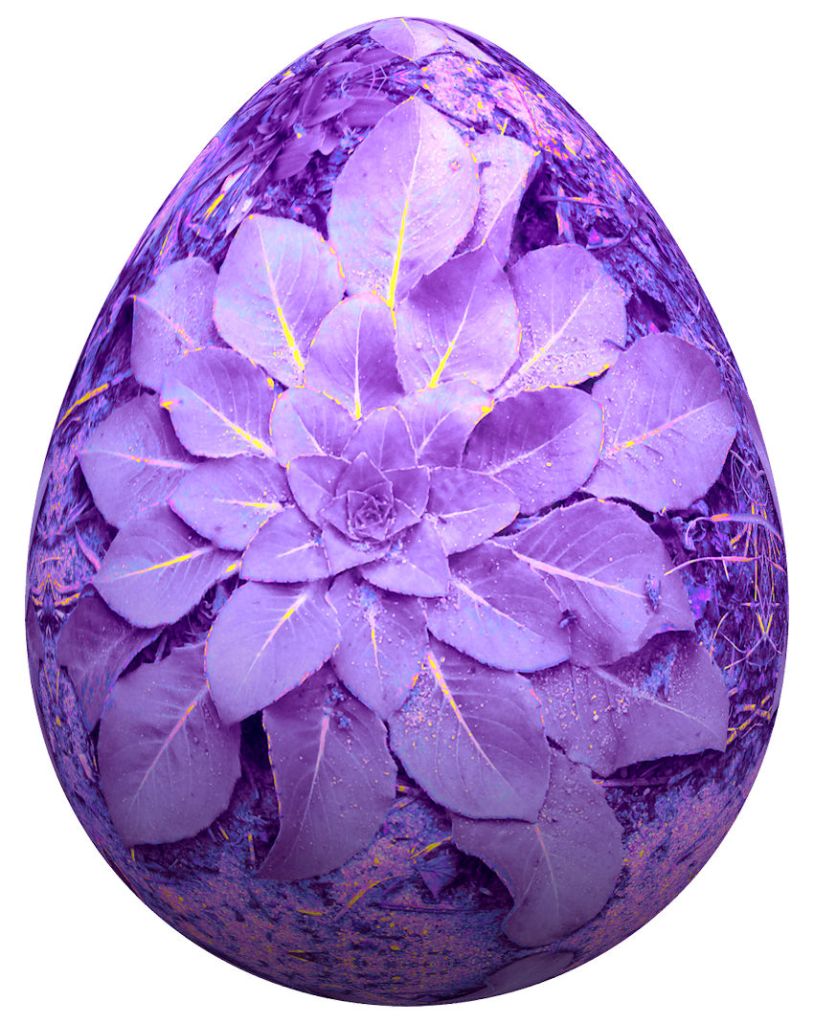
Silk Flower Applique Egg

Purple Floral Egg

Dyed & Beaded Eggs

Beaded Eggs

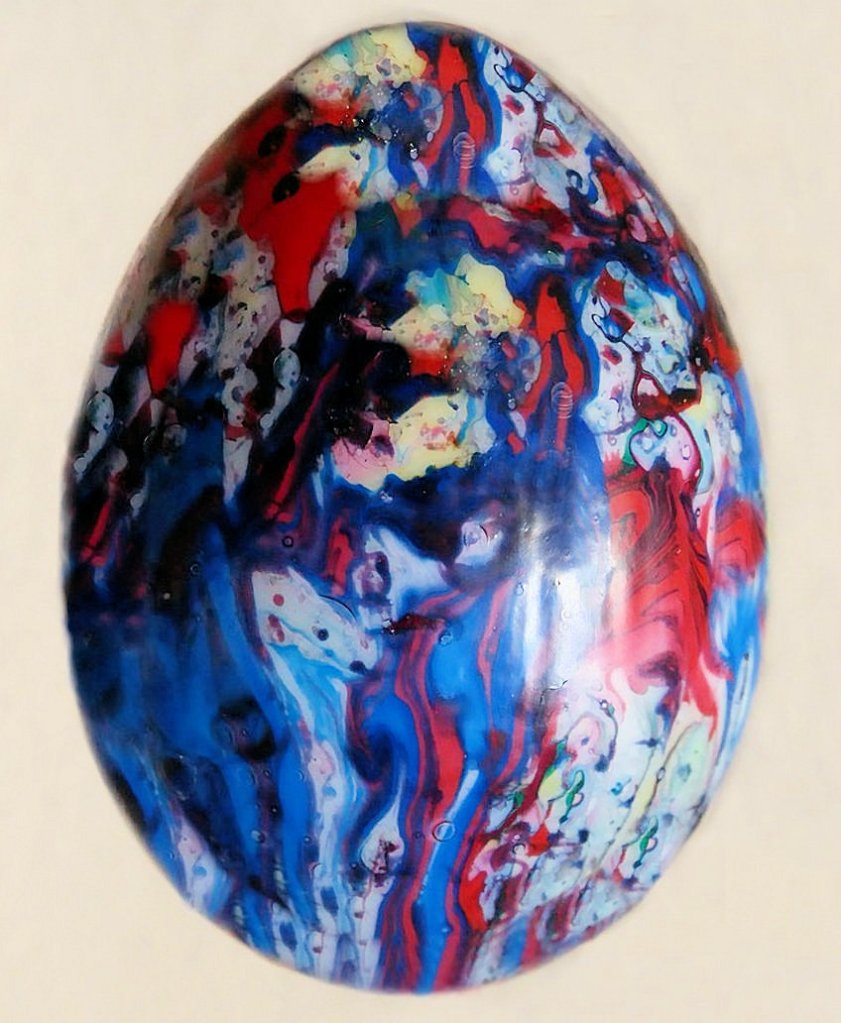
Paint Pour Egg

Marbleized Paint Pouring Egg

Sponge Painted Egg

Sponge Painted Egg

Hand Painting Eggs

Hand Painting Eggs

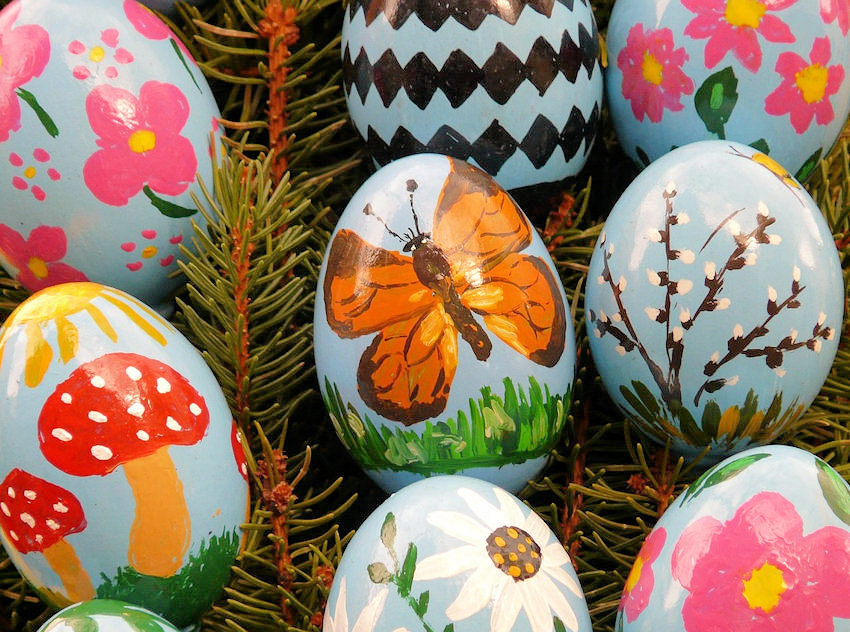
Hand Painted Eggs

Hand Painted Eggs

Hand Painted Eggs

Hand Painted Eggs

3D Hand Painting Eggs

3D Hand Painting Eggs

Hand Painted 3D Metallic Eggs

Fabric Paint & Jeweled

Romanian 3D Metallic Eggs

Metallic Romanian Eggs

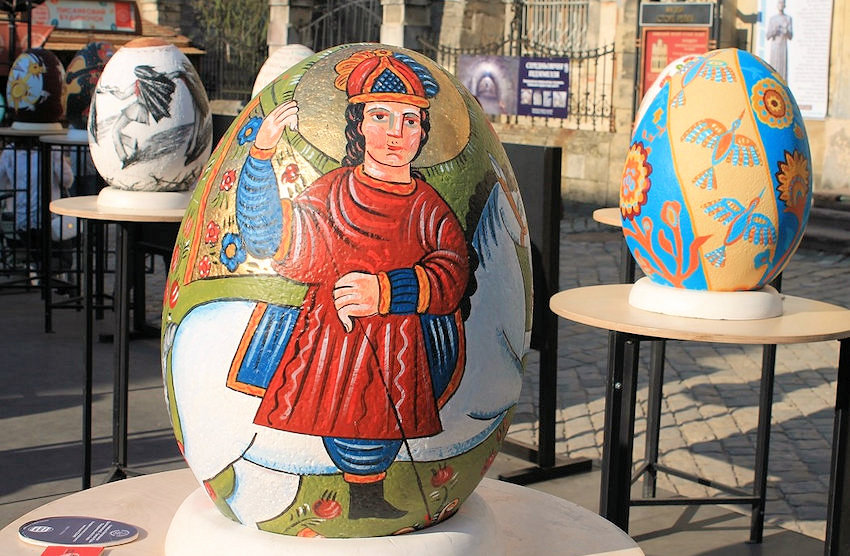
Ukrainian Egg

Oversized Ukrainian Egg

Fine Art Eggs

Fine Art Eggs

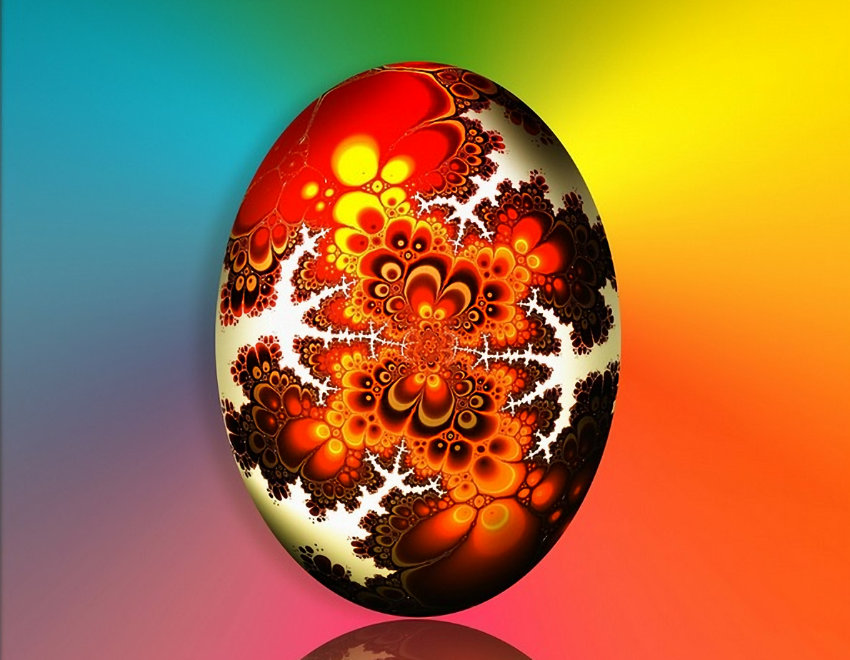
Hand Painted Abstract Art Egg

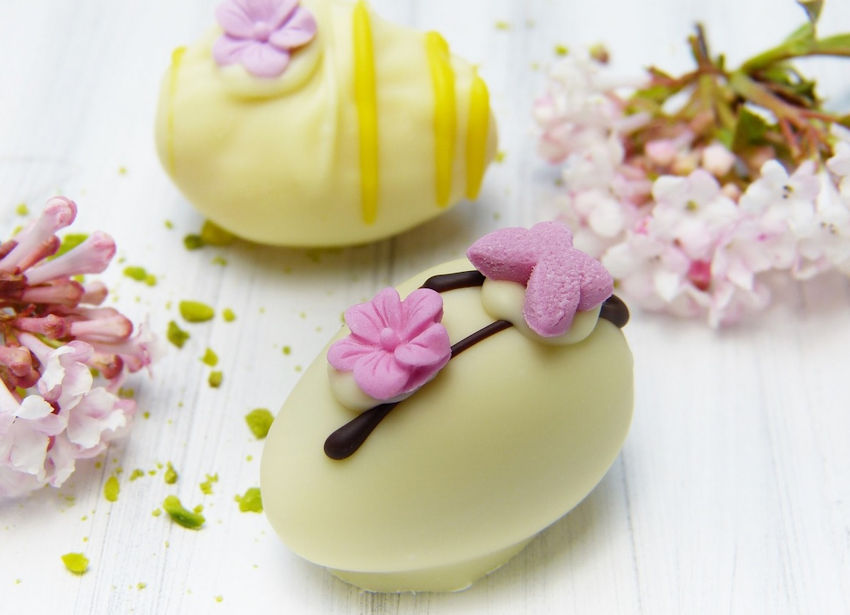
Chocolate Eggs

If you have an egg allergy or if painting is not in your skill set, chocolate eggs can be decorated using the same design principles shown throughout these photos.

I hope you have found some inspiration and will try your hand at decorating eggs.  Do you have a favorite? Please let me know in the comments section.  

Have fun decorating and thanks for reading.

Happy Easter & Happy Crafting!

Walk on the Wild Side

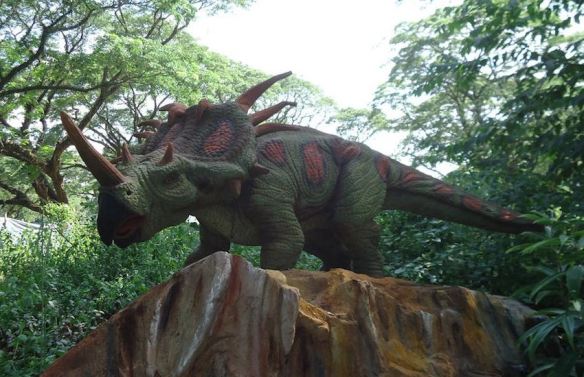
Triceratops
Whose turn is it to walk the dog – I mean dinosaur? Something tells me that 25-foot leash will not be long enough! Dinosaurs are real fan favorites. You can’t get much wilder than that. And what’s not to love?

Dinosaur Eggs
A Dinosaur Nursery – They’re kind of cute at this stage.

Dinosaur
Somewhere between adolescence and adulthood they seem to lose their charm! (lol)

Dinosaur Skeleton
Even when they’re dead, they instill an odd mixture of fear and fascination. Movie Director Steven Spielberg brought dinosaurs back to life on the big screen in the epic movie, Jurassic Park – an emotional roller coaster, that started with awe and wonder, but quickly escalated to bone chilling terror.

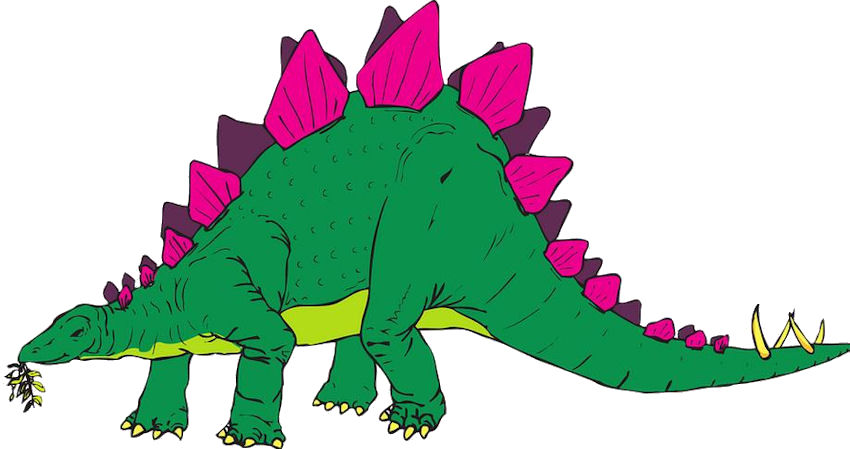
Stegosaurus
We love dinosaurs anyway. Want proof? Look at all the books, movies, television shows, and merchandise. At some point, every kid draws and colors his or her favorite dinosaur. Here’s your chance to feel like a kid again. Grab some paints and brushes and let’s go!

How to Paint a Wooden Stegosaurus
With a little paint you can design your own dinosaur. It can be as simple as a single coat of paint, or as detailed as you like. First we need a little inspiration.
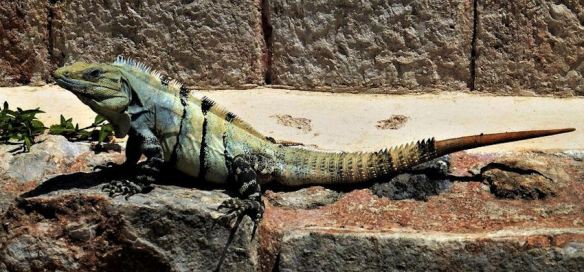
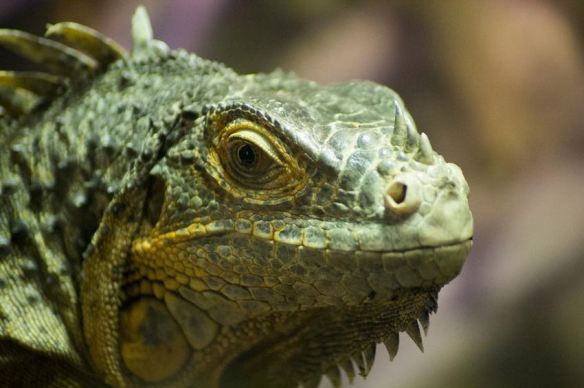
Iguana
Iguana Closeup
Since dinosaurs lived sixty-five million years ago, there’s no one around to tell us exactly what they looked like. For this project, photos of creatures living today, such as iguanas and lizards, can be inspirational. Check out those spines!

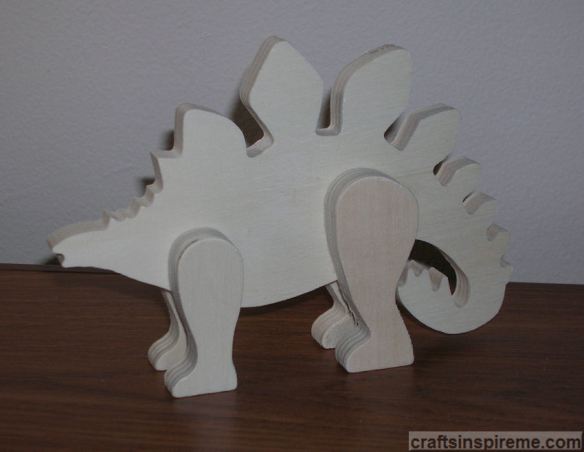
Raw Wood Dinosaur
This carved wood stegosaurus, available at AC Moore, has sturdy legs, making it a freestanding, three-dimensional piece. Both sides and all the edges will need to be painted. Due to the raw nature of wood, it may require sanding, especially along the edges. (There are several types of animals in this carved wood collection. To see a painted flamingo project, please click here.)

Paints
Supplies:
Wooden Stegosaurus (4-1/4” high x 7-1/4” wide x 1-1/4” thick)
Acrylic Paints – black, brown & metallic green
1) Bottle fabric paint – brown
Paintbrushes
Sandpaper

Dinosaur Painted Green
Step 1 – Paint the dinosaur with green acrylic paint, including both sides and all edges. The great thing about paint is that it’s cheap. Feel free to experiment. If you don’t like the results, it can be easily changed.

Dinosaur Tail Detail
Seeing it in color revealed a major anatomical mistake in the tail design. If you loved dinosaurs as a kid, you’ll remember that the stegosaurus has spikes on the top of its tail. The artist chose to curl the tail underneath, and as a result, mistakenly placed the spikes on the underside of the tail. This poor animal would have trouble walking because the spikes would continually get caught on the ground as it moved through the forest, making it easy prey.

Dinosaur with Cut Tail
Step 2 – To make it right, cut off the tip of the tail as shown.

Dinosaur Painted Black
Step 3 – Turn the cut tail piece around, and glue it in place. Paint the entire figure black as a base coat, which will help delineate the scales added in a later step. Looks much better doesn’t it?

Dinosaur with Fabric Paint
Step 4 – Paint the top of the head, the back plates, and the tail with brown fabric paint. Paint the sides of each plate with green fabric paint and add spikes along the sides of the tail.  Brown acrylic paint was applied with a brush in between the back plates, because it was too narrow to fit the tube of fabric paint.

Dinosaur Scale Pattern
Step 5 – Add brown fabric paint on top of each leg and more spikes along the entire length of body. Create a scale pattern on the body using metallic green paint, and use the same color in the sides of the plates on his back.

Finished Dinosaur
Step 6 – Add a small dotted pattern to each leg. Paint the head brown, and add a few green scales along with the eyes. Congratulations! You now have your very own pet dinosaur. Fortunately for you, he’s a “Veggiesaurus,” unlike the one in the next photo.

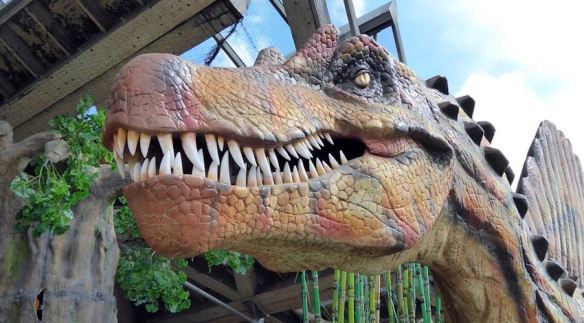
Dinosaur Jaws
What a view, right? Thank goodness this is only an observation tower! Because if it was real… It would be the last thing you ever saw.

Thanks for Reading & Happy Crafting!

Inspirational Christmas Tree

This Christmas tree is unlike most.  It consists of individual flat pieces of wood, much like a signpost, ready for your painted decorations and inspiring words.

Words/Poetry

Most of my craft projects do not call for poetic or inspirational words.  Grab a piece of paper and a pen and scribble down some possibilities.  Take as much time as you need.  Listen to song lyrics, read poems, or notice seasonal phrases from movies, books, or advertising. 

Christmas Magic Sign

Magic Christmas Sign

You will need to consider how many words/lines will fit. 

Santa Christmas Sign

Santa Christmas Sign

Use any fonts you like.  You could use stencils for the lettering or freehand. 

Merry Christmas Sign

Merry Christmas Sign

Add decorative painted accents such as holly leaves and berries, or enhance your project with accessories like garland, and lights. 

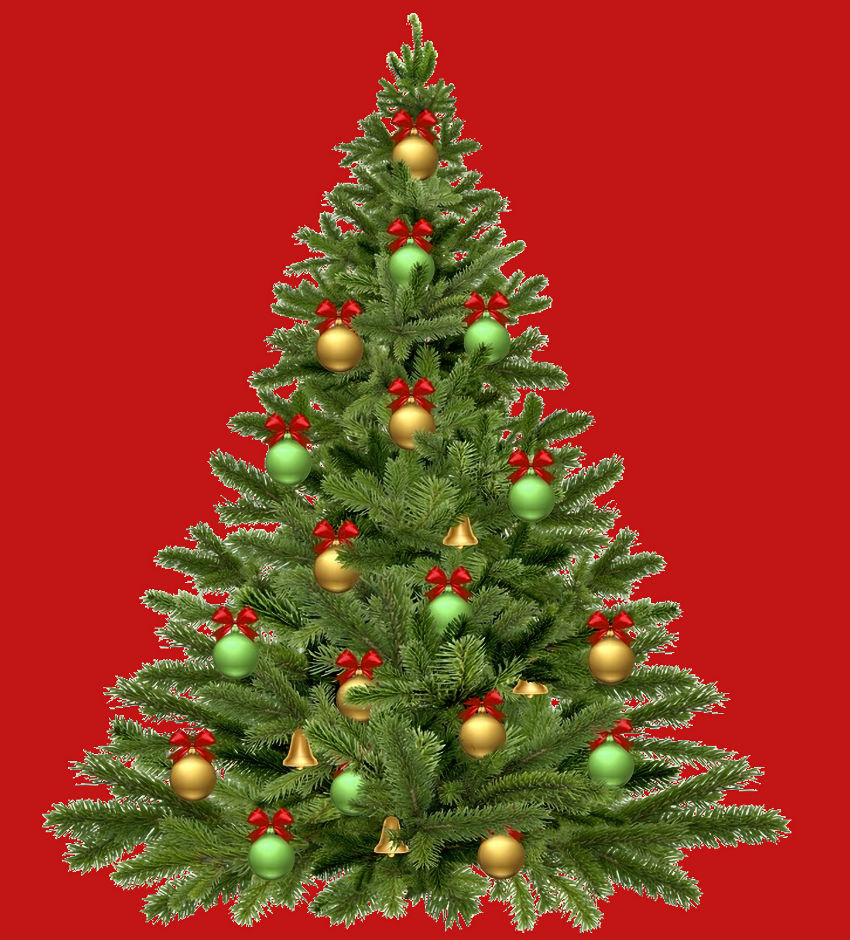
Decorated Christmas Tree

Decorated Tree

Even though this Christmas tree is made with flat pieces of wood, you still need to consider how to decorate it, starting with a color scheme. 

Warm Colors

Warm Colors Ornaments

The warm color palette consists of reds, oranges, and yellows. 

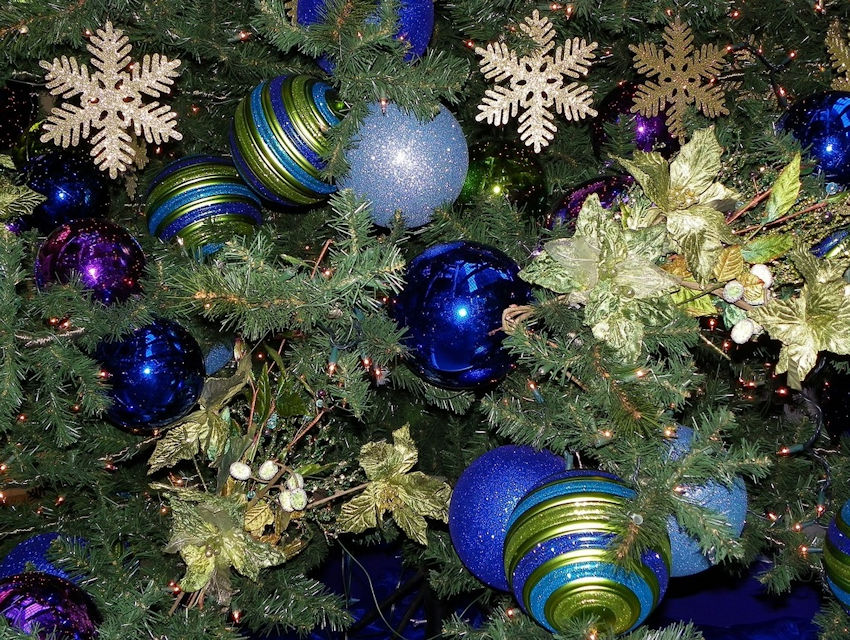
Cool Colors

Cool Colors Ornaments

The cool color palette includes greens, blues, and purples. 

Monochromatic

Monochromatic Ornaments

With a monochromatic scheme, all decorations are the same color, and the variety comes from unique designs. 

Multicolor

Multicolor Ornaments

Create a festive atmosphere with all the colors of the rainbow. 

Christmas Tree Lights

Christmas Tree Lights

Instead of painting Christmas ornaments, you may want to paint lights with metallic acrylics.  Another option is wrapping the tree with mini, battery-operated string lights. 

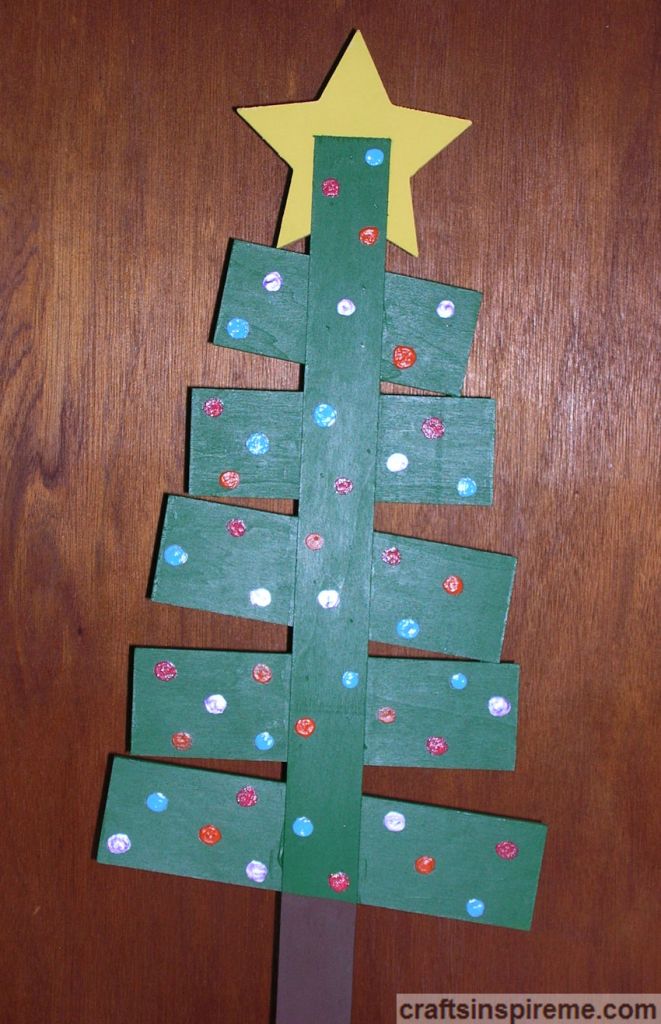
How to Paint a Wooden Christmas Tree:

Raw Wood Tree

Raw Wood Christmas Tree

This freestanding, raw wood tree may need light sanding, especially the edges. 

Supplies

Paint Supplies

Supplies:
Wooden Signpost Tree (28-1/2” high x 10-1/4” wide x 1/4” thick) (base 8”x4”x1/2” thick)
Acrylic Paints – green, yellow, brown
6) Bottles fabric paint: black, purple, blue, orange, pink, glow in the dark white
Paintbrushes

Paint the Tree & Star – Front

Painted Tree & Star Front

Using acrylics, paint the star, the “branches” and the trunk.  You will need a thin brush to paint the trunk between the slats of green.  Paint both sides of the tree, the base and all the edges. 

Paint the Tree & Star – Back

Painted Tree & Star Back

Because this tree is meant to be seen from both sides, I came up with a finished design for the back.  Paint the trunk brown from the base to the bottom “branch,” and green for the remainder. 

Paint Details – Back

Painted Details Back

Apply fabric paints in thick dots to resemble ornaments upon the tree. 

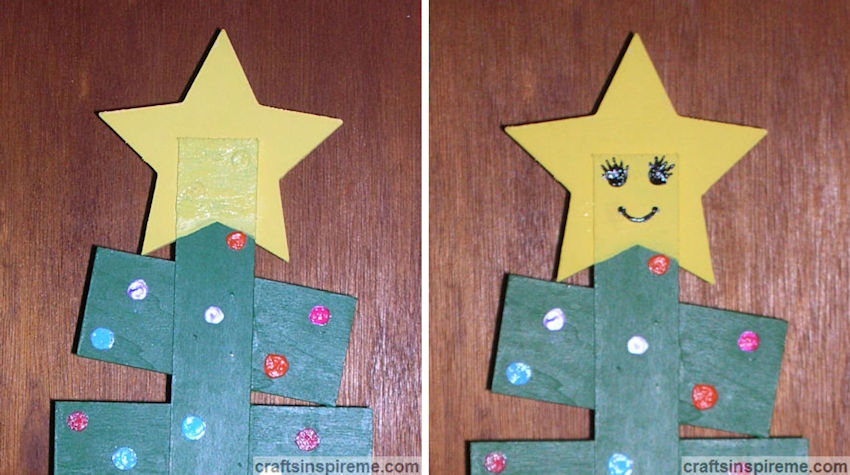
Repaint Star – Back

Revised Star Design Back

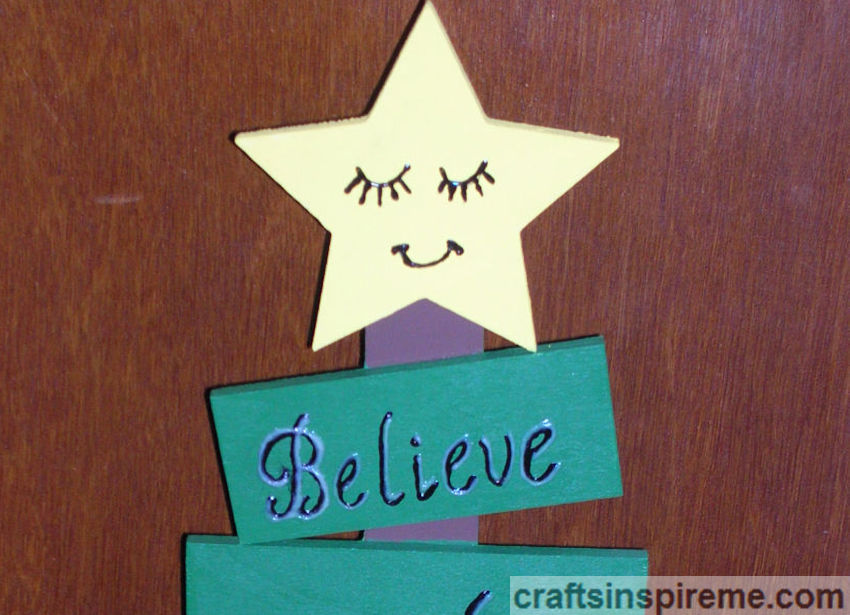
I didn’t like the look of the squared off piece of wood on the back of the star and thought it would better to see the full star on both sides.  To accomplish this, I extended the star shape and filled it in with yellow as shown.  A smiling face was added to the star, using black fabric paint, to give it personality. 

Finished Tree – Back

Finished Tree Back

The back of the tree is now complete.  Only two more steps to complete this project. 

Finishing the Tree – Front

Finishing Tree Front Step 1

Using black fabric paint, write the words you have chosen upon each board.  Finish by giving the star a cute face.  Allow it to dry overnight. 

Finishing the Tree – Front

Finishing Tree Front Step 2

Using glow in the dark white fabric paint, trace the black letters to make them stand out better against the green tree.  Every night, when you turn out the lights, the glowing words will make you smile.  And what a nice way to fall asleep with inspirational thoughts floating in your dreams. 

I hope you enjoy this project and are inspired to explore your creativity.  Good luck in all your artistic endeavors and have fun decorating for the coming holidays!

Merry Christmas, Happy Holidays & Happy Crafting!

Dashing through the Snow

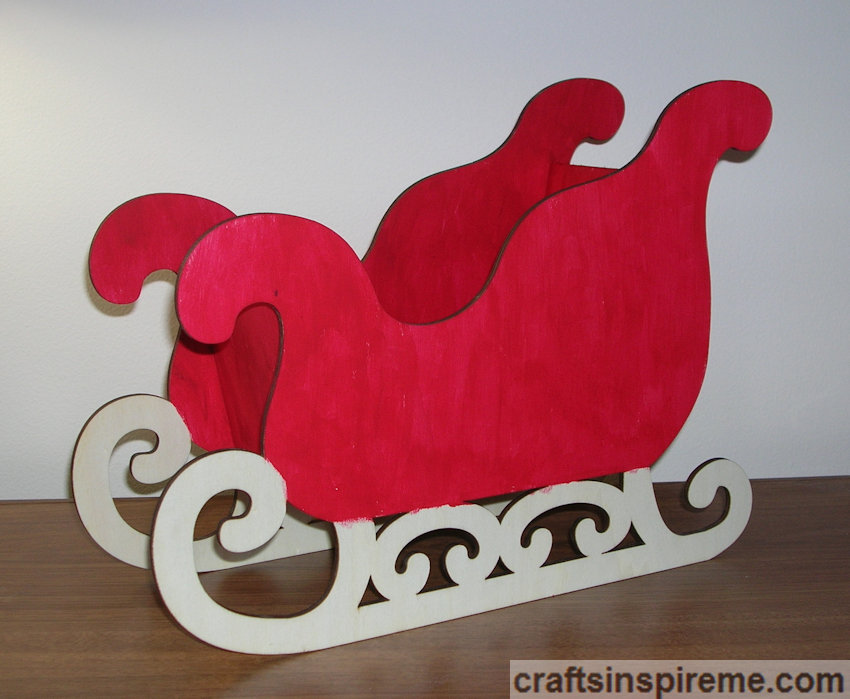
Santa's Sleigh

“Dashing through the Snow” calls to mind sleigh rides and Santa Claus on his gift giving journey.  With a wooden sleigh and a few accessories, you can create a wonderful holiday centerpiece.  Before we begin, let’s look at color schemes and designs of several sleighs to get your creative ideas flowing: 

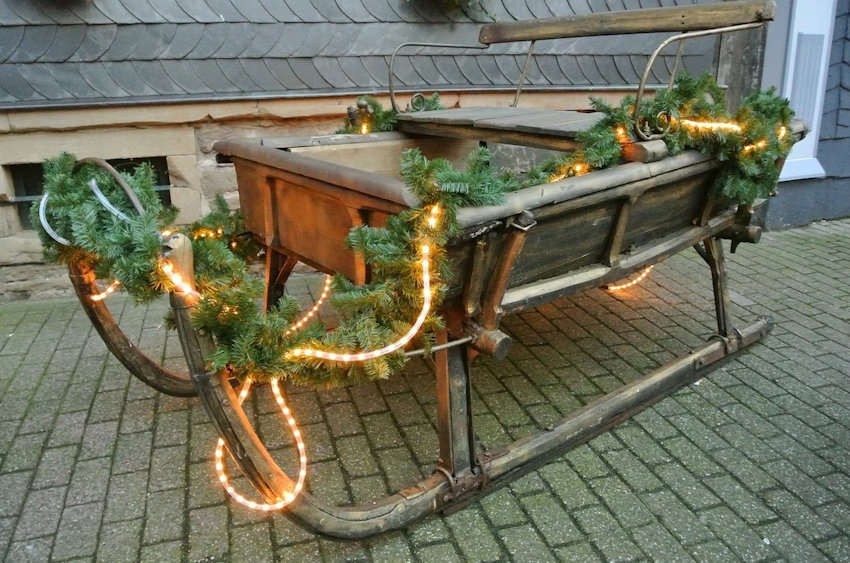
Antique Sleigh

Antique Sleigh

Although this sleigh needs some love, wood in its natural state is attractive.  With a little polish, the brass runners will shine again.  The lights and evergreen garland are great seasonal details. 

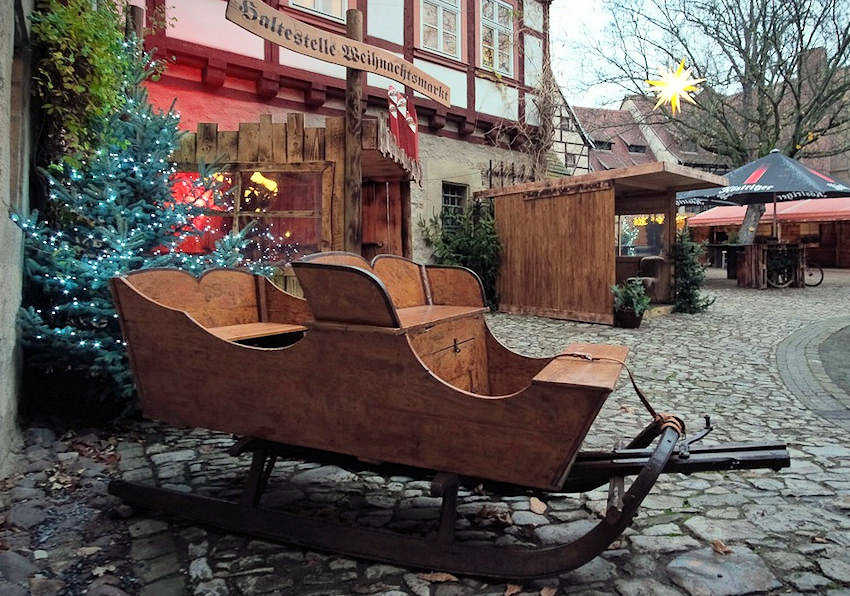
Stained Wood Sleigh

Brown Wood Sleigh

The beauty of natural wood grain may not require color.  A clear sealant coat helps preserve wood for years to come.  Wood stain is optional. 

Green, Gold & White Sleigh

Green & Gold Sleigh

Green and gold are nice alternatives to the standard red and green Christmas colors. 

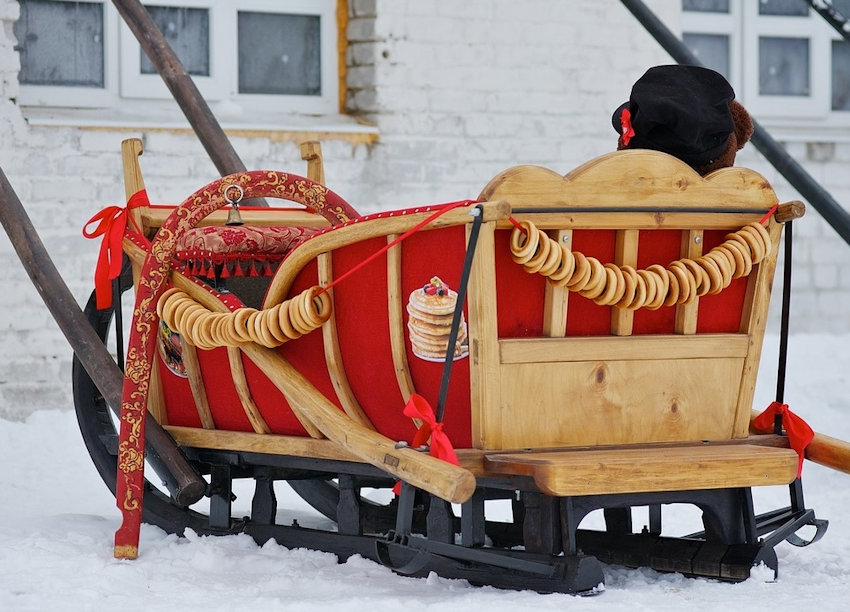
One Horse Open Sleigh

Natural Wood & Red Sleigh

A clear finish protects the natural wood color, while the open sides provide decorative opportunities for colorful pillows and blankets to keep riders warm on a cold winter day. 

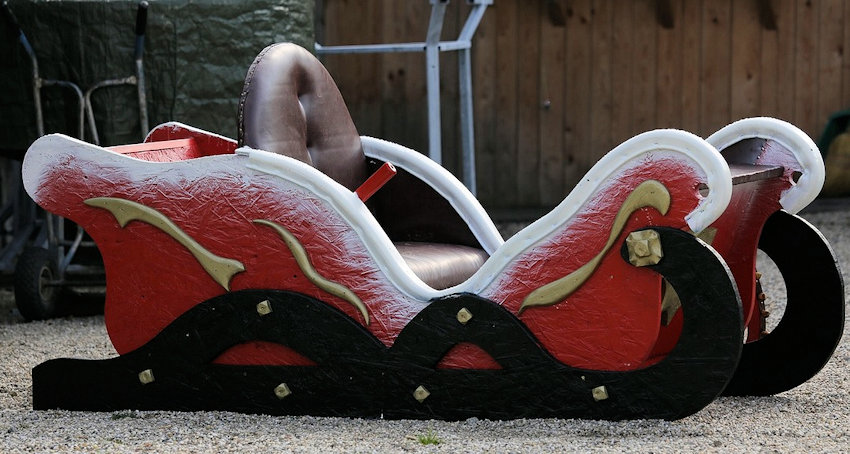
Formula 1 Sleigh?

Red & White Sleigh

If Ferrari built sleighs, this would be the one.  This sleek aerodynamic design would allow Santa Claus to complete his rounds in half the time. 

Red & Gold Sleigh

Red & Gold Sleigh

The brilliant red and shiny gold trim are popular choices for Santa’s sleigh.

Red & Gold Sleigh with Lights

Red & Gold Sleigh with Lights

Dazzling string lights create a magical ambiance, day or night. 

How to Paint a Wooden Sleigh:

Unpainted Sleigh

Raw Wood Sleigh

There are many wooden sleighs available through craft stores or online. 

Supplies

Paints

Supplies:
Wooden Sleigh (10-1/2” high x 14” long x 6” wide)
Acrylic Paints – red, black, metallic gold, & white
1) Bottle fabric paint: white
Paintbrushes

Sleigh Painted Red

Sleigh Painted Red

Paint the sleigh with red acrylic paint.  It may take a couple coats to ensure smooth, even color. 

Black Painted Rails

Sleigh with Painted Rails

Paint the rails black on both sides and all edges. 

Painted Snow & Gold Trim

Sleigh with White Details

Draw snowflakes on all four sides and paint each with white acrylic paint.  To enhance the designs, go over each snowflake with white dimensional fabric paint.  Paint the edges of the sleigh with metallic gold paint.  This will most likely require two coats. 

This completes the sleigh.  Now it is time to think about making it the focal point of a new centerpiece.  Your next decision is: Who will pull the sleigh? 

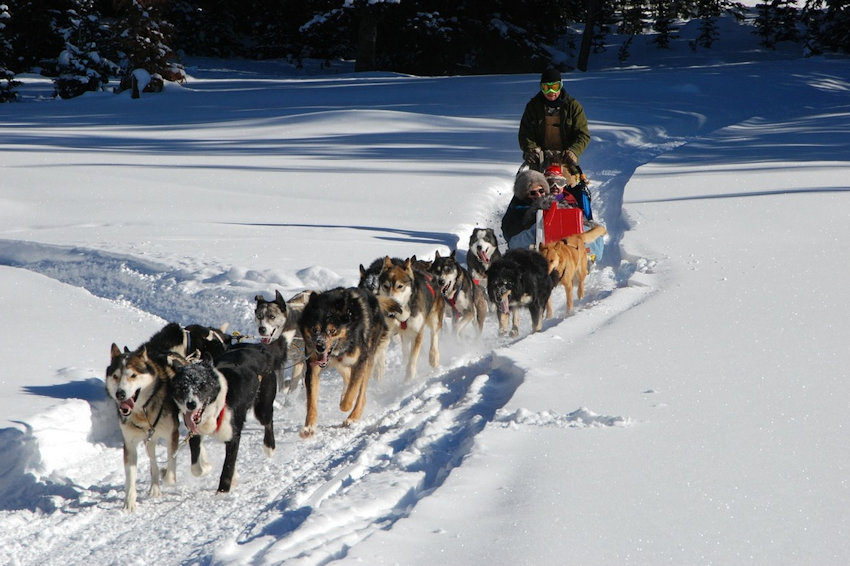
Dog Sledding

Dog Sled

Dog sledding teams compete every year in an Alaskan race called the Iditarod Trail Sled Dog Race. 

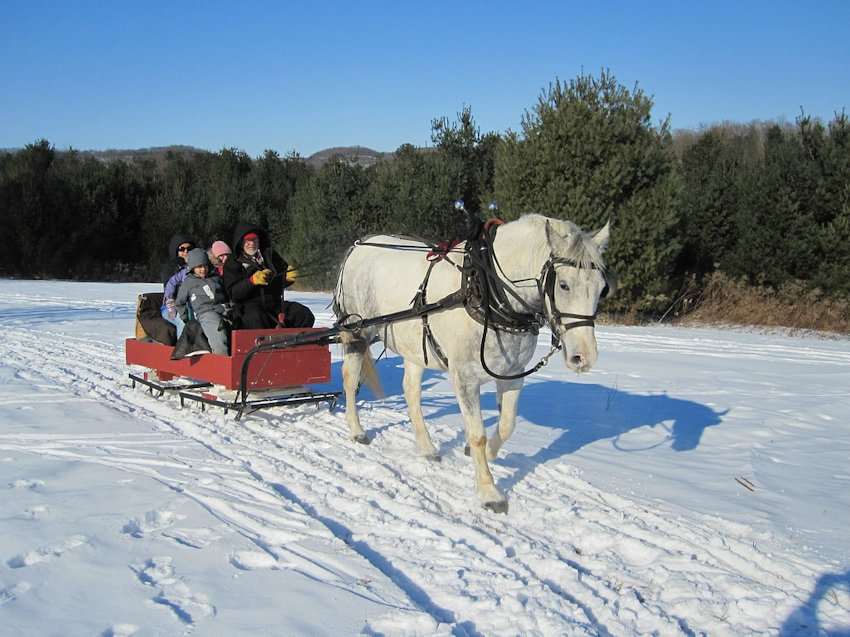
Horse Drawn Sleigh

Horse Drawn Sleigh

Riding in a horse drawn sleigh has been a tradition for centuries.  In warmer seasons the sleighs are swapped out with carriages for year-round enjoyment. 

Reindeer Drawn Sleigh

Reindeer Drawn Sleigh

Santa isn’t the only one using reindeer to guide his sleigh. 

A perfect 10 on the Cuteness Scale

Yorkie Sled

Holding the reins securely in his paws, this adorable yorkie steers a course straight into the hearts of viewers in this moose drawn sleigh. 

With your selections in mind, it is time to complete this project.  There are no wrong answers.  You may already have everything you need.

Christmas Sleigh Centerpiece

Finished Centerpiece

I chose a pig to pull the sleigh.  His hat is a floral pick, without the stick.  Fabric ribbon serves as reins, and I made a collar with a few jingle bells.  Tuck one end of the reins into the collar, and the other is held by a squirrel, wearing a red crocheted hat. 

Christmas Sleigh Centerpiece

Finished Centerpiece

A floral garland fills the sleigh with a harvest of red berries and green leaves.  It looks like this cute little squirrel is stocking up for the winter.  A male cardinal hitches a ride on the sleigh.  All the red accents unify this design, while the pig provides a bit of whimsy. 

Who will pull your sleigh and who will ride?  Please let me know in the comments. 

Thanks for Reading & Happy Crafting!
Abracadabra – Harry & Hermione’s Magic Wands

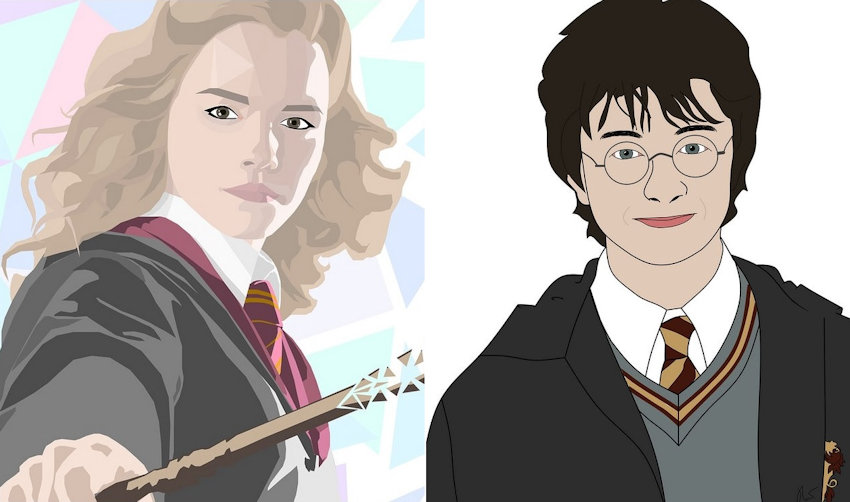
Hermione and Harry never go anywhere without their magic wands. 

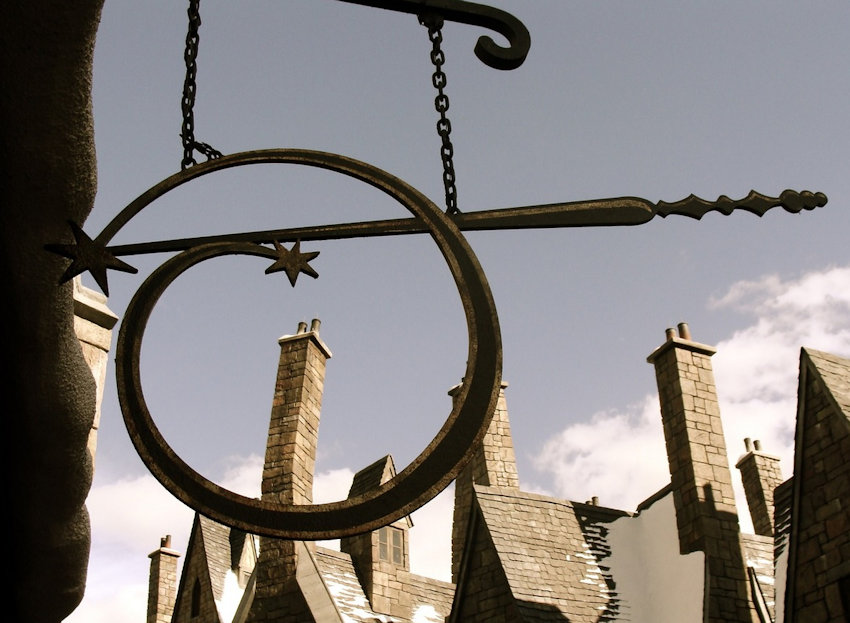
Logo/Sign at Ollivander’s Wand Store, Universal Studios

Every Hogwarts’ wizard goes to Ollivander’s to choose his or her magic wand. 

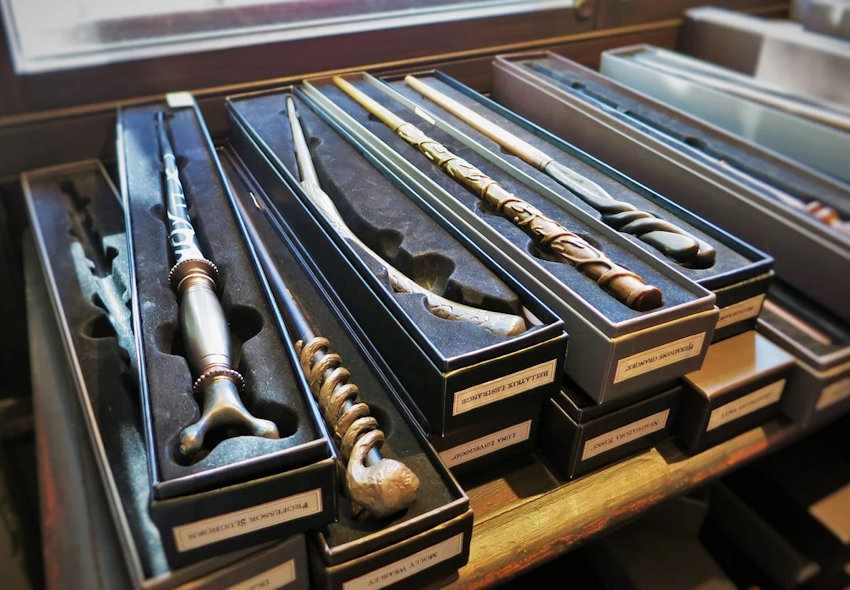
Magic Wands at Ollivander’s Wand Store

While doing research, I was surprised to see that many of the wands in the Harry Potter series were rather lackluster.  I expected wizards to have exquisite, highly personalized wands to express their personalities as well as their power. 

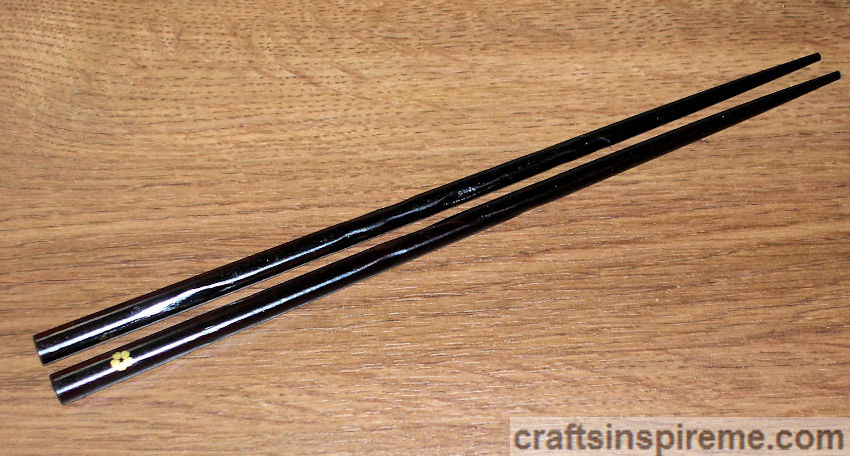
Wooden Chopsticks

For this project, we will transform wooden chopsticks into magic wands for Hermione Grainger and Harry Potter.  Use these techniques to create a wand for any character and add whatever embellishments feel right to you. 

How to Make Hermione’s Magic Wand:

Inspiration

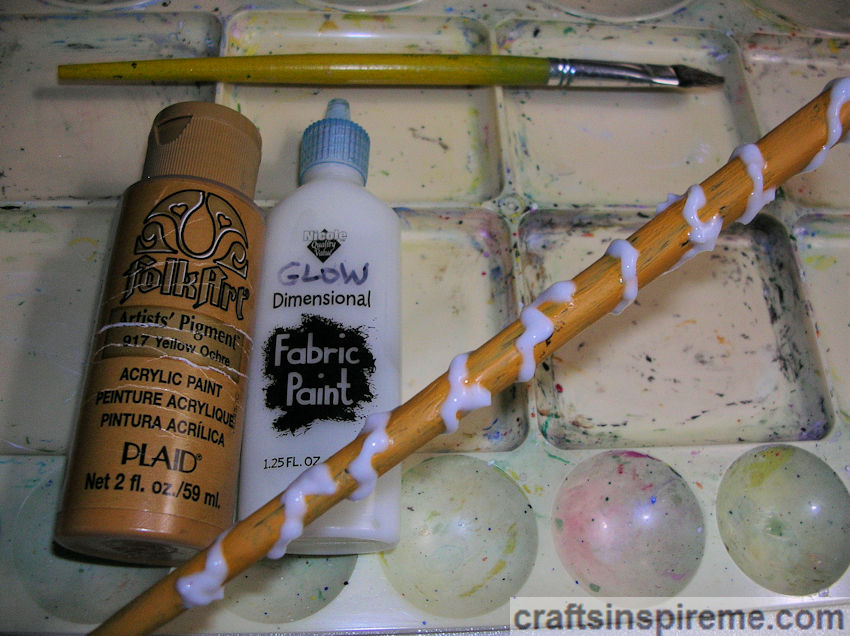
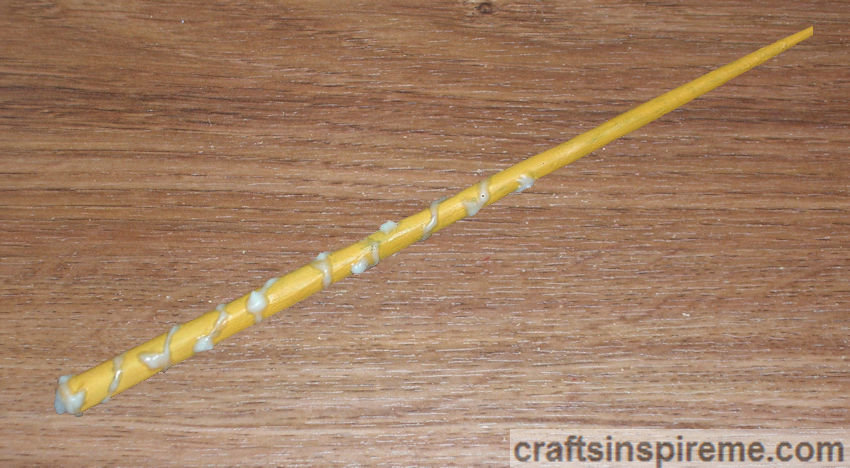
Hermione’s wand has a fairly simple design, consisting of English ivy wrapped around a monotone magic wand. 

Supplies

Supplies:
Wooden Chopstick (9” long x 3/8” thick)
Acrylic Paint: yellow ochre
Bottle fabric paint: glow-in-the-dark white
Paintbrushes
Clear Spray Paint: Matte Finish
Optional 1) Faceted rhinestone & Acrylic Paint: metallic peridot.  See “Advanced Painting” below.

Painting Chopstick

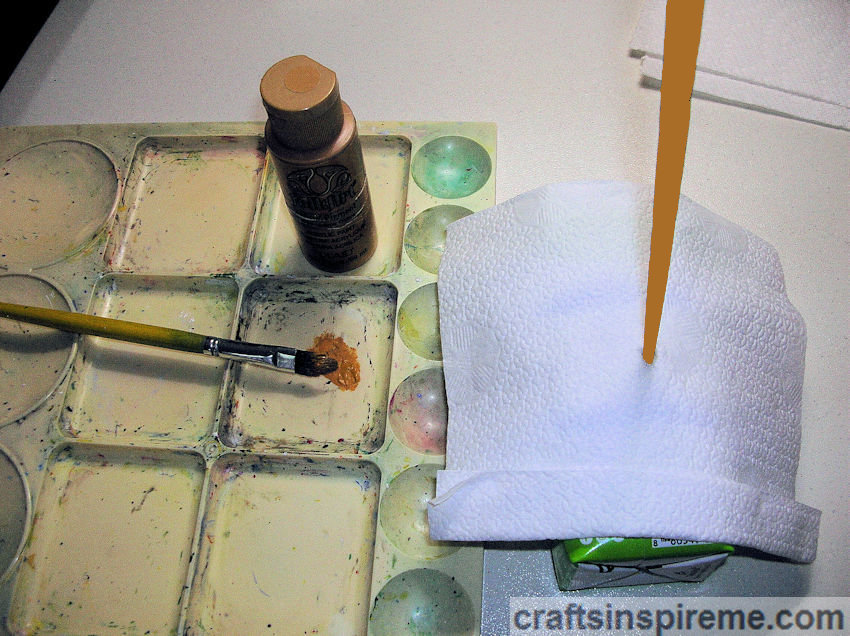
Step 1 – If the chopsticks are lacquer-coated, you may need to prime the surface first, and then apply two coats of acrylic paint.  Puncture a hole in a box to hold the wand upright for drying, but don’t forget to paint the tip later.  To prevent fingerprints and scratches, handle with a tissue. 

Painting Vines & Leaves

Step 2 – Starting at the top, use three-dimensional paint to create an ivy vine wrapping around the wand.  Add an interesting twist by using glow in the dark white paint, but if you prefer, you can use plain white.  If you want to be true to Hermione’s original wand design, wait until the 3D paint dries, and then paint the vines with yellow ochre to match the rest of the wand. 

Hermione’s Finished Wand

To seal the paints, spray the wand with clear spray paint.  At this point, the wand is complete.  If you have been following this blog for a while, you know there is usually an enhanced version, which is shown below in the “Advanced Painting” section. 

How to Make Harry’s Magic Wand:

Inspiration

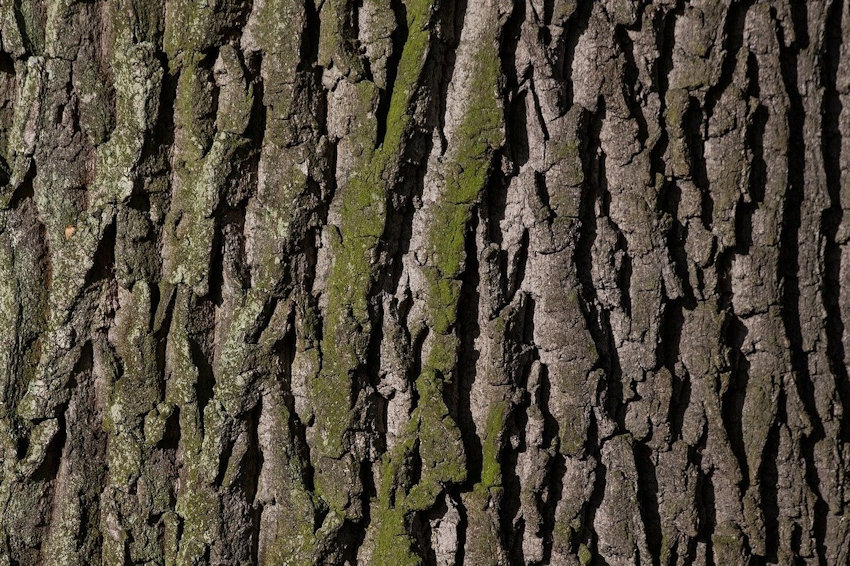
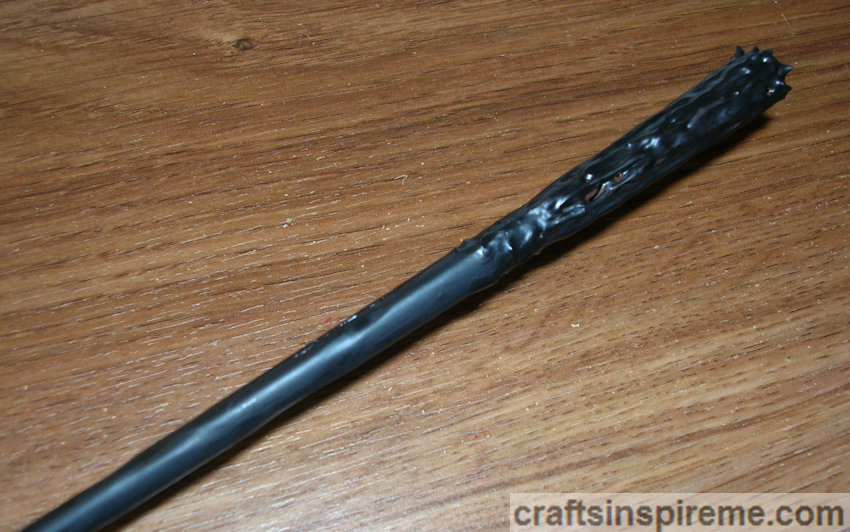
Harry’s wand has a textured, two-tone design.  Rough “tree bark” at the top serves as a handgrip, and the rest is smooth wood. 

Supplies

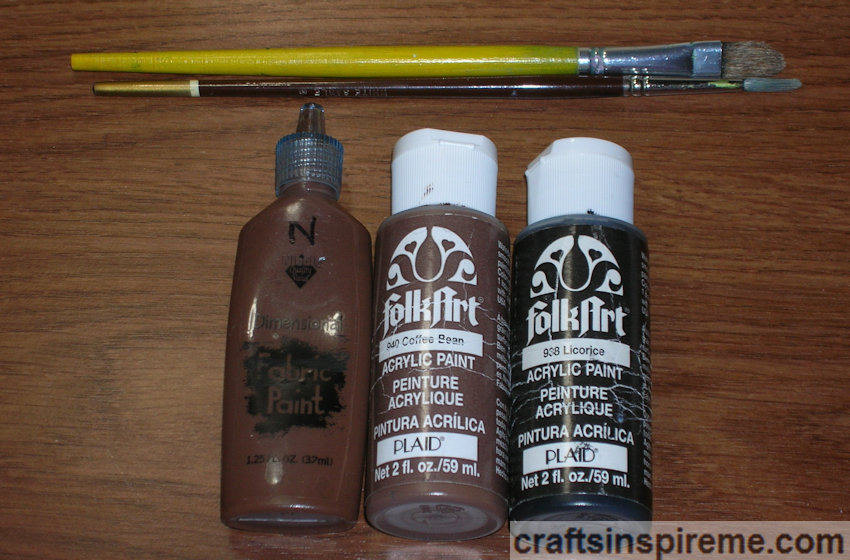
Supplies:
Wooden Chopstick (9” long x 3/8” thick)
Acrylic Paint – licorice black, coffee bean brown
1) Bottle fabric paint – brown
Paintbrushes
Clear Spray Paint: Matte Finish
Optional – Glue gun & 1) Faceted rhinestone. See “Advanced Painting” below.

Creating Texture

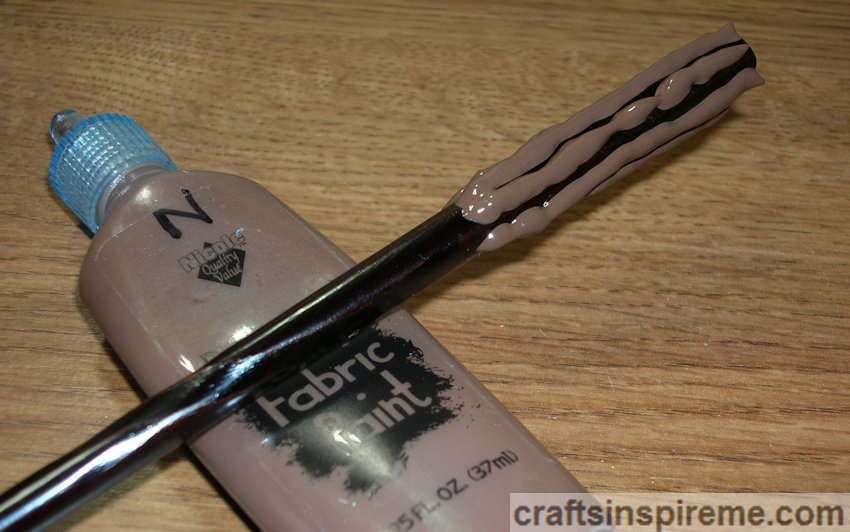
Step 1 – Using three-dimensional paint, draw long lines at top to create the basic texture as shown above. 

Adding More Texture

Step 2 – Fill in with more texture, to create a rough tree bark appearance, including pointed edges across the top of the wand.  Allow paint to dry overnight. 

Painting Black

Step 3 – Paint the entire wand with black acrylic.

Dry Brushing Brown

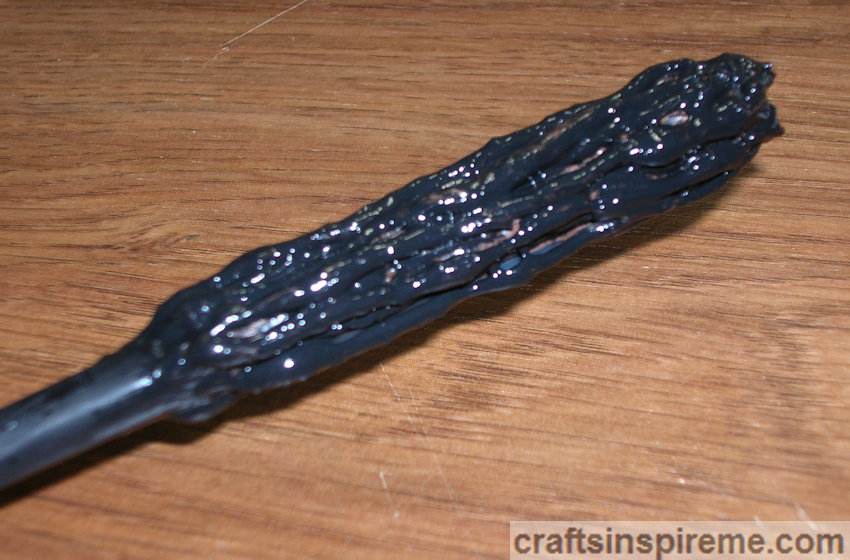
Step 4 – Dry brush the rough bark with brown acrylic paint, allowing the black recessed areas to show through, as they do with real bark.  Seal the paints with clear spray paint. 

Harry & Hermione’s Finished Wands

This photo shows the two completed wands side by side.  I wanted to take this project to the next level by creating more texture on Harry’s wand and more visual interest for Hermione’s. 

Advanced Painting:

Hermione’s Wand – Defining the Leaves

Step 1 – Make the leaves more prominent by applying a thicker coat of the same three-dimensional glow in the dark paint on each individual leaf. 

Close-Up Vines & Rhinestone

Step 2 – Create a glowing cap on the end of the wand and place a rhinestone in the center as shown.  In case you didn’t know, fabric paint can be used in place of glue. 

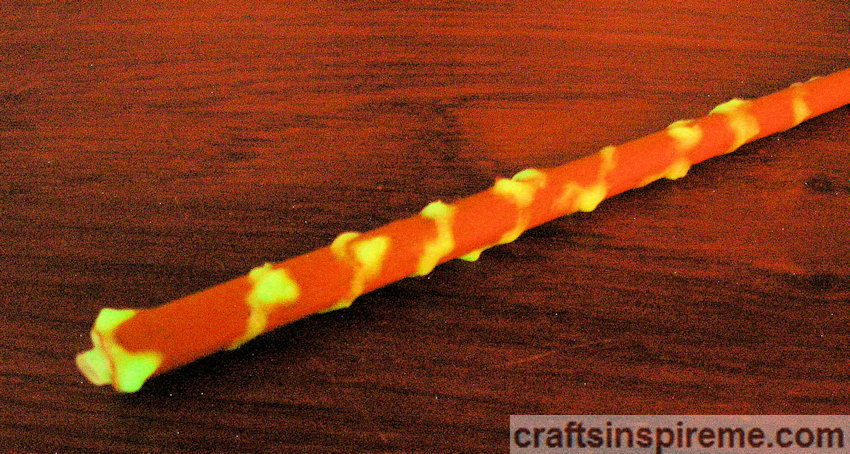
Glowing Wand

Step 3 – After being exposed to light, the vines, and leaves glow in the dark.  You can test the glow by holding the wand under a bright light for several seconds and then switch off the lamp.  Adjust the paint as needed. 

Accent Painting the Leaves

Step 4 – Something still needed to be added, but I didn’t know what it was.  Finally, I decided to apply a soft pastel green to the leaves, providing color as well as a subtle shimmer.  Seal paints with clear spray paint.  By day or night, this wand has stylish and surprisingly powerful. 

Harry’s Wand – Creating Thicker Tree Bark

Step 1 – Using a glue gun, add long lines for more texture upon the handgrip. 

Roughening the Texture

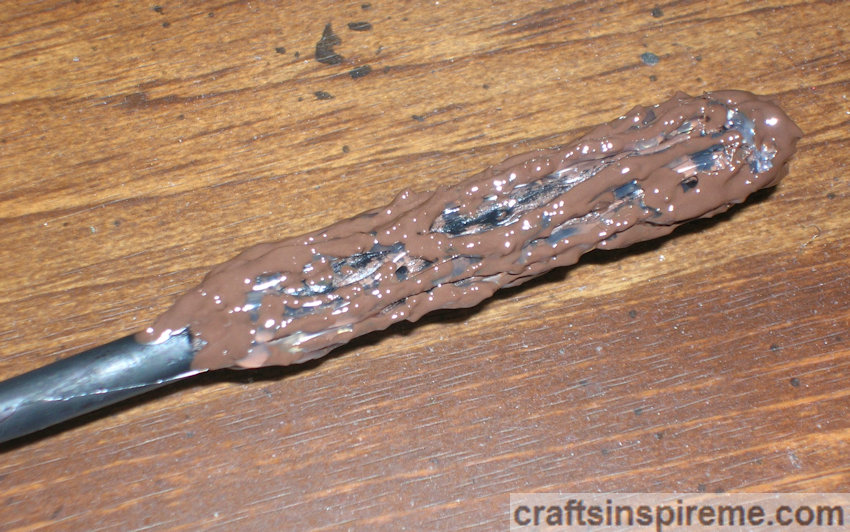
Step 2 – Use brown three-dimensional paint to roughen up the smooth lines of glue, to resemble tree bark more closely. 

Painting Black

Step 3 – Paint the entire wand with black acrylic.

Dry Brushing Brown

Step 4 – Dry brush only the rough bark handle with brown acrylic paint, allowing the black recessed areas to show through, as they do with real bark.  Use glow in the dark fabric paint to attach a rhinestone to the end of the wand as shown above.  Seal paints with clear spray paint. 

Harry’s Finished Wand

The thickened “tree bark” looks better, and the sleek black wand is the perfect choice for a powerful wizard. 

Harry & Hermione’s Finished Wands

These two wands work well together, just like Harry and Hermione. 

Close-Up – Both Finished Wands

I hope you have found a few inspirational ideas to create your own wands.  Do you have a favorite wizard, or a favorite magical literary character?  What kind of magic wand do you think that character would choose?  Please let me know in the comments section.  Enjoy the creative process, and let your ideas run wild. 

For more Harry Potter crafts, please check out this post: “Harry Potter’s Magical Creatures.”

Thanks for Reading & Happy Crafting!
How Do You Like Your Eggs?

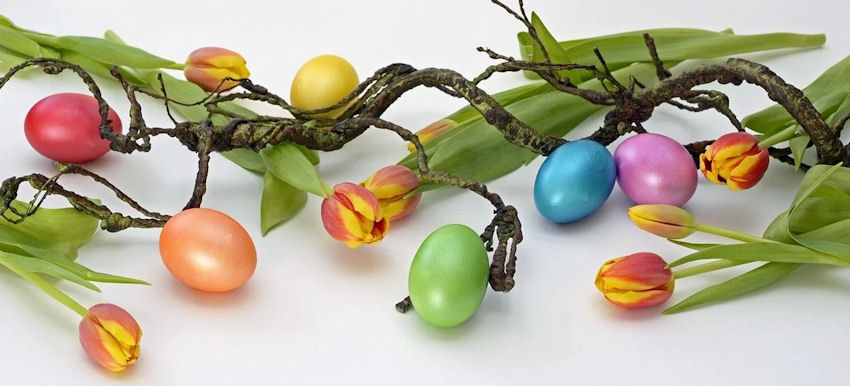
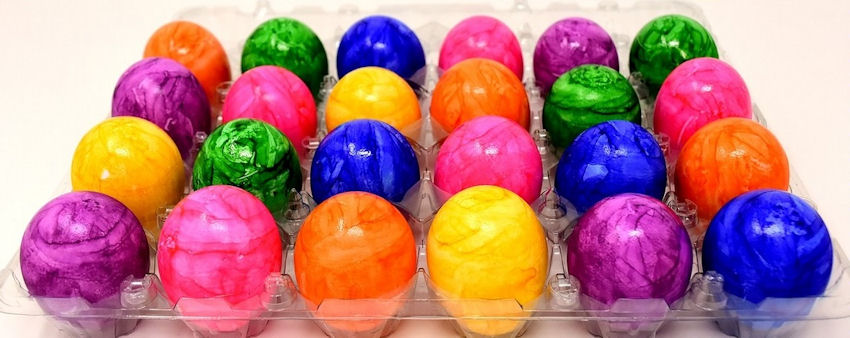
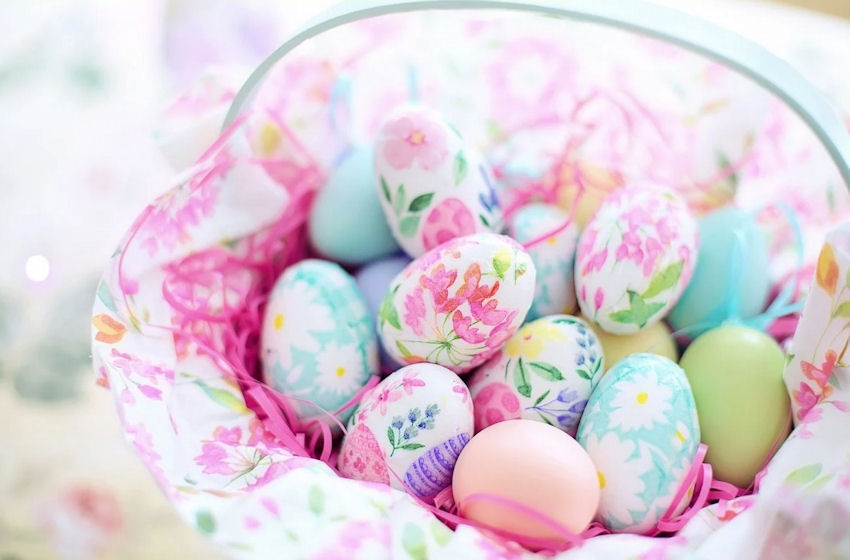
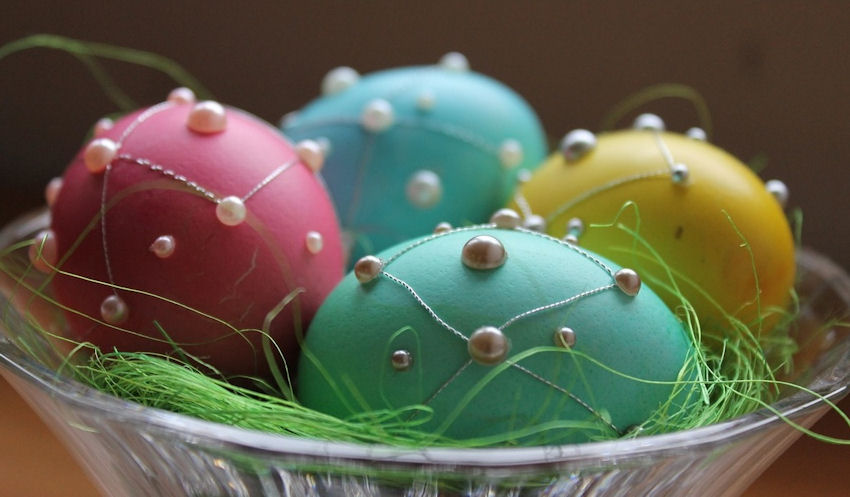
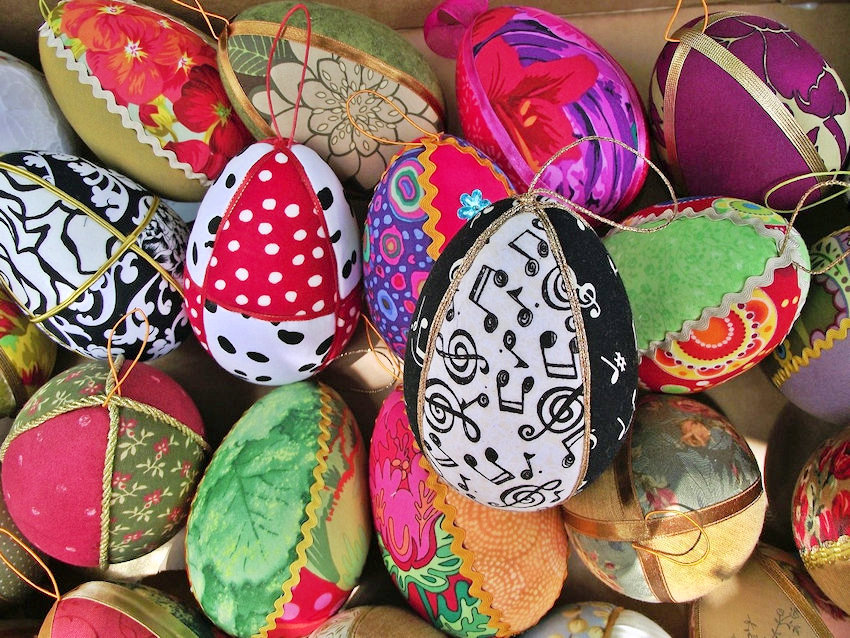
It is an age-old question.  In this case, we are not talking about breakfast.  Instead, let’s talk about egg decorating.  The eggs can be hard-boiled or blown eggs, as well as wooden, ceramic, and plastic eggs.  Decorations include paints, markers, ribbon, fabric, glitter, string, quilling paper, and stickers.  Below are several examples to inspire you:

Strategy Meeting: Egg Production (Hen) & Egg Distribution (Bunny) lol

Dyed Eggs

Iridescent Eggs

Pearlescent Eggs

Paint Pour Eggs

Air-Brushed Eggs

Hand Painting Supplies

Hand Painted Watercolor Eggs

Hand Painted Pastel Eggs

Hand Painted Multicolor Eggs

Hand Painted 3D Multicolor Eggs

Hand Painted Egg Ornament

Hand Painted Egg Artwork

Dyed Eggs with Stickers

Dyed & Beaded Eggs with Metallic Trim

Dyed & Woven Bead Wrapped Eggs

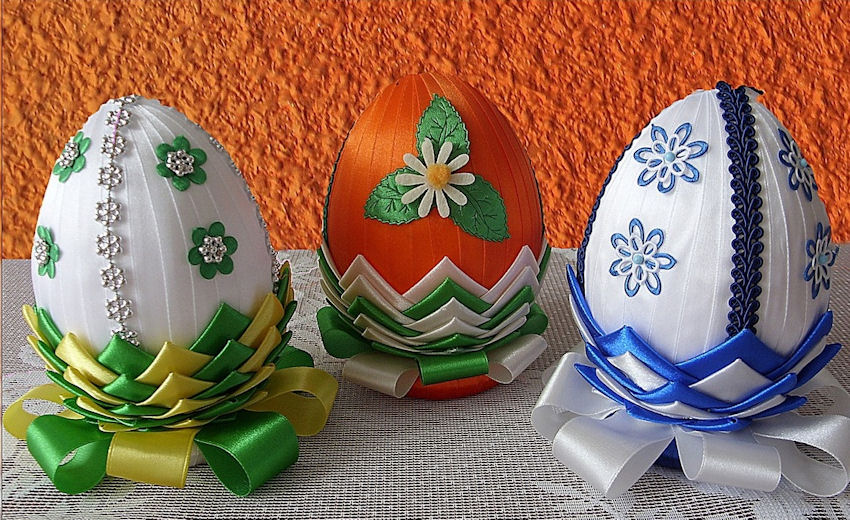
Fabric Wrapped Eggs with Ribbon Trim

Ribbon Wrapped Eggs

Dyed Eggs with White Marker Designs

Dyed Eggs with Multicolor Marker Designs

Decoupage Egg Ornament

Quilled Eggs

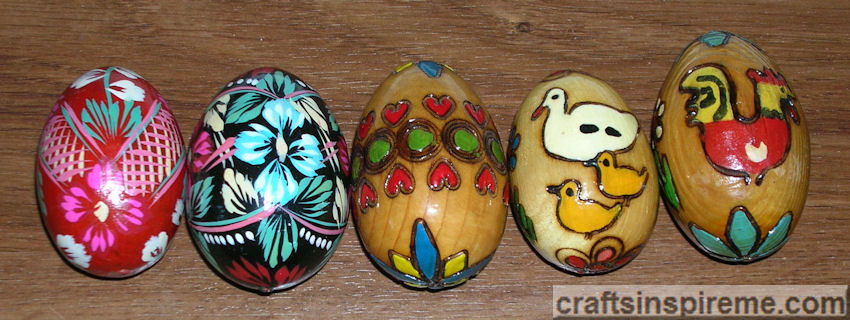
Carved & Painted Wooden Eggs

Multicolor String Wrapped Egg Ornaments

Express Delivery Crew

With so many eggs to deliver this year, the Easter Bunny hired some extra helping hands (paws)!  lol

I hope your creative ideas are flowing.  Do you have a favorite decorating technique?  I look forward to hearing your ideas.  Have fun decorating and thanks for reading.

Happy Easter & Happy Crafting!

The Bunny Hop – Painted Wooden Rabbit

Before we begin this Easter-themed project, we’ll need a little inspiration. Let’s take a look at a few of Mother Nature’s color scheme choices in the adorable bunny photos below:

Tan Baby Bunny
Baby bunnies are just so cute! That’s a lot of love wrapped in a soft tan and cream coat.

Gray & White Bunny
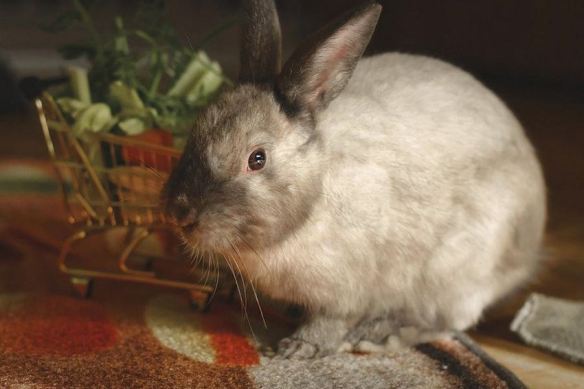
This stylish rabbit is modeling the very popular gray and white color combo.

Tan & Brown Bunny
Wild rabbits often have a blended fur coat of brown, tan and black to help camouflage them from predators. The one pictured above looks perfectly content to nap where he is without a care in the world.

Black & White Bunny
Last but not least is this precious black and white baby. His delicate features, including his button nose, inner ears and the outline of his eyes, are a soft pink.

Now that we’ve seen a few ideas, let’s get started painting!

How to Paint a Wooden Rabbit:

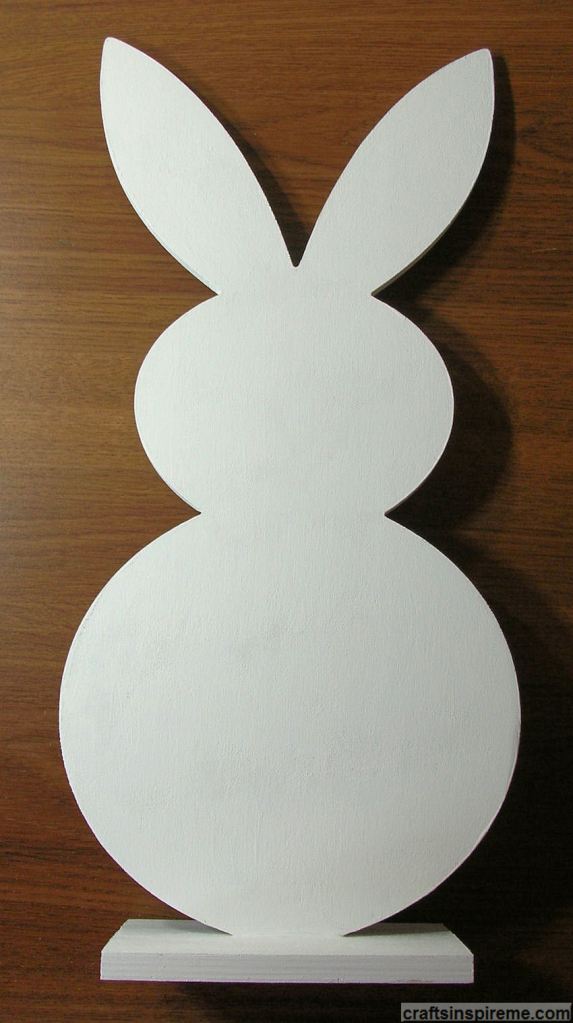
Raw Wood Bunny
Thick wood has been cut out in the shape of a rabbit and has the advantage of strong, rectangular base. Both sides and all the edges will need to be painted. Due to the raw nature of the wood, it may require a little sanding, especially along the edges.

Bunny Supplies
Supplies:
Wooden Rabbit (17” high x 8” wide x 1/4” thick) (Base is 5-3/4” wide x 4”deep)
Acrylic Paints – brown, black, gray, tan, green & white
Fan paintbrush, small detail paintbrush and thicker brush for base coats
Sandpaper
Optional: Fabric paints – black, brown, white (Refer to Advanced section below)

Painted White Bunny
Step 1 – Paint the rabbit with 2) coats of white acrylic paint, including both sides and all edges.

Painted Back Bunny
Step 2 – Start painting the fur on the back. Experiment with colors and brush techniques. I poured black, brown and gray paint onto an artist’s palette. Dip a fan brush into each color and then apply to wood surface to create a fur-like effect. Because the paints have not been mixed, each new brush stroke will have a slightly different combination of colors, just like real fur. Repeat thus process until the back is completed. The white tail will be added later.

Layout Details Front Bunny
Step 3 – On the front, draw the face (eyes, eyelids, eyelashes, muzzle with nose, mouth, whiskers), ears and feet with a pencil. Paint the inside of the ears and eyelids tan.

Painted Front Bunny
Step 4 – Create the fur by repeating the procedures in Step 2. Be sure to make long brush strokes along the edges of the ears to resemble thick fur. You can leave the eyes, muzzle, and feet white for now. These areas will be detailed in the next step.

Bunny Closeup1
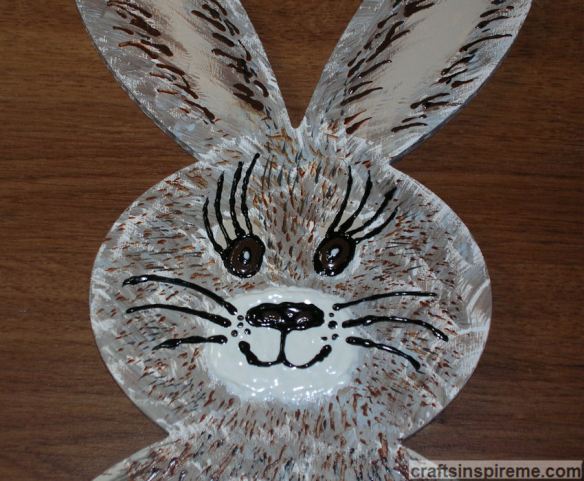
Step 5 – Paint the facial details. I painted the eyes, eyelashes, nose, mouth and whiskers black.

Bunny Closeup 2
Step 5A – This is an alternate version for the eyes and nose. A brown iris has been added to each eye, the eyelashes have been extended, and brown nostrils define the nose. For a more lively expression, don’t forget to put a dot of white in the pupil of each eye.

Finished Bunny
Step 6 – The finished rabbit has white feet with black lines to define the toes. The base was painted with two coats of green.

Finished Bunny Tail
Step 7 – Paint a big, white fluffy tail on the back.

At this point your project is finished and ready to display. If you would like to take this design to the next level, please follow the steps below.

Advanced Rabbit in 3D
Followers of this blog know how much I love creating 3D details on wood projects using fabric paints. If you appreciate three-dimensional effects, this section is for you! Unless otherwise noted, all paints listed below are dimensional fabric paints.

3D Bunny Face
Start by painting 2 thick coats of white fabric paint on the muzzle, and brown paint for the eyes.

3D Bunny Feet
Next paint the feet with 2 thick coats of white paint.

3D Face Details
To complete the face, use black paint for the nose, mouth, whiskers, eyelashes, and the outline around the eyes. Add a black pupil in each eye. Paint a white dot in the center of each pupil, and use brown paint in each nostril.

3D Body Details
Add long brown fur along the inner edges of both ears and define the two front legs using the same paint. Add the black lines to define the toes on each foot.

Detail Facial Fur
Using short strokes, bring the black and brown fur mixture up into the face.

Detail Legs and Feet
Layer additional black and brown fur to define the body, and add the two back feet.

Finished 3D Bunny Front
Because the rear legs are in the background, keep the paint lighter by using tiny strokes with just the brown paint in an upward direction. If you want additional fur texture, you could use acrylic paints and a brush to thicken the fur coat with highlights and lowlights.

Finished 3D Bunny Back
The last step is painting the tail with 3 coats of white fabric paint.

Mission accomplished! This cute little guy is ready to be displayed in your home, bringing joy to your life for years to come.

Happy Easter and Happy Crafting!

Gifts from the Heart

Frog with Heart
As Valentine’s Day approaches, it’s a nice reminder to show appreciation for those who share our lives, including family, friends, and yes even our pets.  It doesn’t have to cost a lot.  In fact, you may already have what you need for the perfect gift.   Here are a few creative ideas to get you started:

Sweets for the Sweet
Homemade Candy & Cookies
Homemade cookies and candy will satisfy any sweet tooth.

Nature Lover
Fruit Hearts
This edible art is delicious & nutritious.

Heart of the Vineyard
Wine Corks Heart
Connoisseurs will appreciate shared memories celebrated with a nice glass of wine.

The Personal Touch
Clay Heart Vase
Gifts made by hand are always the best way to show your love.

Two Hearts Beat as One
Metal & Wood Hearts
Whether you prefer working with wood or metal, this universal symbol of love says it all.

Love is in the Details
Mosaic Heart
Glass, tile, and stones can be used to create mosaic jewelry, tabletops, wall art, etc.

A Rose by Any Other Name
Paper Roses
As timeless symbols of love, these paper roses will forever be in bloom.

Big Bear Hugs
Teddy Bear & Flowers
Everyone could use a hug.  Teddy bears can be sewn, crocheted, or knitted.  If you don’t have those skills, buy one and add a personal touch, such as a bunch of silk flowers or homemade chocolates.

Soft & Dreamy
Watercolor Painting
Watercolor, acrylic or oil paints are the perfect choice for creating beautiful artwork to be treasured for years to come.

Heartfelt Adventure
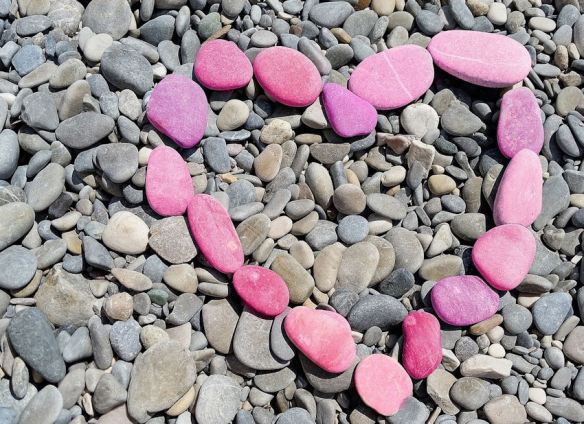
Pink Stone Heart
Outdoor enthusiasts will enjoy taking a romantic walk along a beach or trail on a “treasure” hunt, consisting of well-placed hearts made from stones, shells, or flowers.

Presentation is Everything
Heart Earrings
At the end of the treasure hunt mentioned above, surprise your companion with a little gift, such as a bouquet of wildflowers or handmade jewelry.

Reflective Photography
Black Swan
At first glance, you might only notice the beauty of this black swan but look closer and you will see the perfect heart shape created by his reflection.

Just the Two of Us
Romantic Silhouettes
A sunset photo of a couple is a nice keepsake and posing just right forms a heart.

Your BFF
Dog Wearing Scarf
Our best friends are always looking for affection.  A new scarf or a heart charm for the collar are nice options, but the best way to show your love is by giving them your time and attention.  Works for people too!

Thanks for reading.

Happy Valentine’s Day & Happy Crafting!

The Basics of Decorative Painting

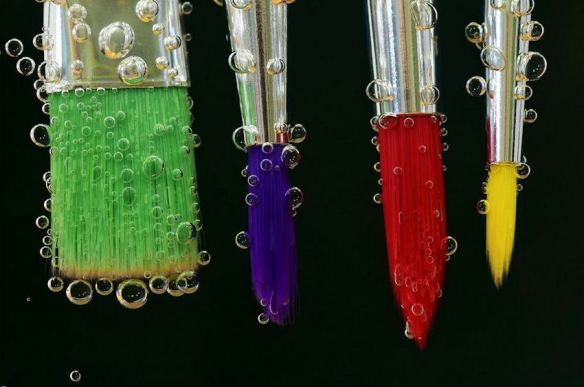
Paint Brushes
In a post a few weeks ago, faux finishing was discussed with several painting options and instructions for sponge painting. Faux finishing is part of a larger category called decorative painting, which includes stenciling, murals, and custom painted details.

At it’s most basic, decorative painting can be as simple as painting vines on a flowerpot. Be sure to use weatherproof paint, not only to protect it from rain and sun, but also from watering the plants.

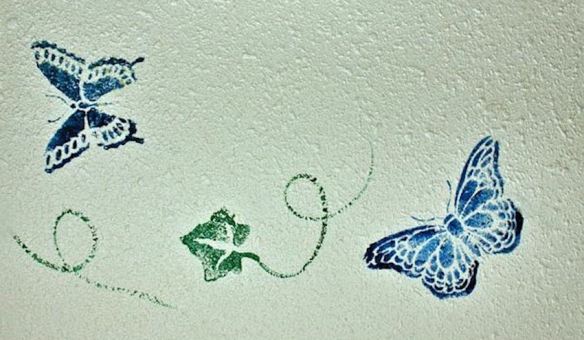
Stenciled Butterflies & Vines
Stenciling
Stenciling is a fairly easy process. Choose a plastic stencil, a few paints, and some sponge brushes. Painter’s tape is great for holding the stencil in place while you work, painting one color at a time. Crafter Tip: Stenciling on a textured wall is not recommended. The bumpy texture can cause the colors to bleed, and the designs may appear stretched or irregular.

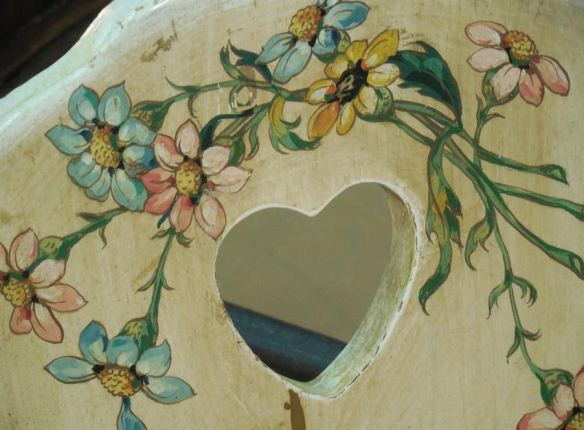
Antiqued Wood Chair with Painted Floral Seat Back
Furniture presents the challenge of durability. Paint alone is not enough. Crafter Tip: Consult a specialist, or research what types of paints and sealants to use to ensure your designs will withstand every day wear and tear.

Stippling
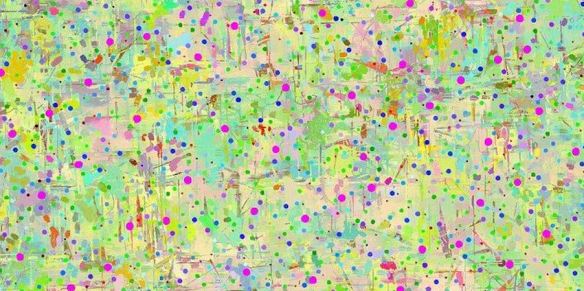
Stippling
This is an example of stippling layered over a multi-color background. The base coat is created using sponges or brushes to blend the colors together. Stippling consists of little dots to create light and dark areas by changing the density of the dotted pattern.

Watercolor
Watercolor
In this technique, water-based paints are thoroughly mixed with water and blended together while still wet. It’s important to remember that you will want to start out with light washes of color and gradually build up to the darker areas. If you get too dark too fast and don’t like the results, you will need to start over.

Layered Techniques
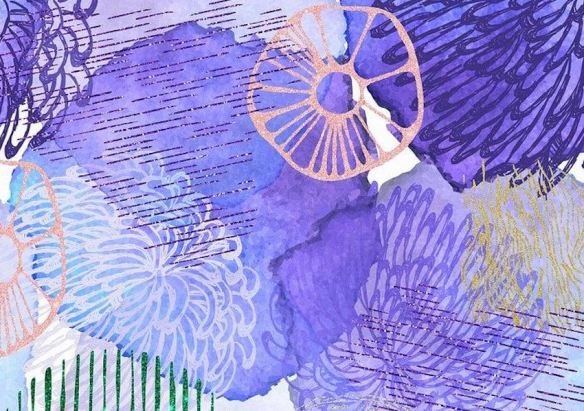
Mixed Media
Here we see an interesting mix of free-hand painting, stenciling, and stamping. Pressing painted corrugated cardboard against the surface created the parallel lines.

Now if you’re really feeling ambitious, here are some amazing painted murals:

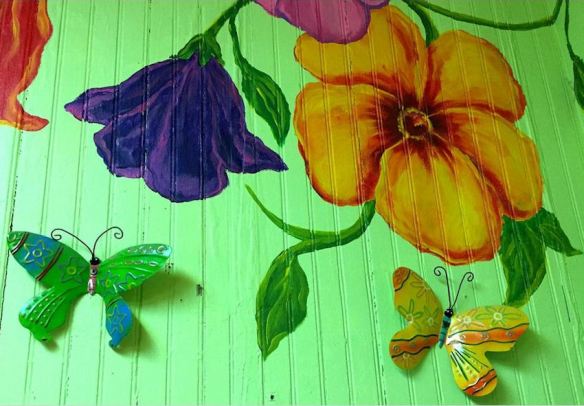
Floral Wall Mural with Metal Butterflies
This bead board paneled wall was painted green as a background color, and then the flowers and vines were added. Crafter Tip: Even though you are painting a mural, you don’t have to paint everything yourself. There are plenty of wall art options, which will coordinate with your painting, such as these sculpted metal butterflies, the perfect complement for this gardener’s retreat.

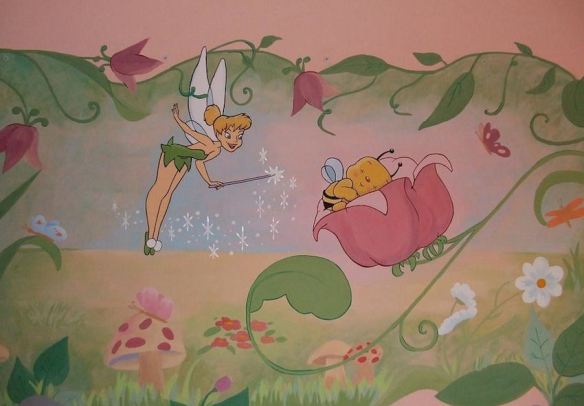
Tinkerbell Wall Mural
Disney characters are sure to be childhood favorites. The flowers and vines in this mural can be painted by hand or stenciled. Crafter Tips: In lieu of using a paintbrush, delicate details can be made using a fine tipped paint pen. If Tinkerbell seems a bit beyond your skill set, purchase a Disney decal, or wallpaper version and adhere it to the wall after the mural is complete. It will save you time, and from a distance, no one will ever know.

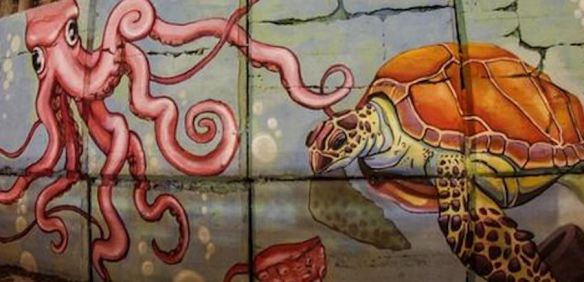
Ocean-Themed Exterior Wall Mural
The old block wall in this photo has been given new life through wall art. Because of the large scale, and dependence upon the weather, the artist used a paint sprayer to speed up the process. With the overall design blocked out, the details can be added using a combination of a fine spray nozzle and paint brushes. Crafter Tip: Using a paint sprayer will certainly give your arms and upper body a workout. You won’t need to go to the gym that day!
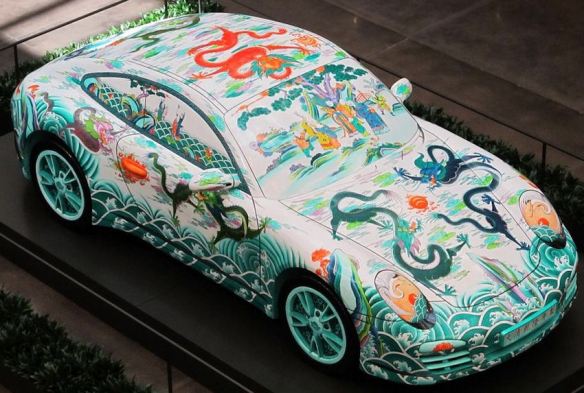
Asian Water Dragons Mural on a Porshe
Vehicle painting is a specialty in itself. Painted details can include logos, initials, stripes, and full-size murals. Crafter Tip: Vehicle painting is best left to the pros. Manufacturers’ new vehicle warranties will most likely become void if the body paint is altered.

How To Decoratively Paint a Powder Room

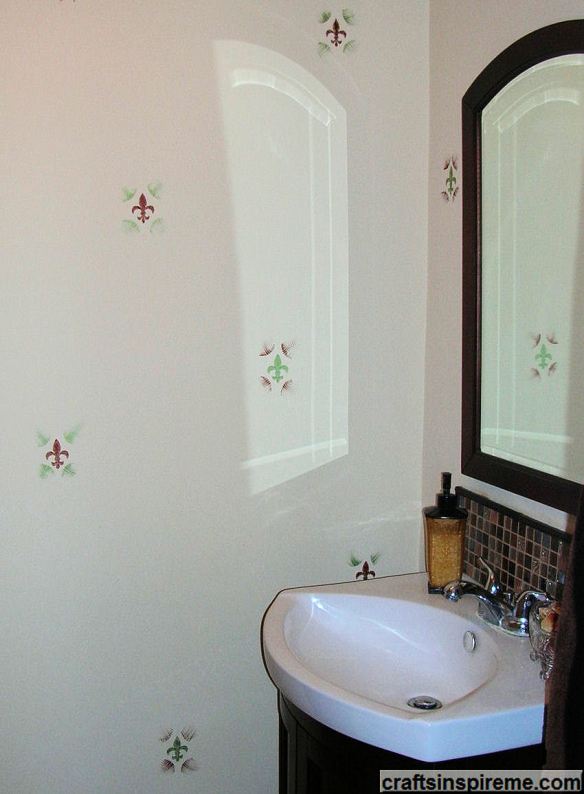
Fleur-de-lis Powder Room
Powder Room
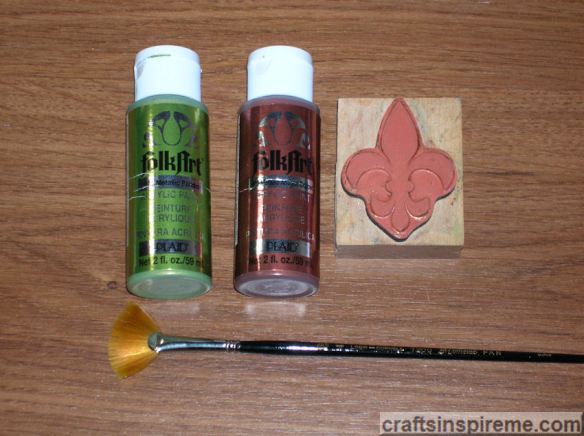
Fleur-de-lis design was made using an ink stamp, which was purchased from the scrapbooking department at Michael’s craft store.

Acrylic Paints, Ink Stamp & Fan Brush
Powder Room Paints
To produce more consistent imprints, paint was applied directly upon the stamp using a small flat brush. The stamp was then pressed against the wall, spacing the pattern by eye. All the brown fleur de lis designs were completed first, and then the stamp was cleaned in preparation for the green paint.

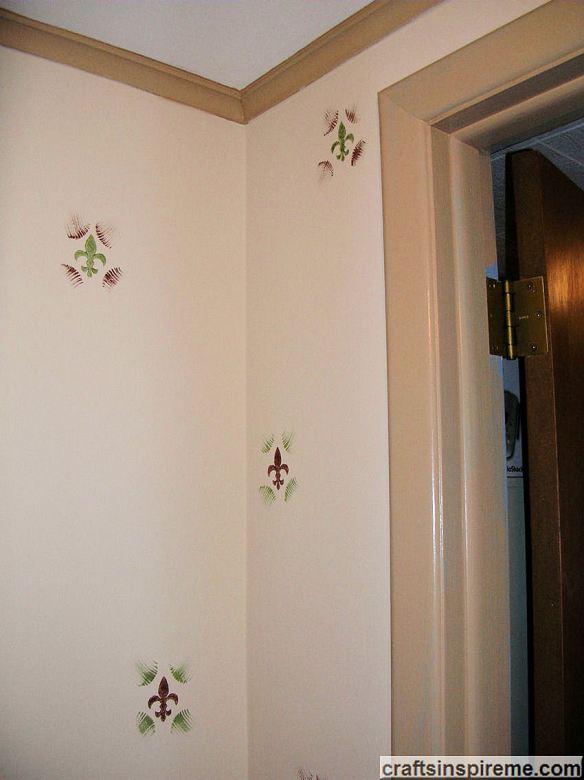
Create a Fleur-de-lis Pattern
Painted Powder Room

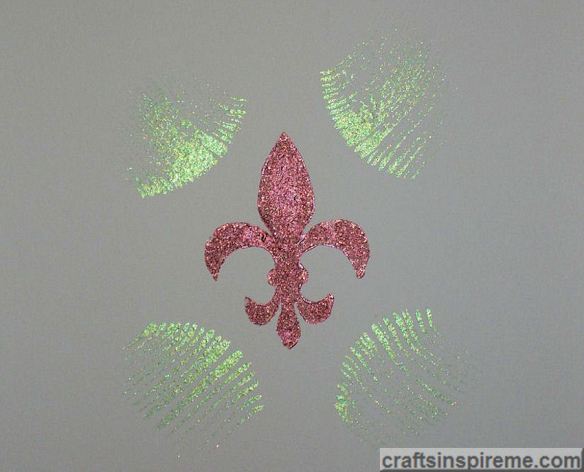
Fleur-de-lis Detail
Powder Room Paint Detail
Using a fan brush at the four corners, brush strokes were applied with the contrasting metallic paint color.

For continuity and consistency of the design, it is probably best to have one person working on a project. However, if your friends or family would like to help, assign a particular design element to each person to be completed throughout the project. Using the fleur-de-lis project as an example, one person could do all the stamping while another applies the flourishes at the corners.

Crafter Tip – Future Decorative Paint Removal
I once had a painter in my home to give estimates on a few small projects. I had recently finished a mural in one of the bedrooms, and as we walked by, the painter said, and I quote, “Do you know how much Kilz it would take to cover that?” Although I was appalled at the idea, it certainly gave me food for thought. At some point in the future, how could I easily cover over painted designs without filling the house with toxic fumes? The answer is simple: paint over it using the same paint used to create it. There was an acrylic midnight blue design (Folk Art Brilliant Ultramarine) painted across the upper half of one wall. White acrylic paint (Folk Art Wicker White) was brushed over the dark paint. Just to be sure, a second coat was applied. The painter was stunned to see how well it covered. The new wall paint was a pale blue, covered in only one coat, and there were no toxic fumes. To protect the air quality in your home, be sure to select low odor paints, with low or no VOCs (volatile organic compounds).

Thanks for reading & Happy Crafting!