New ideas are always brewing at the arts and crafts studio. Here is a sneak peek at a few of the upcoming projects…
Cake Decorating
Cake decorating has been a popular topic on this blog, and I have lots of new cake designs to share.
Crafting with Feathers
Craft stores always have feathers, and there are many creative ways to include them in your artwork.
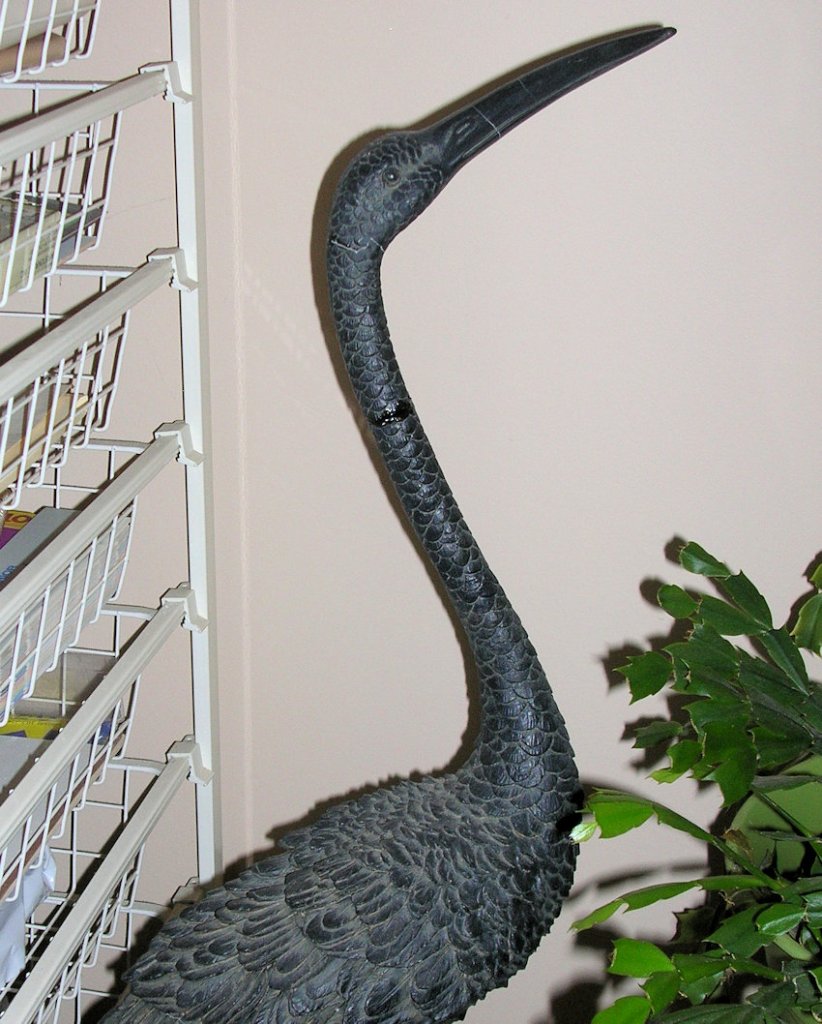
Full Color Makeover
This monotone crane has been standing next to a potted plant for years. It is high time he gets some much-needed attention. Believe it or not this makeover will transform him into a crowned prince.
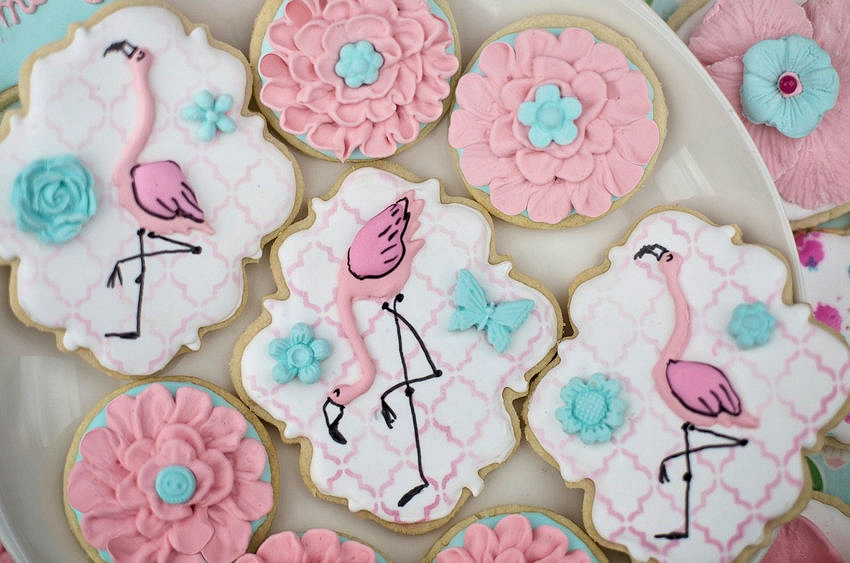
Cookie Decorating
The only time of year my family decorates cookies is Christmas. This post will inspire you to create beautiful cookies any time of year.
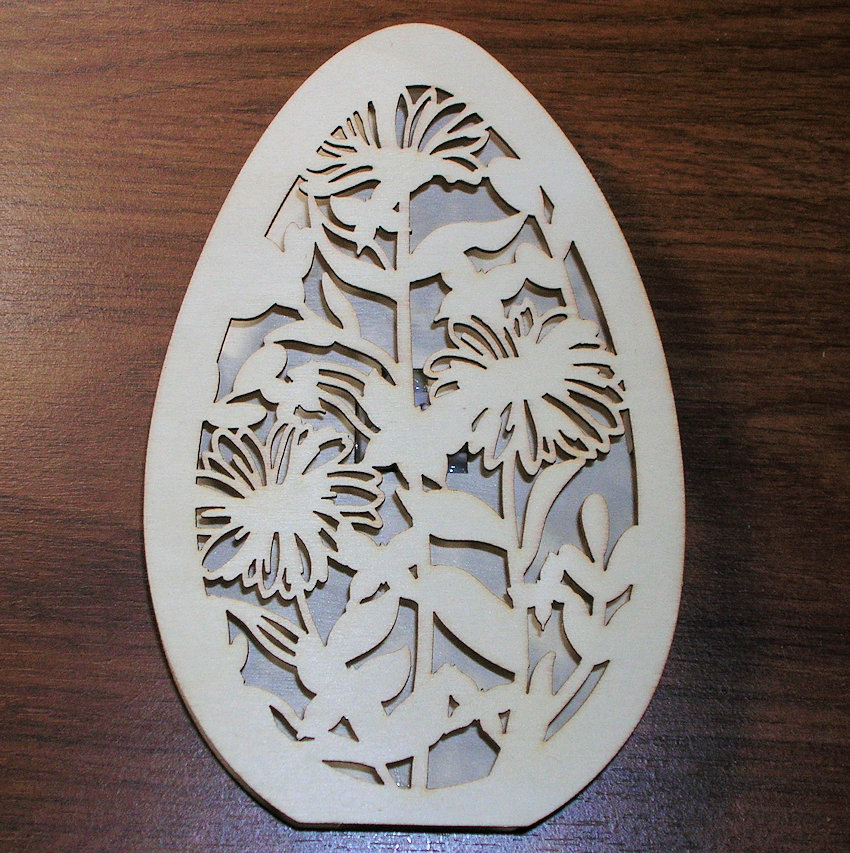
Painted Wood Crafts
Wood crafts are inexpensive, easy to color or paint, and quickly produce attractive décor for your home.
Magical Creatures from Harry Potter
The world of Harry Potter is inhabited by some extraordinary creatures. With a little creative magic, you can conjure one to adopt into your family.
Art Studio Mascots
Speaking of adoption, our foster cats have become permanent members of the family, and they will be popping into the studio from time to time for a visit. Here are a few of their recent comments: “Being an inspiration is exhausting and we’re working for kibble. F.Y.I., the feather projects will be delayed indefinitely…you don’t have any. You’re welcome. Wake us when there’s a big juicy mouse project!”
I hope you enjoyed this brief look into future posts. Comments and suggestions are welcome, and I look forward to hearing from you.
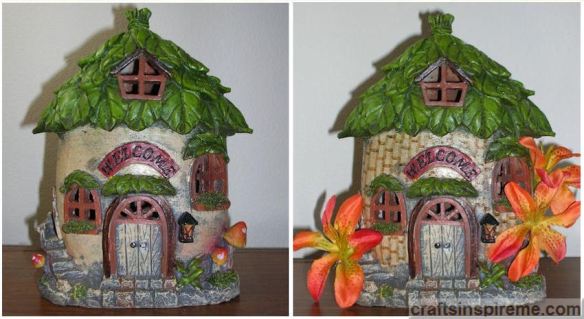
A little piece of paradise – Isn’t that what we all want? That means different things to different people. For many, the idea of a cozy grass shack on a tropical island is a common fantasy. Of course it goes without saying that we’ll expect all the comforts of home in that “shack,” but that’s not important. Visualizing the dream is the focus here. This time of year so many people visit the seashore. An ocean-themed centerpiece, created one piece at a time, brings memories of vacations past to mind, and inspires dreams of vacations yet to come.
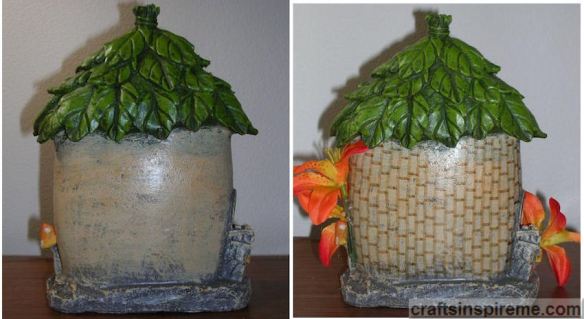
Before & After Photos: Tropical Home – Front Facade. What was once a home for tiny gnomes transforms into a tropical retreat with orange silk flowers, and a bamboo pattern drawn by hand on the exterior walls using a brown Sharpie marker.
Before & After Photos: Tropical home – Back Facade. The bamboo pattern continues across the back, giving it that island vibe.
Before & After Photos: Lighthouse. Whoever heard of a lighthouse without a roof? To make the roof shown, fold the paper into a cone and staple it as needed to hold its shape. Glue a soup can lid to the bottom of the cone and paint it gray to match the lower portion of the building. Add twine along the edge and down the sides to resemble a standing seam metal roof. Tie several knots in a piece of twine and glue it to the peak of the roof. Tint the glass votive holder yellow using a highlighter, and line the inside with orange paper to suggest a brilliant light glowing from within the tower.
Before & After Photos: Sailboat. This sailboat only needed minor adjustments. The faded white stripes needed a fresh coat of paint, and the middle stripe was changed to orange. Because the opposite side of the sail was unfinished, the stripes and shells were duplicated on the back. A cute little blue bird was glued on top of the mast.
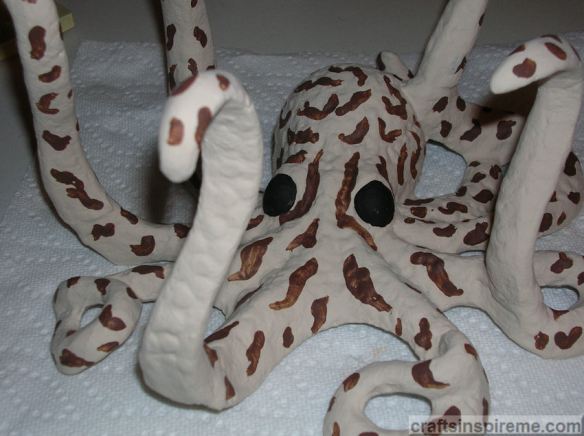
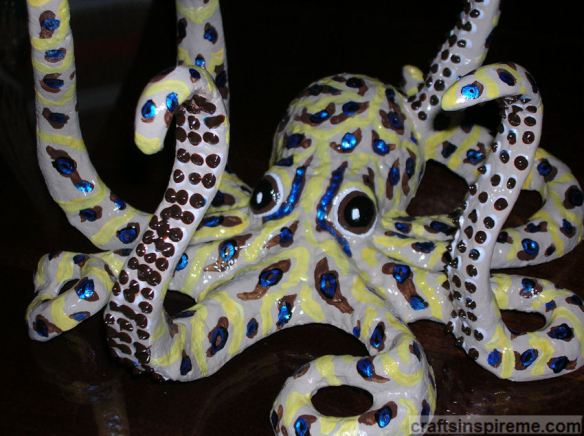
The Star of the Show: A Blue Ringed Octopus Before & After Photos: Octopus Closeup. It’s hard to believe the monochromatic octopus on the left is the same one on the right, but it is. It’s amazing what a difference a little paint can do.
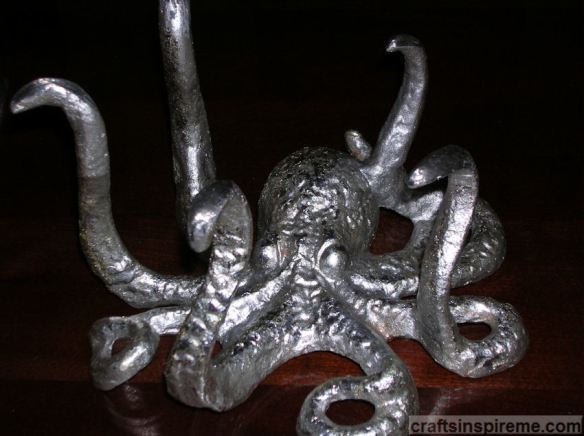
Original Octopus Candleholder: This whole project started with this silver metal octopus candleholder. As you can see, it looks top heavy with the large pillar candles, and the octopus is rather hidden underneath. Round candles were another option, but he looked like a juggler! (lol)
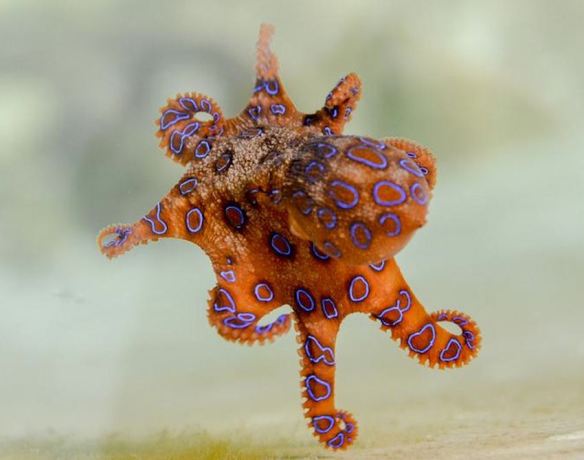
As with all creative projects, it’s helpful to gather a few photos for inspiration. The blue ringed octopus is a fascinating creature. Fans of James Bond 007 will remember the movie, Octopussy, in which Maude Adams had an aquarium with this beautifully patterned octopus, and she also wore a white silk robe emblazoned with its colorful, exotic image. Each octopus has a unique pattern, and the blue iridescent rings are impressive creations courtesy of Mother Nature.
Supplies:
Octopus (7-1/2” high x 4-1/2” wide x 1-3/8” thick)
Acrylic Paints – tan, brown, black, yellow, white, & metallic blue
1) Bottle fabric paint – white
1) Bottle fabric paint – brown
2) Paintbrushes – one for base coat, and a fine brush for details
Paint Palette
Clear Spray Paint
This is how it looks without the candles. The large metal plates are too big, overpowering the beauty of this piece.
The plates were removed using a Dremel cutting tool, and the tips of the tentacles were filed smooth. Now you start to notice the amazing sculptural details created by the artist.
The color was the next issue to be addressed with two coats of tan paint. The artist painstakingly created a realistic looking octopus, but that thick coat of silver paint had obscured all those intricate details.
A brown pattern was applied to the entire body and the eyes were painted black.
Black spots were added, overlapping the brown.
Blue iridescent rings were applied over the black spots. Random yellow stripes wrap around the legs and head. A white dot was added to the pupil of each eye.
The eyes were made more realistic with the addition of brown irises and white outlines.
Two coats of clear spray paint were applied to protect the acrylic paints. White suction cups were added to the underside of the tentacles and allowed to dry. Next brown fabric paint was applied over each of the suction cups to provide shape and depth. This beautiful sculpture now has the rich, colorful appearance it deserves, and makes an interesting conversation piece.
Photo: Completed Centerpiece. Black pebbles form little volcanic islands amid a vast ocean. In front of a cozy tropical home, a mermaid sits quietly reading, as a sailboat glides along the water. Another mermaid leaps out of the sea with a treasured seashell in her hand. The lighthouse makes a welcome rest stop for wildlife and a sunbathing mermaid. A feisty octopus playfully thrashes about the water’s surface. Palm trees swaying in the breeze display a pair of small signs that says it all: “Beach Please!”
All babies are cute, but baby elephants are so expressive like the one above having the best day ever!
Baby Nuzzles Mom
Standing beside their watchful mothers, they look so small and somewhat fragile.
Baby’s First Steps
With those big floppy ears, it’s easy to imagine them taking flight, playfully floating upon the breeze and coming to a landing in our love-filled hearts. Let’s bring some of that joy into this week’s project.
How to Paint a Wooden Baby Elephant:
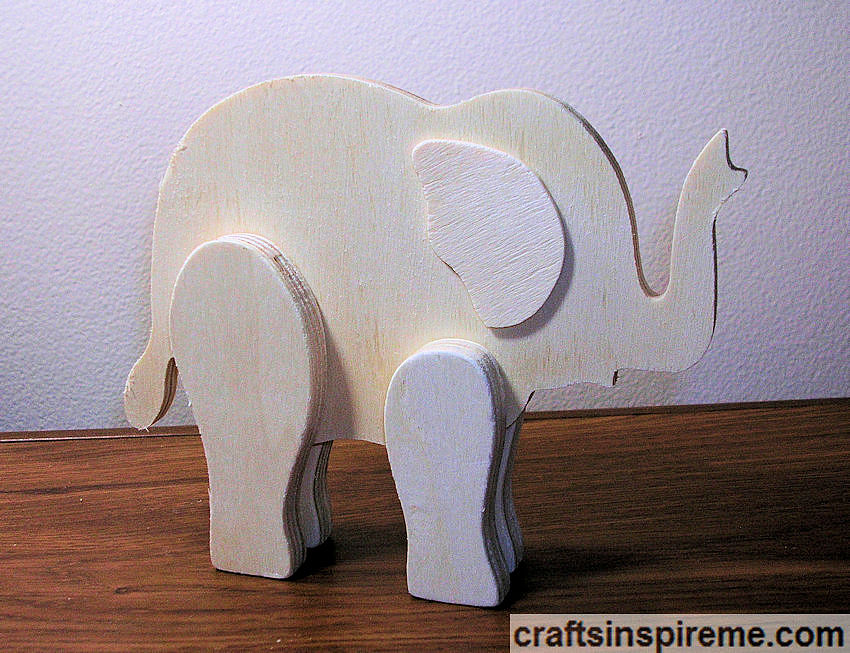
Raw Wood Elephant
In previous painted wood projects, the animals had feathers, scales, or fur. Elephants present a unique challenge: wrinkles. I must admit this took much longer than expected as I progressed through a series of trial and error to achieve the desired appearance by layering. Let’s get started…
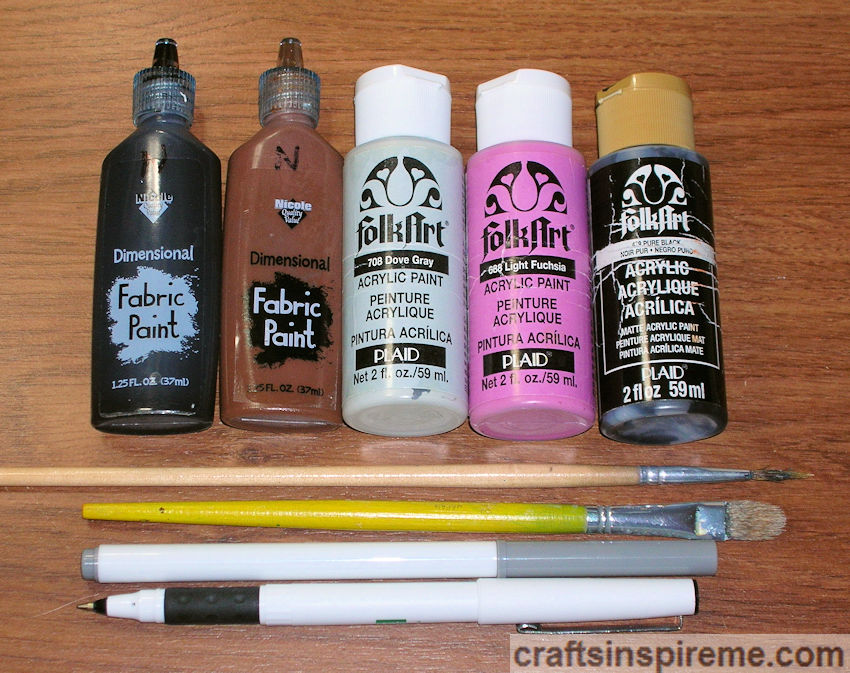
Supplies
Supplies:
Wooden Elephant (5” high x 6-1/4” wide x 1-1/4” thick)
Acrylic Paints – Gray & Black, (Pink is optional)
Paintbrushes
Markers – Gray
Pens -Black Fine Point
1) Bottle fabric paint – Brown
1) Bottle fabric paint – Black
1) Bottle fabric paint – White (not shown)
Texture Building
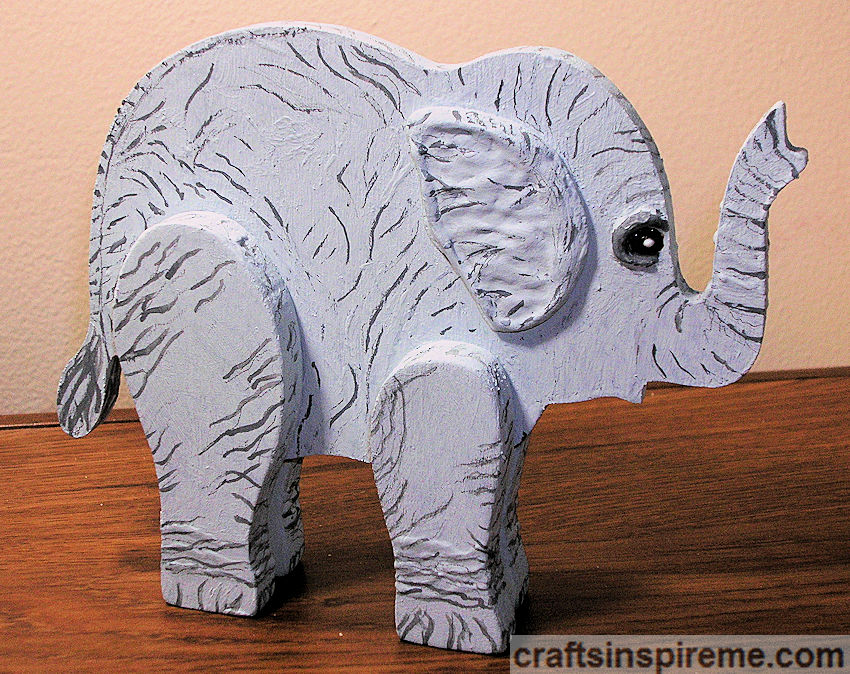
Start building texture with three-dimensional fabric paint. I used white, but any color will do because we will paint over it in a later step. Draw both eyes with a pencil. Thicken and shape the ears and outline the eyes with fabric paint.
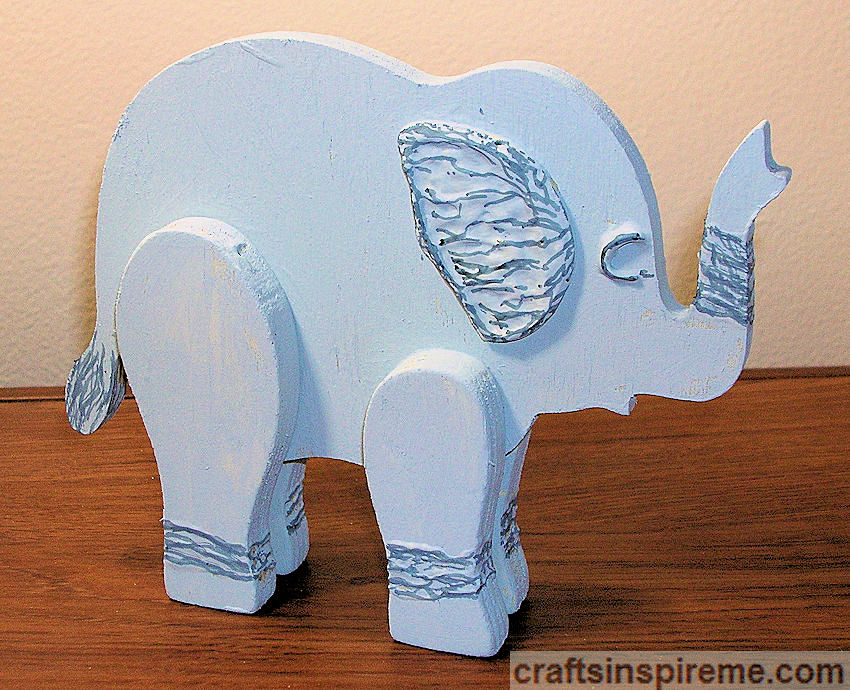
Paint the Body
Paint the body gray, including both sides and all the edges.
Draw Details with a Marker
Define the wrinkles using a gray marker.
Add More Wrinkles
After viewing numerous photos, I added wrinkles all over the body using a marker but immediately regretted it. I should have followed my own advice: Draw or paint what you feel, not what you know.
Repaint the Body
A fresh coat of paint gives us a clean slate to try again and allows the marker lines to lightly show through, which is great for the next step.
Cautiously Draw Wrinkles
Using a pencil, slowly add details in key areas to imply overall wrinkles. Build up the eyes with brown fabric paint.
Trace with a Marker
With a gray marker, trace the wrinkles and outline the eyes. Finish building the eyes up with brown fabric paint and allow it to dry. Add pupils and a white spot in each to bring them to life.
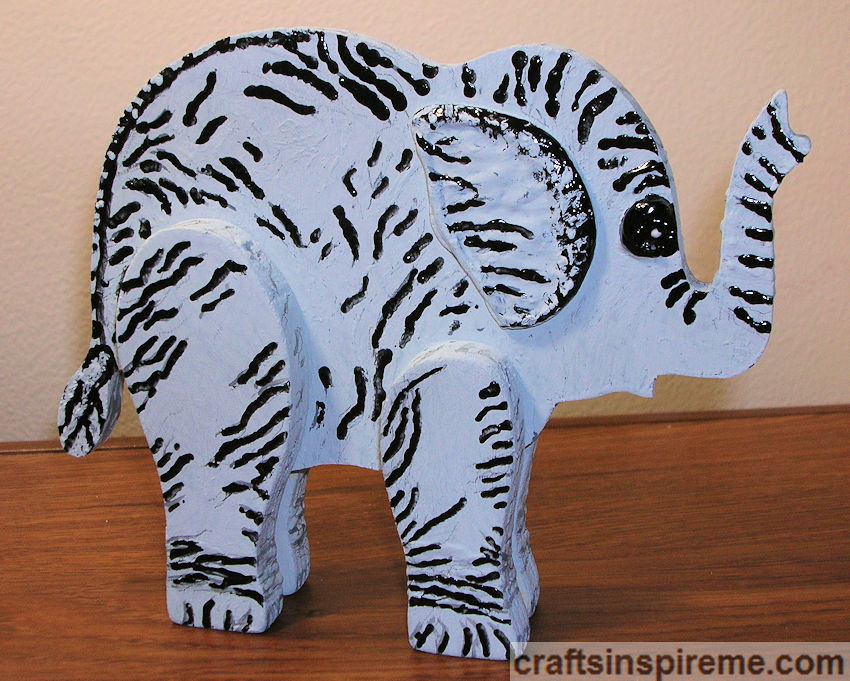
Trace with Fabric Paint
Retrace the wrinkles with black fabric paint. You are probably thinking, “Here she goes again. Jumping in with both feet,” and you are correct. The difference is this time … I like it! Don’t worry about too much contrast because we will tone it down in the next step. Develop the eyes with the same fabric paint.
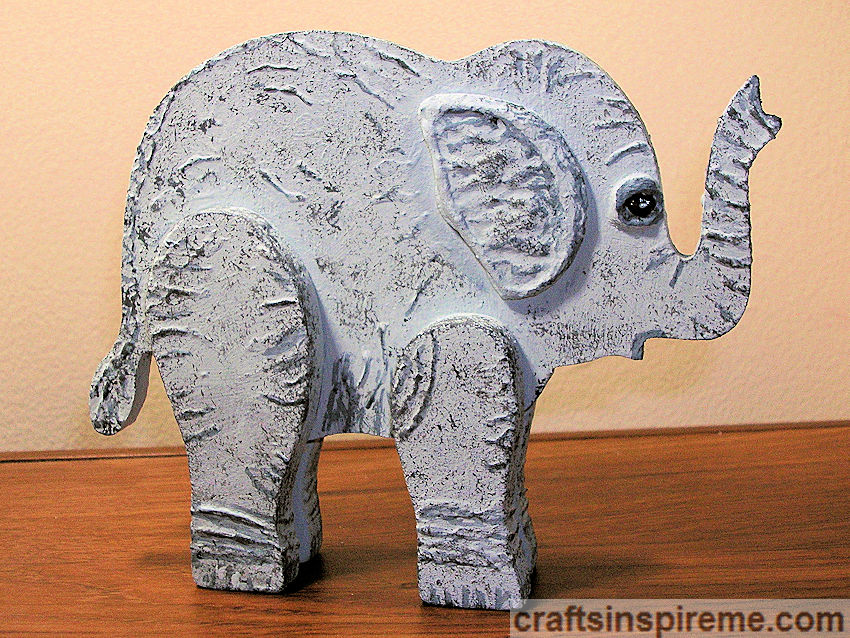
Repaint & Create More Texture
By repainting the body with gray paint, the raised wrinkles recede, becoming part of the thick skin. Next, mix black and gray acrylic paint to create a darker gray. Dip a cotton ball in the new dark gray paint and dab it on a piece of scrap paper to remove the excess. Lightly dab the cotton ball all over the body to create new subtle layers of texture. Repeat as needed.
Trace with a Marker
Retrace the wrinkles, ears, and eyes with gray marker. Add lines around the mouth and tip of trunk. At this point you could stop, but I wanted to add a few little details to make this elephant look like a baby. For that we need a little inspiration.
Adorable Baby Elephant
Three things stand out: eyelashes, the pink inside of the mouth, and peach fuzz hair running along the spine from top of the head to the tail. Markers or paint will work nicely for the first two details, but the third requires a special ingredient…
A Longhair Cat
Yes, I am recommending the use of cat hair for an art project. I must say it is the oddest ingredient I have ever used. Longhair cats require daily brushing, so collecting soft hair is no problem. (lol)
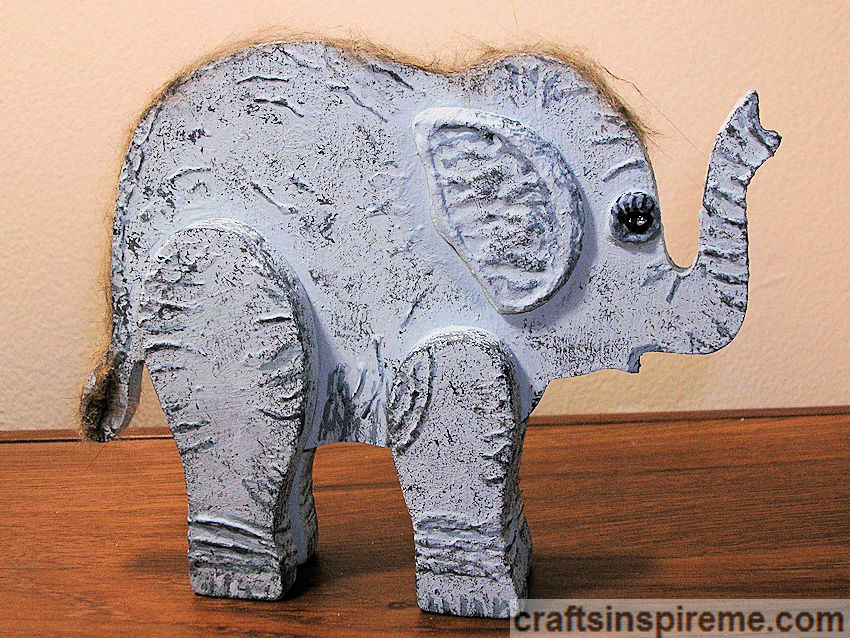
Completed Baby Elephant
Glue on the hair with Elmer’s glue. Adjust and trim the hair as needed. Add eyelashes with a fine point black pen and paint the inside of the mouth pink.
Closeup of Elephant’s Face
Although these details are minor, I think they provide softness and a “cuteness” factor to this baby elephant, just like his living counterparts.
Baby Elephant – Before & After
This completes our project. Persistence pays off. Experimentation is a tremendous help in solving artistic problems. If you are not happy with the results, let it sit for a day or two and the inspiration will come to you just when you need it most.
Have you faced any artistic challenges like wrinkles? Have you used an unusual item, such as cat hair, in an arts and crafts project? Please share your ideas in the comments section. Thanks for joining me. Good luck with your future works of art.
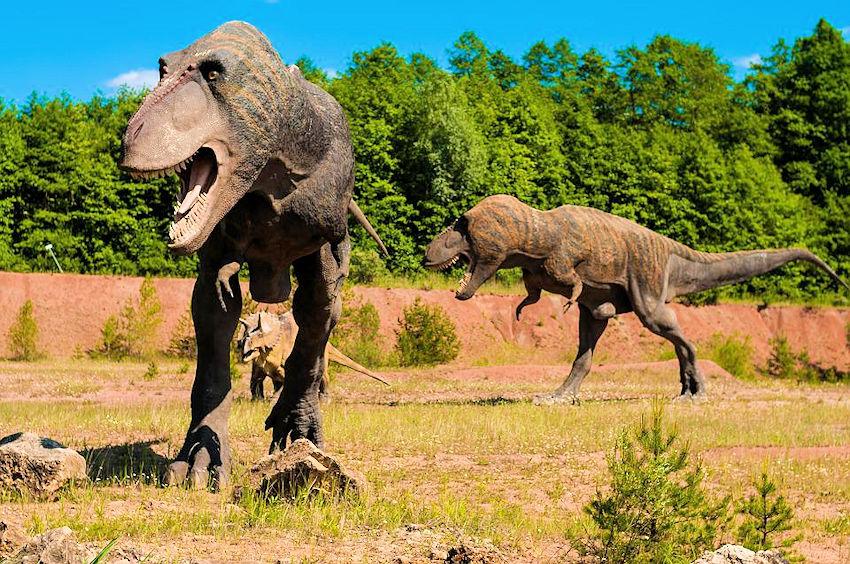
Sixty-five million years ago the Tyrannosaurus Rex, also known as T-Rex, spent his days hunting, eating, and making little dinosaurs. Archaeologists, writers, and world-renowned movie directors have been thrilling us ever since with all the gory details of this master predator.
Did they roar like lions? Were they solitary animals or did they mate for life? Having such short arms, I wonder, how did they get back up after a fall?
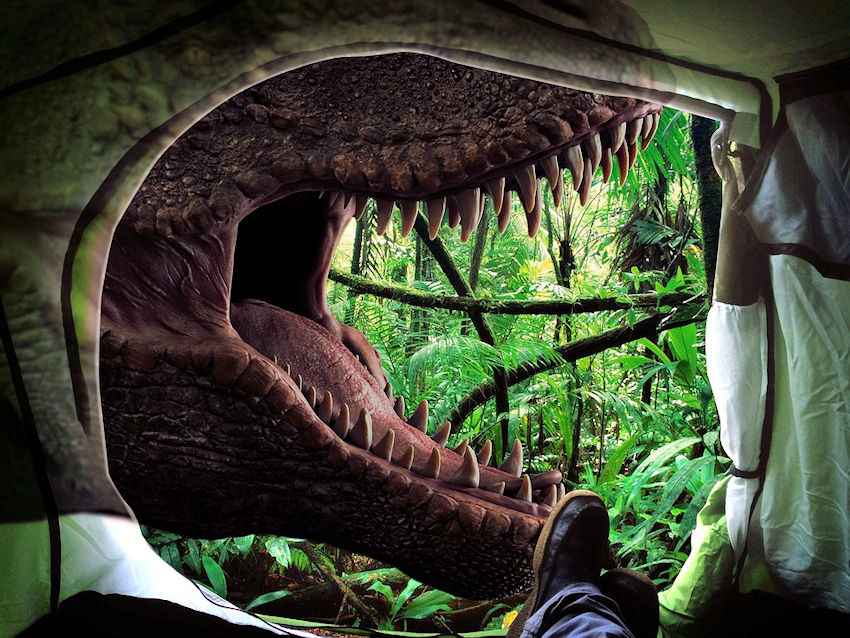
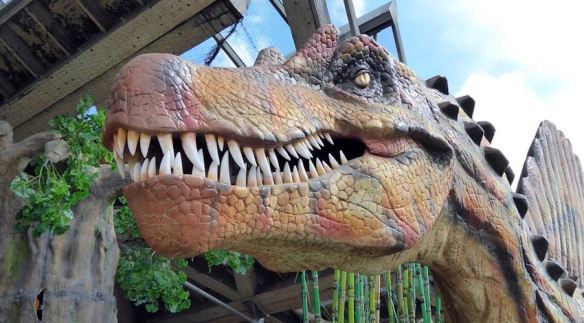
After viewing this photo, who wants to go camping? (lol) The mere thought of facing a creature, capable of eating its prey whole, leaves us with mixed feelings of fear and awe. And we love it. To bring a few of those Jurassic thrills into our lives, let’s jump into our next project:
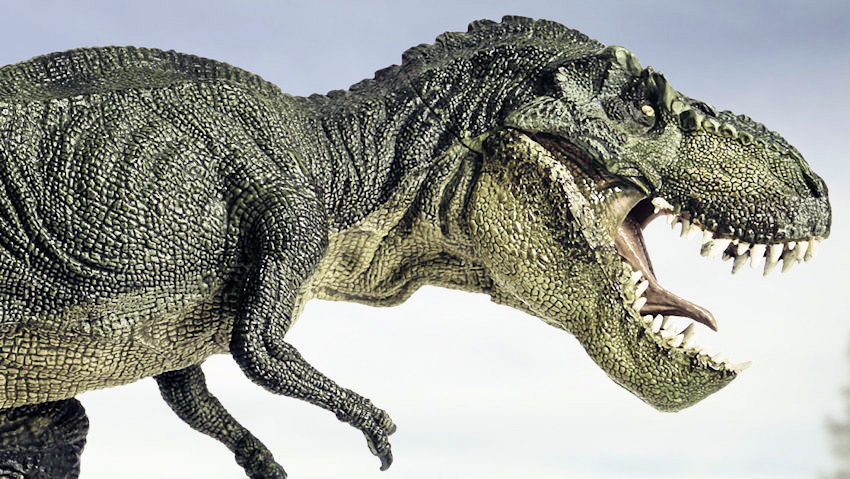
Inspiration
Huge jaws, piercing eyes, and razor-sharp teeth – what’s not to love?
Inspiration
When we look at large lizards alive today, we can visualize tyrannosaurs having thick, textured skin, consisting of scales and bony plates, with a ridge along the spine.
Inspiration
Predators typically have camouflaging patterns and colors to give them an advantage while hunting. With these ideas in mind, we can begin the creative process to bring the T-Rex back to life. Let’s go!
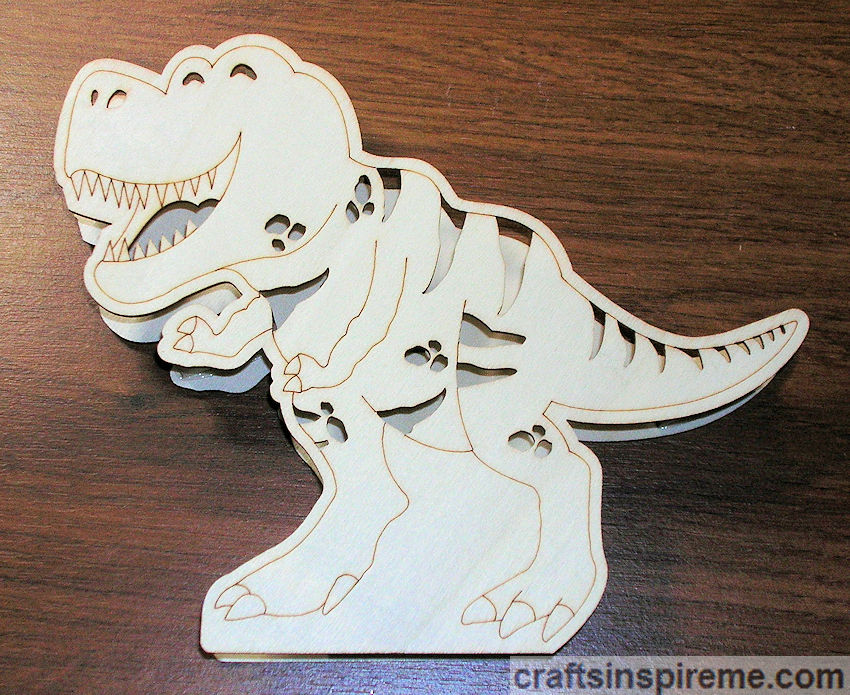
How to Paint an LED Tyrannosaurus Rex:
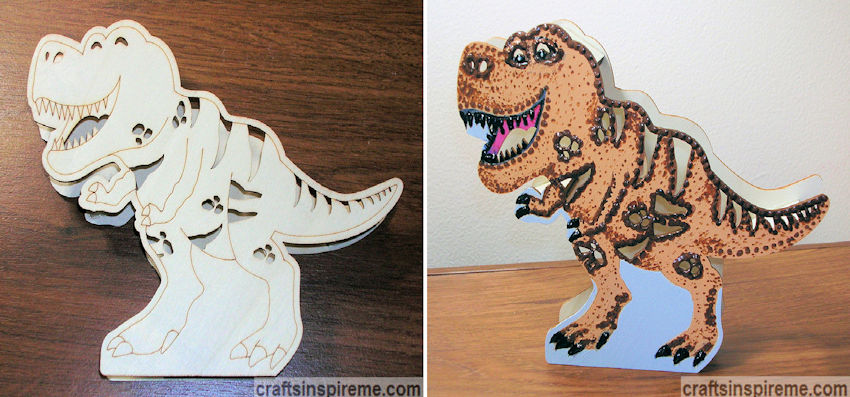
Raw Wood T- Rex, Front
This wooden T-Rex (available at Michaels) has preprinted details and cut outs to enable green light from a concealed LED bulb to penetrate the figure and cause an eerie glow in the surrounding area.
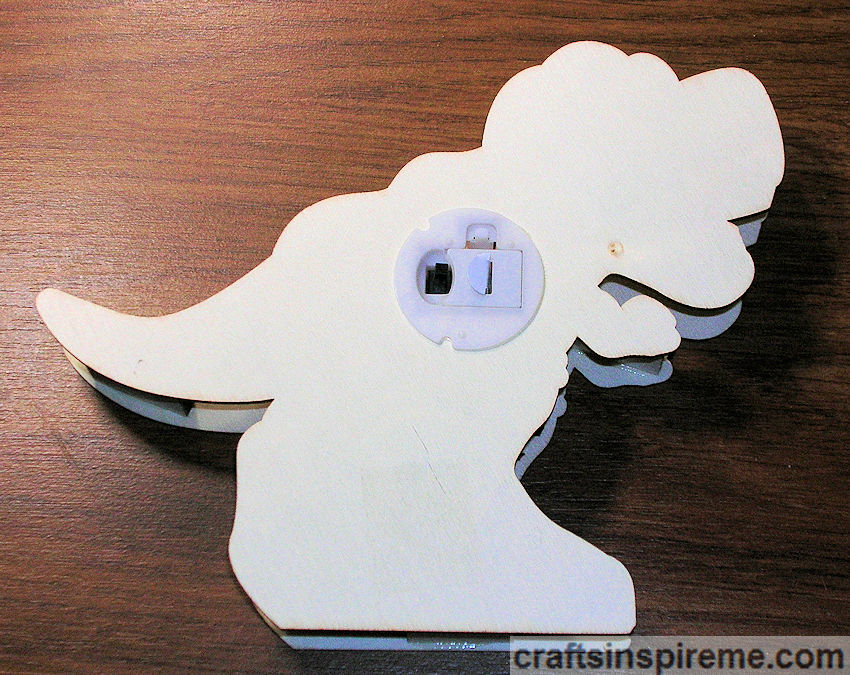
Raw Wood T- Rex, Back
The back is plain wood with the on/off switch and battery compartment. The wood on the front is smooth, however you might want to sand the back lightly, however that is entirely up to you.
Supplies
Supplies:
LED Wooden T-Rex (5-3/4” high x 7” wide x 1” thick)
Acrylic Paints – Cappuccino, Light Fuchsia, & Dove Gray
Paintbrushes
Markers – Brown & Black
Marker Drawn Details
Use magic markers to figure out the color scheme.
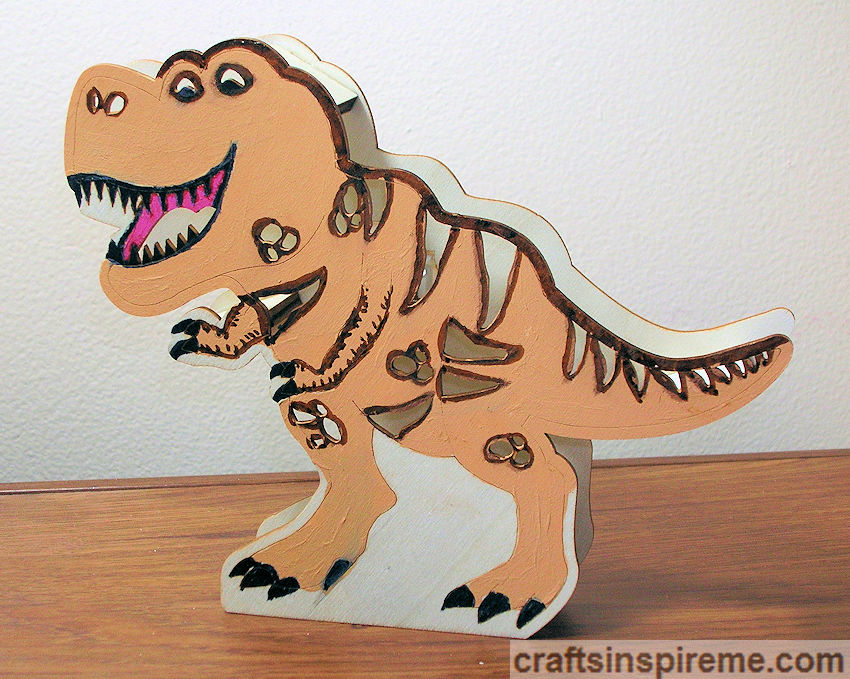
Painted Basecoat, Front
Paint the entire body with the basecoat.
Painted Basecoat, Back
Paint the basecoat on the back. I did not add any details, but you can if you wish.
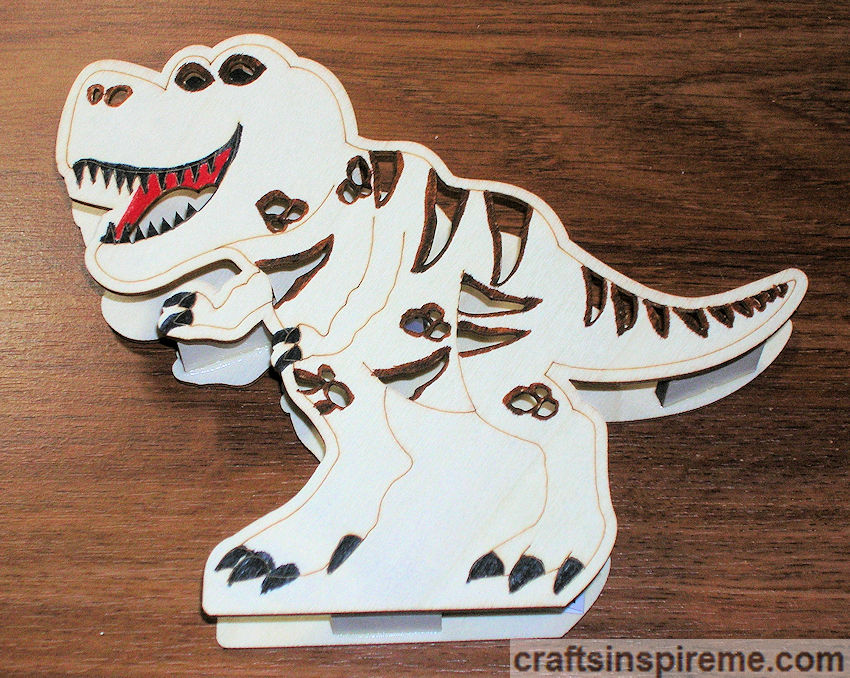
Marker Drawn Details
Go over the details with markers.
Painted Gray Background
Paint the background gray to contrast with the tan body. At this point you could stop.
If you have been following this blog for a while, you know there is a more advanced painted version. Please read on to discover how to give this dinosaur a more reptilian appearance.
Advanced 3D Painting:
Three-Dimensional Fabric Paints
Supplies:
1) Bottle fabric paint – Brown
1) Bottle fabric paint – Black
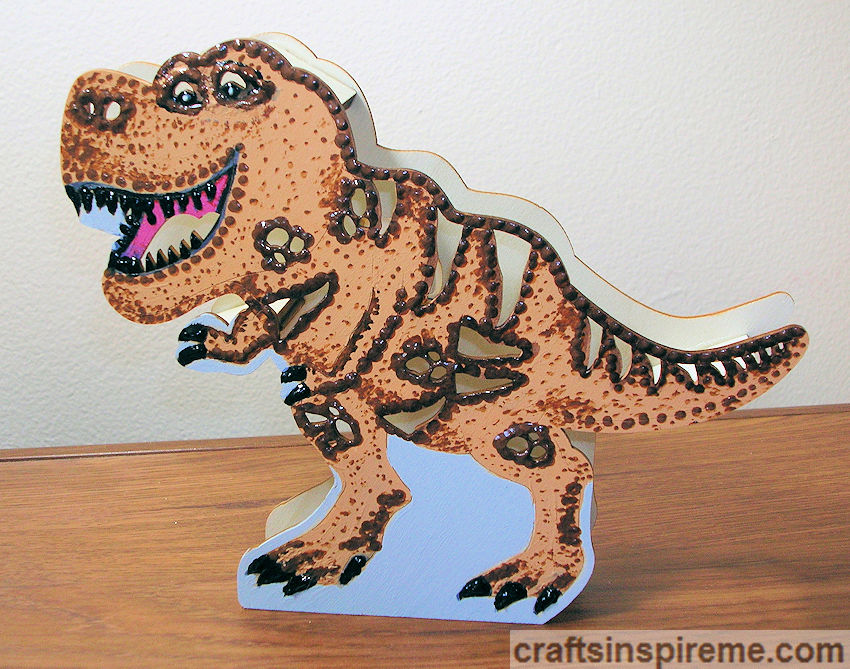
Painted 3D Details
Using brown fabric paint, apply nubby texture to the body. The black paint is for the teeth, pupils, and claws. I outlined the eyes in black too but didn’t like it. To me, he appeared to be wearing a pair of sunglasses. (lol) You can see the revision below.
Completed T-Rex
This is the completed Tyrannosaurus Rex in all his glory.
T-Rex Before & After
I am always surprised seeing the plain original wood side by side with the completed project. Caught up in the creative process, it’s easy to forget where we started.
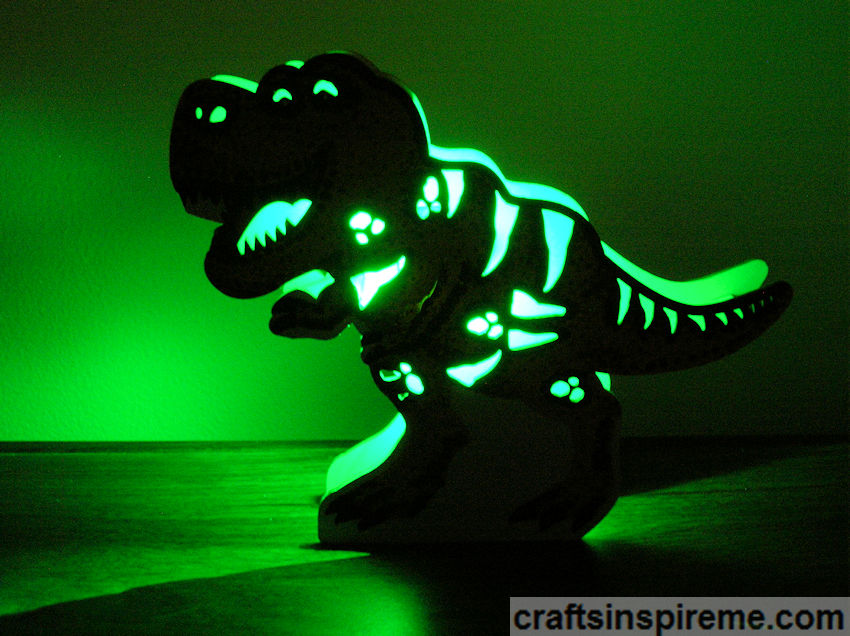
Lit T-Rex with Flash
This photo, taken using flash photography, shows the soft glow of the LED light.
Lit T-Rex without Flash
In a dark room, this T-Rex makes a cool nightlight.
I hope you enjoyed this transformative journey. Thank you for coming along for the ride. What is your favorite dinosaur and why? Please let me know in the comments section.
Welcome to part two delving into the inspiring art of painting. As we go, we will examine different types of paints and techniques to pique your interest. By the end, I hope you will have better insight into the many artistic possibilities and take away a few ideas for future creative projects. Let’s go…
Oil Painting: Produces incredible effects ranging from translucency to rich sculpted textures.
Oil on Canvas
Compared to other options, oil painting requires more supplies, such as solvents, primer, and varnish, and as a result the chemical fumes necessitate working in well-ventilated rooms or outdoors.
Smooth Application
Applying oil paints with brushes produces intricate details and luminous colors.
Thick Textured Application
When oil paint is applied with a palette knife (a.k.a. painting knife), textures can be achieved with sculptural, three-dimensional accuracy found in nature such as leaves, flowers, and trees.
Fine Arts Collectibles
Prior to using oil paints, surfaces must be prepped with primer or gesso, and upon completion the finished work should be sealed with varnish to protect the paints.
Wall Art
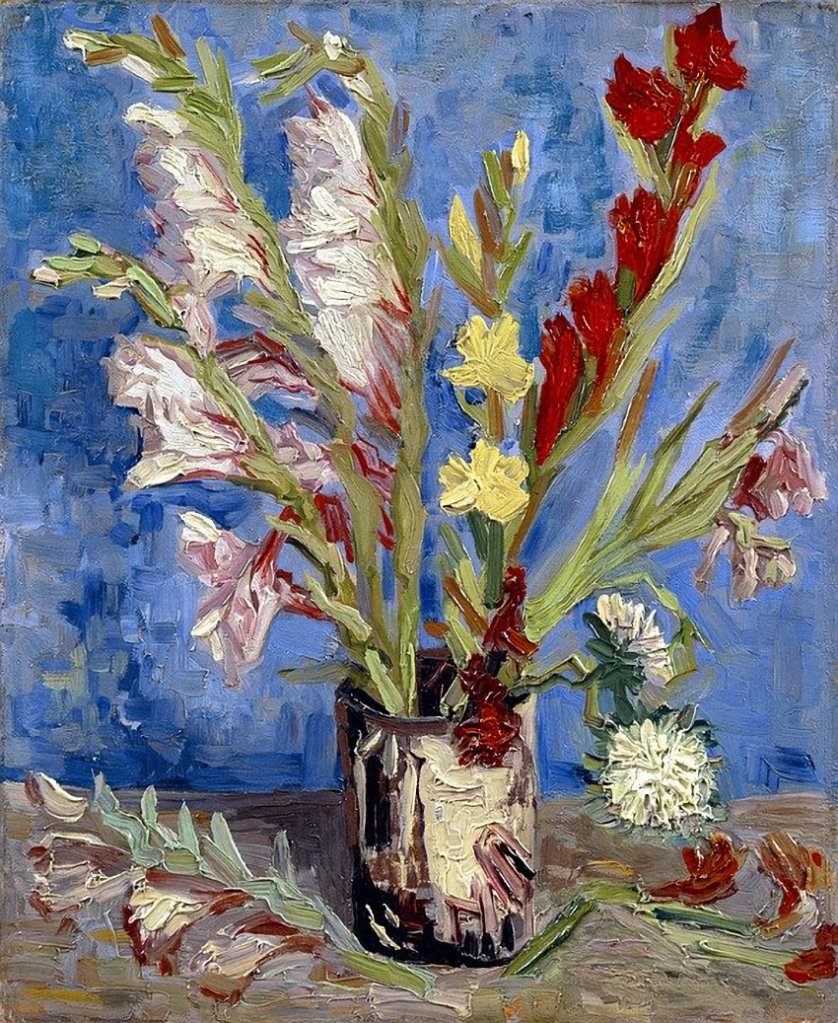
The preferred choice of world-renowned artists, such as Van Gogh, and Michelangelo, and da Vinci, oil paints are excellent for a wide variety of subjects in styles ranging from classical to abstract and everything in between.
Paint Pens: Offer precise control for detailing and illustration.
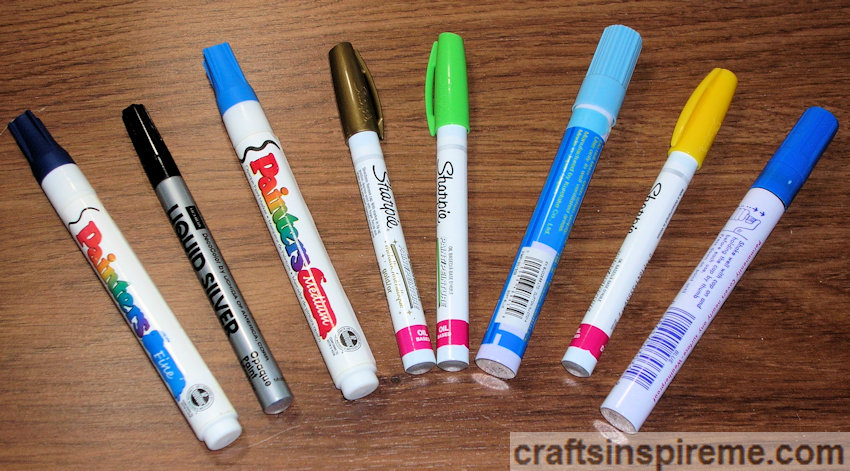
Assorted Paint Pens
Paint pens are prefilled with water-based paints, oil-based paints, or fabric paints in a variety of colors. Since many have strong fumes, you may need to work in a well-ventilated room or paint outdoors.
Specialty Finishes
Tip sizes are available in fine, medium, and broad. You can create layers of colors and finishes, such as metallics and glitter.
Any Materials
Whether you plan to paint rocks, plastic, metal or just about anything else, there is a paint pen for it. The only limitation might be very thin materials, which may allow the paint to bleed through, so remember to have a protective cover underneath to protect your worksurface.
Exterior & Interior
Interior or exterior projects are no problem. Be sure to check pen labels for usage because sometimes store displays become mixed up. Find the right pen for the job and it will last for years to come.
Hand Drawn Designs
Let your imagination run wild on new DIY projects or existing items with a fresh coat of paint and custom hand-drawn designs.
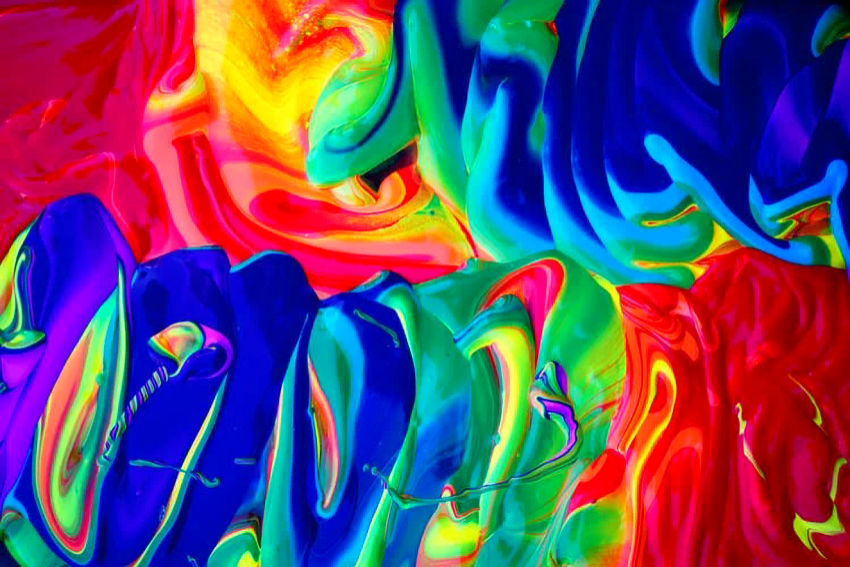
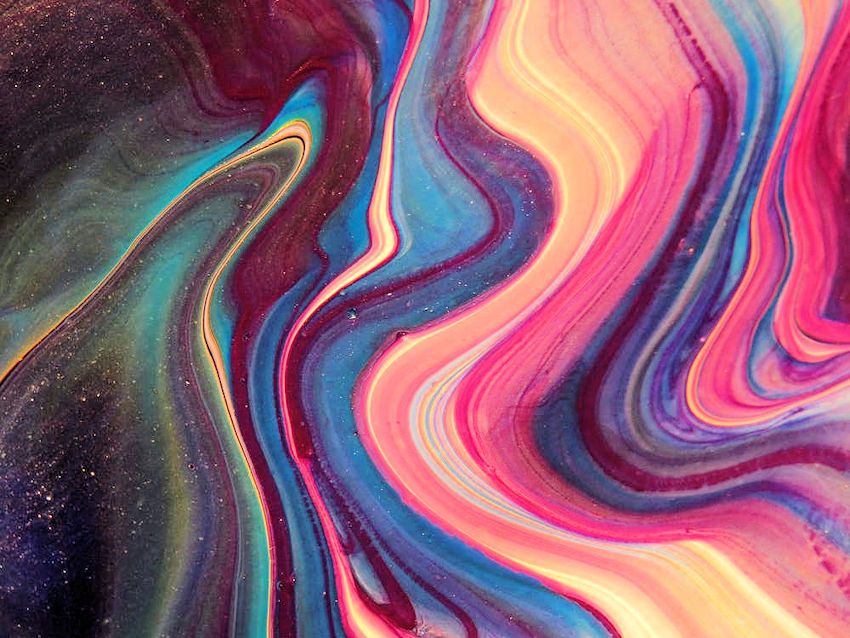
Paint Pouring: Represents playful self-expression, where each combination of colors results in freeform, one-of-a-kind designs.
Mixing Paints
Although acrylic paint cleans up easily with soap and water, you will need gloves, an apron, a covered worksurface, and drop cloths to protect the floor.
Abstract Art
Cups of paint are simply poured onto a canvas or any object, and then tilted back and forth allowing gravity to handle the initial composition.
Decorative Items
Paint pouring utilizes unusual tools, including a hairdryer, wooden craft sticks, balloons, drops of silicone, and a kitchen torch.
Tabletop
Lively patterns resemble natural stone, undulating waves, or clouds drifting upon the sky. Turn ordinary tabletops, ceramics, coasters, picture frames and more into unique works of art.
Abstract Art
Set your inner child free by exploring the playful world of paint pouring.
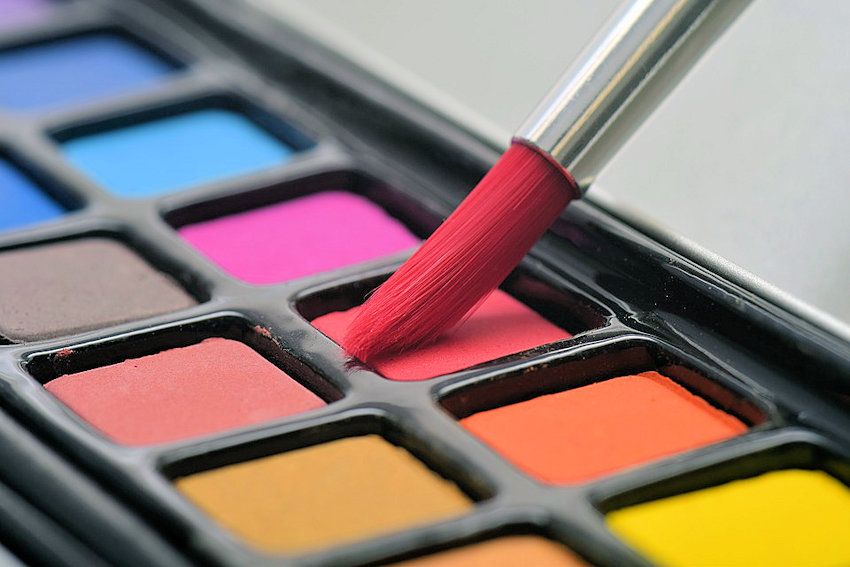
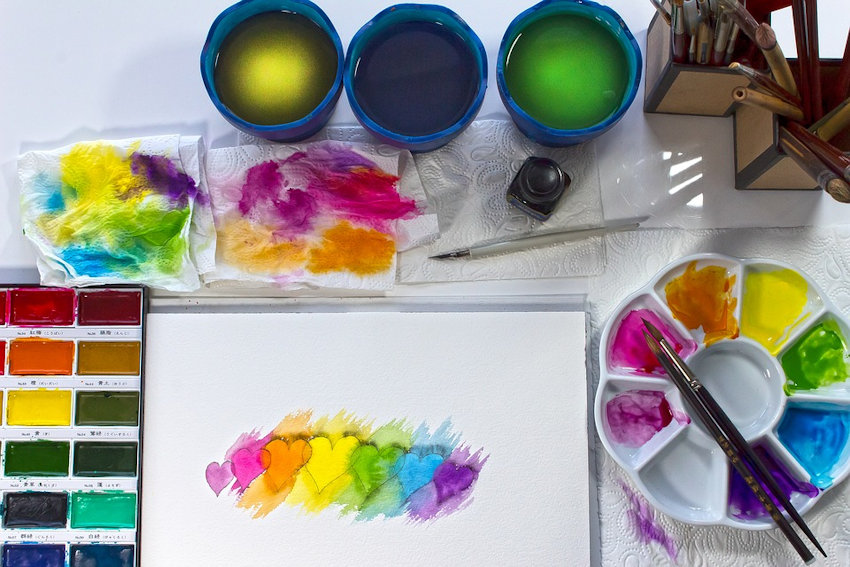
Watercolor Painting: soft and dreamy with vivid colors and subtle nuances.
Watercolor Basics
For many people, watercolors are the first introduction to painting with beginner’s trays prefilled with paint. Watercolors are nontoxic and cleanup is easy with water.
Dreamy Gardens
Be sure to paint on watercolor paper, which dries flat. Regular paper is too thin, resulting in bubbles when wet followed by warping when dry.
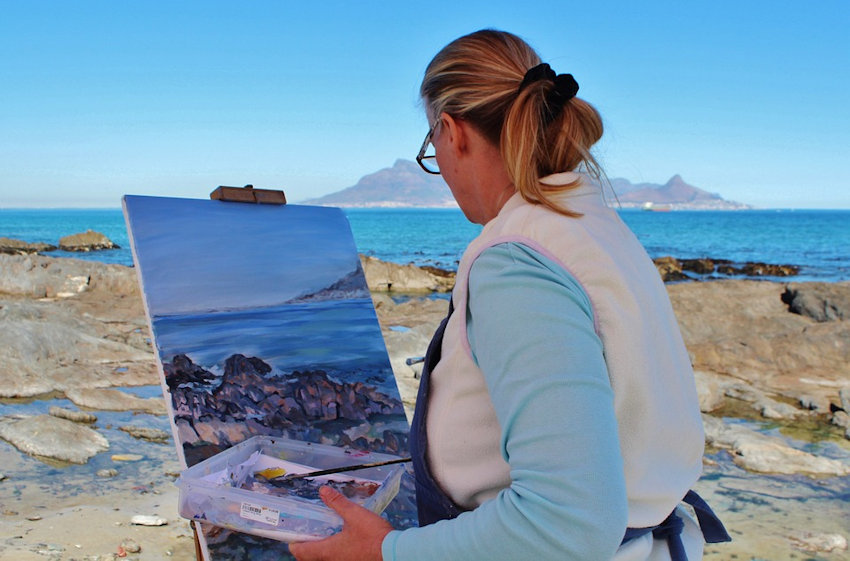
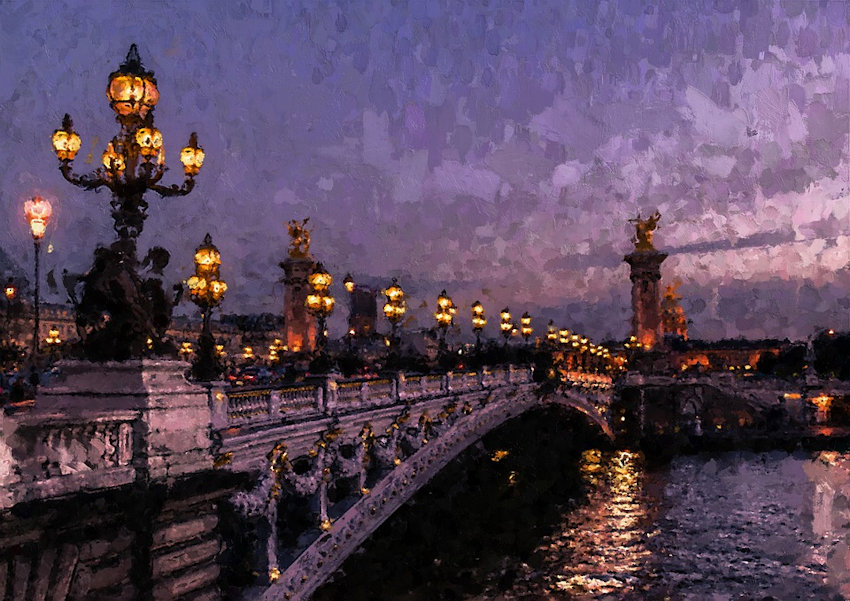
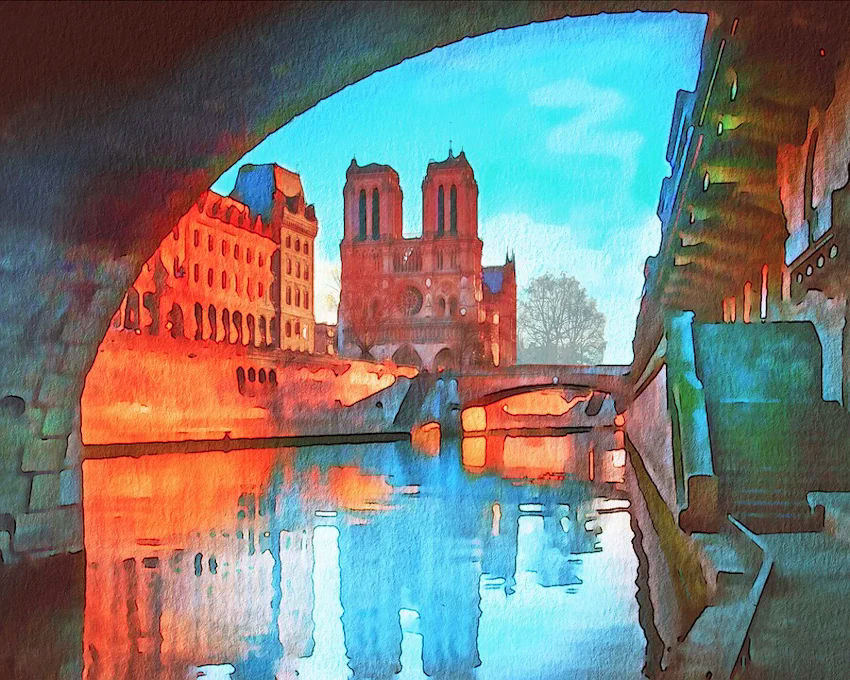
Water & Sky
Watercolors are the perfect choice for painting water and sky, accompanied by reflections rivaling those in nature, but architecture presents a challenge. As you can see, the edges of Notre Dame Cathedral lack definition. Please refer to the photo below for the solution.
Watercolor Painting & Technical Pens
When you are painting a world-renowned landmark like the Taj Mahal, you really need to get it right because people will notice if something is out of place. Watercolors can be combined with technical pens, creating clean crisp edges for the structures and soft fluid movement in the reflecting pool and sky.
Aquatic Scenes
Ocean vistas and all the denizens of the sea benefit from the use of watercolors, which ebb and flow onto the page like the tide upon the sand.
Painting Gallery:
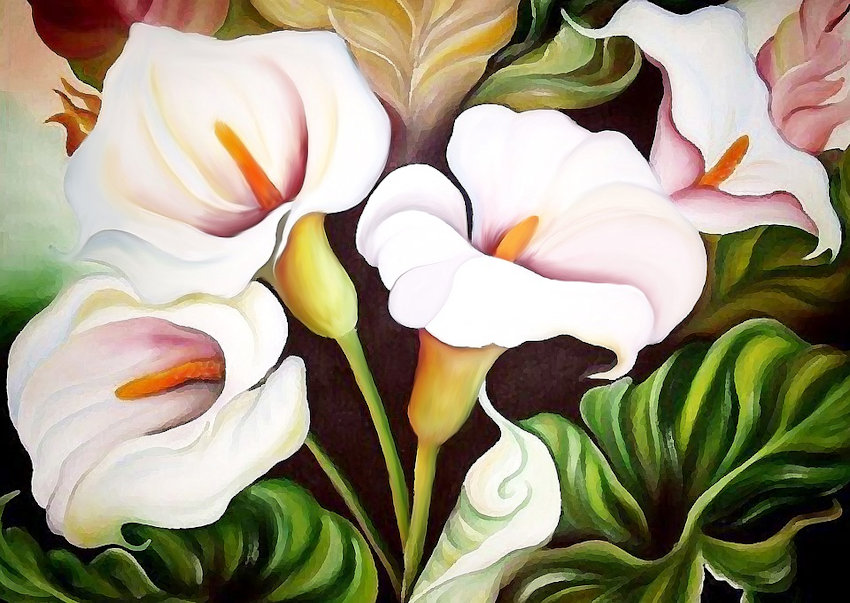
Oil Painting
Watercolor Painting
Paint Pens & Airbrushing
Paint Pouring
Painted Pottery & Ceramics
Oil Painting
Paint Pens & Acrylic Painting
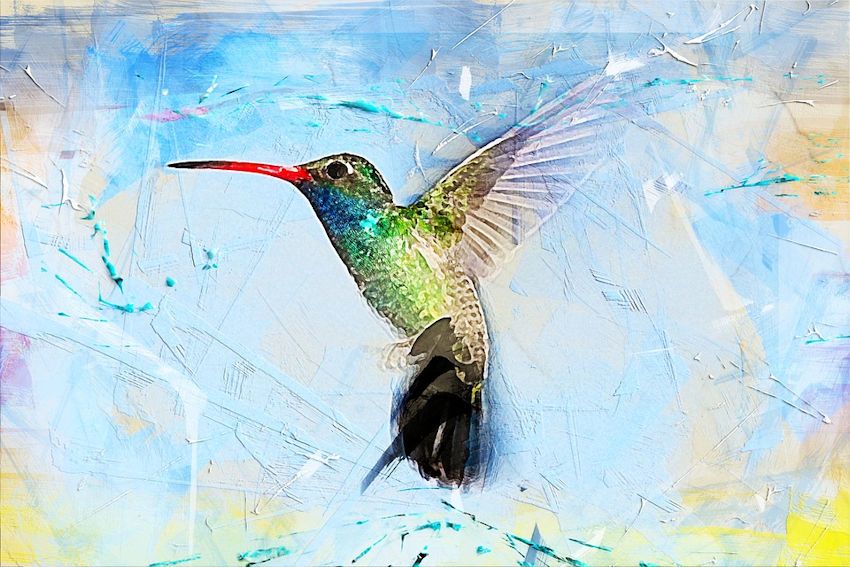
Watercolor Painting & Mixed Media
Paint Pens & Airbrushing
Oil Painting
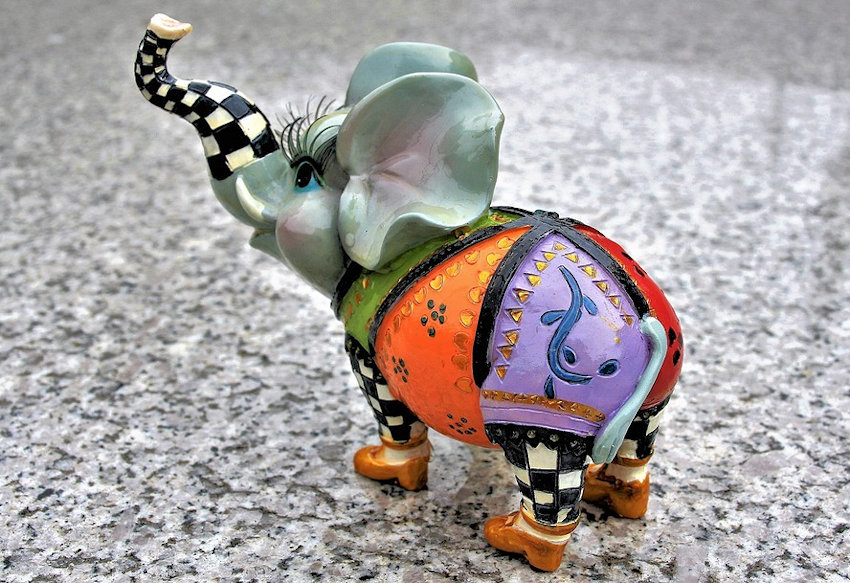
Mixed Media Sculpture Painting
Watercolor Painting
I hope you have found some inspiration to paint whatever appeals to you in a style all your own. To narrow down the options, review the painting photos above and search for more online. Notice the colors, patterns, textures, subjects, and special effects. Notice which ones really capture your attention. Do you have any favorites? Please let me know in the comments section. In case you missed part one of this series, please click here. Good luck with your painting endeavors!
Have you ever wanted to give painting a try? Anyone can paint. With a little patience and a lot of creativity, you will feel like an accomplished artist in no time. It’s fun, relaxing and reduces stress. What are you waiting for? Let’s get started!
Acrylic Painting: Bold colors, unlimited finishes and surfaces, ease of use
Paint by Number
One of the easiest ways for beginners is with an acrylic “Paint by Number” kit, which comes complete with paints, brushes, and a preprinted canvas. Simply match the numbered paints with their corresponding locations on the canvas. There is a wide range of themes for all ages and skill levels.
Decorative Painting & Wall Art
Acrylic paints can be used in almost any application. Brushes are cleaned with soap and water, and the paints have low or no odor, which is great for those sensitive to strong fumes.
Furniture Painting
Make a new piece of furniture look like an old friend with decorative designs and an antiquing finish.
Statues & Figurines
Upcycle a garage sale purchase with a fresh coat of paint and colorful accents.
Faux Finishes & Decorative Painting
Upgrade walls, or any surface with acrylic faux finishes and decorative painting, including Sponge Painting, Marbleized, Faux Wood Grain, Crackle, Metallic, Plaster, Textured, Stenciling, Stippling, Mural Painting, & Tromp l’oeil.
Airbrush Painting: Street art, murals, and no size limitations
Airbrushing
Airbrushing requires compressed air to disperse paint onto any surface. Cans of spray paint work in the same way and are often used on building-sized murals.
Large-Scale Painting
This handsome German shepherd painting disguises an otherwise unsightly telecommunications box.
Automobile Painting
Riding in style has a whole new meaning when your car becomes a mobile work of art.
Mural Painting
Let imagination run wild as any wall, inside or out, can be adorned with flights of fancy.
Tromp l’oeil Painting
Tromp l’oeil means “Fool the Eye” and in this photo three-dimensional painting turns this electrical transformer into a lovely stable, complete with bales of hay and a friendly face.
Fabric Painting: Art, fashion, and home furnishings
Hand Painting
Fabric markers can be used to layout your design, followed by fabric paint applied via brush or easy-squeeze bottles for three-dimensional paints.
Silk-Screening
Silk-screening is like stenciling for fabrics. A separate screen is used for each color, which is applied using a squeegee.
3-D Painting & Appliques
Fabric paints can be applied to any surface, bringing designs to life in three dimensions. They also function as glue, sealing the edges of appliques and adhering beads and other embellishments.
Tie Dyeing
Tie dyeing is easy for kids of all ages, and the end results are always a surprise.
Designing Home Furnishing & Apparel Fabrics
Large-scale patterns are perfect for upholstery, draperies, and pillows. Apparel styles are constantly changing. Launch the next fashion trend by creating and wearing your own designs.
Glass Painting: Illuminating color, and painting with light
Wall Hangings & Suncatchers
Luminous colors and intricate eye-catching details, hallmarks of stained glass, bring character and beautiful style to any décor.
Mosaic Glass Gems & Jewelry
Earrings, bracelets, necklaces sparkle with colorful glass beads. Mosaic glass gems are perfect accent on crafts as well as vases, flowerpots, etc.
Glassware
Drinking glasses and pitchers take center stage with hand-painted colorful accents.
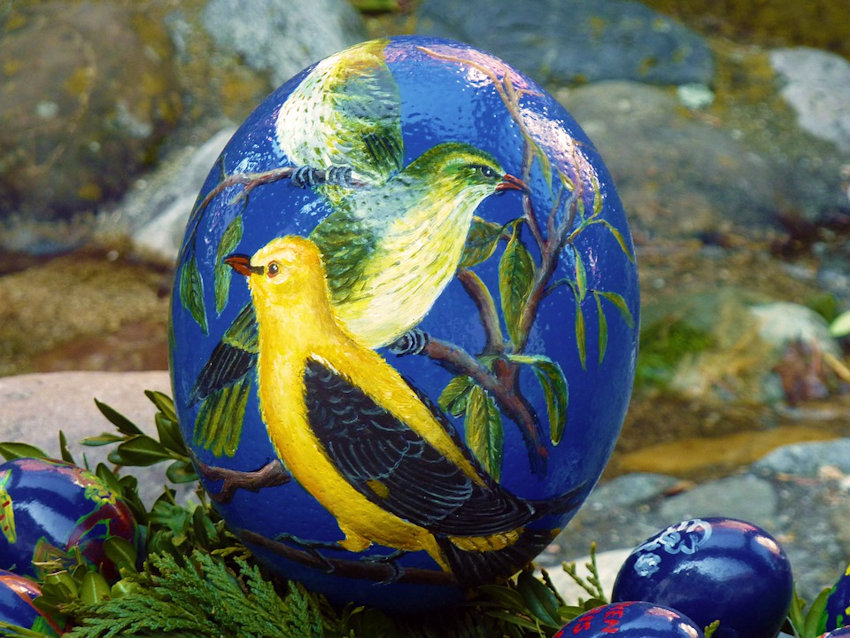
Christmas Ornaments
With a box of clear glass ornaments, you can let your creativity sore. Paints can be applied inside and out, and the finishes range from metallic, pearlescent, iridescent, and glitter in every color of the rainbow.
Stained Glass Windows
Museums, churches, and many secular buildings are adorned with spectacular stained glass. Sunbeams are transformed into a dazzling kaleidoscope of heavenly light.
Painting Gallery:
Acrylic Painting, Airbrushing, & Paint Pens
Airbrushing
Acrylic Painting & Airbrushing
Fabric Painting
Glass Painting
Airbrushing
Acrylic Painting
Acrylic Painting & Airbrushing
Glass Painting
Acrylic Painting
Acrylic Painting & 3D Fabric Painting
Glass Painting
Painting is a wonderful pastime, which enriches your life and can be easily shared with family and friends. No matter what your style and interests may be, there’s a type of painting to challenge your skills and engage your mind for experiences that will last a lifetime. Enjoy the journey!
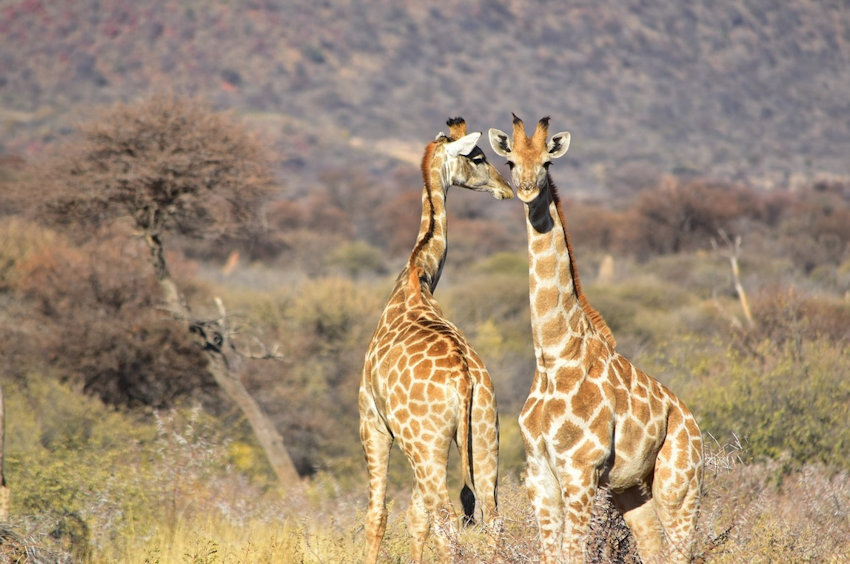
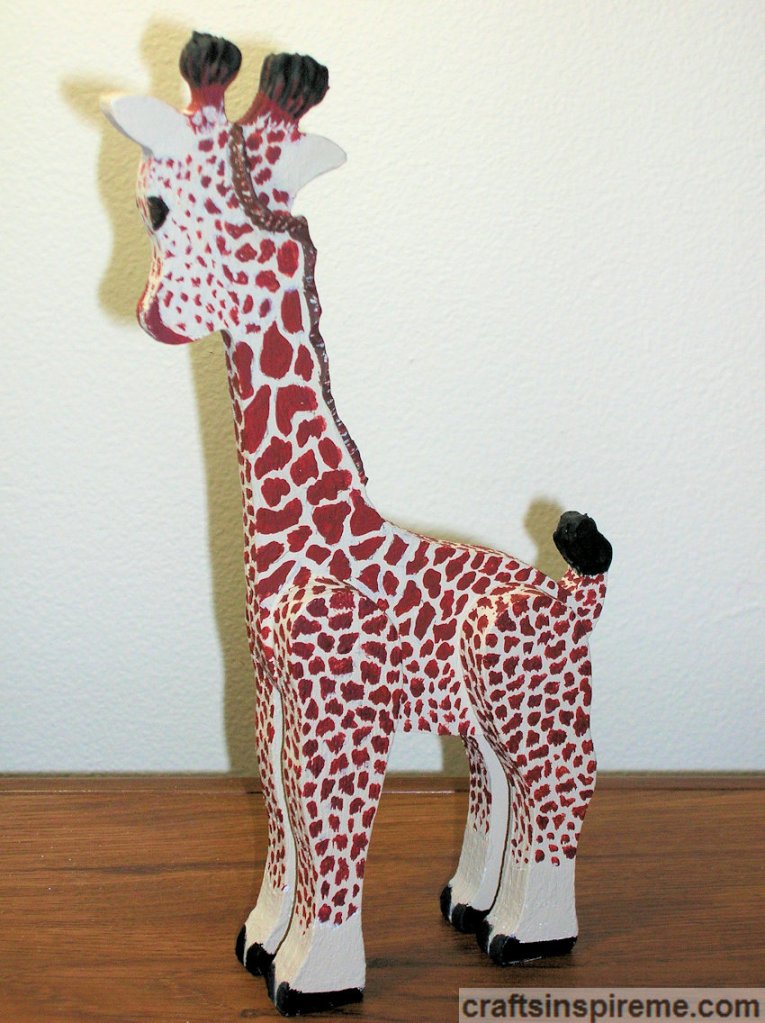
One of the most easily identifiable animals upon the face of the earth is the giraffe. There is nothing else like it – that long neck, towering legs and a fur pattern that resembles mosaics. Giraffes are so tall, that the babies are born at a minimum height of six-feet tall to feed from the mother.
Each subspecies has unique fur patterns and colors. There is a ridge on the forehead and two horn-like protrusions on top of the head.
Some have spots down the length of their legs, while others have solid tan or white below the knee. For this project, you will need to look at giraffe photos and decide which pattern you prefer.
How to Paint a Wooden Giraffe:
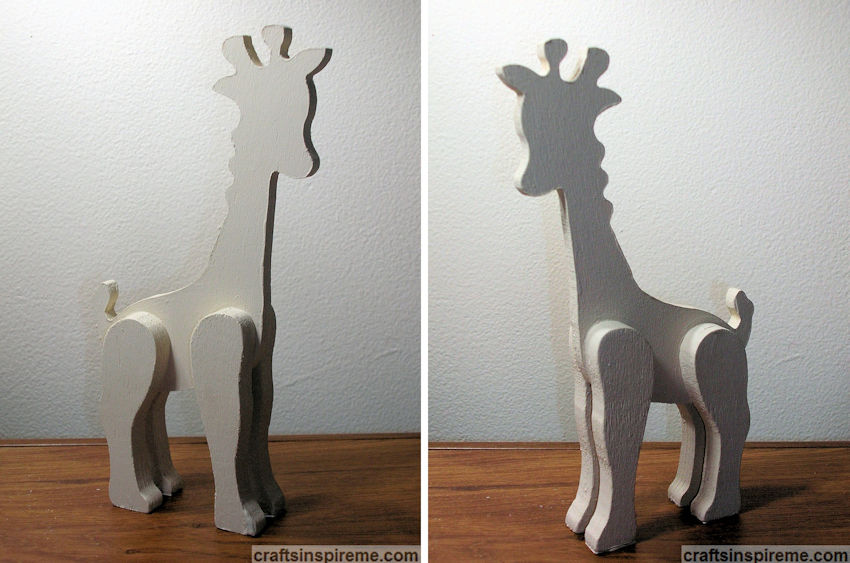
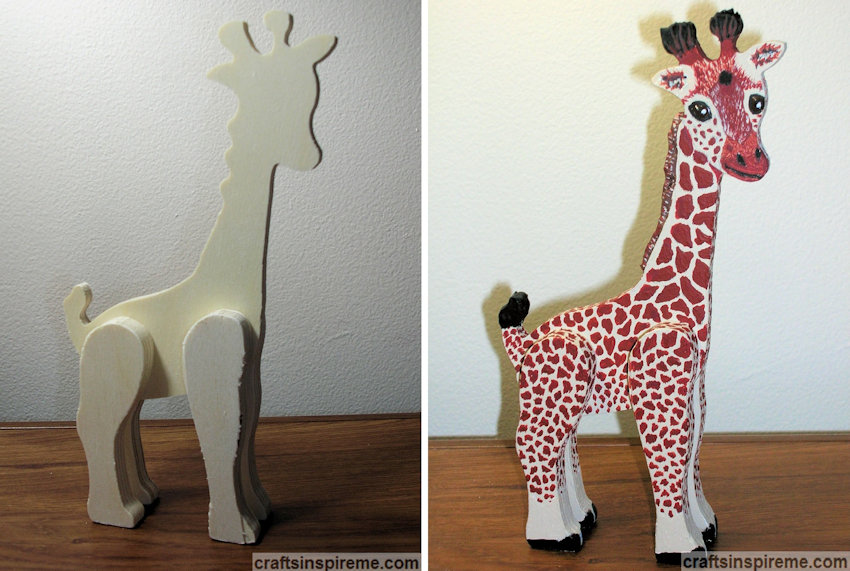
Raw Wood Giraffe
Both sides and all the edges will need to be sanded and painted. Ensure the giraffe stands without wobbling. If needed, restore balance by gluing pieces of thin cardstock to the bottom the feet.
Supplies
Supplies:
Wooden Giraffe (8-1/4” high x 4-1/4” wide x 1-1/4” thick)
Acrylic Paints – red, brown, orange, black, tan
Bottles Fabric Paint – brown, black
Paintbrushes
Sandpaper
Pencil
Sand & Paint Base Color
After sanding, paint the entire body tan.
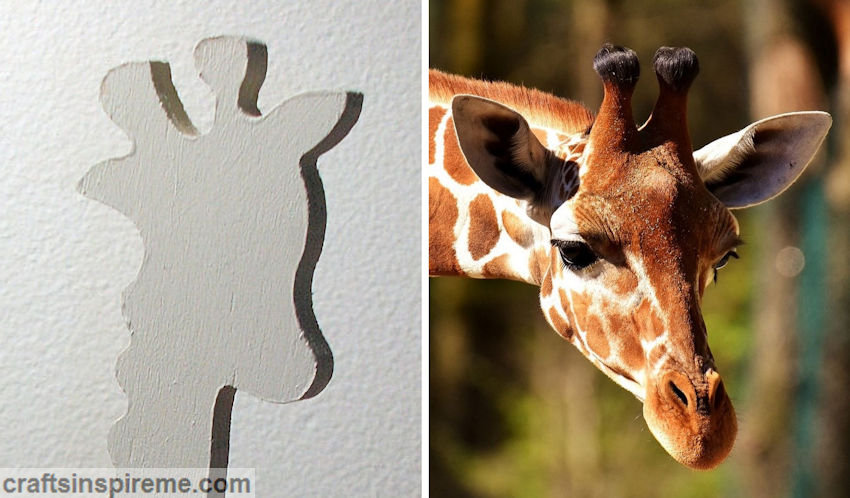
Reference – Giraffe’s Face
I bet you didn’t expect to have a Giraffe anatomy lesson! Typically, wood craft animals stand facing forward. If you look at the close-up photos above, you will notice this giraffe is turning his head to the side. This effects both sides of the head. Both eyes need to be on the same side. We will address the back of the head in a later step.
Hand Draw Details
Because this appears to be a baby giraffe, the facial features are cute but small, including the ridge between the eyes. I began drawing some of the spots to understand what the layout should be. To keep the pencil lines to a minimum, the remainder of the spots were freehanded with the paint brush.
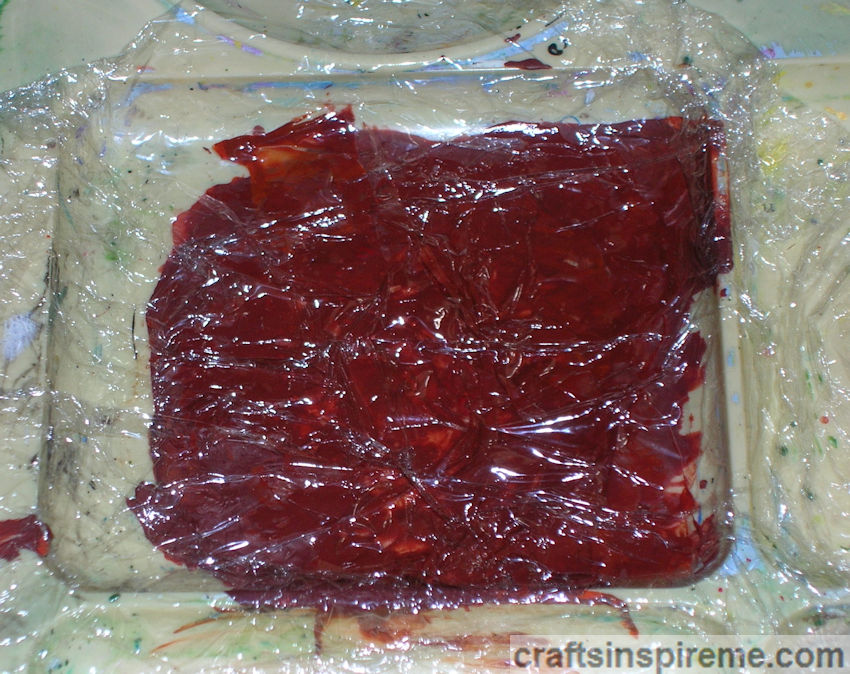
Mix Custom Paint Color
Be sure to mix enough paint for the giraffe’s spots to last throughout the project. To keep the paint moist on a paint palette, cover it with plastic wrap, ensuring the plastic is pressed down upon the paint surface and the edges are sealed. You may need to moisten the paint, but the color will be preserved. I created a reddish-brown by mixing brown, red and orange acrylic paints.
Paint the Spots on the Neck
Use a fine brush for the spots. Be sure to leave space in between, which resembles mosaic tile set in grout.
Paint Spots – Right Side
As you work your way down the body, the size of the spots diminishes. Be sure to paint spots on the edges, including the front and back of each leg and the neck too.
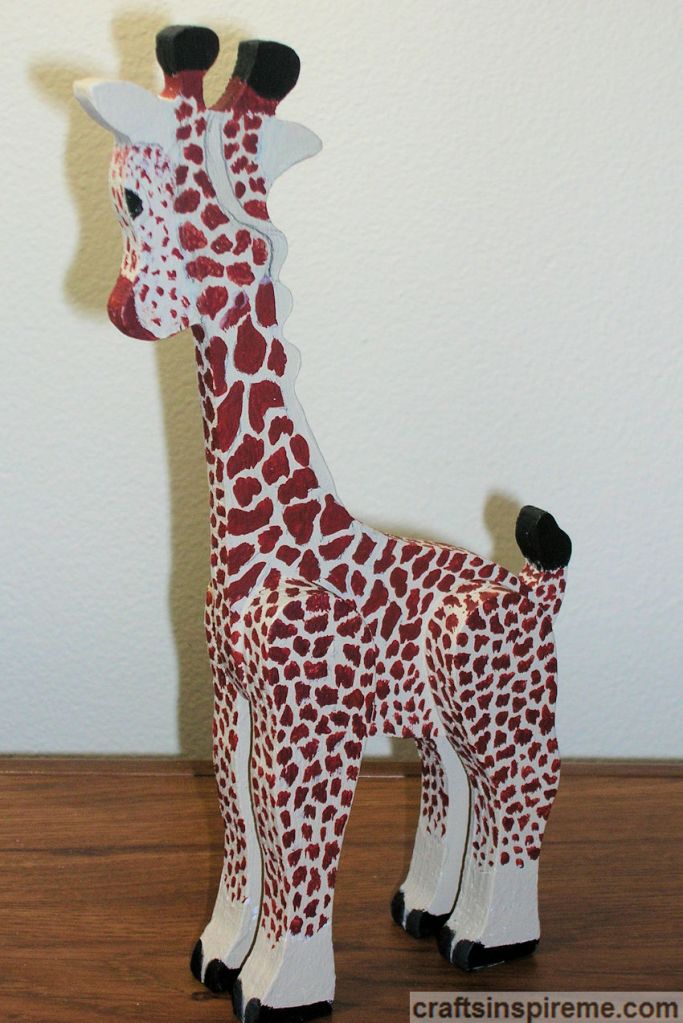
Paint Spots – Left Side
For this step, the following areas will remain tan: the back of the head, the mane, the inside of each leg, the feet, and the tail.
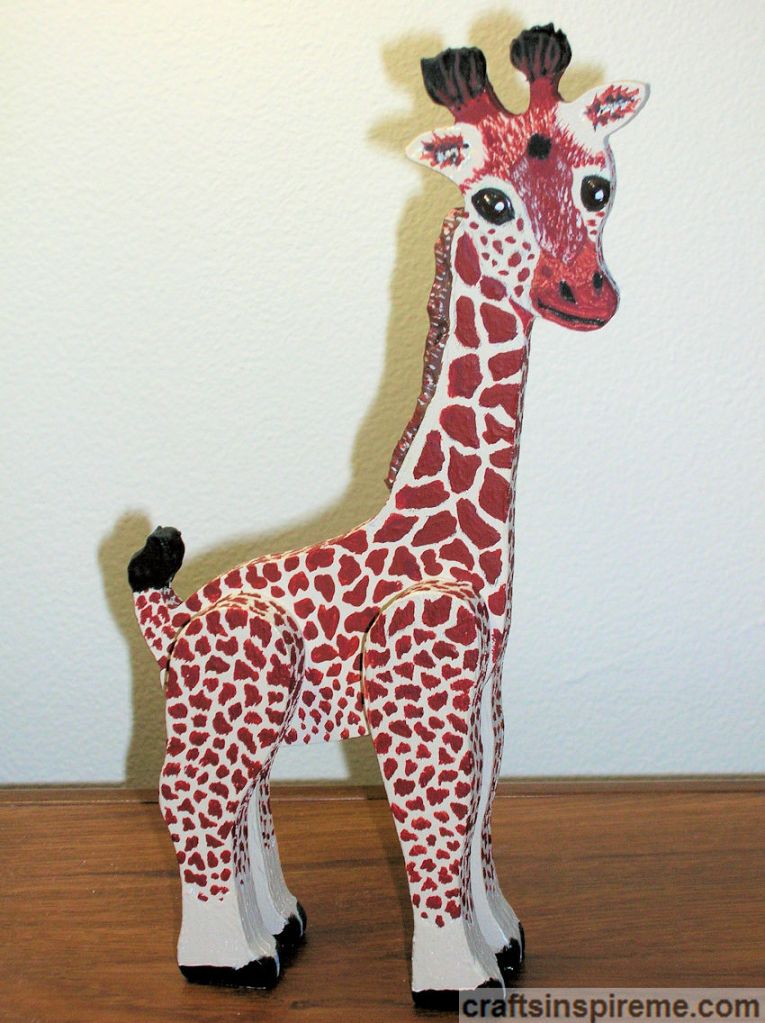
Defining the Details – Right Side
Paint the head and facial details, except for the eyes, which will be completed in a later step. Paint the tail and hooves black. The muzzle and fur between the eyes are darker, while the cheeks are lightly spotted. The “horns” are a combination of black and brown.
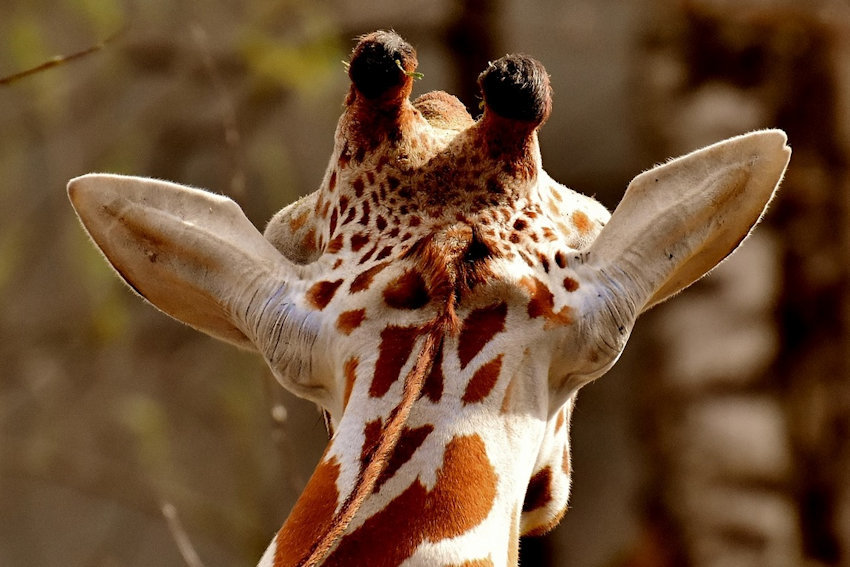
Reference – Back of Giraffe’s Head
Figuring out the back of the head was difficult. Because our giraffe is looking off to the side, you will only see a portion of the face.
Reference – Back of Head & Mane
When the giraffe moves his head and neck, the mane twists and turns.
Reference – Back of Head & Mane
There are no spots on the ears. Notice how the mane twists as the neck shifts.
Defining the Details – Left Side
Draw the details on the back of the head. Be sure to show the twisting mane. Paint all the details except for the mane.
Paint 3D Details – Right Side
The eyes are painted with brown fabric paint for a 3D effect and outlined in black. After it dries, add black pupils and white dots in the center to bring life to the eyes. Using brown fabric paint, create a raised mane, centered down the entire length of the neck. It will take two coats to make the furry mane to stand upright. Create fur on the “horns” with black fabric paint.
Paint 3D Details – Left Side
Paint the eye with brown fabric paint and outline with black. Using brown fabric paint, complete the twisted mane on the back of the head. Create fur on the “horns” with black fabric paint. Allow it to dry overnight.
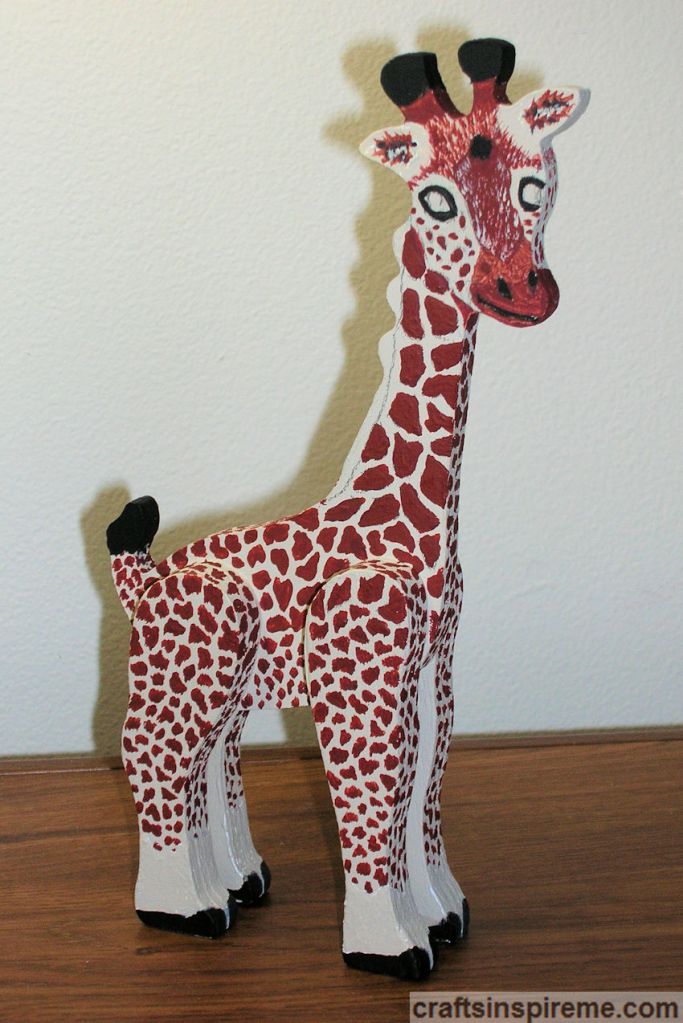
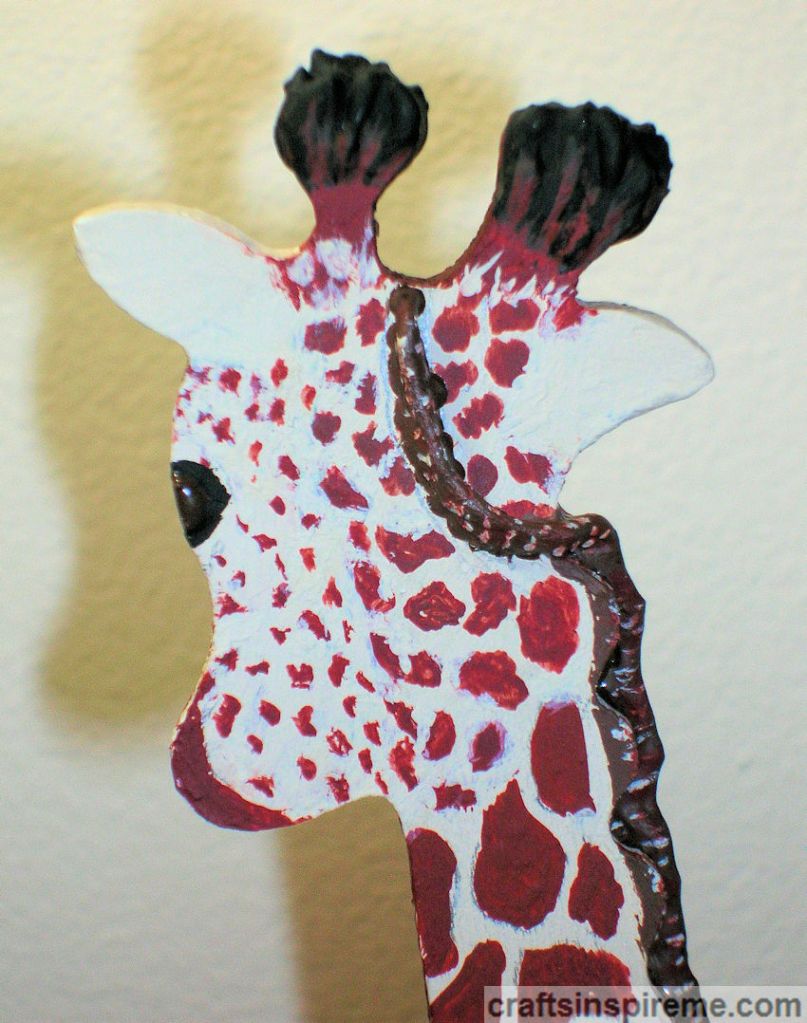
Finished Close Up – Face
The following steps apply to both sides: Because fabric paint is shiny, paint over the mane with brown acrylic and then highlight it with reddish brown and tan. Paint the horns with black acrylic. Some reddish-brown paint was brushed into the ears and up onto the furry horns.
Finished Close Up – Back of Head
Touch up any details as needed. The spots on the left side of the neck, closest to the face, curve toward the face to give a three-dimensional roundness to the upper portion of the neck.
Giraffe – Before & After
Here is a side-by-side comparison of the original raw wood giraffe and the fully detailed project at completion.
I had a lot of fun painting this little guy. Figuring out the anatomy was challenging and rewarding. There are many wooden animal crafts waiting for good homes. Check out your local craft stores or the internet to find one you will love. Good luck!
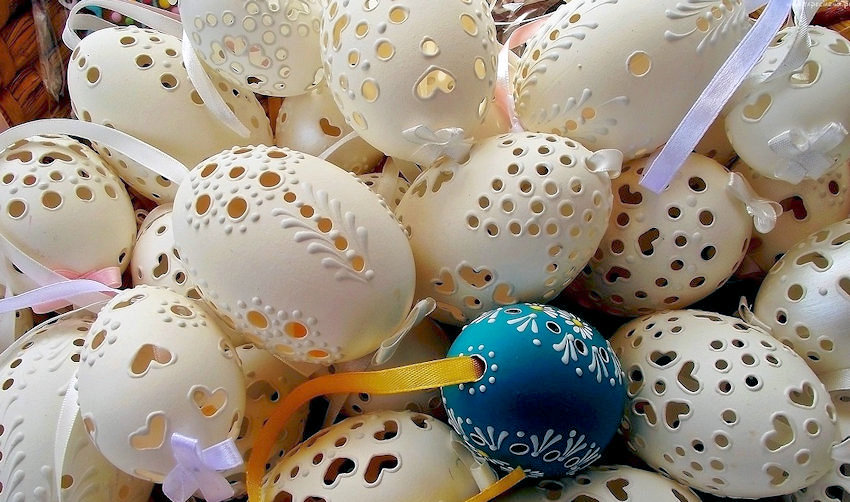
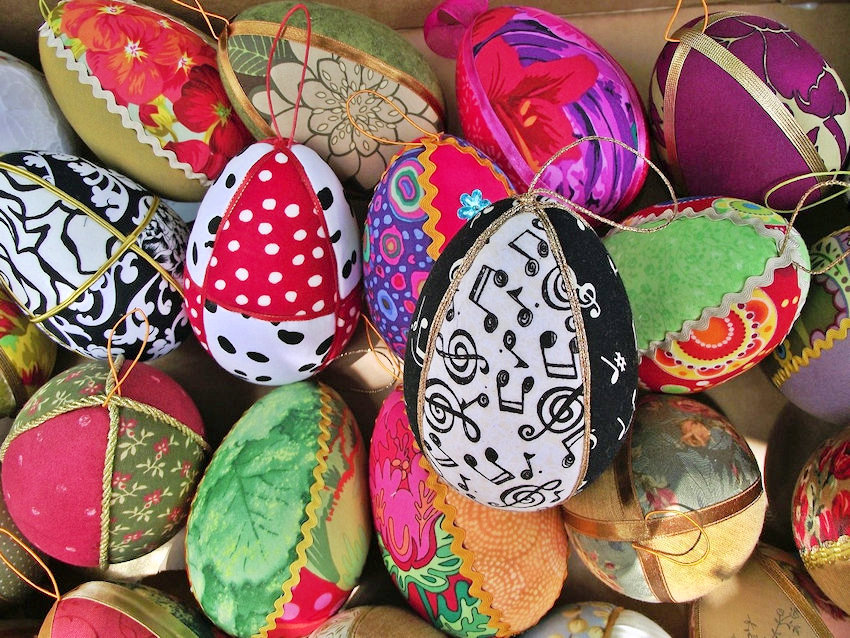
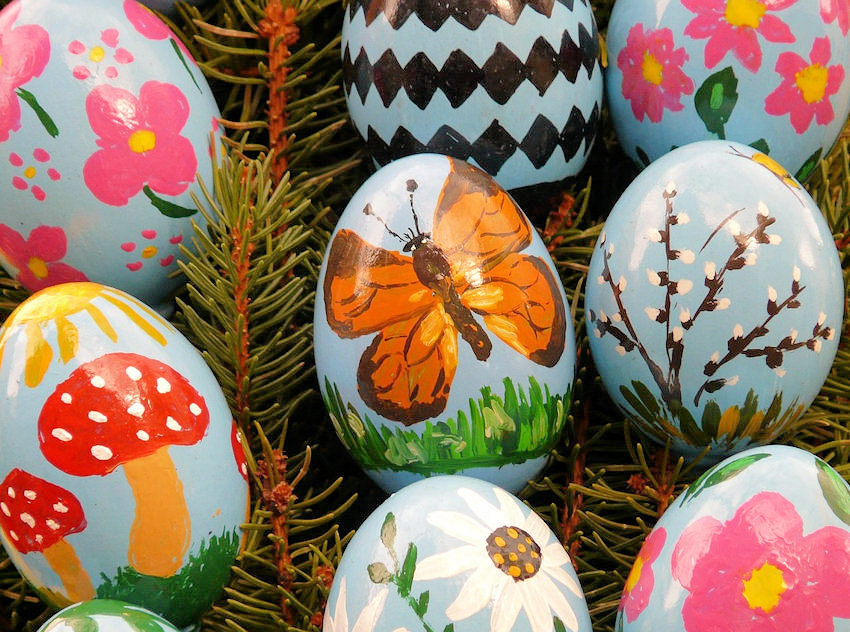
Dyed eggs are a staple of any Easter celebration. All you need is an egg dyeing kit and some vinegar, which makes it easily accessible for all ages. Decorating doesn’t have to be limited to dye and farm fresh eggs. Options include paints, fabrics, markers, ribbons, and appliques, while the eggs can be wooden, foam, or plastic, just to name a few. Let’s look at a variety of decorated eggs to get your creative juices flowing.
Painted Broken Eggs
Crackle Finish Egg
Pierced Eggs with 3D Painted Accents
Fabric Wrapped Eggs with Decorative Trims
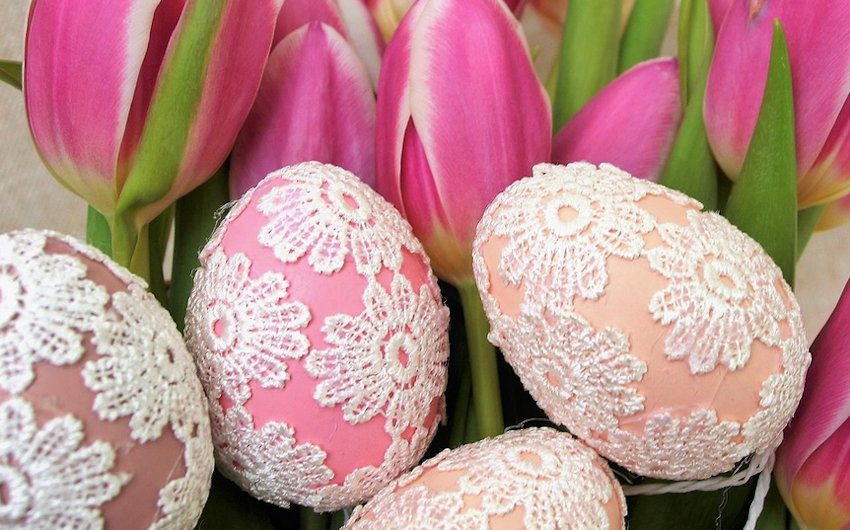
Dyed & Lace Appliqued Eggs
Scrapbooking Eggs
Quilled Egg
Decoupage Egg
Multicolor Marker Egg
Illustrated Egg
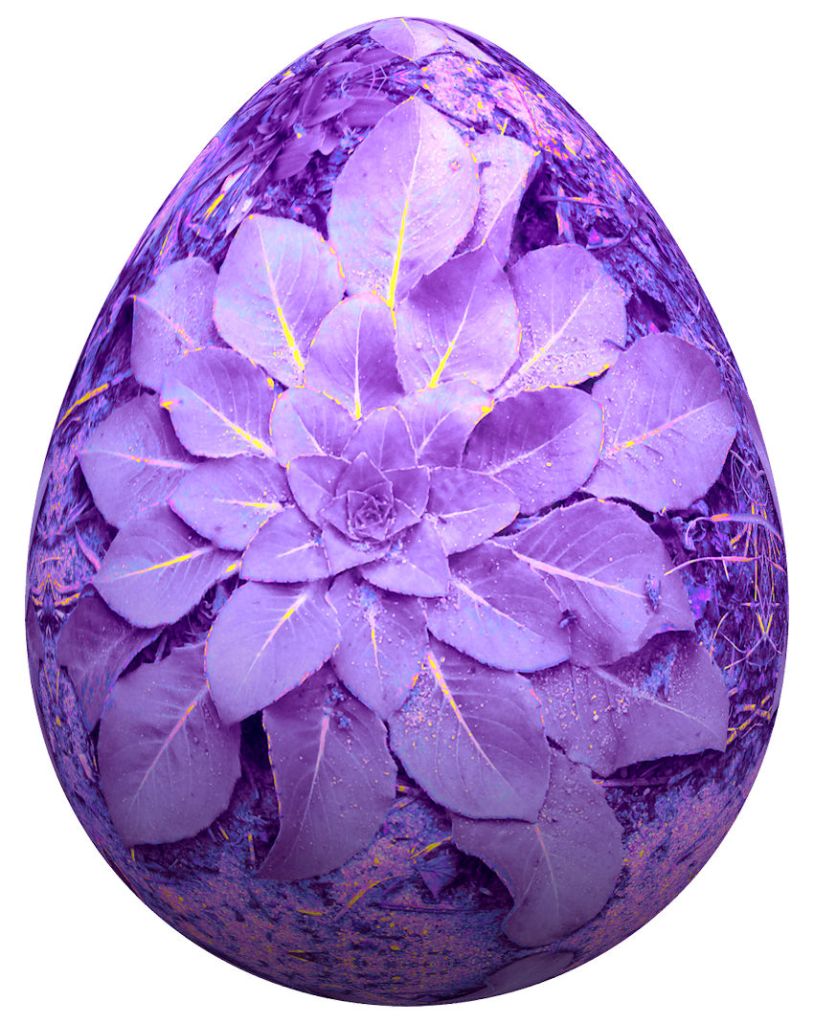
Silk Flower Applique Egg
Dyed & Beaded Eggs
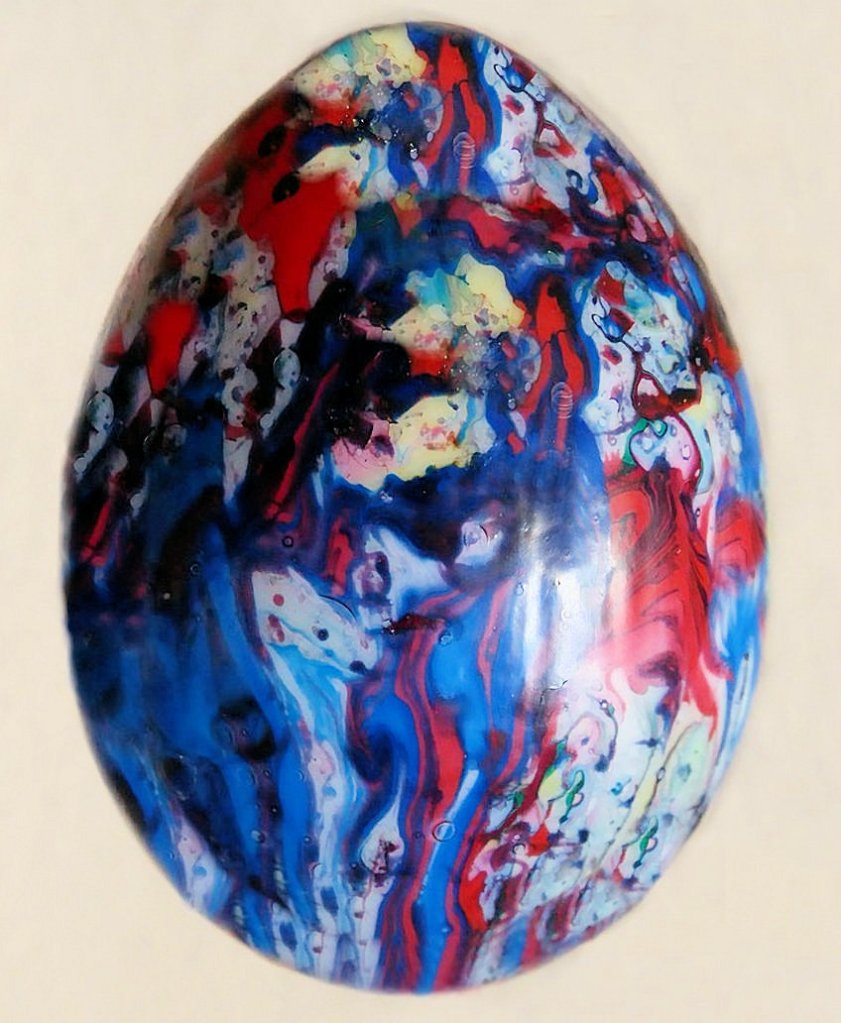
Paint Pour Egg
Sponge Painted Egg
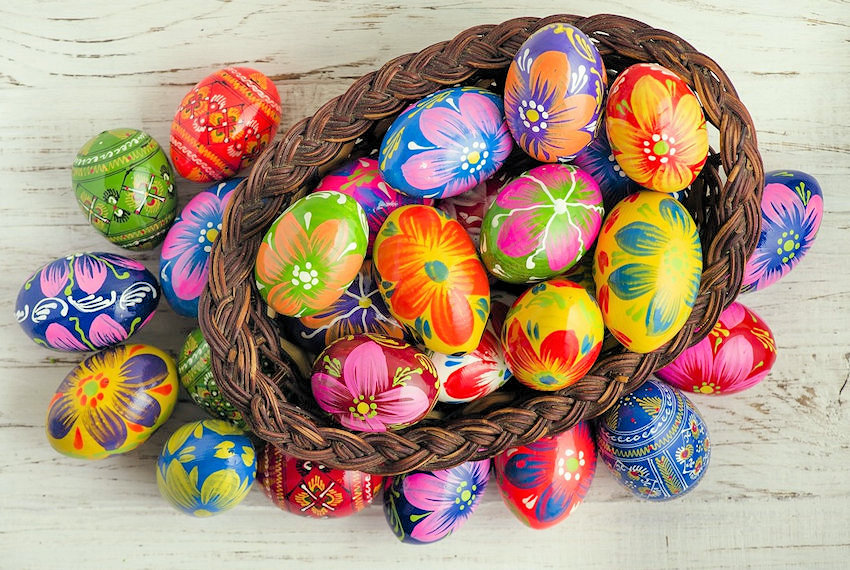
Hand Painting Eggs
Hand Painted Eggs
Hand Painted Eggs
3D Hand Painting Eggs
Hand Painted 3D Metallic Eggs
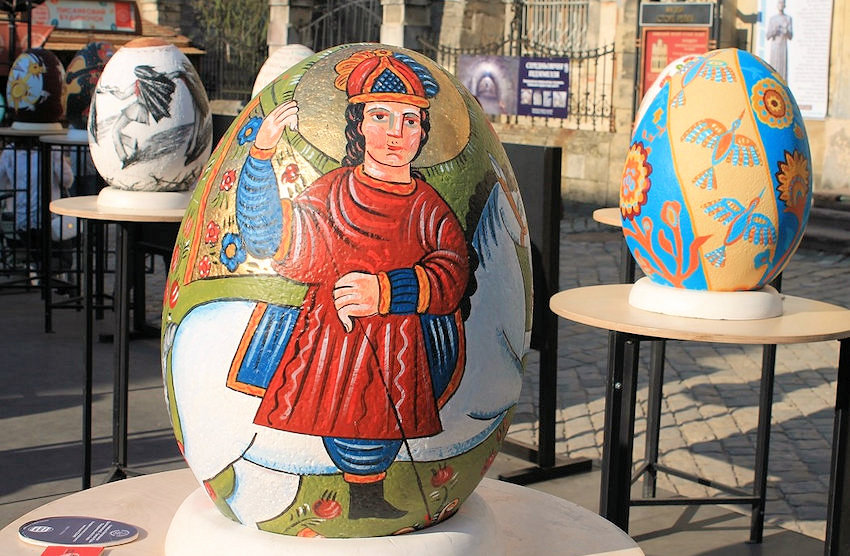
Romanian 3D Metallic Eggs
Ukrainian Egg
Fine Art Eggs
Fine Art Eggs
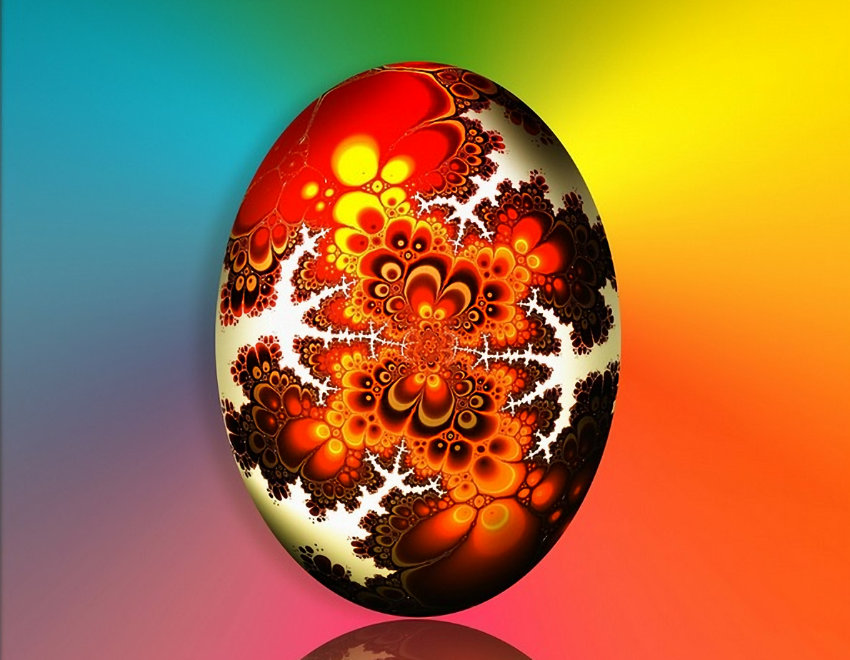
Hand Painted Abstract Art Egg
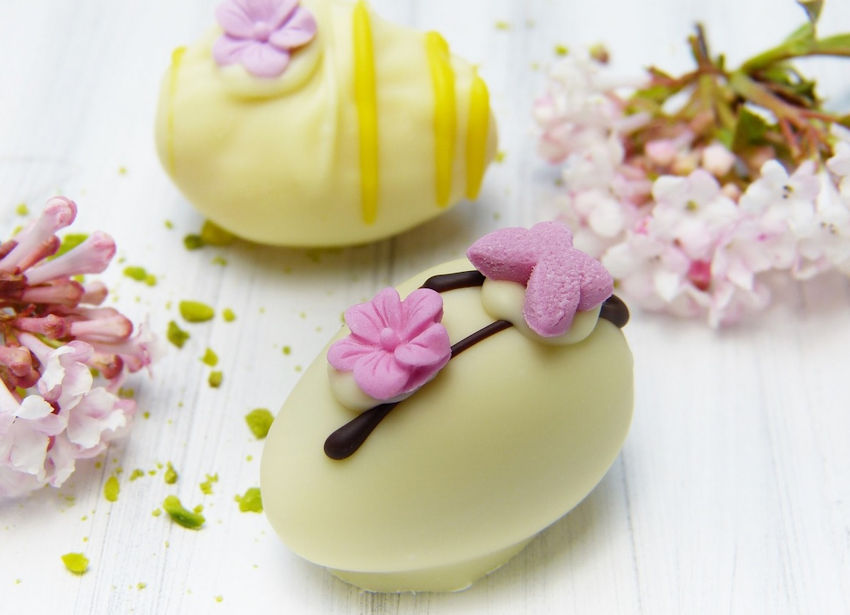
Chocolate Eggs
If you have an egg allergy or if painting is not in your skill set, chocolate eggs can be decorated using the same design principles shown throughout these photos.
I hope you have found some inspiration and will try your hand at decorating eggs. Do you have a favorite? Please let me know in the comments section.
Whose turn is it to walk the dog – I mean dinosaur? Something tells me that 25-foot leash will not be long enough! Dinosaurs are real fan favorites. You can’t get much wilder than that. And what’s not to love?
A Dinosaur Nursery – They’re kind of cute at this stage.
Somewhere between adolescence and adulthood they seem to lose their charm! (lol)
Even when they’re dead, they instill an odd mixture of fear and fascination. Movie Director Steven Spielberg brought dinosaurs back to life on the big screen in the epic movie, Jurassic Park – an emotional roller coaster, that started with awe and wonder, but quickly escalated to bone chilling terror.
We love dinosaurs anyway. Want proof? Look at all the books, movies, television shows, and merchandise. At some point, every kid draws and colors his or her favorite dinosaur. Here’s your chance to feel like a kid again. Grab some paints and brushes and let’s go!
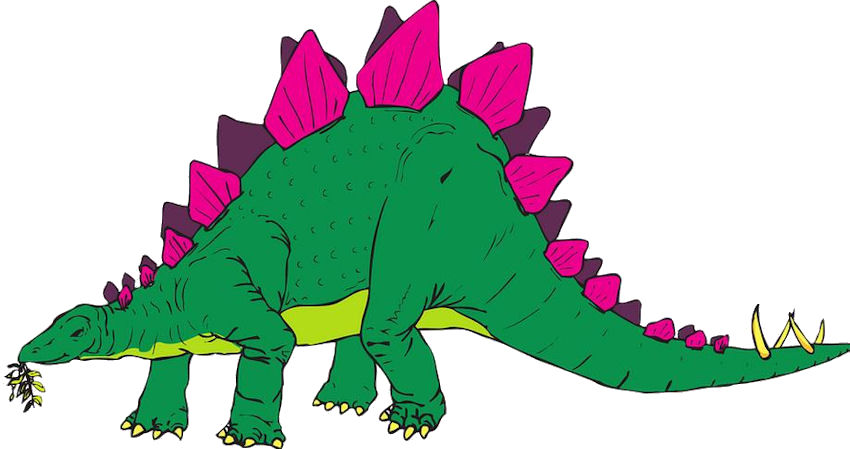
How to Paint a Wooden Stegosaurus
With a little paint you can design your own dinosaur. It can be as simple as a single coat of paint, or as detailed as you like. First we need a little inspiration.
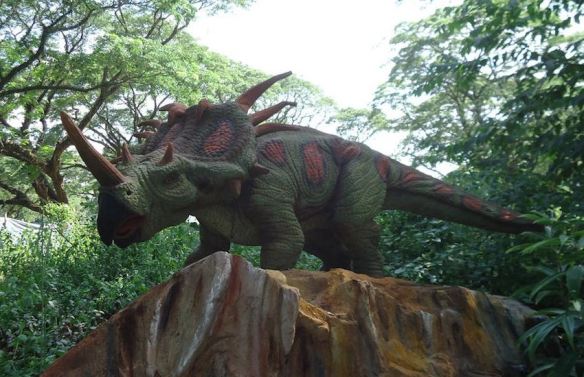
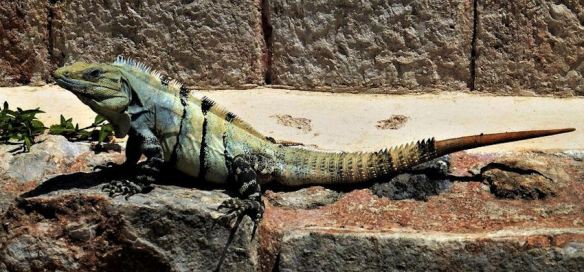
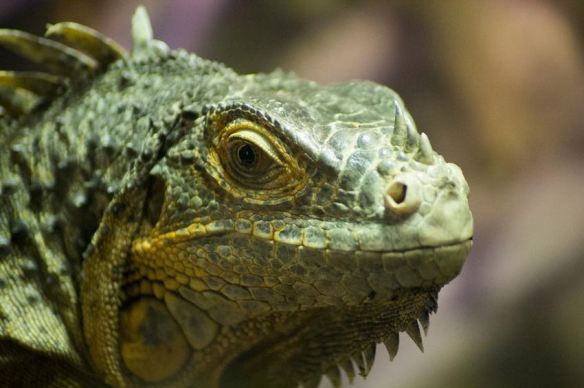
Since dinosaurs lived sixty-five million years ago, there’s no one around to tell us exactly what they looked like. For this project, photos of creatures living today, such as iguanas and lizards, can be inspirational. Check out those spines!
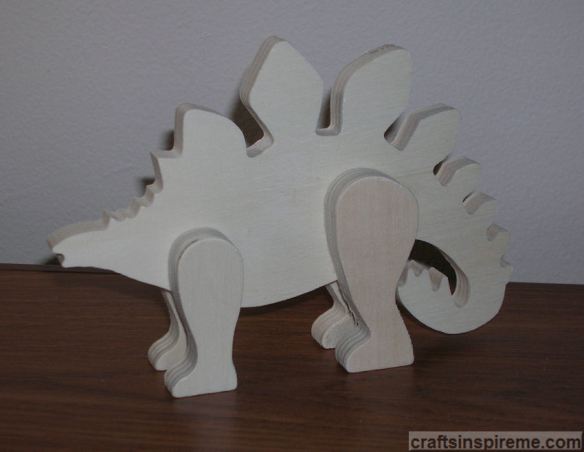
This carved wood stegosaurus, available at AC Moore, has sturdy legs, making it a freestanding, three-dimensional piece. Both sides and all the edges will need to be painted. Due to the raw nature of wood, it may require sanding, especially along the edges. (There are several types of animals in this carved wood collection. To see a painted flamingo project, please click here.)
Supplies:
Wooden Stegosaurus (4-1/4” high x 7-1/4” wide x 1-1/4” thick)
Acrylic Paints – black, brown & metallic green
1) Bottle fabric paint – brown
Paintbrushes
Sandpaper
Step 1 – Paint the dinosaur with green acrylic paint, including both sides and all edges. The great thing about paint is that it’s cheap. Feel free to experiment. If you don’t like the results, it can be easily changed.
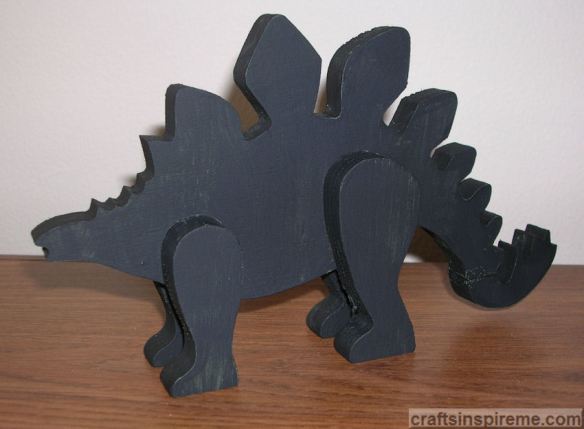
Seeing it in color revealed a major anatomical mistake in the tail design. If you loved dinosaurs as a kid, you’ll remember that the stegosaurus has spikes on the top of its tail. The artist chose to curl the tail underneath, and as a result, mistakenly placed the spikes on the underside of the tail. This poor animal would have trouble walking because the spikes would continually get caught on the ground as it moved through the forest, making it easy prey.
Step 2 – To make it right, cut off the tip of the tail as shown.
Step 3 – Turn the cut tail piece around, and glue it in place. Paint the entire figure black as a base coat, which will help delineate the scales added in a later step. Looks much better doesn’t it?
Step 4 – Paint the top of the head, the back plates, and the tail with brown fabric paint. Paint the sides of each plate with green fabric paint and add spikes along the sides of the tail. Brown acrylic paint was applied with a brush in between the back plates, because it was too narrow to fit the tube of fabric paint.
Step 5 – Add brown fabric paint on top of each leg and more spikes along the entire length of body. Create a scale pattern on the body using metallic green paint, and use the same color in the sides of the plates on his back.
Step 6 – Add a small dotted pattern to each leg. Paint the head brown, and add a few green scales along with the eyes. Congratulations! You now have your very own pet dinosaur. Fortunately for you, he’s a “Veggiesaurus,” unlike the one in the next photo.
What a view, right? Thank goodness this is only an observation tower! Because if it was real… It would be the last thing you ever saw.
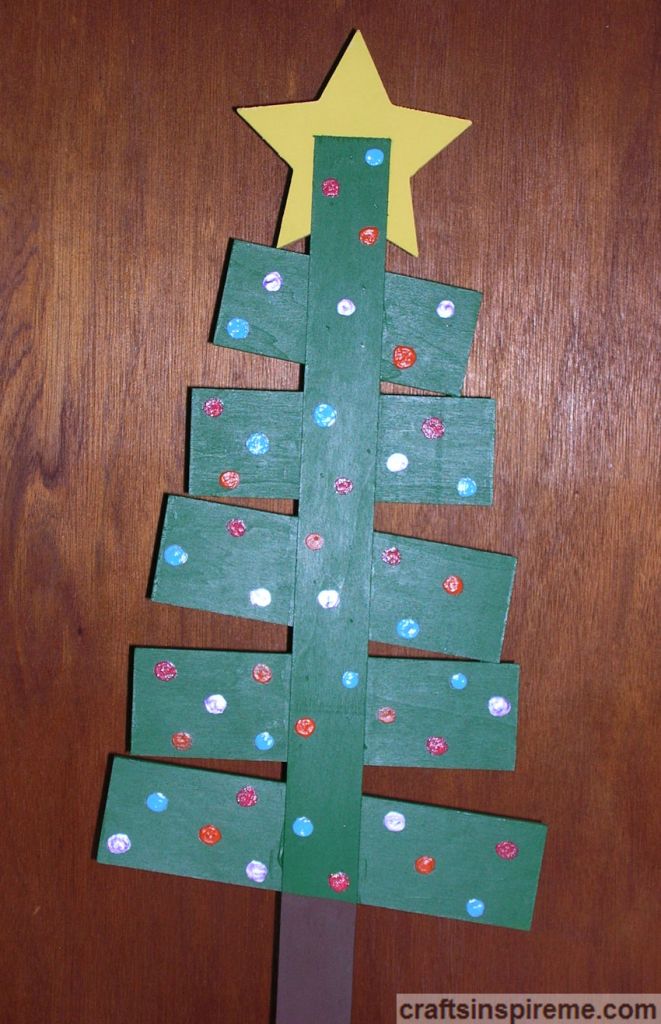
This Christmas tree is unlike most. It consists of individual flat pieces of wood, much like a signpost, ready for your painted decorations and inspiring words.
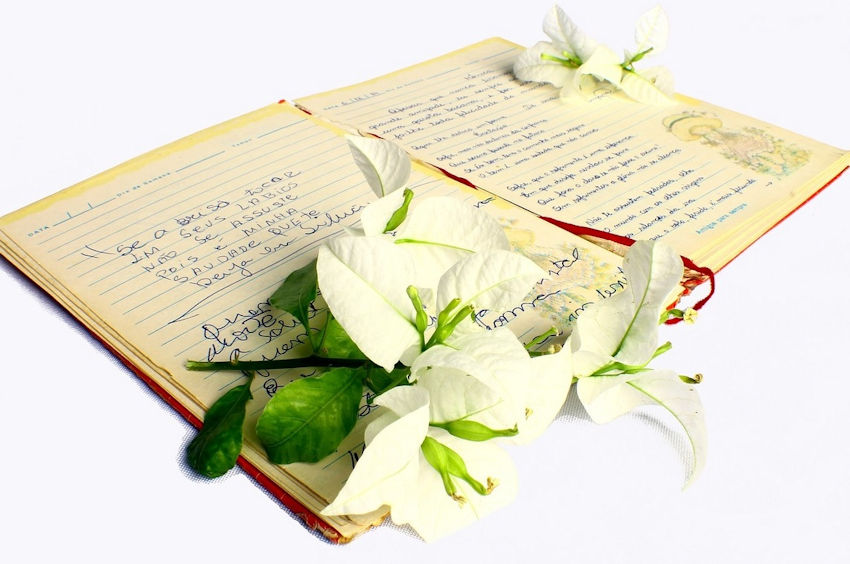
Words/Poetry
Most of my craft projects do not call for poetic or inspirational words. Grab a piece of paper and a pen and scribble down some possibilities. Take as much time as you need. Listen to song lyrics, read poems, or notice seasonal phrases from movies, books, or advertising.
Christmas Magic Sign
You will need to consider how many words/lines will fit.
Santa Christmas Sign
Use any fonts you like. You could use stencils for the lettering or freehand.
Merry Christmas Sign
Add decorative painted accents such as holly leaves and berries, or enhance your project with accessories like garland, and lights.
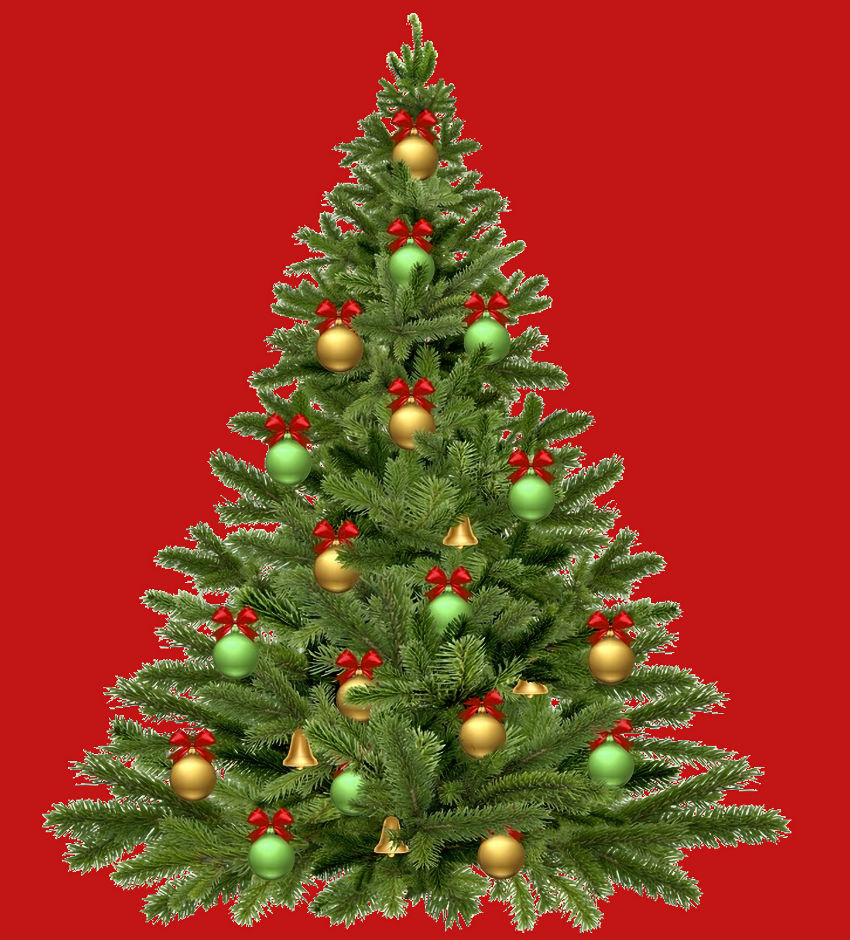
Decorated Christmas Tree
Even though this Christmas tree is made with flat pieces of wood, you still need to consider how to decorate it, starting with a color scheme.
Warm Colors
The warm color palette consists of reds, oranges, and yellows.
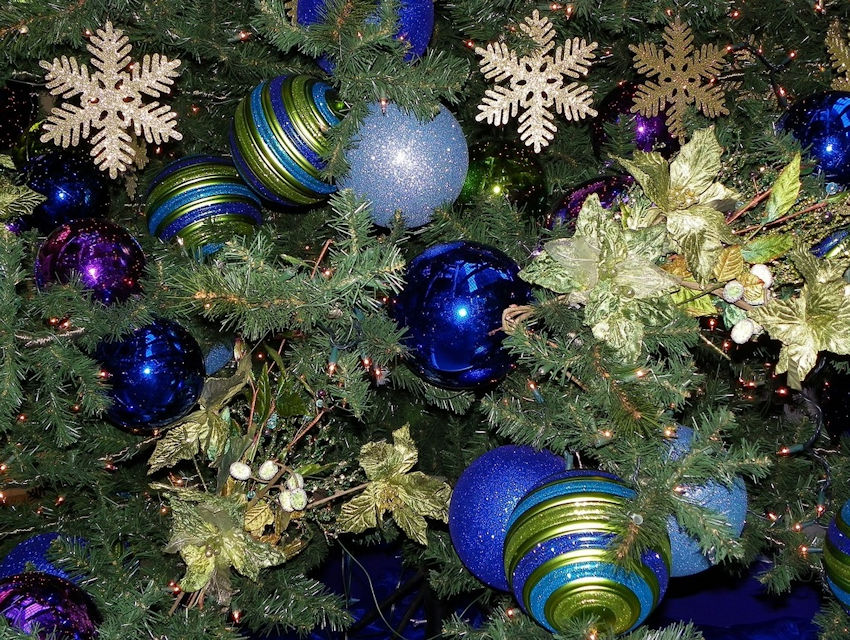
Cool Colors
The cool color palette includes greens, blues, and purples.
Monochromatic
With a monochromatic scheme, all decorations are the same color, and the variety comes from unique designs.
Multicolor
Create a festive atmosphere with all the colors of the rainbow.
Christmas Tree Lights
Instead of painting Christmas ornaments, you may want to paint lights with metallic acrylics. Another option is wrapping the tree with mini, battery-operated string lights.
How to Paint a Wooden Christmas Tree:
Raw Wood Tree
This freestanding, raw wood tree may need light sanding, especially the edges.
Supplies
Supplies:
Wooden Signpost Tree (28-1/2” high x 10-1/4” wide x 1/4” thick) (base 8”x4”x1/2” thick)
Acrylic Paints – green, yellow, brown
6) Bottles fabric paint: black, purple, blue, orange, pink, glow in the dark white
Paintbrushes
Paint the Tree & Star – Front
Using acrylics, paint the star, the “branches” and the trunk. You will need a thin brush to paint the trunk between the slats of green. Paint both sides of the tree, the base and all the edges.
Paint the Tree & Star – Back
Because this tree is meant to be seen from both sides, I came up with a finished design for the back. Paint the trunk brown from the base to the bottom “branch,” and green for the remainder.
Paint Details – Back
Apply fabric paints in thick dots to resemble ornaments upon the tree.
Repaint Star – Back
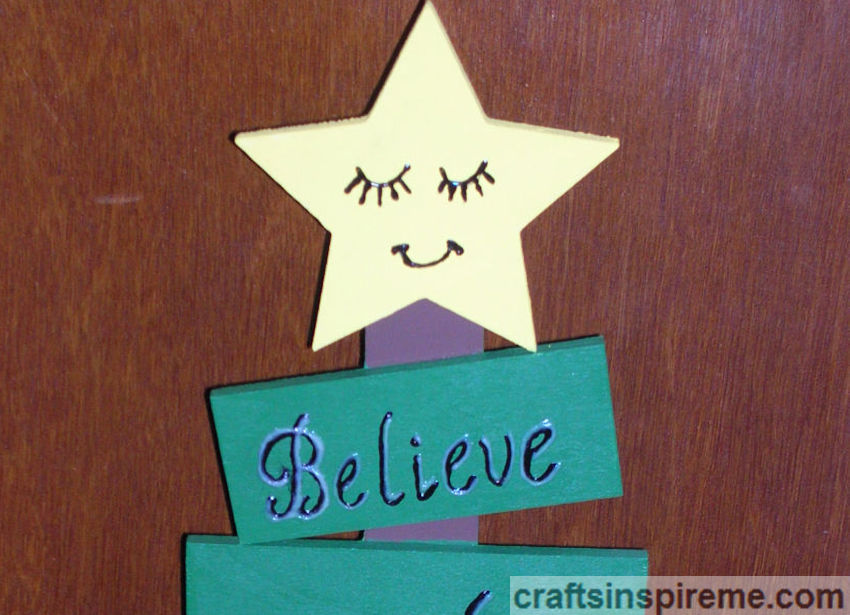
I didn’t like the look of the squared off piece of wood on the back of the star and thought it would better to see the full star on both sides. To accomplish this, I extended the star shape and filled it in with yellow as shown. A smiling face was added to the star, using black fabric paint, to give it personality.
Finished Tree – Back
The back of the tree is now complete. Only two more steps to complete this project.
Finishing the Tree – Front
Using black fabric paint, write the words you have chosen upon each board. Finish by giving the star a cute face. Allow it to dry overnight.
Finishing the Tree – Front
Using glow in the dark white fabric paint, trace the black letters to make them stand out better against the green tree. Every night, when you turn out the lights, the glowing words will make you smile. And what a nice way to fall asleep with inspirational thoughts floating in your dreams.
I hope you enjoy this project and are inspired to explore your creativity. Good luck in all your artistic endeavors and have fun decorating for the coming holidays!