Bewitching Mushrooms

Mushroom Centerpiece

Mushrooms have been trending this year in everything from apparel to home décor. Nature is filled with magical wonders and what better time to tap into that magic than Halloween? This fun project is fun and easy for everyone.

Original Mushroom Decoration

Original Mushroom

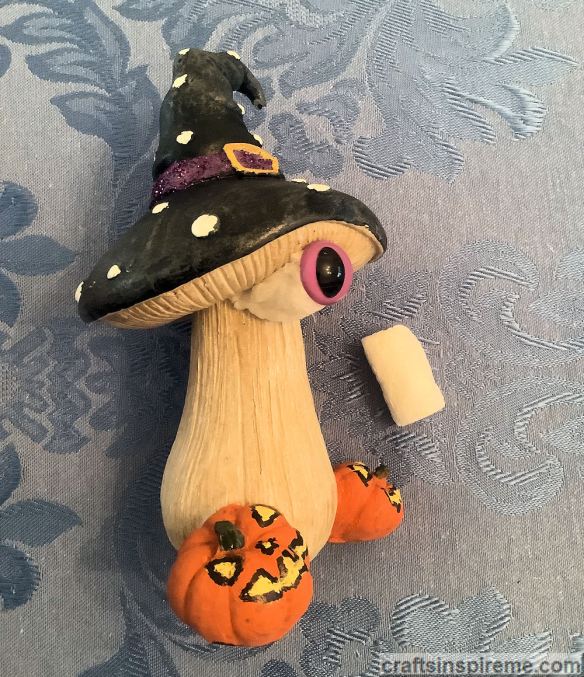
I purchased this cute figurine at Wegmans. The shape of the mushroom cap lends itself perfectly to becoming a witch’s hat.

Supplies

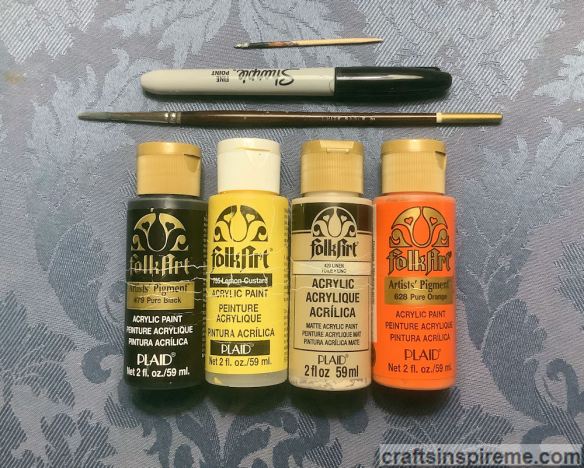
Supplies

For this project you will need acrylic paints, brushes, a black sharpie marker, and a toothpick for tiny touch-ups. You will also need a stuffed animal eye. (You’ll see why below.)

Paint Jack-O-Lantern Faces

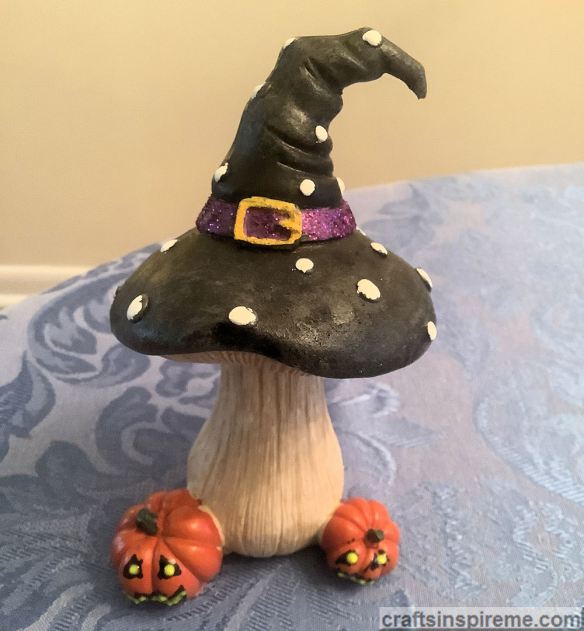
Painted Jack-O Lanterns

Painted faces give these pumpkins personality. I didn’t like the low placement of the faces, so I repainted them to start over.

Repaint Pumpkins

Repainted Pumpkins

The new orange paint creates a new blank canvas.

Paint Yellow Jack-O-Lantern Face Details

Painted Yellow Face Details

Yellow paint creates the inner glow typically found in Jack-O-Lanterns.

Outline Face Details in Black

Black Outlines

Using a black Sharpie marker, outline the face details for a carved appearance.

Add a Purple Eye

Add an Eye

The addition of a purple eye is both cute and creepy.

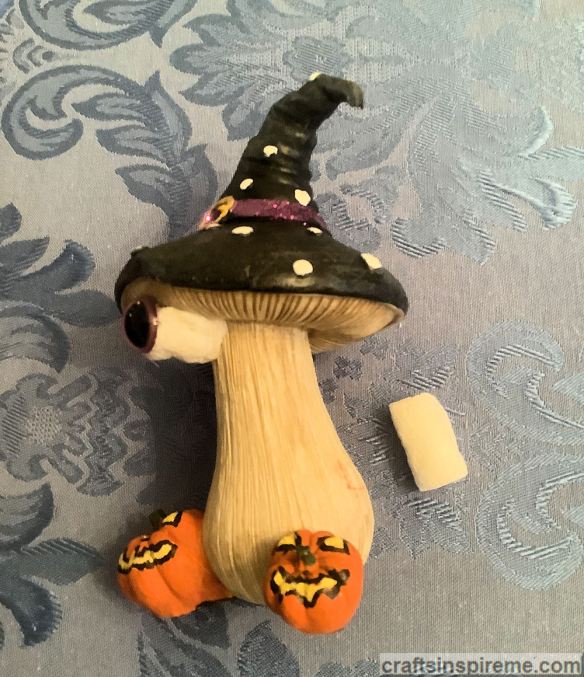
Create Eye Socket with Packing Peanut

Create Eye Socket

Instead of a human eyeball, I decided to give this magical creature a tube-shaped eye socket using flattened packing peanuts.

Side View of Eye Socket

Side Detail

The packing peanut texture coordinates well with the mushroom stem.

Side View of Eye Socket

Side Detail

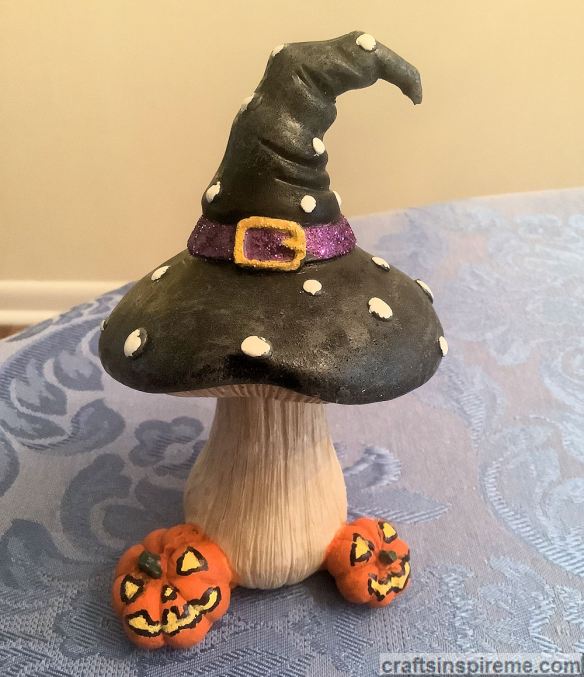
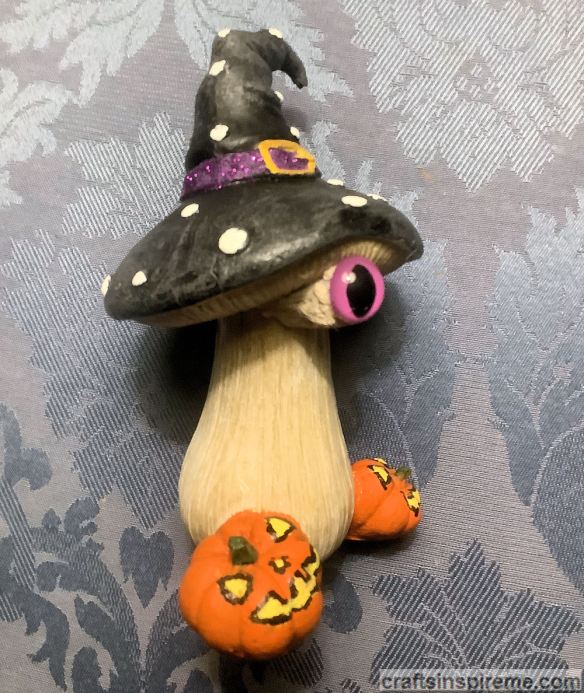
Finished Bewitching Mushroom

Finished Mushroom

The eye socket was painted beige to blend with the stem.

Side View of Finished Mushroom

Side Details

Side View of Finished Mushroom

Side Details

I hope you enjoyed seeing this bewitching mushroom. It makes a great addition to your Halloween décor and creates an element of the unexpected. As you know, I love Halloween and would love to hear about any of your Halloween-themed projects.

Thanks for Reading! Happy Halloween & Happy Crafting!

Hand Painted Potholder & Oven Mitt

I have always loved ancient Egyptian art and architecture. The symbolism, the colors, and the powerful portrayals of the gods and goddesses is fascinating. Bast (aka Bastet) is the ancient Egyptian cat goddess.

Egyptian Wall Art

Egyptian Wall Art

Ancient Egyptian symbols often include the lotus flower, and this color palette is used throughout their artwork.

The Goddess Squeak

I can’t explain why but my brother’s cat, Squeak, has a royal vibe. As queen of the household, she struts around the house looking for attention and spends a lot of time resting on the kitchen counter on top of dish towels or oven mitts.

3-Dimensional Fabric Paints

My love of ancient Egyptian art combined with this pampered cat to inspire a new craft: painted oven mitts & potholders. Special Note: because fabric paint is heat sensitive, avoid direct contact with hot pots and pans. This project is more decorative, serving as art for the kitchen.

Original Potholder

This plain potholder could use some love.

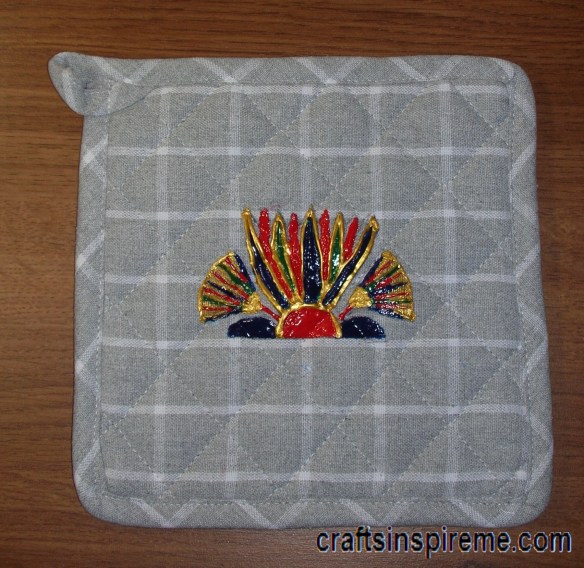
Painted Lotus Potholder

This eye-catching lotus flower is just what it needed.

Original Oven Mitt

Gray is a very popular color, but we can do better.

Painted Cat Goddess Oven Mitt

Here we see the goddess, Bast, posing in front of the Giza pyramids.

Close-Up of Painted Cat Goddess

The gold collar is perfect for a goddess, including the Ankh and Eye of Horus symbols. I painted the cat’s eyes metallic gold to catch the light and create a glow amid the dark black fur.

My brother and his cat love these. They also make a great place for a quick nap – for the cat, not my brother. Lol

I hope you will be inspired to add some decorative details to your homes. Anything can serve as your canvas. What will you create next?

Thanks for Reading & Happy Crafting!

Forest Dragon

Baby Dragon

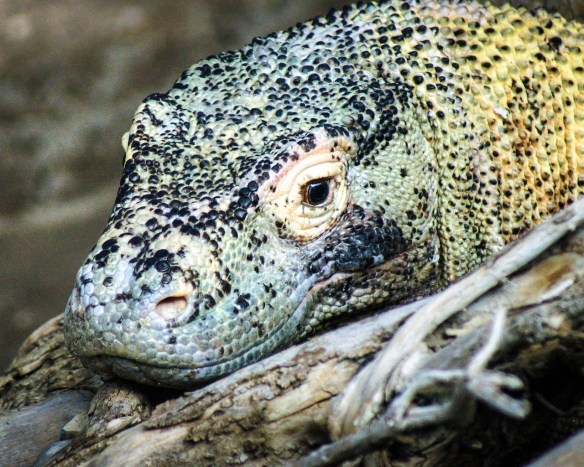
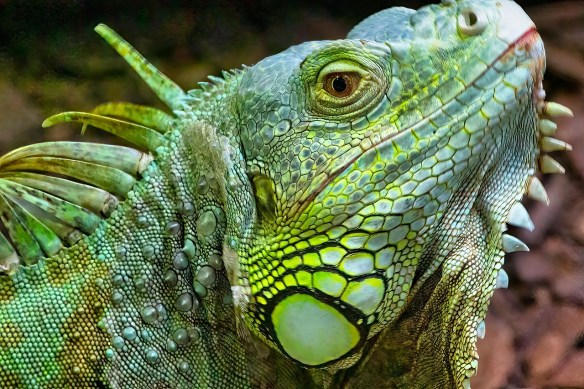
The mysterious legends of dragons have been a fascination for centuries. appearing in ancient and modern texts, maps, as well as artwork and architecture around the world. Some may say dragons are pure fantasy, but shown below are several dragons alive today. This week’s project, a colored/painted LED dragon, is easy to complete and suitable for all ages and skill levels.

Inspirations:
Komodo Dragon

Komodo Dragon

Australian Seadragon

Australian Seadragon

Green Iguana

Iguana

Supplies:
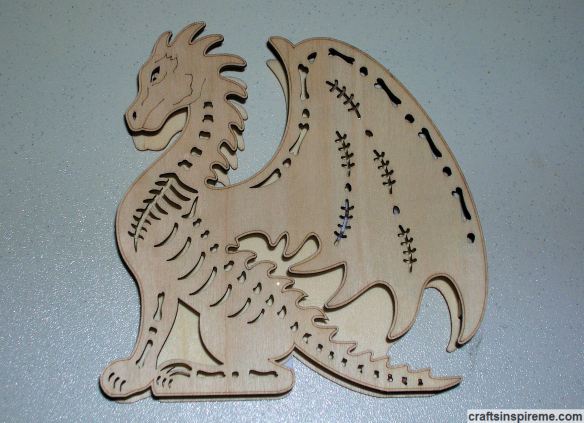
Raw Wood LED Dragon

Raw Wood Dragon

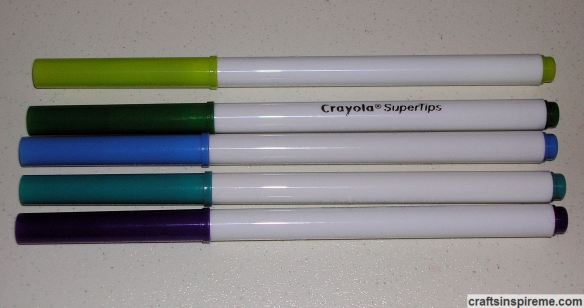
Magic Markers

Magic Markers

Acrylic Paints

Acrylic Paints

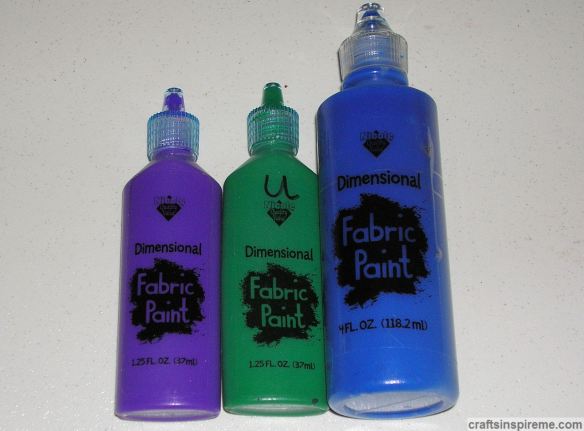
3-Dimensional Fabric Paints

Fabric Paints

How to Color/Paint a Wooden Dragon:
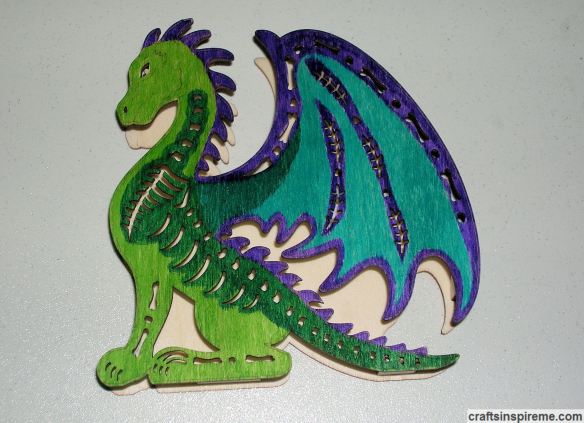
Apply Dark Blue Marker

Dark Blue Marker

Color the wing details and spines running down the dragon’s back and tail.

Apply Aqua Marker

Aqua Marker

Fill in the wings with magic marker. Don’t be afraid to experiment. You can always change it, as you will see in a later step.

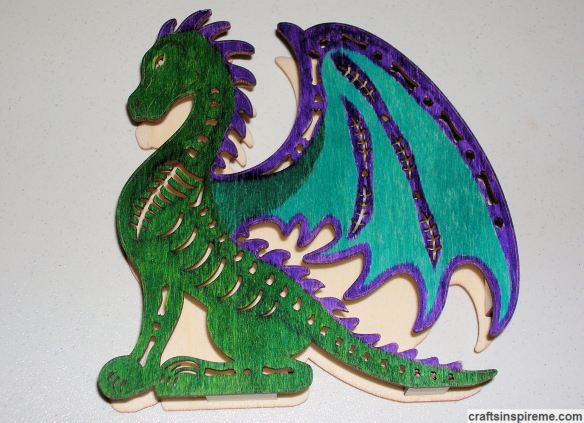
Apply Lime Green Marker

Lime Green Marker

Apply Dark Green Accents

Dark Green Marker Accent

I didn’t like lime green and dark green together and changed it in the next step.

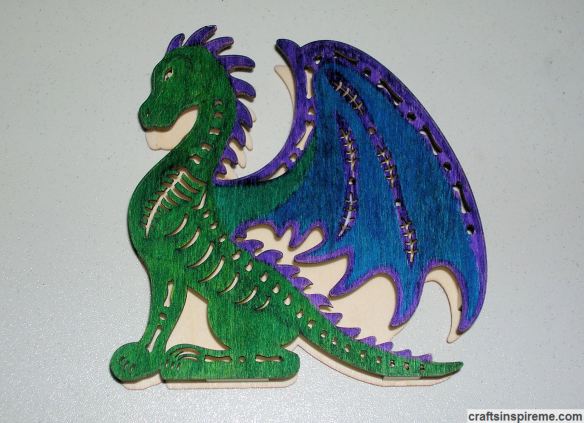
Apply Dark Green Marker

Dark Green Marker Body

Apply Dark Blue Marker

Lt Blue Marker Wings

Cover the original aqua wing with dark blue. I liked the color, but it appeared to be rather dull for such a magical beast. At this point, if you are satisfied with your dragon, you could stop. I like to experiment with different paints, as you will see below.

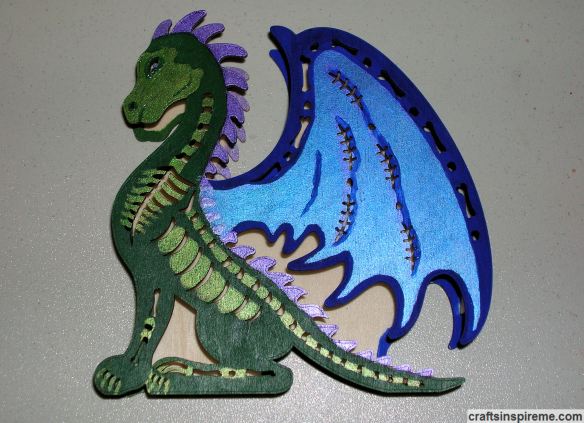
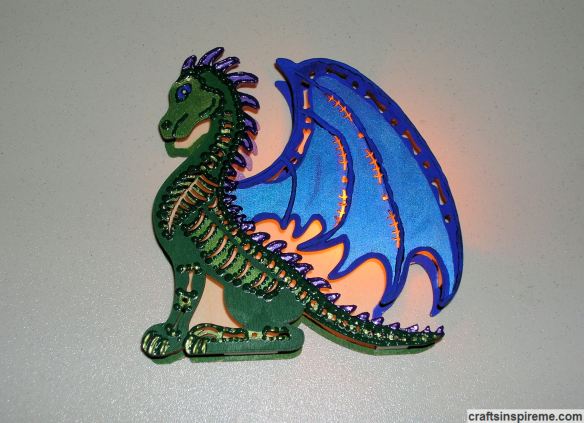
Paint Wing Metallic Light Blue

Metallic Blue Painted Wings

Paint Face and Body Details Metallic Green

Metallic Green Painted Accents

Paint Spines Metallic Purple

Metallic Purple Spines

Paint the spines metallic purple. Add facial details with green 3D paint. Paint the eye metallic blue and outline it in 3D green paint.

Add Textured Scales with 3D Paint

Dk Green 3D Scales

To make tiny scales, dip toothpicks in 3D green paint and lightly touch the wood surface creating a textured pattern.

Add Wing Veins with 3D Paint

Dk Green 3D Wing Details

Finished Dragon

Finished Dragon

Paint the wing veins blue and outline the spines with 3D purple paint.

Finished Dragon Close Up

Dragon Close Up

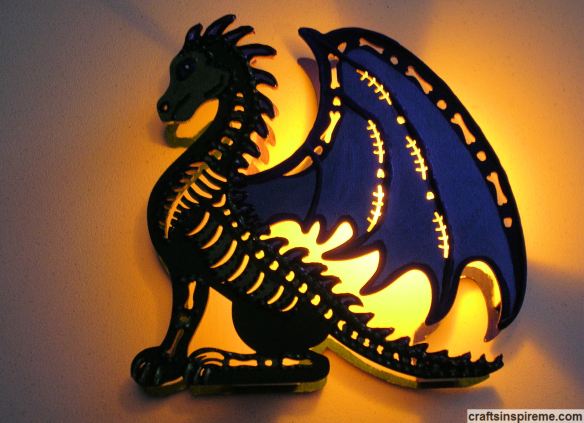
Dragon LED Lights Lit

Lit Dragon

Dragon Nightlight

Dragon LED Nightlight

This completes our dragon. It’s fun, colorful and functions as a night light too. I hope you enjoy it and feel inspired to explore the many creative options for your next project.

Thanks for Reading & Happy Crafting!

Tropical Splendor

Tropical Inspiration
Ah the tropics! I’m sure we all wish we could be basking in the sun on a tropical island -sand under your feet, a soft ocean breeze, and a cool fruity drink within reach. Our travel plans may be on hold for now, but we can dream. A tropical project may be just what we need to brighten the day and lift our spirits.

Inspiration
Tropical Inspiration
The thick vegetation and unusual wildlife is a constant reminder that this is a whole new world, and we are invited to come inside to explore.

Inspiration
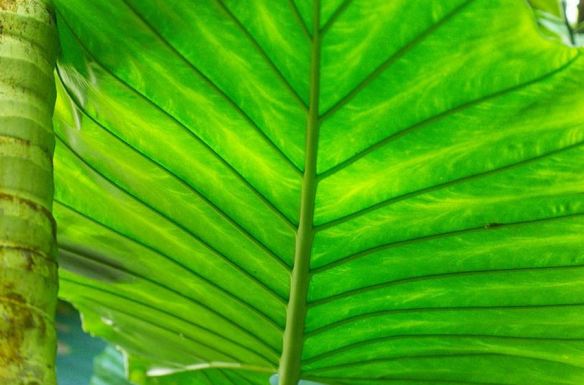
Close-up Tropical Leaf
There’s an infinite variety of foliage and tropical leaves provide many interesting shapes, intricate patterns and vibrant colors.

Original Metal Leaf Wall Sconces
In this project we will be refinishing these metal, leaf-shaped wall sconces. Purchased from an online home furnishing store, it was a great disappointment to open the box and discover their color schemes were completely mismatched. Because we liked the size and shape of these leaves, we decided to keep them anyway, with hopes of one day fixing the problem. That day is today!

Supplies
Paints
Supplies:
Metal Leaf Wall Sconces (18” high x 11-1/2” wide x 6-1/2” thick)
Acrylic Paint – medium green, dark green, yellow, and brilliant blue
Paintbrushes
Clear Spray Paint – gloss or matte finish

Paint the Base Coat
Leaves Painted Green
Step 1 – Paint each leaf medium green. They look better already. As you progress, remember this is your chance to experiment with colors as well as painting techniques. If you don’t like something, you can easily paint over it with another base coat and try again.

Choose your Color Scheme
Blue Wash vs. Blue Stippling
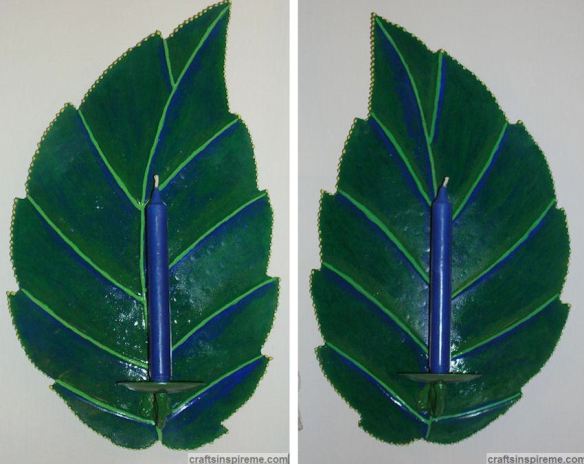
Step 2 –On the left, a blue wash was applied over the surface, using very watered down blue paint. The right leaf has a blue stippled pattern, made by applying blue paint with short brushstrokes. I like the light and shadow effect of the wash technique on the left, which provides depth and richness in the color, while also helping to define the leaf’s structure. The texture on the right leaf is interesting, but visually breaks up the surface, making it appear to be clustered leaves as opposed to one large leaf.

Define Light & Shadow
Highlight & Veining
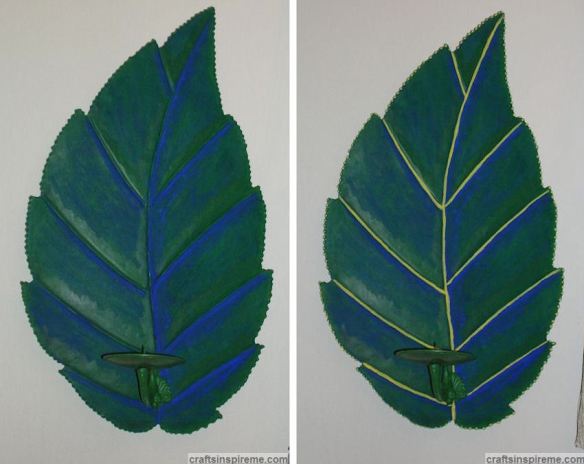
Step 3 – The position of the sun in the sky creates the marvelous effects of light and shadow. I chose to have the light coming from above on the left. This means the left side of each leaf is lighter than the right. Washes of blue and green were applied, with the darker hues upon the right side of each leaf. The veins were given dimension with blue shadows beneath, which lighten gradually as they approach the next vein below. The leaf photo on the right has light yellow veins. Other shades were tested as well.

Veining details
Finalized Colors
Step 4 – Bright green (a mixture of yellow and dark green) was applied to all the veins on both leaves. The beaded edge around the perimeter of each leaf was painted yellow.

Completed Flat Finish Leaves
Finish Option 1
Step 5 –At this point you could stop. I highly recommend spraying each leaf, front and back, with a matte finish clear spray paint to seal the paints. Before installing candles, please see the Crafter Tip below. For a gloss finish, please continue to Step 6.

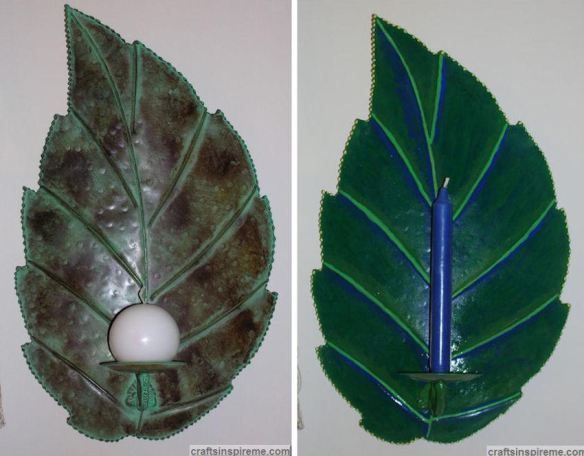
Flat Finish versus Gloss
Step 6 – Tropical islands have high humidity and frequent rain. To achieve that wet-look, you will need to spray a few coats of glossy clear spray paint. This photo shows the dramatic difference between the flat and gloss finishes. Notice how much more vibrant the colors become with the gloss finish.

Completed Gloss Finish Leaves
Finish Option 2
These are the completed tropical leaves with new navy blue candles.

Crafter Tip: Each wall sconce has a metal spike to hold a candle. If you try to push a taper candle down onto the spike, it will inevitably split the candle. How do I know? I broke two! To avoid this, pre-drill a hole in the bottom of each candle using a very thin drill bit.

I hope you enjoyed this makeover process. These steps can be applied to all kinds of home décor. You don’t have to settle for anything. Take out your paints and let your imagination bring crafts to life in your own personal style.

Thanks for Reading & Happy Crafting!

Problem Solving for Tree Frogs

Tree Frog
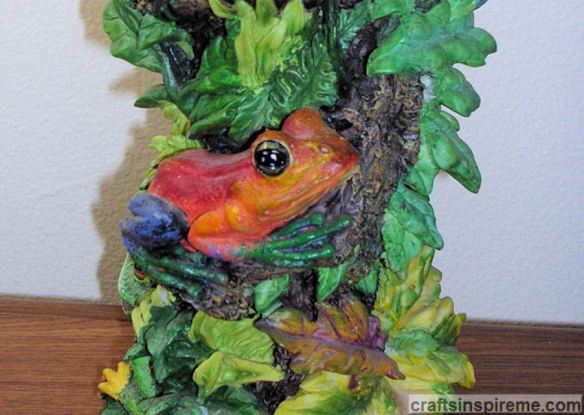
These beautiful candleholders were purchased many years ago in Sanibel Island, Florida. Unfortunately, there’s a hidden problem, and it’s not the tree frogs.
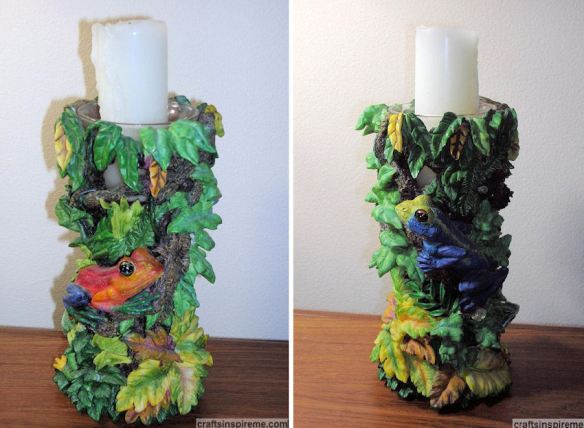
Candleholders Before
Thick layers of tropical leaves weave their way around the base with three colorful tree frogs crawling among the foliage. Can you spot the problem? If you think it’s the candles, you’re right!

Closeup Top Candleholder
As you can see from this photo, the glass top of each candleholder will only fit a votive size candle. Proportionally, they would look much better with tall slim candles but they just won’t fit. We’re going to change that! The same procedure can be followed for any candleholders you may have. Let’s get started!

Supplies:
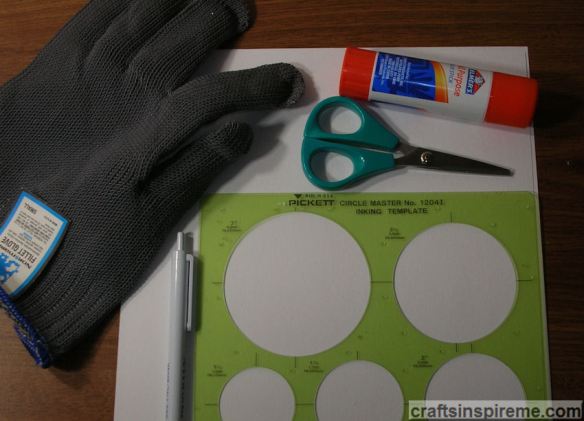
Candleholder Supplies
Supplies:
2) Candleholders
6) 12” Navy taper candles
Cardstock (See Crafting Tip in Step 1 for alternatives)
Glue stick
Scissors (or an X-Acto knife)
Fillet glove (optional protection when cutting)
Circle template
2) Rubber bands
Crinkle Paper (or mini glass marbles)

Additional Supplies:
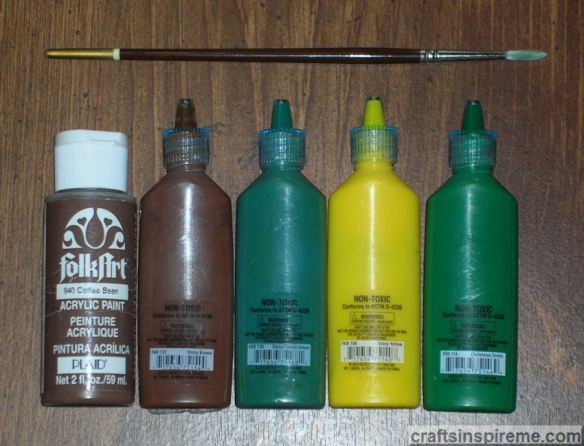
Candleholder Paints
Painting Supplies:
Acrylic Paint – brown
Bottles of fabric paint – brown, dark green, yellow, medium green
Paintbrush

Creating Candleholder Caps
Cardstock Circles & Glue
Step 1 – To accommodate slimmer candles, we need to create a cap for the top of each candleholder. Measure the top of the candleholder. If you are using cardstock, cut 3) small 2-1/2” circles, and 2) large 3” circles. Glue the small circles together, one on top of the other like a layer cake. Glue the two large circles together in the same fashion. Center the small circles on top of the large and glue them together. Repeat this step to make the cap for the second candleholder.

Crafter Tip: This project was completed during the Covid 19 lockdown. I had to work with what I had on hand. In hindsight, I believe caps made from matt board or a sheet of plastic would be more rigid, and would only require cutting out two circles, one for each candleholder.

Tracing the Candles
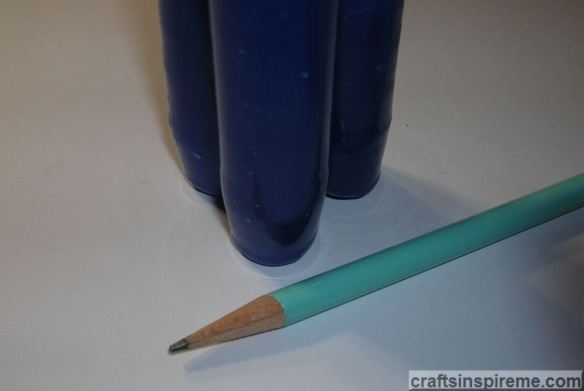
Trace Candles
Step 2 – I decided to use three 12” tall taper candles in each candleholder. Hold the three candles in the center of each cap and trace the shape with a pen or pencil. Cut out the center of each cap following the triad shape of the candles.

Finished Caps
Assembled Cardstock Caps
You now have two caps for the candleholders. Test each to ensure a good fit on the candleholders. Test-fit the candles for a snug fit in each cap. Make adjustments by trimming as needed. Because the taper candles vary in size, be sure to label the bottom of each cap with “L” for left and “R” for right to ensure the candles will fit in a later step.

Painted Base Coat & Glass Marbles
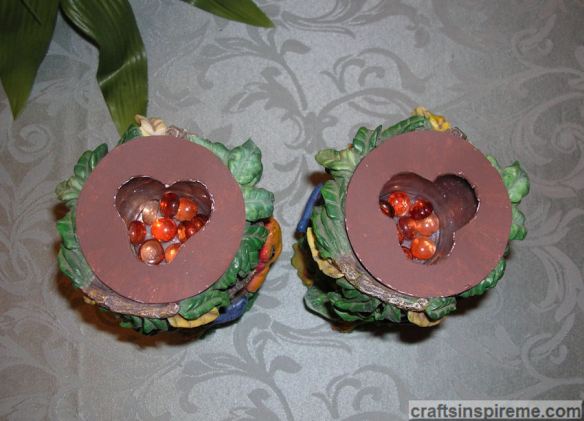
Cardstock Caps Painted Brown
Step 3 – Paint the tops and edges of the caps brown to blend with the branches in the base. You may need to add mini glass marbles or crinkle paper to the bottoms to adjust the candles to the desired height.

Candles in Caps
Banded Taper Candles
Step 4 – Slide the candles into the cap. Adjust the cap’s position as needed. Wrap the candles with a rubber band beneath the cap to secure their positioning.

Final Candle Placement
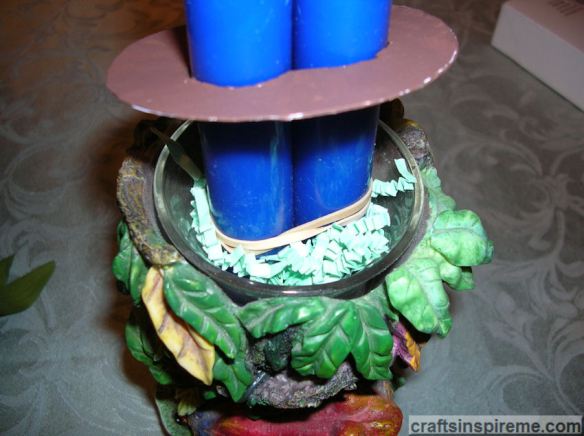
Fitting Tapers in Candleholders
Step 5 – Place the candles and cap into the top of the holder. Temporarily slide the cap up to fill the void with marbles or crinkle paper. This will stabilize the candles in an upright position. To ensure that the caps will stay in place, I tacked three spots along the edge of each cap with hot glue.

Crafter Tip: I found that the crinkle paper provided firmer support than the glass marbles, which have a tendency to shift.

First Layer of Leaves
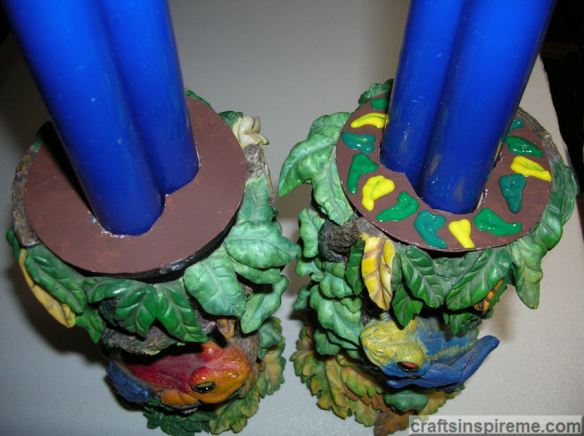
1st Layer Leaves
Step 6 – Create 3-dimensional leaves on top with fabric paint in colors similar to those found in the base.

Second Layer of Leaves
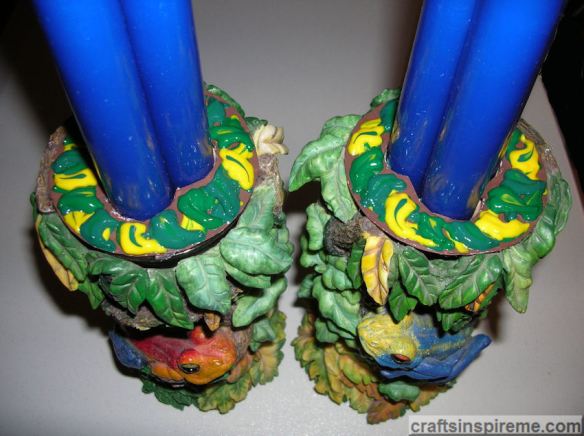
2nd Layer Leaves
Step 7 – Allow drying time. Add another layer of leaves overlapping the previous one.

Fourth Layer of Leaves
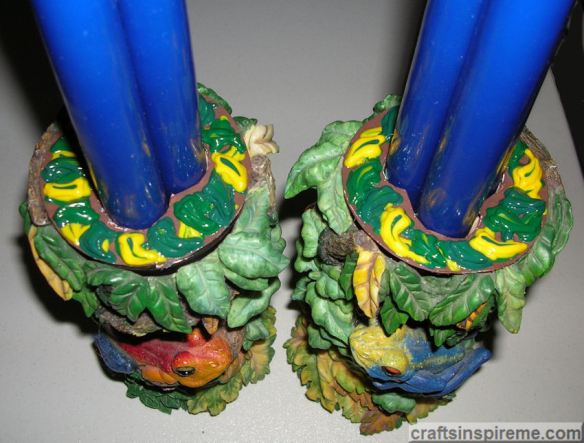
4th Layer Leaves
Step 8 – Allow drying time between layers. Add as many layers as you like to build up thick foliage.

Finished Candleholders
Completed Candleholders
These are the completed candleholders with their new candles.

Candleholders – Before & After
Before & After Frog Candle Holders
Note how much better they look with the taller candles. The blue candles and new three-dimensional painted green and yellow leaves accentuate the rainforest colors in the frogs and foliage.

When you can’t find the candles you need, it’s time to flex your creativity muscles. If you have had a similar creative challenge, please share your experiences in the comments section.

Thanks for Reading & Happy Crafting!
Crafting Day & Night

Eiffel Tower Day & Night

“As different as day and night” is a common expression. When we find ourselves stuck inside, we’re often looking for ways to be entertained. For many, crafting is the answer. A little effort goes a long way, and everyone loves seeing “Before” and “After” photos. These crafts will surprise and hopefully inspire you to create a little crafting magic of your own.

Sledding Centerpiece

Before:  Wooden Sled Wall Art.   After:  Snowman & Friends Centerpiece.
(Click here for how to instructions)

Foxy Santa

Before:  Misfit Christmas Decoration.   After:  Foxy Santa with new hat and tail.
(Click here for how to instructions)

Seashell Plaque

Before:  Drab Wall Art Print.   After:  Seashells, Sea Urchin & Starfish Framed Art.
(Click here for how to instructions)

Piggy Before and After

Before:  Colorless Pig Statue.   After:  Pink Pig with lots of personality.
(Click here for how to instructions)

Before & After Pumpkins

Before:  Faded Lawn Decoration.   After:  Bold Halloween Jack-O-Lanterns
(Click here for how to instructions)

Headless Dog Before & After

Before:  Snowman with Headless Dog.   After:  Restored Dog.
(Click here for how to instructions)

Light House Before & After

Before:  Incomplete Candleholder.   After:  New Lighthouse Roof & “Light.”
(Click here for how to instructions)

Octopus Before & After

Before:  Monochromatic Candleholder.   After:  Blue Ringed Octopus Sculpture.
(Click here for how to instructions)

Candlestick Before & After

Before:  Difficult Candle Size.   After:  Candleholder for Taper Candles.
(Click here for how to instructions)

Leaves Before & After

Before:  Dull, “Muddy” Wall Sconces.   After:  Vibrant Tropical Leaves & Candles.
(Click here for how to instructions)

I hope you enjoyed these projects. Take a look around your home for any items that could use a little refreshing. You’ll be amazed at what you can accomplish. Good Luck!

Thanks for Reading & Happy Crafting!

Countdown -Top Six Posts 2023

Hourglass Countdown

It seems we are always keeping an eye on the time.  Busy schedules and ever-growing “To-Do” lists often prevent us from stopping to review our accomplishments.  Let us take a few minutes to look back at the highest ranked posts, as voted by you, the readers. Below is a list of the Top Six posts of 2023, in ascending order: (Likes for posts 4, 5 & 6 were tied)

Number 6: The Beauty of Origami

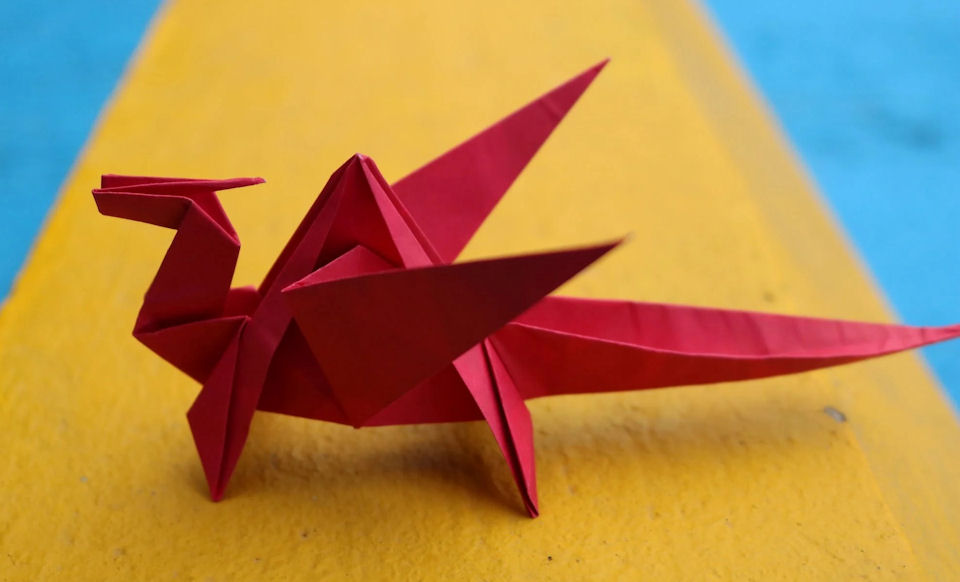
Origami Dragon

Origami is an ancient art of paper folding. Boats are one of the more familiar forms, but there is a wide variety of shapes, including animals, trees, and flowers.  To read more, please click here. 

Number 5: Eternal Spring

Painted Wood Butterfly Garden

As new blooms of spring dazzle us with their beautiful pastel or jewel tone petals, equally attractive butterflies gather the sweet nectar and flutter away like fairies in the wind.  To read more, please click here.

Number 4: Table Décor – Elements

Table Decor Color Scheme Red & Gold

Earlier this year, one of my followers requested a post featuring table décor inspirations for year-round events.  To read more, please click here.

Number 3: Muffin Fest 2023

Apple Cheddar Muffins

This week’s post celebrates the many flavors of muffins. Of course, we have all heard and hopefully tasted some of the classics, such as corn or blueberry muffins, but you may also find some new ones here to tempt your taste buds.  To read more, please click here.

Number 2: Table Décor – Designs for All Occasions

Table Decor Color Theme Red & Gold

Welcome to part two of table décor. Last week we reviewed the basic elements used in decorating tables. Today, we will see table designs for most occasions celebrated throughout the year.  To read more, please click here.

Number 1: Inspiring Cake Design

Sewing Machine Cake

A well-designed cake sets the tone (e.g., romantic, playful, humorous), or complements the theme (e.g., fairytales, natural wonders, hobbies, holidays) for every celebration.  To read more, please click here.

Seasonal Craft Projects

And there we have it – the top 6 posts of 2023.  We have a new year to explore the world of creativity.  There are always new ideas and I’ll be sure to include more of your favorites.  Your opinions are greatly appreciated, and I look forward to so much more this year.  If you have any suggestions for future posts, please let me know. 

Thanks for Reading, Happy New Year & Happy Crafting! 

A Crafter’s Nightmare Before Christmas

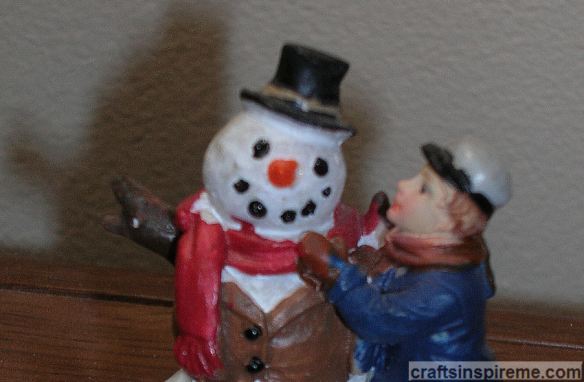
Snowman Detail
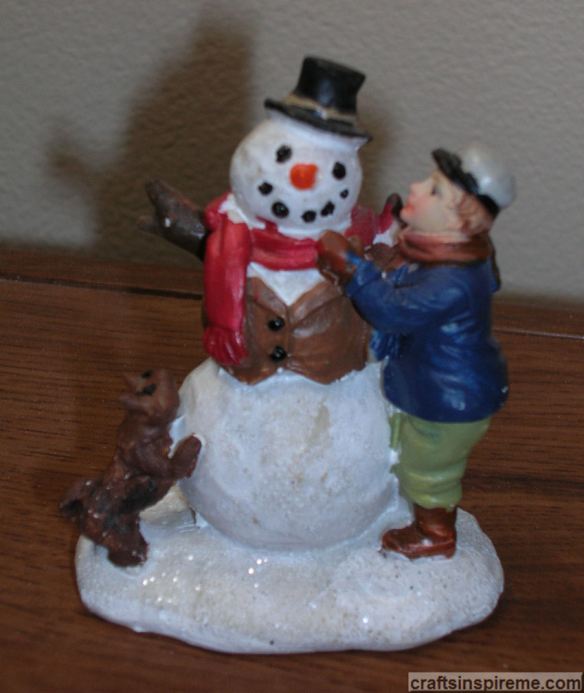
Many people enjoy expressing their creativity during the holidays, with decorations, gifts, etc. Although this happened at Christmas time, this funny story could happen any time of the year.  Did you ever buy something without noticing a major flaw?  I did, and it took a few days to notice.  I purchased several wintry figurines for use in a Christmas centerpiece.  There was a cardinal, a penguin, and an adorable polar bear.  I also chose a cute figure of a boy building a snowman, which resembled one of those warm family scenes in a Norman Rockwell painting.

Original Headless Dog
I set up the sleigh centerpiece and surrounded it with the new figures. There it sat in our family room for a few days. Occasionally I would look at it but didn’t notice anything amiss. Then one night, while watching television, I picked up one of the figures for a closer look. There appeared to be a snow-covered object leaning against the base of the snowman. What could it be? Maybe it was a tree stump or a rock?

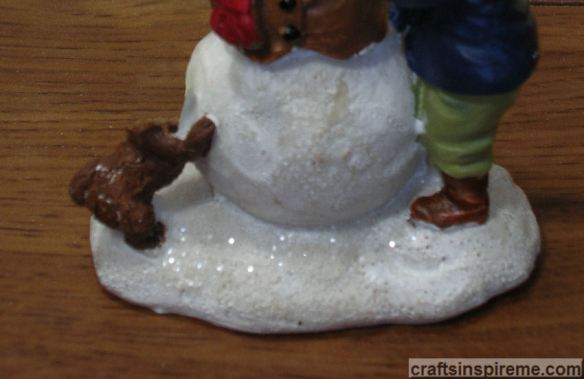
Close Up Headless Dog
Curiosity got the best of me. I held it under a lamp and was shocked by my discovery! It was a headless dog! Unless you happen to be Tim Burton, a headless dog is a little too macabre for such a festive season. The store where I purchased it was closing, and all sales were final. Maybe I could fix it myself, but how? I considered breaking off the rest of it, but that would most likely damage the snowman. I began wondering if I could create a new head using three-dimensional paint.

Headless Dog Painted Brown
Because the white dog was leaning against a white snowman, it was very difficult to see. To correct that problem, the first step was painting the dog’s body with acrylic brown paint. What a big improvement! He was actually a cute little dog if you overlooked the missing head!

New Dog Head
Next, using white three-dimensional paint, I built up a small head in proportion to the body. Because the dog was looking up at the snowman, the head needed to be angled upward. After allowing it to dry, I added the muzzle and the pointed ears with the same dimensional white paint.

Finished Dog
The last step was painting the new head with brown acrylic paint to match the body, and a toothpick was used to add black eyes and a nose. The completed dog looked very happy to be in one piece again!


The repaired snowman figurine had been restored to a Rockwell worthy appearance. Sorry, Tim, maybe next year – lol!

Did something like this ever happen to you? How did you fix it? Please share your experiences in the comments section.

Thanks for Reading & Happy Crafting!
This Little Piggy Gets a Makeover

Flying Pig
We’ve all heard the expression, “when pigs fly,” implying impossibility. Well, we won’t let that stop us from expressing our creativity!

Flying Pig Front
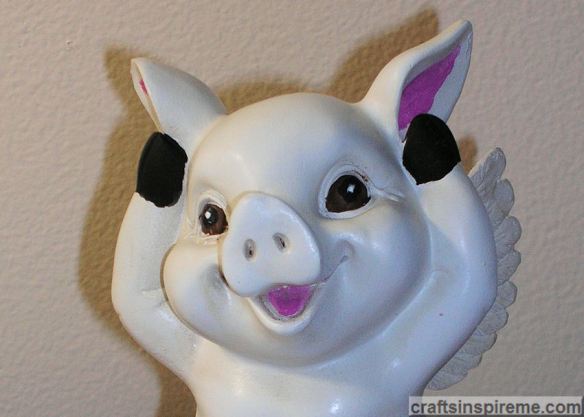
Sometimes you find your next art project in the most unlikely of places! I found this cute little winged pig at the local Rite Aid Pharmacy. Although it’s fine the way it is, I thought it would be nice to add some color. Break out your brushes and acrylic paints because we’re going to give this little piggy a makeover. In my excitement to get started, I had already painted the eyes when I realized I hadn’t taken a “Before” photo. In its original state, there was no color at all.

Flying Pig Back
Here’s a photo of the back. The wings are so cute.

Piglet
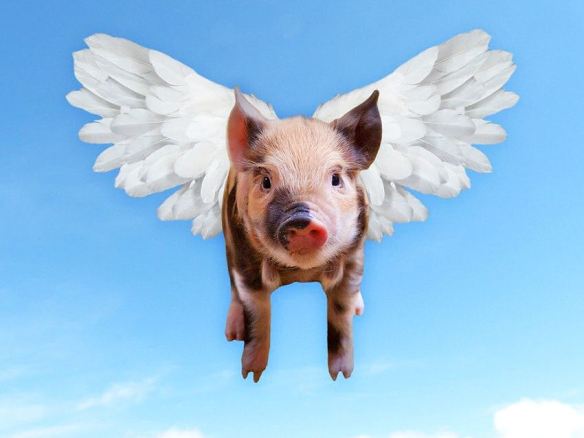
Before we get started, I found a photo of this piglet for inspiration. Please feel free to choose any colors you like. The mix of colors on the spotted pig featured at the top of this post would make a great color scheme as well.

Piggy Paints
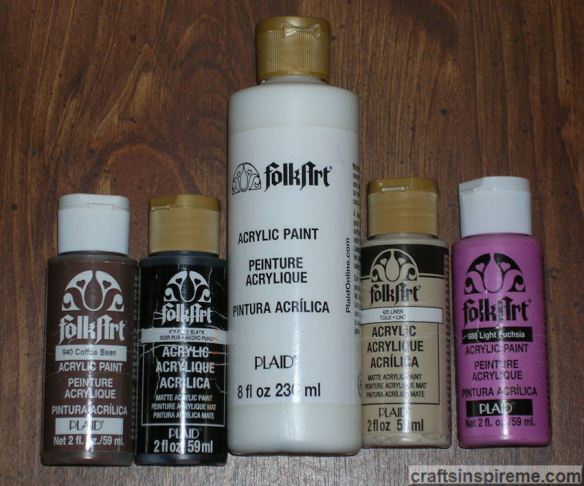
To complete this project, you will need several acrylic paints and two paint brushes (1 large & 1 small). Clear spray paint is optional.

Painted Pig Details
Paint the details first, including the hooves, eyes, tongue, and the inside of each ear.

Closeup Facial Details
Here is a close up of his smiling little face. The eyes are painted brown, with black pupils and a dot of white in each eye to create a lively expression.

Pink Pig Front
Because the black hooves seemed to be too much contrast, I changed the color of the hooves to tan. In doing so, the eyes become the focal point. Mix white and fuchsia together to create the desired shade of pink, and use it to paint the entire body, except for the end of the snout, which is unpainted.

Pink Pig Back
Here is the back photo. The wings are also unpainted. If you like a challenge, you could come up with a unique scheme for the feathers, possibly using iridescent colors. To protect the acrylic paints, the entire statue was sprayed with clear spray paint.

Piggy Before and After
Before                                                             After

This fun and easy project is inexpensive and can be completed in a very short amount of time. All drug stores have a seasonal section, which is marked down after every holiday and at season’s end by as much as 50% -75% off. There are some great options for adults as well as kids.

Thanks for Reading & Happy Crafting!

Pineapple Dreams

Pineapple Beach
We all dream of fun in the sun at the beaches on exotic tropical islands. Until vacation time rolls around again, we can find ways to bring a little sunshine into our homes and maybe a smile or two along the way.  This week’s project is a painted wooden pineapple.  As usual, we’ll need a little inspiration courtesy of Mother Nature.

Pineapple Colors
It’s amazing how many colors can be found in the outer skin of a pineapple.

Pineapple Texture
The complex textures and geometric patterns are beautiful.

Golden Pineapple
Pineapples have long been a symbol for hospitality. What could be a better way to greet everyone to your home than displaying a bright welcoming pineapple?

How to Paint a Textured Wooden Pineapple:
Pineapple CloseUp
Pineapple has such a wonderful texture that needs to be touched. By using fabric paints, you can create thick, 3-D effects with very little effort.

Raw Wood Pineapple
Raw Wood Pineapple
Thick wood has been cut out in the shape of a pineapple and has the advantage of strong, rectangular base. Both sides and all the edges will need to be painted. Due to the raw nature of the wood, it may require a little sanding, especially along the edges.

Supplies
Pineapple Supplies
Supplies:
Wooden Pineapple (11-3/8” high x 5” wide x 1/2” thick) (Base is 5” wide x 2” deep)
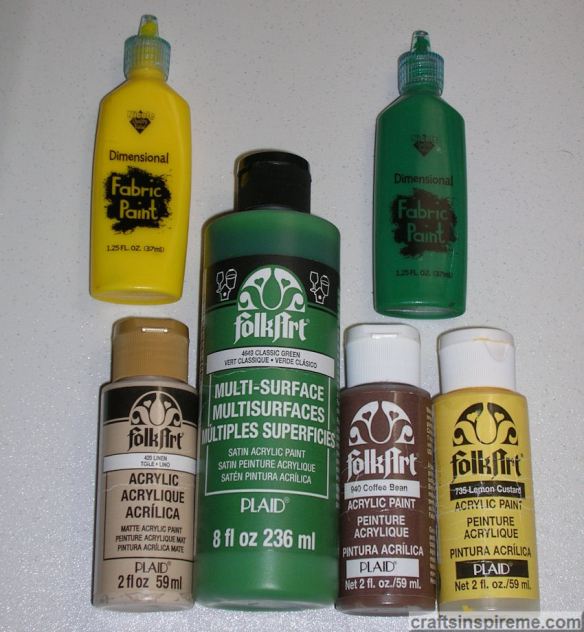
Acrylic Paints – brown, yellow, green, tan
5) Bottles Fabric Paint – dark green, yellow, white (not shown)
Paintbrushes
Sandpaper
Black Sharpie Marker or pencil

Paint Base Colors
Pineapple Ptd Base Colors
Using acrylic paints and a brush, paint the leaves green, the remainder of the pineapple yellow and the base brown.

Define the Leaves
Draw Pineapple Leaf Details
Draw the leaf details with a Sharpie marker or pencil.

Texture the Leaves
Pineapple 3D Leaves
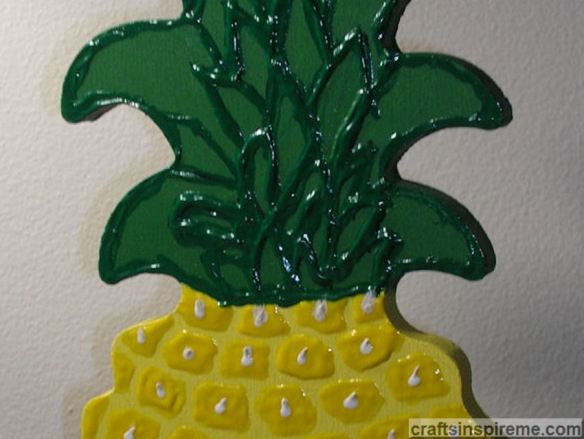
Trace the leaves with green fabric paint, including the perimeter edges. Allow the paint to dry overnight. Depending upon how thick you want the texture to be, it may require a second coat.

Texture the Pineapple
Pineapple Texture1
Starting at the base of the leaves, paint two horizontal rows of irregularly shaped rectangles with yellow fabric paint.

Directional Texture
Pineapple Texture2
Continue painting the yellow texture, working on a diagonal as shown. I started in the upper right corner and staggered the shapes, which get larger as you work toward the bottom.

Completed Yellow Texture
Pineapple Completed Texture
This photo shows the completed yellow texture. Allow it to dry overnight. If you accidentally get yellow paint on the brown base, simply touch up the paint as needed. It’s now ready for a few finishing touches.

Little Details
Pineapple Texture Detail
To complete the look, make a dot in the center of each yellow “block” and create an upward stroke of paint, which narrows to a point. Repeat this step across the entire yellow pineapple surface. Allow drying time. For the last step, use a tiny brush to apply tan acrylic paint to the tip of each white point.

Finished Pineapple
Pineapple Finshing Details
This completes the textured pineapple project. I hope you enjoyed it.

Have you painted any wooden home décor items? Do you have any secrets for creating texture? Please share your ideas in the comments section.

Thanks for Reading & Happy Crafting!