Pumpkin – Baking with Seasonal Flavor

Pumpkins
After Halloween has come and gone, you might be wondering what to do with all those leftover pumpkins. Whether you prefer fresh or canned pumpkin, there are plenty of delicious ways to enjoy this seasonal favorite. There’s nothing like the mouth-watering aromas of homemade cookies and pastries, straight from the oven. It may be a cold fall and winter, but you can warm hearts and bellies with a lot of love and a few easy recipes.

Iced Pumpkin Donuts
Iced Donuts
To save you time and ensure success, the baking section of your local craft store has a large selection of pans, including bundt cake, cupcakes, muffins, jelly roll, etc. One of the more unusual pans is for baking donuts. Since no deep fryer is required, anyone can bake donuts at home, and the same pan can be used to make bagels too.

Pumpkin Bundt Cake with Vanilla Frosting
Bundt Cake
A fluted pan is the secret to the bundt cake. This photo shows the standard version of a bundt cake with icing drizzled over the top. If you really want to impress your guests, prepare an unexpected surprise by adding filling. To do this, pour half the batter into the pan. Spread the filling around the pan, ensuring it does not touch the inner or outer edges of the pan. Pour the remaining batter on top and bake. When the cake is sliced, the unusual profile of the slice will be enhanced by a colorful creamy center.

Homemade Pumpkin Bread
Pumpkin Bread
Pumpkin bread needs to cool before slicing. By refrigerating the loaf, the bread becomes moist like a cake. Toasted pumpkin bread is delicious with melted peanut butter. Metal pans are fine, but for baking bread I prefer a ceramic loaf pan. I don’t know about you, but the sound of metal scraping makes my skin crawl. Ceramic cleans up easier too.

Spiced Pumpkin Roll with Orange Cream Cheese Icing
Pumpkin Roll
A spiral design is the hallmark of this impressive dessert, but it’s easy to make, and will melt in your mouth. Bake the cake in a jellyroll pan lined with parchment paper. After baking, lay the cake face down on a towel. If necessary, trim any ragged edges. Starting with a long side, roll the cake in the towel and cool completely on a wire rack. Unroll and remove the towel, and lay cake flat. Spread the filling over the top within 1/2” of the edges. Suggested fillings include whipped cream, pie filling, and pudding. Carefully roll the cake and place it with the seam side down on a platter. Garnish as desired.

Pumpkin Muffins
Pumpkin Muffins
Pumpkin muffins are delicious as is, or shake a little powdered sugar over the top. Sometimes the simplest version is the best.

Pumpkin Cheesecake with Whipped Cream & Graham Cracker Crust
Pumpkin Cheesecake
Cheesecake is a dessert menu staple. The only bad thing about pumpkin cheesecake is that it’s only available from October through January, or February if you’re lucky. Beyond that you’ll have to wait until the next pumpkin season.

Walnut Pumpkin Pie with Whipped Cream
Walnut Pumpkin Pie
A pastry bag and fresh whipped cream will dress up any baked goods, but it’s just as easy to use a can of whipped cream. For best results, practice a few floral shapes first before tackling the final product.

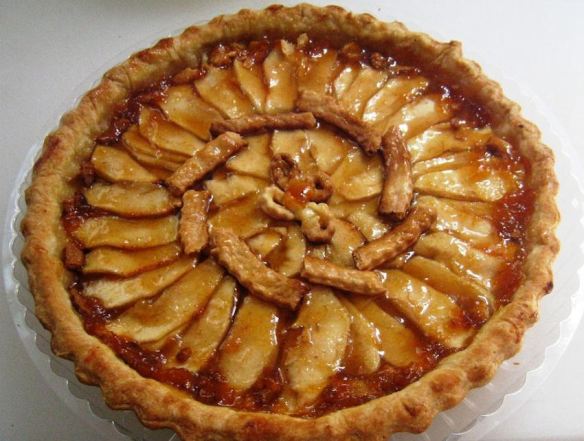
Traditional Pumpkin Pie with Homemade Crust
Pumpkin Pie
Pumpkin pie typically has a delicious flaky crust. This baker created a pretty undulating pattern with the crust and garnished the top with a leaf cut from the same pastry crust. There are some really cool baking tools, such as fluted piecrust cutters for edging, and spring-loaded piecrust cutters to create cutouts or appliqués, like the leaf shown in the photo above.

Chocolate Drizzled Pumpkin Pie with Chocolate Crust
Pumpkin Tart
This contemporary pumpkin pie has a chocolate graham cracker bottom crust, and a pumpkin cream cheese filling. For a no-bake version, buy a ready-to-use crust.

Savory Pumpkin Soup
Pumpkin Soup
Like butternut squash, pumpkin soup gets its savory flavor from rich heavy cream and just the right amount of seasoning from ginger, cinnamon, onion and celery.

Pumpkin Pancakes
Pumpkin Pancakes
Do you love pancakes but are bored with the same old taste? Boost the flavor and your taste buds by adding 1/2 cup of canned pumpkin for every 2 cups of batter.

Homemade Pumpkin Pudding
Pumpkin Pudding
Deep-dish pumpkin pudding tastes delicious while still warm from the oven, or chilled and served with fresh whipped cream. If you’ve never had it, the top and edges have a cake-like texture, but the rest is creamy pudding with that awesome pumpkin flavor. If your favorite part of a pumpkin pie is the filling, this pudding will be your new go-to dessert.

Baking is a fun and rewarding activity to be shared with the whole family. Enjoy the process and remember you can always eat your mistakes.

Happy Crafting!

Pets Celebrate Halloween Too!

Ghost Dogs
Every Halloween, you decorate your home and dress in costume, but don’t forget to include your furry friends. You could make the costume yourself. Scissors and some old sheets will do the trick. Or it may be easier to buy from crafts stores, Halloween stores and of course online too. Below are several pets “hamming” it up for the camera in their Halloween’s finest costumes. Enjoy!

Cowboy Dog
Leading a parade in a covered wagon is a tough job, but this cowboy is up to the task.

Bear Cat
What a difference the right hat can make!

Princess Dog
This cute poodle will be the belle of the ball in her elegant evening gown.

Pumpkin Dog
The best pumpkin in the patch has a very cheerful personality.

Bunny Cat
It may be Halloween but you can still dress up as the Easter Bunny.

Pumpkin Dog
Larger dogs like to celebrate too.

Sailor Cat
Who says cats don’t like water? This handsome boy is ready to sail the seven seas.

Spider Cat
Arachnophobia is a very common fear, but this little guy is just adorable.

Bewitching Dog
Something magical is always brewing with this bewitching little lady.

Pirate Bear
Don’t have a pet? No problem! Put a costume on your favorite stuffed animal. This Vermont Teddy Bear is wearing a Build A Bear pirate costume, which included the eye patch, sword and parrot. How cute is that? These costumes will fit any 10” to 14” plush animal of your choice.

The family that plays together stays together, including our pets. With everyone in costume, you won’t be able to resist taking pictures to commemorate the occasion.

Happy Halloween & Happy Crafting!

Glowing Eyes in the Darkness: Jack-O-Lanterns

Spooky Pumpkin
It just wouldn’t be Halloween without a few carved pumpkins, also known as Jack-O-Lanterns. Patterns are readily available online, or you can flex your creative muscles by coming up with your own designs. What does your pumpkin say about you? Here are a few ideas to get you started.

Carved Pumpkins
From the goofy to the spooky, there’s something for everyone.

Pumpkin Trio
There are numerous options for lighting your pumpkins: Lit candles flicker in the breeze. LEDs produce high intensity and sometimes color-changing light. Glow sticks give off softer, otherworldly light. Spotlights and flashlights light up the face while also creating some eerie dark shadows inside the pumpkin.

Awestruck Pumpkin
Even pumpkins have moments of surprise and awe. I wonder what he sees?

Monster Pumpkin
Little details make all the difference. This carved pumpkin owes its devilishly good looks to the absence of a nose. That one little detail, plus the intensity of the light within, gives him a more ghoulish appeal.

Jaws Pumpkin
This one brings a whole new meaning to the name “Jaws.” After carving the teeth, the orange skin around the perimeter of the mouth was removed to reveal the white flesh beneath. If that seems like too much work, you could use a white Sharpie marker to define the mouth.

Jack Skelleton Pumpkin
Nightmare Before Christmas is a very popular Halloween movie and decorating theme, and this pumpkin doesn’t disappoint. A little dry ice, or a fog machine takes the spooky vibe to a whole new level.

Cat & Spider Pumpkin
Cat lovers will appreciate this creative design. Black cats and spiders are staples in Halloween décor.

Scary Pumpkin
This frightening character has menacing eyes surrounded by flames above and below.

Scary Ghost Pumpkin
This ghoulish ghost is another Tim Burton inspired design from his nightmare movie.

Pumpkin Happy Hour
It’s Happy Hour for Jack-O-Lanterns only! Honestly, if I saw a gathering like this in my backyard, I would probably run away! It looks like a scene from a Steven King movie.

Pumpkin carving isn’t for everyone. There’s also nothing wrong with displaying your pumpkins “as is” with the added bonus of being able to keep them on display for Thanksgiving too.

Painted Pumpkins
If you like to paint, you could paint designs on real or artificial pumpkins. These decorated pumpkins can be accomplished with a few Sharpie markers, and they will last longer than the carved variety.

Lamppost Pumpkins
Another great option is painting a wooden plaque like the one shown above. It can be used for years and is very inexpensive to make. Over time, the sun, wind and weather can take their toll. Whether you are painting a brand new pumpkin, or giving a makeover to an existing one, the steps are the same.

How to Paint and /or Repaint a Wooden Outdoor Halloween Decoration:

Supplies:
Wooden Pumpkin Decoration (30” high x 22” wide x 1/2” thick)
Orange Outdoor Spray Paint – OR – Orange Outdoor Acrylic Paint (See Step 2)
Outdoor Acrylic Paint – black, green & brown
Paintbrush
Sandpaper
Black Sharpie Marker

Faded Original Pumpkins
Step 1 – First you will need to clean off the dirt and debris, and lightly sand the surface and edges in preparation for paint.

Orange Spray Paint
Step 2 – You have two painting options here: Spray Painting versus Brush on Painting.
For Spray Painting: Apply multiple coats of orange outdoor spray paint. To be honest, I’m not a fan of spray paint due to the toxic fumes.  I also was not satisfied with the paint coverage. I’m not sure why, but the consistency was very thin like water.

Three Coats Acrylic
For Brush on Painting: – Apply 3 coats of orange outdoor acrylic paint with a brush. Be sure to coat all the edges and the back of the plaque as well to protect and seal the wood from water damage.

Green & Brown Details
Step 3 – Add details such as stems, leaves, and the surrounding ground at the edges. You may want to outline the details first with a Sharpie marker.

Black Lines
Step 4 – Draw the faces and add curved lines to give the pumpkins a three-dimensional effect. Outline the leaves and stems in black to make them stand out better.

Black Paint
Step 5 – Fill in the faces with black paint.

Before & After Pumpkins
After spending a day at the spa, these pumpkins have been renewed, rejuvenated, and are ready to greet your guests at the door. The choice of pumpkins is up to you. Whether you decide to use real, artificial, or any other material, the enjoyment and celebration of the holiday will always come through in festive style.

Happy Halloween & Happy Crafting!

Halloween Decorating Tips – Part 2

Jack-O-Lanterns
Spooky story telling around the campfire, frightful decorations haunting the yard, and fanciful costumes excite and delight, as bags are filled with candy and laughter drifts upon the air. Halloween will soon be here. Celebrate this popular holiday and dance like nobody’s watching! First you’ll need a few decorative ideas to set the stage for your celebration. Let’s get started…

Lantern
Many people enjoy the warm summer nights by candlelight. With Halloween approaching, transform your lanterns into Halloween décor by adding a few decals to the glass.

Moody Lighting
Lighting is so important to setting the mood. Carved pumpkins can be lit with standard candles or opt for the battery operated flameless variety. Luminaries can be made from glass jars and decals or simply draw a design with Sharpie markers.

Skeleton
Tombstones and skeletons are a Halloween classic. This one has a more menacing appearance with its glowing red eyes and the bright light from below, giving the impression he’s climbing out of his grave.

Alien Pumpkins
If elaborate carving seems a bit too daunting, these mini pumpkins will make you smile.   Cut out a rectangle in the front, large enough to fit plastic teeth as shown above. Draw eyeballs or use olives as an alternative. Attach the eyes with toothpicks and you have silly extraterrestrial pumpkins to delight your guests. Green pumpkins would be even better!

Caged Pumpkin
Do you have an old cage in your garage? People can’t resist looking, wondering what’s hidden inside. A glowing pumpkin in a dark cage will certainly keep them guessing. To kick the fear factor up, you could carve a big bite mark in the side or add some jagged claw marks.

String Lights
Strings of orange lights are perfect accents on decks and patios for railings, pergolas, and arbors. There is a wide variety of bulb shapes and sizes, and the LED strands will last a long time.

Bat Silhouette
Silhouettes of bats, crows, spiders and more are readily available online. Print out several, cut them out and tape them inside your front windows. The lights in your home will provide the eerie glow they need to be seen every evening.

Castle
Having a party? Create a castle using a roll of pre-printed blocks. This one was “built” along walls and around a china closet. Crenulations were cut in the top for the true castle experience. Owls and other figures were perched on top.

Castle Gate
It wouldn’t be a castle without a menacing gate. To make one, cardboard toilet paper tubes and a long box lid were shaped, assembled, and painted black.

Mirrored Snakes
Seeing double? A rubber snake dangles from atop this mirror. At times it’s a little difficult to tell which one is the reflection.

Spider & Gourds
Strange gourds make their debut in the fall. Combine a few with rubber spiders, snakes, rats or any other creepy crawlers you care to include. Be sure to include a few critters on your food table as well. It will keep your guests on their toes.

Pumpkin Cookies
There are plenty of opportunities for Halloween themed food at your party.

Pumpkin Glasses
Beverages can be served in cups and glasses decorated with festive faces, created with Sharpie markers or Halloween decals.

Spider Web Cupcakes
Spiders appear to have spun webs across this tabletop and over the cupcakes on this dessert table.

Witch Pumpkin
A simple pumpkin becomes a bewitching character with the perfect hat. A glow in the dark tablecloth can be used as a wall hanging.

Funny Skeletons
Not all skeletons are scary. This clever homeowner has a wonderful sense of humor with this updated version of “Hear no evil – Speak no evil – See no evil.”

From kid-friendly Casper the Ghost to a nightmare on Elm Street, there’s Halloween décor for every party, home, or office. Over time you will collect an interesting collection of favorites. Decorating for Halloween is fun for the whole family, and you will enjoy your handiwork all month long.

Be sure to check out part 1 of this article for more Halloween Decorating tips.

Happy Halloween & Happy Crafting!

Halloween Decorating Tips

Pumpkins by Candlelight
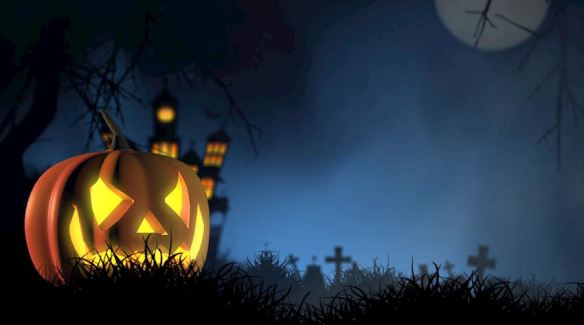
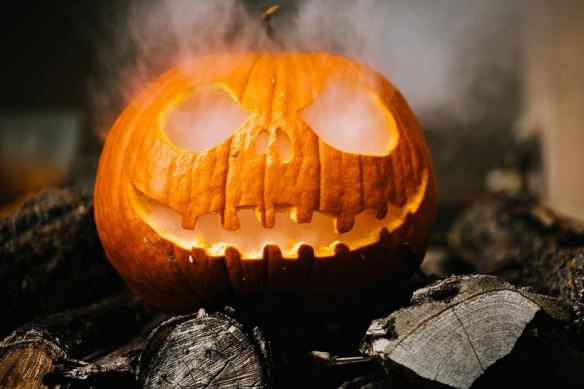
One of my favorite holidays is Halloween. It brings back such happy memories of dressing up as a child, and the excitement has continued as an adult. Apparently many people agree, because Halloween has become the second biggest holiday of the year. Decorating your home is a fun activity for the whole family. Here are a few ideas for inspiration:

Halloween Wreath
Halloween WreathGreet your guests at the front door with a boldly decorated Halloween wreath. The humorous witch’s legs were the inspiration for the purple and black color scheme with accents of orange and white. The wire wreath frame was wrapped first with tissue paper to add bulk, and then fabric for color and texture. The witch’s legs came mounted on a dowel, which was secured to the frame. A metallic garland conceals the dowel and an owl was tied in the center using matching ribbon. The witch’s hat, ghosts, pumpkins, and spiders complete the design.

Spider Web Placemat
Spider Web Placemat

Pumpkin Placemat
Pumpkin Placemat
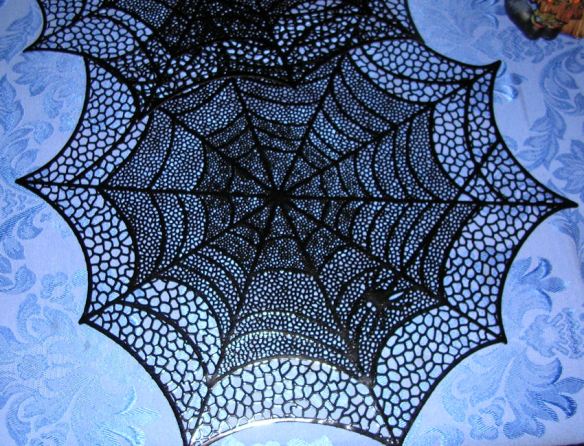
Setting a Spooky Table – Whether you are having a Halloween party, or want to spice up your breakfast table, an inexpensive solution is layering placemats. Laser cutting technology has produced beautifully detailed, lace-like products with both style and durability. A Spider Web placemat (from Wegmans) was layered with a Metallic Finish Pumpkin placemat (from AC Moore) to create this lively place setting. The blue tablecloth peeks out from underneath like a midnight sky and creates great contrast to the orange and black. As alternatives, you could use a yellow tablecloth (think full moon) or green tablecloth (think forest).

Arachnophobia? No Problem with this tablecloth.
Spider Table CoverHalloween themed tablecloths can be difficult to find and pricey, especially for large dining room tables. There’s an easy alternative. Measure your table, and go to a fabric store, such as Jo Ann Crafts. It’s amazing to see some of the scary patterns that have been developed over the last several years. The semi-sheer fabric in the photo above is layered over a gold tablecloth I already had. If you prefer an opaque table cover, there are ghosts, skeletons and witches. Oh My! Some fabrics have entire haunted scenes emblazoned across the surface suitable for covering tables, or as wall hangings. There’s no need to hem the edges. It’s Halloween – a few ragged edges only adds to the haunted house vibe.

Inside Out Pumpkin
JackolanternGlowing Illusion Pumpkin – We are all accustomed to seeing the typical orange pumpkin with an interior that is either candlelit or dark & shadowy. That color scheme has been turned inside out by painting the outside black and the inside fluorescent orange. When placed near any light source (lamp, ceiling light, or sunlight), the result is a scary glowing pumpkin without the need for electricity or batteries. I can’t tell you how many times well-meaning co-workers have warned me about the company’s strict no candle burning policy, until they see for themselves that it’s completely empty. It’s easy to fool the eye with this illusion.

Pumpkins for All Seasons
Craft Pumpkin
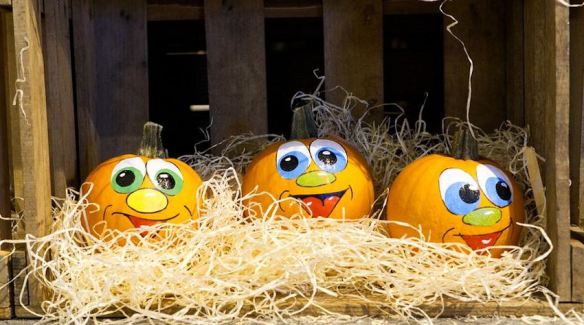
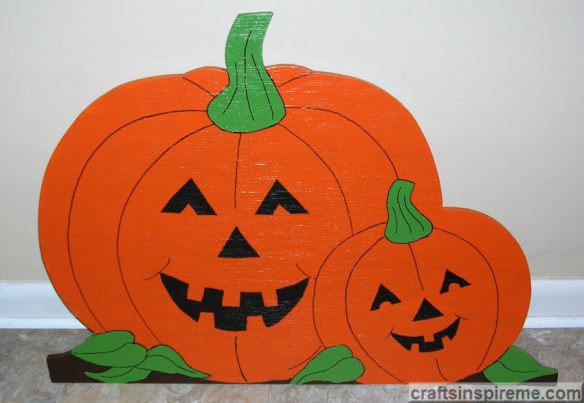
Craft Pumpkins – If you have ever decorated your yard with live pumpkins, you probably lost a few, if not all, to squirrels, slugs or other hungry critters. Craft pumpkins look like the real thing, but are made of foam or resin, which is not on the menu for wildlife. These pumpkins are ready to display as is, or they can be carved or painted with exterior paint. Craft pumpkins are for indoor and outdoor use, inexpensive, will last years, and are nice for Thanksgiving too.

To the Bat Cave! (which in this case is a Chandelier)
Bats & OwlBats – A cluster of bats hanging over your table will surprise and delight party guests. The faux fur bodies are a simple tube shape with a slightly larger, rounded end and ears for the head. The owl in the center is from Pier 1, and the pumpkin garland is from AC Moore.

Bat Making Instructions:
Supplies:
Brown or black faux fur (from Jo Ann Crafts)
Shiny black fabric (for wings)
Fishing tackle
Sewing needle and black thread
Foam filler or batting
Cardboard (for pattern making)

Bat Wing & Body Patterns
Bat PatternsMake patterns for the body and wings as follows:
Draw a thick capital letter “T” on cardboard – vertically 6” x 2”; top of “T” is 4”x 1” thick.
Carefully cut it out. This will be the pattern for the bat’s body.
Draw a bat wing on cardboard, approximately 9”x4. Cut out wing. Now flip it over, trace onto cardboard, and cut it out for the other wing.

Finished Bat
Finished BatUsing the body pattern, cut out two pieces of faux fur for the front and back of each bat.
Sew the fur by hand, leaving the bottom open for filling later.
Trace each bat wing pattern onto shiny black fabric and cut out both wings.
Hand-sew the wings on either side of the body; fill it with foam or batting and stitch closed.
Remember bats hang upside down, so add fishing tackle on the bottom of each bat for hanging from a chandelier or wall sconce.

Please click here to see part 2 of this Halloween decorating article.

Happy Halloween & Happy Crafting!

Eye Candy & Memories – Creating Collages

Camera Collage
A collage is a themed grouping of images artfully arranged on poster board or mat board. This clever piece has a camera “lens” in the center of photographs placed in concentric circles. Although it’s a visually interesting composition, the individual photos would be difficult to view, especially since the majority are sideways or upside down.

Butterfly Collage
Themes can include anything from vacations, family photos, nature’s beauty, or anything else that inspires or brings you joy.

Water Lilies Collage
The first rule of collage making is…there are no rules! Anything goes! The background can be white or any color you prefer. You may want to overlap the images in a freeform design, or divide the board into a grid, showcasing each individual photo.

Postcard Collage
When you travel, you often collect magazines and postcards as souvenirs, which typically end up stuffed in a drawer. Why not create a collage? Every time you walk by you’ll relive your vacations.

Fabric Elephant Collage
Collages don’t have to be limited to photographs. Here’s an example of a fabric collage in the shape of an adorable elephant. The blue mat board complements the fabrics and brings a cheerful element to this playful character.

Seashell & Feather Collage
You could also use silk flowers, leaves, feathers, or seashells. When using heavier materials like seashells, be sure to use a strong backer board for support.

Duck Collage
If you prefer more organization, the geometric precision of a grid can be created using a T-square or a ruler and triangles. In the above example, white space around each photo defines the composition.

Travel Collage
For a freeform collage, lay the photos out upon the board, make adjustments until you’re satisfied with the arrangement, and then glue the photos down one at a time with Elmer’s Glue Stick.

French Sightseeing Collage
Usually poster board, mat board, or collage board serve as backing, but you could also use a wood plaque, a shadow box frame, or a framed slate board. Whatever you choose will personalize your creation. If you plan to frame the finished collage, be sure to select a board size that will fit into a standard frame.

Seasonal Fall Collage
Scrapbooking paper can be used to add colors, patterns and textures (e.g. faux wood grain), to an otherwise plain background. You could also hand paint details.

Collage Frame
If cutting out pictures and gluing them down seems like too much work, the simplest and quickest way to create a collage is by using a collage frame. Place a few photos in the frame and your done. No muss or fuss!

Scrapbook Vision Board
If wall space is limited or you prefer a more portable option, a scrapbook collage (vision board) can be developed over time. As your dreams and goals come true, there are plenty of additional pages for future inspirations.

How to Make a Collage / Vision Board

A vision board is a collage with goals and dreams to be manifested into your life. It gives you a daily reminder to focus your thoughts upon making your dreams come true.

Supplies:
Photos, postcards, color copies
Scissors
Elmer’s Glue Stick (All Purpose is permanent, or the Washable formula is adjustable)
Poster Board or Mat Board
Poster Frame (optional)

Magazines
Collect brochures, magazines, photos, and color copies of your wishes and dreams. Carefully cut out the pictures. It’s fine to have an assortment of various sizes, because these will fit together like puzzle pieces with overlapping edges. Lay the images upon your board. Move them around until you feel the composition is coming together. Think about the colors, contrasting textures, and patterns. It’s okay to have empty spaces.

Preliminary Vision Board
This photo is a progress shot showing the initial photo layout. Glue each image in place. Now fill in the gaps with smaller photos or inspirational words.

Completed Vision Board
Layers were added to enrich the composition, which completely covered the background. After leaning this vision board against a wall for a few weeks, it was inspirational, but the poster board was starting to bow. I had a new 24” x 36” gold metal poster frame, and decided to use it for the vision board to protect the images behind glass and to give it a more finished look, ready to hang upon the wall. I had to add approximately 8” to the length of the poster board on the right side to fit the oversized frame. Additional images were then added to blend with the existing. Now that it is framed, this simple project has become an attractive piece of art.

What kind of collage are you thinking about making? Do you have a theme in mind? Please share your ideas in the comments section.

Happy Crafting!

Spring Cleaning the Craft Studio

Organized Art Supplies
Spring is a wonderful time for renewal. We all like getting a fresh start. To that end, I decided the Crafts  Inspire Me website needed some freshening as well. Please check out the new “Crafts by Topic” page. It is divided into categories, similar to the departments found in a craft store, to make it easier to find the types of projects that most interest you. Here is a small sampling:

Baking & Candy Making

Beaded Jewelry & Gemstones

Floral & Home Decor

To see the new Crafts page, please click here. You will also find a new page entitled, “Color Theory,” which contains information on the magnificent variety of colors in this world, and their effects on our daily lives.   I hope these changes will inspire and entertain you. Please let me know what you think in the comments section. In case you missed a recent post, there is also a “How To Projects” page with complete instructions for all kinds of creative projects. As always, questions and suggestions for future projects are welcome. Thanks for reading.

Happy Crafting!

Save Room for Dessert

Assorted Desserts
There’s a reason they say: “Life is short. Eat dessert first.” It really is the best part of the meal. Now that spring has arrived, there will be plenty of entertaining opportunities. Why not offer to bring dessert? Many people don’t realize that craft stores have large baking departments with specialty pans, cake decorating tools, glassware, cake plates, fondant and many other useful tricks of the trade to make your desserts the hit of the party.

Apple Pie
Apple Pie – Hot apple pie a la mode is a favorite any time of year. Layering the apple slices across the top in a creative spiral design adds to the visual appeal.

Birds Nests
Chocolate Birds Nests – Kids and adults love the taste of Rice Krispie Treats but these have a wonderful springtime chocolate twist. Simply follow the recipe using chocolate rice cereal.  Drop spoonfuls into cupcake wrappers and shape into nests. For the finishing touch, place a few malted milk eggs or jellybeans on top as eggs.

Brownie
Brownies with Heart – Everyone has a recipe for brownies. To make them extra special, bake them in a specialty pan with individual compartments. Cut out a paper heart and set in on top, and then sprinkle with powdered sugar. It’s so much more impressive than the usual square cut brownie.

Caramel Flan
Caramel Flan – This delicious egg custard has a caramel glaze poured over the top.

Raspberry Cheesecake
Raspberry Cheesecake – Any flavor of cheesecake is a delicious choice year round.

Chocolate Fudge Cake
Chocolate Fudge Cake – This chocolate lover’s dream has a thick layer of chocolate fudge icing, chocolate filling and a chocolate graham cracker crust. Yummy!

Chocolate Roll
Red Velvet Roll – Moist rich chocolate cake filled with vanilla cream and topped with chocolate shavings, coffee beans and a dusting of chocolate powder – Who could resist?

Chocolate Truffles
Chocolate Truffles – To make these decadent truffles, you will need to fill the candy mold one layer at a time. Form the outer shell by coating the mold with chocolate. Next add the filling. Popular favorites are hazelnuts, butter cream, peanut butter, caramels, chocolate liqueurs and cream fillings. A piping bag can be used to make filling easier. Refrigerate the mold to allow the filling and chocolate to solidify. The last step is adding another layer of chocolate to fill any remaining voids and seal the top of the mold. Refrigerate and carefully un-mold. If you want a more colorful treat, dip each truffle in melted chocolate and then dip in candy sprinkles.  Your candy making skills will be the envy of all your guests.

Cookies
Assorted Cookies – Dress up your next batch of cookies by using fanciful cookie cutters, and embellishing with icing, sprinkles, nuts or dipping chocolate.

Cupcakes
Cupcakes – These are easy to make party favorites and kids love to help with decorating.

Fruit Tart
Fruit Tart – This is a beautiful, eye-catching dessert. It’s all about the pattern and colors. The brightly colored plate creates the perfect frame for this artistic piece.

Fruit Yogurt
Yogurt Parfaits – What could be easier than mixing yogurt and fresh fruit?

Muffins
Muffins – Decorative paper wraps add pizzazz to simple muffins and cupcakes. Use a piping bag to apply whipped cream icing and top with a few berries and a sprig of mint.

Raspberry Vanilla Pudding
Raspberry Vanilla Pudding – While this may appear fancy, it’s easy to make. You’ll need an empty egg carton to hold the glass dishes at an angle. Mix the pudding, pour it into the tilted dishes and refrigerate. Puree raspberries and pour onto the firm pudding. A little whipped cream, a few chocolate pieces, a fresh raspberry and a mint leaf complete this visually intriguing dessert.

Strawberry Cream Puffs
Cream Puffs – Two dessert favorites in one: cream puffs and strawberry shortcake.

So many delicious choices! What’s your favorite? The only challenge in making dessert is preventing your family from devouring it before the guests arrive. Oh well, you can always make extra just in case.

Happy Crafting!

What’s New in the Studio?


It’s that time again. You’re in a creative mood but aren’t sure where to start. The endless possibilities can be overwhelming. Sometimes it’s easier to look at a wide assortment of completed projects, to see if anything piques your interest. Below are photos of several projects for your review. When you find one you like, click on the link above the photo for a complete list of easy to follow instructions. Enjoy!

Harry Potter Monster Book

Bejeweled Box
Jeweled Box

Suncatchers
Mirror with Applied Suncatchers

For additional photos and instructional links, please click here to visit a new page on our website called “How to Projects.” From time to time, new projects will be added, so please stop by to see what’s new in the studio.

Happy Crafting!

In Search of Inspiration?

Inspiring Hot Air Balloon
Everyone knows inspiration can strike at any time. Sometimes it’s obvious, such as a sunset or a pretty vista. Other times it’s a subtle feeling. Occasionally inspiration sneaks up on you when you least expect it, but there are some very frustrating times when it seems nowhere to be found. Below are a few examples of project inspirations to get your creative ideas flowing:

Artwork on a Case of Beer inspired…Cold Beverage Coasters.
Cold Beverage Coasters
These coasters were easy to make. Cut out the artwork and laminate each piece. Seal the edges with black duct tape. Glue each coaster to a cork backing and you’ll have a nice little gift for the beer lover in your family.

A festive Fox Toy inspired…Santa Claws Guiding his Sleigh.
Foxy Santa
In this case it was the missing items, namely a tail and a hat, which inspired this Santa Claus centerpiece. Foxes are known for their thick, beautiful tails. Who knows why the manufacturer neglected to provide one? It was easy enough to fix with a little faux fur. The hat was an obvious necessity, since the fox was already decked out in Santa’s finest coat, pants and boots.

Love of Chocolate inspired…Homemade Crispy Chocolate Caramel Bars

Who doesn’t love chocolate? It’s amazing how tempting a little piece of chocolate can be. These candy bars are so easy to make. I’m inspired to make a batch right now, but I better finish this post first! For instructions, please click here.

An ornately decorated Easter Wreath inspired…an Ocean Wreath.
Ocean Wreath
The colors, textures, and intricate details were eye-catching and beautiful, but an Easter wreath has a very limited time frame. By switching to the aquatic theme, the wreath can be displayed throughout the spring and summer. For instructions to make this ocean wreath, please click here.

For more inspirational project photos, please click here to visit the new Inspiration page on our website.

I hope these photos will inspire new project ideas. Magazines, online searches, and a visit to the craft store are also great resources. With an infinite supply of inspiration and a few well-chosen supplies, you will be on your way to creating your next masterpiece.

Good Luck & Happy Crafting!