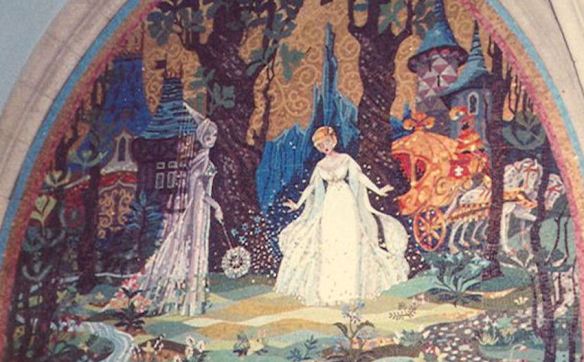
Every Harry Potter fan dreams of living in his magical world. You have read the books and seen the movies, but to experience it in the real world, you’ll need to make the trip to Universal Studio’s Wizarding World of Harry Potter. If travel isn’t on your agenda, perhaps you could bring a piece of Harry’s world into your own. You can’t be a wizard without a few enchanted books. Who could forget the ferocious monster book? Ever wondered if you could make one?

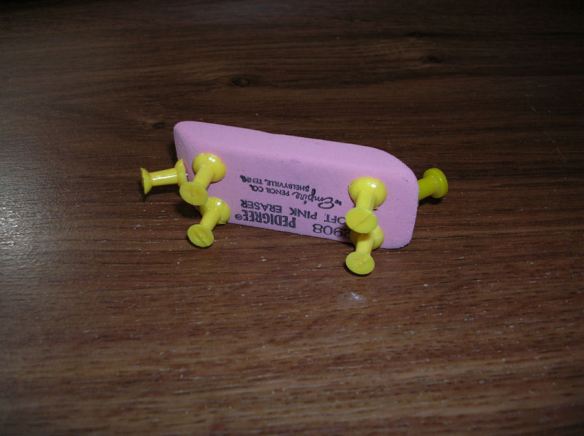
The moon and the stars must have aligned to make your wish come true with the discovery of this wooden book box, available through Michaels for $5.99. It’s the perfect size and thickness, and offers a strong foundation for building a monster book. As a bonus, there’s a secret compartment inside for storing your favorite spells (recipes), magic charms (office supplies), or wizardly collectibles.
How to Make a Monster Book Fit for a Wizard:
Supplies:
Wooden Book Box (9.75″ x 7.5″ x 2.88″)
Black Paint – brush on Acrylic or spray paint
Sharpie Metallic gold marker – medium point
Vampire Teeth
Faux fur
4) Packing peanuts
4) Glass marbles – orange
1) Bottle fabric paint – black
1) Bottle fabric paint – white
1) Leather or vinyl belt
Glue gun
Scissors
Paintbrush

Paint the box black, inside and out. This dark color will make a great contrasting background for the gold paint applied in the next step.

To create the appearance of gilded pages, draw horizontal lines along all three sides of the book, using a Sharpie metallic gold pen. Don’t worry about crooked lines. Pages in old books become crinkled and curled. Imperfect lines will provide an aged look.

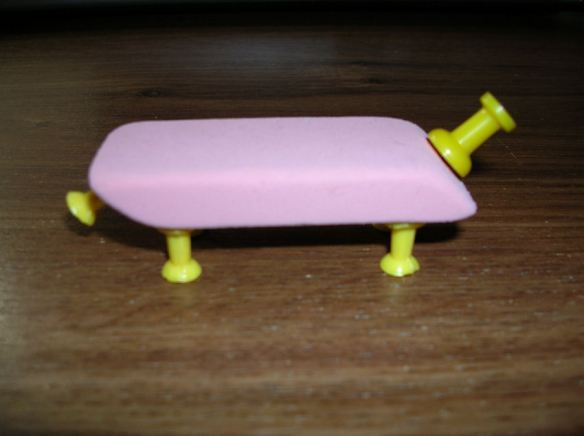
The next step is attaching teeth. Center the mouth as shown. The large fangs are from Fire Mountain Gems, and the smaller teeth are actually clear quartz crystal chips, painted to match. To simplify this step, purchase vampire teeth at a Halloween store or Amazon.

Faux fur from JoAnn Arts & Crafts is the perfect color and texture for this monster. Cut the piece large enough to allow a hem on all four sides. Be sure the fur will not interfere with the operation of the hinges. Please note: the raw edges of fur shed like crazy. Once they are hemmed and attached to the book the shedding stops. (Yeah!)

The sides could be hand sewn, but these hems were made with a glue gun.

I decided this monster would have four eyes. To make the eye sockets, use four packing peanuts. Each peanut is pinched in half and glued to hold its shape. Glue the four together end to end as shown.

Paint the foam with black fabric paint. Use a toothpick to keep the paint off your fingers.

I found four orange glass marbles with red streaks resembling bloodshot eyes. Each was glued into the sockets, and outlined with white fabric paint. A white dot was added to each marble to give it that creepy glint in the eye appearance.

Attach the eyes to the fur, and then secure the fur on top of the box.
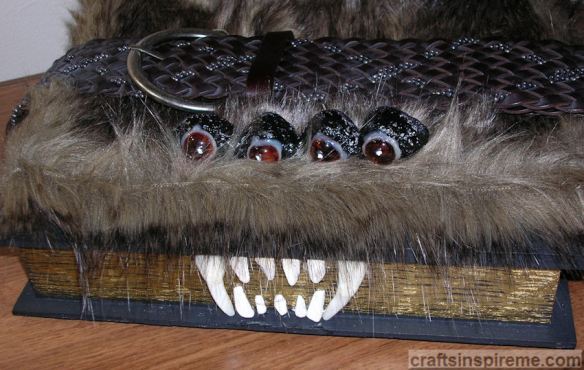
Last step: Wrap an old leather belt around the book to keep your monster under control.
Congratulations! You’re now the proud parent of your very own Monster Book. Be sure to keep it on a short leash because we all know how much it loves to shred – shoes, feet, paper – anything within reach. For decades, kids have been telling their teachers, “The dog ate my homework!” With a monster book as a pet, this excuse might actually be believed!
Do you have a favorite Harry Potter creature? Please share your thoughts in the comments section. Until next time…
Happy Crafting!


 It’s the night before Christmas, and little feet tiptoe toward the tree for a sneak peek at the presents. We may not have done this, but we thought about it a lot. It’s human nature to wonder -What’s inside the box?
 If your name is Mrs. Claus, you probably don’t need help wrapping gifts.
 In fact, Mrs. Claus probably has a gift-giving closet that looks like this one. For the rest of us, there’s still a lot of shopping to be done and presents to be wrapped. Department stores typically offer gift wrap, but it can be pricey. Many retailers have eliminated this service and the gift boxes as well. Shopping malls offer gift wrapping, but the lines can be very long. Fortunately there are lots of solutions to make your gifts look beautiful.
 Gift bags are probably one of the best inventions of all time. They’re sold just about everywhere, including the food stores, so when you’re running around last minute a gift bag is easily on hand.
 These burlap bags are dressed up with the addition of berries and glitzy red ornaments.
 This red and white gift bag has a built-in drawstring.
 Amazon provided these festive gift bags, which my family passes back and forth for various occasions all year long. Unfortunately there’s no way of knowing which color you might receive, and some items are wrapped in paper instead of a bag.
 A metal box is an intriguing way to package a gift.
 Porcelain boxes come in a variety of shapes and colors for every occasion. These are perfect for jewelry or other small items, and can also be used to conceal a cash gift.
 For the baker in the family, this fluted glass jar and lid will hold your gift now, and will be perfect for holding baking ingredients in the future. It could also be used as cookie jar.
 Gift baskets filled with the recipient’s favorites is always a welcome surprise. You can purchase a roll of colored cellophane wrap or use regular plastic wrap to cover the entire basket, and tie a bow on top.
 Some stores provide colorfully printed boxes, which are suitable for gifts any time of year, and can be stacked and tied with a pretty ribbon.
 When using standard wrapping paper, you can always wrap the lid separately. By doing so, the box can be reused for years to come.
 A floral pine cone stem and some ribbon were all that was needed to complete this package.
 Don’t forget to add a gift tag. Some people save the pictures, from last year’s holiday cards, and use them as gift tags on this year’s presents.
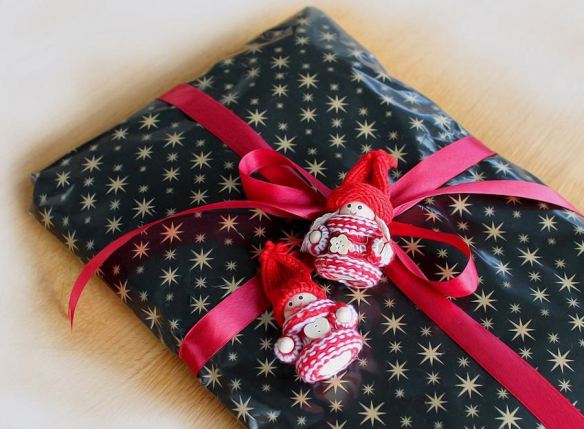
 For an all-natural look, recycled paper can be used, with twine instead of ribbon, some evergreen and a pine cone from your backyard.
 A silver bow makes a statement on this aqua and silver wrapped gift.
 A glittering gold bow makes the perfect topper for this dancing reindeer package.
 A 3-dimensional snowflake has sprung to life from this pretty wrapping paper.
 For a glamorous look, combine sparkling red paper, gold studded ribbon, and a shiny gold bow.
 This perfectly coordinated metallic ribbon and paper is suitable for gifts any time of year.
 Sometimes a really great topper steals the show. A bow like this one will be appreciated for sure, with its petal-like layers in full bloom and wisps of green ribbon leaves peeking out beneath. There’s a very interesting pattern of wildlife, holly sprigs, and guitars intertwined among the curvilinear vines.