When I was writing the first three posts in this series, I found myself constantly flipping back and forth between each of the Halloween themes within the Kid Friendly, Creepy and Nightmares levels. I thought you might like to see a side-by-side comparison. The results below are astonishing.
Halloween Themes: Kid Friendly Creepy Nightmares
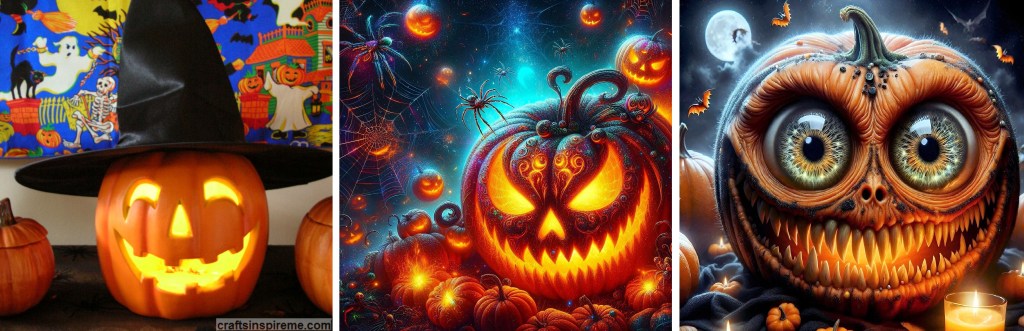
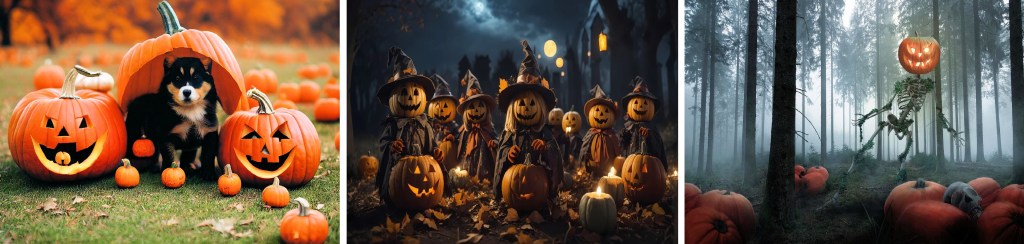
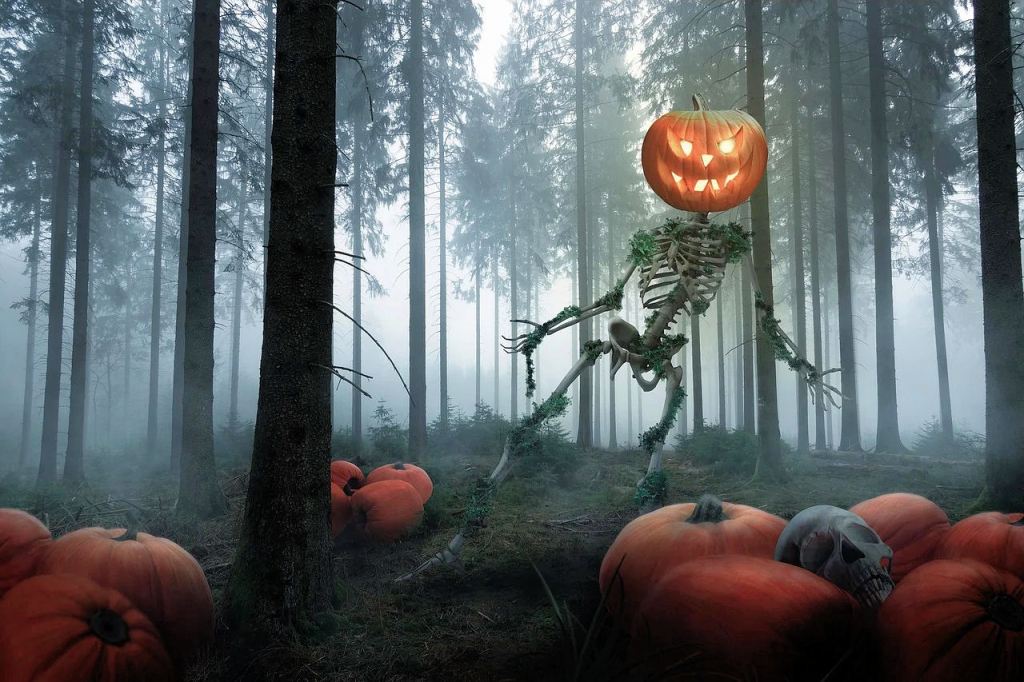
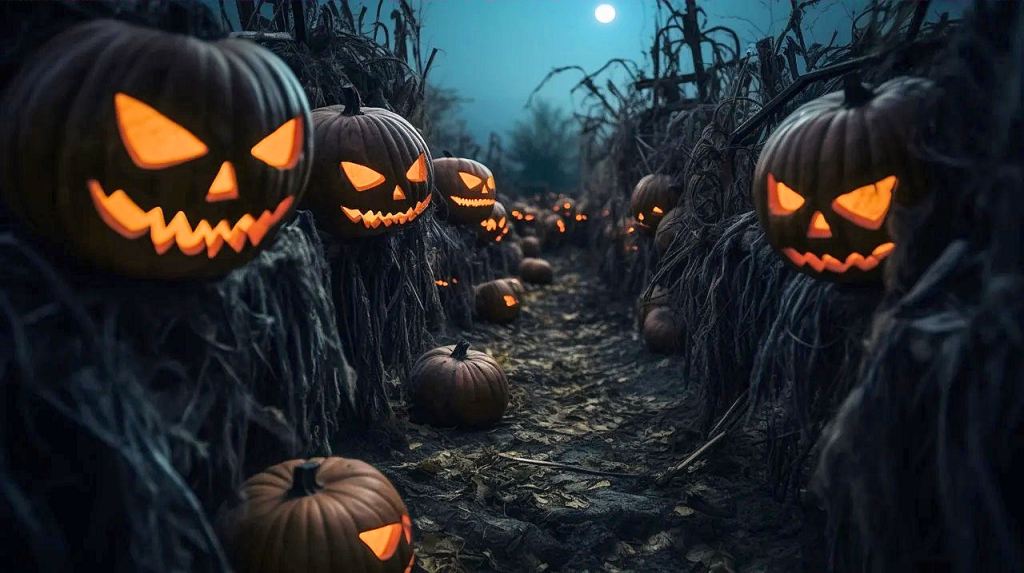
Jack-O-Lanterns
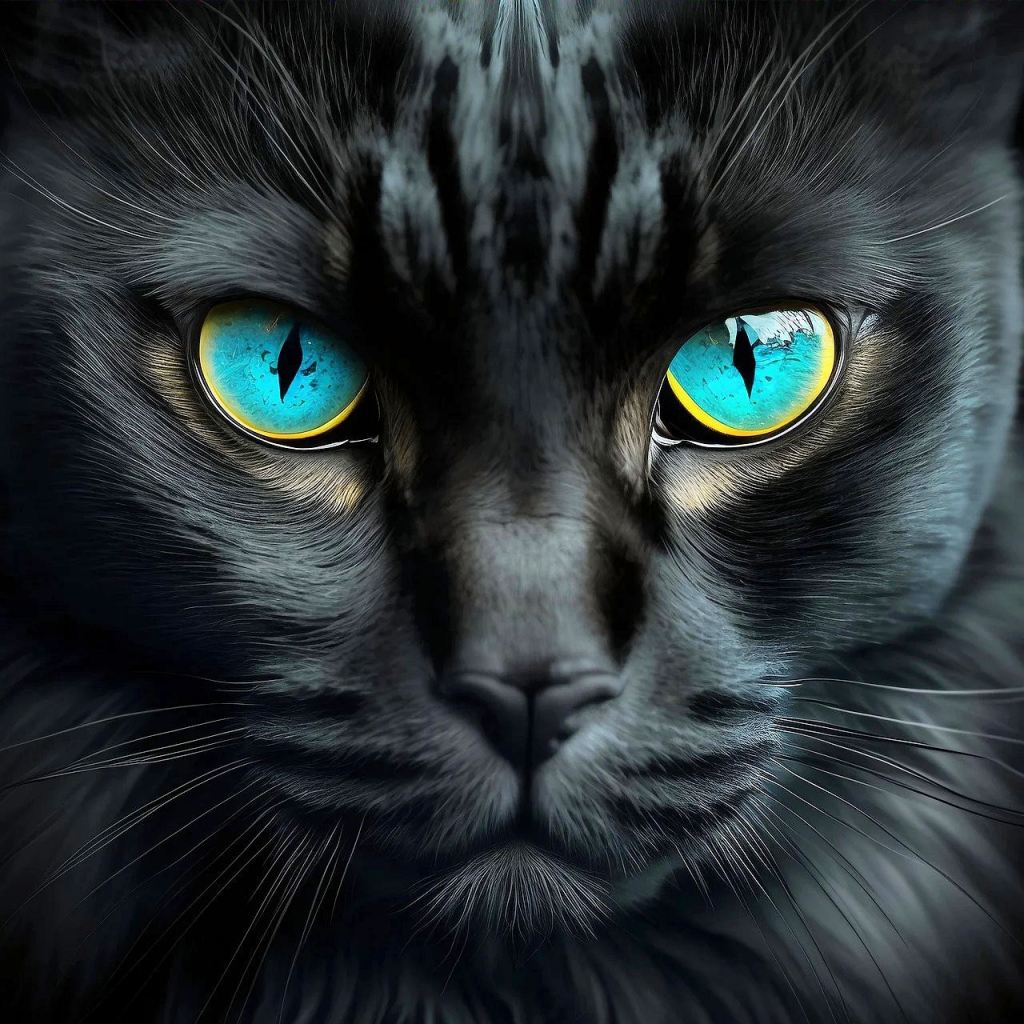
Black Cats
Mummies
Spiders
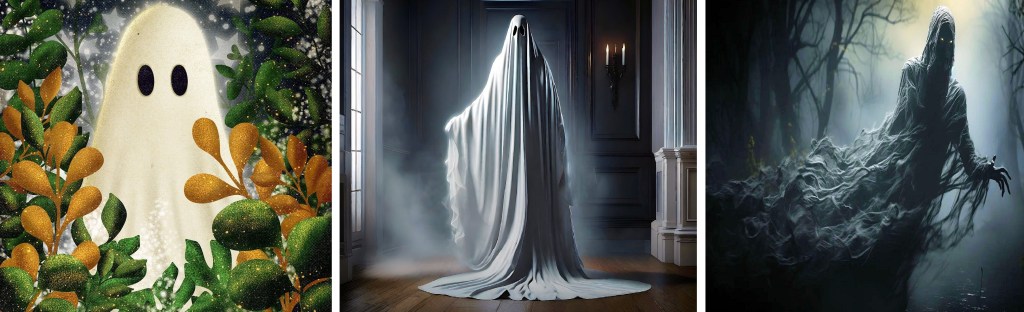
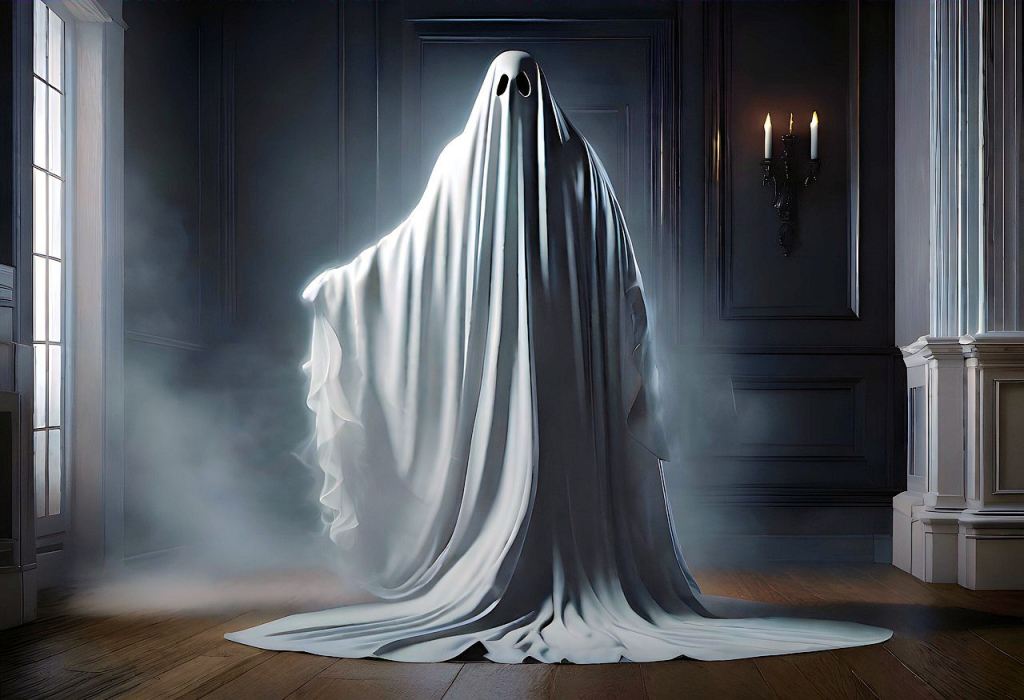
Ghosts
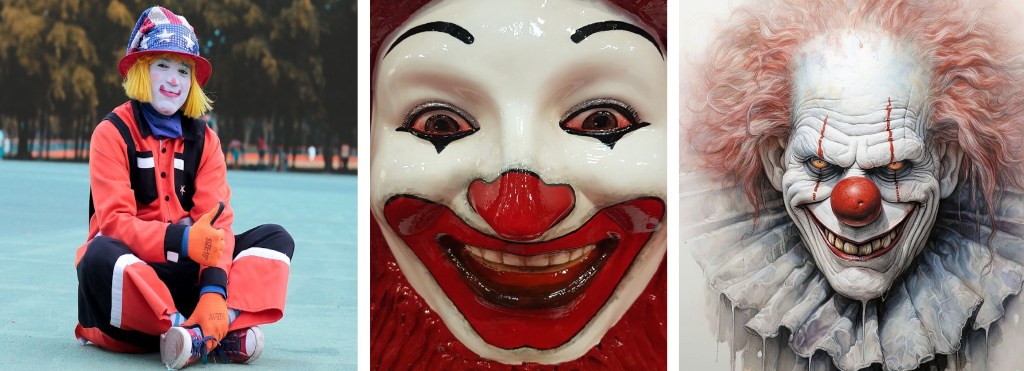
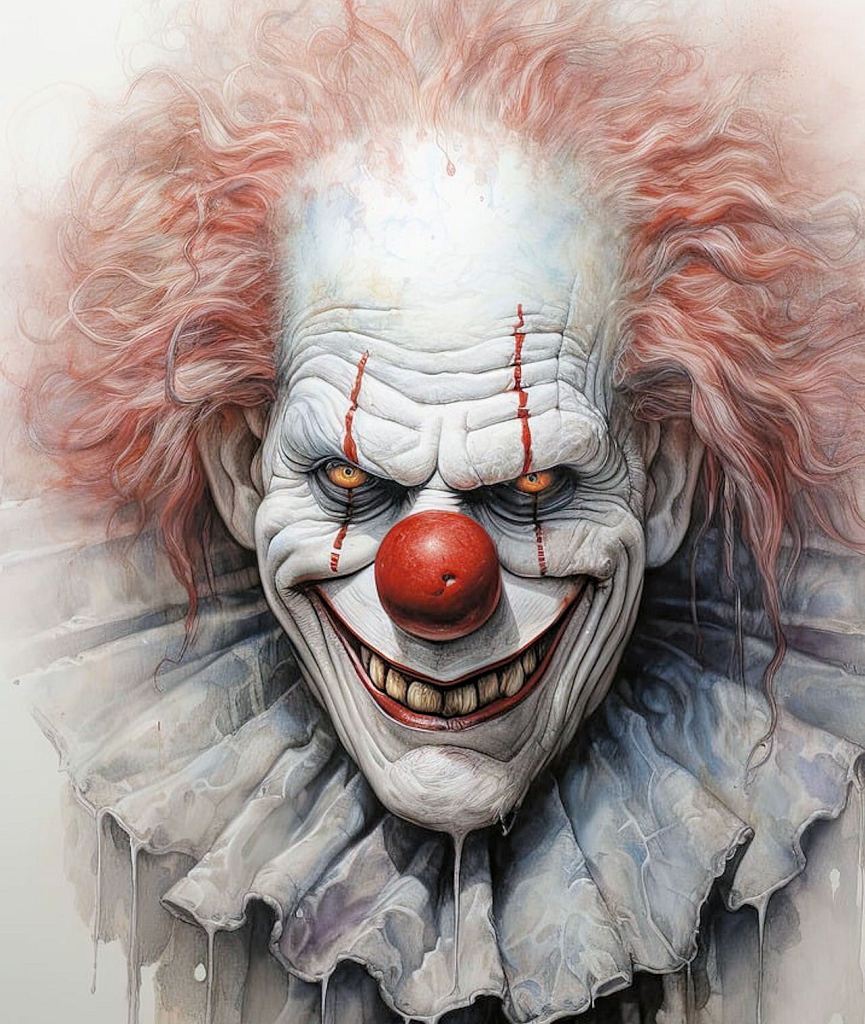
Clowns
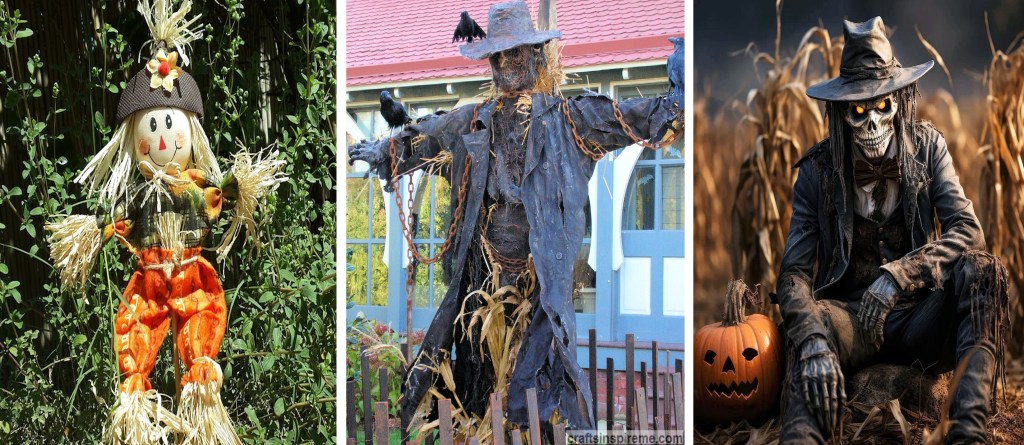
Scarecrows
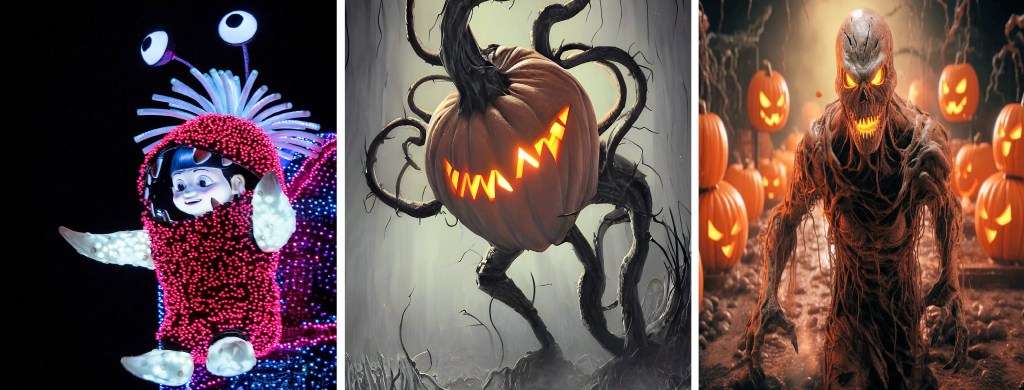
Monsters
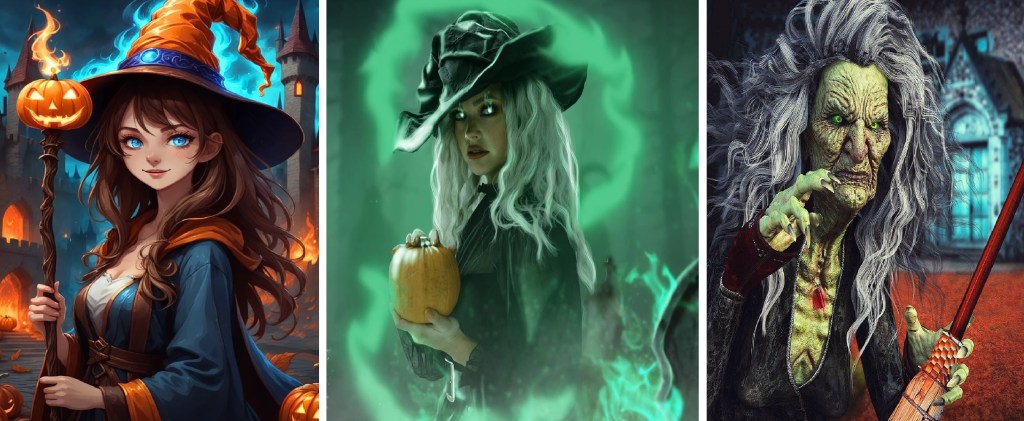
Witches
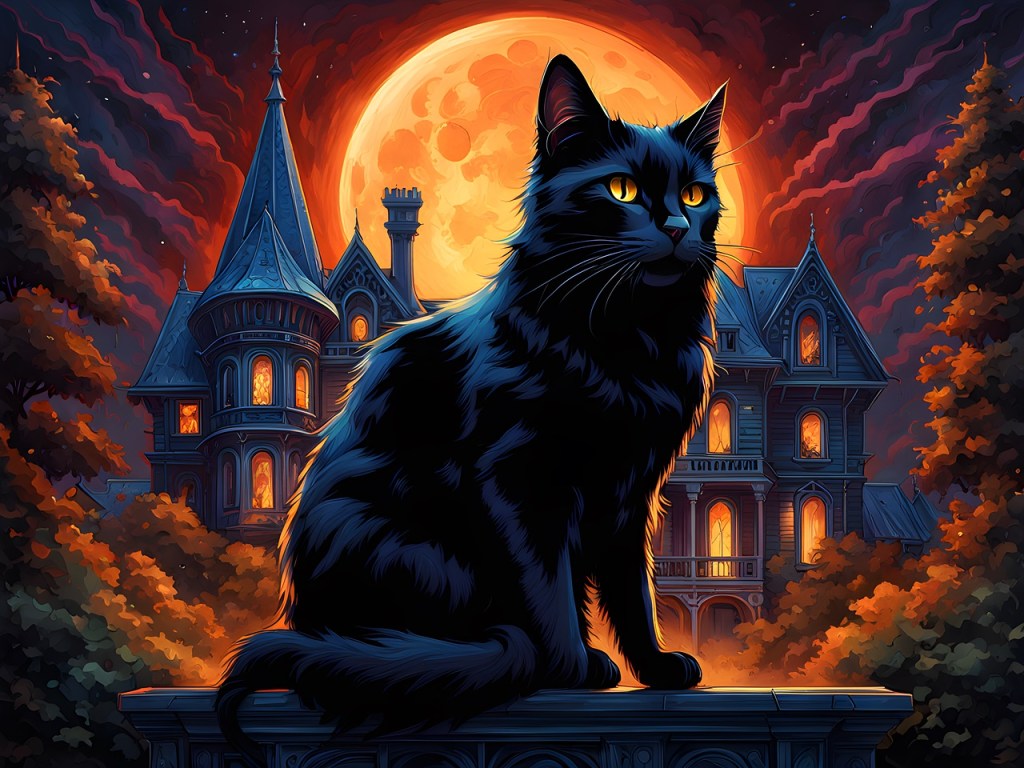
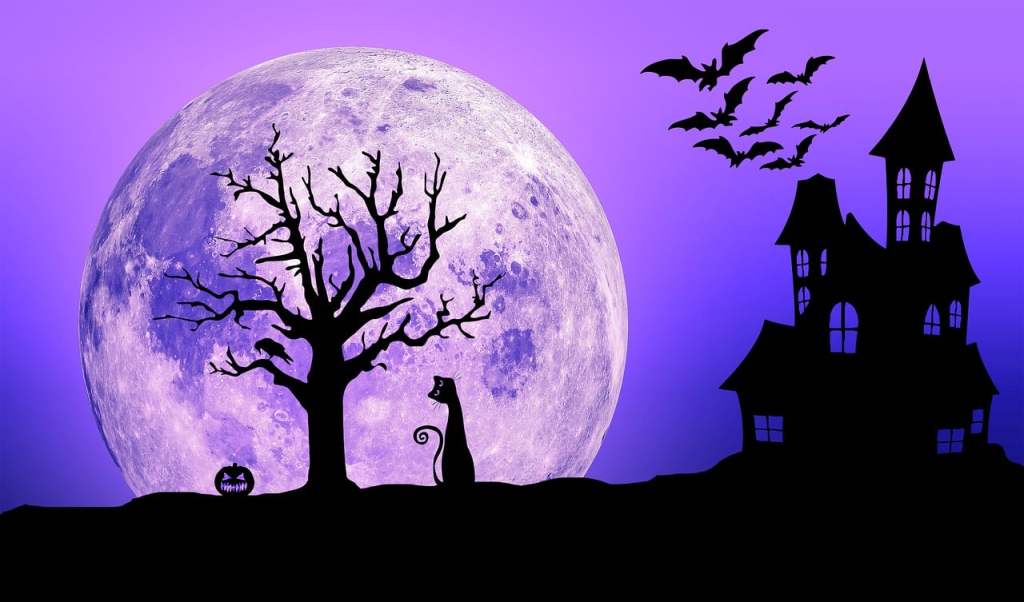
Haunted House
Pumpkin Patch
Skeletons
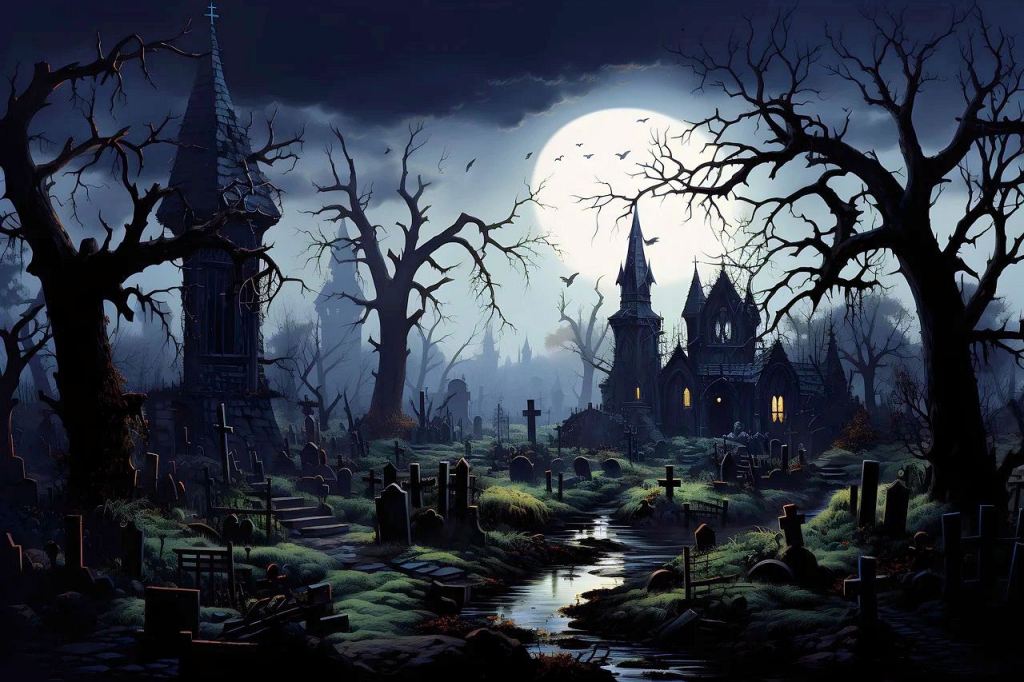
Graveyards
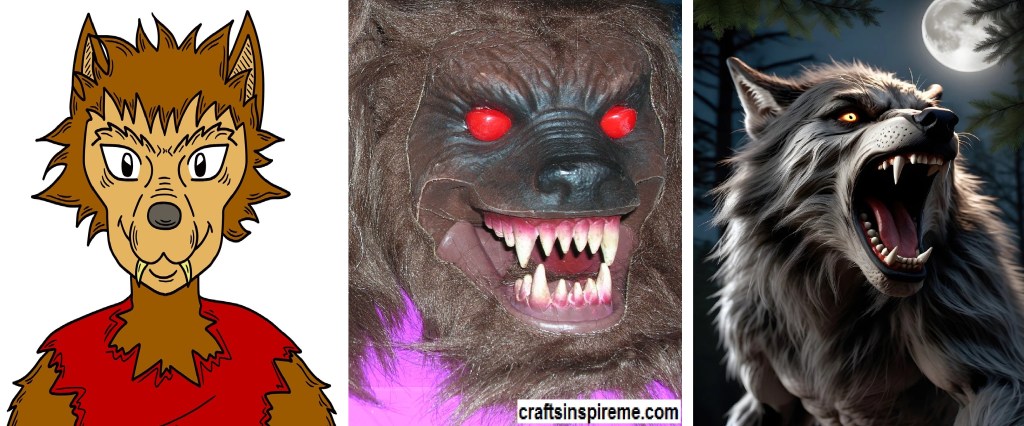
Werewolves
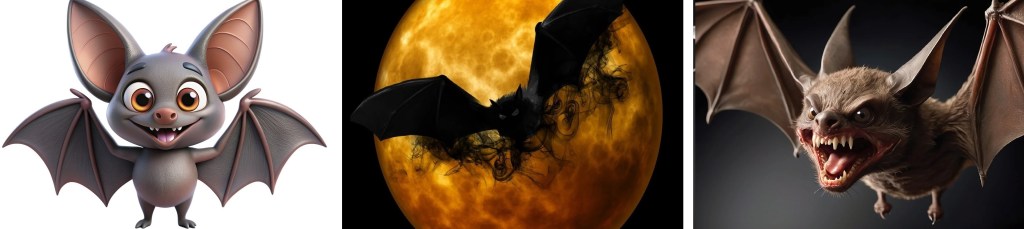
Bats
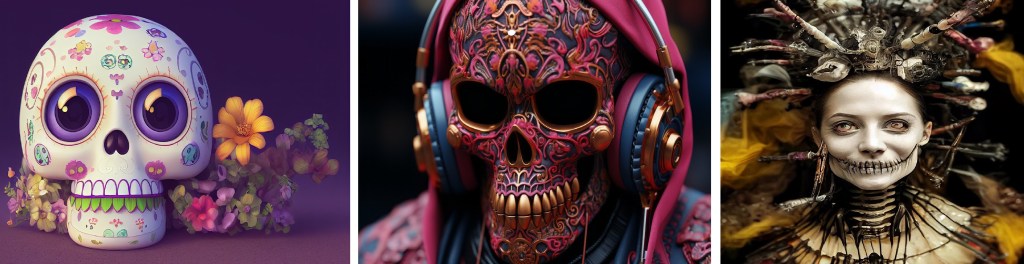
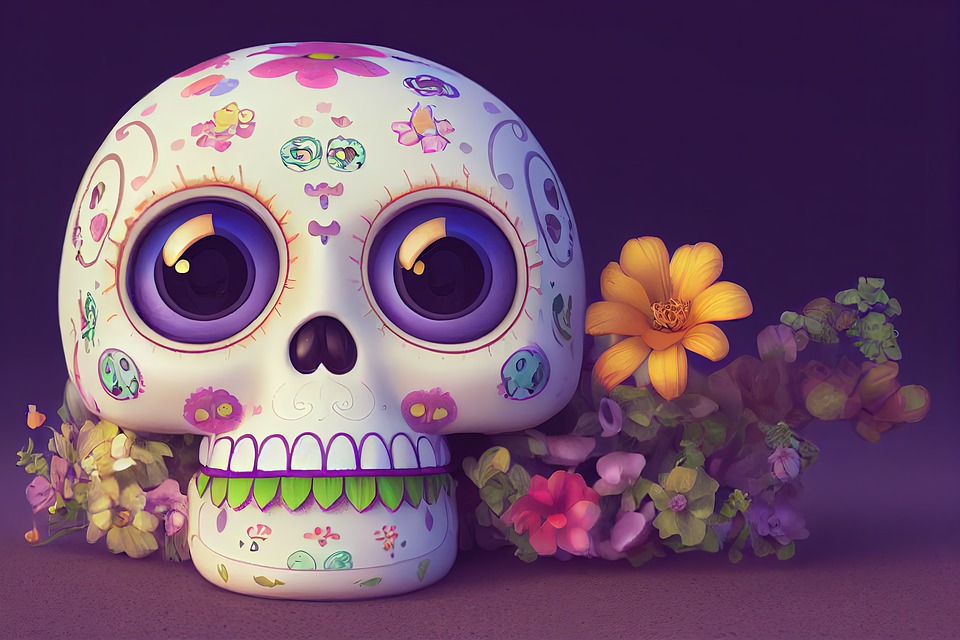
Day of the Dead
Vampires
As you can see, Kid Friendly characters are cute, almost cuddly. Creepy ones make you feel uneasy, wondering what it might do. However, if you encounter a Nightmare character along a lonely road at night, don’t waste time wondering… Run away!
This is the last post in the Halloween Grins, Chills & Screams series. In case you missed the first three parts, please be sure to read part 1 Kid Friendly, part 2 Creepy, and part 3 Nightmares for more inspiring ideas. I hope you enjoyed it. Please let me know your favorites in the comments.
Thanks for Reading. Happy Halloween & Happy Crafting!
When decorating for Halloween, there are two decisions to be made:
1. Choose a Theme. 2. Choose a Fear Factor.
What is the fear factor? Think of it as how much you want to frighten people, based upon a 3-level scale. Level 3 is Nightmares. Halloween themes at this level provide good old-fashioned scares like when someone sneaks up behind you and yells Boo. You jump and maybe scream in shock…and then you tell them they’re grounded for life. (lol) Let’s see how the desired emotional reactions affect our choices in Halloween décor.
Nightmare Themes:
Jack-O-Lanterns
Black Cats
Mummies
Spiders
Ghosts
Clowns
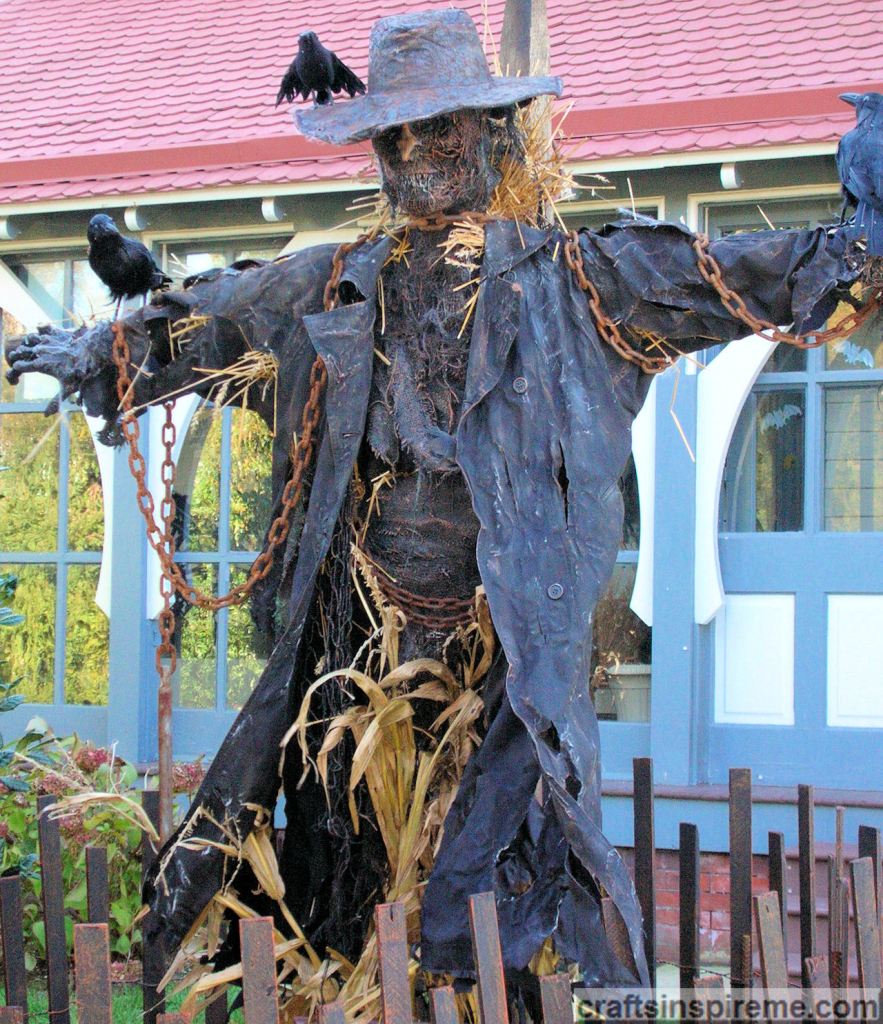
Scarecrows
Monsters
Witches
Haunted House
Pumpkin Patch
Skeletons
Graveyard & Zombie
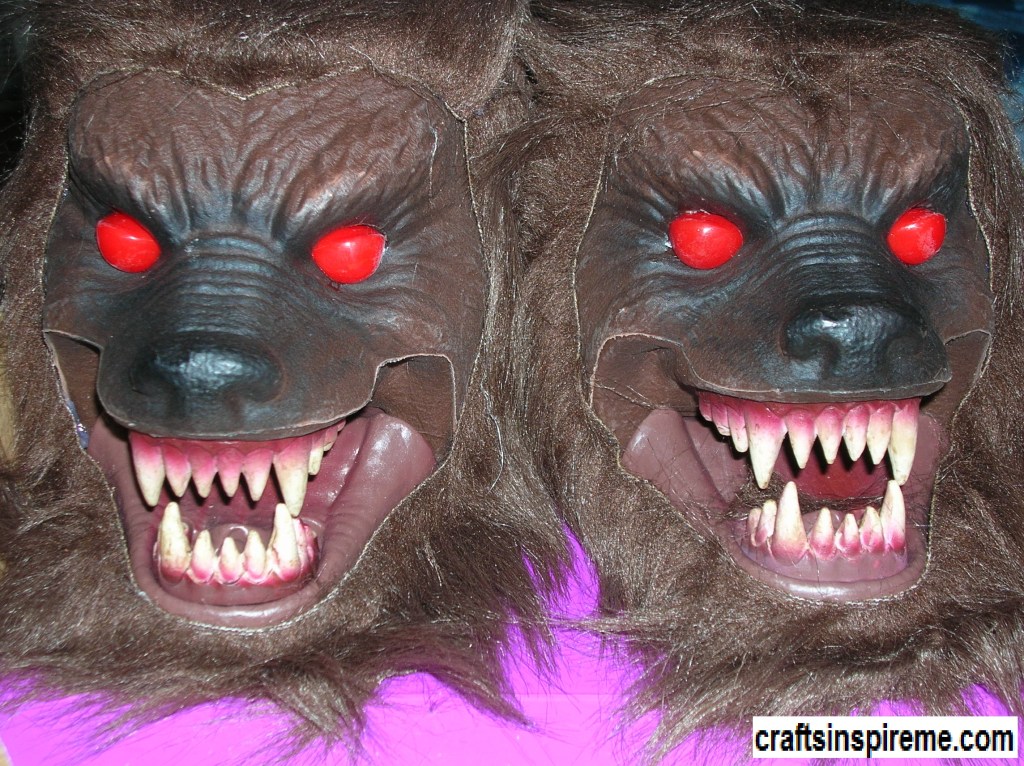
Werewolves
Bats
Day of the Dead
Vampires
Haunted Corn Maze
Haunted Village
Haunted Bog
Onion Monster
Insects
Headless Horseman
Vampires & Werewolves (Extra Credit for Living Chess Pieces. lol)
Gremlins
Nightmare Themed Foods:
Beverages
Cakes
Desserts
Pastries
Let’s Toast to Halloween
Halloween Nightmares themes explore the unknown and isn’t that mankind’s biggest fear? Being more complex, these characters appear out of the darkness via motion (costumed actors or animatronics), light, sound and fog, triggering screams or bad dreams for days to come.
Stay tuned for the fourth and final post in this series for a frightfully fun side-by-side comparison of Halloween themes. In case you missed the first two parts, please be sure to read part 1 Kid Friendly and part 2 Creepy for more inspiring ideas. Please let me know your favorites in the comments.
Thanks for Reading. Happy Halloween & Happy Crafting!
When decorating for Halloween, there are two decisions to be made:
1. Choose a Theme. 2. Choose a Fear Factor.
What is the fear factor? Think of it as how much you want to frighten people, based upon a 3-level scale. Level 2 is Creepy. Halloween themes at this level are eerie and unsettling, resulting in spine-tingling chills & goosebumps. Let’s see how the desired emotional reactions affect our choices in Halloween décor.
Creepy Themes:
Jack-O-Lanterns
Black Cats
Mummies
Spiders
Ghosts
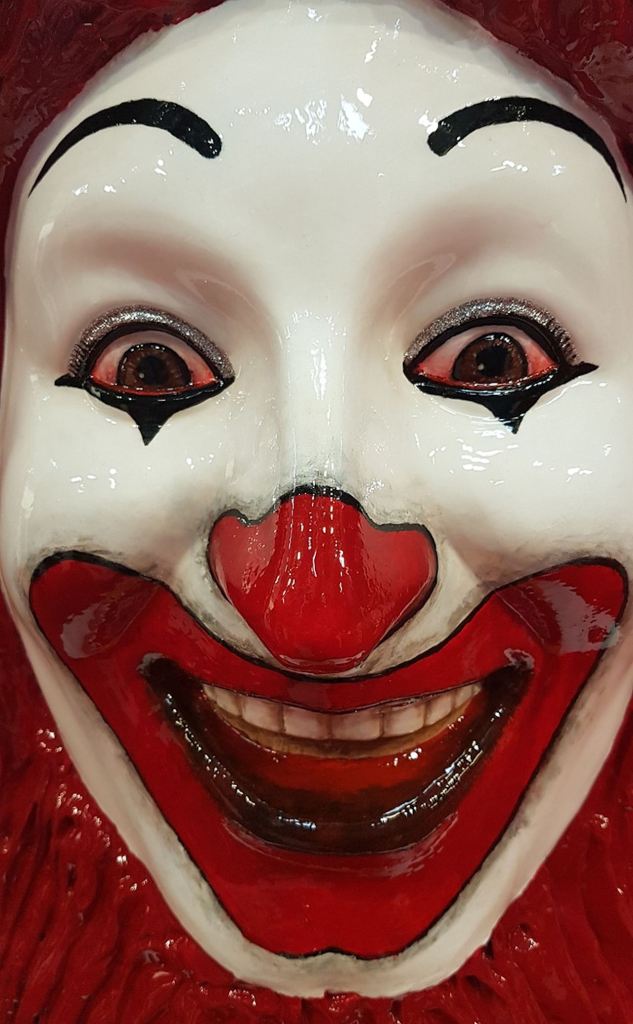
Clowns
Scarecrows
Monsters
Witches
Haunted House
Pumpkin Patch
Skeletons
Graveyard
Werewolves
Bats
Day of the Dead (Extra credit for being fashionably frightening. lol)
Vampires (Looks like Tom Cruise in Interview with a Vampire)
Twisted Fairy Tales
Dolls (Reminds me of the little girls in Stephen King’s The Shining)
Creepy Themed Foods:
Beverages
Cakes
Candy
Serving Dishes
Guests, craving the thrills of amusement parks, will appreciate the chilling surprises discovered around every corner with these Halloween Creepy themes. Please let me know your favorites in the comments.
Stay tuned for the third and fourth posts in this series for ideas on Halloween Nightmares themes and a comparison of all three. In case you missed it, please be sure to read part 1 for Kid Friendly inspiration.
Thanks for Reading. Happy Halloween & Happy Crafting!
When decorating for Halloween, there are two decisions to be made:
1. Choose a Theme. 2. Choose a Fear Factor.
What is the fear factor? Think of it as how much you want to frighten people, based upon a 3-level scale. Level 1 is Kid Friendly. Halloween themes at this level are cute or funny, resulting in widespread grins. In this four-part series, let’s see how the desired emotional reactions affect our choices in Halloween décor.
Kid Friendly Themes:
Jack-O-Lanterns
Black Cats
Mummies
Spiders
Ghosts
Clowns
Scarecrows
Monsters
Witches
Haunted House
Pumpkin Patch
Skeletons
Graveyard
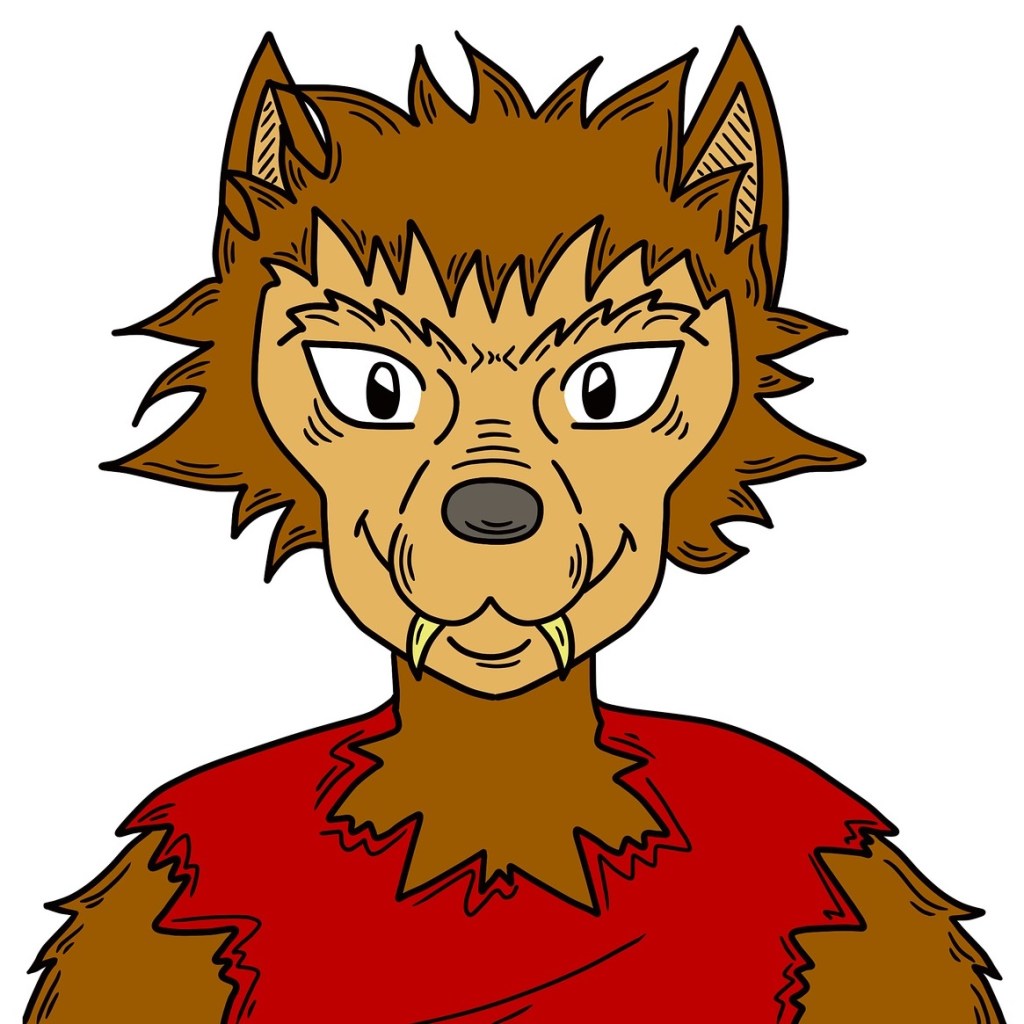
Werewolves
Bats
Day of the Dead
Vampires
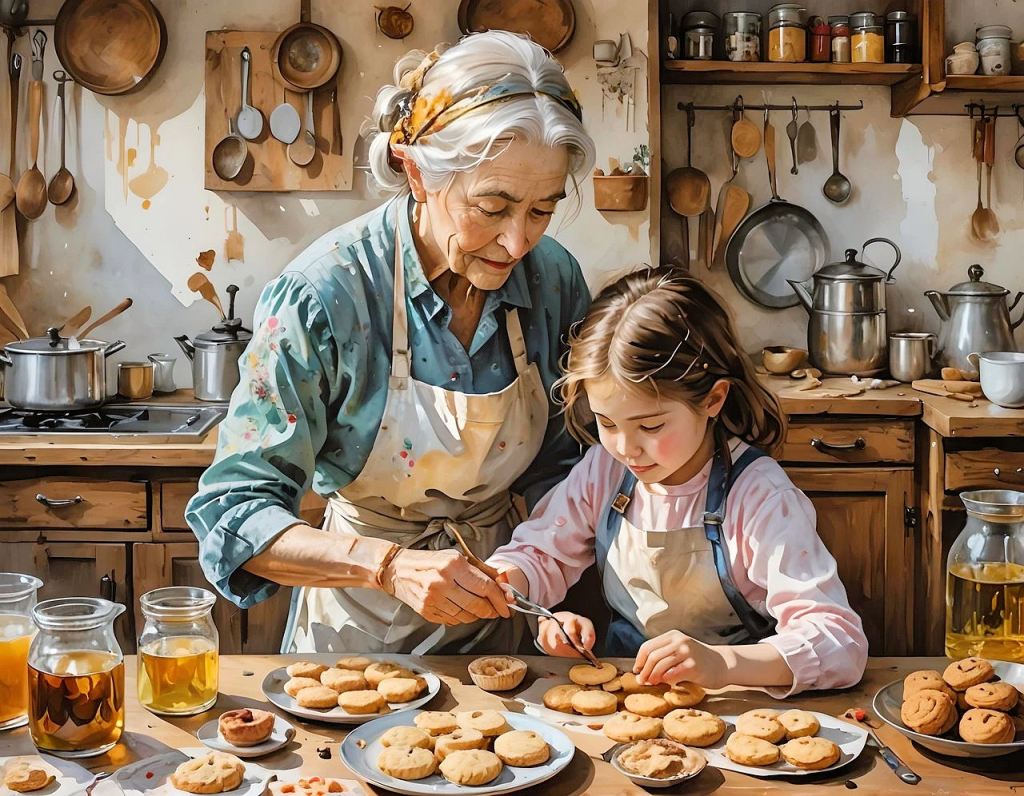
Kid Friendly Themed Foods:
Candy/White Chocolate Marshmallows
Cupcakes
Cakes
Cookies
Donuts
Guests of all ages will appreciate the playful, festive atmosphere created by these Kid Friendly decorations. Stay tuned for the next three posts in this series, exploring Creepy themes, Nightmare themes, and a comparison of all three. Please let me know your favorite Halloween themes and if you prefer amusing or frightening decor.
Thanks for Reading. Happy Halloween & Happy Crafting!
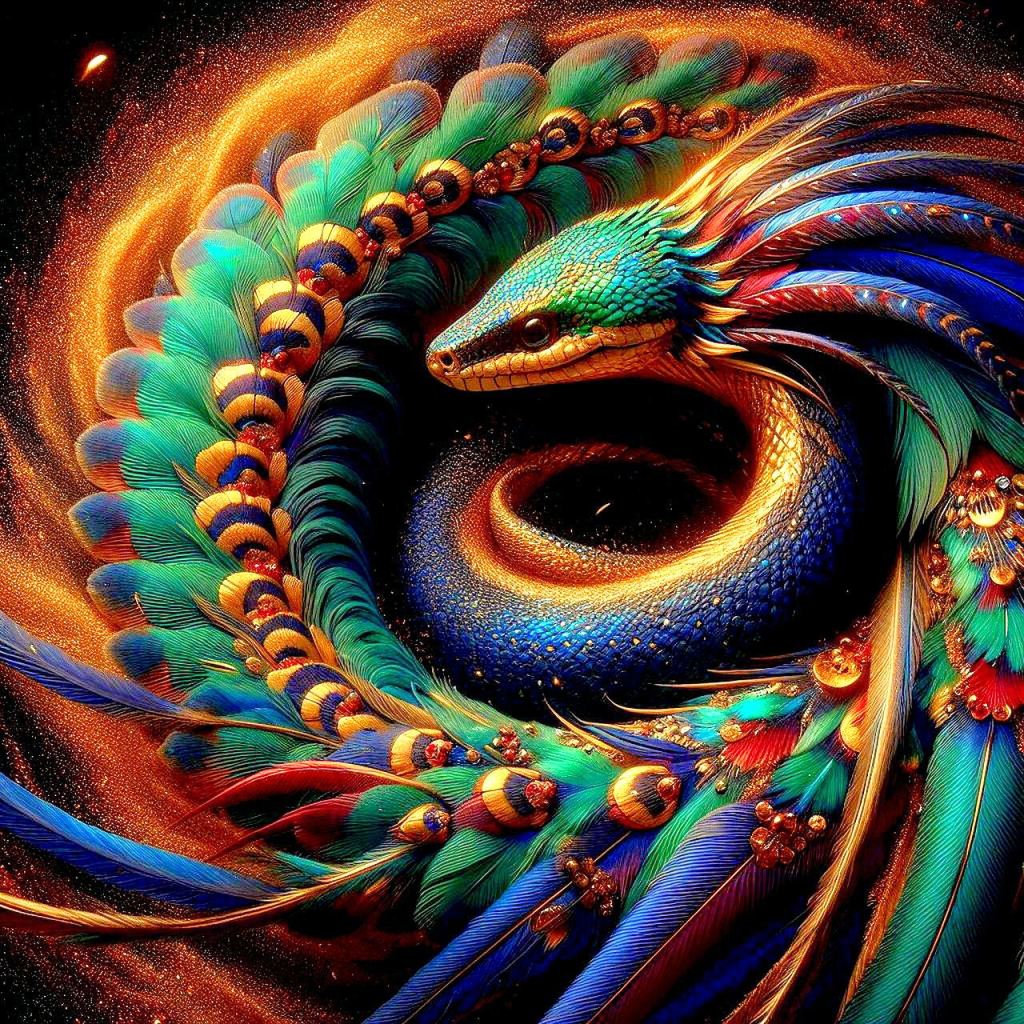
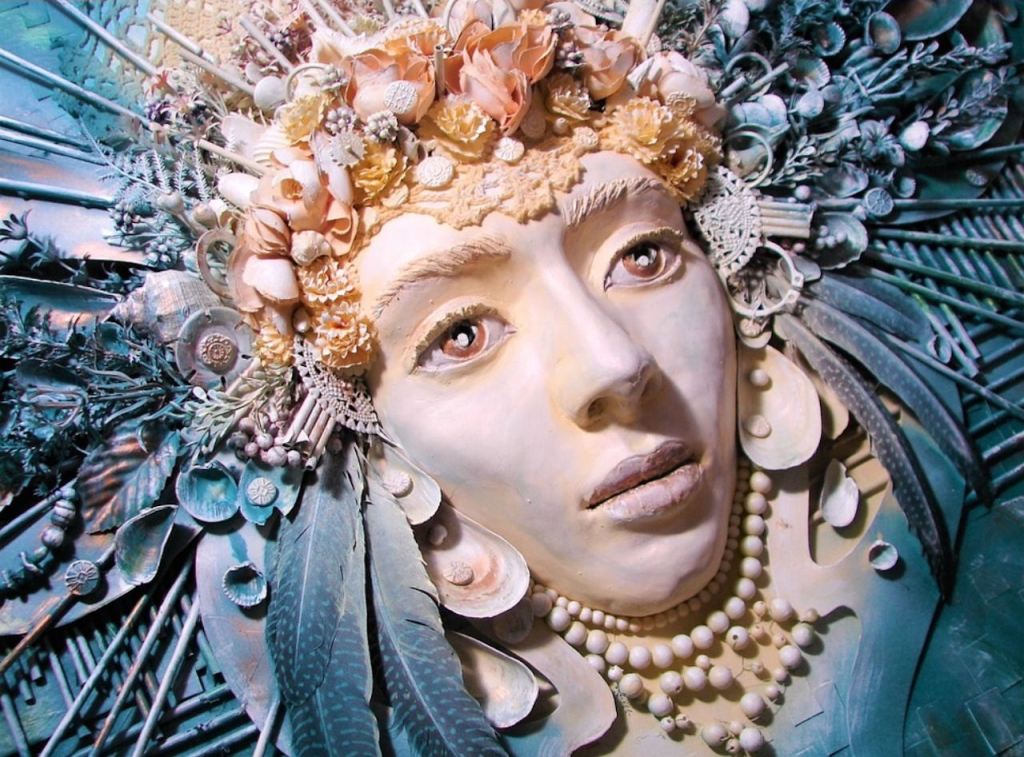
Feathers have been used for centuries as personal adornments, ceremonial costumes, wall art, and as the inspiration for freestanding sculptures and architectural reliefs. The photo above is a modern-day interpretation of the ancient Mayan & Aztec feathered serpent gods.
Light as a feather, each one is a fanciful treasure found.
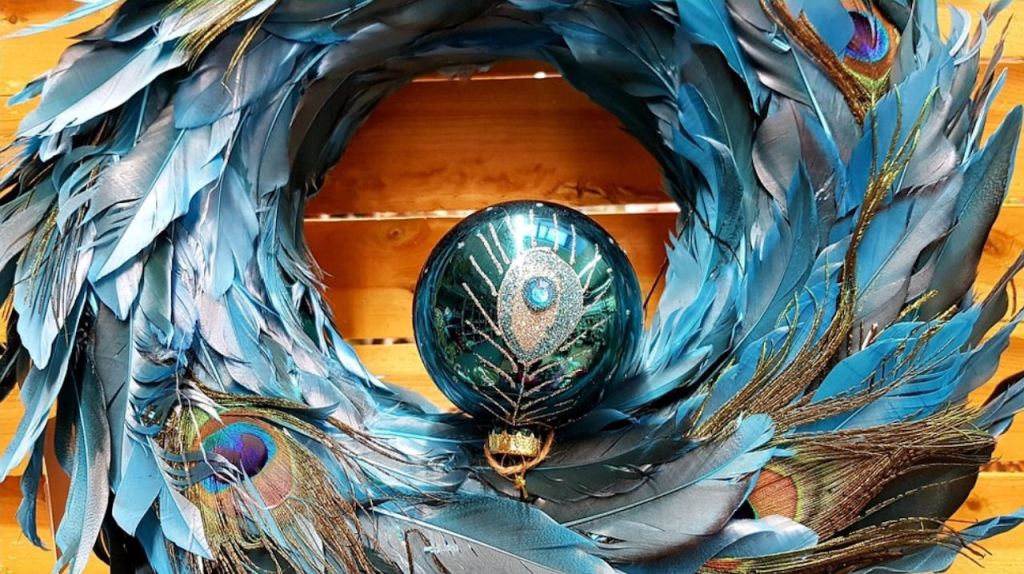
The finest feathers provide bold colors in unique patterns and soft textures.
Peacock feathers are highly sought for their fascinating colors, shapes and natural sheen. Peacock patterns are often used in clothing, home furnishings and finishes. Let’s explore some of the artistic possibilities for these delicate natural wonders…
Costumes
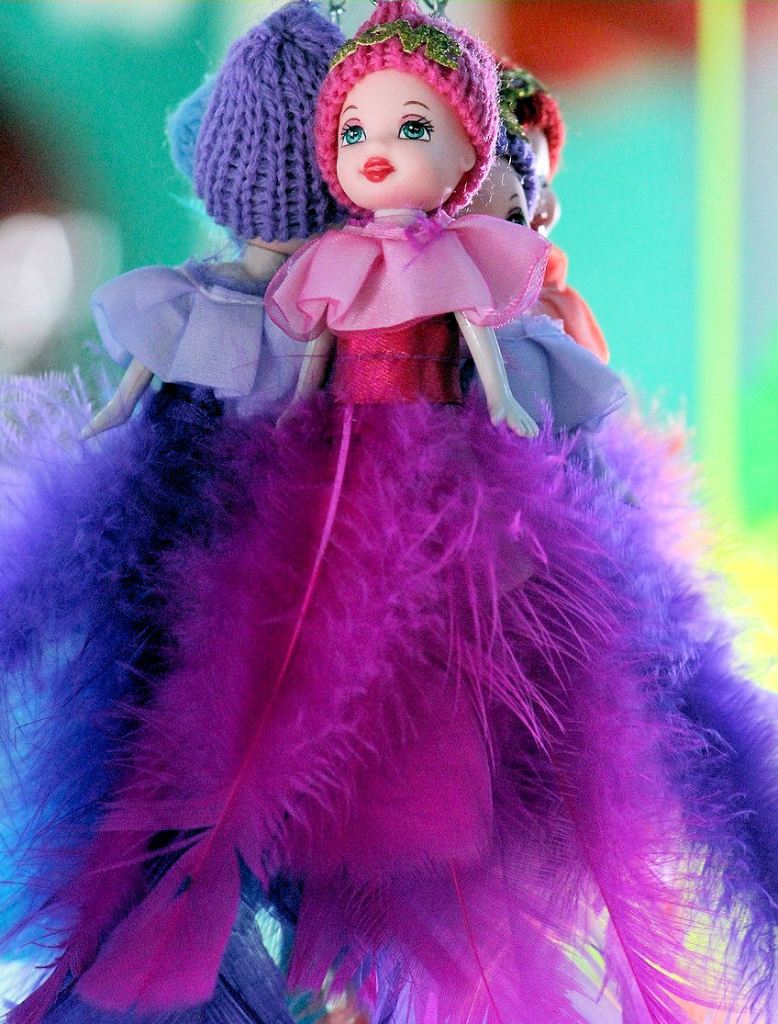
Dolls
Dreamcatchers
Easter/Spring Décor
Digital Art
Quill Pen
Fantasy Portraiture
Feather Boas
Jewelry
Mobile
Photography
Wall Art
Feather Wreath
Feathered Hats
Feathered Hair Accessories
Flower Arrangements
Cultural/Religious Ceremonies
Feathered Masks
As you can see, there are many ways to incorporate feathers in your life. I hope these ideas inspire you to give it a try. Please let me know your favorites in the comments.
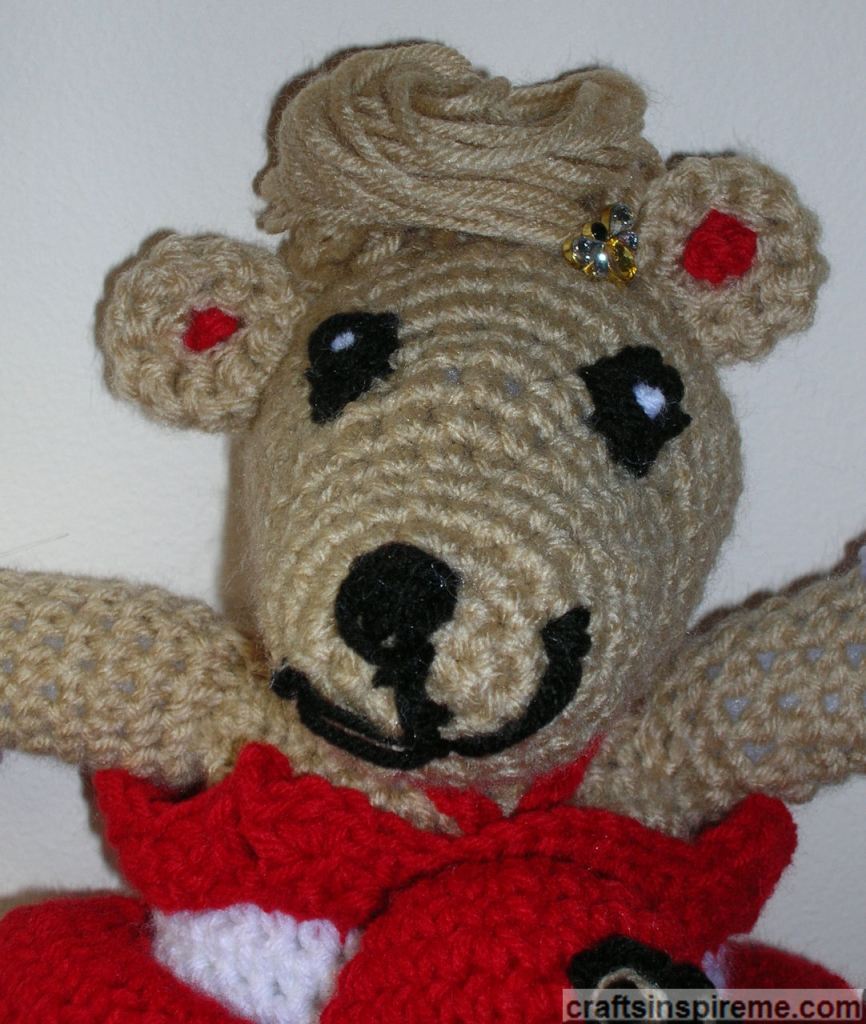
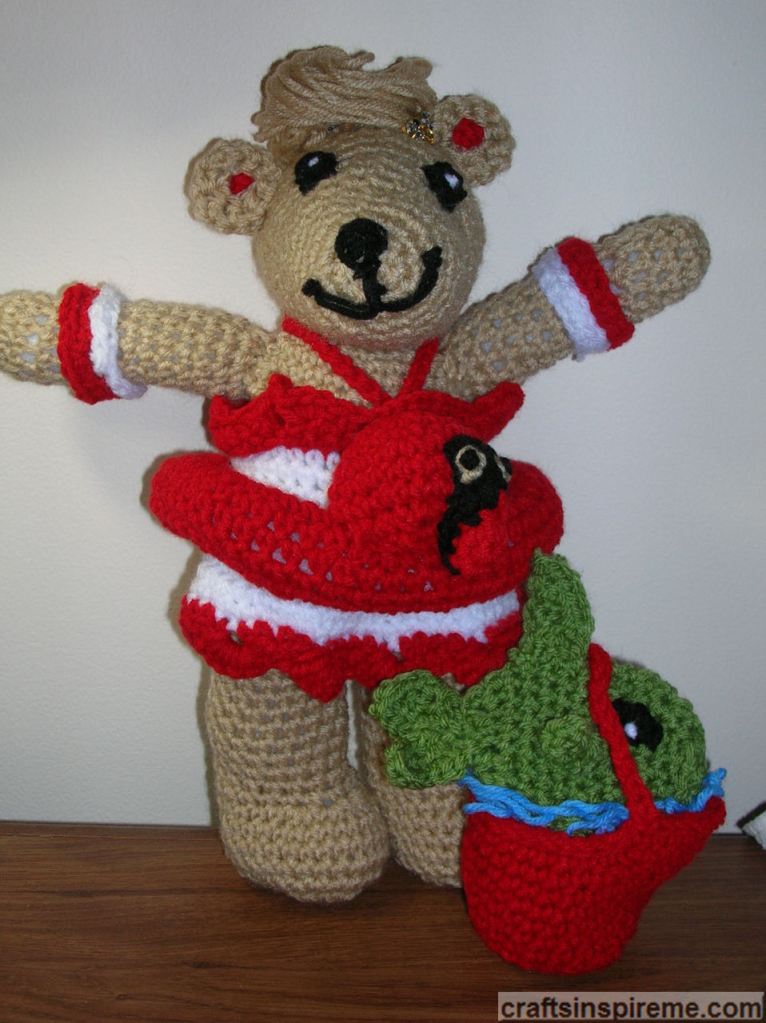
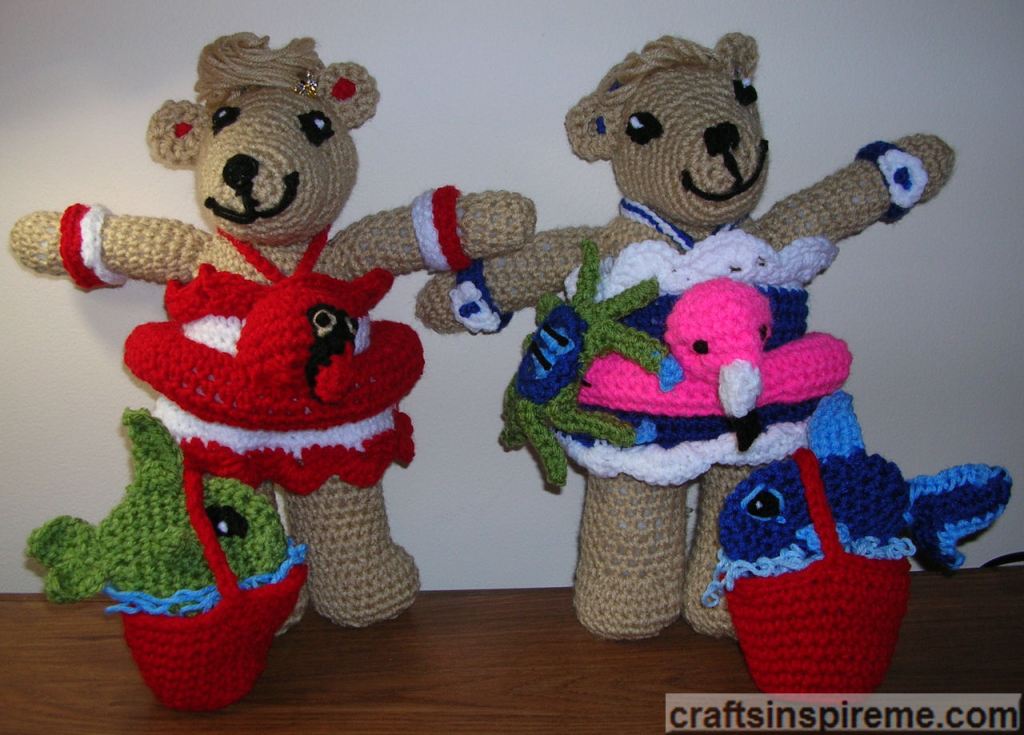
Those of you who follow this blog are familiar with a recent crochet project called Beach Bear Rita. Well, guess what? Rita now has a twin sister! Wouldn’t it be nice to simply use a crochet needle to bring a new sibling into your life? And here she is…
She’s feistier than the original and loves red, making her the center of attention wherever she goes. Please check out the photos below to see how this little lady came together.
In Progress: Body with Swimsuit, Arms, Head, Ears & Skirt
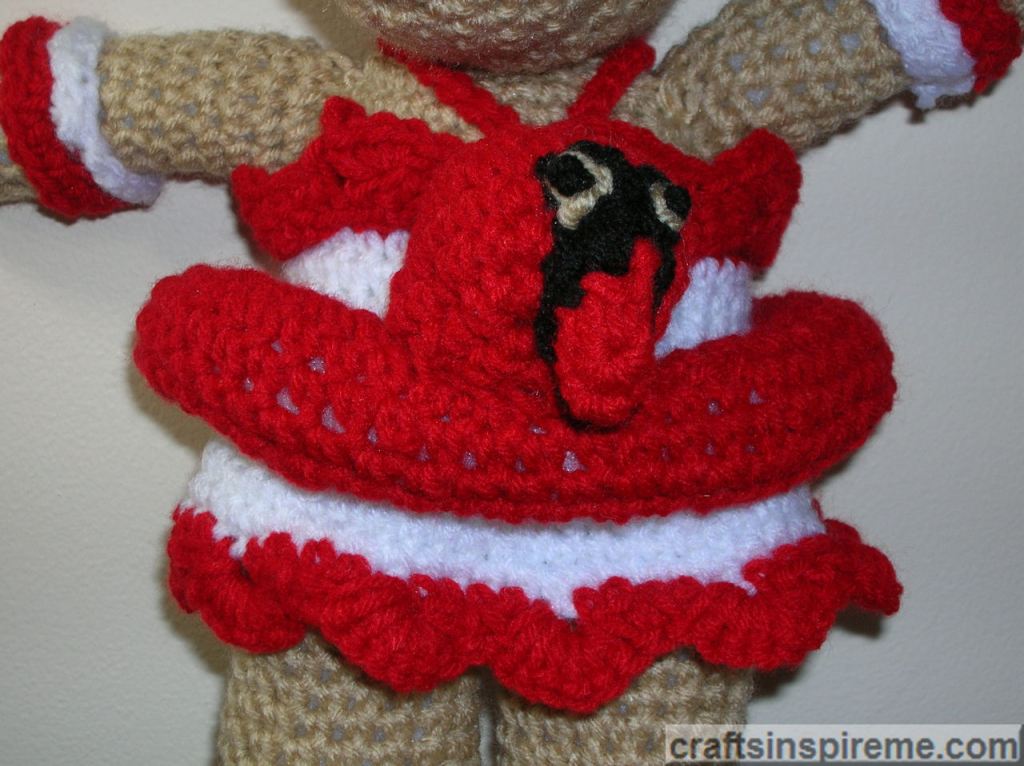
Rita II has a red and white swimsuit with matching bracelets. The white skirt will have a red scalloped edge in a later step.
In Progress: Cardinal Inner Tube, Fish & Pail
The fish needs a white dot in the eyes and the cardinal inner tube needs to be assembled.
In Progress: Completed Body, Swimsuit & Inner Tube but Needs a Hairdo
Rita II is close to completion. The arms, ears and head have been sewn on as well as the facial details. The swimsuit has red scalloped edges at the top and bottom. Red earrings and a red tie for the swimsuit have been added. The skirt and inner tube may need to be tacked in place. The next decision is what type of hairdo would she like?
A New Up Hairdo
She may be a twin, but she has her own style, and an up-do seems to be a perfect choice. Bobby pins hold the style in place, while a vintage crystal bee pin tucked beside her ear provides the sparkle every fashionista craves.
Crocheted Bracelets & Scalloped Edge on Swimsuit Top
Cardinal Inner Tube
Unlike her sister, Rita II likes cardinals. You can easily adjust the pattern to resemble any bird.
Side View
Back View
Finished Bear with Fish in Pail
Beach Bear Rita Twin Sisters
Just like their human counterparts, these two may have their differences, but they will forever be sisters!
I hope you like this adorable, crocheted bear. For additional information, please see my first post by clicking this link: “Beach Bear Rita.” The pattern can be easily found online. These bears make great gifts, which can be personalized for each recipient and they’re a lot of fun to make. Good luck with your future craft projects.
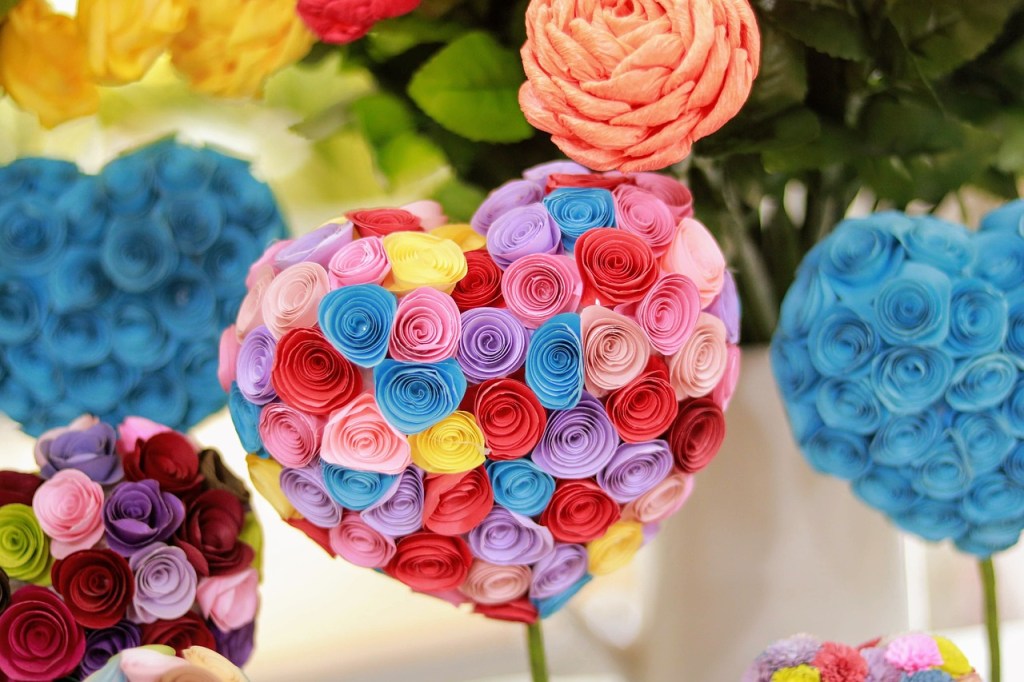
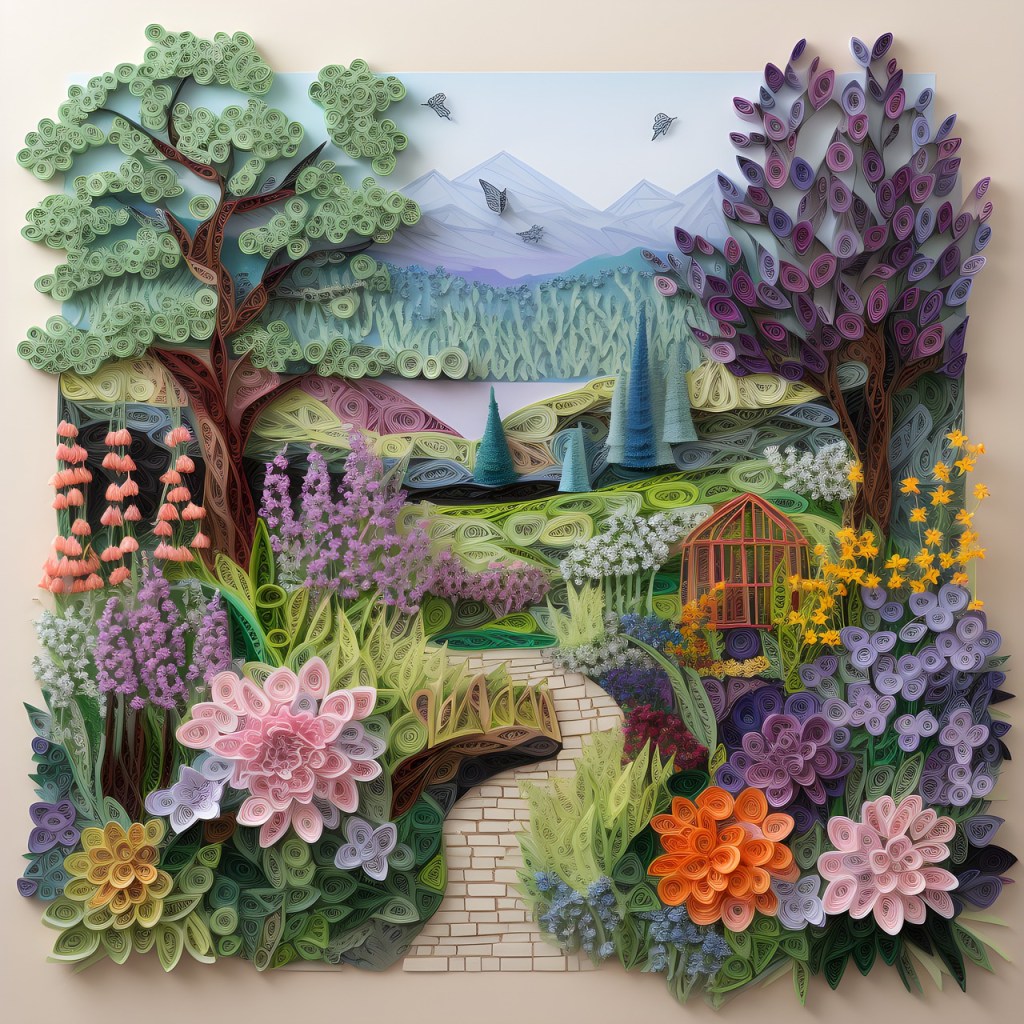
Quilling is a craft utilizing colorful precut strips of paper. After the paper has been rolled using a special slotted tool, the coils are shaped using your fingers to create teardrops, squares, diamonds, etc. and then glued into interesting compositions. Below are a few ideas to inspire your creativity…
Party Décor
Handmade Envelope – (Quilled card shown below)
Greeting Card
Edible Quilling
Ceramic Easter Eggs
Collector’s Egg
Intricate Quilling Design Detail
Portraiture – (Quilling & Illustration)
Wall Art
Freestanding Sculpture – (Requires substrate for support)
Tropical Wall Art – (Quilling & Illustration)
Fantasy Wall Art
Springtime Garden Wall Art
I hope you enjoyed seeing these beautiful examples of quilling and will consider giving it a try. Kits are available with all the supplies you need. Please let me know your favorites in the comments.
If you are searching for a new hobby, then this is the post for you. Because there are too many hobbies to fit into one post, arts and crafts can be found in my 3-part series entitled, “Creative Stress Relief.”
Sports, for the faint of heart as well as daredevils, can be easily found online.
Below is an eclectic list of hobbies to pique your interest:
Antiquing: furniture, home furnishings, jewelry
Aromatherapy: perfumes, body washes, sachets, scent sticks
Historical Re-enactments: Renaissance fairs, famous battles
Kite Building
Model Airplane Building
Lego Building
Model Trains
Puzzles: Jigsaw, Crossword, Seek & Find
Reading
Stargazing
Video Gaming
Wine Making
As you can see, there is something for everyone. What starts as a hobby often blossoms into a new career. I hope you are inspired to try something new. Please let me know your favorite hobbies in the comments.
Ah the tropics! I’m sure we all wish we could be basking in the sun on a tropical island -sand under your feet, a soft ocean breeze, and a cool fruity drink within reach. Our travel plans may be on hold for now, but we can dream. A tropical project may be just what we need to brighten the day and lift our spirits.
Inspiration
The thick vegetation and unusual wildlife is a constant reminder that this is a whole new world, and we are invited to come inside to explore.
Inspiration
There’s an infinite variety of foliage and tropical leaves provide many interesting shapes, intricate patterns and vibrant colors.
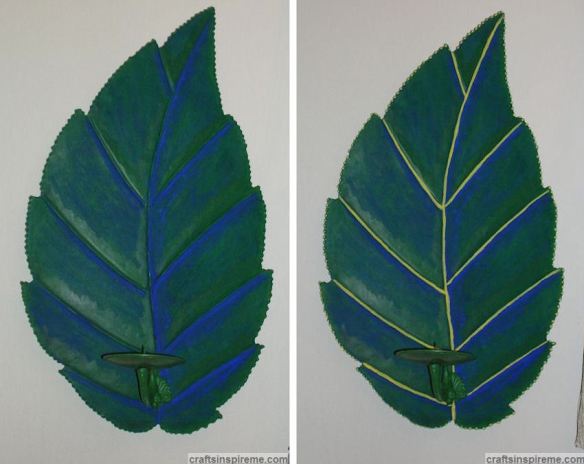
Original Metal Leaf Wall Sconces
In this project we will be refinishing these metal, leaf-shaped wall sconces. Purchased from an online home furnishing store, it was a great disappointment to open the box and discover their color schemes were completely mismatched. Because we liked the size and shape of these leaves, we decided to keep them anyway, with hopes of one day fixing the problem. That day is today!
Supplies Supplies:
Metal Leaf Wall Sconces (18” high x 11-1/2” wide x 6-1/2” thick)
Acrylic Paint – medium green, dark green, yellow, and brilliant blue
Paintbrushes
Clear Spray Paint – gloss or matte finish
Paint the Base Coat
Step 1 – Paint each leaf medium green. They look better already. As you progress, remember this is your chance to experiment with colors as well as painting techniques. If you don’t like something, you can easily paint over it with another base coat and try again.
Choose your Color Scheme
Step 2 –On the left, a blue wash was applied over the surface, using very watered down blue paint. The right leaf has a blue stippled pattern, made by applying blue paint with short brushstrokes. I like the light and shadow effect of the wash technique on the left, which provides depth and richness in the color, while also helping to define the leaf’s structure. The texture on the right leaf is interesting, but visually breaks up the surface, making it appear to be clustered leaves as opposed to one large leaf.
Define Light & Shadow
Step 3 – The position of the sun in the sky creates the marvelous effects of light and shadow. I chose to have the light coming from above on the left. This means the left side of each leaf is lighter than the right. Washes of blue and green were applied, with the darker hues upon the right side of each leaf. The veins were given dimension with blue shadows beneath, which lighten gradually as they approach the next vein below. The leaf photo on the right has light yellow veins. Other shades were tested as well.
Veining details
Step 4 – Bright green (a mixture of yellow and dark green) was applied to all the veins on both leaves. The beaded edge around the perimeter of each leaf was painted yellow.
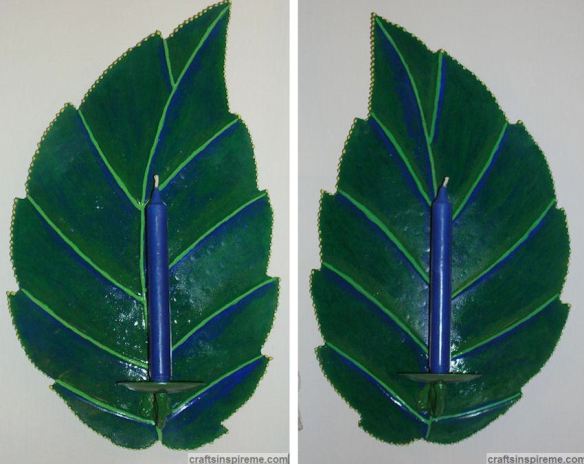
Completed Flat Finish Leaves
Step 5 –At this point you could stop. I highly recommend spraying each leaf, front and back, with a matte finish clear spray paint to seal the paints. Before installing candles, please see the Crafter Tip below. For a gloss finish, please continue to Step 6.
Flat Finish versus Gloss
Step 6 – Tropical islands have high humidity and frequent rain. To achieve that wet-look, you will need to spray a few coats of glossy clear spray paint. This photo shows the dramatic difference between the flat and gloss finishes. Notice how much more vibrant the colors become with the gloss finish.
Completed Gloss Finish Leaves
These are the completed tropical leaves with new navy blue candles.
Crafter Tip: Each wall sconce has a metal spike to hold a candle. If you try to push a taper candle down onto the spike, it will inevitably split the candle. How do I know? I broke two! To avoid this, pre-drill a hole in the bottom of each candle using a very thin drill bit.
I hope you enjoyed this makeover process. These steps can be applied to all kinds of home décor. You don’t have to settle for anything. Take out your paints and let your imagination bring crafts to life in your own personal style.
Time flies. It’s hard to believe I launched this blog in 2018. Today I thought it might be interesting to find out the most popular posts as voted by you, the readers. Below is a list of the Top 10 posts in ascending order:
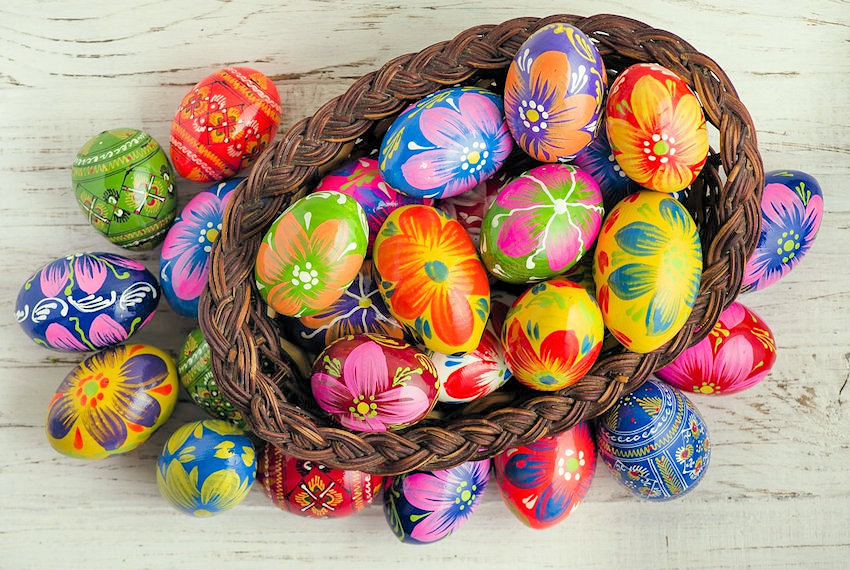
Number 10: Decorating Easter Eggs
Dyed eggs are a staple of any Easter celebration. To read more, please click here.
Number 9: Collages: Old School vs. High Tech
Collages can be created by two different methods: 1) “Old School” Traditional, or 2) High Tech. To read more, please click here.
Number 8: Table Décor – Designs for All Occasions
Welcome to part two of table décor. Last week we reviewed the basic elements used in decorating tables. Today, we will see table designs for most occasions celebrated throughout the year. To read more, please click here.
Number 7: Fun with Photo Editing
Wouldn’t it be cool if you could simply change a gloomy sky to a gorgeous day with a wave of your arm? We might not have that ability now, but we can certainly achieve this monumental task through the power of photo editing. To read more, please click here.
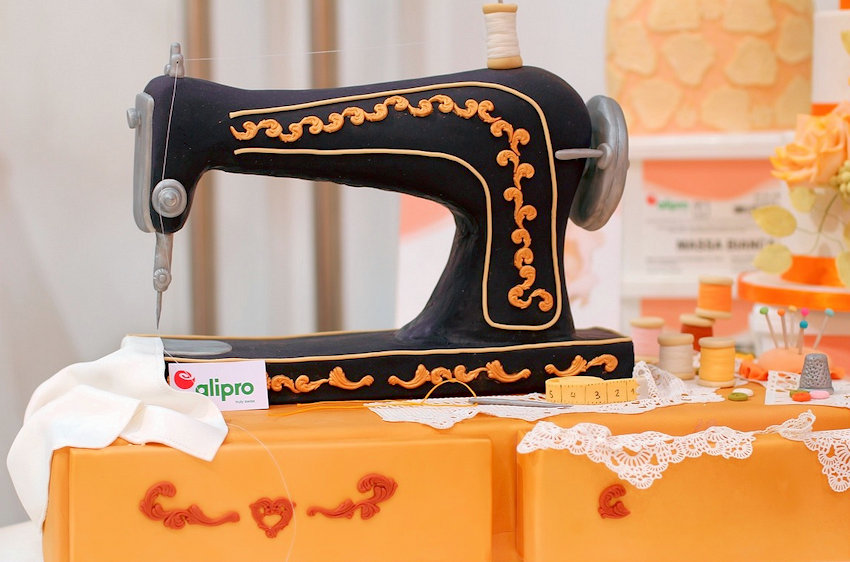
Number 6: Inspiring Cake Design
A well-designed cake sets the tone (e.g., romantic, playful, humorous), or complements the theme (e.g., fairytales, natural wonders, hobbies, holidays) for every celebration. To read more, please click here.
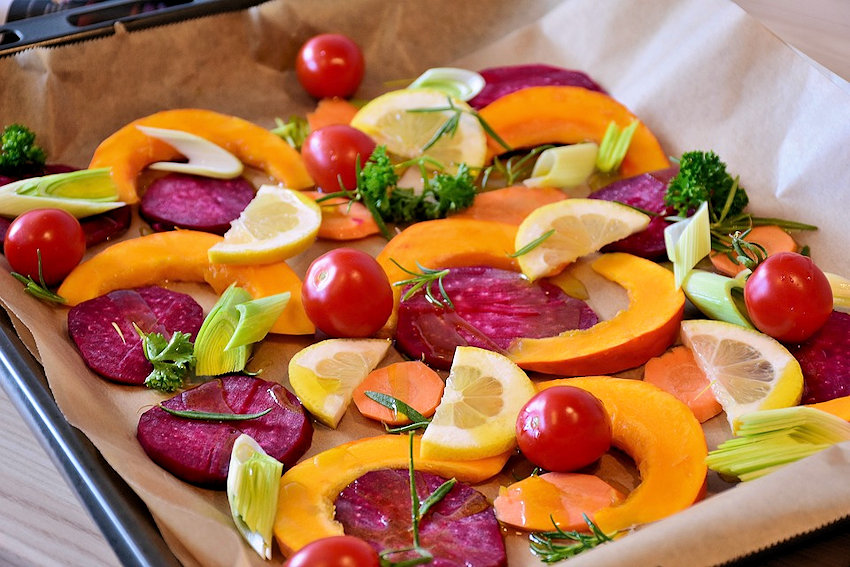
Number 5: Pumpkin Spice & Everything Nice
In Autumn, as the leaves begin to turn, pumpkin flavored items begin popping up everywhere, from coffee shops to fast food restaurants and even the local pub. To read more, please click here.
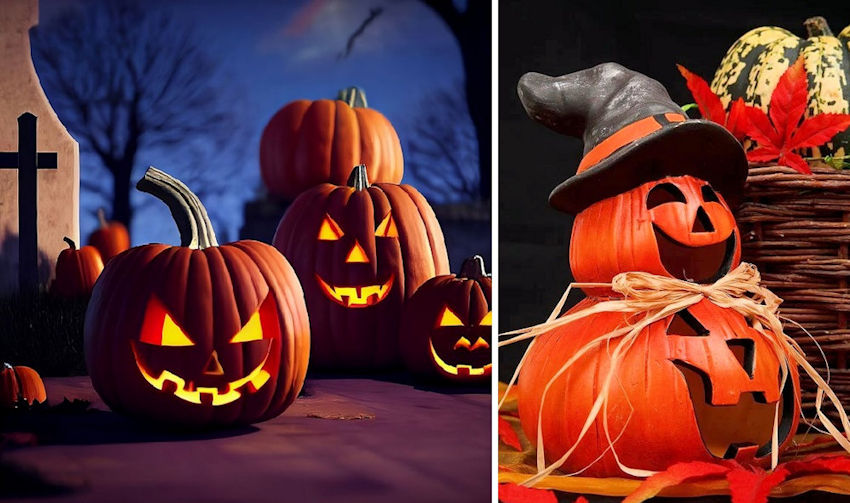
Number 4: Halloween: Naughty or Nice?
There are all sorts of Halloween themes and characters to help us celebrate this imaginative holiday. To read more, please click here.
Number 3: One Craft Leads to Another
Because we live in such a beautiful world, it comes as no surprise that we are inspired to create using every color of the rainbow. To read more, please click here.
Number 2: Inspiration: Lost & Found – Part 1
Sometimes it feels like inspiration is impossible to find. It hides in plain sight, masquerading as mundane items in our daily lives. To read more, please click here.
Number 1: Blogging Vacation
Throughout the summer, I usually take a break, by posting every other week. This year there were so many inspirations to share I simply kept going. To read more, please click here.
And there we have it – the top 10 posts from 2018 through 2023. There are always new ideas to explore, and I’ll be sure to include more of your favorites. Your opinions are greatly appreciated, and I look forward to so much more in the future. If you have any suggestions for posts, please let me know.