New ideas are always brewing at the arts and crafts studio. Here is a sneak peek at a few of the upcoming projects…
Cake Decorating
Cake decorating has been a popular topic on this blog, and I have lots of new cake designs to share.
Crafting with Feathers
Craft stores always have feathers, and there are many creative ways to include them in your artwork.
Full Color Makeover
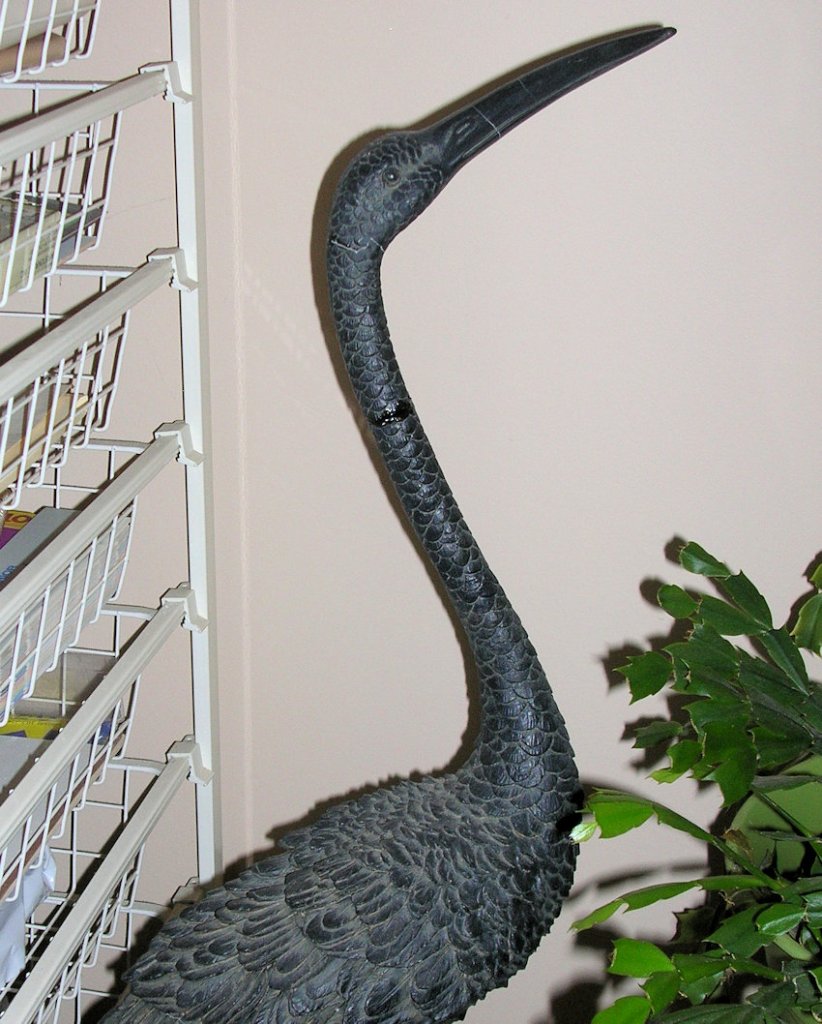
This monotone crane has been standing next to a potted plant for years. It is high time he gets some much-needed attention. Believe it or not this makeover will transform him into a crowned prince.
Cookie Decorating
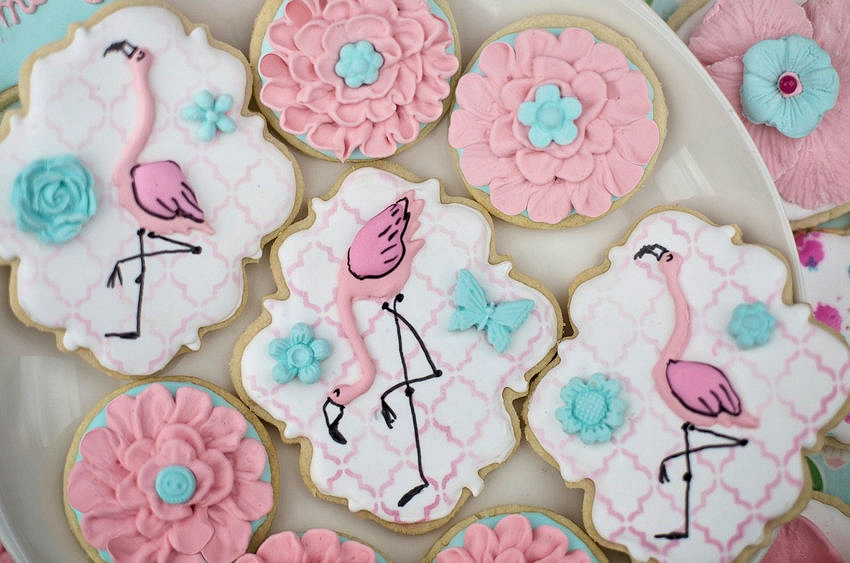
The only time of year my family decorates cookies is Christmas. This post will inspire you to create beautiful cookies any time of year.
Painted Wood Crafts
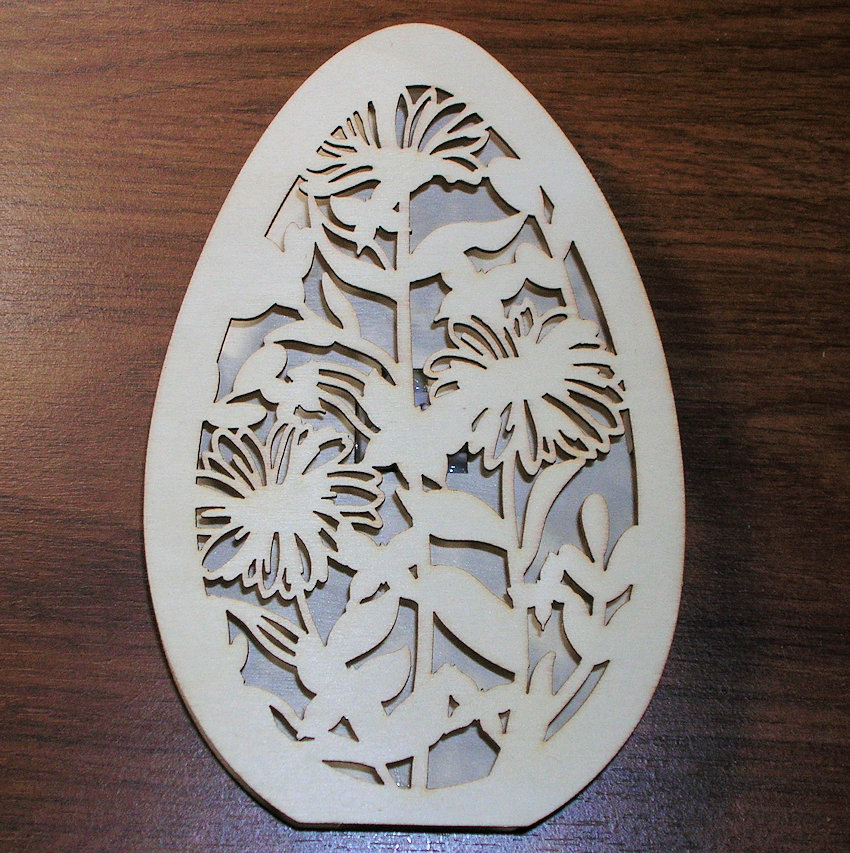
Wood crafts are inexpensive, easy to color or paint, and quickly produce attractive décor for your home.
Magical Creatures from Harry Potter
The world of Harry Potter is inhabited by some extraordinary creatures. With a little creative magic, you can conjure one to adopt into your family.
Art Studio Mascots
Speaking of adoption, our foster cats have become permanent members of the family, and they will be popping into the studio from time to time for a visit. Here are a few of their recent comments: “Being an inspiration is exhausting and we’re working for kibble. F.Y.I., the feather projects will be delayed indefinitely…you don’t have any. You’re welcome. Wake us when there’s a big juicy mouse project!”
I hope you enjoyed this brief look into future posts. Comments and suggestions are welcome, and I look forward to hearing from you.
This is the final leg of our gemstone tour as we explore the neutral color palette, followed by several multicolor gems that really know how to stand out in a crowd. Here we go…
Color: Black – mysterious, sexy, luxurious
Black Onyx
Historically, black onyx has been carried as protection for travelers. Used in jewelry, it provides great eye-catching contrast, showcasing any accompanying gems.
Black Diamonds
Have you ever seen black diamonds? The natural-color black has been growing in popularity, but unlike other diamonds, these stones are opaque.
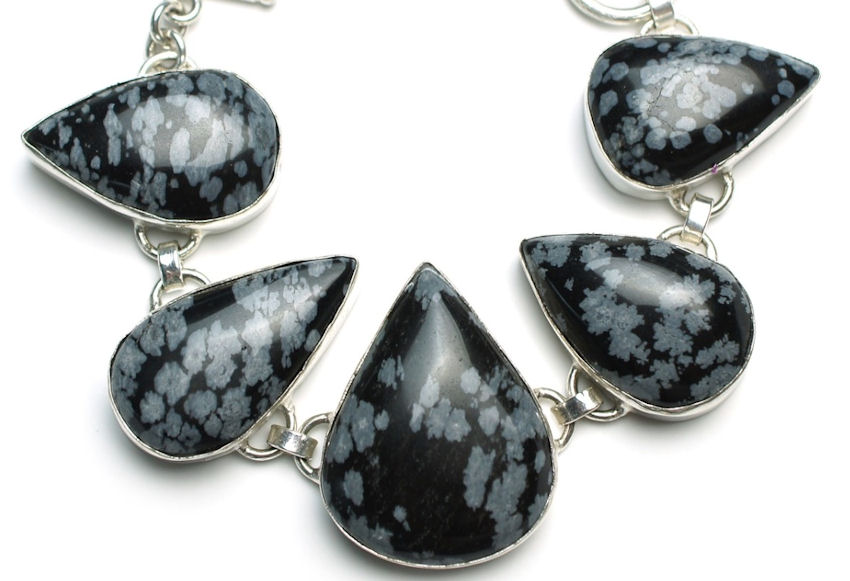
Snowflake Obsidian
The product of volcanic activity, as molten obsidian cools tiny pockets of trapped gases burst forming the delicate snowflake patterns in this beautiful gemstone.
Tahitian Black Pearls
Tahitian black pearls, grown in the waters of French Polynesia, are the only true black pearls. All other black pearls have been dyed.
Gray jasper brings a sense of calm and well-being to the wearer.
Color: Brown – relaxing, grounding, comfortable
Tigereye
Want to see a magic trick? When bright light reflects off fibers in a Tigereye stone, the color appears to change in a phenomenon known as chatoyancy.
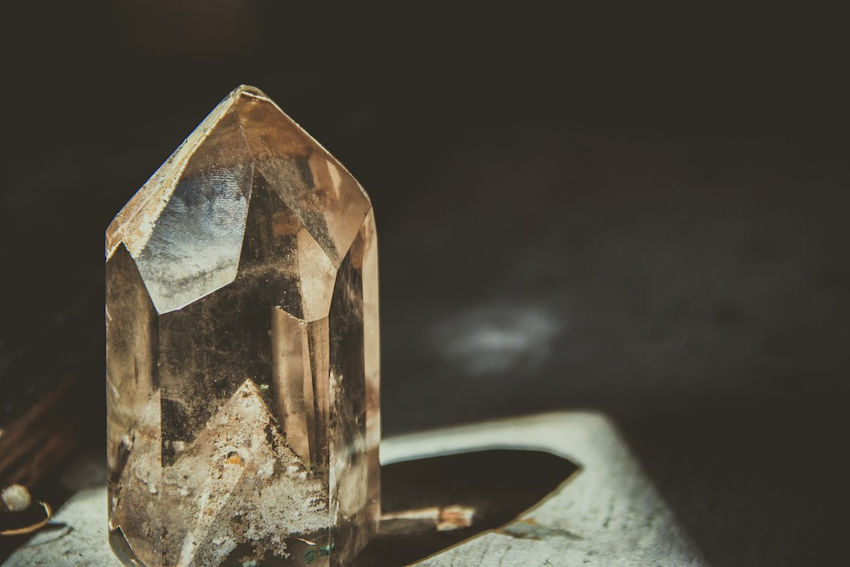
Smoky Quartz
Also known as smoky topaz, this gemstone ranges in color from light browns to black, just like its namesake, smoke.
Natural Mother of Pearl
Mother of pearl comes from the shell of an oyster or mussel. These organic gems are cream, beige and tan swirled with white.
Color: White – peaceful, practical, cool
Onyx
This banded stone is believed to increase intuition and clarify dreams.
White Mother of Pearl
Because this organic gem comes from a pearl producing shell, it is associated with nurturing and motherhood. Cameo pendants and pins are typically carved from mother of pearl.
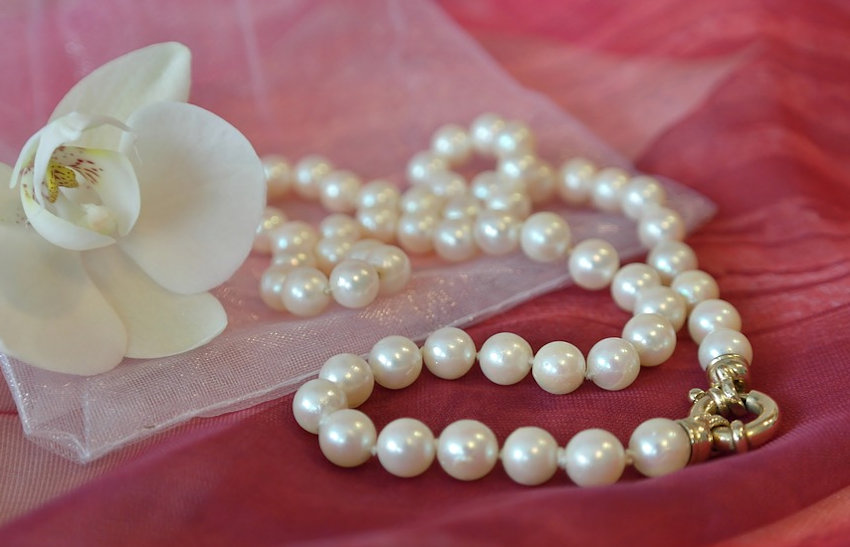
Pearls
Pearls have long been associated with female power. Cleopatra is believed to have worn makeup made from ground gemstones. Today we may wear pearlescent eyeshadows, but she wore the real thing!
Clear Quartz
Clarity of vision and creative inspiration are qualities associated with clear quartz. Because this gem resembles ice, it looks even more frosty when paired with blue or black gemstones.
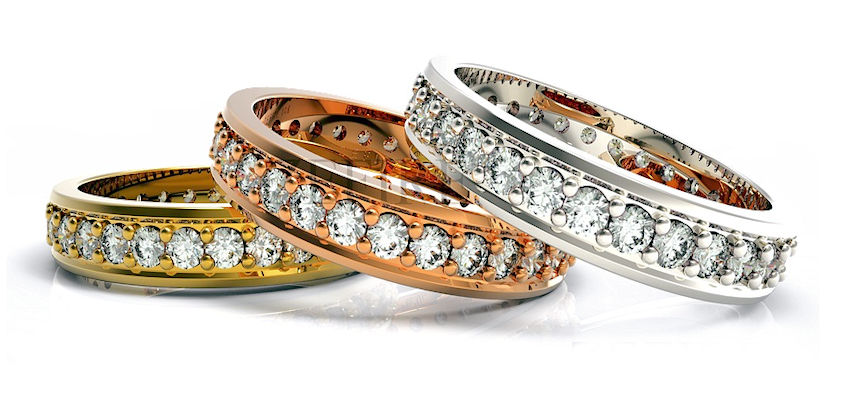
Diamonds
Diamonds are the hardest gemstone in the world. Perhaps that is why they have become a universal symbol of love and commitment in engagement and wedding rings.
Multi-Color Gemstone Gallery: – multiple colors in one gemstone
Sardonyx
Fluorite
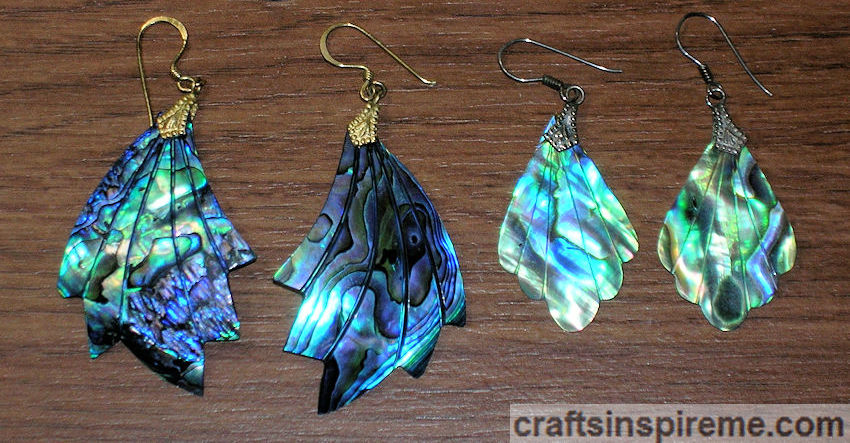
Abalone
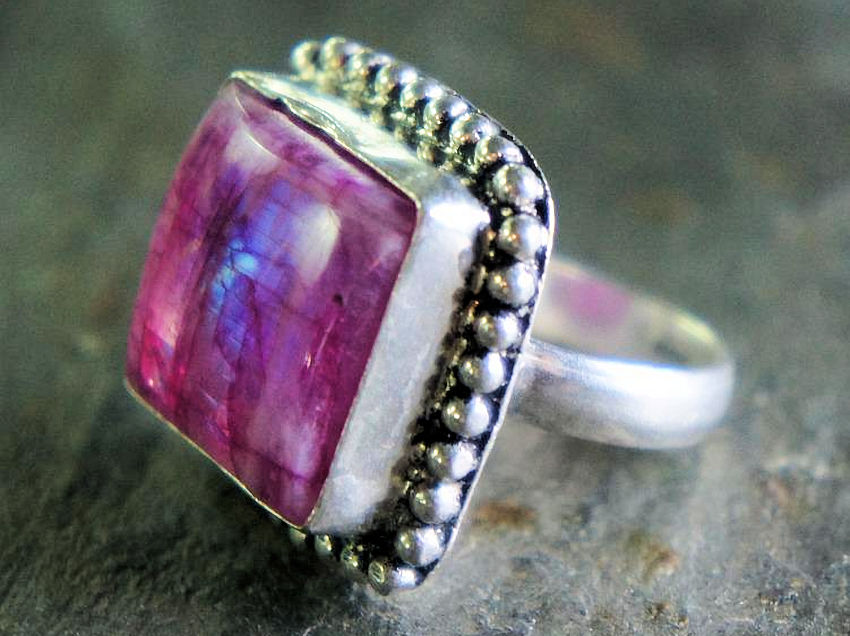
Pink Labradorite
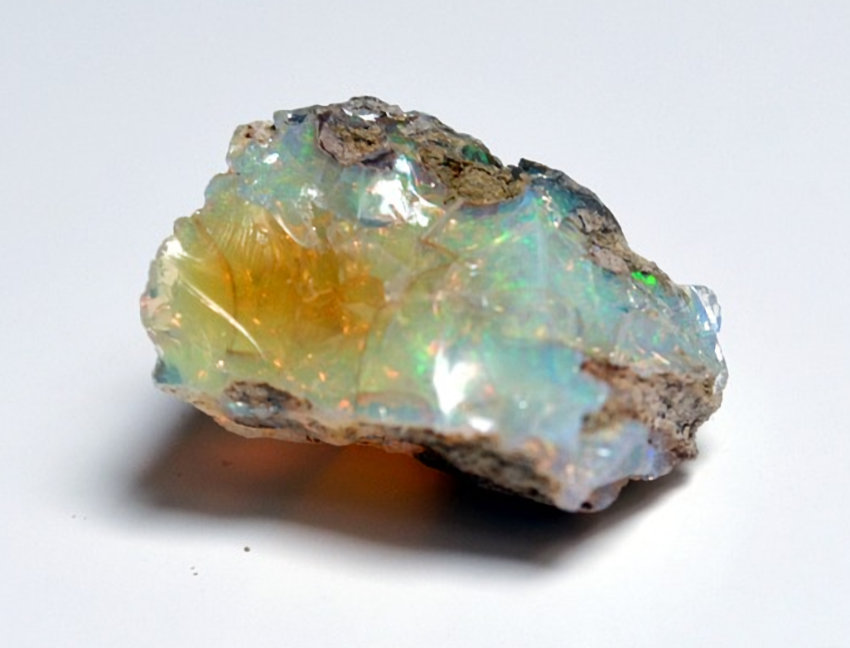
Opal
Blue Agate
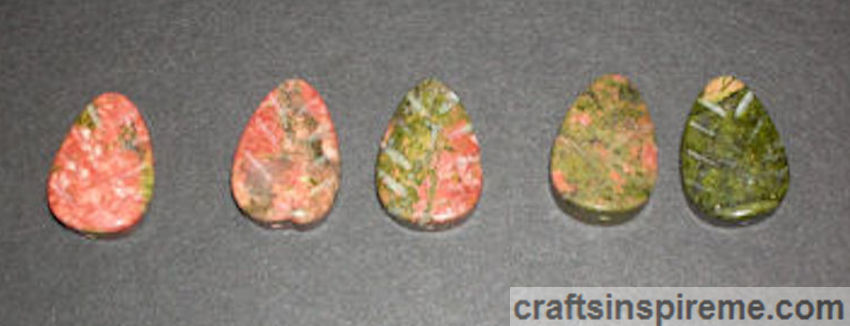
Unakite
Chrysocolla
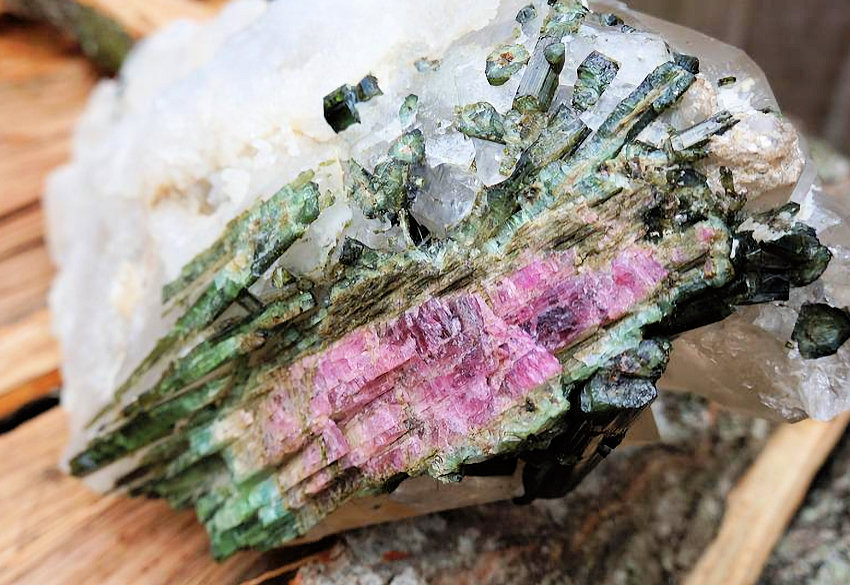
Watermelon Tourmaline
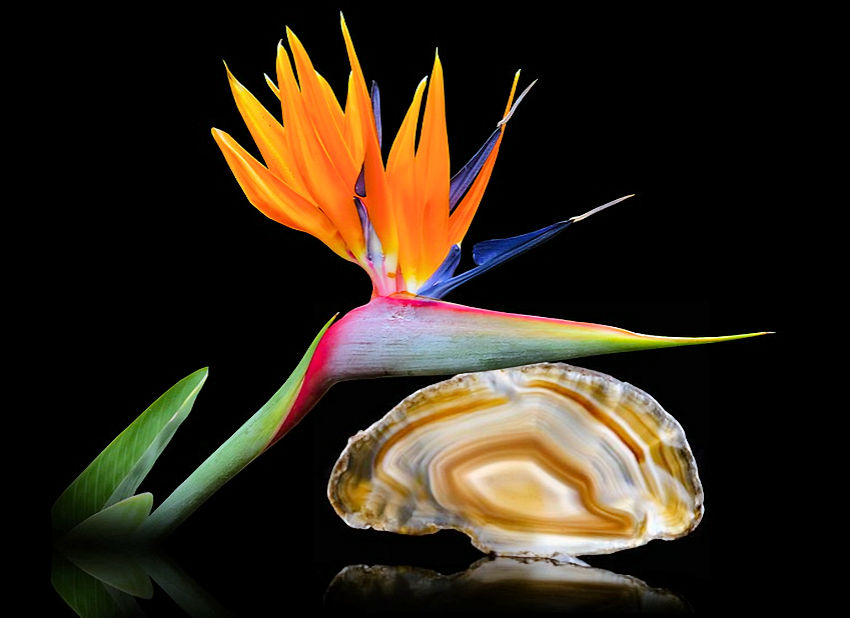
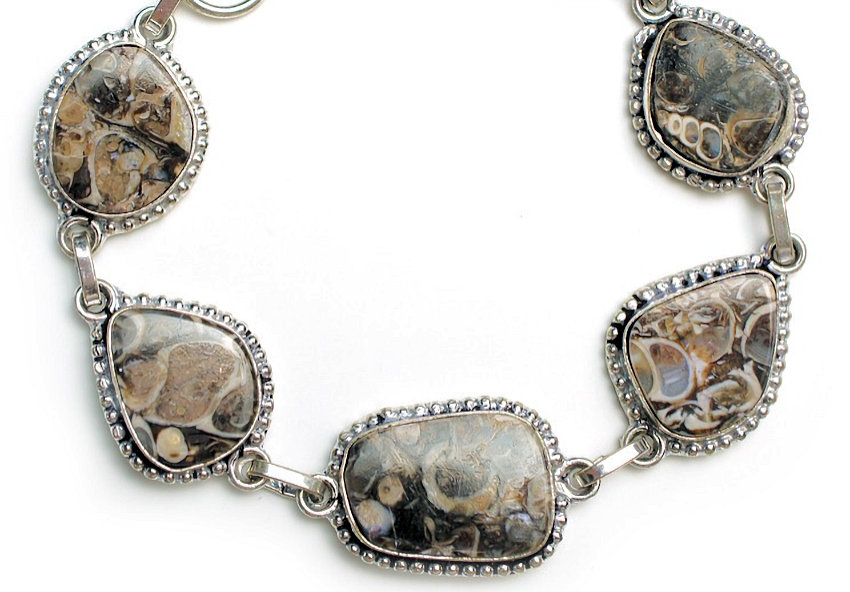
Turritella Agate
If you love gemstones and archeology, turritella agate is for you. Turritella is a midsize snail that lived millions of years ago. These fossilized creatures are forever preserved within the stones, resulting in a one-of-a kind, visually stunning piece of jewelry.
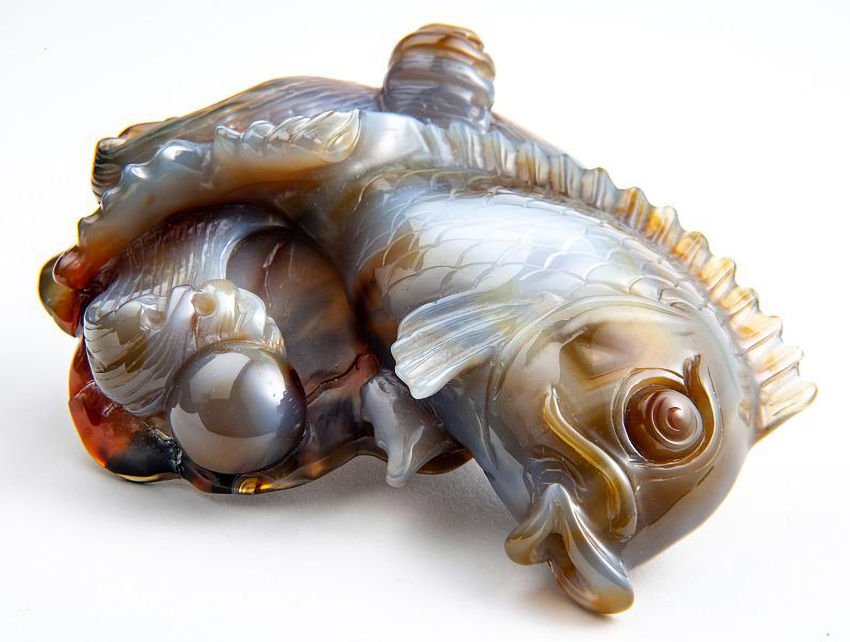
Carved Agate
Our final gemstone is this beautifully carved fish cut from a single piece of agate. It’s a gemstone and sculpture in one. How cool is that?
I hope you have enjoyed Mother Nature’s rainbow of gems. New gemstones are still being discovered, creating fresh possibilities in jewelry design. If you feel inspired to try jewelry making, Fire Mountain Gems is a wonderful resource for gemstones, supplies, tutorials and more.
Welcome to part two of our rainbow of gems tour. The Warm Color Palette includes yellows, oranges, reds, and pinks. Qualities associated with each color are noted below. Warm colors call to mind images of blooming flowers, days at the beach, and barbecues in the backyard. Let’s find gems to inspire us.
Color: Yellow – cheerful, warm, motivational
Golden Beryl
You may not have heard of the gemstone called beryl, but I am sure you are familiar with two of its relatives, emerald and aquamarine. Although it comes in a few colors, yellow is the rarest.
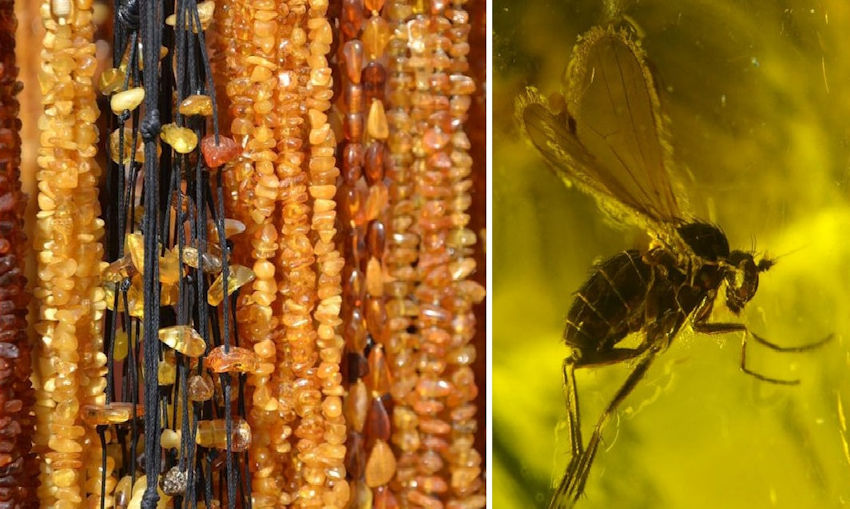
Amber & Amber with an Insect Trapped Inside
Even when the sky is gray, cheerful gold and yellow amber beads will brighten your day. Amber is often found with very interesting inclusions like the famous mosquito in the movie, “Jurassic Park.”
Citrine
Want more light and positivity in your life? Citrine captures rays of sunshine you can wear day or night.
Lemon Quartz
Yellow quartz quenches your thirst for beautiful gemstones like a cold glass of lemonade on a hot summer’s day.
Color: Orange – joyful, playful, independent
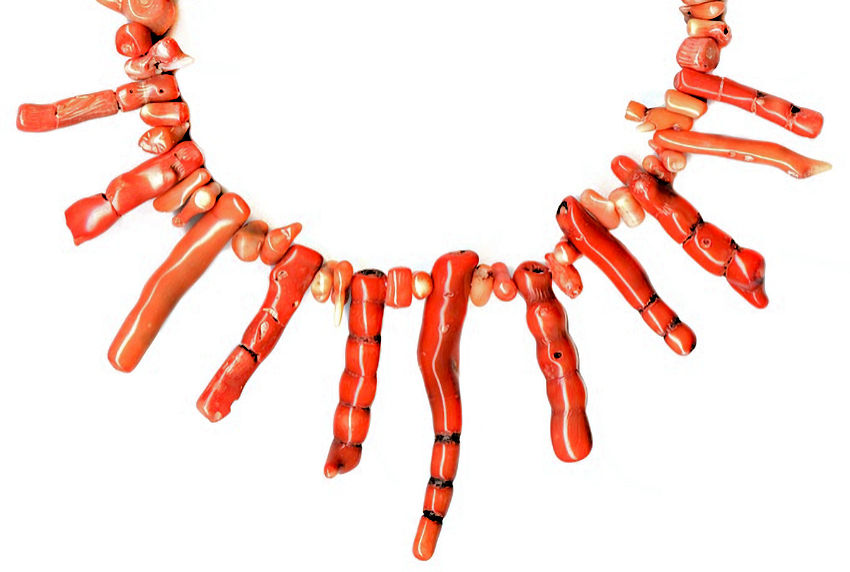
Orange Coral
Coral has been used for centuries in jewelry. Because it is susceptible to damage from direct sunlight and excessive heat, care should be taken when wearing or storing your coral pieces.
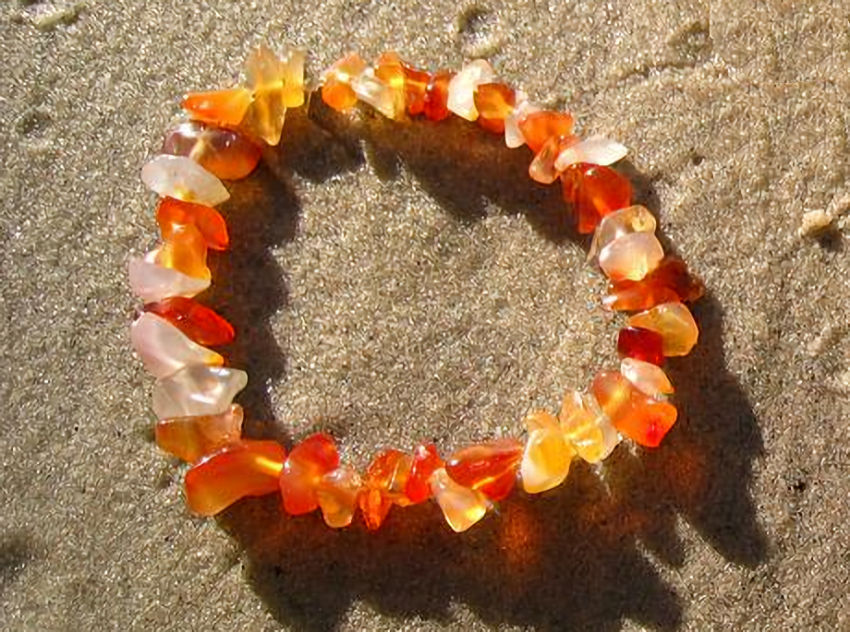
Orange Carnelian
Carnelian has a blend of color from light to dark within the same stone.
Orange Chalcedony
Available in several colors, chalcedony may also have bands of color. I must be hungry because these beads remind me of an orange creamsicle.
Peach Pearls
Known for their iridescent luster, pearls have been a worldwide favorite for every type of jewelry, from single pearl earrings to priceless crown jewels.
Color: Orange Red – energizing, attention-getting, self-assured
Madeira Citrine
Named for a city in Portugal, Madeira citrine has a deep, reddish orange or brownish orange color.
Color: Red – bold, romantic, sexy, powerful
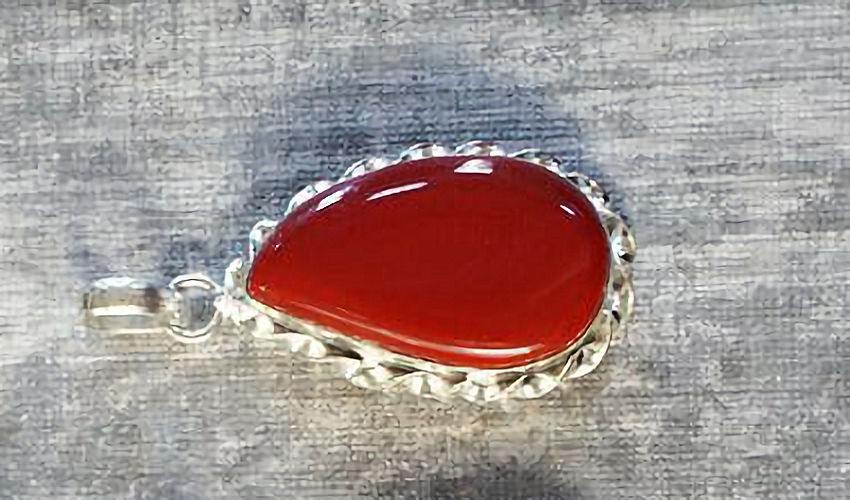
Red Carnelian
In ancient Egypt, carnelian was worn as jewelry for its beauty, carried daily to energize the body, and buried with the dead as protection in the afterlife.
Red Coral
Red coral is typically harvested in the deep waters of the Western Mediterranean.
Garnet
Garnets have a long history as symbols of love, power, and protection. Many rulers have worn garnet studded crowns as sign of their power and authority.
Rubies
Rubies, the birthstone for July, are one of four “precious” gemstones, which includes Sapphires, Emeralds, and Diamonds.
Red Jasper
Jasper can be spotted, striped or solid color. Warriors often adorned their weapons and armor with jasper to ensure success in battle.
Color: Pink – soft, feminine, sweet
Rhodochrosite
This beautiful pink gem is honored by Native Americans. With frequently occurring “floral” patterns within the stones, rhodochrosite is a popular gift of love.
Rose Quartz
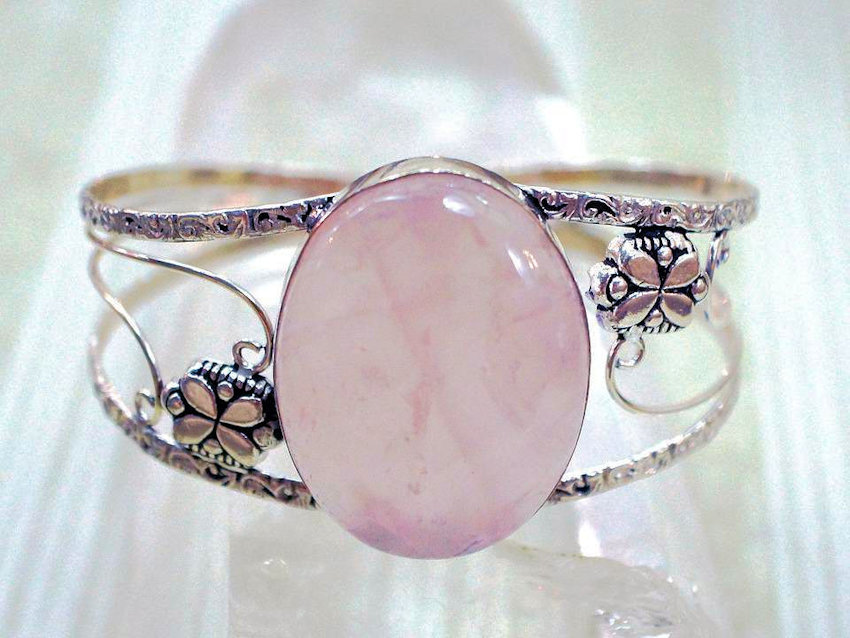
Transparent rose quartz is very rare, and the most prized comes from Madagascar.
This completes the warm color palette and the traditional colors of the rainbow, but there is still a treasure trove of gems waiting for their turn in the spotlight. Please share your thoughts about your favorite gemstones in the comments section and stay tuned for part three. To read part one, please click here.
Mother Nature created gemstones for every color of the rainbow. I thought you might enjoy seeing some of her greatest works. We will start with the Cool Color Palette, consisting of violets, blues, and greens. Qualities associated with each color are noted below. Let’s delve into the fabulous world of gemstones.
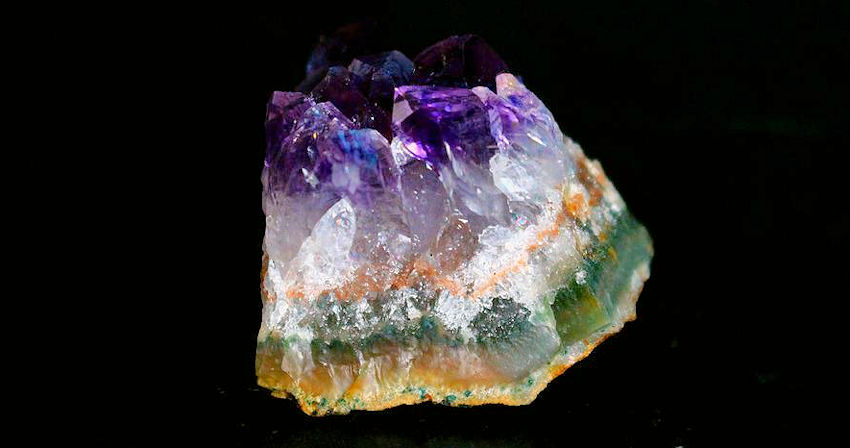
Gemstones grow as crystals in a variety of colors. Amethyst is typically found in shades of purple, but as shown above, it also comes in green, which is known as mint quartz.
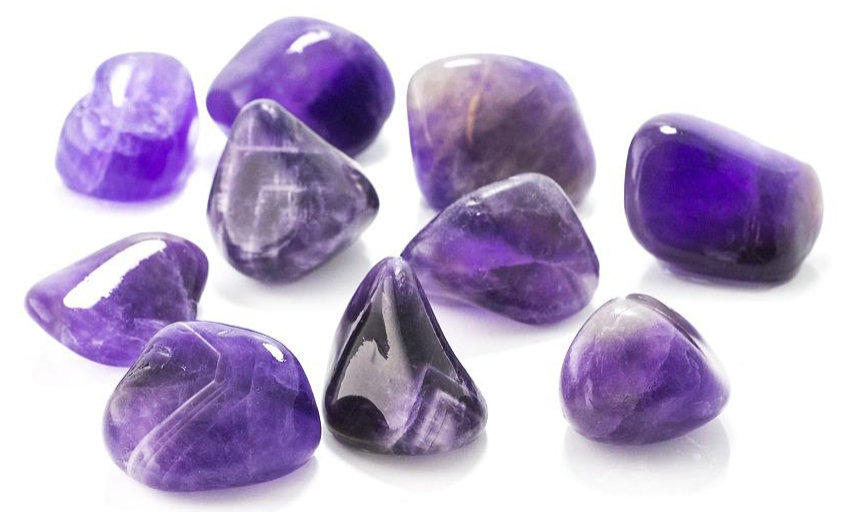
Amethyst Nuggets
Polished gemstone nuggets serve as decorative home accents and touchstones or may be displayed in jewelry designs by drilling or wiring.
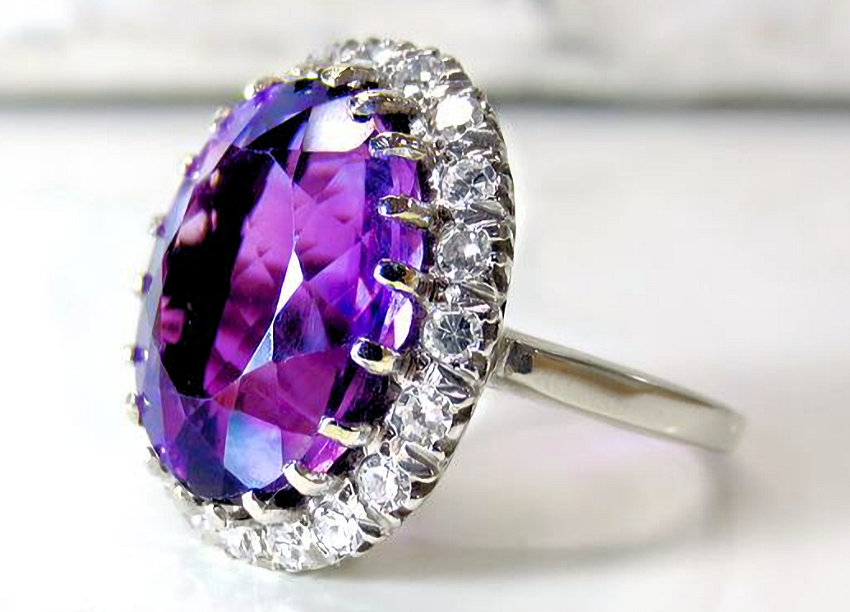
Faceted Oval Cut Amethyst
Gemstones are graded according to several qualities including clarity, hardness (scratch resistance based upon Mohs scale), color, carats (weight), and luster (light reflection).
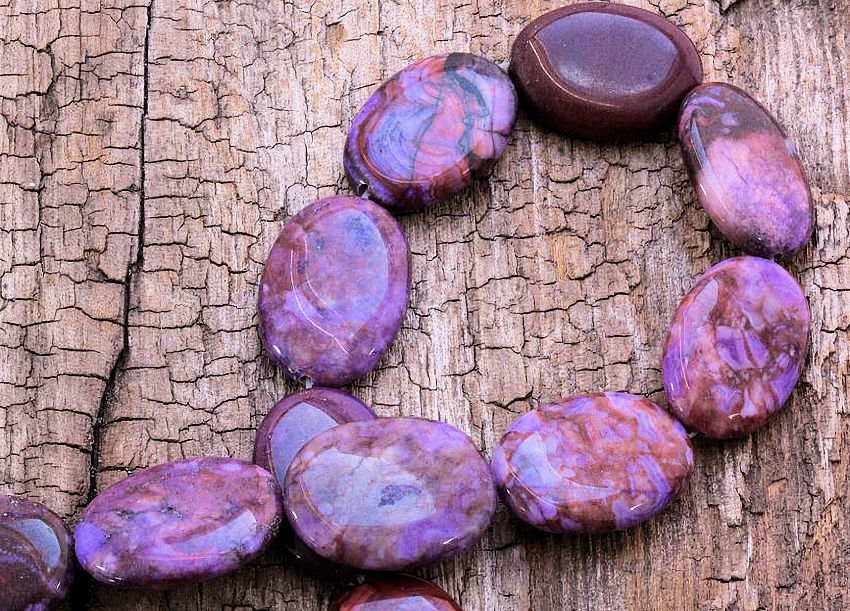
Purpurite
Colors for this opaque gemstone typically range from reddish purples to deep violets. Both ends of that spectrum can be seen in the photo above.
Sugilite
Although this gemstone is usually seen in soft shades of lilac, it can also be bluish purple or deep violet.
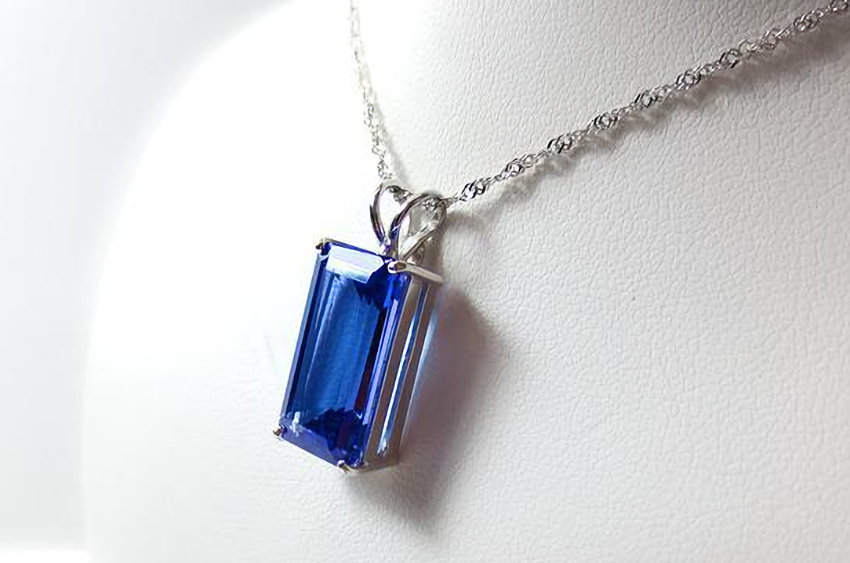
Depending upon the viewing angle, tanzanite, which is rarer than diamonds, changes color from exotic violets to indigo blues.
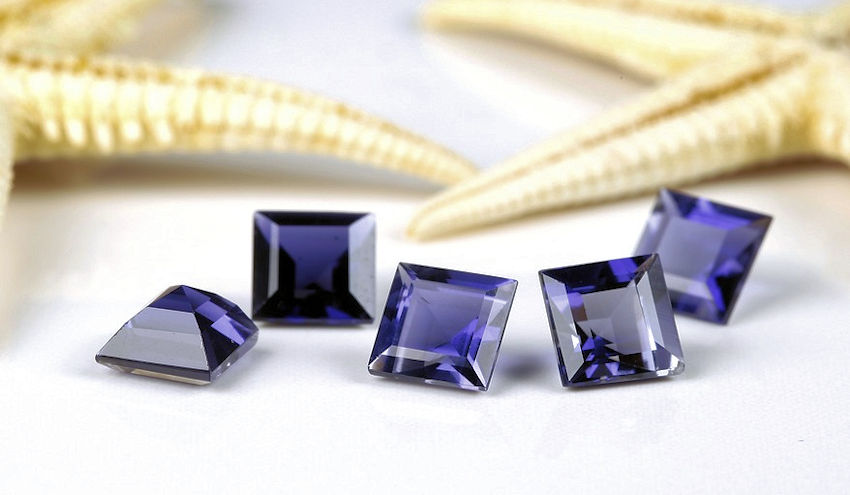
Iolite
Iolite is the perfect marriage of violet and blue. With reflective properties like tanzanite, changes in natural or artificial light transform the color through the full range of blues to violets and back again.
Color: Blue – refreshing, tranquil, playful, inspiring
Lapis Lazuli – Rough Stones
Vibrant blue stones flecked with gold differentiate lapis lazuli from another blue gem called sodalite.
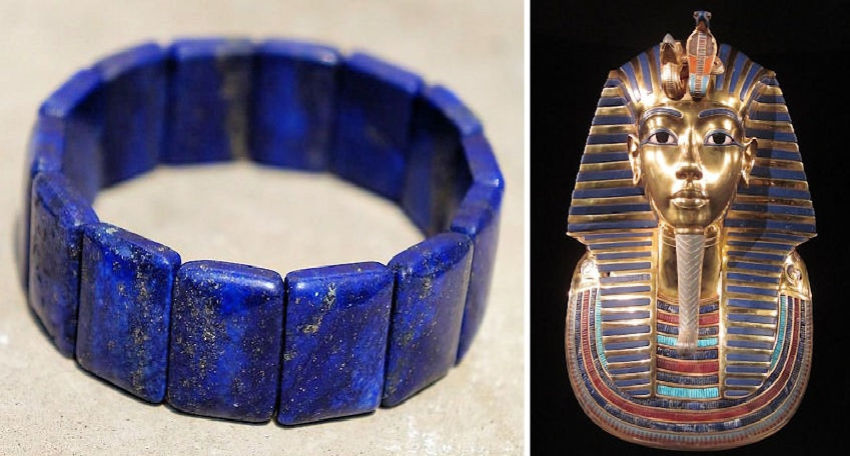
Lapis Lazuli – Polished Stones & King Tut’s Funerary Mask
Historically, lapis lazuli has been a favorite gemstone of royalty. The most famous example is the funerary mask of King Tut, which includes inlaid lapis lazuli, turquoise, and obsidian.
Blue Sapphires
Although blue is the most recognized color, it also comes in several rare varieties including green, yellow, pink, and star sapphire.
Sodalite
Sodalite is a blue stone with white and sometimes black inclusions, which are materials trapped within growing crystals. You’ll see a famous inclusion photo in the next post.
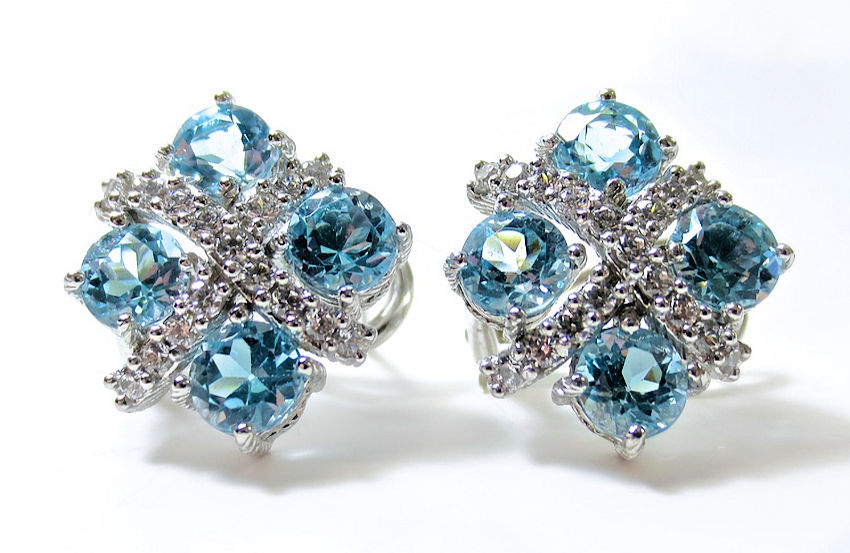
Blue Topaz
Light blue topaz gemstones are called Sky Blue, medium blue is referred to as Swiss Blue, and dark blue is known as London Blue.
Turquoise
Green and blue turquoise typically have black or brown veins called matrix. The most coveted turquoise is Robin’s Egg blue, which has only been found in one location, the Sleeping Beauty Mine in Arizona.
Color: Blue Green – successful, creative, luxurious, exotic
Paraiba Tourmaline
This beautiful blue green gemstone is among the rarest in the world and is highly sought by jewelry designers and gemstone aficionados.
Color: Green – abundant, grounding, renewing, prosperous, fortunate
Malachite
Bold green swirls and striations are hallmarks of this popular gemstone.
Emeralds
Emeralds have been treasured throughout history, but surprisingly they tend to be easily damaged due to the presence of inclusions, which weaken the stones.
Nephrite Jade
This is another ancient gemstone in beautiful shades of green, which can be carved for jewelry as well as decorative figurines.
Peridot
Peridot, the birthstone for August, is also known as Olivine. Inclusions and fractures often found in these stones make peridot more susceptible to damage.
Aventurine
The inherent shimmering quality of aventurine makes it stand apart from all other gemstones.
This completes our exploration of the gemstone cool color palette. I hope you have seen some old friends and met a few new ones. Do you have any favorites? Please let me know in the comments section, and please stay tuned for part two next week.
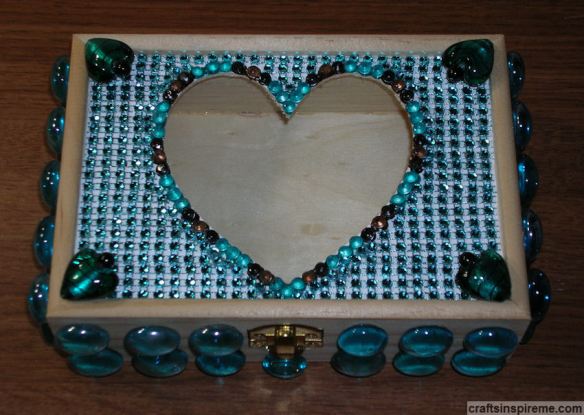
Treasure chest? Jewelry box? What could it be? There’s something so exciting about starting a new project. Sometimes you start out with one thing in mind, which slowly transforms into a beautiful butterfly. Originally. I intended to paint geometric designs all over this box. A roll of rhinestone ribbon became my inspiration, which revealed my hidden need for a lot of bling. Who knew? Where will your inspiration take you?
How to Decorate a Wooden Box:
Plain Wooden Box with Heart Shaped Window
When selecting a box for your project, look it over carefully for damage. Check for splinters or dents, and test the functionality of the latch and hinges. I often find smudges of glue on the glass/acrylic. If necessary, compare several boxes side by side at the store.
Wooden Box with Open Lid
This box, available through AC Moore, is wood inside and out.
Painted Lid
I liked the look of the natural wood and kept most of it as-is, with the exception of the flat top, which was brushed with white acrylic paint to create a high contrast background.
Project Supplies:
You will need a bag of loose rhinestones and fabric paints in turquoise, black and brown.
Additional Project Supplies:
You will also need a bag of turquoise flat glass marbles, a roll of 1/2” turquoise rhinestone ribbon, Elmer’s glue and a glue gun. The rhinestone ribbon and marbles are available at dollar stores.
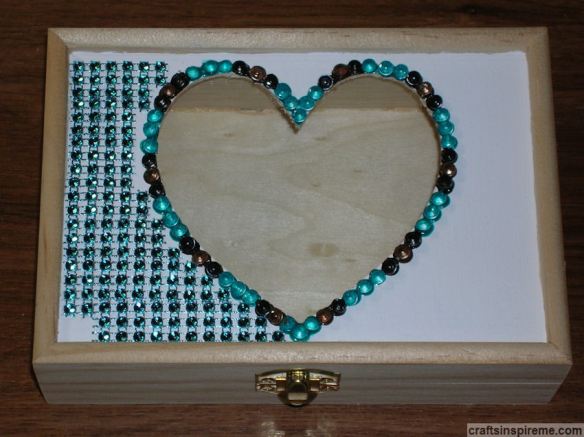
Outline the Heart with Rhinestones
Apply a large dot of fabric paint at the edge of the heart. Use tweezers to push a rhinestone down into the wet paint. Alternate the fabric paint colors to create your pattern. Repeat the process until the outline is complete. Just as reminder: the rhinestones are clear. It’s the paint that determines the color.
Apply Rhinestone Ribbon
Rhinestone ribbon is glued in horizontal bands across the top of the box. Use Elmer’s glue because it will allow you to reposition as needed. Use scissors to cut the ribbon to fit. At the end, fill in any blank spaces by cutting rhinestones from the ribbon and hand placing them with tweezers and Elmer’s glue.
Completed Beading on Lid
As you work around the center heart, you may need to pry off individual beads to make the ribbon fit. They say hindsight is 20/20. If I had to do this over, I would probably apply the ribbon first and then outline the heart.
Apply Flat Glass Marbles
A glue gun will make this step quick and easy. Apply marbles on all sides. Ensure the marble placement will not interfere with the opening and closing of the lid. I found are marble that had broken in half, and placed it under the latch to complete the pattern, which you can see in the next photo.
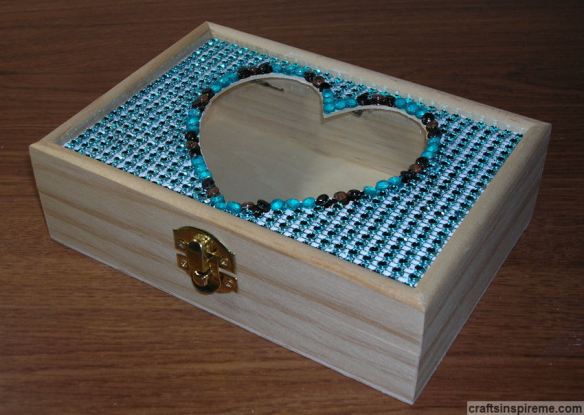
The Completed Bejeweled Box
Large turquoise hearts are glued in each of the four lid corners. These hearts are actually jewelry pendants. A black onyx bead has been glued to each heart to cover the hole on top.
I’m considering lining the inside of the box with felt or velvet. It all depends upon how it will be used, and frankly I haven’t decided yet. What would you do? Please make suggestions in the comments section. I look forward to hearing your ideas.
Spending time in nature brings a renewed sense of balance, re-energizing the mind and body and nourishing the soul. Wearing flowers in your hair is a lovely way of taking a little piece of paradise with you as a daily reminder to stop and smell the roses.
Accessories by Nature
Who needs an accessories store when Mother Nature provides everything we could possibly need and more?
The Power of One
Sometimes all you need is one bold flower as a focal point. Of course, there is no denying that having green hands tends to be an attention-getter as well. (lol)
Hawaiian Traditions
Native Hawaiians celebrate beautiful traditions with music, dance, and flowers, and visitors are encouraged to join in the fun.
Timeless Flowers
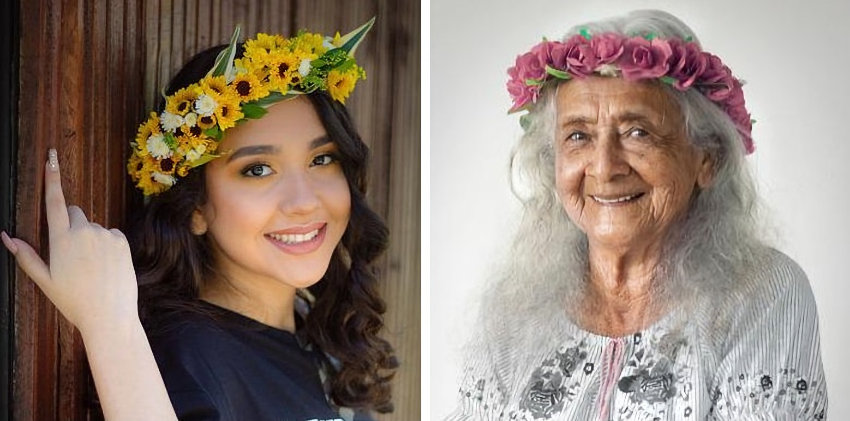
Weddings, birthdays, and anniversaries are all great excuses for floral accessories, but you don’t have to wait for a special occasion. Celebrate “Me Day” with flowers!
Flower Girls
Sweet and sassy flower girls are experts at charming audiences and stealing the show.
Back to Nature
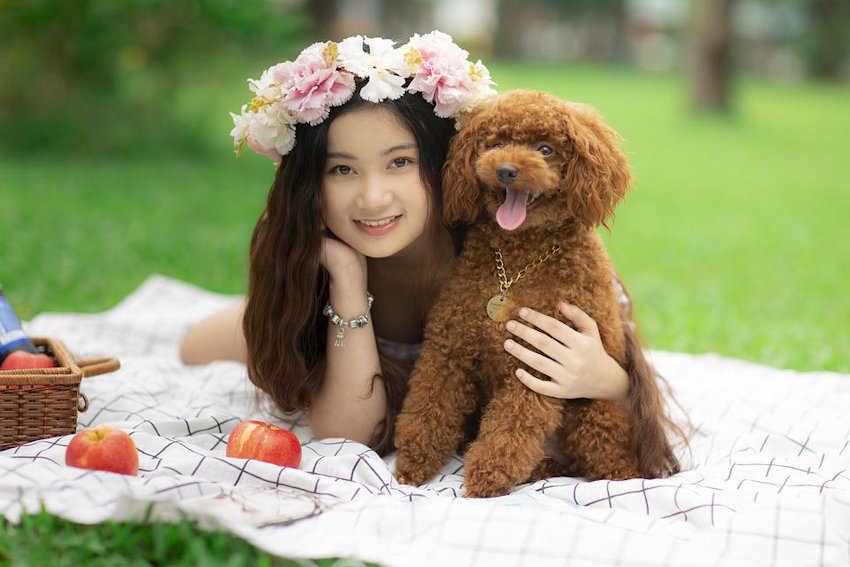
Turn an ordinary picnic in the park into a portrait session for you and the kids.
Fairytale Princess
Start with an adorable portrait of your precious crowned prince or princess (a.k.a. child) and let the power of photo software magically develop a fairytale image to be treasured for years to come.
Fur Babies
If your kids are fur babies, a few flowers will render heartwarming photo results.
Love & Romance
Perfectly placed blooms evoke an exquisite romantic vibe.
Beaded Beauty
As the bride processes down the aisle, guests are dazzled by a delicately beaded headpiece and a ring of bold red flowers to complete this attractive updo.
All Eyes on Me
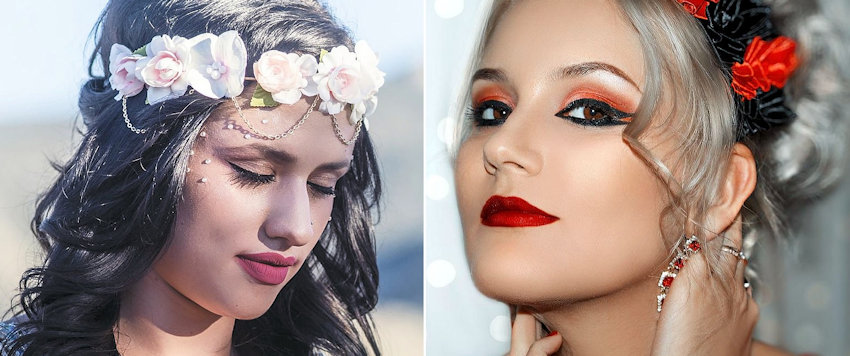
On the left, a copper headband wrapped in flowers, complemented by beaded copper earrings and shimmering eyeshadow, creates this lovely harmonious look. The more organic style on the right beautifully frames the bride’s face, while dramatic makeup and lashes draw attention to her eyes.
Confidence is Beautiful
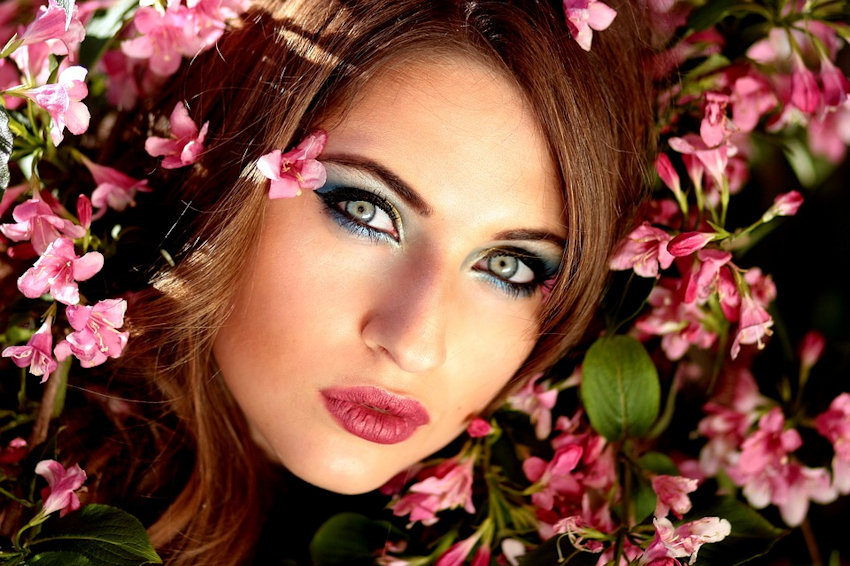
Soft and ethereal like a fairy princess or bold and sensual as a siren of the sea, flowers let your personality shine through with confidence.
Floral Fashionistas
Makeup, hair, and jewelry accompanied by color-coordinated flowers are the key elements of these fashion forward styles.
Pretty in Pink
Peonies are so beautiful, and their scent is intoxicating.
Bold & Beautiful
If you want to stand out in a crowd, wear red. Flawless makeup with vibrant lip color will have them hanging on every word.
In Perfect Harmony
A white pearl headband and earrings mimic the white hydrangea blossoms and charming lace wedding gown. A filmy pink dress calls for delicate mini roses and pastel blooms of spring.
Poetry in Motion
Flowers, ribbons, and vibrant designs are an integral part of Mexican traditions. Her black dress and hair provide the perfect contrast for the fuchsia and green palette, with a brilliant smile as the cherry on top.
Belle of the Ball
Start with an intricately beaded evening gown, layered with fabric petals and pearl centers. Wispy greens serve as the foundation for a lovely peach floral crown and matching bouquet. A soft peach makeup palette completes this exceptional formal look. The belle of the ball will be dancing long after midnight.
Flower Power
If you love being the center of attention, a bold statement is the way to go, and this floral look is unforgettable. The makeup palette perfectly complements this jaw dropping composition. The only disappointment is not seeing how her bridal gown coordinates with such an over-the-top floral display.
Here we are at the end of our flower extravaganza. Hopefully you are inspired to incorporate more flowers into your life. Flowers bring smiles and we all benefit from more happiness.
A little piece of paradise – Isn’t that what we all want? That means different things to different people. For many, the idea of a cozy grass shack on a tropical island is a common fantasy. Of course it goes without saying that we’ll expect all the comforts of home in that “shack,” but that’s not important. Visualizing the dream is the focus here. This time of year so many people visit the seashore. An ocean-themed centerpiece, created one piece at a time, brings memories of vacations past to mind, and inspires dreams of vacations yet to come.
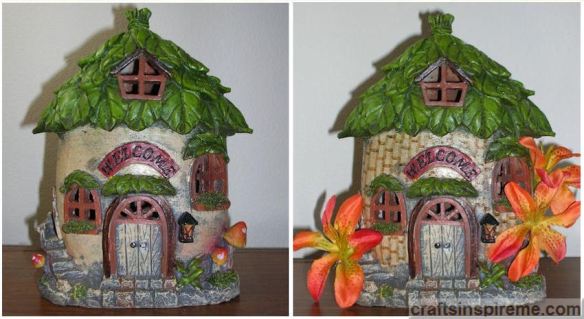
Before & After Photos: Tropical Home – Front Facade. What was once a home for tiny gnomes transforms into a tropical retreat with orange silk flowers, and a bamboo pattern drawn by hand on the exterior walls using a brown Sharpie marker.
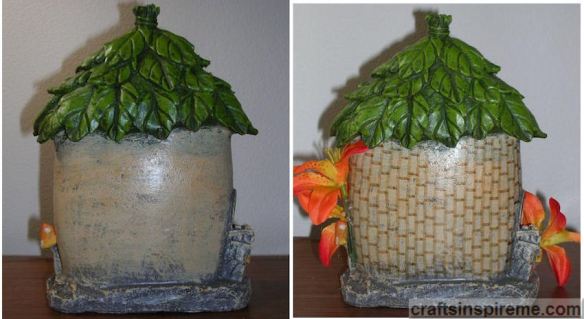
Before & After Photos: Tropical home – Back Facade. The bamboo pattern continues across the back, giving it that island vibe.
Before & After Photos: Lighthouse. Whoever heard of a lighthouse without a roof? To make the roof shown, fold the paper into a cone and staple it as needed to hold its shape. Glue a soup can lid to the bottom of the cone and paint it gray to match the lower portion of the building. Add twine along the edge and down the sides to resemble a standing seam metal roof. Tie several knots in a piece of twine and glue it to the peak of the roof. Tint the glass votive holder yellow using a highlighter, and line the inside with orange paper to suggest a brilliant light glowing from within the tower.
Before & After Photos: Sailboat. This sailboat only needed minor adjustments. The faded white stripes needed a fresh coat of paint, and the middle stripe was changed to orange. Because the opposite side of the sail was unfinished, the stripes and shells were duplicated on the back. A cute little blue bird was glued on top of the mast.
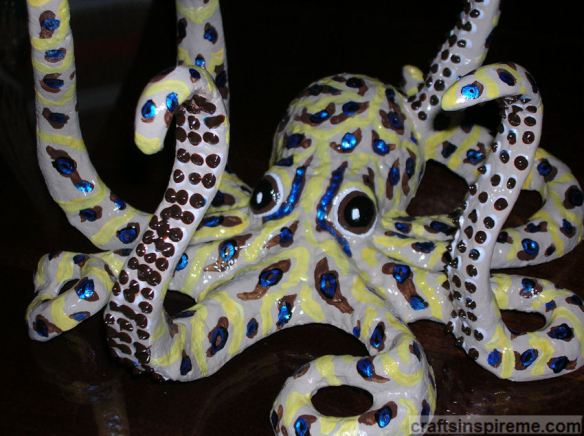
The Star of the Show: A Blue Ringed Octopus Before & After Photos: Octopus Closeup. It’s hard to believe the monochromatic octopus on the left is the same one on the right, but it is. It’s amazing what a difference a little paint can do.
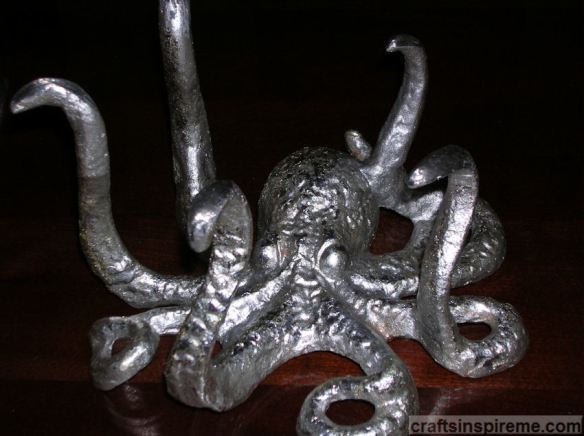
Original Octopus Candleholder: This whole project started with this silver metal octopus candleholder. As you can see, it looks top heavy with the large pillar candles, and the octopus is rather hidden underneath. Round candles were another option, but he looked like a juggler! (lol)
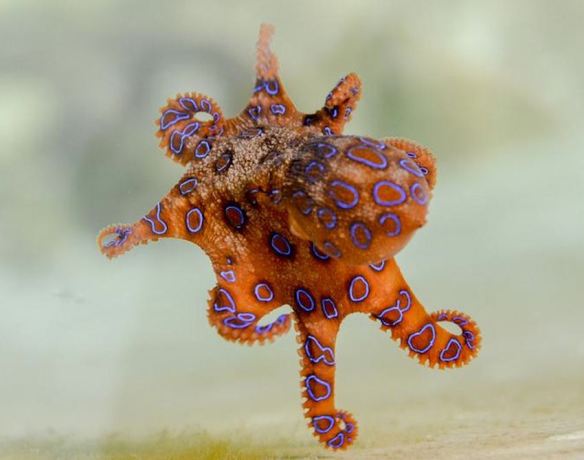
As with all creative projects, it’s helpful to gather a few photos for inspiration. The blue ringed octopus is a fascinating creature. Fans of James Bond 007 will remember the movie, Octopussy, in which Maude Adams had an aquarium with this beautifully patterned octopus, and she also wore a white silk robe emblazoned with its colorful, exotic image. Each octopus has a unique pattern, and the blue iridescent rings are impressive creations courtesy of Mother Nature.
Supplies:
Octopus (7-1/2” high x 4-1/2” wide x 1-3/8” thick)
Acrylic Paints – tan, brown, black, yellow, white, & metallic blue
1) Bottle fabric paint – white
1) Bottle fabric paint – brown
2) Paintbrushes – one for base coat, and a fine brush for details
Paint Palette
Clear Spray Paint
This is how it looks without the candles. The large metal plates are too big, overpowering the beauty of this piece.
The plates were removed using a Dremel cutting tool, and the tips of the tentacles were filed smooth. Now you start to notice the amazing sculptural details created by the artist.
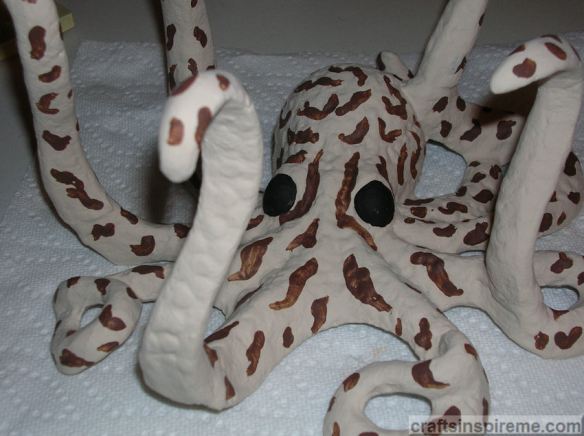
The color was the next issue to be addressed with two coats of tan paint. The artist painstakingly created a realistic looking octopus, but that thick coat of silver paint had obscured all those intricate details.
A brown pattern was applied to the entire body and the eyes were painted black.
Black spots were added, overlapping the brown.
Blue iridescent rings were applied over the black spots. Random yellow stripes wrap around the legs and head. A white dot was added to the pupil of each eye.
The eyes were made more realistic with the addition of brown irises and white outlines.
Two coats of clear spray paint were applied to protect the acrylic paints. White suction cups were added to the underside of the tentacles and allowed to dry. Next brown fabric paint was applied over each of the suction cups to provide shape and depth. This beautiful sculpture now has the rich, colorful appearance it deserves, and makes an interesting conversation piece.
Photo: Completed Centerpiece. Black pebbles form little volcanic islands amid a vast ocean. In front of a cozy tropical home, a mermaid sits quietly reading, as a sailboat glides along the water. Another mermaid leaps out of the sea with a treasured seashell in her hand. The lighthouse makes a welcome rest stop for wildlife and a sunbathing mermaid. A feisty octopus playfully thrashes about the water’s surface. Palm trees swaying in the breeze display a pair of small signs that says it all: “Beach Please!”
All babies are cute, but baby elephants are so expressive like the one above having the best day ever!
Baby Nuzzles Mom
Standing beside their watchful mothers, they look so small and somewhat fragile.
Baby’s First Steps
With those big floppy ears, it’s easy to imagine them taking flight, playfully floating upon the breeze and coming to a landing in our love-filled hearts. Let’s bring some of that joy into this week’s project.
How to Paint a Wooden Baby Elephant:
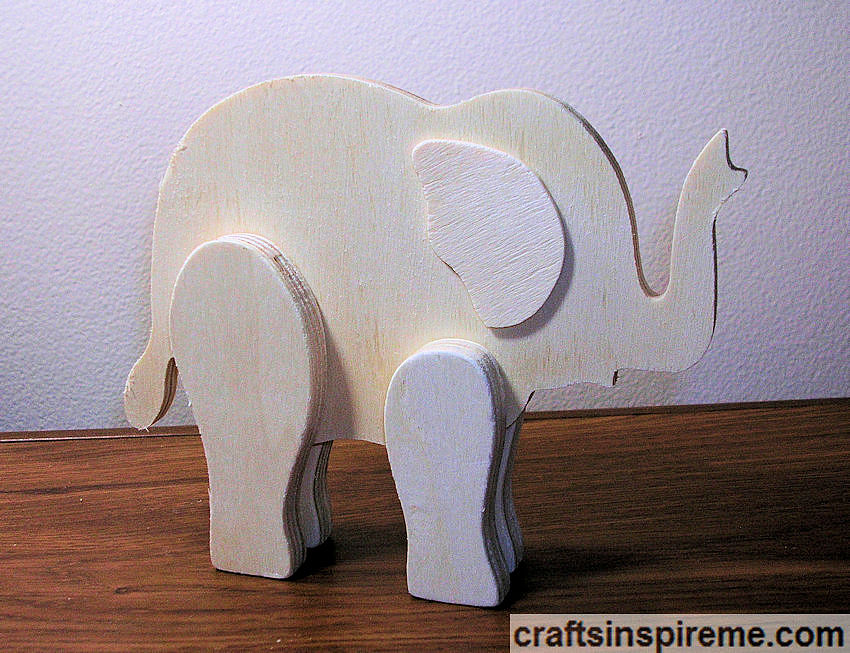
Raw Wood Elephant
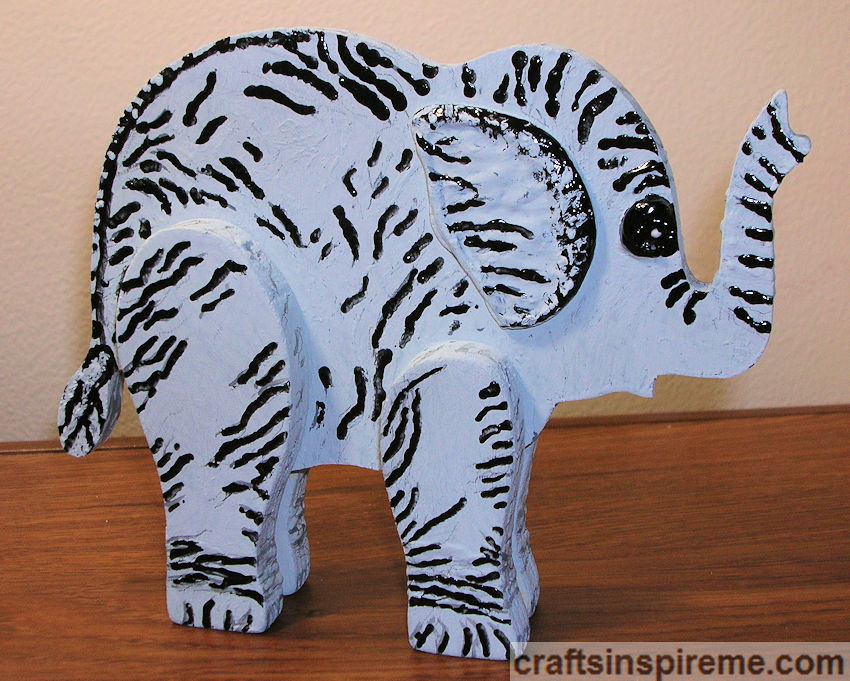
In previous painted wood projects, the animals had feathers, scales, or fur. Elephants present a unique challenge: wrinkles. I must admit this took much longer than expected as I progressed through a series of trial and error to achieve the desired appearance by layering. Let’s get started…
Supplies
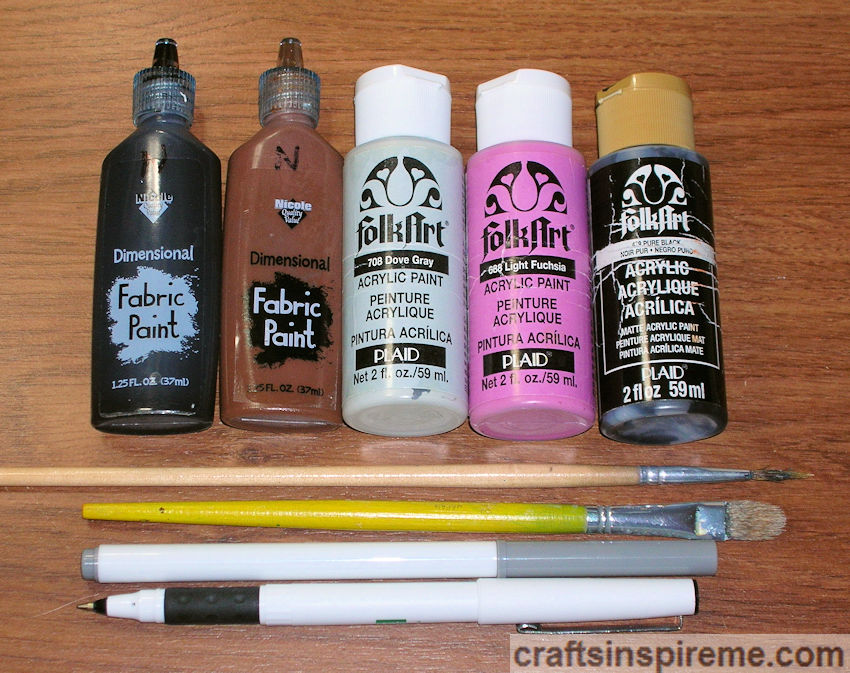
Supplies:
Wooden Elephant (5” high x 6-1/4” wide x 1-1/4” thick)
Acrylic Paints – Gray & Black, (Pink is optional)
Paintbrushes
Markers – Gray
Pens -Black Fine Point
1) Bottle fabric paint – Brown
1) Bottle fabric paint – Black
1) Bottle fabric paint – White (not shown)
Texture Building
Start building texture with three-dimensional fabric paint. I used white, but any color will do because we will paint over it in a later step. Draw both eyes with a pencil. Thicken and shape the ears and outline the eyes with fabric paint.
Paint the Body
Paint the body gray, including both sides and all the edges.
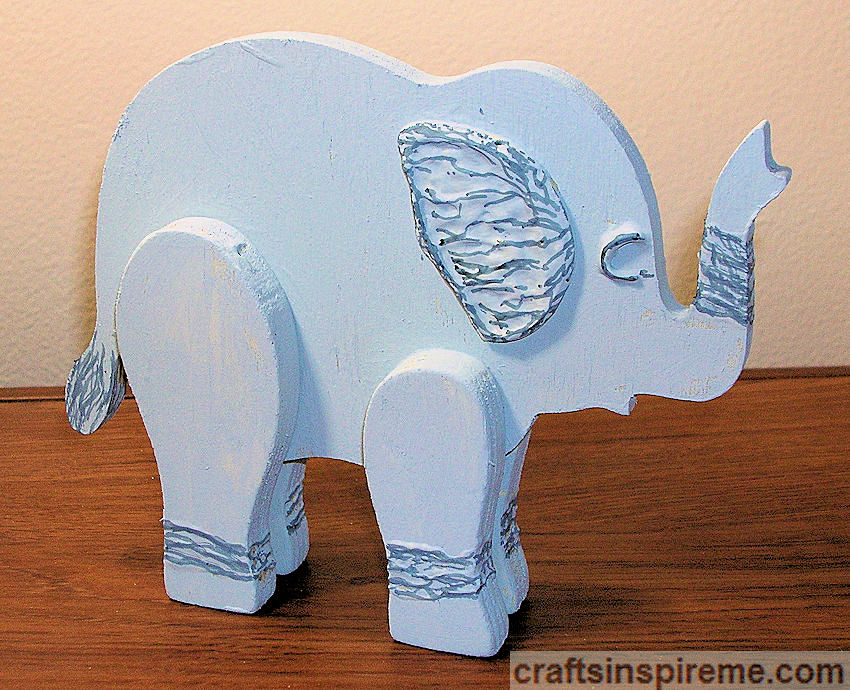
Draw Details with a Marker
Define the wrinkles using a gray marker.
Add More Wrinkles
After viewing numerous photos, I added wrinkles all over the body using a marker but immediately regretted it. I should have followed my own advice: Draw or paint what you feel, not what you know.
Repaint the Body
A fresh coat of paint gives us a clean slate to try again and allows the marker lines to lightly show through, which is great for the next step.
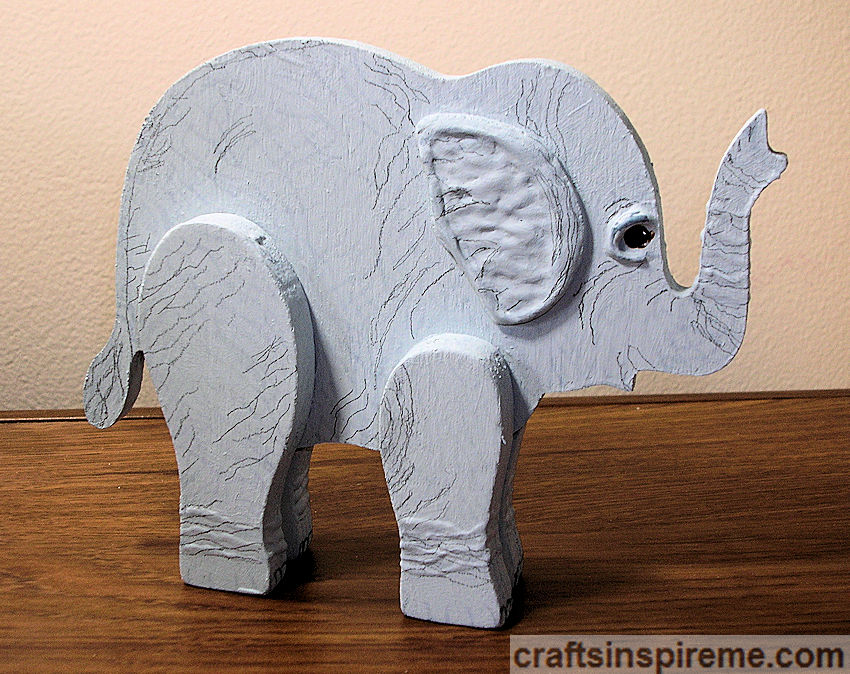
Cautiously Draw Wrinkles
Using a pencil, slowly add details in key areas to imply overall wrinkles. Build up the eyes with brown fabric paint.
Trace with a Marker
With a gray marker, trace the wrinkles and outline the eyes. Finish building the eyes up with brown fabric paint and allow it to dry. Add pupils and a white spot in each to bring them to life.
Trace with Fabric Paint
Retrace the wrinkles with black fabric paint. You are probably thinking, “Here she goes again. Jumping in with both feet,” and you are correct. The difference is this time … I like it! Don’t worry about too much contrast because we will tone it down in the next step. Develop the eyes with the same fabric paint.
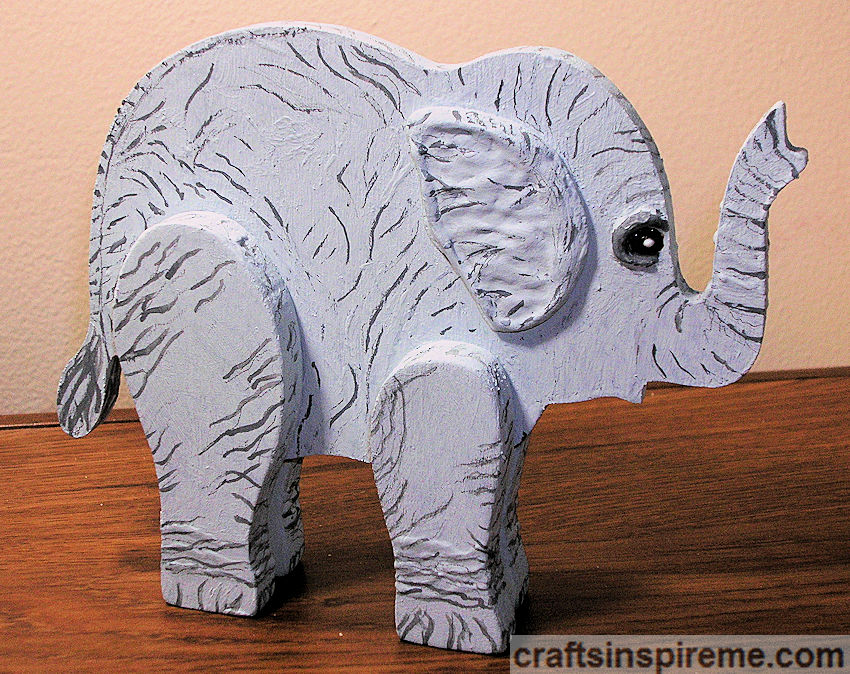
Repaint & Create More Texture
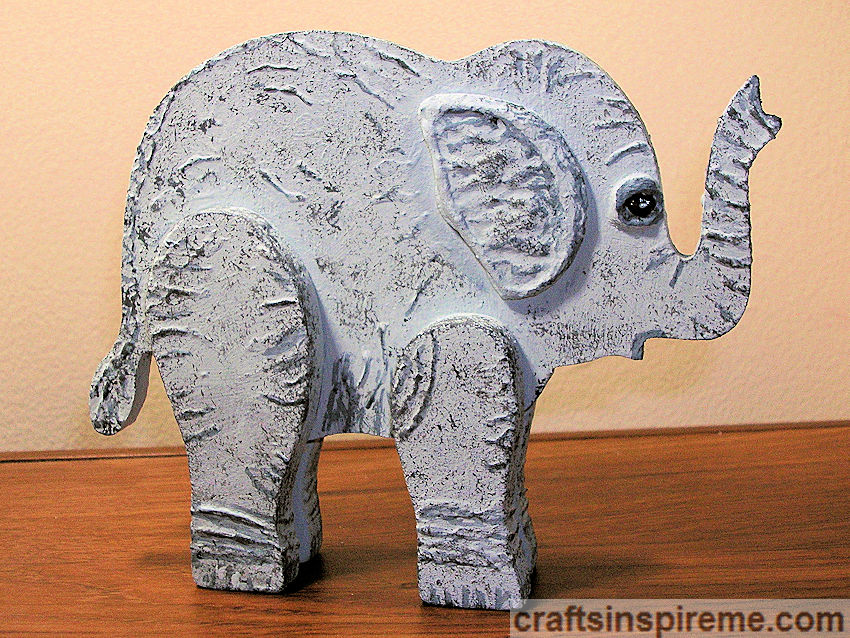
By repainting the body with gray paint, the raised wrinkles recede, becoming part of the thick skin. Next, mix black and gray acrylic paint to create a darker gray. Dip a cotton ball in the new dark gray paint and dab it on a piece of scrap paper to remove the excess. Lightly dab the cotton ball all over the body to create new subtle layers of texture. Repeat as needed.
Trace with a Marker
Retrace the wrinkles, ears, and eyes with gray marker. Add lines around the mouth and tip of trunk. At this point you could stop, but I wanted to add a few little details to make this elephant look like a baby. For that we need a little inspiration.
Adorable Baby Elephant
Three things stand out: eyelashes, the pink inside of the mouth, and peach fuzz hair running along the spine from top of the head to the tail. Markers or paint will work nicely for the first two details, but the third requires a special ingredient…
A Longhair Cat
Yes, I am recommending the use of cat hair for an art project. I must say it is the oddest ingredient I have ever used. Longhair cats require daily brushing, so collecting soft hair is no problem. (lol)
Completed Baby Elephant
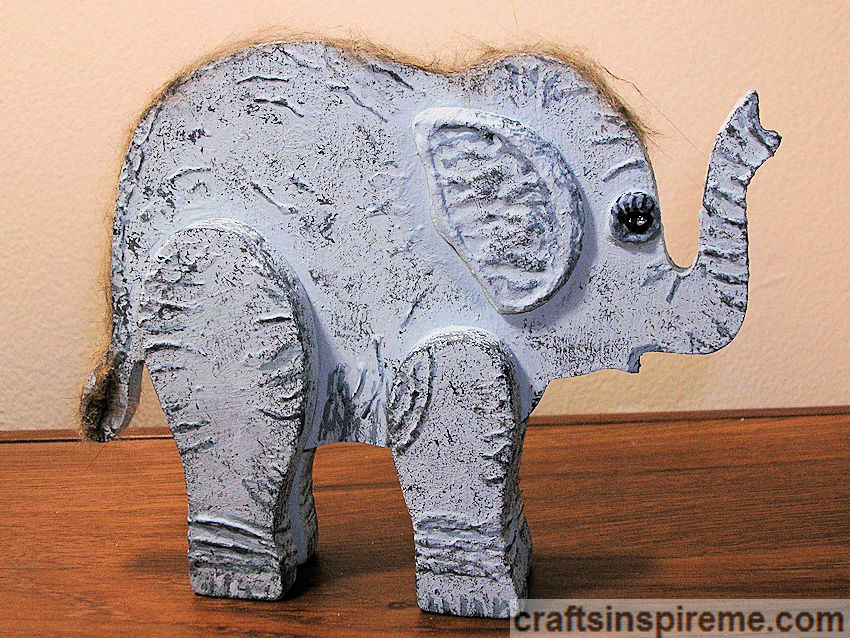
Glue on the hair with Elmer’s glue. Adjust and trim the hair as needed. Add eyelashes with a fine point black pen and paint the inside of the mouth pink.
Closeup of Elephant’s Face
Although these details are minor, I think they provide softness and a “cuteness” factor to this baby elephant, just like his living counterparts.
Baby Elephant – Before & After
This completes our project. Persistence pays off. Experimentation is a tremendous help in solving artistic problems. If you are not happy with the results, let it sit for a day or two and the inspiration will come to you just when you need it most.
Have you faced any artistic challenges like wrinkles? Have you used an unusual item, such as cat hair, in an arts and crafts project? Please share your ideas in the comments section. Thanks for joining me. Good luck with your future works of art.
Lilacs are such beautiful flowers, and their scent is intoxicating. I wish they could bloom all summer, but we can only enjoy them for a few weeks each spring. By creating a silk wreath, you can enjoy lilac blooms year-round. Let’s get started.
Heart- Shaped Grapevine Wreath
I chose a heart-shaped grapevine, but you can use any shape wreath made from whatever material you prefer.
Flower Layout
While shopping for a wreath, experiment with flower colors and placement. You will also need wire cutters and floral wire. As an alternative to wire, you could use brown twine.
Wire Floral Picks
Choose a starting point and begin attaching each floral pick. Because I am working with a heart, I started at the top center point, and moved along the left side, placing each bloom as though it is growing upward.
Progress Photo
Continue adding flowers. When you reach the bottom of the heart, turn the blooms to climb up the right side.
Progress Photo
Adjust the flowers and leaves to fill in any gaps. Trim any visible wires as needed or tuck them into the back of the wreath.
Finished Wreath
I used a piece of purple ribbon to hang the wreath upon a wall. As an optional step, you can recreate that heavenly scent by simply spritzing the finished wreath with lilac essential oil.
I hope you enjoyed this project. Wreath making is a fun and easy craft anyone can do. Over time, the wreath can be easily updated with new flowers to coordinate with your décor.
Sixty-five million years ago the Tyrannosaurus Rex, also known as T-Rex, spent his days hunting, eating, and making little dinosaurs. Archaeologists, writers, and world-renowned movie directors have been thrilling us ever since with all the gory details of this master predator.
Did they roar like lions? Were they solitary animals or did they mate for life? Having such short arms, I wonder, how did they get back up after a fall?
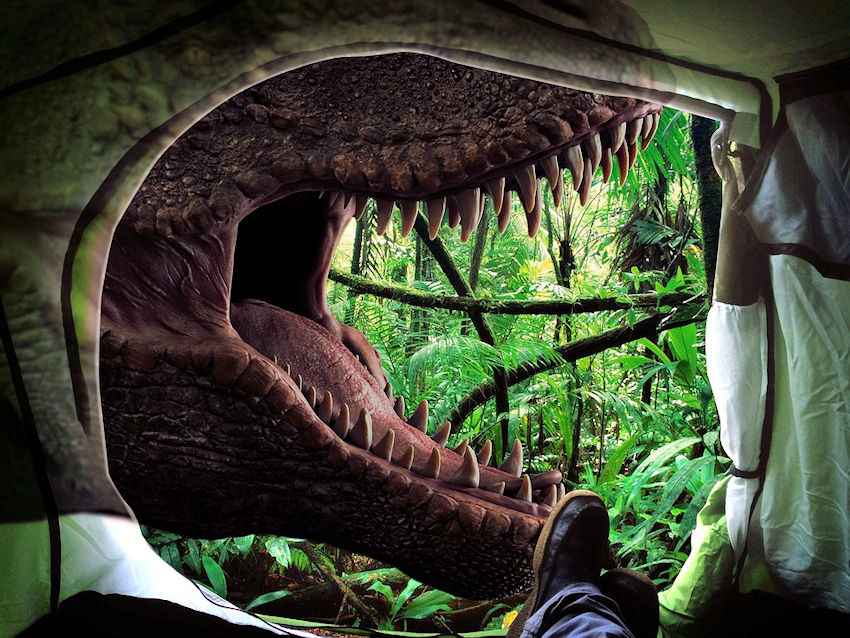
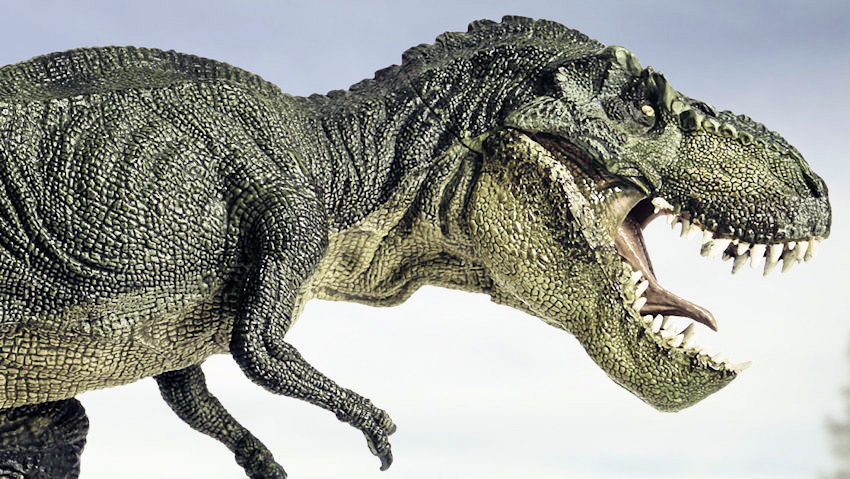
After viewing this photo, who wants to go camping? (lol) The mere thought of facing a creature, capable of eating its prey whole, leaves us with mixed feelings of fear and awe. And we love it. To bring a few of those Jurassic thrills into our lives, let’s jump into our next project:
Inspiration
Huge jaws, piercing eyes, and razor-sharp teeth – what’s not to love?
Inspiration
When we look at large lizards alive today, we can visualize tyrannosaurs having thick, textured skin, consisting of scales and bony plates, with a ridge along the spine.
Inspiration
Predators typically have camouflaging patterns and colors to give them an advantage while hunting. With these ideas in mind, we can begin the creative process to bring the T-Rex back to life. Let’s go!
How to Paint an LED Tyrannosaurus Rex:
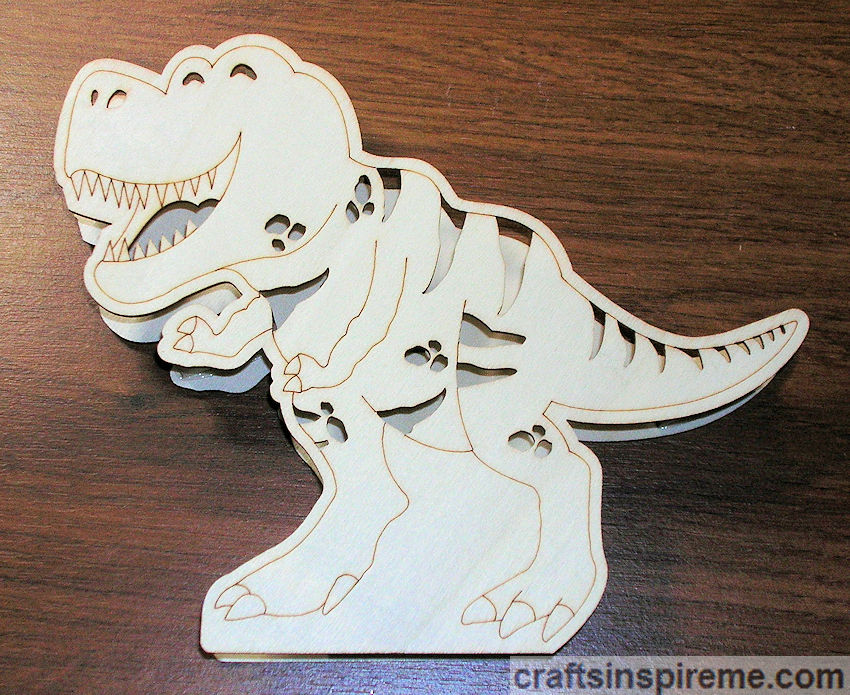
Raw Wood T- Rex, Front
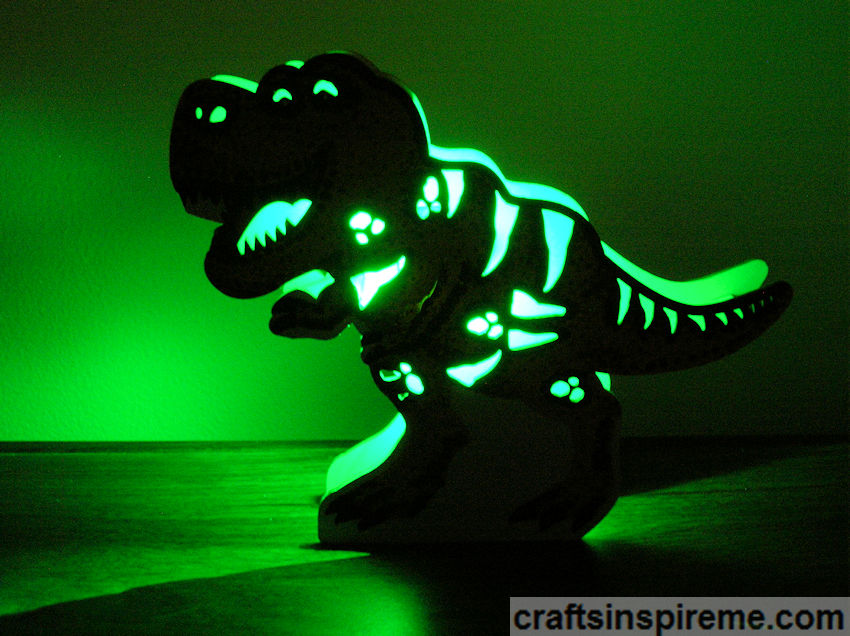
This wooden T-Rex (available at Michaels) has preprinted details and cut outs to enable green light from a concealed LED bulb to penetrate the figure and cause an eerie glow in the surrounding area.
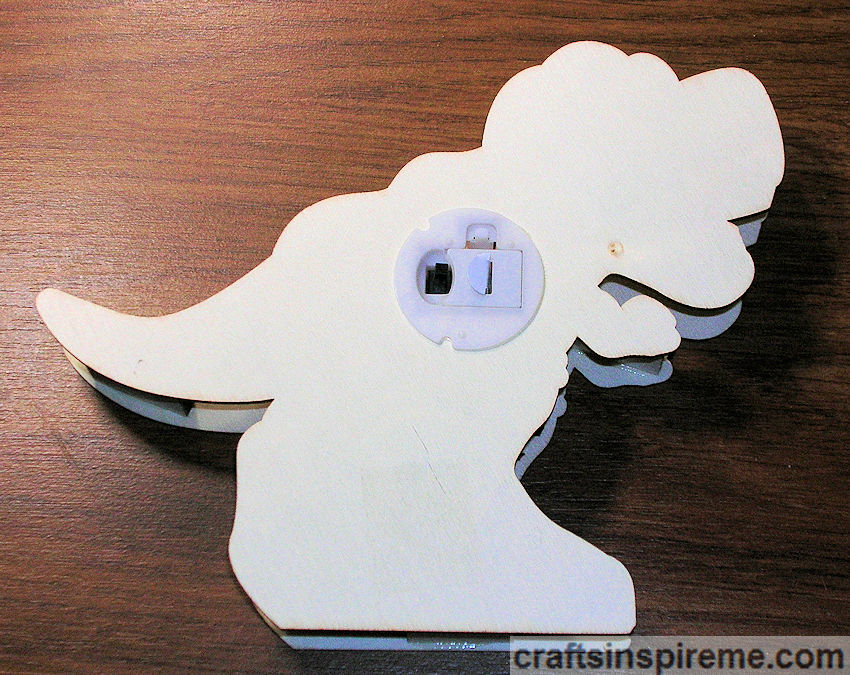
Raw Wood T- Rex, Back
The back is plain wood with the on/off switch and battery compartment. The wood on the front is smooth, however you might want to sand the back lightly, however that is entirely up to you.
Supplies
Supplies:
LED Wooden T-Rex (5-3/4” high x 7” wide x 1” thick)
Acrylic Paints – Cappuccino, Light Fuchsia, & Dove Gray
Paintbrushes
Markers – Brown & Black
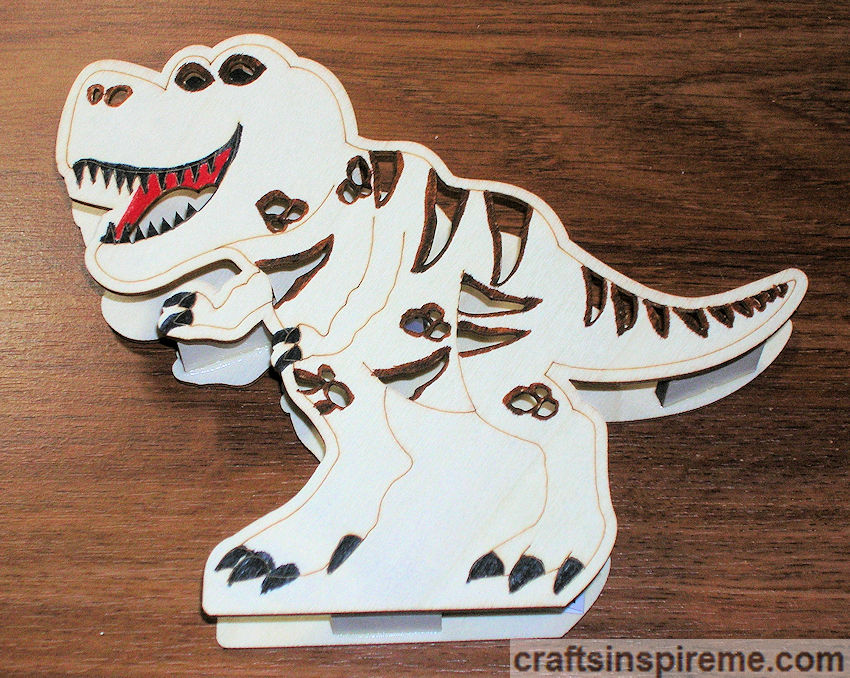
Marker Drawn Details
Use magic markers to figure out the color scheme.
Painted Basecoat, Front
Paint the entire body with the basecoat.
Painted Basecoat, Back
Paint the basecoat on the back. I did not add any details, but you can if you wish.
Marker Drawn Details
Go over the details with markers.
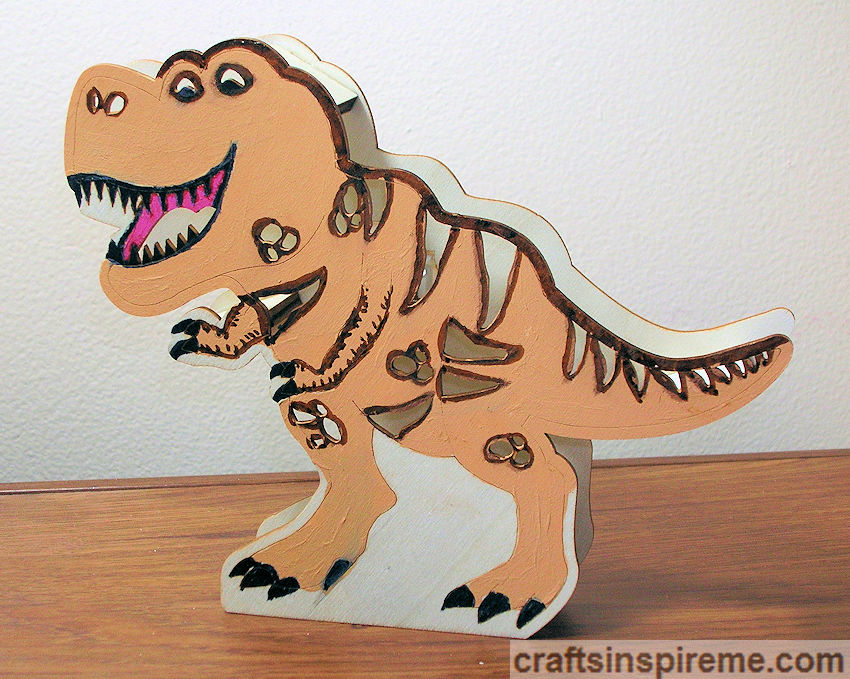
Painted Gray Background
Paint the background gray to contrast with the tan body. At this point you could stop.
If you have been following this blog for a while, you know there is a more advanced painted version. Please read on to discover how to give this dinosaur a more reptilian appearance.
Advanced 3D Painting:
Three-Dimensional Fabric Paints
Supplies:
1) Bottle fabric paint – Brown
1) Bottle fabric paint – Black
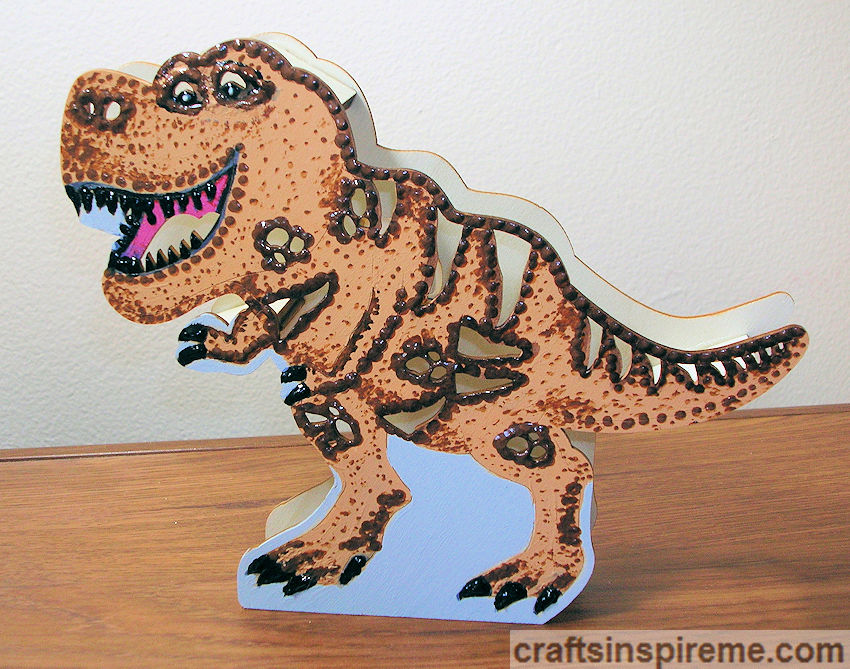
Painted 3D Details
Using brown fabric paint, apply nubby texture to the body. The black paint is for the teeth, pupils, and claws. I outlined the eyes in black too but didn’t like it. To me, he appeared to be wearing a pair of sunglasses. (lol) You can see the revision below.
Completed T-Rex
This is the completed Tyrannosaurus Rex in all his glory.
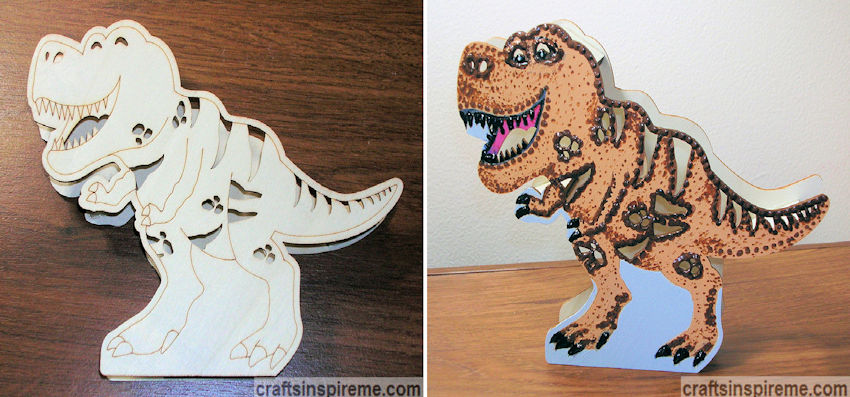
T-Rex Before & After
I am always surprised seeing the plain original wood side by side with the completed project. Caught up in the creative process, it’s easy to forget where we started.
Lit T-Rex with Flash
This photo, taken using flash photography, shows the soft glow of the LED light.
Lit T-Rex without Flash
In a dark room, this T-Rex makes a cool nightlight.
I hope you enjoyed this transformative journey. Thank you for coming along for the ride. What is your favorite dinosaur and why? Please let me know in the comments section.





























































 Crafts Inspire Me