Unknown's avatar

About Crafts Inspire Me

Arts and Crafts are my passion. Inspiration is everywhere. Each new project is a journey to be shared.

Painting 101 – Part 2

Watercolors

Welcome to part two delving into the inspiring art of painting. As we go, we will examine different types of paints and techniques to pique your interest. By the end, I hope you will have better insight into the many artistic possibilities and take away a few ideas for future creative projects. Let’s go…

Oil Painting: Produces incredible effects ranging from translucency to rich sculpted textures.

Oil on Canvas
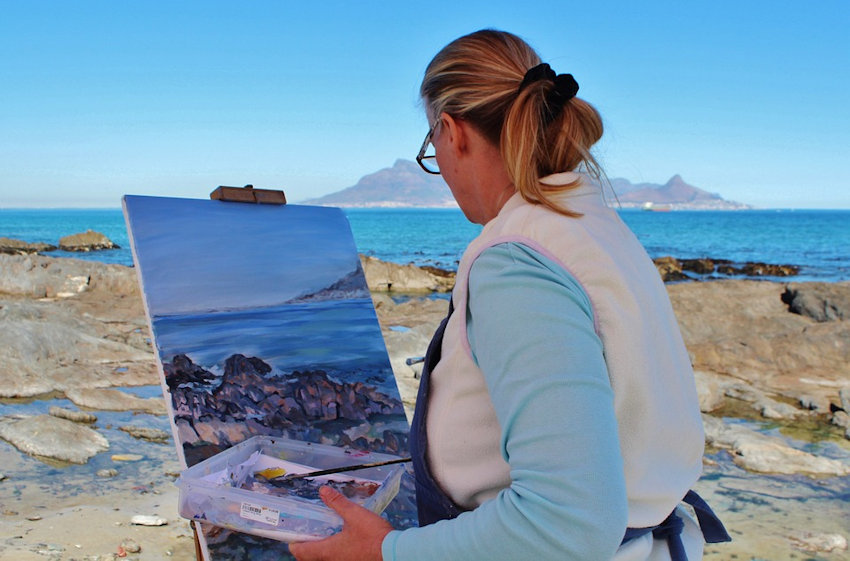
Oil Painting Artist

Compared to other options, oil painting requires more supplies, such as solvents, primer, and varnish, and as a result the chemical fumes necessitate working in well-ventilated rooms or outdoors.

Smooth Application

Oil Painting Dog Portrait

Applying oil paints with brushes produces intricate details and luminous colors.

Thick Textured Application
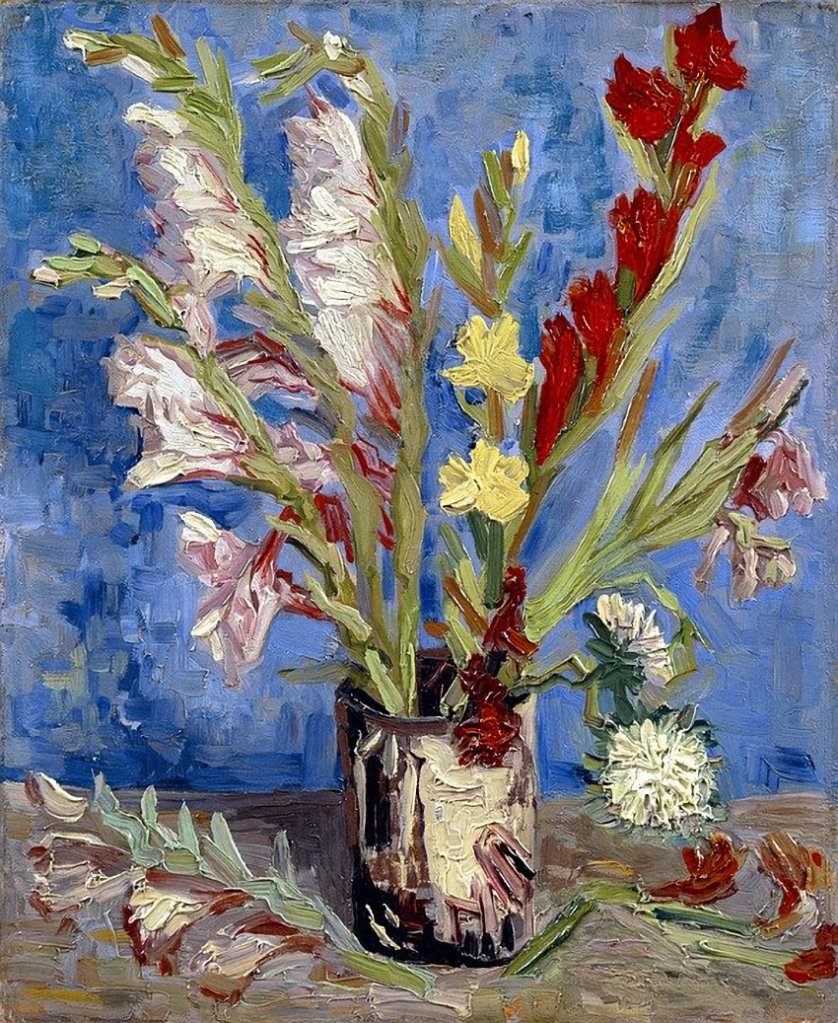
Oil Painting Flowers

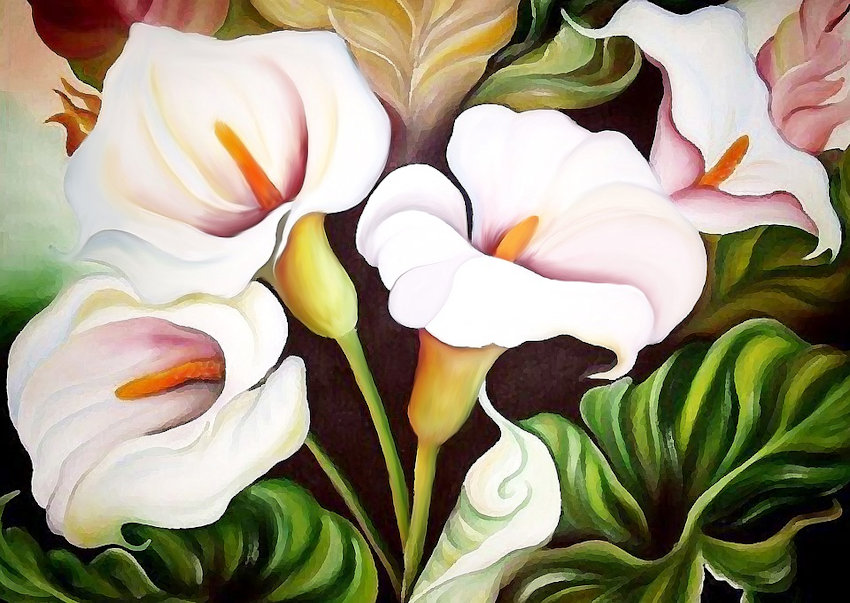
When oil paint is applied with a palette knife (a.k.a. painting knife), textures can be achieved with sculptural, three-dimensional accuracy found in nature such as leaves, flowers, and trees.

Fine Arts Collectibles
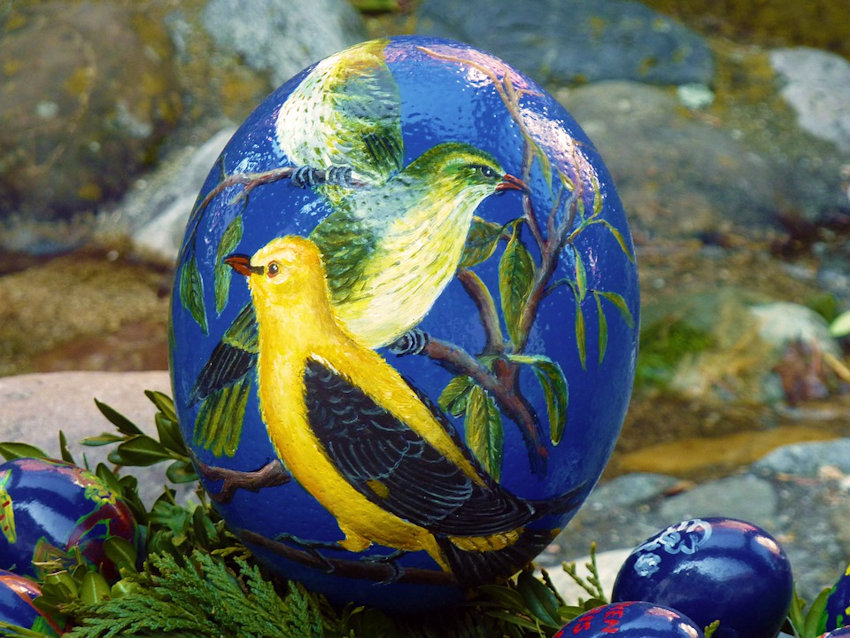
Oil Painting Egg

Prior to using oil paints, surfaces must be prepped with primer or gesso, and upon completion the finished work should be sealed with varnish to protect the paints.

Wall Art
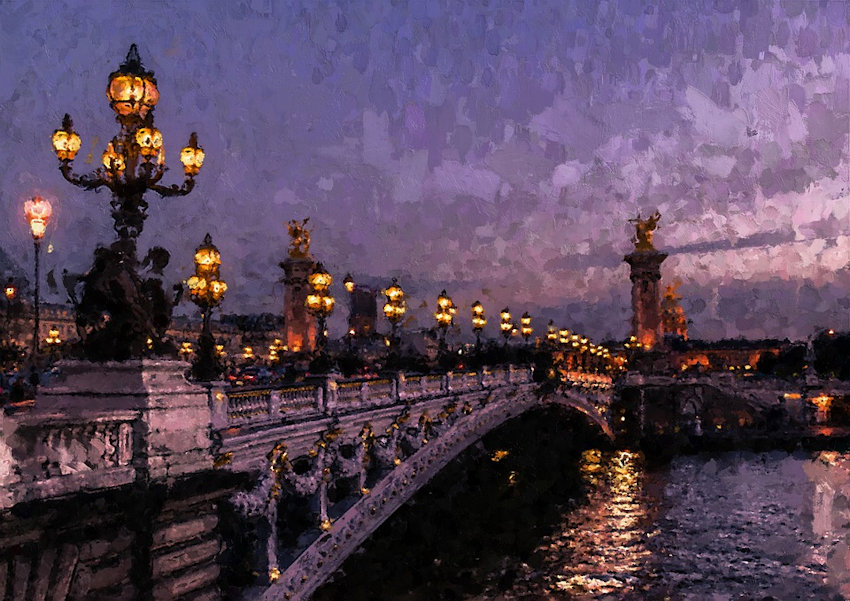
Oil Painting Nightscape

The preferred choice of world-renowned artists, such as Van Gogh, and Michelangelo, and da Vinci, oil paints are excellent for a wide variety of subjects in styles ranging from classical to abstract and everything in between.

Paint Pens: Offer precise control for detailing and illustration.

Assorted Paint Pens
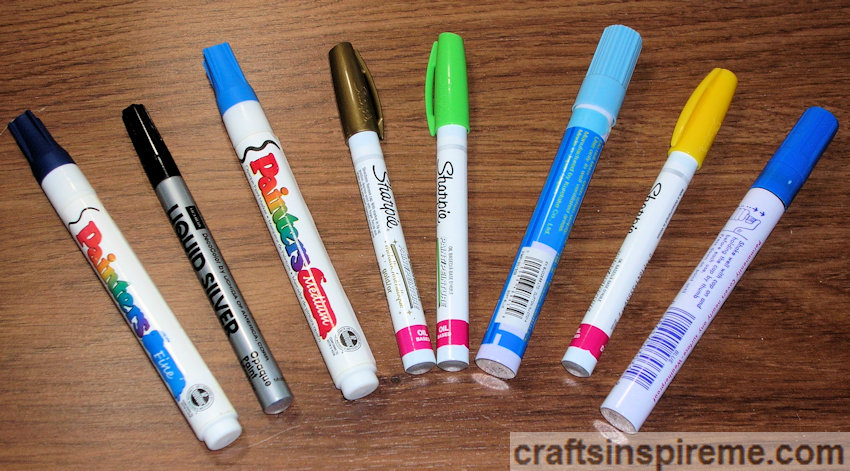
Paint Pens

Paint pens are prefilled with water-based paints, oil-based paints, or fabric paints in a variety of colors. Since many have strong fumes, you may need to work in a well-ventilated room or paint outdoors.  

Specialty Finishes

Paint Pens Butterfly

Tip sizes are available in fine, medium, and broad. You can create layers of colors and finishes, such as metallics and glitter.

Any Materials

Paint Pens Rock Painting

Whether you plan to paint rocks, plastic, metal or just about anything else, there is a paint pen for it. The only limitation might be very thin materials, which may allow the paint to bleed through, so remember to have a protective cover underneath to protect your worksurface.

Exterior & Interior

Paint Pens Birds

Interior or exterior projects are no problem. Be sure to check pen labels for usage because sometimes store displays become mixed up. Find the right pen for the job and it will last for years to come.

Hand Drawn Designs

Paint Pens Birdhouse

Let your imagination run wild on new DIY projects or existing items with a fresh coat of paint and custom hand-drawn designs.

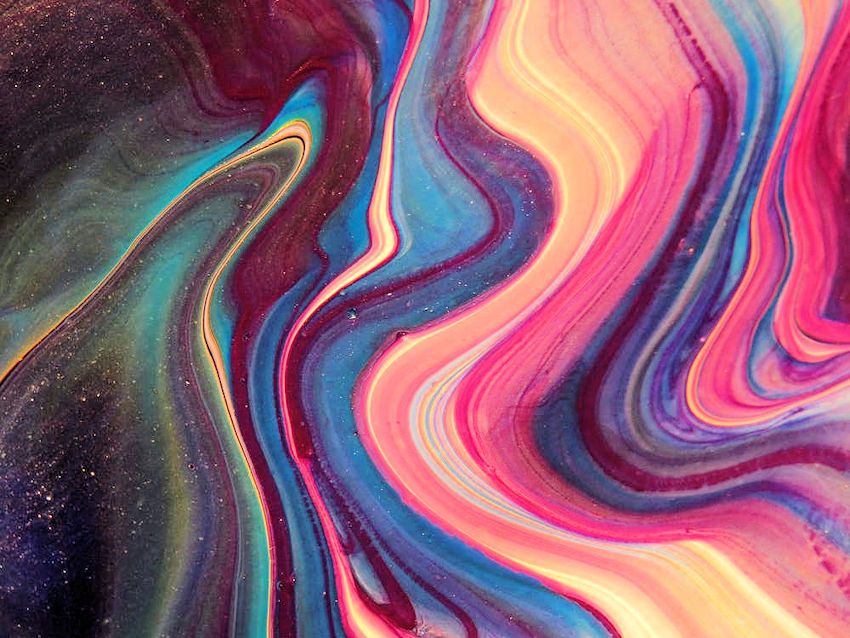
Paint Pouring: Represents playful self-expression, where each combination of colors results in freeform, one-of-a-kind designs.

Mixing Paints
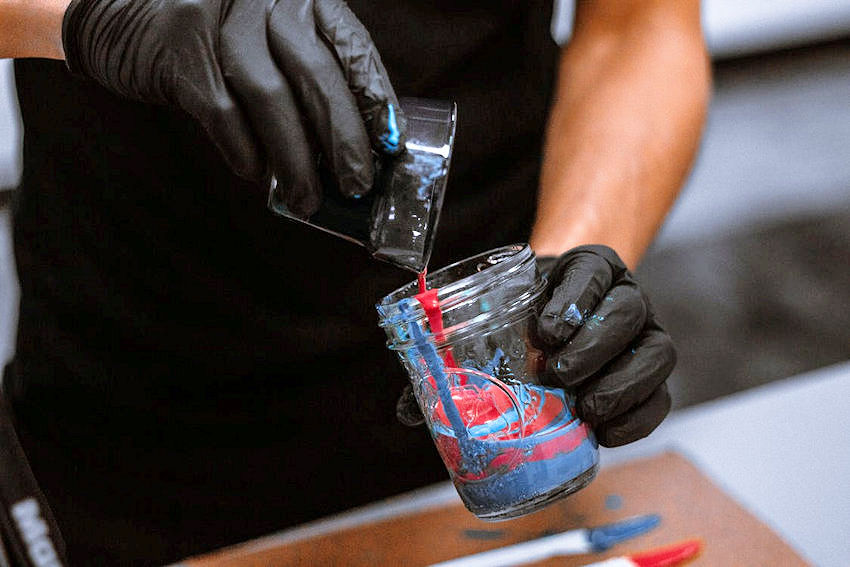
Paint Pouring Artist

Although acrylic paint cleans up easily with soap and water, you will need gloves, an apron, a covered worksurface, and drop cloths to protect the floor.

Abstract Art

Paint Pouring Abstract Art

Cups of paint are simply poured onto a canvas or any object, and then tilted back and forth allowing gravity to handle the initial composition.

Decorative Items

Paint Pouring Easter Eggs

Paint pouring utilizes unusual tools, including a hairdryer, wooden craft sticks, balloons, drops of silicone, and a kitchen torch.

Tabletop

Paint Pouring Tabletop

Lively patterns resemble natural stone, undulating waves, or clouds drifting upon the sky. Turn ordinary tabletops, ceramics, coasters, picture frames and more into unique works of art.

Abstract Art
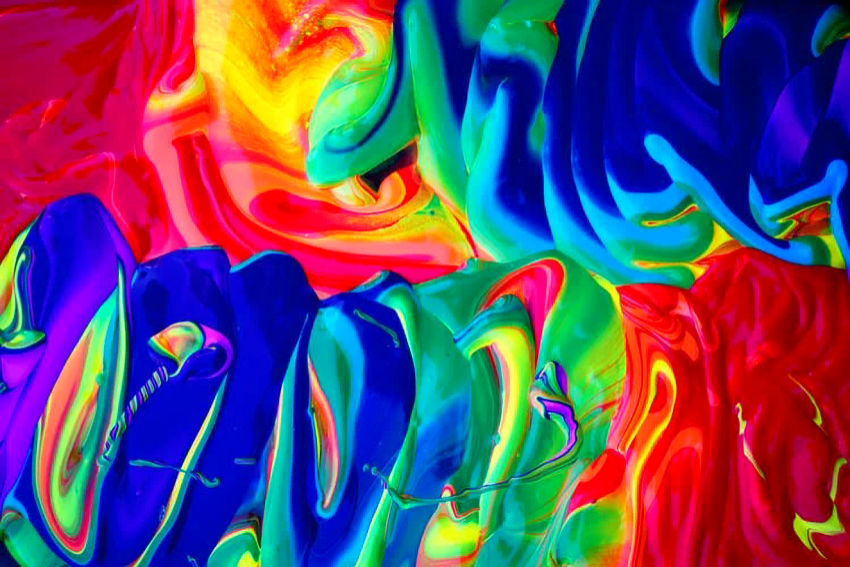
Paint Pouring Abstract Art

Set your inner child free by exploring the playful world of paint pouring.

Watercolor Painting: soft and dreamy with vivid colors and subtle nuances.

Watercolor Basics
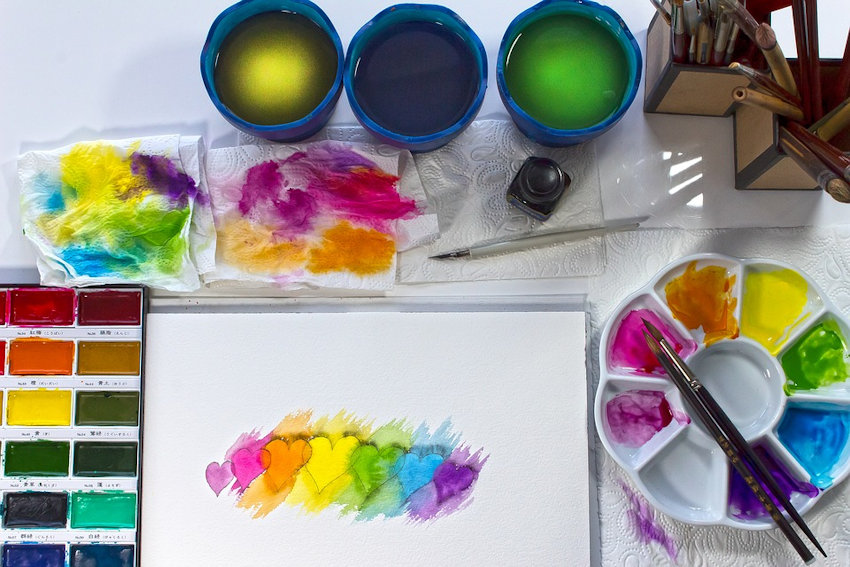
Watercolor Painting

For many people, watercolors are the first introduction to painting with beginner’s trays prefilled with paint. Watercolors are nontoxic and cleanup is easy with water.

Dreamy Gardens

Watercolor Painting Flowers

Be sure to paint on watercolor paper, which dries flat. Regular paper is too thin, resulting in bubbles when wet followed by warping when dry.

Water & Sky
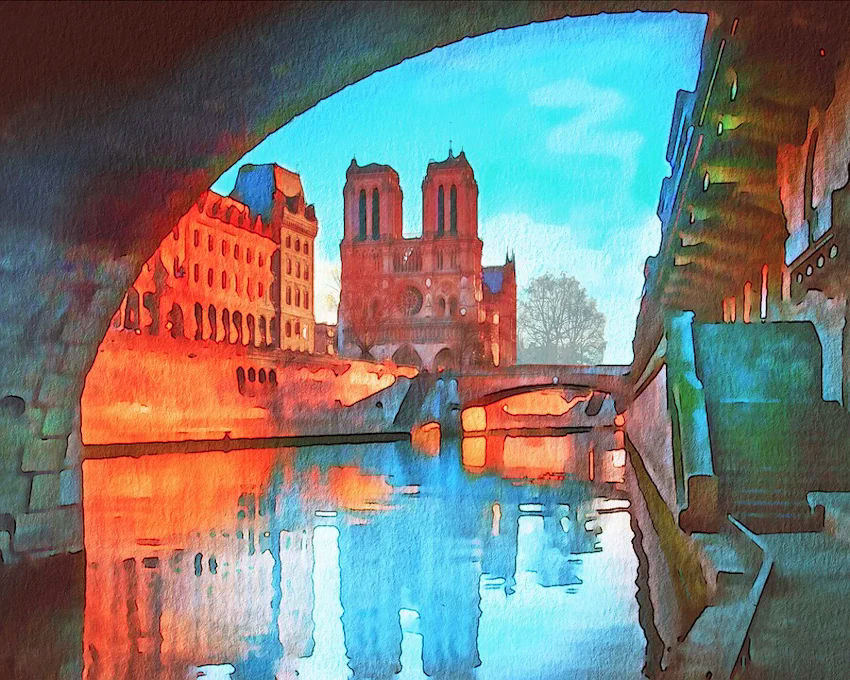
Watercolor Painting Notre Dame

Watercolors are the perfect choice for painting water and sky, accompanied by reflections rivaling those in nature, but architecture presents a challenge. As you can see, the edges of Notre Dame Cathedral lack definition. Please refer to the photo below for the solution.

Watercolor Painting & Technical Pens

Mixed Media Taj Mahal

When you are painting a world-renowned landmark like the Taj Mahal, you really need to get it right because people will notice if something is out of place. Watercolors can be combined with technical pens, creating clean crisp edges for the structures and soft fluid movement in the reflecting pool and sky.

Aquatic Scenes

Watercolor Painting Sea Turtle

Ocean vistas and all the denizens of the sea benefit from the use of watercolors, which ebb and flow onto the page like the tide upon the sand.

Painting Gallery:

Oil Painting

Oil Painting Forest

Watercolor Painting

Watercolor Wall Art & Cards

Paint Pens & Airbrushing

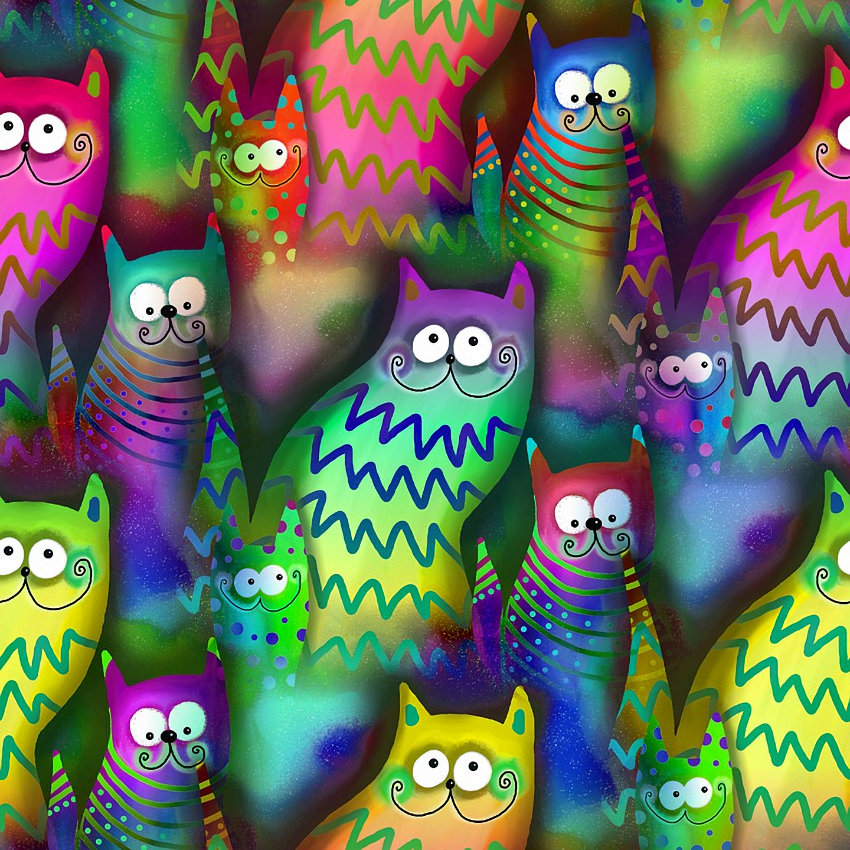
Painted Cats Mixed Media

Paint Pouring

Paint Pouring

Painted Pottery & Ceramics

Painted Pottery

Oil Painting

Oil Painting Wood Plaque

Paint Pens & Acrylic Painting

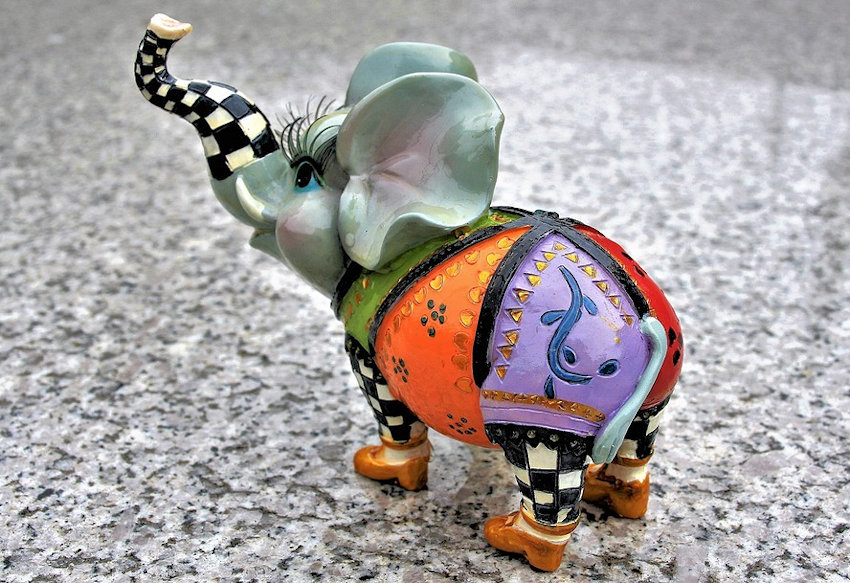
Mixed Media Figurine

Watercolor Painting & Mixed Media

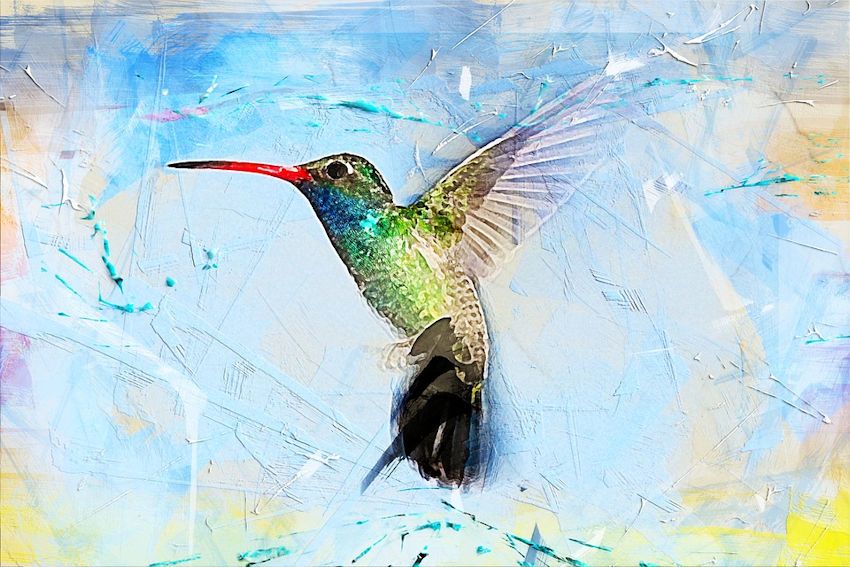
Mixed Media Hummingbird

Paint Pens & Airbrushing

Mixed Media Guitar

Oil Painting

Oil Painting

Mixed Media Sculpture Painting

Mixed Media Metal Sculpture

Watercolor Painting

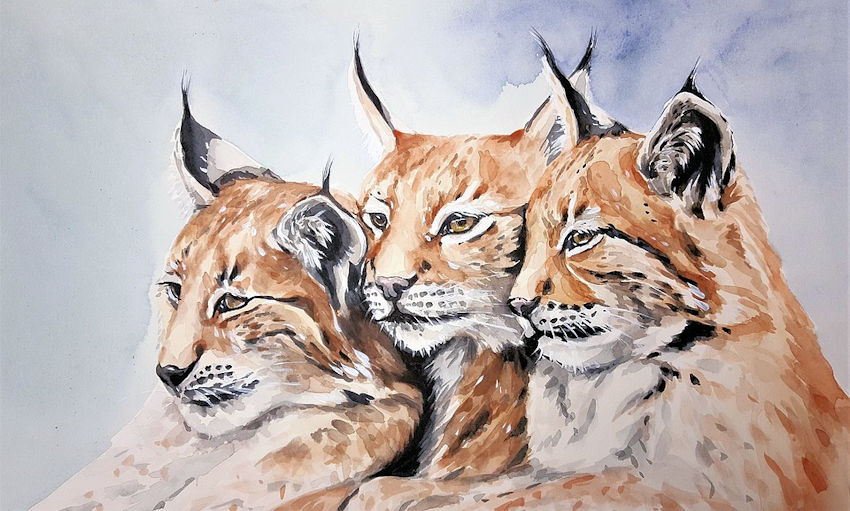
Watercolor Lynx

I hope you have found some inspiration to paint whatever appeals to you in a style all your own. To narrow down the options, review the painting photos above and search for more online. Notice the colors, patterns, textures, subjects, and special effects. Notice which ones really capture your attention. Do you have any favorites? Please let me know in the comments section. In case you missed part one of this series, please click here. Good luck with your painting endeavors!

Thanks for Reading & Happy Crafting!

Painting 101 – Part 1

Have you ever wanted to give painting a try? Anyone can paint. With a little patience and a lot of creativity, you will feel like an accomplished artist in no time. It’s fun, relaxing and reduces stress. What are you waiting for? Let’s get started!

Acrylic Painting: Bold colors, unlimited finishes and surfaces, ease of use

Paint by Number

Acrylic Paint by Numbers

One of the easiest ways for beginners is with an acrylic “Paint by Number” kit, which comes complete with paints, brushes, and a preprinted canvas. Simply match the numbered paints with their corresponding locations on the canvas. There is a wide range of themes for all ages and skill levels.

Decorative Painting & Wall Art

Acrylic Painting1

Acrylic paints can be used in almost any application. Brushes are cleaned with soap and water, and the paints have low or no odor, which is great for those sensitive to strong fumes.

Furniture Painting

Acrylic Painting2 Chair Back

Make a new piece of furniture look like an old friend with decorative designs and an antiquing finish.

Statues & Figurines

Painted Statue

Upcycle a garage sale purchase with a fresh coat of paint and colorful accents.

Faux Finishes & Decorative Painting

Painted Wall Faux Finish Sponge Painting

Upgrade walls, or any surface with acrylic faux finishes and decorative painting, including Sponge Painting, Marbleized, Faux Wood Grain, Crackle, Metallic, Plaster, Textured, Stenciling, Stippling, Mural Painting, & Tromp l’oeil.

Airbrush Painting: Street art, murals, and no size limitations

Airbrushing

Airbrushing 1

Airbrushing requires compressed air to disperse paint onto any surface. Cans of spray paint work in the same way and are often used on building-sized murals.

Large-Scale Painting

Airbrushing 2 Telecom Equipment

This handsome German shepherd painting disguises an otherwise unsightly telecommunications box.

Automobile Painting

Airbrushing 3 Sports Car

Riding in style has a whole new meaning when your car becomes a mobile work of art.

Mural Painting

Painted Mural Butterfly

Let imagination run wild as any wall, inside or out, can be adorned with flights of fancy.

Tromp l’oeil Painting

Painted Transformer Airbrush

Tromp l’oeil means “Fool the Eye” and in this photo three-dimensional painting turns this electrical transformer into a lovely stable, complete with bales of hay and a friendly face.

Fabric Painting: Art, fashion, and home furnishings

Hand Painting

Fabric Painting1

Fabric markers can be used to layout your design, followed by fabric paint applied via brush or easy-squeeze bottles for three-dimensional paints.

Silk-Screening

Fabric Painting2 Butterfly

Silk-screening is like stenciling for fabrics. A separate screen is used for each color, which is applied using a squeegee.

3-D Painting & Appliques

Fabric Painting4 3D & Applique

Fabric paints can be applied to any surface, bringing designs to life in three dimensions. They also function as glue, sealing the edges of appliques and adhering beads and other embellishments.

Tie Dyeing

Painted Fabric Tie Dye

Tie dyeing is easy for kids of all ages, and the end results are always a surprise.

Designing Home Furnishing & Apparel Fabrics

Painted Fabric

Large-scale patterns are perfect for upholstery, draperies, and pillows. Apparel styles are constantly changing. Launch the next fashion trend by creating and wearing your own designs.

Glass Painting: Illuminating color, and painting with light

Wall Hangings & Suncatchers

Glass Painting1 Window

Luminous colors and intricate eye-catching details, hallmarks of stained glass, bring character and beautiful style to any décor.

Mosaic Glass Gems & Jewelry

Glass Painting2 Mosaic Gems

Earrings, bracelets, necklaces sparkle with colorful glass beads. Mosaic glass gems are perfect accent on crafts as well as vases, flowerpots, etc.

Glassware

Glass Painting3 Drinking Glasses

Drinking glasses and pitchers take center stage with hand-painted colorful accents.

Christmas Ornaments

Painted Glass Ornaments

With a box of clear glass ornaments, you can let your creativity sore. Paints can be applied inside and out, and the finishes range from metallic, pearlescent, iridescent, and glitter in every color of the rainbow.

Stained Glass Windows

Painted Glass Window3

Museums, churches, and many secular buildings are adorned with spectacular stained glass. Sunbeams are transformed into a dazzling kaleidoscope of heavenly light.

Painting Gallery:

Acrylic Painting, Airbrushing, & Paint Pens

Birdhouse

Airbrushing

Painted Airplane

Acrylic Painting & Airbrushing

Painted Carousel Horse

Fabric Painting

Painted Fabric Thistles

Glass Painting

Painted Glass Bottles

Airbrushing

Painted Porsche

Acrylic Painting

Painted Mural Dove

Acrylic Painting & Airbrushing

Painted Mural Theater Mask

Glass Painting

Painted Glass Jewelry

Acrylic Painting

Painted Wall Stenciling Sponge Painting

Acrylic Painting & 3D Fabric Painting

3D Painted Flamingo

Glass Painting

Painted Glass Horses

Painting is a wonderful pastime, which enriches your life and can be easily shared with family and friends. No matter what your style and interests may be, there’s a type of painting to challenge your skills and engage your mind for experiences that will last a lifetime. Enjoy the journey!

Please stay tuned for part two next week.

Thanks for Reading & Happy Crafting!

A View from Above – Giraffes

One of the most easily identifiable animals upon the face of the earth is the giraffe.  There is nothing else like it – that long neck, towering legs and a fur pattern that resembles mosaics.  Giraffes are so tall, that the babies are born at a minimum height of six-feet tall to feed from the mother. 

Adult Giraffe

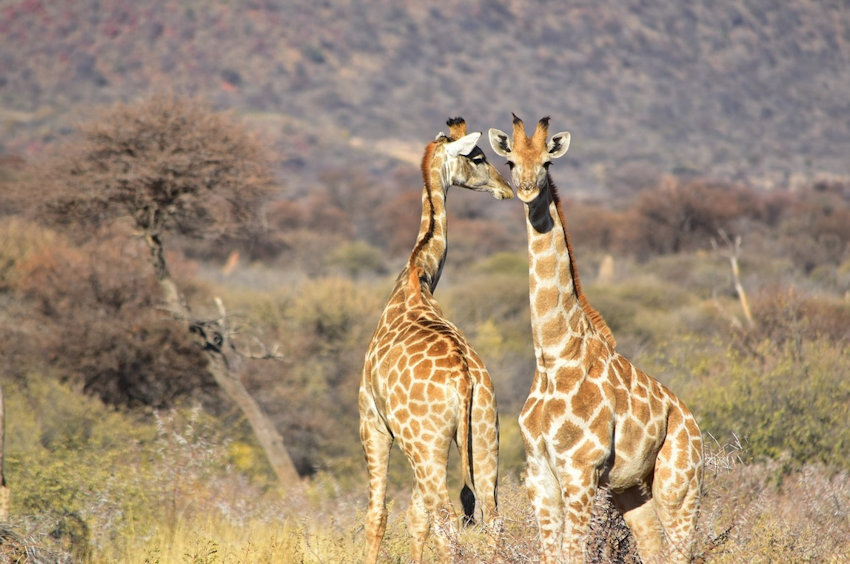
Each subspecies has unique fur patterns and colors.  There is a ridge on the forehead and two horn-like protrusions on top of the head. 

Giraffe Herd

Some have spots down the length of their legs, while others have solid tan or white below the knee.  For this project, you will need to look at giraffe photos and decide which pattern you prefer. 

How to Paint a Wooden Giraffe:

Raw Wood Giraffe

Raw Wood Giraffe

Both sides and all the edges will need to be sanded and painted.  Ensure the giraffe stands without wobbling.  If needed, restore balance by gluing pieces of thin cardstock to the bottom the feet. 

Supplies

Giraffe Paints

Supplies:
Wooden Giraffe (8-1/4” high x 4-1/4” wide x 1-1/4” thick)
Acrylic Paints – red, brown, orange, black, tan
Bottles Fabric Paint – brown, black
Paintbrushes
Sandpaper
Pencil

Sand & Paint Base Color

Sanded & Painted

After sanding, paint the entire body tan. 

Reference – Giraffe’s Face

Giraffe Facial Close Up

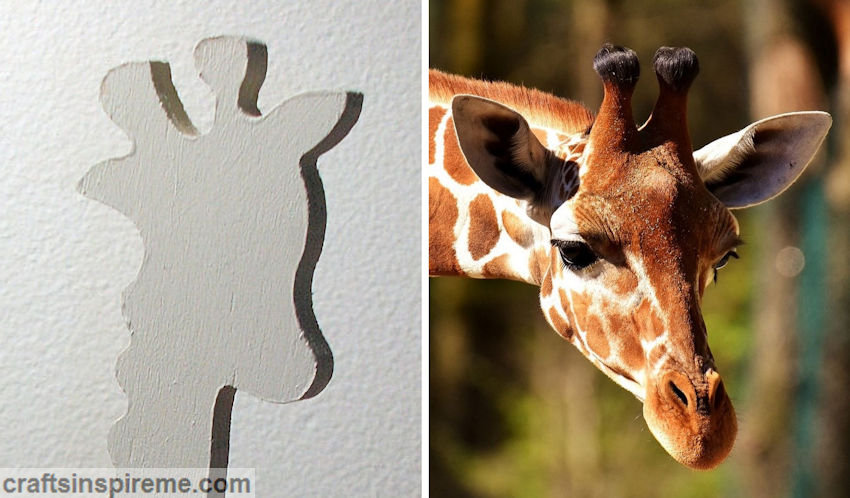
I bet you didn’t expect to have a Giraffe anatomy lesson!  Typically, wood craft animals stand facing forward.  If you look at the close-up photos above, you will notice this giraffe is turning his head to the side.  This effects both sides of the head.  Both eyes need to be on the same side.  We will address the back of the head in a later step. 

Hand Draw Details

Draw Giraffe Details

Because this appears to be a baby giraffe, the facial features are cute but small, including the ridge between the eyes.  I began drawing some of the spots to understand what the layout should be.  To keep the pencil lines to a minimum, the remainder of the spots were freehanded with the paint brush. 

Mix Custom Paint Color

Plastic Covered Paint

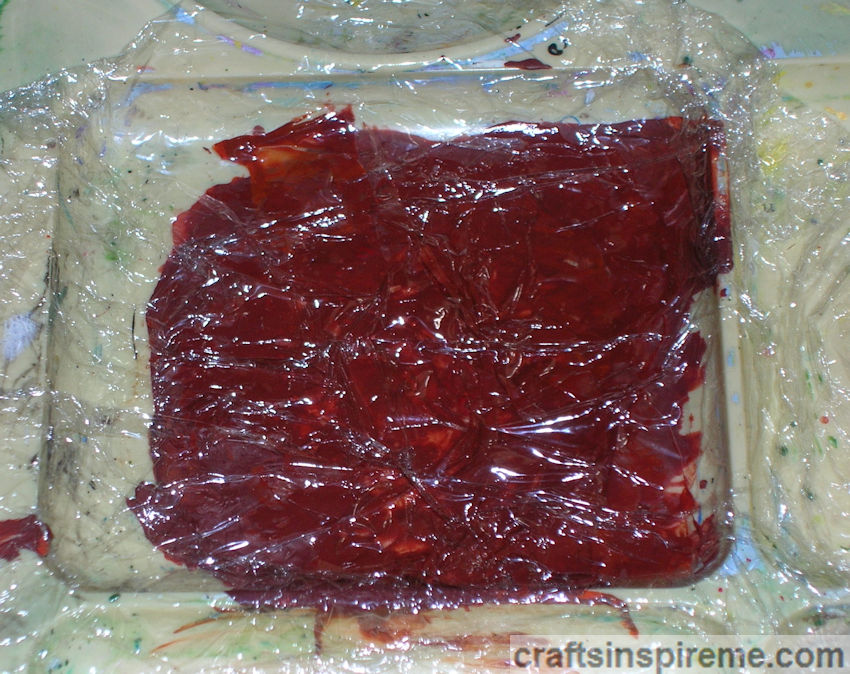
Be sure to mix enough paint for the giraffe’s spots to last throughout the project.  To keep the paint moist on a paint palette, cover it with plastic wrap, ensuring the plastic is pressed down upon the paint surface and the edges are sealed.  You may need to moisten the paint, but the color will be preserved.  I created a reddish-brown by mixing brown, red and orange acrylic paints. 

Paint the Spots on the Neck

Painted Pattern

Use a fine brush for the spots.  Be sure to leave space in between, which resembles mosaic tile set in grout. 

Paint Spots – Right Side

Painted Body - Right

As you work your way down the body, the size of the spots diminishes.  Be sure to paint spots on the edges, including the front and back of each leg and the neck too. 

Paint Spots – Left Side

Painted Body - Left

For this step, the following areas will remain tan: the back of the head, the mane, the inside of each leg, the feet, and the tail. 

Defining the Details – Right Side

Painted Face Tail & Feet - Right

Paint the head and facial details, except for the eyes, which will be completed in a later step.  Paint the tail and hooves black.  The muzzle and fur between the eyes are darker, while the cheeks are lightly spotted.  The “horns” are a combination of black and brown. 

Reference – Back of Giraffe’s Head

Giraffe Back of Head

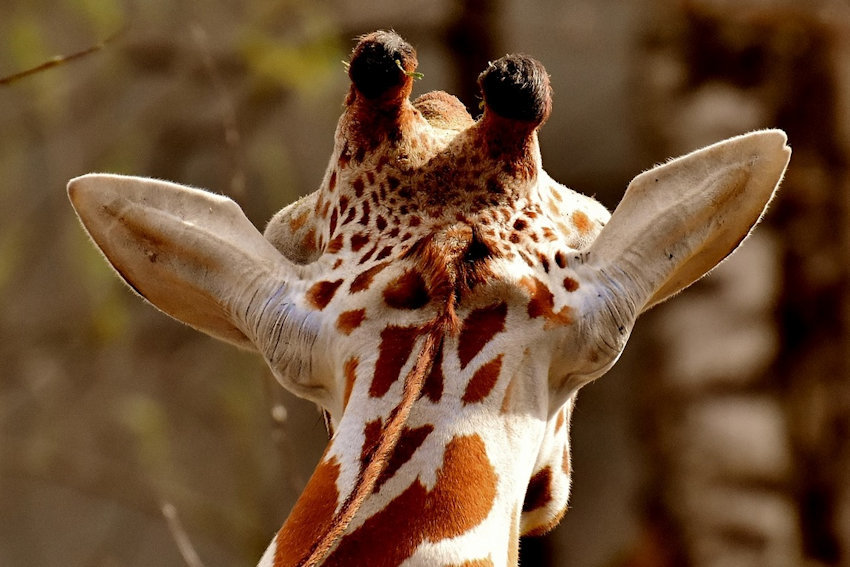
Figuring out the back of the head was difficult.  Because our giraffe is looking off to the side, you will only see a portion of the face. 

Reference – Back of Head & Mane

Giraffe Back of Head

When the giraffe moves his head and neck, the mane twists and turns. 

Reference – Back of Head & Mane

Giraffe Back of Head

There are no spots on the ears.  Notice how the mane twists as the neck shifts. 

Defining the Details – Left Side

Painted Back of Head

Draw the details on the back of the head.  Be sure to show the twisting mane.  Paint all the details except for the mane. 

Paint 3D Details – Right Side

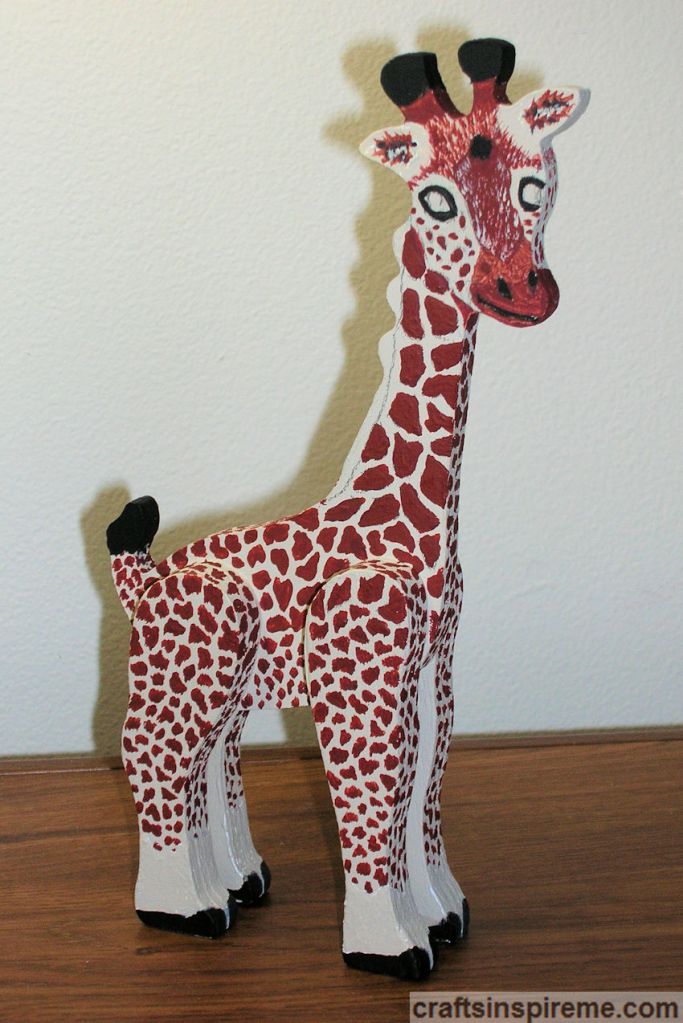
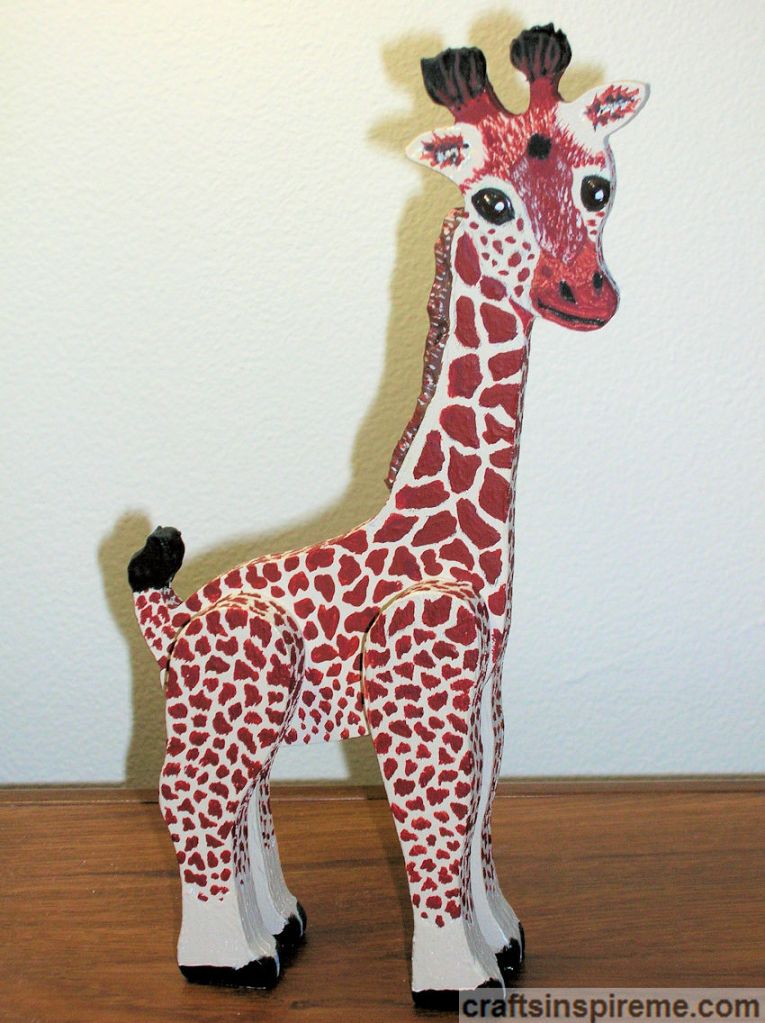
Finished Giraffe - Right

The eyes are painted with brown fabric paint for a 3D effect and outlined in black.  After it dries, add black pupils and white dots in the center to bring life to the eyes.  Using brown fabric paint, create a raised mane, centered down the entire length of the neck.  It will take two coats to make the furry mane to stand upright.  Create fur on the “horns” with black fabric paint. 

Paint 3D Details – Left Side

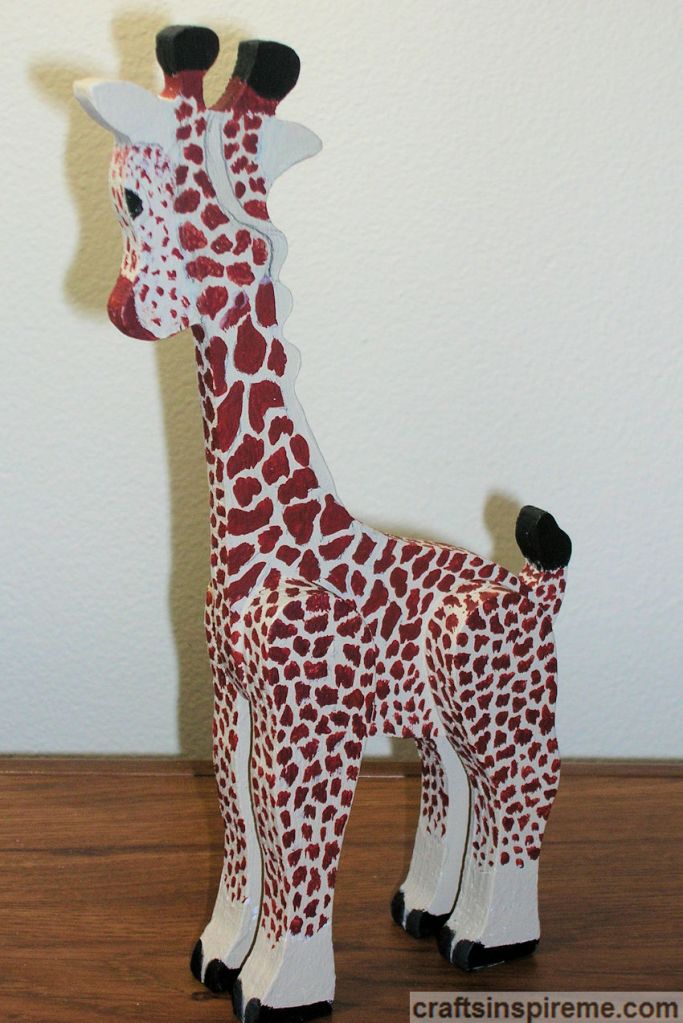
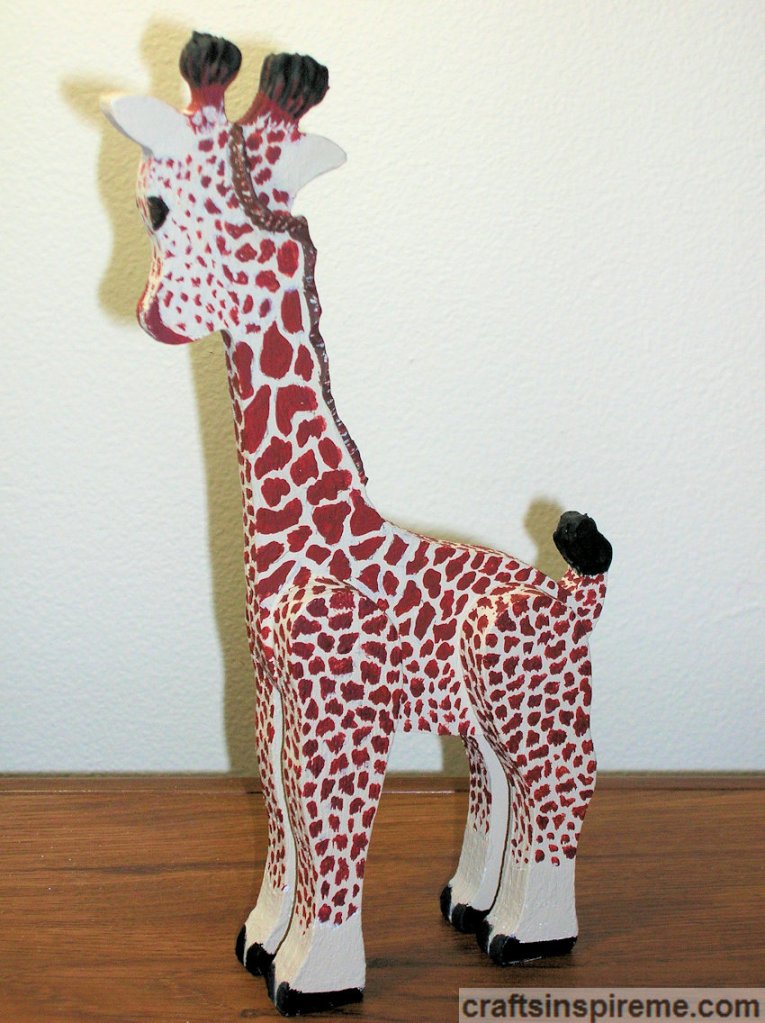
Finished Giraffe - Left

Paint the eye with brown fabric paint and outline with black.  Using brown fabric paint, complete the twisted mane on the back of the head.  Create fur on the “horns” with black fabric paint.  Allow it to dry overnight. 

Finished Close Up – Face

Finished Close Up - Right

The following steps apply to both sides: Because fabric paint is shiny, paint over the mane with brown acrylic and then highlight it with reddish brown and tan.  Paint the horns with black acrylic.  Some reddish-brown paint was brushed into the ears and up onto the furry horns. 

Finished Close Up – Back of Head

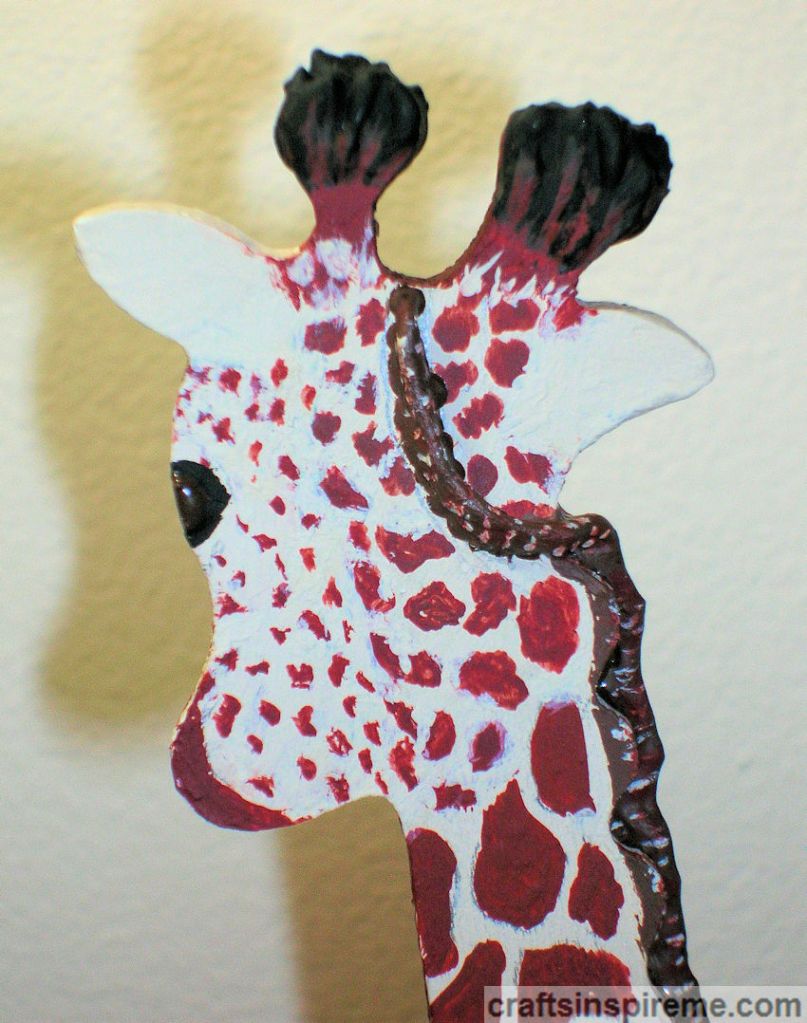
Finished Close Up - Left

Touch up any details as needed.  The spots on the left side of the neck, closest to the face, curve toward the face to give a three-dimensional roundness to the upper portion of the neck. 

Giraffe – Before & After

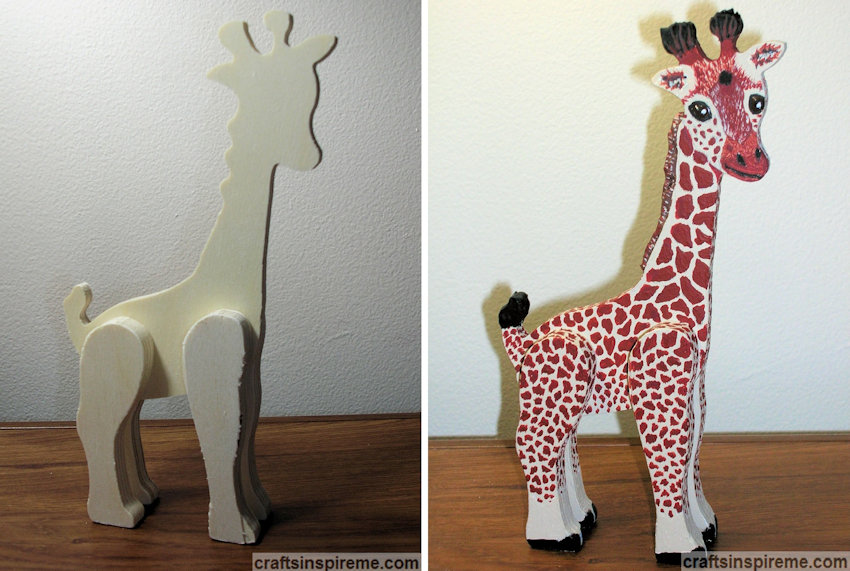
Before & After Giraffe

Here is a side-by-side comparison of the original raw wood giraffe and the fully detailed project at completion. 

I had a lot of fun painting this little guy.  Figuring out the anatomy was challenging and rewarding.  There are many wooden animal crafts waiting for good homes.  Check out your local craft stores or the internet to find one you will love.  Good luck! 

Thanks for Reading & Happy Crafting!

Hidden Messages – How Businesses Use Color

Color Wheel

Believe it or not, color influences our behavior, actions and expectations. Businesses use this knowledge to gain customers, build trust and brand recognition, and increase their profitability. Sometimes it is quite obvious, and others are more subliminal. There’s a delicate balance in creating a memorable impression to play upon our emotions or inspire particular thoughts and actions. Let’s look at some examples of how color is being used on a daily basis.

Mystery Businesses
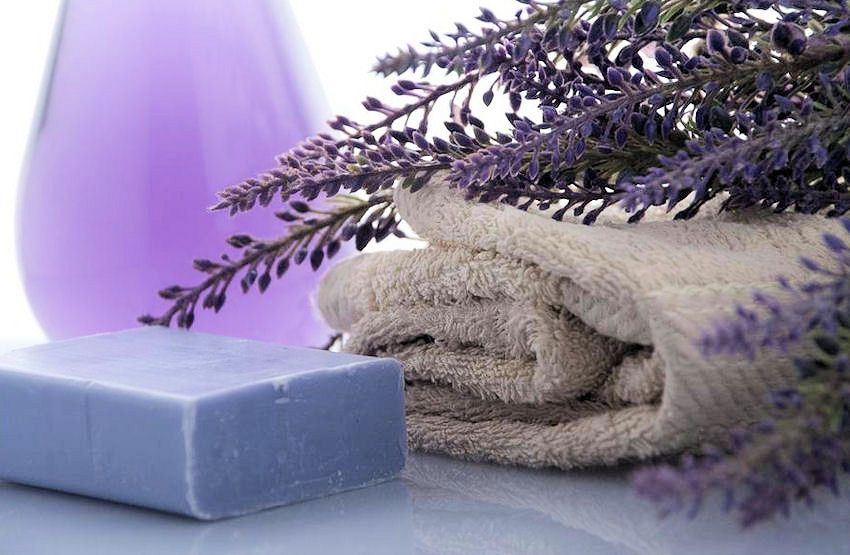
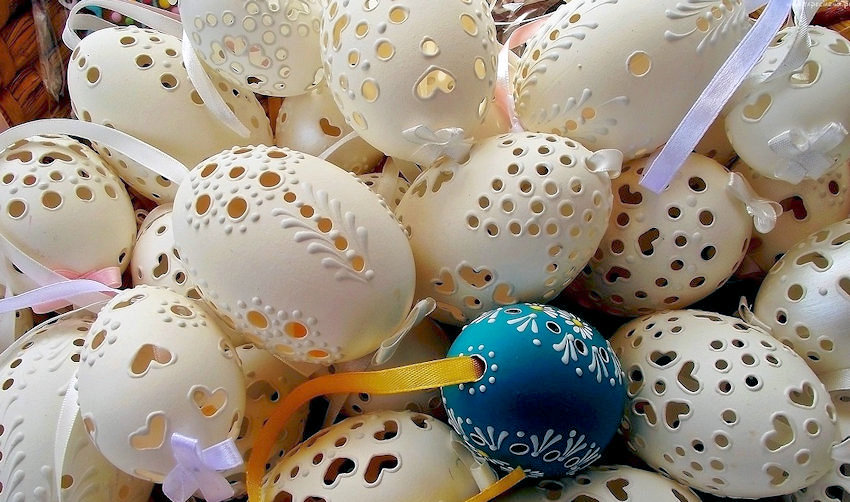
But first, let’s play a game! Can you name each of the companies associated with the four photos above? Your subconscious mind has been trained to recognize brands. Many are instantly known by a particular color combination. Did you guess them all correctly? Read on to find the answers.

Day Spa
Day spas offer renewal and relaxation by reconnecting with Nature through pampering treatments set in rooms with earth tones, blues, greens and purples to soothe away the stresses of everyday life. The sweet floral scent of lavender is known to promote restful sleep and has an instant calming affect simply by smelling the fragrance.

Laboratory
The laboratory interiors are typically white to give the impression of cleanliness and purity even though we know there are millions of microscopic germs. Antibacterial wipe, anyone?

Bank Vault
There was a time when banks were red brick buildings, symbolic of strength, wealth, and confidence to weather any storm. Today bank’s branding colors include red (a power color and a nod to bricks of past), and green (the color of money and abundance.) Regardless of the colors your bank uses, the message is the same: “Your money is safe with us.”

Tiffany & Co.
Tiffany & Co. is easily recognizable by its robin’s egg blue packaging, store displays, and interior accents. Many people refer to this color as “Tiffany Blue.” Because it is rather rare in nature, the color suggests bold but delicate designs in timeless jewelry to be treasured for a lifetime.

Leopard at Sunset
The jewelry designer, Cartier, often uses leopard print and their signature red packaging in their advertising, but as you can see from the photo, Mother Nature is the originator of this color, pattern and texture combo. It’s wild, exotic, and luxurious.

Na Hoku
Na Hoku, a Hawaiian jeweler, entices shoppers with a deep blue storefront dotted with shiny silver sparkles, and pairs of lit torches on either side of the entrance, which calls to mind warm tropical evenings under a star-filled sky. Inside, palm tree murals further that beachy vibe, while jewelry designs celebrate the beauty of this paradise found.

Tommy Bahama
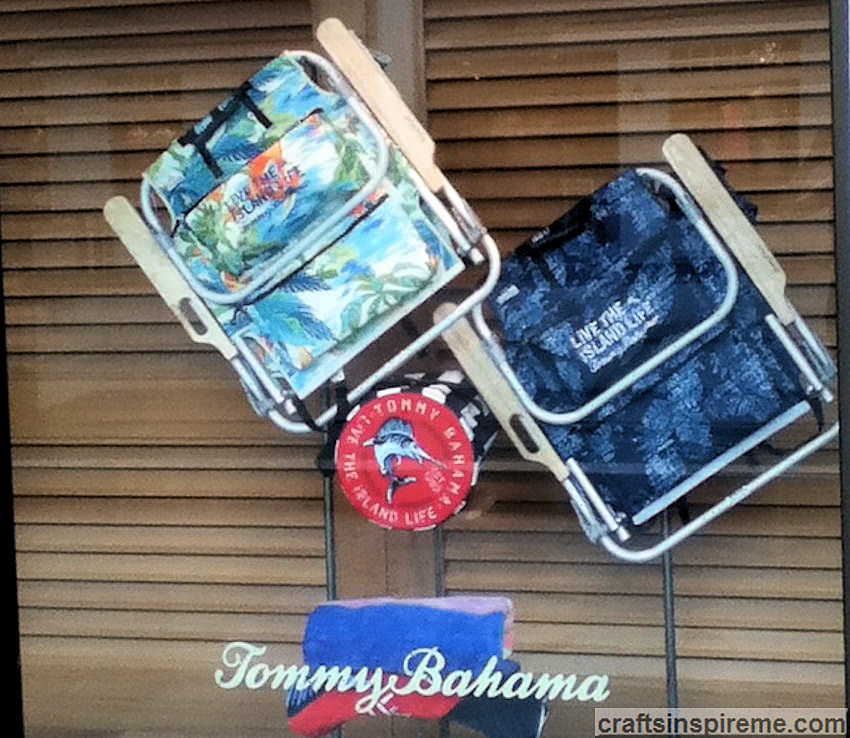
Another name synonymous with the tropics is Tommy Bahama. Their merchandise and stores exude island charm with natural wood plantation shutters, vibrant floral decor, and exotic prints on everything from clothing to umbrellas and beach chairs. Sometimes the stores feature musicians playing guitars or steel drums to foster a playful, party atmosphere inviting everyone to come on in, stay a while, and take a piece if the tropics home with you today.


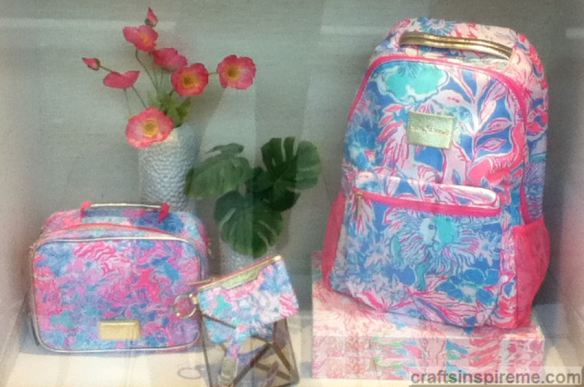
You would think that limiting yourself to a palette of pastel colors would restrict your options for creating new products and drawing new customers. Lilly Pulitzer has successfully accomplished this and is one of the most easily recognized brands in the world.

LOccitane1
The French company, L’Occitane, stands out among a sea of retailers because of its signature golden yellow color on its products, storefront and interior. Competition is fierce so it pays to draw attention with a bold presence. Back it up with fine quality and service, and you will have customers for life.

Coffee Shop
The warm, rich, layered flavors of coffee are echoed in the earth tones, wood grain and brick textures in this popular coffee shop. This down to earth atmosphere invites you to kick back and stay a while, as you enjoy a few cups of your favorite beverage and maybe a scrumptious, fresh-baked muffin too.

Grocery Store Fresh Produce
The green walls and brown display case suggest nature. The signage reassures shoppers it’s fresh and organic. The light purple labels and packaging are appealing against the reds, oranges and greens found in fresh produce. The better it looks, the more you’ll want to buy.

Refrigerated Foods
Food packaging depicts professionally prepared and photographed dishes to tempt you. The actual product may look nothing like it, but manufacturers pay consultants hefty fees to select the perfect colors for their products as well as the packaging. Supermarkets invest fortunes in colorful displays to entice shoppers to buy more.

Time Square
Time Square – Billboards, storefronts, and signage all vie for your attention in a very competitive world. Where will you spend your shopping dollars – probably at the shops with the most inventive storefronts and/or branding? Those advertising campaigns stick with you, and your brain is all too happy to supply you with purchasing options.

French Cafe
You’re seated at a table in a fine restaurant sipping wine in an elegantly appointed room with red walls. Why? Studies show the color red stimulates the appetite, which results in consuming more food and drinks and more profits for the restaurant. Restaurant ambiance is created by combining many elements – light level, color scheme, lamp type, china color and pattern, linens, upholstery, etc. Nothing is by accident – it’s tailored to make you spend more.

Fast Food McDonalds
McDonalds enlists the help of the color red to encourage eating more, but it’s combined with yellow so don’t get too comfy. Hard seats and dense table arrangements ensure guests will make this a short stay. The subliminal message: Eat fast and go!

Cheesecake Factory
The Cheesecake Factory – What will you do to pass the time while you wait for a table? You’re hungry. You could take a look at the menu, but most customers peruse the Takeout Desserts counter, which is filled with the most tempting cheesecakes and sweets. The rich chocolate browns and caramel colors, in the interior as well as the foods, entice your taste buds. You’re not walking out of here without buying dessert.

Eddie Bauer
What could be more outdoors than forest green accents, river rocks, and lots of natural wood trim? Eddie Bauer immerses customers in the great outdoors long before their adventures begin.

Take a look at your office, the local supermarket, and the stores you frequent. What kind of atmosphere are the colors and textures creating? How do they make you feel? If you could make one change, what would it be? Hopefully this has given you some food for thought. If you have any ideas to share, please note them in the comments section. Until next time…

Thanks for Reading & Happy Crafting!

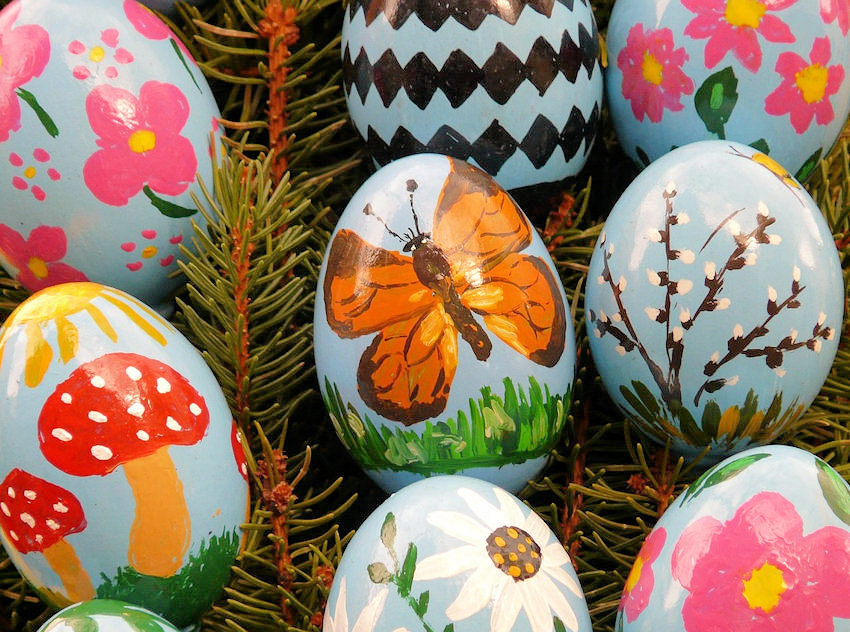
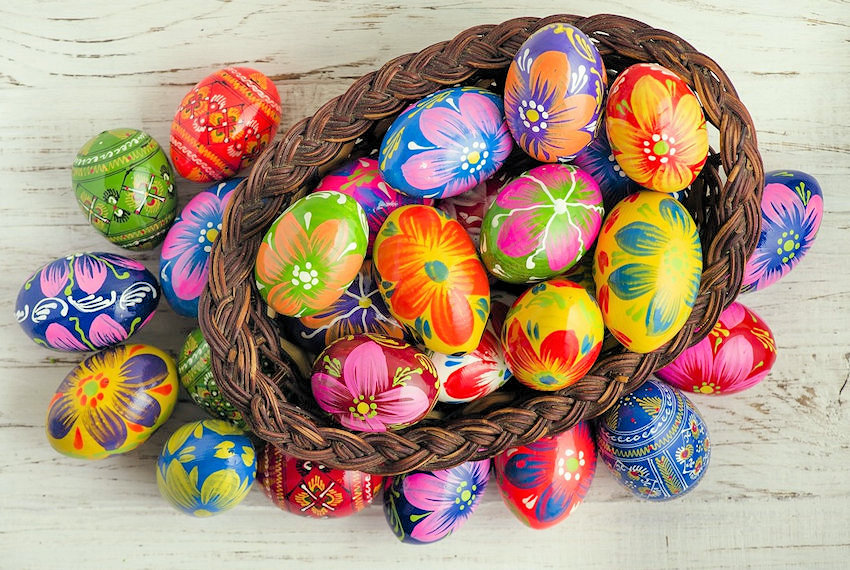
Decorating Easter Eggs

Dyed Eggs

Dyed eggs are a staple of any Easter celebration. All you need is an egg dyeing kit and some vinegar, which makes it easily accessible for all ages.  Decorating doesn’t have to be limited to dye and farm fresh eggs. Options include paints, fabrics, markers, ribbons, and appliques, while the eggs can be wooden, foam, or plastic, just to name a few. Let’s look at a variety of decorated eggs to get your creative juices flowing. 

Painted Broken Eggs

Broken Eggs

Crackle Finish Egg

Crackle Finish Egg

Pierced Eggs with 3D Painted Accents

Pierced Eggs

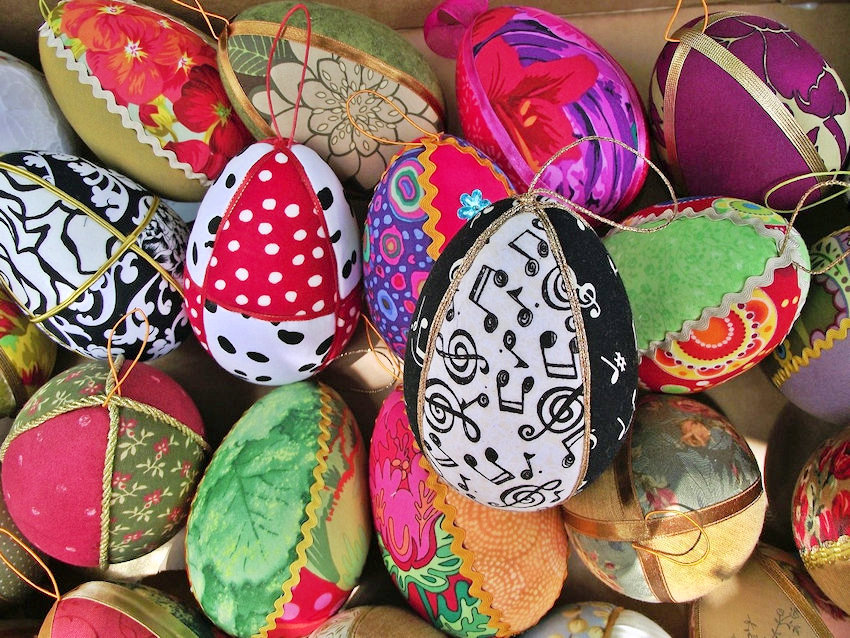
Fabric Wrapped Eggs with Decorative Trims

Fabric Covered Eggs

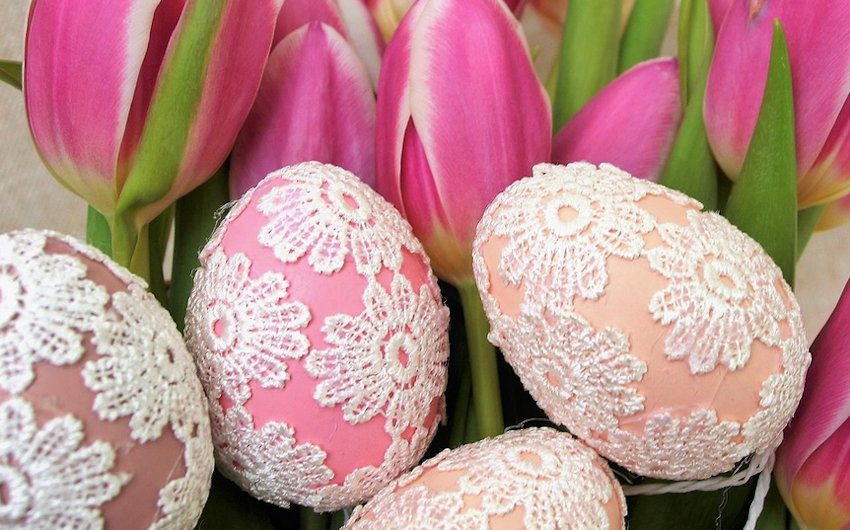
Dyed & Lace Appliqued Eggs

Lace Decorated Eggs

Scrapbooking Eggs

Scrapbooking Eggs

Quilled Egg

Quilling Egg

Decoupage Egg

Decoupage Fairytale Egg

Multicolor Marker Egg

Marker Egg

Illustrated Egg

Hand Drawn & Colored Egg

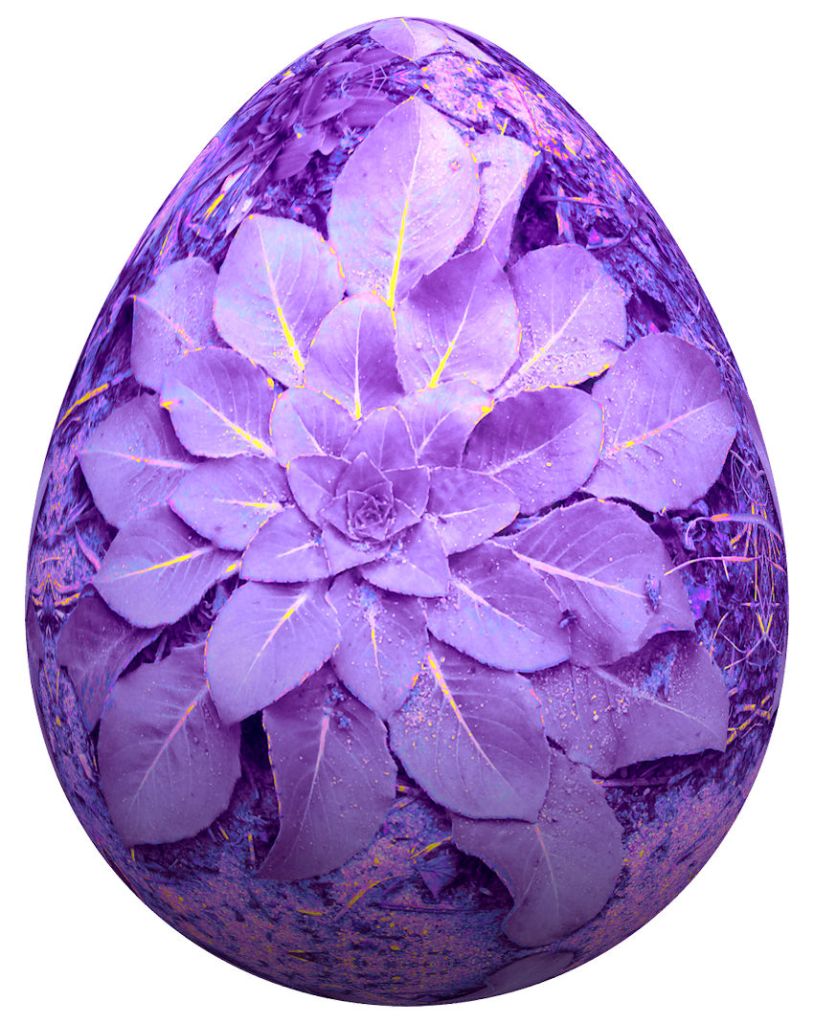
Silk Flower Applique Egg

Purple Floral Egg

Dyed & Beaded Eggs

Beaded Eggs

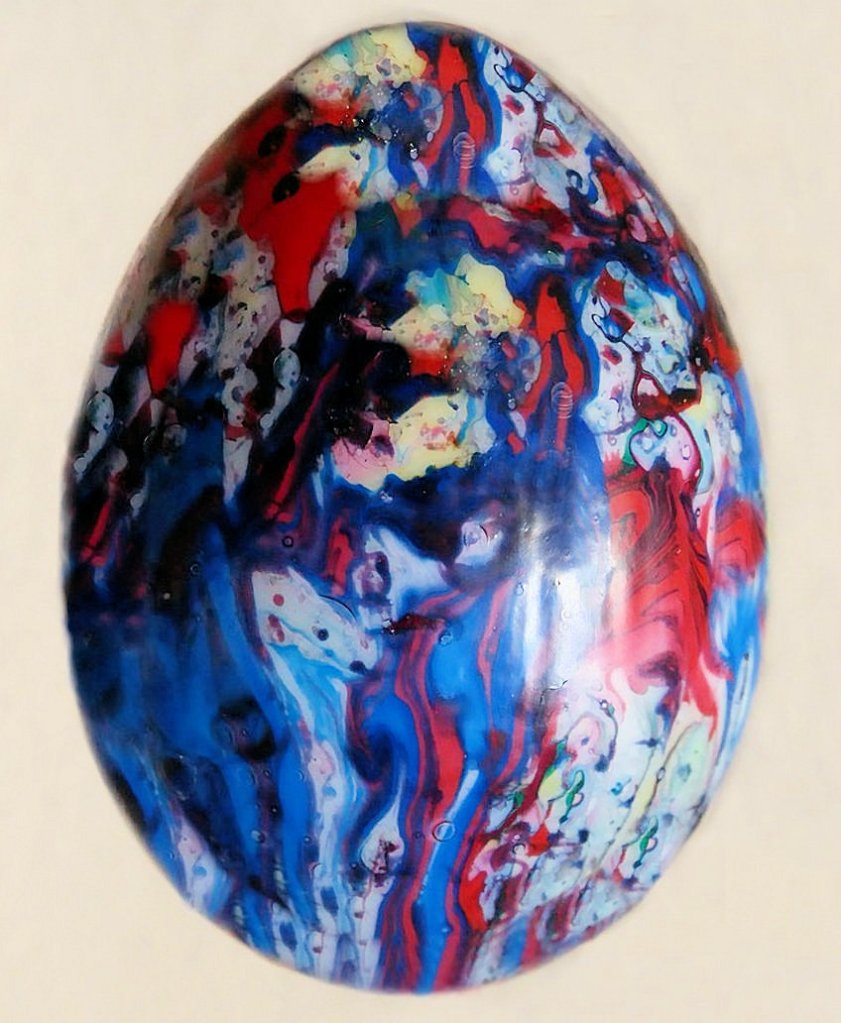
Paint Pour Egg

Marbleized Paint Pouring Egg

Sponge Painted Egg

Sponge Painted Egg

Hand Painting Eggs

Hand Painting Eggs

Hand Painted Eggs

Hand Painted Eggs

Hand Painted Eggs

Hand Painted Eggs

3D Hand Painting Eggs

3D Hand Painting Eggs

Hand Painted 3D Metallic Eggs

Fabric Paint & Jeweled

Romanian 3D Metallic Eggs

Metallic Romanian Eggs

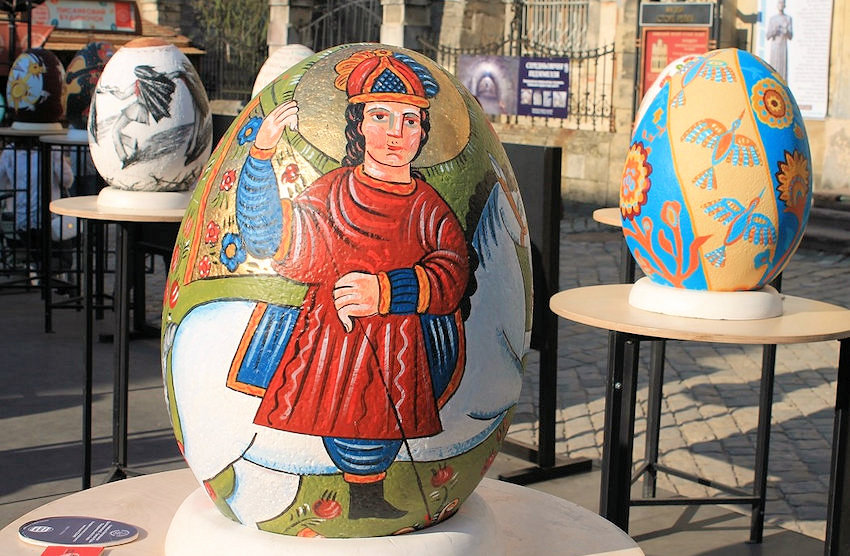
Ukrainian Egg

Oversized Ukrainian Egg

Fine Art Eggs

Fine Art Eggs

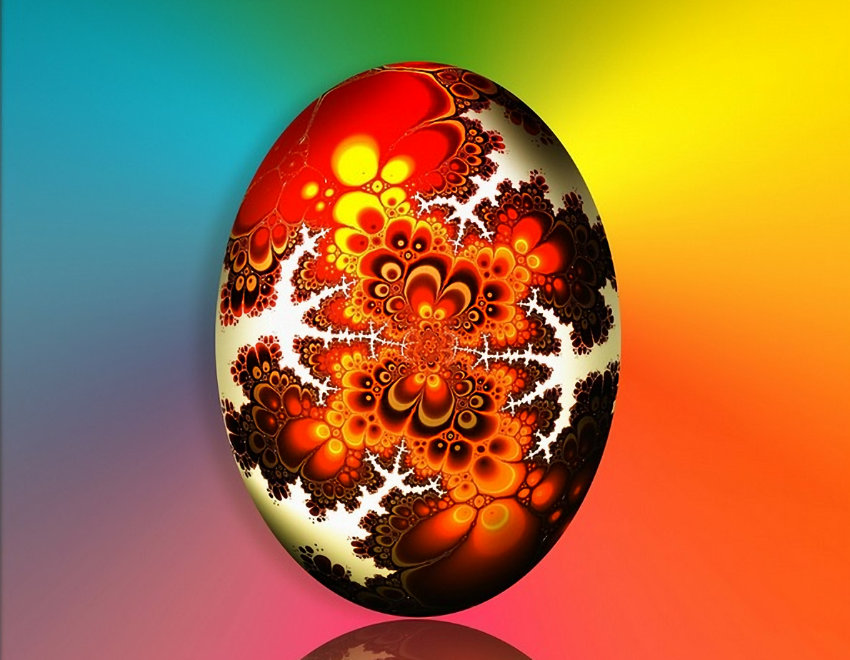
Hand Painted Abstract Art Egg

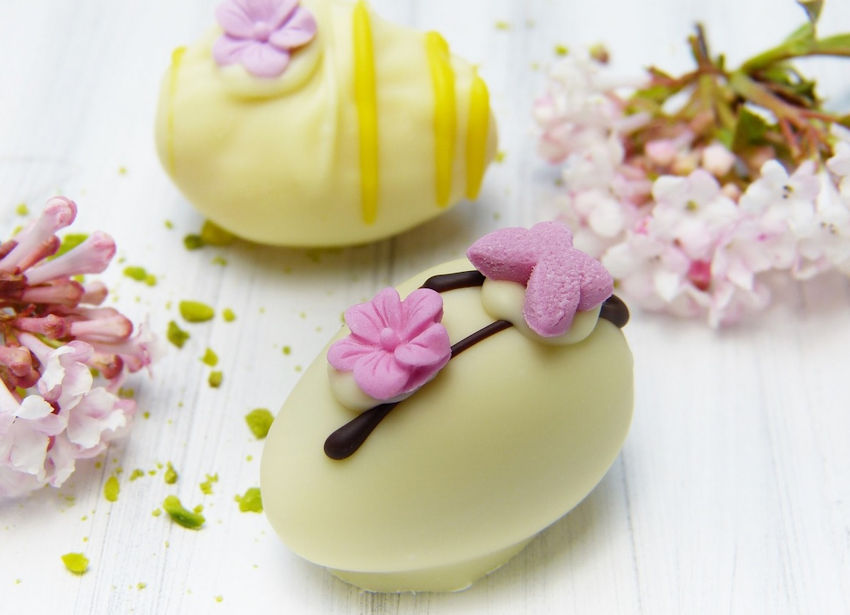
Chocolate Eggs

If you have an egg allergy or if painting is not in your skill set, chocolate eggs can be decorated using the same design principles shown throughout these photos.

I hope you have found some inspiration and will try your hand at decorating eggs.  Do you have a favorite? Please let me know in the comments section.  

Have fun decorating and thanks for reading.

Happy Easter & Happy Crafting!

Collages: Old School vs. High Tech

Camera & Collage

Collages can be created by two different methods: 1) “Old School” Traditional -Assemble and glue groups of photos onto a backer board, or 2) High Tech – Use photo editing software. Both methods are fun and produce impressive results. Let’s look at several possibilities…

“Old School” Collages:

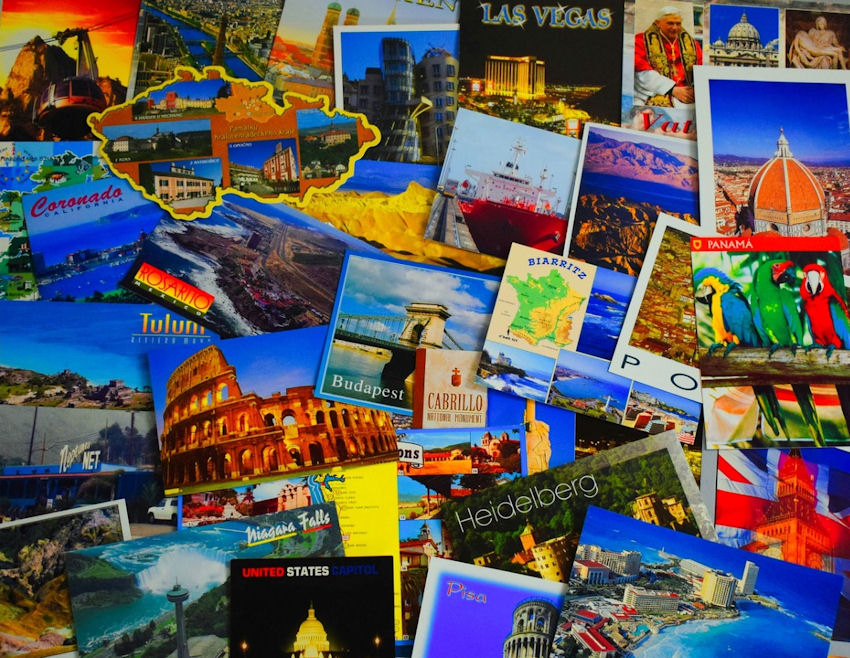
Postcard Collage

Travel Collage

Many people collect postcards during their travels. Instead of stuffing them in a drawer, create a collage, frame it, and hand it up so you can reminisce about past vacations and dream of future destinations. 

Vision Board

Vision Board

What are your dreams? A vision board helps focus mental and physical energy toward achieving your goals.  Magazines, catalogs, travel guides and brochures provide great source material for collages.
For more information about traditional collage making, please click here.

Digital Collages:

Horizontal Grid (a.k.a. Photo Montage)

Dog Collage

A horizontal collage is a great way of displaying your favorite photos, such as family members, fur babies, or anything else that warms your heart.

Horizontal Grid

Fireworks Collage

Whatever you love – fireworks, lighthouses, beaches – can be assembled into a frameable work of art.

Layered Images

Peacock Collage

Compose a one-of-a-kind masterpiece by overlaying multiple images.

Symmetrical Grid

Antique Door Hardware

Displaying your collectibles, such as antique door hardware, requires a lot of space, but a photo montage makes it easy to enjoy your collection on a daily basis.

Asymmetrical Grid

Undersea Collage

The placement and sizes of photos can be easily modified to create a visually pleasing composition.

Custom Grid

Flower Collage

With photo editing software, you can experiment with colors, layers, and special effects. Bring your imagination to life right before your eyes.

Hybrid Collages:

Bold Design

Parrot Collage

Much like the traditional collage making process, images from different photos can be digitally “cut and pasted” onto new backgrounds.

Action Adventure

Wave Collage

Spice up your family vacation photos with a few thrills and chills.

Out of this World

Universe Collage

To achieve this otherworldly image, photograph a model leaning upon a beach ball. Cut & paste it onto a star filled background. Replace the ball with a photo of the earth and add a planet or two. Enjoy!

Mandalas

Mandala

Drawing, painting, or traditional collage making would take forever to create this complex mandala. Thanks to digital technology, you can create one quarter of this design and then mirror it vertically and horizontally to complete the circle. You could add three-dimensional sparkle by gluing beads to the completed composition.

Mixed Media Collages:

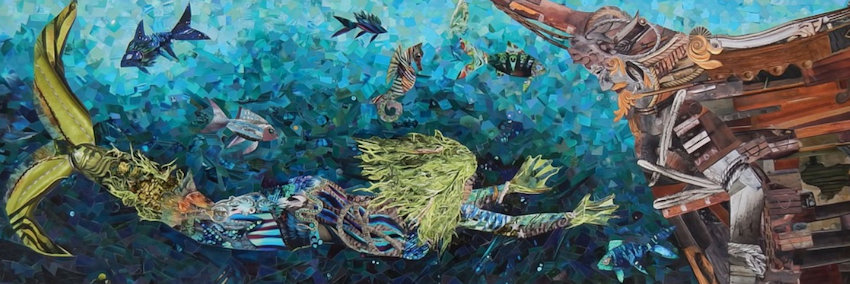
Siren of the Sea

Mixed Media Mermaid Collage

This mermaid and sunken ship can be made using a combination of traditional and digital collage making. The background would be easier to create digitally. After printing out the full-size image, the mermaid and ship could be hand drawn. Based upon desired colors, textures and patterns, pieces cut from the pages of magazines can be glued in place, producing a three-dimensional effect.

Flower Power

Mixed Media Floral Collage

Who wouldn’t love eternal spring? Make it a reality by starting with a photo of a beautiful flower garden. Enhance it by cutting and pasting layers of colorful flowers on top of the finished image.

Creature of the Night

Mixed Media Owl Collage

A digital sepia tone background can be printed full size on canvas. The owl is drawn and detailed with a combination of markers and paint. Genuine feathers, layered and glued upon the wings, bring this owl off the canvas and into the viewer’s world.

Abstract Words

Mixed Media Abstract Collage

It is said you should choose your words carefully. Choose a poem or quotes, whatever appeals to you. Layered colors, words, and embossed textures harmonize, creating visual movement and a palpable sense of warmth and peace in this abstract masterpiece.

The Cat’s Meow

Mixed Media Cat Collage

What do you think he sees? A bird? A butterfly? Maybe a mouse? Whatever it is, those reflective amber eyes capture our attention. The antiqued background, with embossed floral motifs and pen and ink style writing, ensures this quizzical feline remains center stage. Additional detailing of the cat’s body and punching up the contrast of the purple and green flowers around him will make it appear as if he is sitting in front of a wall.

I hope these collages have inspired you to playfully experiment with the infinite possibilities of photography and collages to create personalized art to be enjoyed for years to come. Please let me know your thoughts in the comments section. Good luck with all your future creative projects.

Thanks for Reading & Happy Crafting! 

Mother of Pearl – A Gift from the Sea

Mollusk
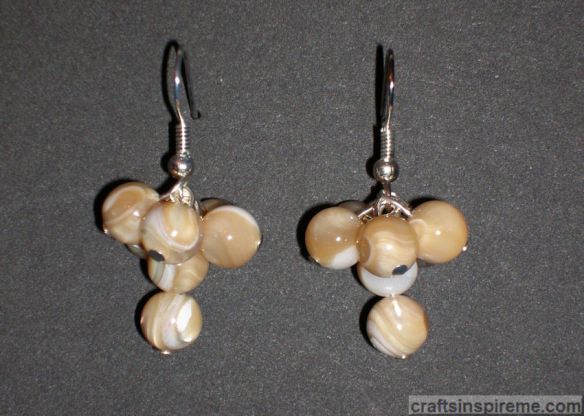
Mother of Pearl comes from mollusks, and is naturally a blend of tan, cream and white, with an iridescent finish. It can be bleached white, or dyed and color of the rainbow. Mother of Pearl beads come in an amazing range of shapes and sizes, while the thicker pieces are carved into cameos and pins, or cut into squares as mosaic tiles. Let’s turn a few round beads into a lovely pair of earrings.

How to Make Natural Mother of Pearl Cluster Earrings
Mother of Pearl Earrings

These 1-1/2” long Natural Mother of Pearl earrings swing and shift with your movements, and they’re a neutral color, which coordinates with whatever you’re wearing. In this design, five beads orbit around a dangling two bead central core. These earrings are a little challenging in Step 6. At times you may feel like you have fumble fingers. If you are looking for an easy pair of earrings for beginners, please click here.

Required Beads & Findings:
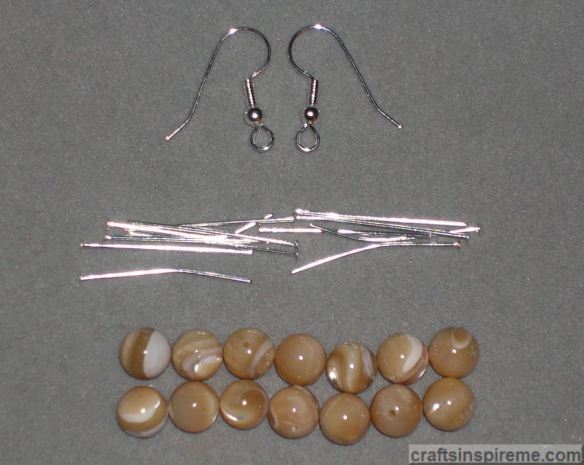
MoP Earring Supplies

Supplies:
To make this pair of earrings you will need:
12) Silver plated Head Pins – 1” length,
14) 7-7.5mm round Natural Mother of Pearl beads,
2) Silver plated Surgical Steel Fishhook Earwires with ball & coil

(Please note: Head pins are the foundation of these earrings. They are inexpensive and come in big packages. Be sure to have several on hand just in case. Craft stores carry jewelry making supplies, including beads, accents, and tools. If you get hooked on jewelry making and yearn for the ultimate selections, look no further than FireMountainGems.com)

Required Jewelry Making Tools:
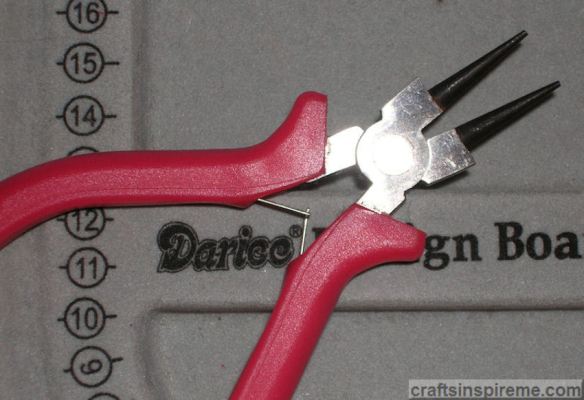
Round Nose Pliers
Round Nose Pliers – the smooth, round tips on these pliers make it easy and safe to manipulate wire, pins, and small jewelry metal pieces known as findings. Please don’t use standard pliers, which have teeth that will damage delicate precious metals.

Jewelry Wire Cutters
Jewelry Wire Cutters – a sharp pair of wire cutters makes jewelry making so much easier. Do not use them for other crafts, such as floral arranging, which can damage the blades.

Earring Making Instructions:
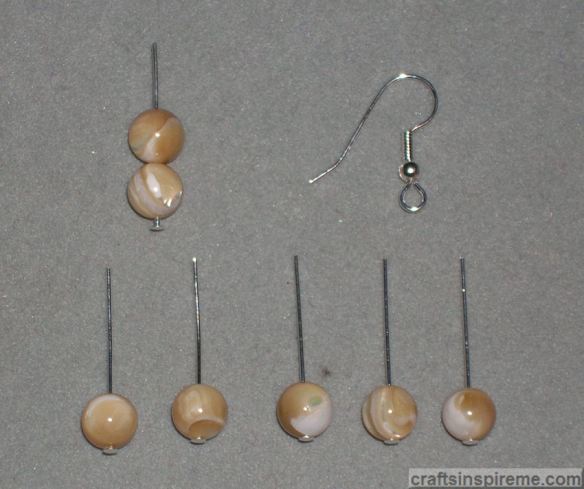
Beads on Head Pins
Step 1: Slide the beads onto head pins as shown.

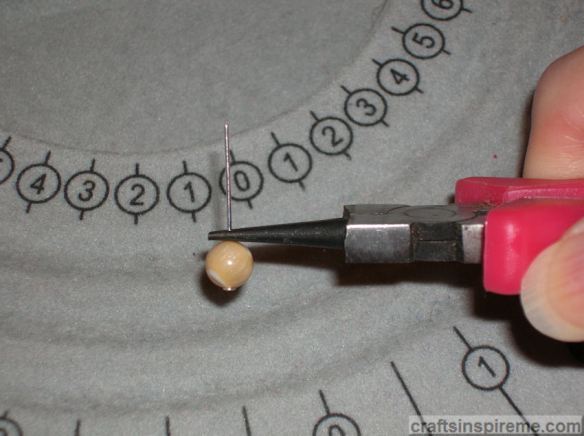
Grasp Head Pin with Pliers
Step 2: With the round nose pliers in your right hand, grip the wire just above the Mother of Pearl bead. Hold the pliers in this position for the next step.

Bend Head Pin
Step 3: Grasp the end of the head pin with your left thumb and index finger, and bend the wire toward you. Continue bending the pin over the tip of the pliers until it touches the Mother of Pearl bead.

Beads with Partial Loops
The reshaped pins will look like the photo above.

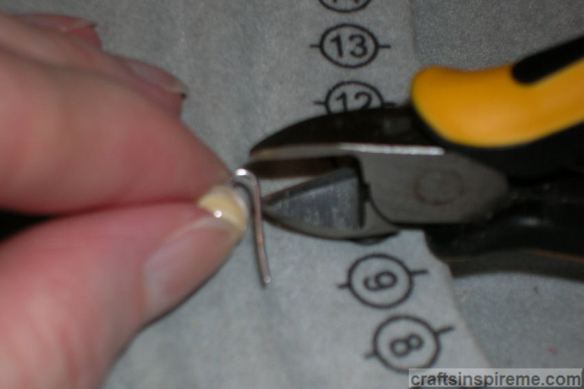
Cut Excess Pin Length
Step 4: Cut off the excess wire. Leave enough wire to form a small loop above the bead. This may take a few tries. Don’t worry if you cut it too short. Simply use a new head pin and repeat the steps.

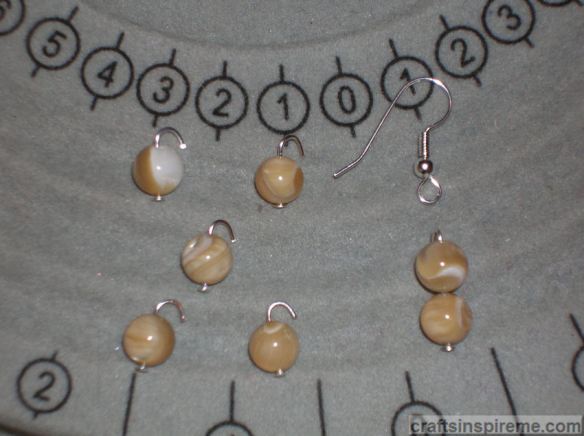
Beads with Trimmed Pins
This photo shows the beads with trimmed pins.

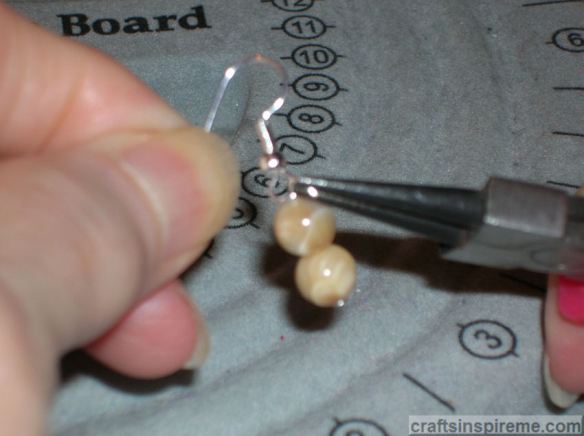
Attach Earwire
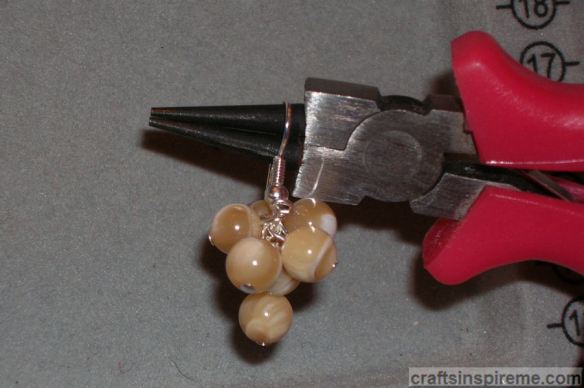
Step 5: Hook the double bead pin onto the loop on the bottom of the fishhook earwire, and close the loop using the round nose pliers.

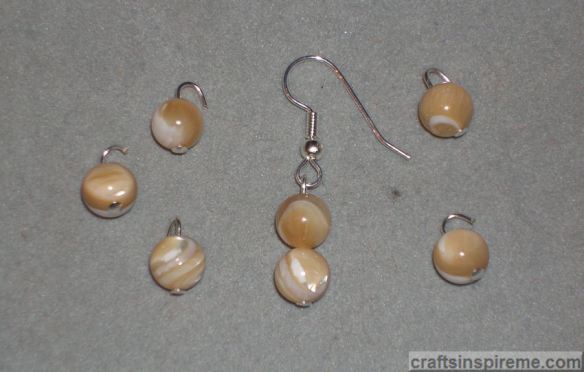
Core Beads Attached
The earring will look like the above photo.

Close the Loop
Step 6: Attach the first “satellite” bead to the earwire in the same way.

First Bead Attached
The earring now has a center core and one satellite bead. Repeat this step for the remaining four beads. If you have trouble getting the beads to lay correctly, remove the dangling two bead central core. Shift the five satellite beads with your fingers until they form a circle around the earwire, and then reattach the two bead central core.

Finished Earrings
Congratulations! You have successfully made a pair of Mother of Pearl cluster earrings.

Black Onyx Version
Here’s the same pair of earring made with Black Onyx beads. Note how the color dramatically changes the look. You could also experiment with different gemstones, glass or wood beads.

Jewelry making is a great way to explore your creativity. There are so many options available that it’s hard to choose. After making several items for yourself, keep in mind that people love receiving jewelry as gifts.

Thanks for Reading & Happy Crafting!

Flowers – Reality vs. Illusion

Assorted Flowers

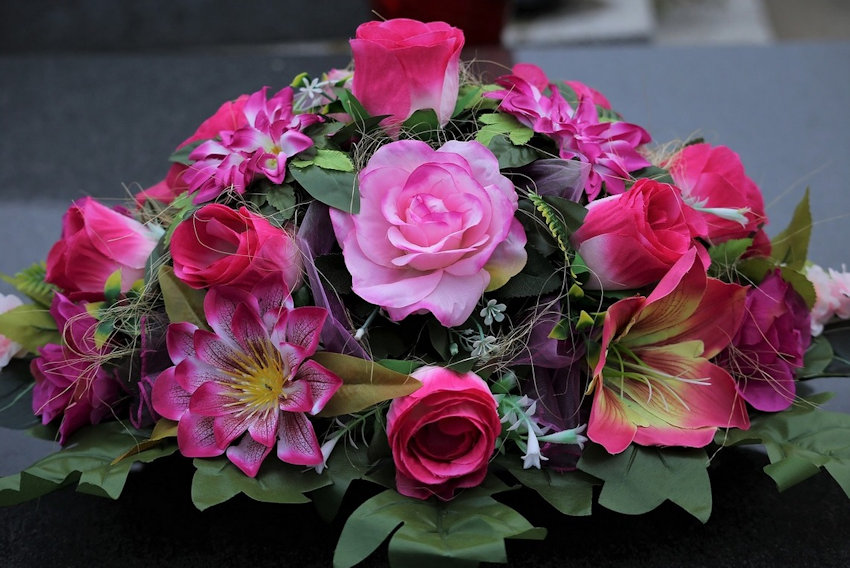
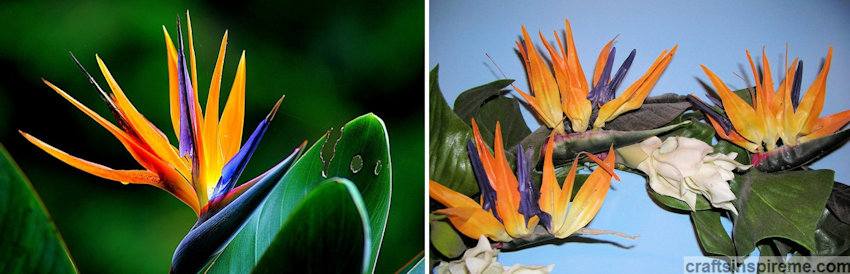
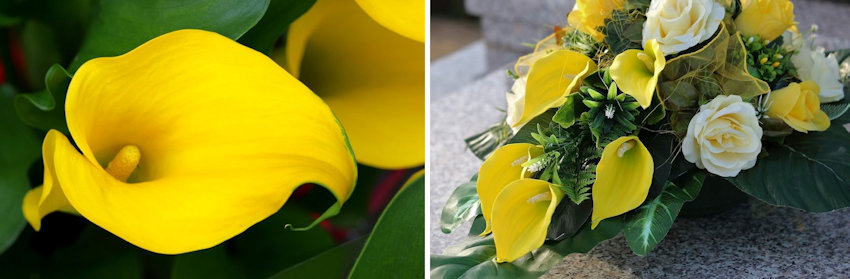
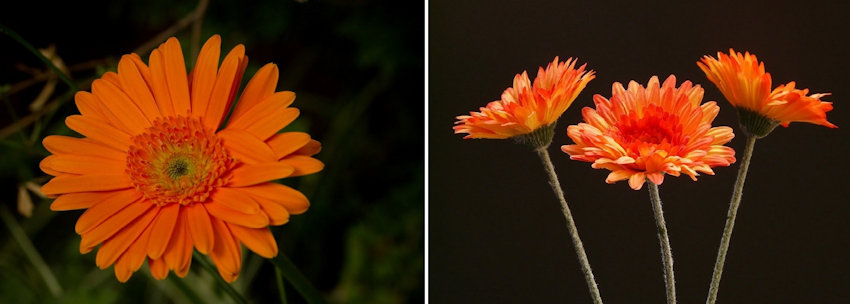
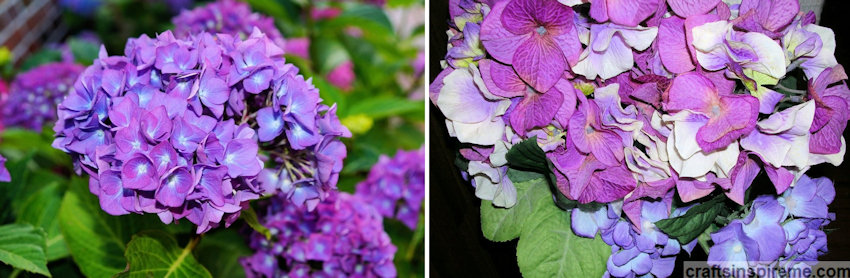
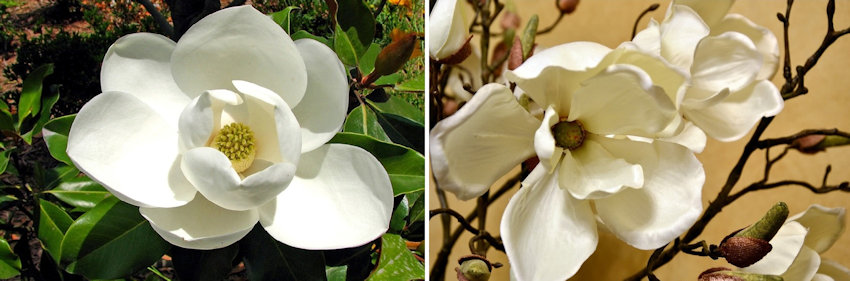
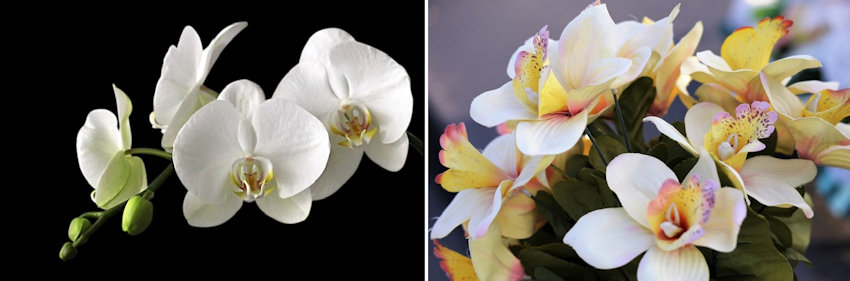
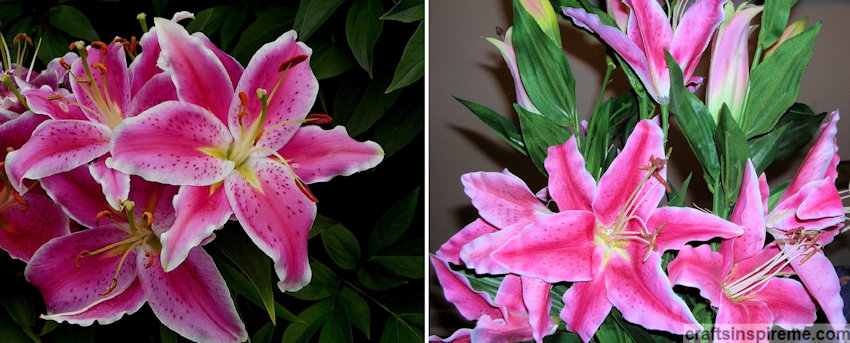
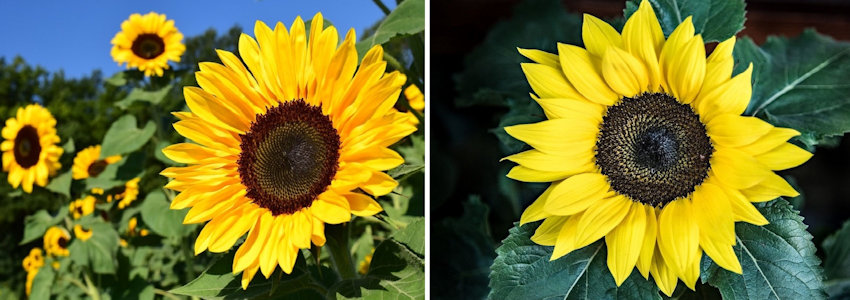
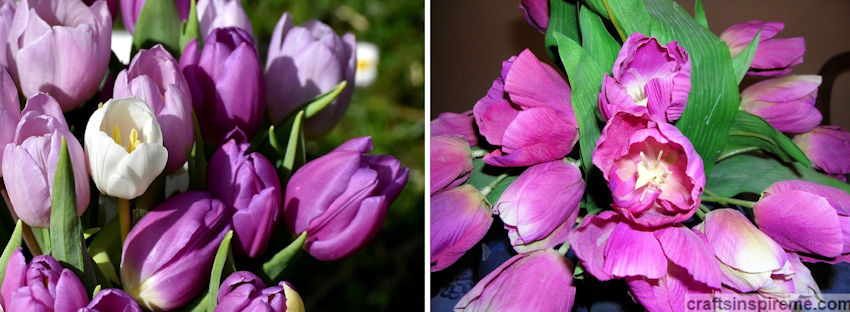
Today’s silk flowers easily fool the eye and are available in an infinite assortment.  Prepare to be amazed with the side-by-side photos of silk and live flowers.  Which are real and which are an illusion? Can you tell the difference? Let’s find out…

Birds of Paradise

Birds of Paradise Live vs Silk

Calla Lilies

Calla Lilies Live vs Silk

Chrysanthemums

Chrysanthemum Live vs Silk

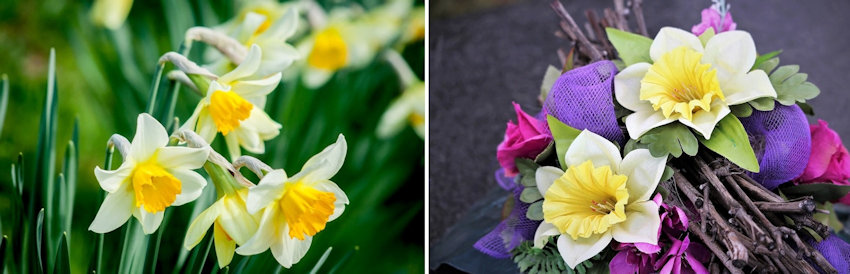
Daffodils

Daffodils Live vs Silk

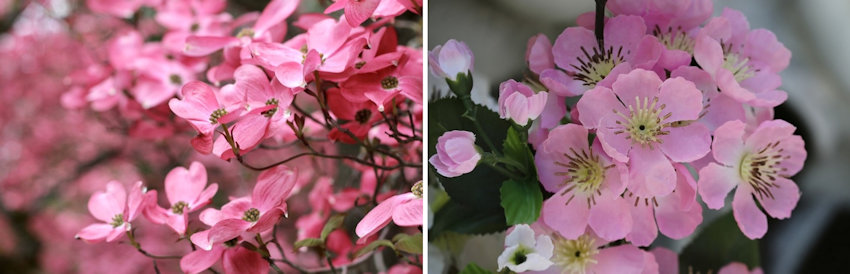
Dogwood Blooms

Dogwood Live vs Silk

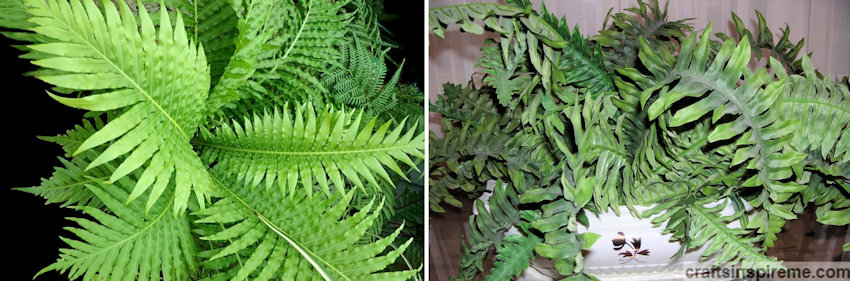
Ferns

Ferns Live vs Silk

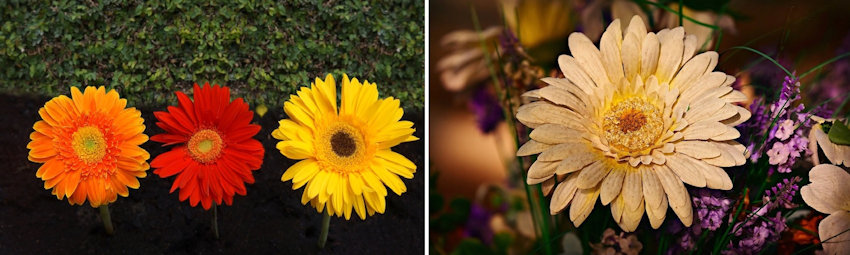
Gerber Daisies

Gerber Daisies Live vs Silk

Hydrangeas

Hydrangeas Live vs Silk

Magnolias

Magnolias Live vs Silk

Orchids

Orchids Live vs Silk

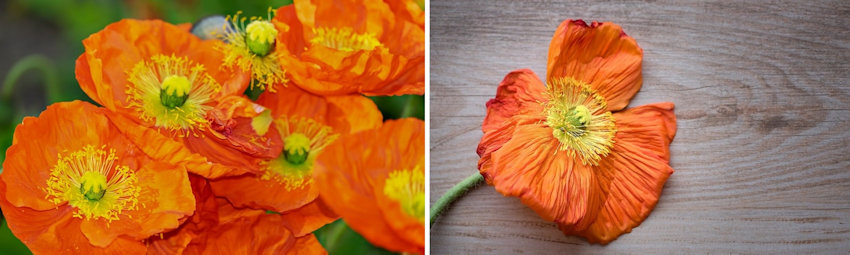
Poppies

Poppies Live vs Silk

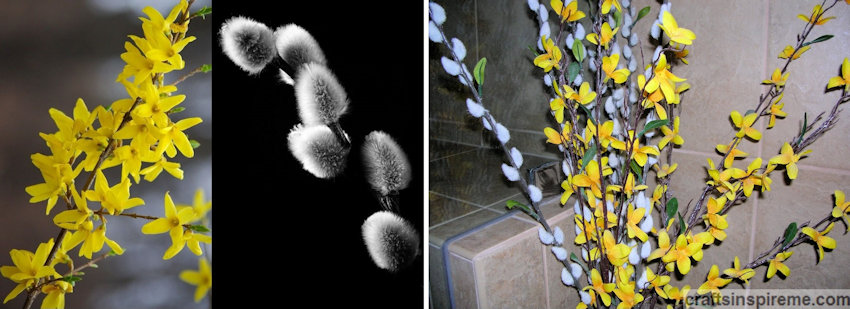
Pussy Willows & Forsythia

Pussy Willows & Forsythia Live vs Silk

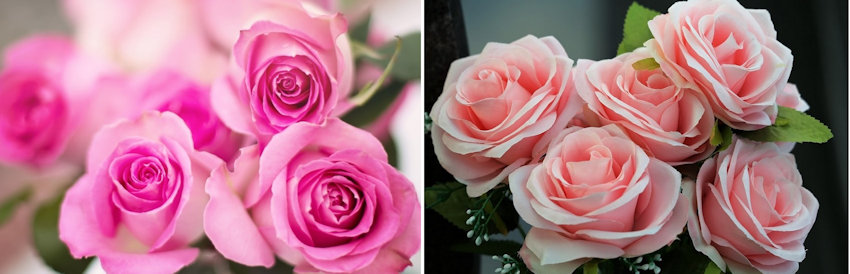
Roses

Roses Live vs Silk

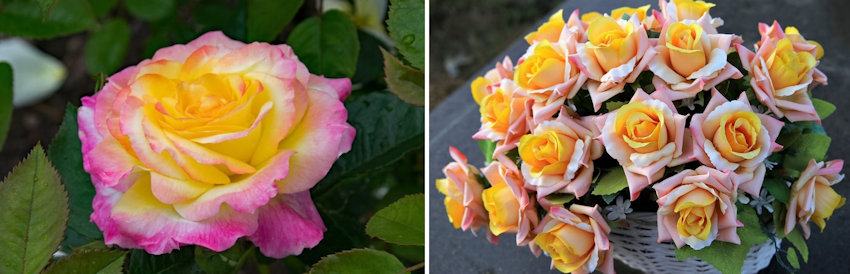
Roses – Two Tone

Roses Two Tone Live vs Silk

Stargazer Lilies

Stargazer Lilies Live vs Silk

Sunflowers

Sunflowers Live vs Silk

Tulips

Tulips Live vs Silk

With silk flowers, there’s no need for water, fertilizer, sunshine, or a green thumb.  In the challenge of recognizing live flowers versus silk, how did you do?  Please let me know your thoughts and favorites in the comments section. 

Thanks for Reading & Happy Crafting!

Walk on the Wild Side

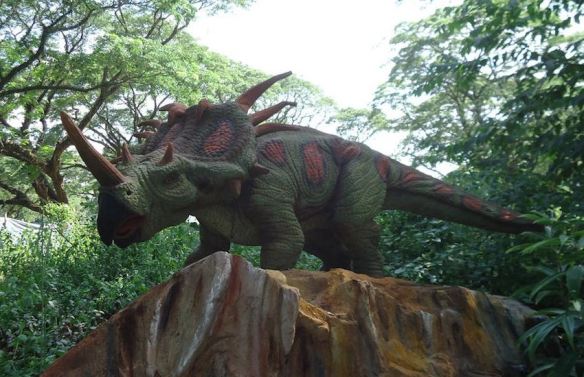
Triceratops
Whose turn is it to walk the dog – I mean dinosaur? Something tells me that 25-foot leash will not be long enough! Dinosaurs are real fan favorites. You can’t get much wilder than that. And what’s not to love?

Dinosaur Eggs
A Dinosaur Nursery – They’re kind of cute at this stage.

Dinosaur
Somewhere between adolescence and adulthood they seem to lose their charm! (lol)

Dinosaur Skeleton
Even when they’re dead, they instill an odd mixture of fear and fascination. Movie Director Steven Spielberg brought dinosaurs back to life on the big screen in the epic movie, Jurassic Park – an emotional roller coaster, that started with awe and wonder, but quickly escalated to bone chilling terror.

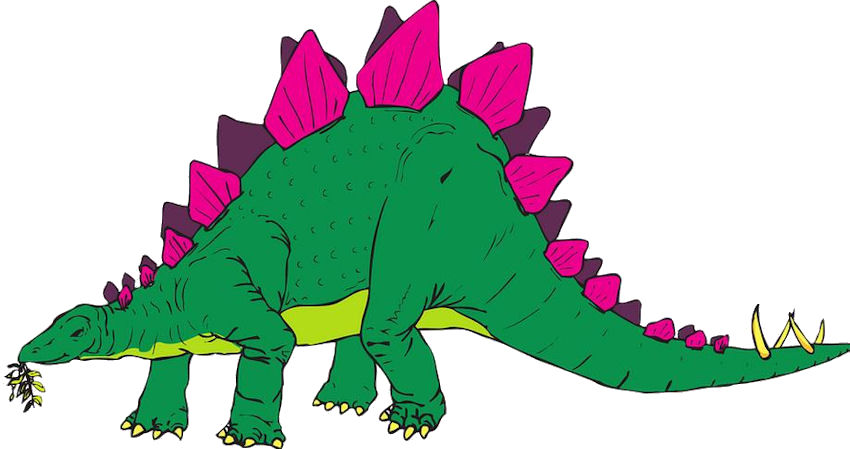
Stegosaurus
We love dinosaurs anyway. Want proof? Look at all the books, movies, television shows, and merchandise. At some point, every kid draws and colors his or her favorite dinosaur. Here’s your chance to feel like a kid again. Grab some paints and brushes and let’s go!

How to Paint a Wooden Stegosaurus
With a little paint you can design your own dinosaur. It can be as simple as a single coat of paint, or as detailed as you like. First we need a little inspiration.
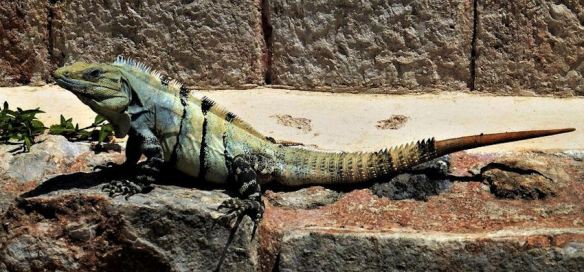
Iguana
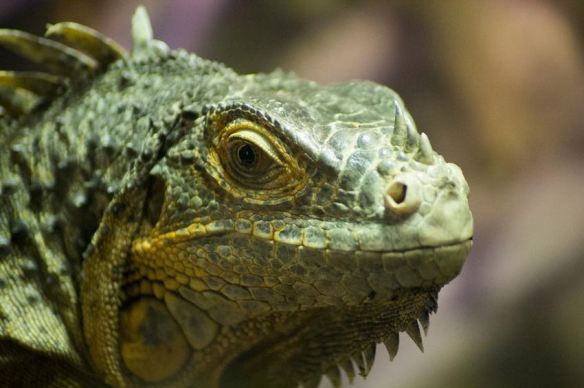
Iguana Closeup
Since dinosaurs lived sixty-five million years ago, there’s no one around to tell us exactly what they looked like. For this project, photos of creatures living today, such as iguanas and lizards, can be inspirational. Check out those spines!

Raw Wood Dinosaur
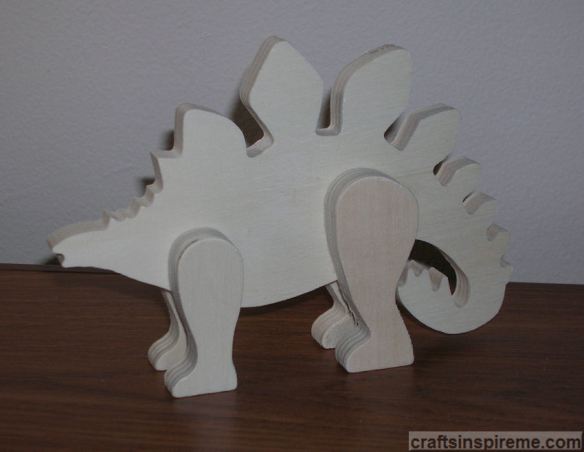
This carved wood stegosaurus, available at AC Moore, has sturdy legs, making it a freestanding, three-dimensional piece. Both sides and all the edges will need to be painted. Due to the raw nature of wood, it may require sanding, especially along the edges. (There are several types of animals in this carved wood collection. To see a painted flamingo project, please click here.)

Paints
Supplies:
Wooden Stegosaurus (4-1/4” high x 7-1/4” wide x 1-1/4” thick)
Acrylic Paints – black, brown & metallic green
1) Bottle fabric paint – brown
Paintbrushes
Sandpaper

Dinosaur Painted Green
Step 1 – Paint the dinosaur with green acrylic paint, including both sides and all edges. The great thing about paint is that it’s cheap. Feel free to experiment. If you don’t like the results, it can be easily changed.

Dinosaur Tail Detail
Seeing it in color revealed a major anatomical mistake in the tail design. If you loved dinosaurs as a kid, you’ll remember that the stegosaurus has spikes on the top of its tail. The artist chose to curl the tail underneath, and as a result, mistakenly placed the spikes on the underside of the tail. This poor animal would have trouble walking because the spikes would continually get caught on the ground as it moved through the forest, making it easy prey.

Dinosaur with Cut Tail
Step 2 – To make it right, cut off the tip of the tail as shown.

Dinosaur Painted Black
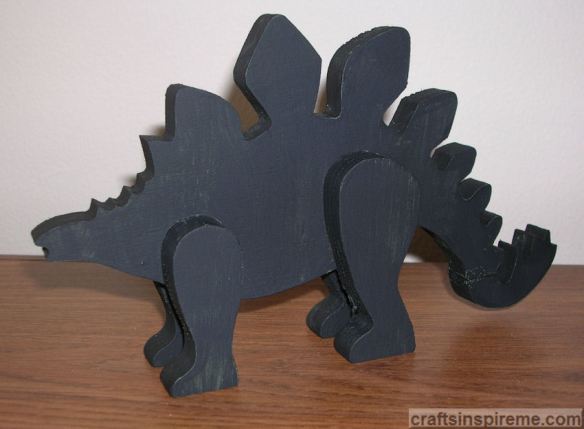
Step 3 – Turn the cut tail piece around, and glue it in place. Paint the entire figure black as a base coat, which will help delineate the scales added in a later step. Looks much better doesn’t it?

Dinosaur with Fabric Paint
Step 4 – Paint the top of the head, the back plates, and the tail with brown fabric paint. Paint the sides of each plate with green fabric paint and add spikes along the sides of the tail.  Brown acrylic paint was applied with a brush in between the back plates, because it was too narrow to fit the tube of fabric paint.

Dinosaur Scale Pattern
Step 5 – Add brown fabric paint on top of each leg and more spikes along the entire length of body. Create a scale pattern on the body using metallic green paint, and use the same color in the sides of the plates on his back.

Finished Dinosaur
Step 6 – Add a small dotted pattern to each leg. Paint the head brown, and add a few green scales along with the eyes. Congratulations! You now have your very own pet dinosaur. Fortunately for you, he’s a “Veggiesaurus,” unlike the one in the next photo.

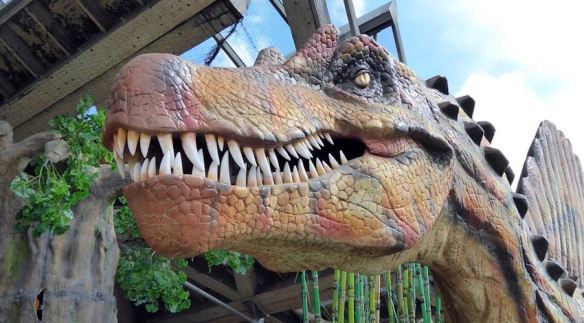
Dinosaur Jaws
What a view, right? Thank goodness this is only an observation tower! Because if it was real… It would be the last thing you ever saw.

Thanks for Reading & Happy Crafting!

Picture Framing Do’s & Don’ts

You finally found a photograph, painting, or drawing, which speaks to your soul, evoking special meaning in a style uniquely your own.  Before rushing out to buy whatever frame you can find, you might be able to refresh a one you already own, or you could personalize a readymade frame. 

Painted Frame

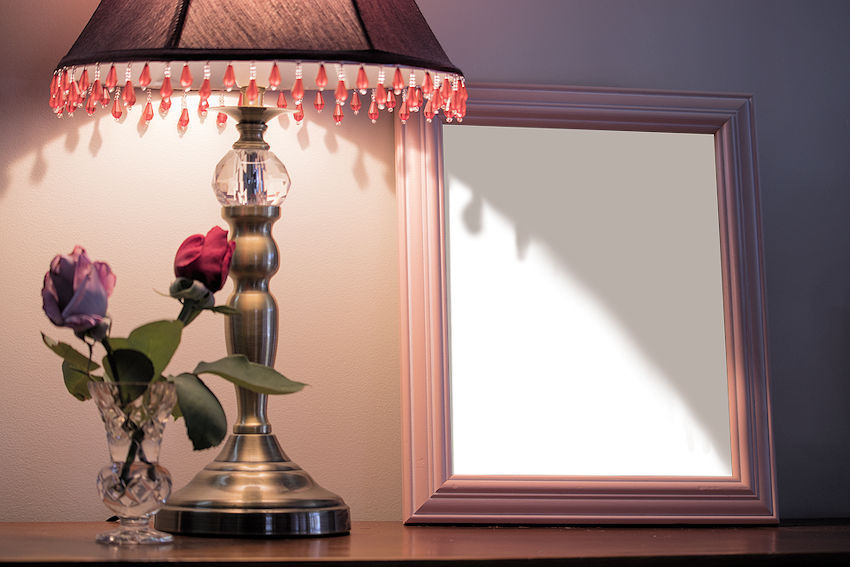
A room’s lighting & color scheme will have major effects upon your artwork.  Be sure to view the item in the room you wish to hang it.  The frame can be easily painted to match or contrast with existing décor.

Sponge Painted Frame

Sponge painting is easy and fun way to add color and texture.  Paint the base color first with a brush and then apply two or three additional colors with sponges.  Experiment with different colors and techniques on scrap paper first until you find the combination that works best. 

Decoupage or Scrapbooking Frame

Decorative scrapbooking papers, wallpaper and contact paper offer infinite possibilities.  Whether you decide to cover all or part of the frame, simply glue on your designs. 

Seashell Frame

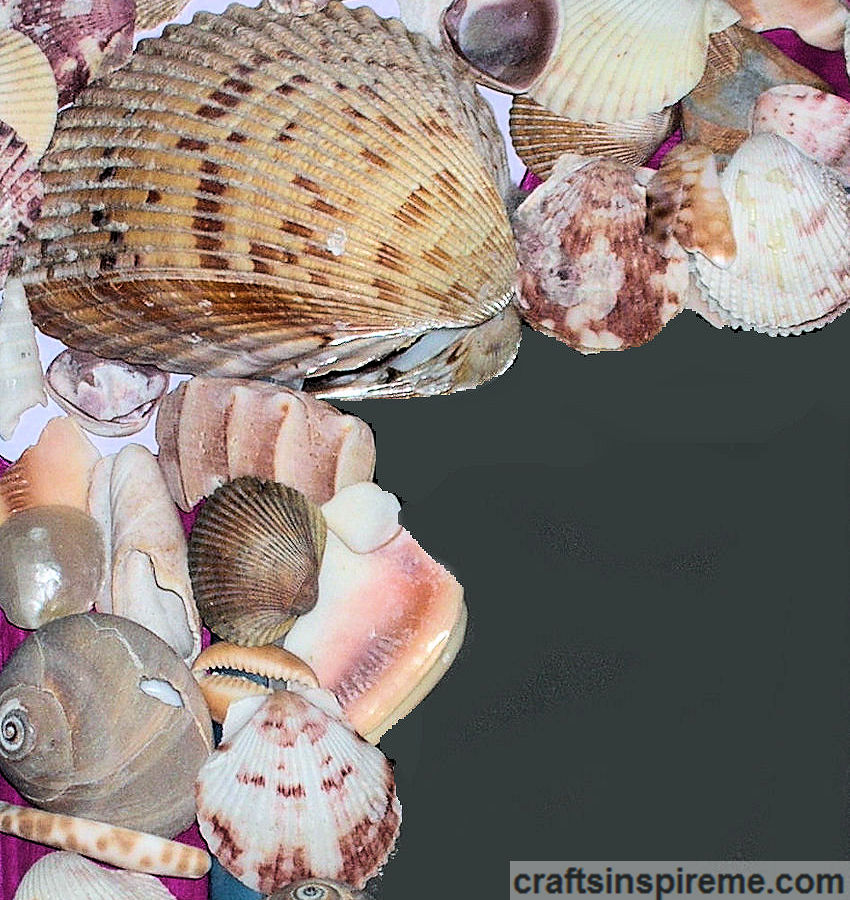
Frame with Seashell Border

A plain picture frame gets a fashionable update with a seashell border.  Beads, glass marbles, pom poms, flower petals, and anything else you imagine can be applied for a unique finished art piece. 

Fabric Wrapped Frame

Fabric Wrapped Frame

Textile designers continually push the limits of color, geometry, and texture, ensuring you will find fabrics you absolutely love. 

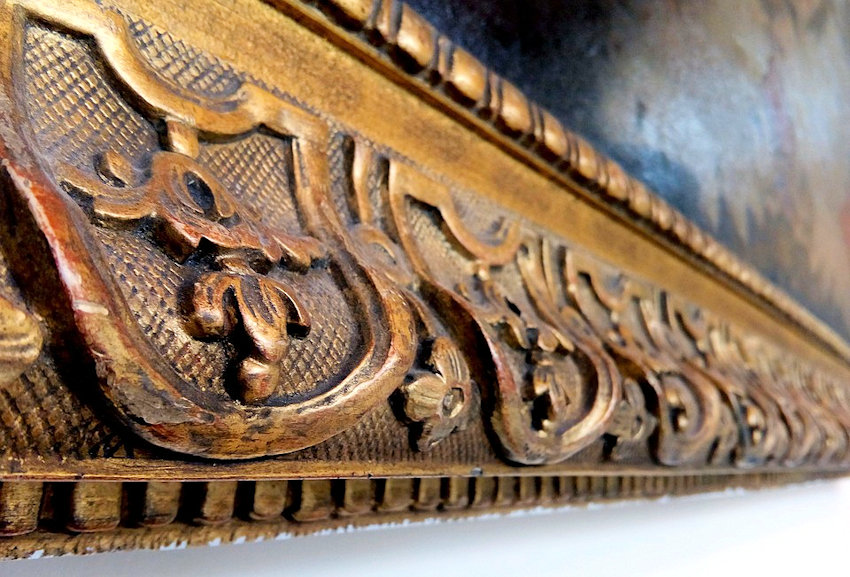
Gilded Carved Wood Frame

Carved Wood Frame Detail

For a museum-quality finish, apply gold or silver paint on the surface details.  The recesses will remain dark, while enhancing the three-dimensional carvings. 

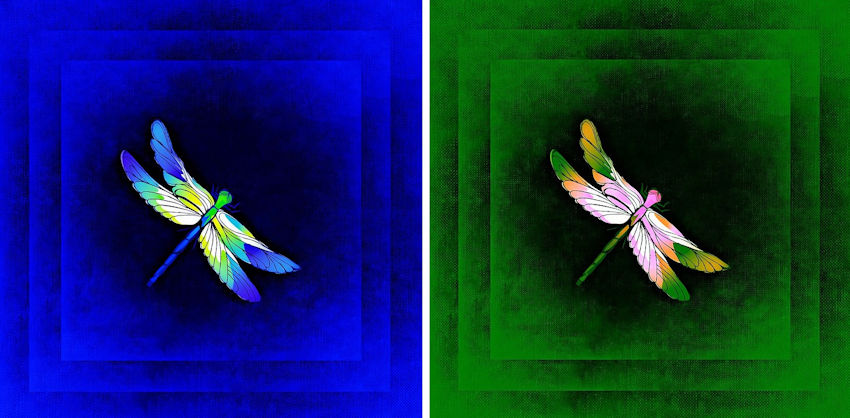
Background & Border Colors

Mat Color Choices

Look for colors, patterns, and textures within the image, which can be coordinated with matboards, metallic trims, fabric wrapped edging for needlepoint, and decorative frames.  The same applies to plaque mounted artwork. 

Do’s & Don’ts:

Triple Matted & Framed -Options 1 & 2

Neutral vs Blue Mats

This neutral gray mat will work with any décor but choosing colors within the image, such as blue, creates a more dramatic piece of artwork. 

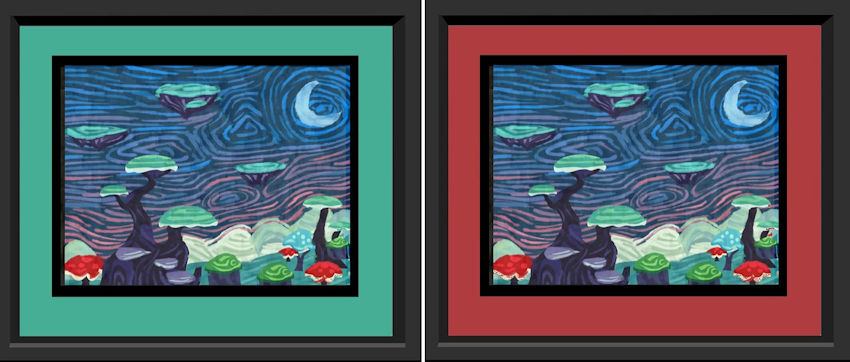
Triple Matted & Framed -Options 3 & 4

Dark Green vs Dark Red Mats

Green is also a great border color to harmonize with the artwork.  Although there is a small amount of red in the image, the red border pulls the viewer’s attention away from the image. 

Carved Wood Frame

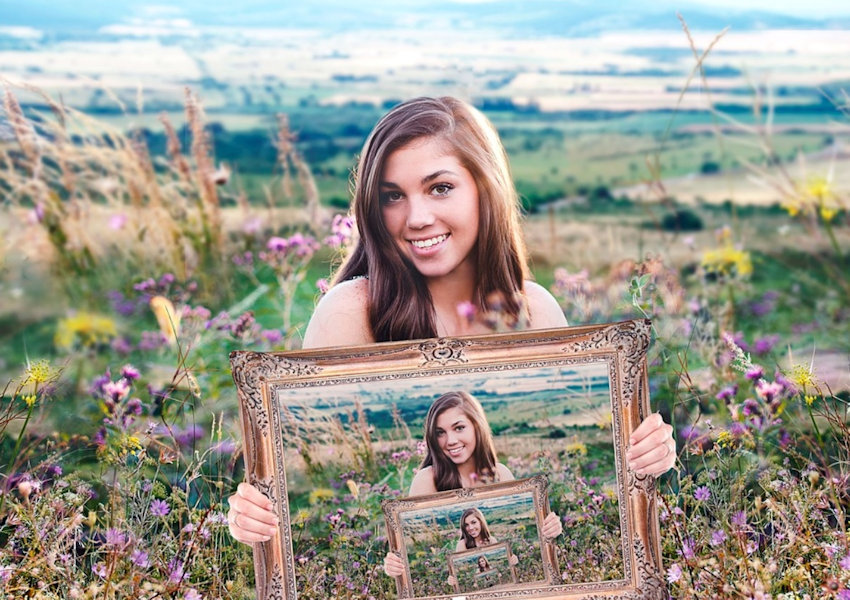
Girl with Wood Frame

This field of wildflowers grows outward onto the floral, carved wood frame.

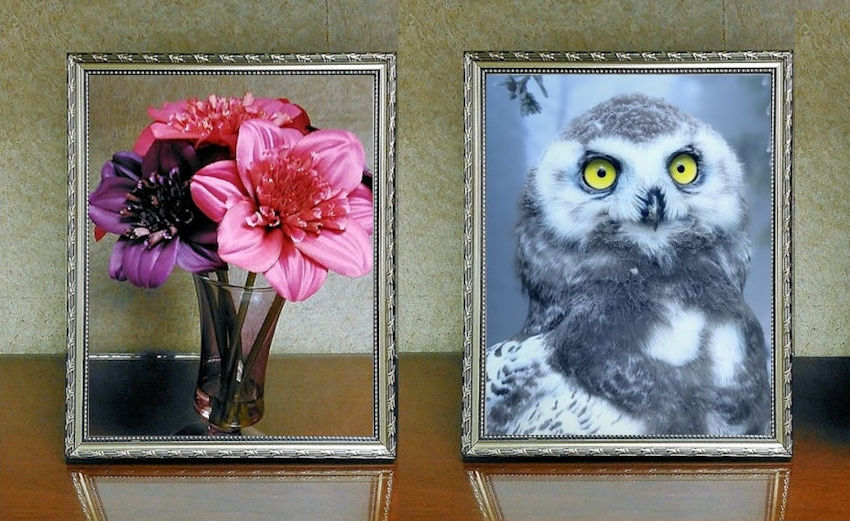
Metal Frame – Options 1 & 2

Warm vs Cool Colors

This frame is pretty, but the cool silver tone works in opposition to the warm pink flowers.  The cool grays in the owl photo harmonize with the frame. 

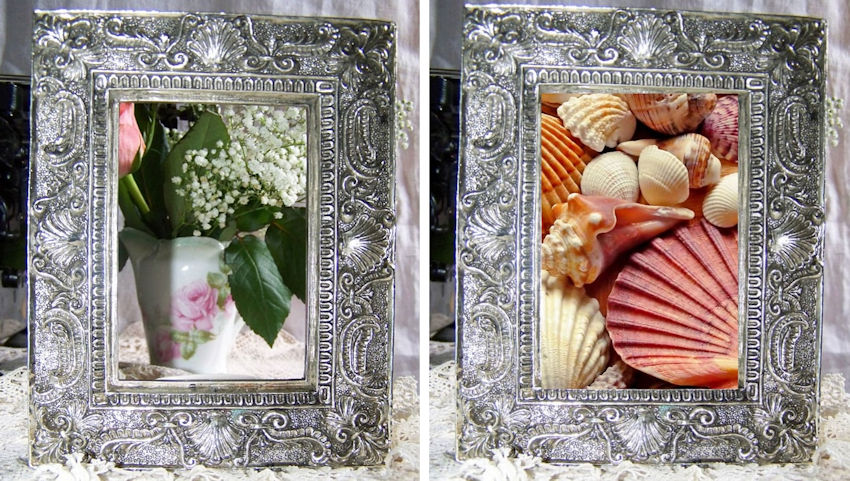
Ornate Metal Frame – Options 1 & 2

Silver Frames

The bold silver frame overpowers the delicate baby’s breath flowers.  The frame’s scroll designs resemble shells, while the strong geometry and saturated colors of the seashells hold your attention. 

Floral Frame – Option 1

Scrapbook Papered Frame

While orange provides the maximum contrast to blue, this floral frame is too “busy” for the multitude of leaves in the photo. 

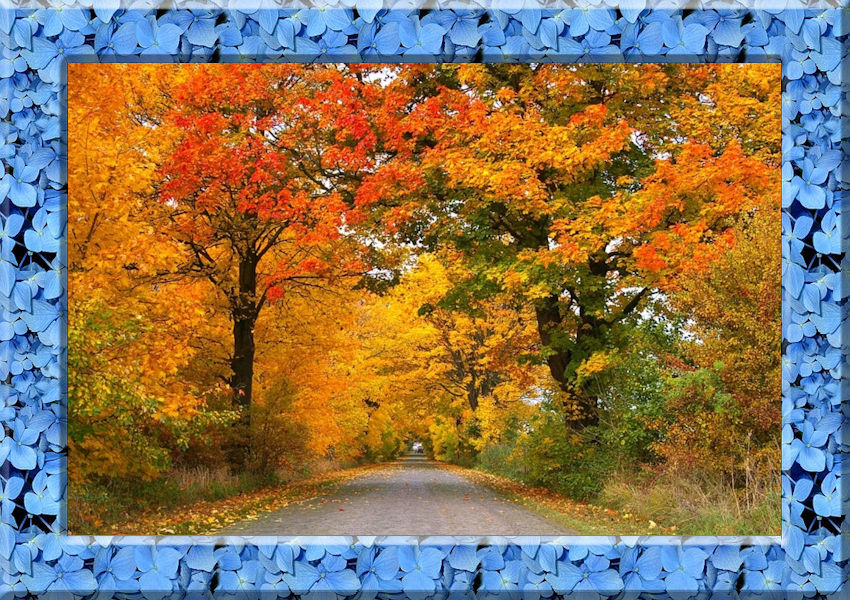
Floral Frame – Option 2

Scrapbook Papered Frame

Here we see a perfect match between subject and frame.  The bluebird and delicate crabapple blooms harmonize with the blue hydrangea frame. 

Wood Dentil Edge Frame – Option 1

Wood Frame

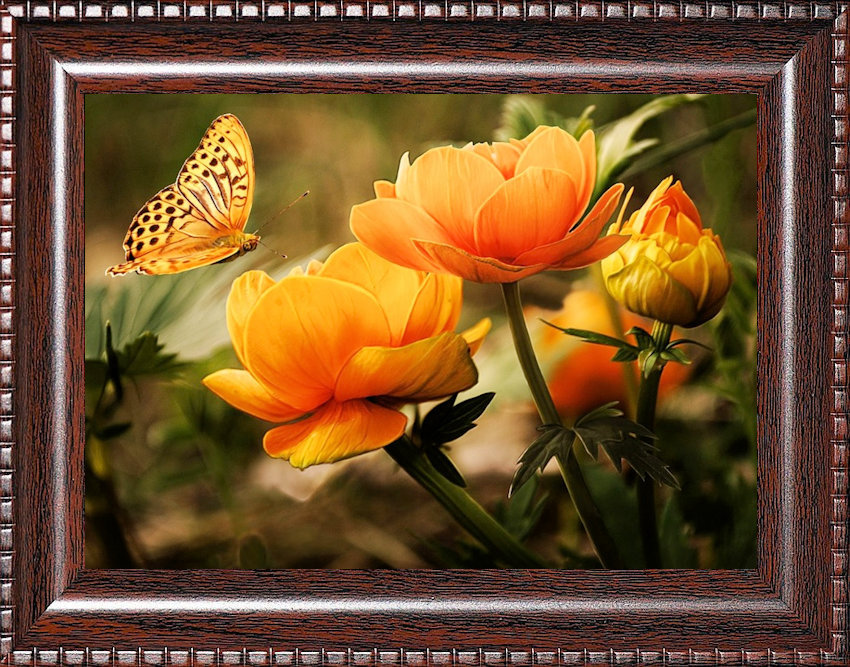
The rigid geometry of the border and heavy appearance of the frame competes with the delicate butterflies and flowers in this springtime photo. 

Wood Dentil Edge Frame – Option 2

Wood Frame

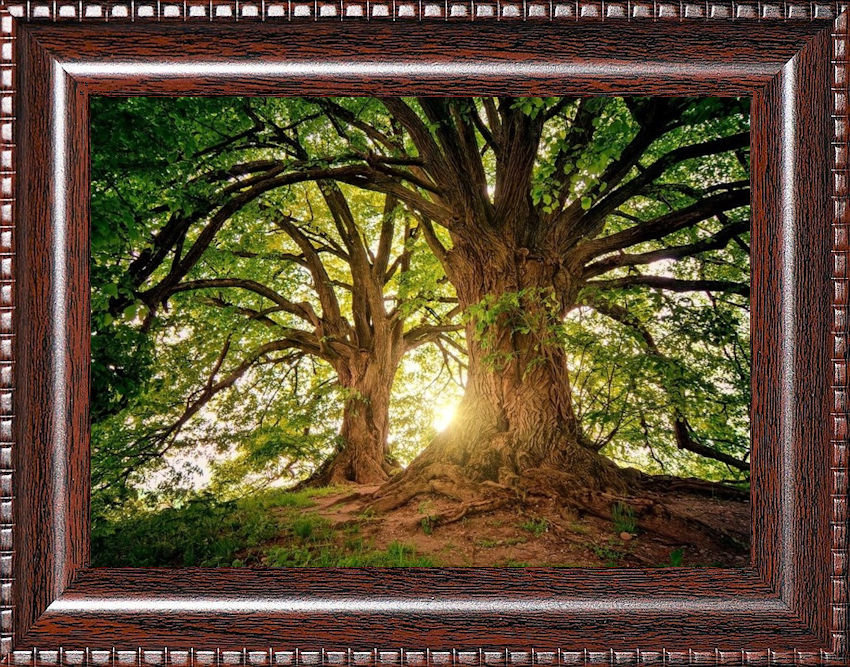
The rounded, faux wood grain frame borders resemble tree trunks in the forest. 

Wood Dentil Edge Frame – Option 3

Wood Frame

The warm wood tones coordinate beautifully with the soft orange and green in this nature scene.

Wood Dentil Edge Frame – Option 4

Wood Frame

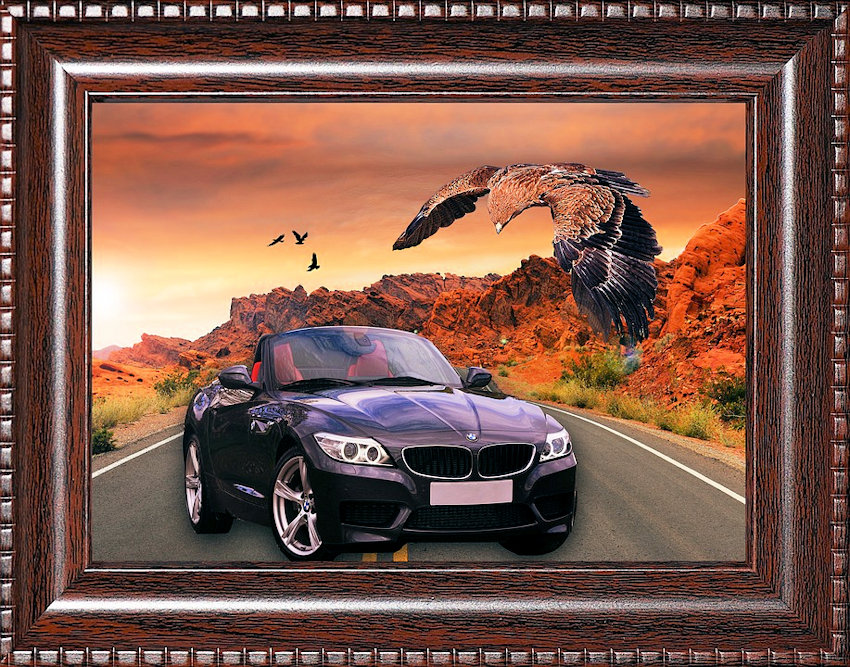
There’s quite a bit of “masculine” energy in this photo, including the high-performance sports car, raptors in flight, and the rugged desert landscape, which are perfectly showcased in this tailored frame. 

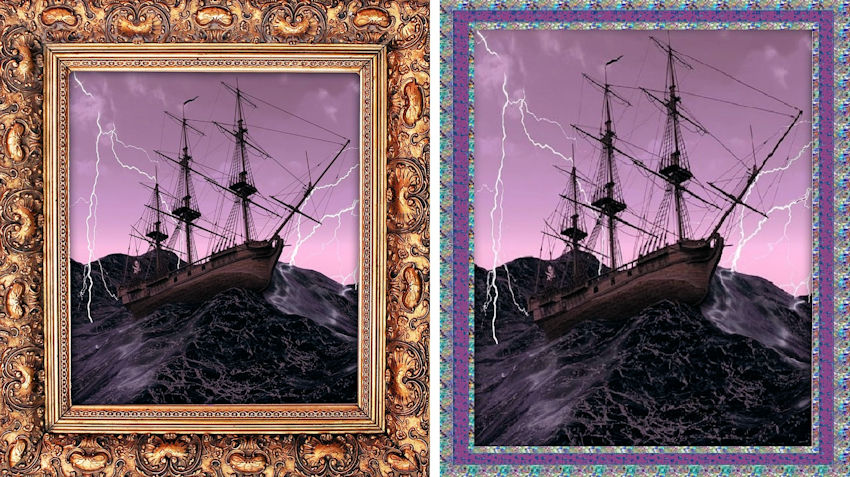
Gilded Carved Wood Frame vs. Color-Coordinated Frame

Wood Frame vs Pastel Frame

This ornate gilded wood frame freezes the motion of the ship upon the stormy sea, while the second frame extends the movement and accentuates the purple sky. 

Gilded Carved Wood Frame – Options 1 & 2

Wood Frame

The cheetah’s spots and the surrounding colors are echoed in the frame, as are the textures of the leaves and bricks in the second painting. 

As you can see, choosing the right frame to showcase your artwork is easy to achieve.  Let your artwork tell you what it wants by observing colors (warm or cool, pastel or bold, light or dark), patterns, textures, and themes.  The most important thing your artwork should do is make you happy!  
Thanks for Reading & Happy Crafting!