Birds of a Feather – Decorative Wood Crafts


For some reason, I often find myself drawn to the wood crafts aisle at my local hobby store. Maybe it’s the quick reward for very little effort at an inexpensive cost. Who doesn’t enjoy a little instant gratification? There’s always something new to discover. New trends and seasonal favorites compete for your attention on the shelves.

Painted Inspirational Words
The popularity of the television show, “Fixer Upper,” has brought farmhouse chic to the forefront of home design trends. As a result, oversize wood letters and words have become very popular wall art. If a particular word or phrase has special meaning for you, spell it out on a wall as a daily inspiration to share with your family and friends.

Birds on Wire
Looking for a quick and easy way to add some pizzazz to any flat wood surface? Apply contact paper or left over wallpaper for interesting colors and patterns.

Wooden Bird & Fish
For a distressed look, keep the color palette soft as if they faded over time, allow the paint to dry, and then use sandpaper to “age” the surface.

Painted Wood Boxes
The base coat for decorative boxes can be painted using brushes or spray paint. Intricate details and complex designs can be applied using fine point paint pens in solid or metallic finishes. Rhinestones and beads will provide a touch of sparkle.

Wood Owl
This adorable little owl has a painted face and the patterned wings were created with contact paper. For clean, crisp edges on the eyes and beak, use stencils.

Wooden Eggs
Painted eggs are a tradition in many cultures. Applying wax in intricate patterns and dipping the exposed areas into dyes created these beautiful designs.

How to Paint a Wooden Flamingo
Now that you’ve seen several woodcraft examples, it’s time to try your hand at decorating. Craft stores and Dollar Tree stores have several freestanding wood animals, including a flamingo, rhino, hippo, stegosaurus, peacock, elephant and more.
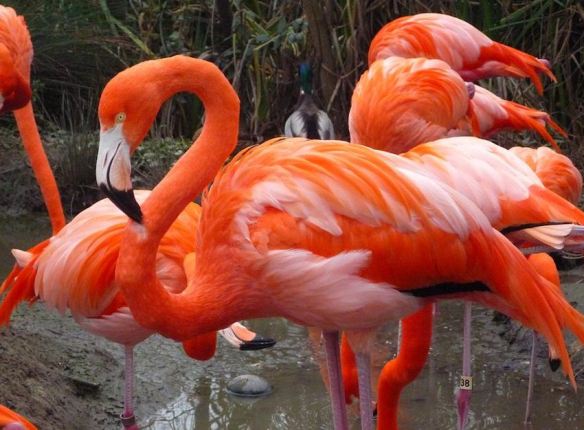
Flamingos
As with all projects, it helps to have a little inspiration. Seeing live flamingos really helps with color and feather pattern decisions as well as basic biology.

Raw Wood Flamingo
As you can see, the thick wood has been cut out in the shape of a flamingo and has the advantage of strong, sturdy legs, making this a freestanding, three-dimensional piece. Both sides and all the edges will need to be painted. Due to the raw nature of the wood, it may require a little sanding, especially along the edges.

Supplies:
Wooden Flamingo (7-1/2” high x 4-1/2” wide x 1-3/8” thick)
Acrylic Paint – orange, black, & white (plus optional yellow for eyes)
1) Bottle fabric paint – orange
1) Bottle fabric paint – pink
Paintbrush
Sandpaper

First Coat of Paint
Step 1 – Paint the flamingo with orange acrylic paint, including both sides and all edges.

Second Coat of Paint
Step 2 – Apply a second coat of orange acrylic paint, and add details to the face. The legs have been painted gray.

Textured Paint
Step 3 – Create a feathered texture by applying orange fabric paint. The paint on the head and neck was applied in a random dotted pattern because these areas are smoother than the lower body. Use long strokes on the torso, ensuring to go in the direction of the feathers. Refer to the inspiration photo as needed. Allow the paint to dry overnight. Using a small paintbrush, and orange acrylic paint, add the thin leg and feet details on the sides, front and back of each leg. This gives the illusion of thin legs like the live birds.
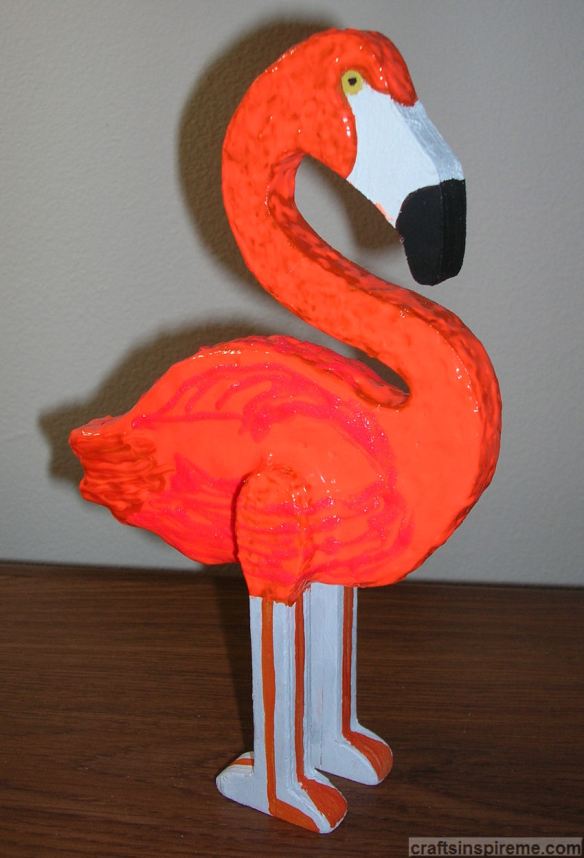
Second Coat Textured Paint
Step 4 – Create more texture by repeating the orange fabric paint process in Step 3. Add additional details with pink acrylic paint: Dot the pink over the head and neck, and create the wings on the torso. Refer to the inspiration photo as needed.
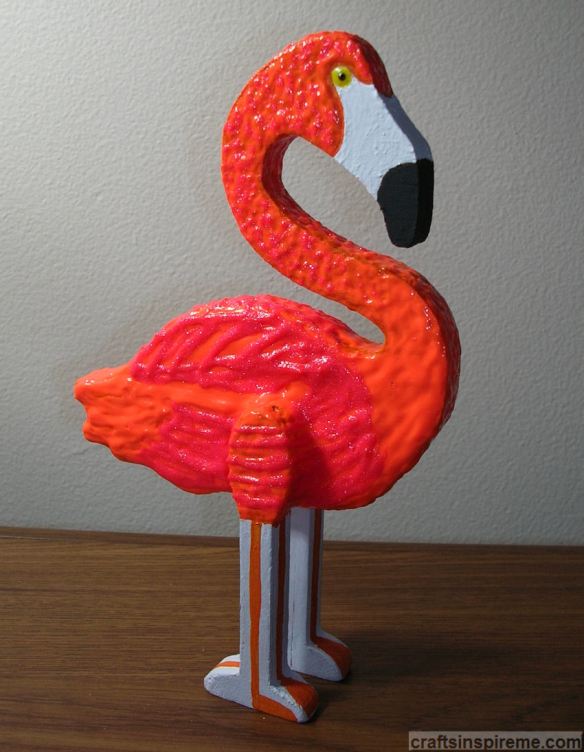
Finished Flamingo
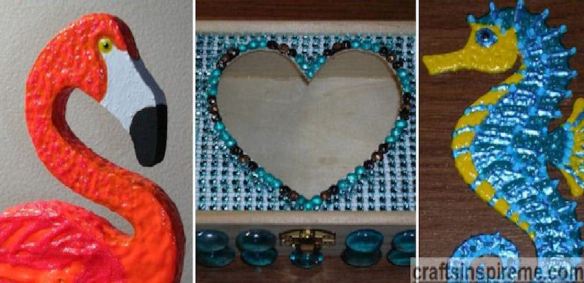
Step 5 – Apply a second coat of pink fabric paint, thickening the wings and increasing the pink highlights on the head and neck. Allow the paint to dry overnight. Using a paintbrush, give the beak a second coat of white and black acrylic paint. To give the eyes more dimension, add a large dot of yellow fabric paint. Remember to add a black dot in the center of each pupil.

This completes your flamingo project. He may not take flight, but the bright colors and cheerful expression are sure to make you smile.  For more painted wood crafts, please click here.

Thanks for Reading & Happy Crafting!
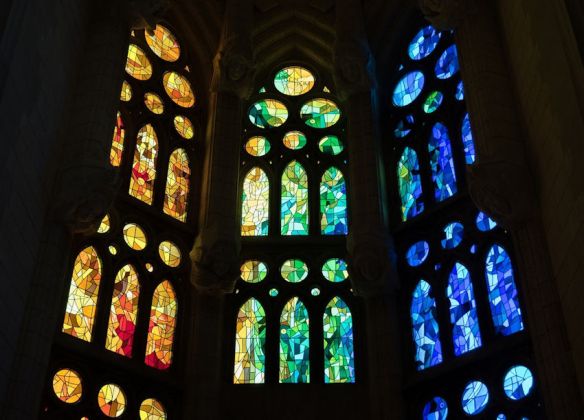
Catching Some Rays

Stained Glass Windows
Have you ever admired the beauty of sunlight filtering through stained glass windows? The kaleidoscope effects are stunning. Given its otherworldly effects, it is not surprising to find stained glass in churches, royal palaces, and many grand architectural structures all over the world. Wouldn’t it be nice to have a similar experience at home?

Stained Glass Entry
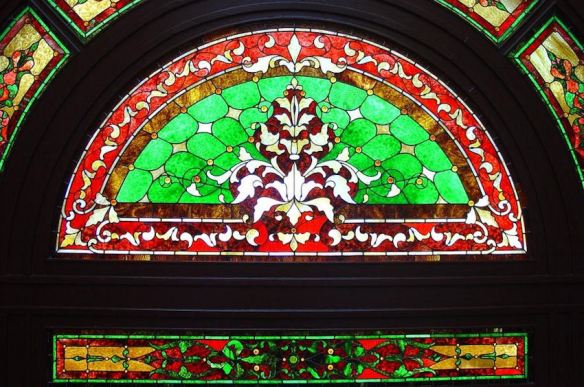
Stained Glass Window Entry
If you are in the market for a new front door, there are many glass pattern options for the doors, sidelights, and transom windows. Because it is labor intensive, stained glass is significantly more expensive.

Glass Painting
Glass Painting
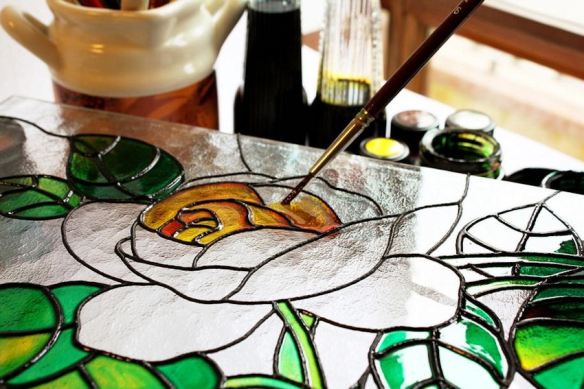
If you happen to be an artist, you could paint your own design on a sheet of glass, with special pigments called stains, which must be fired in a kiln to complete the process. Next it will need a frame to be used as a wall hanging, or metal hardware for hanging it in front of an existing window. It can also be installed in a window frame with a protective layer of glass on the exterior side to protect it from wind and weather.

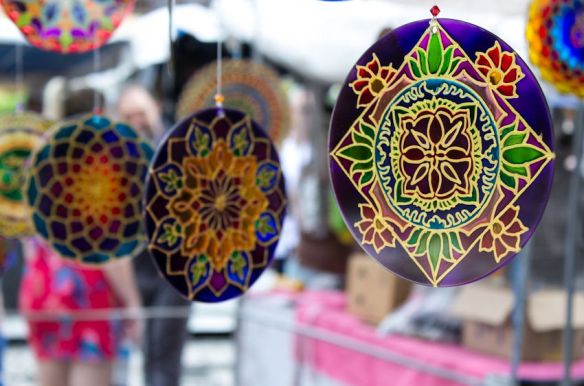
Painted Glass Mandalas
These hand painted mandalas offer the beauty of stained glass without the need for cutting tools or wire.

If you love the look of stained glass, but lack the time and artistic ability, or have budgetary constraints, you still have a few options.

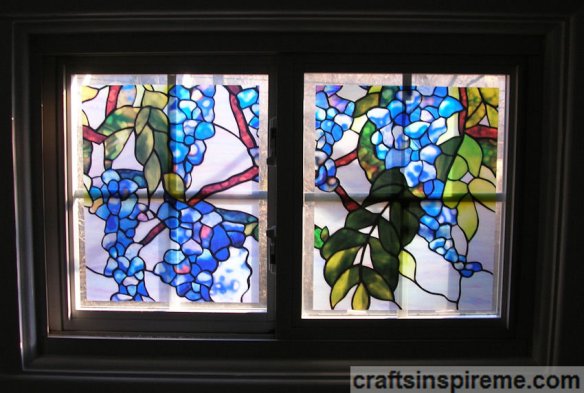
Decorative Window Film
Window Film
Window films are available through many sources including home improvement stores. As you can see, the film provides the color and patterns of genuine stained glass without the expense. Film also provides privacy, and blocks unsightly views.   Be sure to follow the installation instructions carefully. The most important step is ensuring the glass is free of all dust, dirt and debris. There must be a perfectly smooth surface for the film to adhere properly. Failure to follow these instructions could result in air pockets, bubbles and delaminating (peeling film).

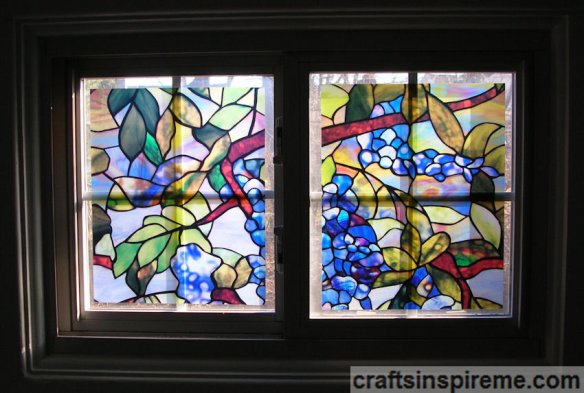
Decorative Window Film
Window Film
There are two types of window films, which differ by installation. The first adheres to the glass via static cling and the second uses adhesive. The films shown in these two photos are the static cling type. Personally, I prefer static cling film, instead of adhesive, because it’s easy to install and more importantly can be easily removed. The films come in a wide variety of styles, including the more traditional “stained glass” and some very contemporary geometric patterns.

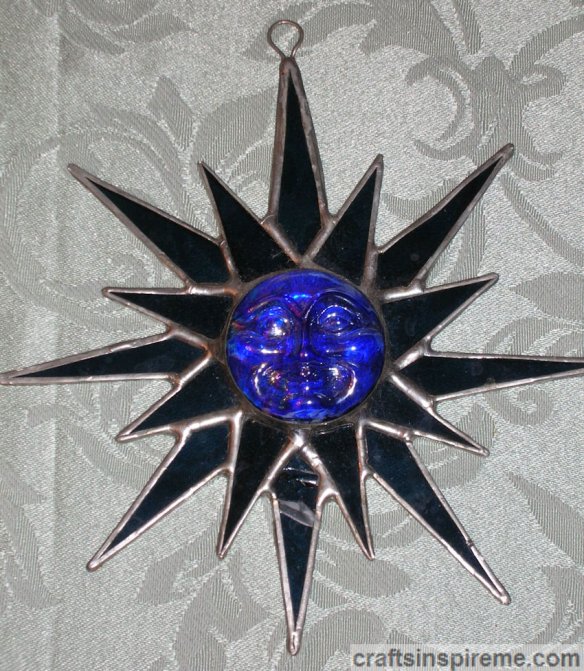
Sunburst Stained Glass Suncatcher
Sunburst Suncatcher
Genuine stained glass requires specialized skills. Due to precise cutting required, sharp glass and metal edges and joint soldering, this process is not suitable for children. There’s an inexpensive alternative, which is an easy, family-friendly project.

How to Make Colorful Acrylic Suncatchers:

Unpainted Suncatchers
These suncatchers look like glass, but are actually clear acrylic with raised black ridges, which create compartments for holding individual stain colors. One big advantage is that the acrylic is not fragile, like glass, so if you accidentally drop one, no harm is done.

Suncatcher Stain Kit
Suncatcher Stain
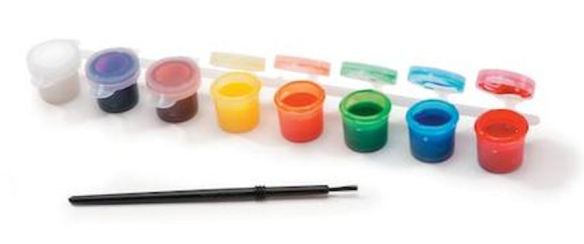
Some stores sell the stains separately, while others offer kits, which include a suncatcher(s), several stain colors and a paintbrush applicator. When the stains have dried, the surface hardens and the vibrant colors are translucent, just like stained glass.

Suncatcher Stain Application Process
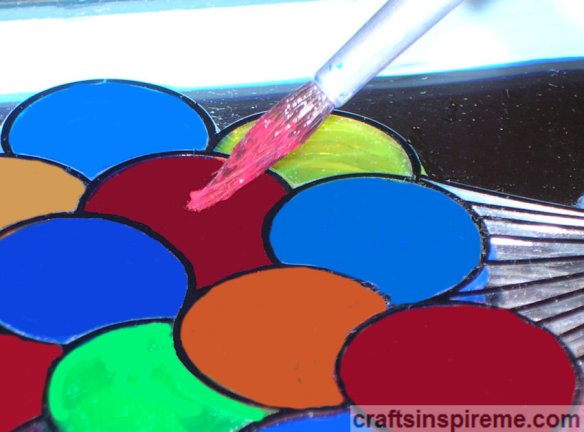
Staining Progress Detail
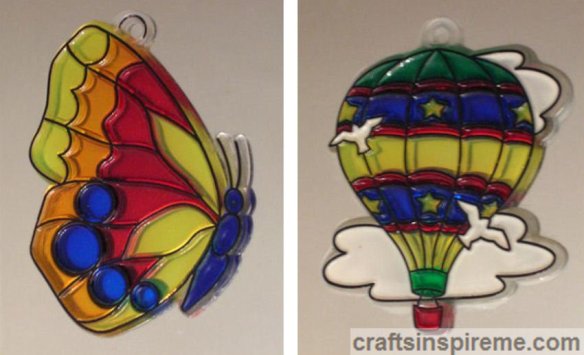
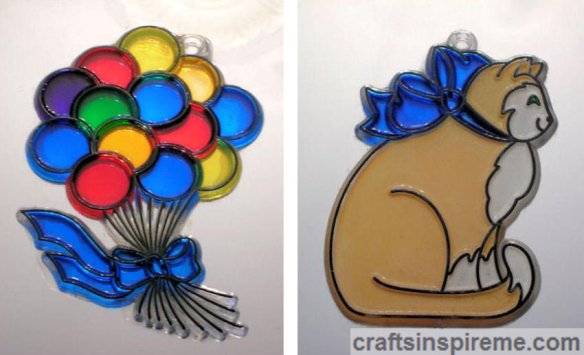
Using the provided paintbrush, stains are applied one drop at a time. No blending, no special brush strokes and no extra supplies are required. It’s that easy! There are no other steps. Simply let them dry and they’re ready to hang. Below are examples of completed acrylic suncatchers.

Butterfly & Hot Air Balloon Suncatchers
Butterfly & Balloon

Balloon Bouquet & Cat Suncatchers
Balloons & Cat

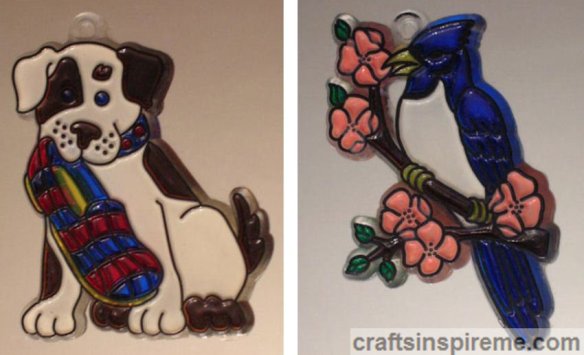
Dog & Bluebird Suncatchers
Dog & Bluebird

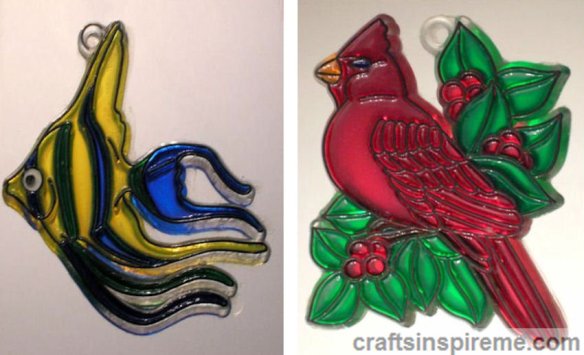
Tropical Fish & Cardinal Suncatchers
Fish & Cardinal

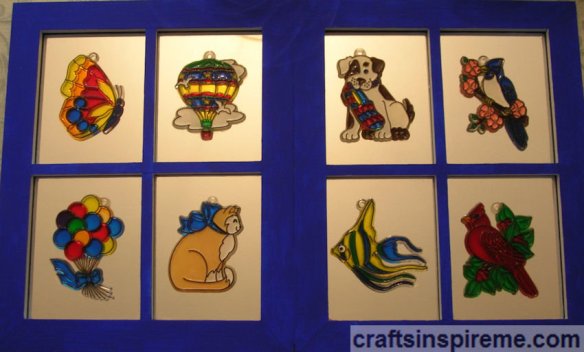
Mirror with Applied Suncatchers
Framed Mirror with Suncatchers
Suncatchers can be hung upon windows or mirrors using suction cups on the glass, or hung with ribbons looped over window locks. I purchased two divided mirrors and screwed them together to create the eight-panel wall hanging shown in the photo above. The suncatchers were glued in the center of each square. The mirror allows natural and artificial light to reflect through the suncatchers. Because it resembles a window, I placed it above my stove to give me something pretty to look at while I’m cooking. It can also be hung in an interior room that needs a boost of color along with a “view.”

Anyone can make colorful suncatchers with very little effort, beautiful results, and they make great gifts at a very affordable price.

Thanks for Reading & Happy Crafting!
Want to Make Beaded Earrings?

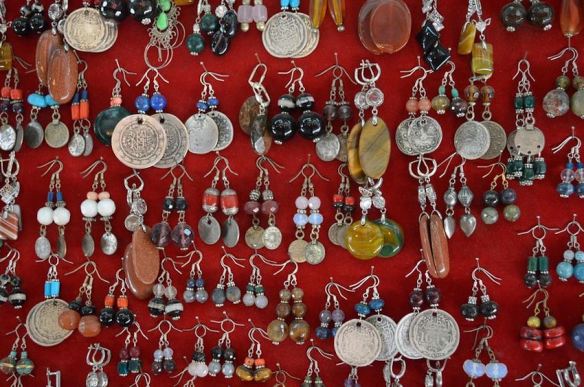
Assorted Earrings
Making fine jewelry requires years of special training in gemstones, precious metals, and jewelry design. Materials and tools are very expensive, and mistakes can be very costly. The invention of beaded jewelry created beautiful designs in a much more affordable way, and put the jewelry making possibilities into everyone’s hands. If you’ve ever wondered how to make a piece of jewelry, now is your chance.

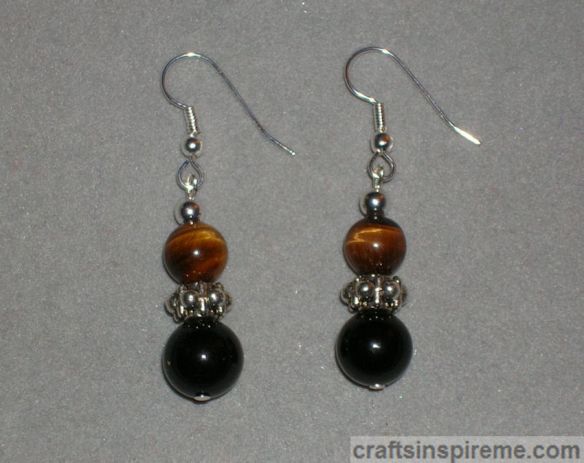
How to Make Black Onyx & Tigerseye Earrings
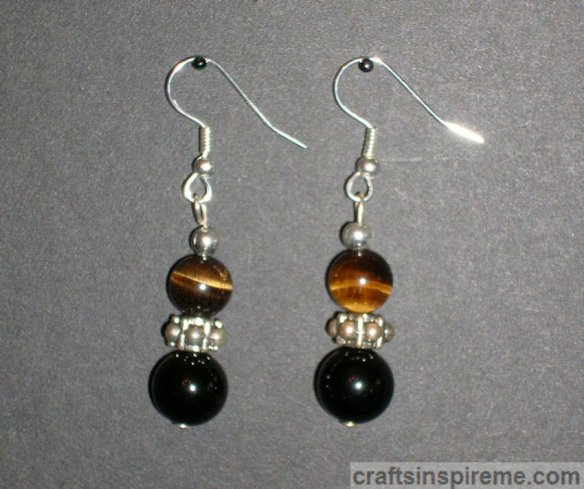
Tigerseye Black Onyx Earrings
These 2” long gemstone earrings are fashionable and easy to make.

Required Beads & Findings:
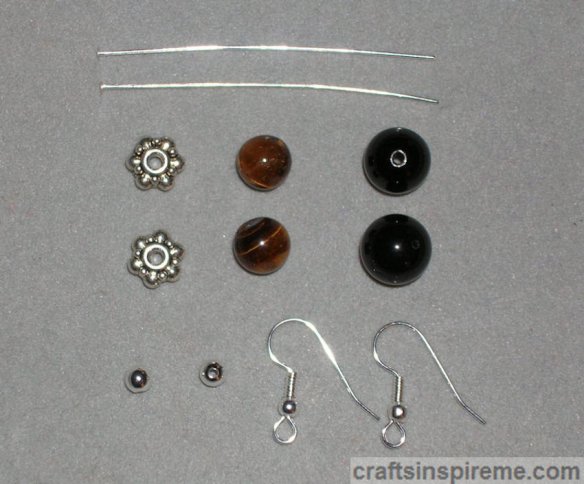
Earring Supplies
Supplies:
To make this pair of earrings you will need:
2) Silver plated Head Pins – 2” length,
2) 8.5mm Granulated Round Pewter Rondelles,
2) 8mm Tigerseye beads,
2) 10mm Black Onyx beads,
2) Silver plated Round 4mm Spacer beads
2) Silver plated Surgical Steel Fishhook Earwires with ball & coil

(Please note: Head pins are the foundation of these earrings. They are inexpensive and come in big packages. Be sure to have several on hand just in case. Craft stores carry jewelry making supplies, including beads, accents, and tools. If you get hooked on jewelry making and yearn for the ultimate selections, look no further than FireMountainGems.com)

Jewelry Making Tools:
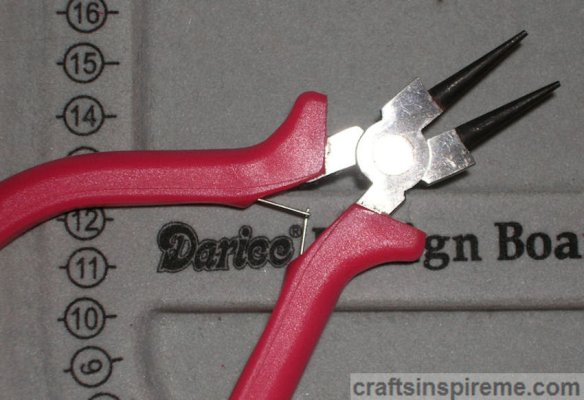
Round Nose Pliers
Round Nose Pliers – the smooth, round tips on these pliers make it easy and safe to manipulate wire, pins, and small jewelry metal pieces known as findings. Please don’t use standard pliers, which have teeth that will damage delicate precious metals.

Jewelry Wire Cutters
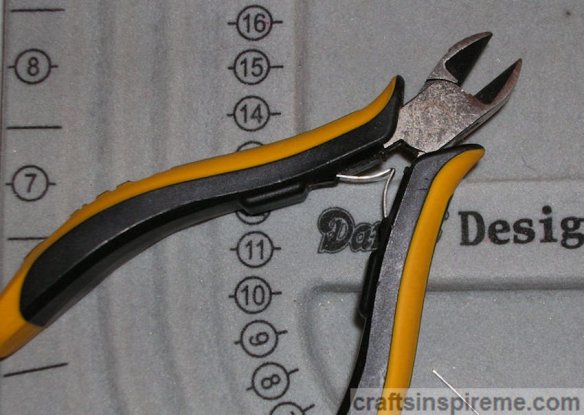
Jewelry Wire Cutters – a sharp pair of wire cutters makes jewelry making so much easier. Do not use them for other crafts, such as floral arranging, which can damage the blades.

Earring Making Instructions:

Bead Layout
Step 1: Stack the beads in sequence on the head pin as shown. This is the dangle part of the earring.

Grip with Pliers
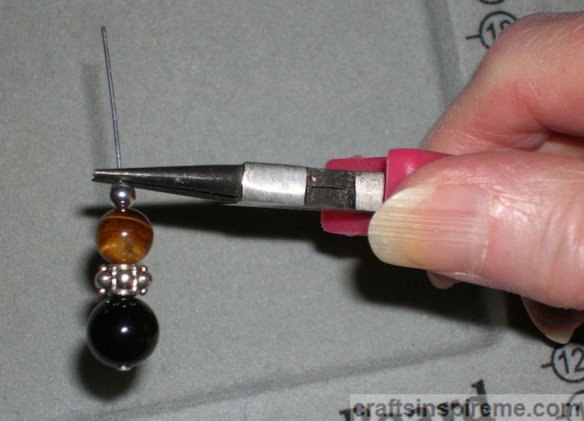
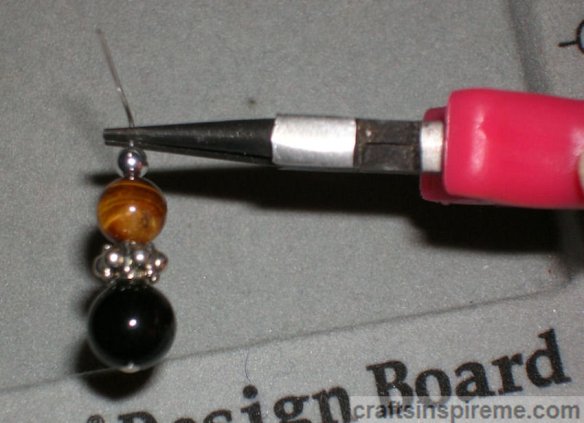
Step 2: With the round nose pliers in your right hand, grip the wire just above the top silver bead. Be sure the beads are close together with no gaps in between. Hold the pliers in this position for the next step.

Grasp Wire with Fingers
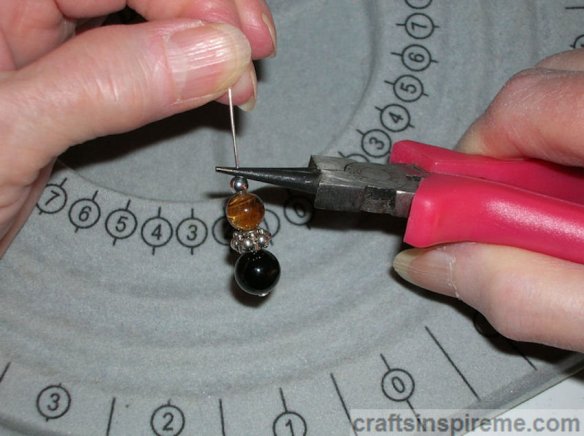
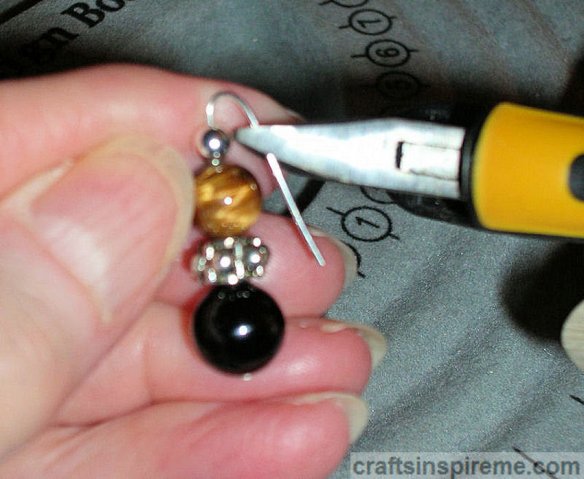
Step 3: Grasp the end of the head pin with your left thumb and index finger, and bend the wire toward you.

Bend Wire
Continue bending the pin over the tip of the pliers until it touches the Black Onyx bead.

Reshaped Wire
The reshaped pin will look like the photo above.

Trim Excess Wire
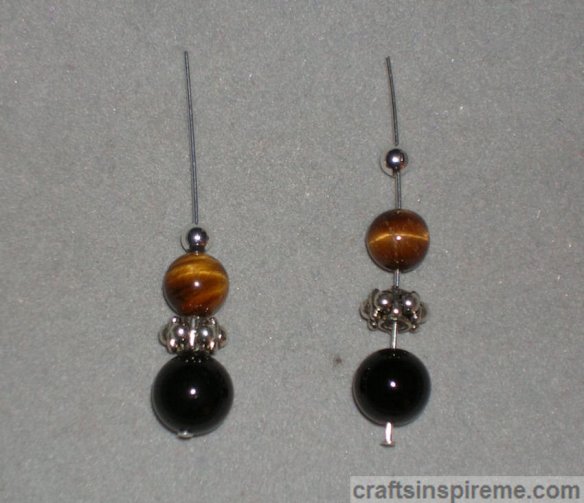
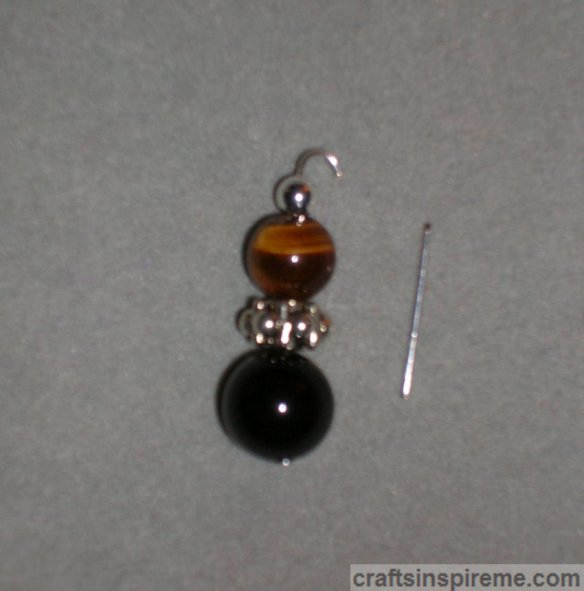
Step 4: Cut off the excess wire. Leave enough wire to form a small loop above the silver bead. This may take a few tries. Don’t worry if you cut it too short. Simply use a new head pin and repeat the steps.

Shortened Wire
This photo shows the trimmed wire, and beside it is the scrap piece to be thrown away.

Attach Earwire
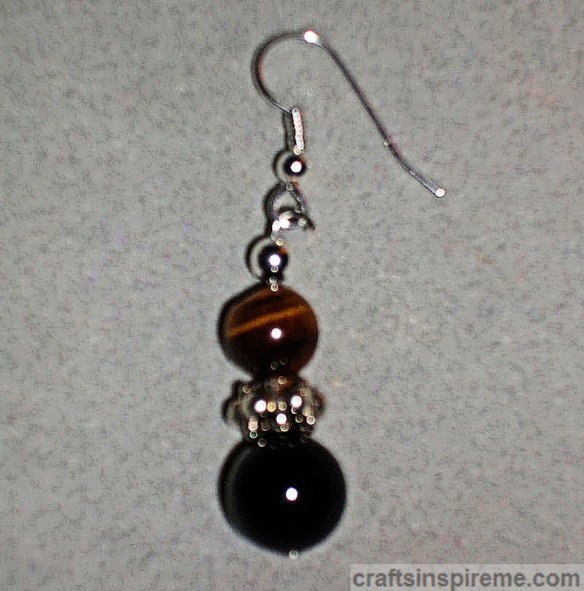
Step 5: Hook the dangle earring onto the loop on the bottom of the fishhook earwire,

Loop Closeup
and close the loop using the round nose pliers.

Finished Earrings
Congratulations! You have successfully made your first pair of earrings.

These skills can be used to create many styles, which at first may appear to be complex, but are actually fairly easy when broken down into basic steps. Let’s take a look at a few examples below.

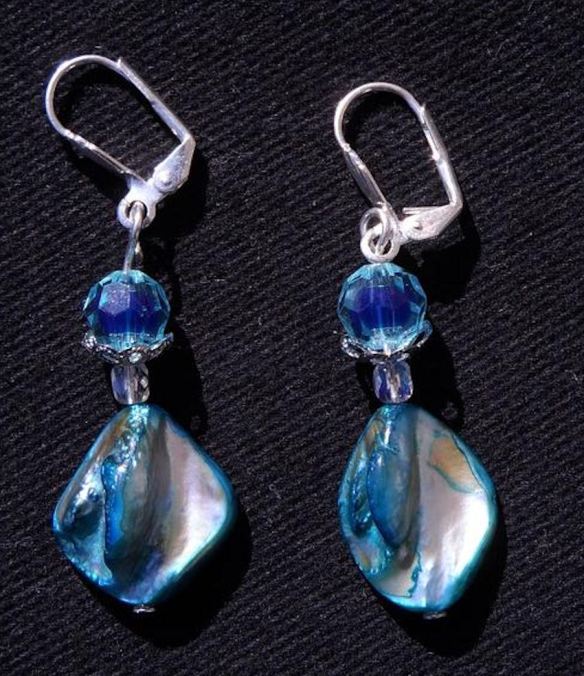
Blue Earrings
Blue Bead & Pearl Earrings– If you look closely, you’ll notice the same elements we talked about before: head pins, stacked beads, and earwires. The choice of silver earwires and accents with faceted blue crystals and Mother of Pearl creates a cool, summery vibe. This pair of earrings utilizes a different type of earwire known as lever backs, which prevent the earring from falling off – no more lost earrings!

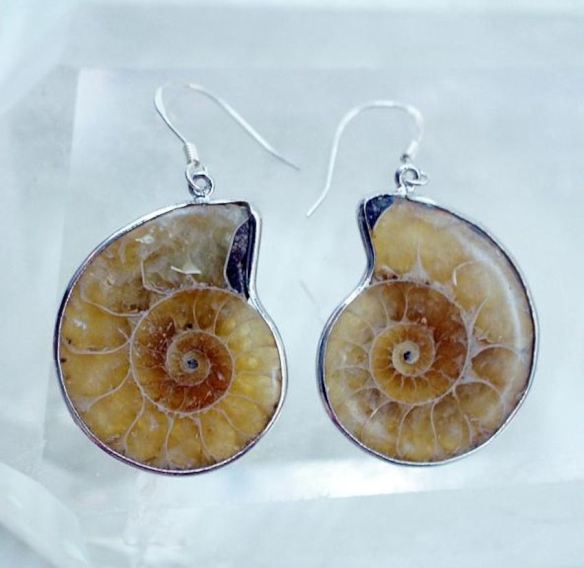
Fossil Earrings
Fossil Earrings – The natural spiral design and intricate details of these fossils make great focal points for these earrings. You can purchase charms and pendants such as these and simply attach earwires to the provided loops on top. How easy is that?

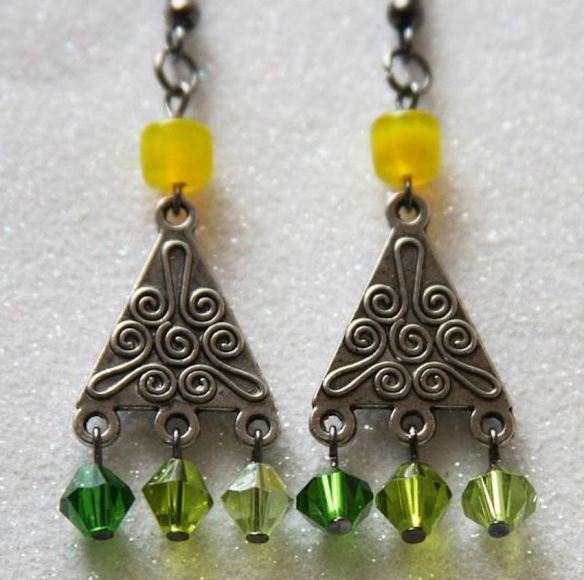
Triangle Earrings
Triangle Earrings – These earrings are a simple progression from the fossil earrings above. The triangles are merely charms. Head pins, which are available in many lengths, are the keys to this design. Attach the three beads on the bottom of each triangle using pliers. The yellow beads are also attached with head pins. Cut the head off a pin, and use the pliers to make a loop above and below the yellow bead and then attach to the triangle on the bottom and to the earwire on the top.

Jasper& Pearl Earrings
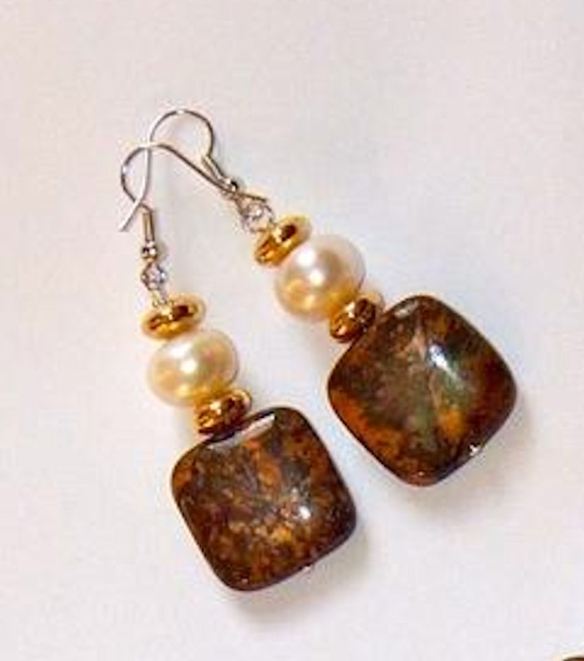
Jasper & Pearl Earrings – Gemstones come in an amazing array of colors and shapes. The accent beads can be mixed and matched in infinite combinations. Experiment by laying out the beads to test your options. The nice thing about earrings is that you can place the beads on a pin and hold them up to your ear to see how they look, with no commitment whatsoever. Don’t like what you see? Try another combo.

Jewelry making is a fun, creative hobby. Best of all you get to wear and share your creations with your family and friends. For more information on beaded jewelry, please read “Designing Beaded Jewelry.”

Thanks for Reading & Happy Crafting!
Color Selection 101

Artist's Paint Palette
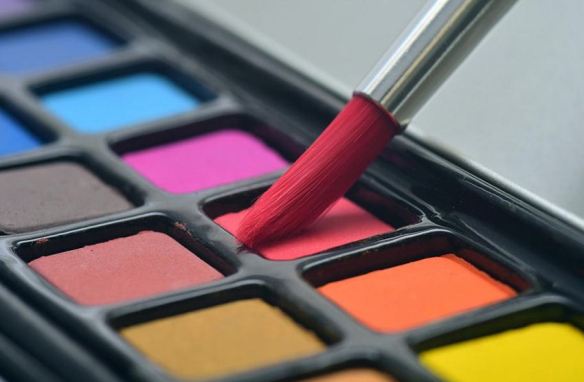
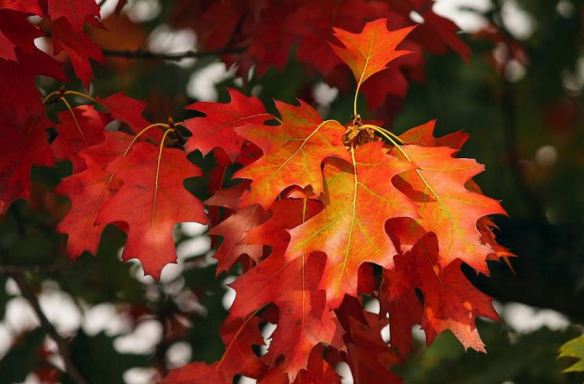
Choosing colors is one of the most difficult parts of any project. Fortunately the ultimate artist, Mother Nature, has already done most of the work for us. Below are assorted nature photos to inspire your exploration of the infinite possibilities of color.

The Color Wheel
Color Wheel
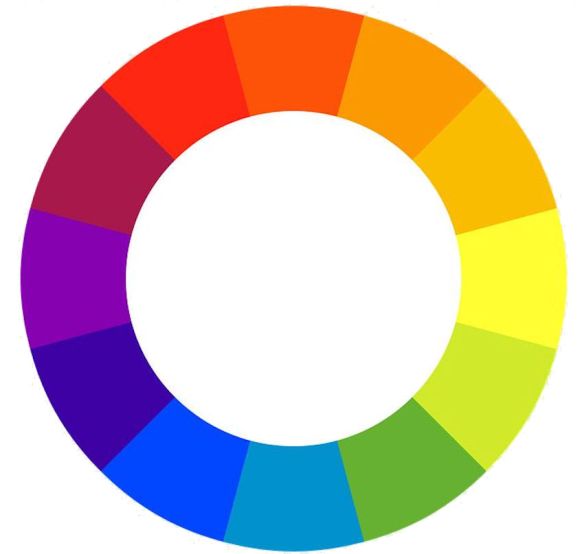
A Color Wheel – all the colors of the visible spectrum, that is, visible to the human eye.

Primary Colors
Primary Colors - Parrot
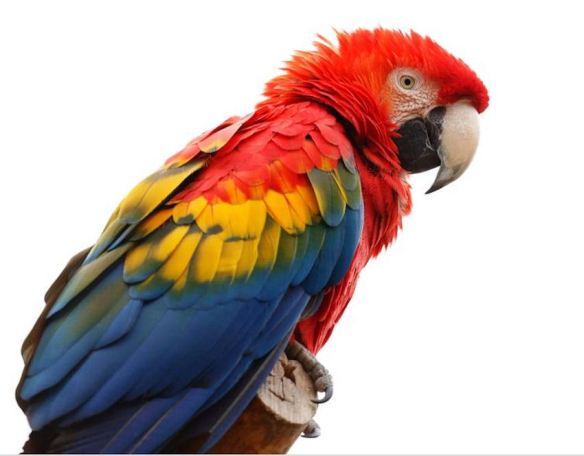
Primary Colors: Red, Blue, & Yellow – base colors found in nature.

Secondary Colors
Secondary Colors-Butterflies
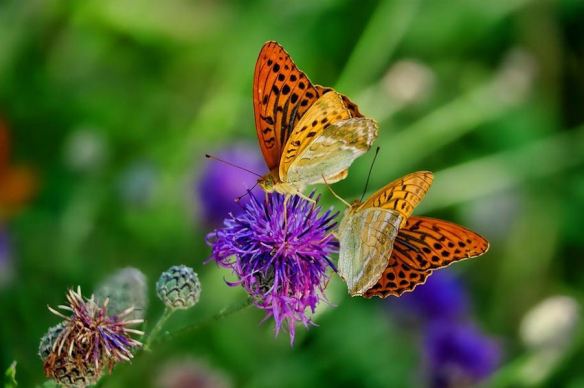
Secondary Colors: Green, Orange, & Purple – colors made by mixing two primary colors together.

Black & White
Black & White - Whale
White & Black – produce shades of color from light to dark. Black and white is a classic combo often used in the textile and interior design industries. Turn the ordinary to extraordinary by adding brilliant jewel tone colors, such as sapphire blue, emerald green or ruby red.

Complementary Colors
Complementary Colors: Opposites on the color wheel (red & green; purple & yellow; blue & orange). When used together, they produce the highest contrasts.

Rainbow
Rainbow
All the colors of the spectrum – Red, Orange, Yellow, Green, Blue & Violet – in that exact order can be seen in this rainbow. If you want to create a realistic rainbow effect, be sure to get the color order correct.

Fresh Picked Fruit
Fresh Picked Fruit
Pastel Red, Green, Fuchsia & Orange – These are great spring and summer colors.

Tropical Fish
Tropical Fish
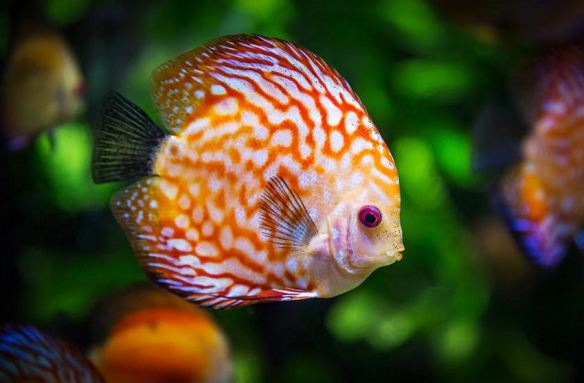
Golden & Reddish Browns with White, set against a Green background – Brown & White are another classic combo, which look great with jewel tones.

Tropical Beach
Tropical Beach
Blues, Greens, & Tans – whether you prefer vacations on the beach or in the mountains, this combination of colors has a familiar relaxing affect.

Hibiscus Bloom
Hibiscus Bloom
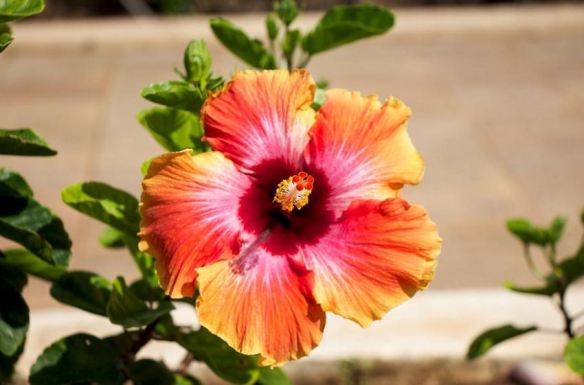
Red, Orange, Yellow & touches of Pink & White – Warm pastels with a dramatic red center attract attention.

Molten Lava
Molten Lava
Black, Orange, & Yellow – These colors remind me of my favorite holiday, Halloween.

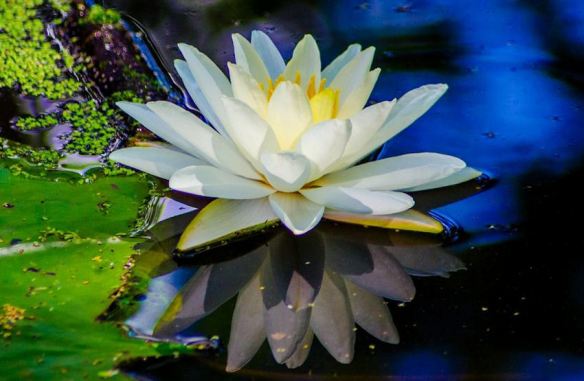
Floating Lotus Blossom
Pure White & Yellow offset by Green, Blue & Black – White is such a cool, crisp color in summer, and coordinates with any colors in warm or cool tones.

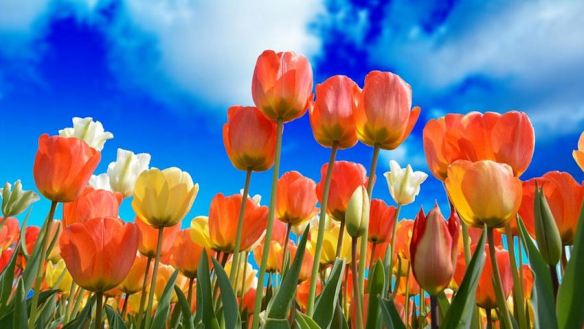
Field of Tulips
Field of Tulips
Orange, Green, & Yellow contrast with Blue – Pastels come alive with a punch of color.

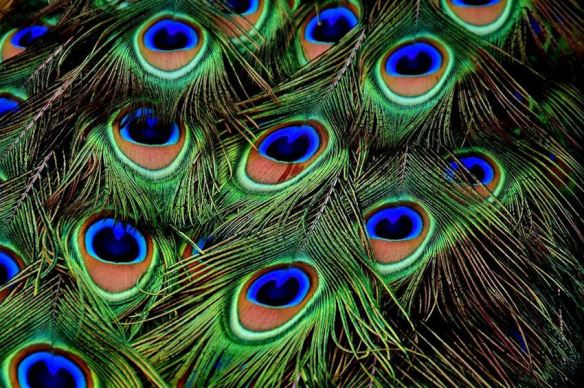
Peacock Feathers
Peacock Feathers
Blue, Green, Gold, & Black – Exotic & luxurious is the vibe created by these colors. The electric blue set against the black makes a bold statement with the naturally shimmering gold and green.

Cherry Blossoms
Cherry Blossoms
Pink & Blue – In the case of these cherry blossoms and blue sky, bold colors would be overpowering. Such tiny, delicate blooms call for gentle, soft colors. Is it any wonder these colors are often used for baby nurseries?

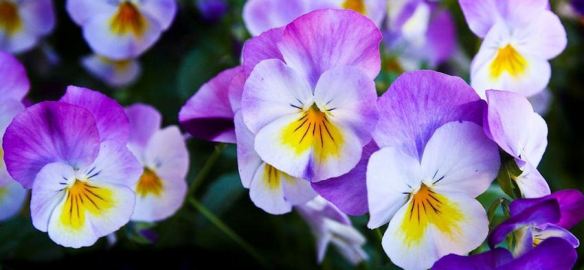
Pansies
Pansies
Purple, White & Yellow – The frilled purple petals resemble watercolors, while the yellow centers look like they were hand painted in this striking palette.

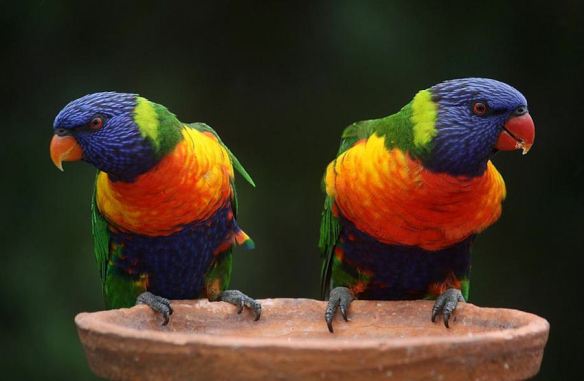
Rainbow Lorakeets
Rainbow Lorakeets
It’s hard to believe that one animal could have all the colors of the rainbow, except purple, and yet here it is in two small parrots. If Mother Nature can come with this, imagine what you can do.

Hummingbird Fuchsia
Fuchsia
Fuchsia and Purple are striking together as well as exotic.

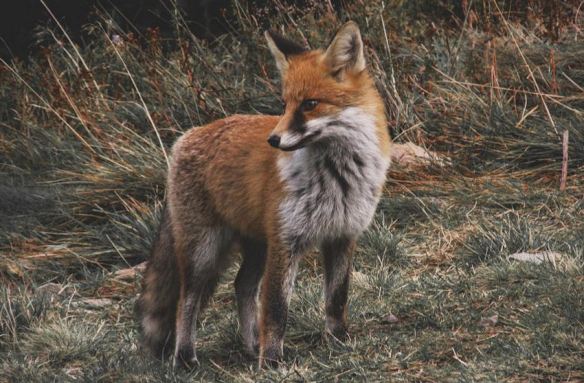
Red Fox
Red Fox
Reddish-orange with white & black accents, is cheerful by day, but sexy and seductive by night.

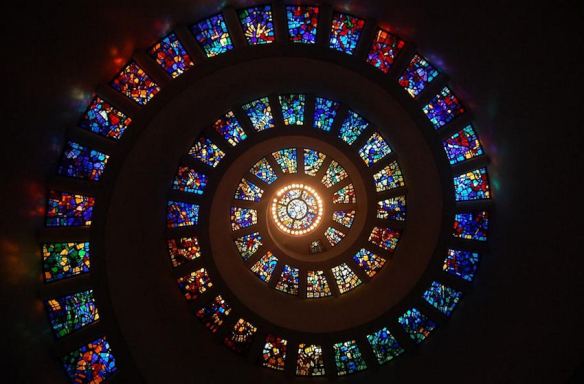
Spiral Stained Glass Windows
Blue & Red with Green, Orange, Purple & Yellow accents – The spiral draws your eye toward the center, while the blended colors move you along one frame at a time.

Sunset #1
Sunset - Cool tones
Purple, Yellow, & Blue – Cool colors of evening (blues & purples) provide the dramatic backdrop for the vibrant yellow sun setting at the distant horizon. This palette has a dreamy, relaxing quality.

Sunset #2
Sunset - Warm tones
Red, Yellow, & Orange with touches of Pink & Purple – Blended warm colors have an energetic, motivational effect.

The next time you are looking for some color inspiration for your next project, take a look outside. Mother Nature has provided a feast for the eyes. Don’t be afraid to experiment. You will be pleasantly surprised.  To learn more about color, please read “World of Color – Part 1” and “World of Color- Part 2.”

Thanks for reading & Happy Crafting!
The Bunny Hop – Painted Wooden Rabbit

Before we begin this Easter-themed project, we’ll need a little inspiration. Let’s take a look at a few of Mother Nature’s color scheme choices in the adorable bunny photos below:

Tan Baby Bunny
Baby bunnies are just so cute! That’s a lot of love wrapped in a soft tan and cream coat.

Gray & White Bunny
This stylish rabbit is modeling the very popular gray and white color combo.

Tan & Brown Bunny
Wild rabbits often have a blended fur coat of brown, tan and black to help camouflage them from predators. The one pictured above looks perfectly content to nap where he is without a care in the world.

Black & White Bunny
Last but not least is this precious black and white baby. His delicate features, including his button nose, inner ears and the outline of his eyes, are a soft pink.

Now that we’ve seen a few ideas, let’s get started painting!

How to Paint a Wooden Rabbit:

Raw Wood Bunny
Thick wood has been cut out in the shape of a rabbit and has the advantage of strong, rectangular base. Both sides and all the edges will need to be painted. Due to the raw nature of the wood, it may require a little sanding, especially along the edges.

Bunny Supplies
Supplies:
Wooden Rabbit (17” high x 8” wide x 1/4” thick) (Base is 5-3/4” wide x 4”deep)
Acrylic Paints – brown, black, gray, tan, green & white
Fan paintbrush, small detail paintbrush and thicker brush for base coats
Sandpaper
Optional: Fabric paints – black, brown, white (Refer to Advanced section below)

Painted White Bunny
Step 1 – Paint the rabbit with 2) coats of white acrylic paint, including both sides and all edges.

Painted Back Bunny
Step 2 – Start painting the fur on the back. Experiment with colors and brush techniques. I poured black, brown and gray paint onto an artist’s palette. Dip a fan brush into each color and then apply to wood surface to create a fur-like effect. Because the paints have not been mixed, each new brush stroke will have a slightly different combination of colors, just like real fur. Repeat thus process until the back is completed. The white tail will be added later.

Layout Details Front Bunny
Step 3 – On the front, draw the face (eyes, eyelids, eyelashes, muzzle with nose, mouth, whiskers), ears and feet with a pencil. Paint the inside of the ears and eyelids tan.

Painted Front Bunny
Step 4 – Create the fur by repeating the procedures in Step 2. Be sure to make long brush strokes along the edges of the ears to resemble thick fur. You can leave the eyes, muzzle, and feet white for now. These areas will be detailed in the next step.

Bunny Closeup1
Step 5 – Paint the facial details. I painted the eyes, eyelashes, nose, mouth and whiskers black.

Bunny Closeup 2
Step 5A – This is an alternate version for the eyes and nose. A brown iris has been added to each eye, the eyelashes have been extended, and brown nostrils define the nose. For a more lively expression, don’t forget to put a dot of white in the pupil of each eye.

Finished Bunny
Step 6 – The finished rabbit has white feet with black lines to define the toes. The base was painted with two coats of green.

Finished Bunny Tail
Step 7 – Paint a big, white fluffy tail on the back.

At this point your project is finished and ready to display. If you would like to take this design to the next level, please follow the steps below.

Advanced Rabbit in 3D
Followers of this blog know how much I love creating 3D details on wood projects using fabric paints. If you appreciate three-dimensional effects, this section is for you! Unless otherwise noted, all paints listed below are dimensional fabric paints.

3D Bunny Face
Start by painting 2 thick coats of white fabric paint on the muzzle, and brown paint for the eyes.

3D Bunny Feet
Next paint the feet with 2 thick coats of white paint.

3D Face Details
To complete the face, use black paint for the nose, mouth, whiskers, eyelashes, and the outline around the eyes. Add a black pupil in each eye. Paint a white dot in the center of each pupil, and use brown paint in each nostril.

3D Body Details
Add long brown fur along the inner edges of both ears and define the two front legs using the same paint. Add the black lines to define the toes on each foot.

Detail Facial Fur
Using short strokes, bring the black and brown fur mixture up into the face.

Detail Legs and Feet
Layer additional black and brown fur to define the body, and add the two back feet.

Finished 3D Bunny Front
Because the rear legs are in the background, keep the paint lighter by using tiny strokes with just the brown paint in an upward direction. If you want additional fur texture, you could use acrylic paints and a brush to thicken the fur coat with highlights and lowlights.

Finished 3D Bunny Back
The last step is painting the tail with 3 coats of white fabric paint.

Mission accomplished! This cute little guy is ready to be displayed in your home, bringing joy to your life for years to come.

Happy Easter and Happy Crafting!

Countdown – Top Six Posts of 2020

Time Travel
In the movie, “Back to the Future”, Michael J. Fox traveled back in time.  As a new year begins, it’s interesting to review the best moments from the previous year.  As voted by you, the readers, below is a list of the Top Six posts of 2020, in ascending order:

Number 6: Say It with Flowers
Creative Flower Arranging
Flowers have been used for centuries to decorate, commemorate and celebrate the moments of our lives.  Whether you choose fresh cut or silk flowers, the artfully arranged blooms are both a challenge and a triumph for the dedicated crafter.  To read more, please click here.

Number 5: Celebrating 100th Post
100th Post
Today marks a very important milestone – my 100th post!  It has been a wonderful experience, and I thank all my readers and followers.  To read more, please click here.

Number 4: The Beauty of Wood Crafts
Beauty Wood Crafts
Wood crafts are a fun and inexpensive way to express your creativity.  From birdhouses to toys and home décor, there’s something for everyone and these projects are great activities to do with the kids.  To read more, please click here.

Number 3: Tropical Splendor
Tropical Leaves
Ah the tropics!  I’m sure we all wish we could be basking in the sun on a tropical island -sand under your feet, a soft ocean breeze, and a cool fruity drink within reach.  Our travel plans may be on hold for now, but we can dream.  A tropical project may be just what we need to brighten the day and lift our spirits.  To read more, please click here.

Number 2: Thank You
400 Followers
With many thanks to all of you, I have reached an important milestone: 400 Followers.  Thank you to all my readers and followers for liking, commenting, and sharing this creative journey with me.  I am so grateful for each and every one of you.  To read more, please click here.

Number 1: Fun with Photo Editing
Photo Editing
Wouldn’t it be cool if you could simply change a gloomy sky to a gorgeous day with a wave of your arm?  We might not have that ability now, but we can certainly achieve this monumental task through the power of photo editing.  To read more, please click here.

Future Projects
Art Supplies
And there you have it – the top 6 posts of 2020.  Now we have a new year, a clean slate, and together we shall explore the world of creativity.  There are always new ideas, new mediums for experimenting, and I’ll be sure to include more of your favorites.  Your opinions are greatly appreciated, and I look forward to so much more this year.  If you have any suggestions for future posts, please let me know.  Thanks for reading!

All the best in 2021 and Happy Crafting!

Decorating for the Holidays

Hand Painted Glass Ornaments
It’s that time again when we deck the halls, shop ‘til we drop, and dream of snowflakes and gingerbread fresh from the oven. Decorating your home can be stressful. There are so many styles and colors to choose. Where to begin? Let’s review several options to pique your interest.

Mood Lighting
Dining Room Ambiance
The festive contemporary vibe in this dining room is created solely through the clever use of lighting. Round white lights adorn the table and trendy letters upon the back wall, which is bathed in soft lavender light and soft blue accent lights.

Traditional Candle Wreath Centerpiece
Candle Centerpiece
The traditional red and green Christmas color scheme is accented with nuts and pinecones in this evergreen centerpiece. The aromatic scents of the great outdoors will last for weeks. To convert this to an Advent wreath, replace the red candles with three purple and one pink.

Contemporary Candle Un-Wreath Centerpiece
UnWreath
Create a contemporary candle centerpiece, without the wreath, by using a gold or silver tray covered with pinecones, artificial fruit, and assorted small decorations.

Contemporary Candle & Glass Ornament Centerpiece
Christmas balls can be glued together to form a wreath, which is great as a centerpiece, or you can hang it on the wall for a colorful, reflective focal point.

Sophisticated Gold & Brown Centerpiece
This unusual gold and brown combo brings to mind boxes of Godiva chocolate. The rich colors and just the right amount of glitter make this an elegant, eye-catching choice.

Traditional Style Meets Contemporary Flair
Red & green are traditional, but here we have a glass bowl filled with natural elements, such as moss, apples, and pinecones, mixed with glass and carved wood ornaments, and metal spheres. The candlelight is supplemented with flower shaped mini lights tucked among the greens like little blooms.

Red & Green Glowing Glass Centerpiece
What sets this display apart is the lighting hidden inside the fluted glass bowl. This inner glow reflects off the tabletop and twinkles upon the glass ornaments.

Fresh Cut Flowers Centerpiece
Floral centerpieces can be quite expensive. As an alternative, make your own with evergreens, pinecones, and berries from your yard, and add a few exotic looking fresh cut flowers for maximum impact.

Colorful Foil Garlands
Many trees are decorated with silver or gold garland, but there are many other colors and styles available.

Beaded Garlands
Beaded Garlands
If you look at historical photos of decorated trees, you may notice beautiful beaded garlands. Originally they were made from glass, but today plastic beads provide the same old-fashioned look without the added expense and fragility of glass.

Floral Garlands
Floral Garland
Those fortunate enough to be living in warmer climates may choose genuine flower garlands for natural tropical flair.

Popcorn Garland
Popcorn Garland
Another old-fashioned choice is popcorn garland, which is easy and inexpensive to make. For a dash of color, alternate popcorn with cranberries.

Semi-Homemade Ornaments
Transform store-bought ornaments with a little personalization. This crafter started with purple glass ornaments. A glitter paint pen was used to draw vertical line, and then gold rhinestones were randomly glued along the stripes for a regal appearance.

Christmas Ornament Kits
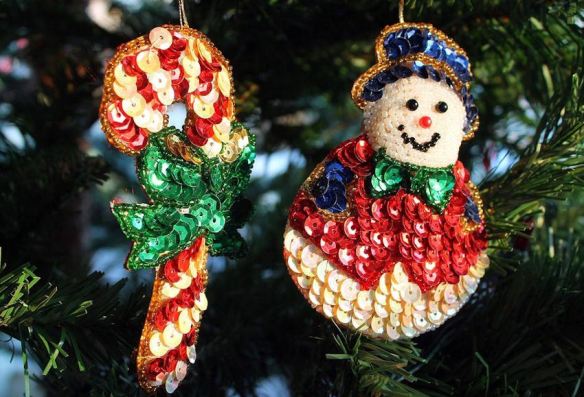
Due to the small sequin size and intricate sewing, the two ornaments shown above would be for the more advanced crafters, but there are plenty of options for beginners and kids.

Festive décor varies based upon the holiday being celebrated and your personal style. Below are several different theme ideas to inspire and consider for your next holiday.

Festive Bells
Christmas Bells
Bells make pretty Christmas ornaments. Collectors adorn their trees with bells of all kinds, typically from around the world. If you have a prized collection, whether it’s snow globes, porcelain figurines, dolls, etc., consider displaying it this festive time of year using your own creative style.

Blue & Gold
Blue & Gold Tree
For some, it’s all about the lights. Here we have blue lights and fancy gold ribbon taking center stage.

Blue, Silver, & Gold with Purple Accents
On this tree, ornaments are the main focus, accented by silver snowflakes and gold poinsettias.

Red & Silver
Red & Silver Tree
Glitz and glamour are achieved with mirror-finished ornaments, pinpoint white lights, and last but certainly not least, a sparkling reindeer.

Red, Purple & Gold
Red, Purple & Gold
Colorful ornaments and two shades of garland vie for your attention in this beautifully coordinated tree.

Turquoise & Silver
Turquoise & Silver
This tree is exotic in so many ways. The combination of turquoise and silver is as rare as the color of the tree, which is brown! The silver ornaments vary in textures, shapes and materials. It is truly a one of a kind.

Mother Nature’s Tree
For nature lovers, decorate with pinecones, berries and cute little birds. Animal themed trees have been very popular for the last few years. Whatever strikes your fancy – owls, birds, sea horses, etc. – decorations can be found or made to make your vision a reality.

Nature’s Fragrance
Natural Scents
Perfume the air with pinecones and cinnamon sticks.

Wintry Forecast
Snow & Ice on a Window
Christmas is typically associated with winter, but not everyone has a white Christmas. To create the look of ice and snow, use blankets or bags of artificial snow and aerosol cans of spray snow, which cleans up after the holidays with window cleaner.

Our Furry Companions
Let’s not forget an ornament or two for those lovable family pets. In case you didn’t know, tree skirts are very popular places for afternoon naps.

A Room with a Fabulous View
Curl up with a good book by the fire, or find a cozy spot overlooking a winter wonderland. The holidays are a wonderful time to decorate our homes and celebrate the season with family and friends. May your holiday dreams be happy, filled with peace and love.

Happy Holidays & Happy Crafting!

Designing Beaded Jewelry

Beaded Jewelry in Fall Colors
Making beaded jewelry is a fun activity for the entire family. There’s an incredible selection of gemstone, glass, crystal, metal, and mixed media beads, which can be strung upon wire, leather cords, ribbons, or any other material of your choosing.

Strands of Gemstone Beads
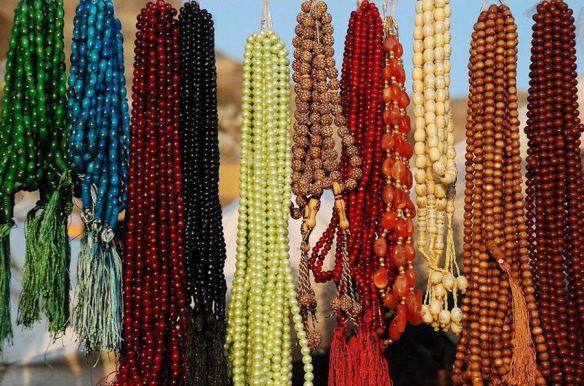
Most beads are sold in strands, which are pre-strung on fishing tackle. You cannot keep the beads on this temporary strand because it is not durable for every day wear and tear, and will eventually break.

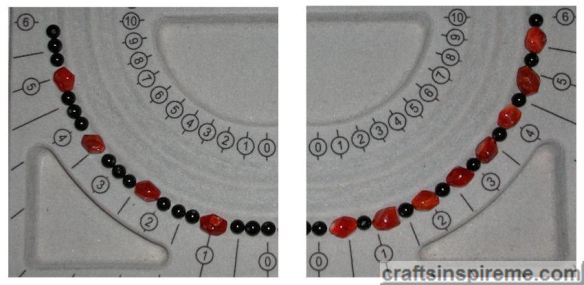
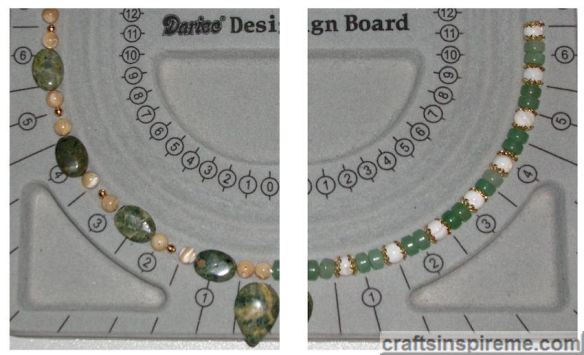
When working with beads, having a jewelry maker’s tray (like the one pictured below) is extremely beneficial for laying out your designs. The numbers along the perimeter are for measuring the length of bracelets and necklaces. The grooves in the tray are multi-purpose: enable experimentation with different beads; create a necklace and bracelet at the same time; design a multi-strand necklace. Compartments in the tray hold additional beads while you finalize your work.

Black Onyx & Carnelian Beads
Onyx Carnelian Beads
Using the same beads produces two different looks by simply changing the pattern – both are in seasonal fall colors. The large, reddish orange, Carnelian nuggets have a raw but luxurious appeal, while the smooth, round, Black Onyx beads are cool and sophisticated.

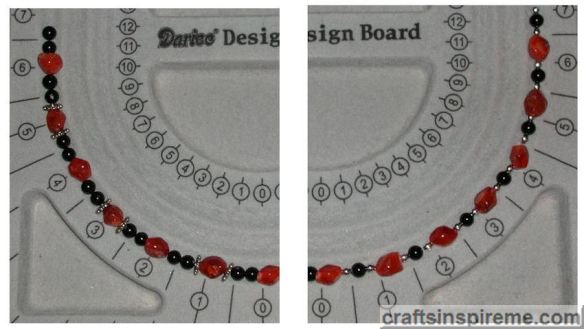
Black Onyx, Carnelian & Silver-Plated Metal Beads
Onyx Carnelian & Metal Beads
The addition of precious metal beads provides rich texture, eye-catching contrast, and the all-important sparkle.

Rain Forest Jasper & Mother of Pearl Beads
Rain Forest Jasper & Aventurine Beads
These two photos demonstrate the effects of using shape and color to create necklaces with very different styles. On the left, a pear-shaped, Rain Forest Jasper pendant takes center stage with Rain Forest Jasper and Natural Mother of Pearl beads. The result is a fancy necklace with warm rich earth tones, suitable for a night out on the town. On the right, Aventurine alternates with dazzling, White Mother of Pearl beads in a soft palette and casual style for everyday wear.

Rain Forest Jasper, Mother of Pearl, and Gold-Plated Metal Beads
Rain Forest Jasper Aventurine & Metal Beads
The same beads are shown here with the addition of gold-plated, round spacer beads on the left, and gold-plated, filigree bead caps on the right.

When you are satisfied with your design, the beads can be strung one at a time onto wire. Be sure to place a piece of scotch tape on the end of the wire before you start stringing your beads. Once you’re satisfied, the clasp can be attached. There are many videos available to show you how to attach each of the different types of clasps.

Here are a few photos to get your creative ideas flowing:

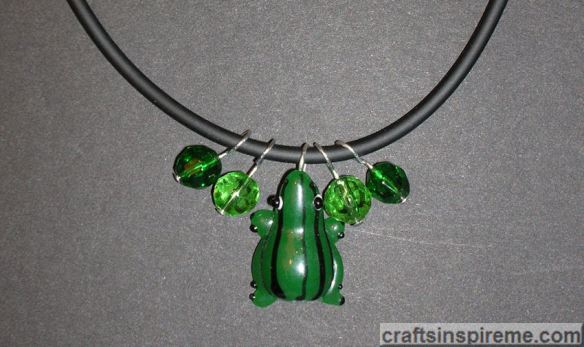
Necklace – Lampwork Glass Frog & Glass Beads on a Cord
Glass Frog Cord
This striped glass frog is a fanciful addition to any wardrobe. Cords are easy work with and comfortable to wear. All it takes are a few beads and a focal point to complete this piece of jewelry. You could also use a pendant you already own. Cords can be made of leather, rubber, or woven fibers.

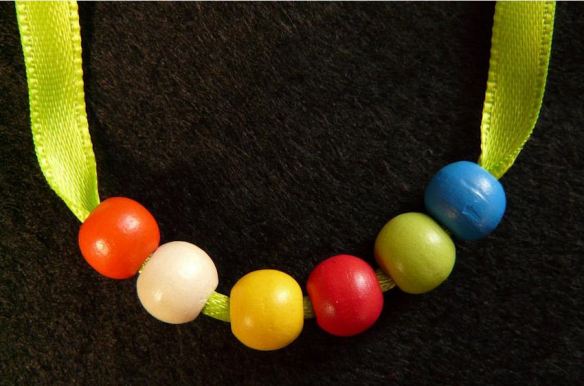
Necklace – Large-Hole Resin Beads on Ribbon
Necklace - Large-Hole Resin Beads on Ribbon
Stringing large-hole beads on ribbon is an easy way for beginners to learn about jewelry making. Children and those struggling with arthritis or any other dexterity issues can easily handle these over-sized beads. Stringing on ribbon or a cord can be done quickly and beads can be interchanged until the desired look is achieved. Best of all, there are no special skills or tools required.

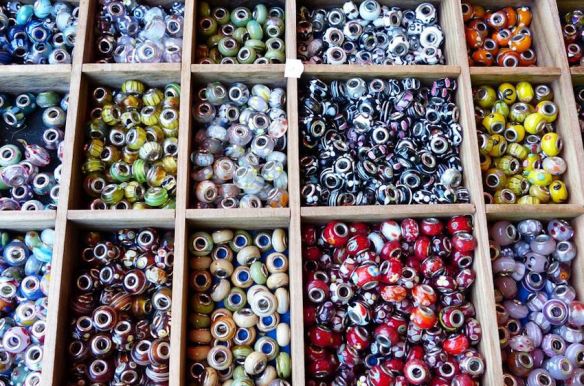
Large-Hole Glass Beads
Large-hole beads are for use on cords, ribbons, thick chains and wire. Crafter Tip: With these beads, you can achieve the same fashionable look as seen in Pandora stores, but at a fraction of the price. The best selection is available at Fire Mountain Gems.

Bracelet -Large-Hole Glass Beads and Metal Beads on wire
Stringing beads upon wire is easy to do, but requires the special jewelry making tools to attach the clasp. Bead stores will typically offer shoppers the chance to select beads, and string your own necklace or bracelet. A staff member will then attach the clasp, or can give you instructions to do it yourself using their tools. These stores periodically have classes, and offer private jewelry making parties for your family and friends.

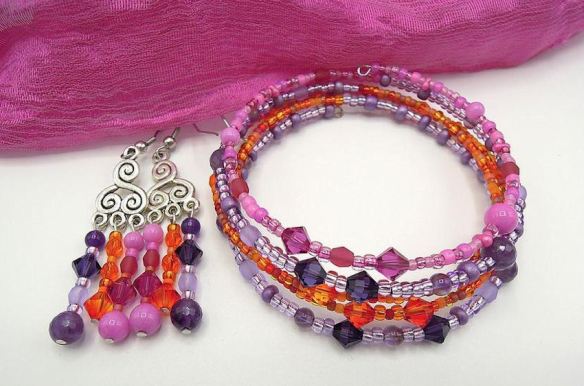
Earring & Bracelet – Crystal & Glass Seed Beads
Earring & Bracelet - Crystal & Glass Seed Beads
When you think of crystal jewelry, the name that most likely tops your list is Swarovski. The rich, colors and light reflecting facets of crystal have been featured in memorable jewelry designs ready to wear anywhere from the super market to the high fashion runway.

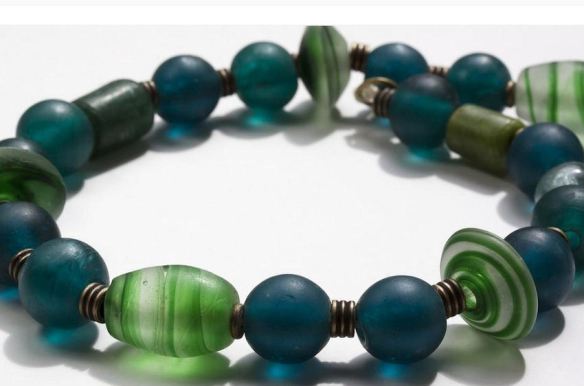
Necklace – Glass & Metal Beads
Necklace - Glass & Metal Beads
Glass blowers create beads one at a time, and each one is a unique masterpiece. All the colors of the rainbow and a few Mother Nature never considered can be found in glass. Solid colors, striated, and two tone beads are but a mere few of the possibilities with matte or high-gloss finishes. Glass pendants make interesting focal points, while tiny glass seed beads can be woven into intricate spiral patterns in necklaces, bracelets and earrings.

Bracelets – Gemstones, Metal Beads, & Bells on cords
There’s a bracelet style to match every person’s fashion needs – cords, cuffs, stretch, charm, bangles, and many more. Genuine gemstone beads are available in an amazing array of colors and sizes. Beads can be purchased from craft stores, beaded jewelry stores, bead trade shows, and from online retailers, such as Fire Mountain Gems. Because genuine gemstones come from the earth, the colors and patterns will vary. If you are planning to make a bracelet and matching necklace or earrings, make sure you have enough beads to complete the set. Each finished piece of jewelry will be as unique and individual as you are.

Jewelry making is an exciting and rewarding craft. Enjoy the process. Learn from mistakes. Experiment as you follow your inspiration to create the perfect design to express your personality and style.

Thanks for reading & Happy Crafting!
The Basics of Decorative Painting

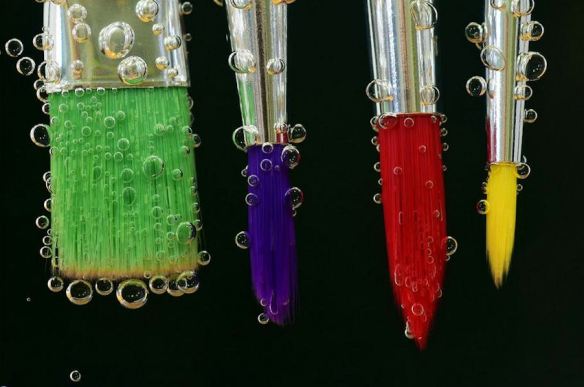
Paint Brushes
In a post a few weeks ago, faux finishing was discussed with several painting options and instructions for sponge painting. Faux finishing is part of a larger category called decorative painting, which includes stenciling, murals, and custom painted details.

At it’s most basic, decorative painting can be as simple as painting vines on a flowerpot. Be sure to use weatherproof paint, not only to protect it from rain and sun, but also from watering the plants.

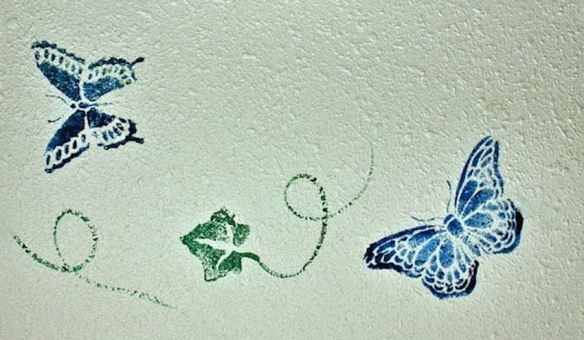
Stenciled Butterflies & Vines
Stenciling
Stenciling is a fairly easy process. Choose a plastic stencil, a few paints, and some sponge brushes. Painter’s tape is great for holding the stencil in place while you work, painting one color at a time. Crafter Tip: Stenciling on a textured wall is not recommended. The bumpy texture can cause the colors to bleed, and the designs may appear stretched or irregular.

Antiqued Wood Chair with Painted Floral Seat Back
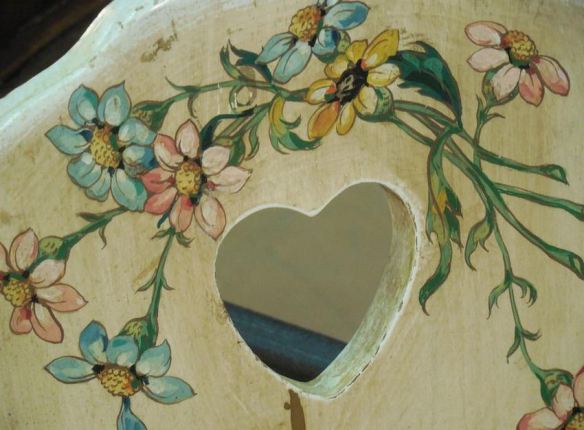
Furniture presents the challenge of durability. Paint alone is not enough. Crafter Tip: Consult a specialist, or research what types of paints and sealants to use to ensure your designs will withstand every day wear and tear.

Stippling
Stippling
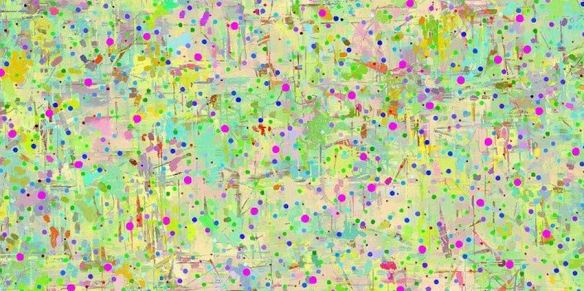
This is an example of stippling layered over a multi-color background. The base coat is created using sponges or brushes to blend the colors together. Stippling consists of little dots to create light and dark areas by changing the density of the dotted pattern.

Watercolor
Watercolor
In this technique, water-based paints are thoroughly mixed with water and blended together while still wet. It’s important to remember that you will want to start out with light washes of color and gradually build up to the darker areas. If you get too dark too fast and don’t like the results, you will need to start over.

Layered Techniques
Mixed Media
Here we see an interesting mix of free-hand painting, stenciling, and stamping. Pressing painted corrugated cardboard against the surface created the parallel lines.

Now if you’re really feeling ambitious, here are some amazing painted murals:

Floral Wall Mural with Metal Butterflies
This bead board paneled wall was painted green as a background color, and then the flowers and vines were added. Crafter Tip: Even though you are painting a mural, you don’t have to paint everything yourself. There are plenty of wall art options, which will coordinate with your painting, such as these sculpted metal butterflies, the perfect complement for this gardener’s retreat.

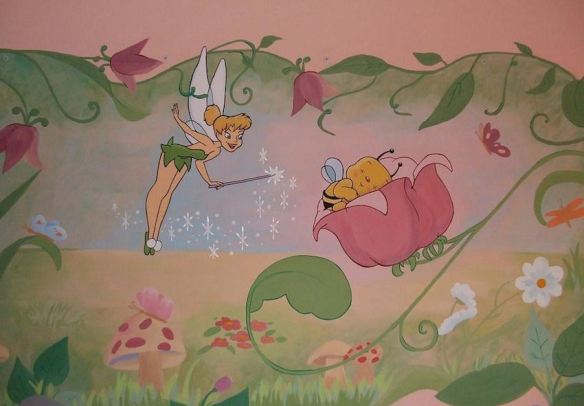
Tinkerbell Wall Mural
Disney characters are sure to be childhood favorites. The flowers and vines in this mural can be painted by hand or stenciled. Crafter Tips: In lieu of using a paintbrush, delicate details can be made using a fine tipped paint pen. If Tinkerbell seems a bit beyond your skill set, purchase a Disney decal, or wallpaper version and adhere it to the wall after the mural is complete. It will save you time, and from a distance, no one will ever know.

Ocean-Themed Exterior Wall Mural
The old block wall in this photo has been given new life through wall art. Because of the large scale, and dependence upon the weather, the artist used a paint sprayer to speed up the process. With the overall design blocked out, the details can be added using a combination of a fine spray nozzle and paint brushes. Crafter Tip: Using a paint sprayer will certainly give your arms and upper body a workout. You won’t need to go to the gym that day!

Asian Water Dragons Mural on a Porshe
Vehicle painting is a specialty in itself. Painted details can include logos, initials, stripes, and full-size murals. Crafter Tip: Vehicle painting is best left to the pros. Manufacturers’ new vehicle warranties will most likely become void if the body paint is altered.

How To Decoratively Paint a Powder Room

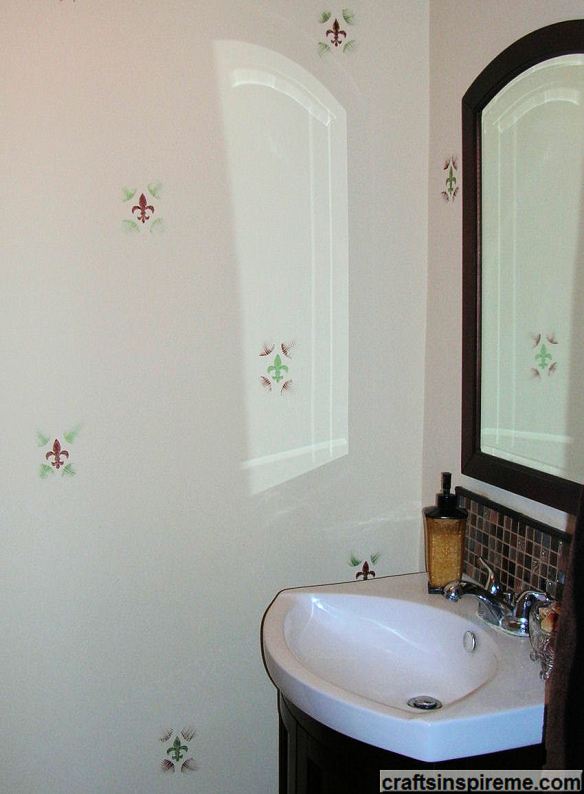
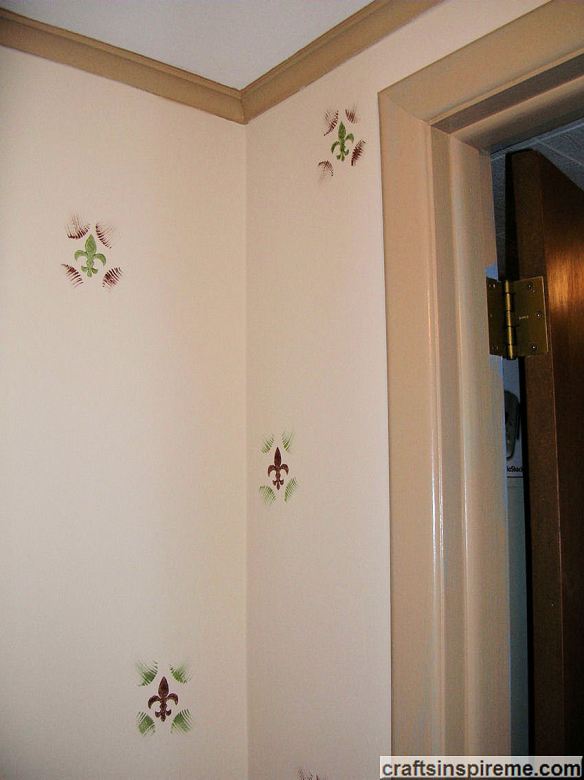
Fleur-de-lis Powder Room
Powder Room
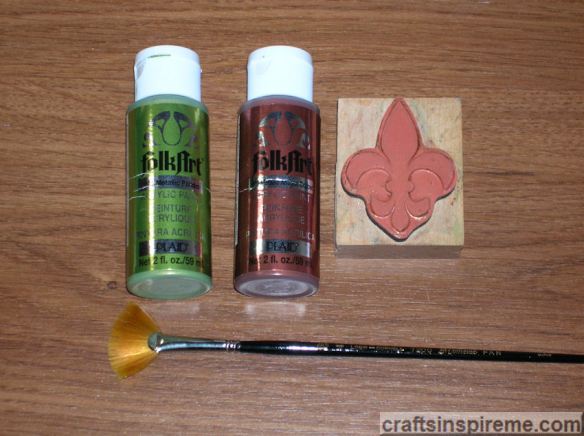
Fleur-de-lis design was made using an ink stamp, which was purchased from the scrapbooking department at Michael’s craft store.

Acrylic Paints, Ink Stamp & Fan Brush
Powder Room Paints
To produce more consistent imprints, paint was applied directly upon the stamp using a small flat brush. The stamp was then pressed against the wall, spacing the pattern by eye. All the brown fleur de lis designs were completed first, and then the stamp was cleaned in preparation for the green paint.

Create a Fleur-de-lis Pattern
Painted Powder Room

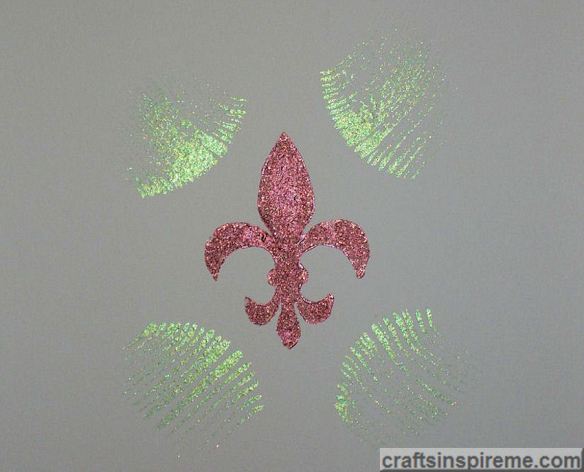
Fleur-de-lis Detail
Powder Room Paint Detail
Using a fan brush at the four corners, brush strokes were applied with the contrasting metallic paint color.

For continuity and consistency of the design, it is probably best to have one person working on a project. However, if your friends or family would like to help, assign a particular design element to each person to be completed throughout the project. Using the fleur-de-lis project as an example, one person could do all the stamping while another applies the flourishes at the corners.

Crafter Tip – Future Decorative Paint Removal
I once had a painter in my home to give estimates on a few small projects. I had recently finished a mural in one of the bedrooms, and as we walked by, the painter said, and I quote, “Do you know how much Kilz it would take to cover that?” Although I was appalled at the idea, it certainly gave me food for thought. At some point in the future, how could I easily cover over painted designs without filling the house with toxic fumes? The answer is simple: paint over it using the same paint used to create it. There was an acrylic midnight blue design (Folk Art Brilliant Ultramarine) painted across the upper half of one wall. White acrylic paint (Folk Art Wicker White) was brushed over the dark paint. Just to be sure, a second coat was applied. The painter was stunned to see how well it covered. The new wall paint was a pale blue, covered in only one coat, and there were no toxic fumes. To protect the air quality in your home, be sure to select low odor paints, with low or no VOCs (volatile organic compounds).

Thanks for reading & Happy Crafting!
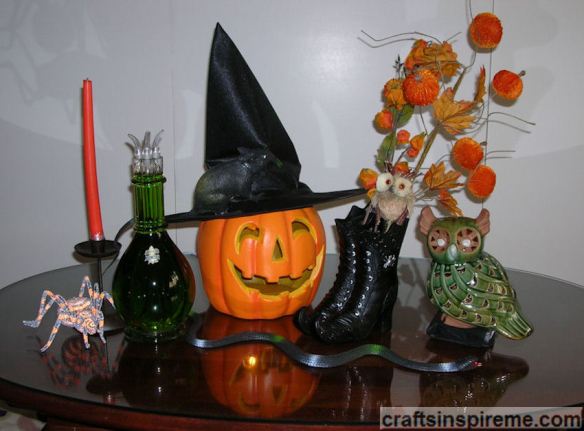
Halloween Magic – How to Make a Bewitching Centerpiece

Witch Flying Across Full Moon
The movie Hocus Pocus is celebrating its 27th Anniversary, inspiring witch themed costumes and decorations. Whether you’re having a Halloween party or simply decorating for the fun of it, a centerpiece is a must for the coffee or dining tables. Below are step-by-step instructions and photos for building your own, one piece at a time.

Witch Boots
The Inspiration – As with all creative projects, the first requirement is a source of inspiration. This pair of witch’s boots is sold at Michaels. Although smaller than expected, it still has a spooky vibe. The style varies slightly, but all are black with a silver spider painted on each side. Having a pair of boots is nice, however it’s one piece and can’t be separated. If you prefer a more humorous impression, many stores sell individual witch boots painted in bright, fanciful colors and patterns.

Witch Boots
Step 1. Witch’s Boots – Centered upon this coffee table, these boots look quite sparse, but we’ve only just begun.

Witch Boots with Floral Stems
Step 2. Floral Stems & Owl – For color and texture, the key to this design is choosing strange looking plants in autumn, Halloween colors. Here we have added leafy vines with plush mini pumpkins, and orange lanterns. Bend the stems as needed to adjust the height. Crafter Tips: Do not cut the stems because you may need to adjust the height at the end when the arrangement is complete. (You may not need to cut them at all, simply conceal the bent stems inside the boots). The owl, made from twigs, was already mounted on a long stick for easy placement.

Witch Boots with Pumpkin
Step 3. Jack-O-Lantern – Orange and black – the perfect color combo for Halloween. This resin pumpkin includes optional lighting. High contrast and a brilliant punch of color lend visual interest to this asymmetrical composition. Instead of a pumpkin, you could use a round platter or globe, resembling the full moon, or a light color witch’s broom to contrast with the dark boots.

Witch Boots with Pumpkin & Owl
Step 4. Ceramic Owl – Contemporary details with an eerie presence make this owl a perfect addition by contributing color, light, and texture. Moss green and tan coordinate with the autumn vines and leaves. Feather-like half moon slits in the body of the owl allow light to pass through and the opportunity to insert mini lights inside with the battery pack underneath, wrapped in black fabric. Crafter Tip: Ensure the battery pack’s on/off switch remains accessible.

Add Decanter
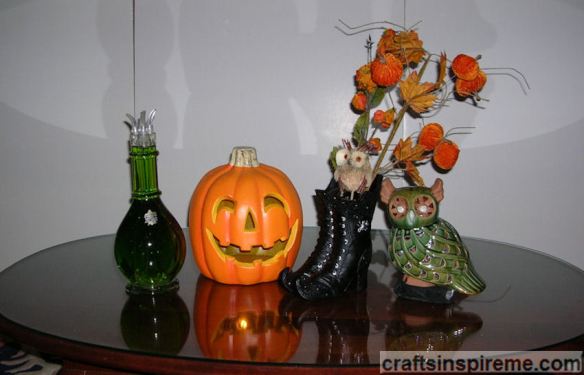
Step 5. Decanter – No witch-themed display would be complete without a few unknown potions brewed with magical spells. The clear glass decanter, with four separate chambers and claw-like stoppers, provides much needed height and color on the left end of the display. A little food coloring and water becomes a scary cocktail of witch’s potions. The green color was chosen to coordinate with the other green elements. Alternatives: You could create a grouping of different size bottles or apothecary jars with strange contents inside; or add a book of “spells” and candles to capture the spooky aura. Crafter Tip: Experiment with various objects and colors, being sure to balance the composition.

Add Rat & Snake
Step 6. Rat & Snake – Now we need a few creepy crawlers to stir up our primal fears. A rat on top of the pumpkin seems like a natural choice, and the snake has the added bonus of implying movement, as it appears to slither along the tabletop among the objects in the centerpiece. A trip to a Halloween or craft store is sure to have plenty of options, including spiders, worms, skeleton bones, and the like. A few spider webs might kick up the spooky factor another notch.

Candle Stick
Step 7 Orange Candle & Metal Candleholder – To add height and a pop of color on the left end of the centerpiece, add an orange candlestick in a dark metal candleholder. Although the base of the holder is plain, it provides an opportunity which we will take advantage of in the next step. The candle had been stuck in a box for years, which caused the wax to curve. This works great in a Halloween project, where crooked lines are more desirable than straight ones.

Add Spider
Step 8. Orange & Black Spider – I never thought I would say these words, but this spider is actually quite beautiful. The camera flash tends to wash out the brilliant colored stripes upon the spider’s body, which is covered in tiny orange and black glass beads. The large size and imposing ready-to-strike posture are just what this display needed.

Add Witch's Hat
Step 9. Witch’s Hat – The pumpkin’s toothy grin becomes the witch’s face by the simple addition of a classic black hat, which frames the pumpkin’s face, adds character, and ties all pieces together into a unified Halloween theme.

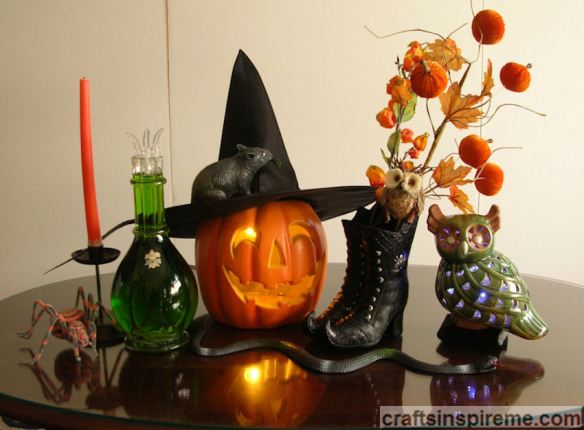
Finished Centerpiece Illuminated
Step 10. Illumination – This is the finished centerpiece with optional lights turned on inside the owl and pumpkin. It’s spooky fun just like the movie, Hocus Pocus.

Designing a Halloween centerpiece is an enjoyable process for stretching your creative muscles. Start with one piece as an inspiration and decorative items you may already own. Find different ways to use existing items by looking at things in a whole new way with your theme in mind.

Happy Halloween and Happy Crafting!