In Search of Inspiration?

Inspiring Hot Air Balloon
Everyone knows inspiration can strike at any time. Sometimes it’s obvious, such as a sunset or a pretty vista. Other times it’s a subtle feeling. Occasionally inspiration sneaks up on you when you least expect it, but there are some very frustrating times when it seems nowhere to be found. Below are a few examples of project inspirations to get your creative ideas flowing:

Artwork on a Case of Beer inspired…Cold Beverage Coasters.
Cold Beverage Coasters
These coasters were easy to make. Cut out the artwork and laminate each piece. Seal the edges with black duct tape. Glue each coaster to a cork backing and you’ll have a nice little gift for the beer lover in your family.

A festive Fox Toy inspired…Santa Claws Guiding his Sleigh.
Foxy Santa
In this case it was the missing items, namely a tail and a hat, which inspired this Santa Claus centerpiece. Foxes are known for their thick, beautiful tails. Who knows why the manufacturer neglected to provide one? It was easy enough to fix with a little faux fur. The hat was an obvious necessity, since the fox was already decked out in Santa’s finest coat, pants and boots.

Love of Chocolate inspired…Homemade Crispy Chocolate Caramel Bars

Who doesn’t love chocolate? It’s amazing how tempting a little piece of chocolate can be. These candy bars are so easy to make. I’m inspired to make a batch right now, but I better finish this post first! For instructions, please click here.

An ornately decorated Easter Wreath inspired…an Ocean Wreath.
Ocean Wreath
The colors, textures, and intricate details were eye-catching and beautiful, but an Easter wreath has a very limited time frame. By switching to the aquatic theme, the wreath can be displayed throughout the spring and summer. For instructions to make this ocean wreath, please click here.

For more inspirational project photos, please click here to visit the new Inspiration page on our website.

I hope these photos will inspire new project ideas. Magazines, online searches, and a visit to the craft store are also great resources. With an infinite supply of inspiration and a few well-chosen supplies, you will be on your way to creating your next masterpiece.

Good Luck & Happy Crafting!

Wizarding World of Harry Potter – Monster Book

Harry Potter Monster Book
Every Harry Potter fan dreams of living in his magical world. You have read the books and seen the movies, but to experience it in the real world, you’ll need to make the trip to Universal Studio’s Wizarding World of Harry Potter. If travel isn’t on your agenda, perhaps you could bring a piece of Harry’s world into your own. You can’t be a wizard without a few enchanted books. Who could forget the ferocious monster book? Ever wondered if you could make one?

Unfinished Wood Book Box
The moon and the stars must have aligned to make your wish come true with the discovery of this wooden book box, available through Michaels for $5.99. It’s the perfect size and thickness, and offers a strong foundation for building a monster book. As a bonus, there’s a secret compartment inside for storing your favorite spells (recipes), magic charms (office supplies), or wizardly collectibles.

How to Make a Monster Book Fit for a Wizard:

Supplies:
Wooden Book Box (9.75″ x 7.5″ x 2.88″)
Black Paint – brush on Acrylic or spray paint
Sharpie Metallic gold marker – medium point
Vampire Teeth
Faux fur
4) Packing peanuts
4) Glass marbles – orange
1) Bottle fabric paint – black
1) Bottle fabric paint – white
1) Leather or vinyl belt
Glue gun
Scissors
Paintbrush

Book Painted Black
Paint the box black, inside and out. This dark color will make a great contrasting background for the gold paint applied in the next step.

Gilded Pages
To create the appearance of gilded pages, draw horizontal lines along all three sides of the book, using a Sharpie metallic gold pen. Don’t worry about crooked lines. Pages in old books become crinkled and curled. Imperfect lines will provide an aged look.

Attach Teeth
The next step is attaching teeth. Center the mouth as shown. The large fangs are from Fire Mountain Gems, and the smaller teeth are actually clear quartz crystal chips, painted to match. To simplify this step, purchase vampire teeth at a Halloween store or Amazon.

Fur Cover
Faux fur from JoAnn Arts & Crafts is the perfect color and texture for this monster. Cut the piece large enough to allow a hem on all four sides. Be sure the fur will not interfere with the operation of the hinges. Please note: the raw edges of fur shed like crazy. Once they are hemmed and attached to the book the shedding stops. (Yeah!)

Trim & Hem Fur
The sides could be hand sewn, but these hems were made with a glue gun.

Packing Peanuts as Eye Sockets
I decided this monster would have four eyes. To make the eye sockets, use four packing peanuts. Each peanut is pinched in half and glued to hold its shape. Glue the four together end to end as shown.

Painted Packing Peanuts
Paint the foam with black fabric paint. Use a toothpick to keep the paint off your fingers.

Marble Eyes
I found four orange glass marbles with red streaks resembling bloodshot eyes. Each was glued into the sockets, and outlined with white fabric paint. A white dot was added to each marble to give it that creepy glint in the eye appearance.

Attach Eyes & Fur
Attach the eyes to the fur, and then secure the fur on top of the box.

Finished Monster Book
Last step: Wrap an old leather belt around the book to keep your monster under control.

Congratulations! You’re now the proud parent of your very own Monster Book. Be sure to keep it on a short leash because we all know how much it loves to shred – shoes, feet, paper – anything within reach. For decades, kids have been telling their teachers, “The dog ate my homework!” With a monster book as a pet, this excuse might actually be believed!

Do you have a favorite Harry Potter creature? Please share your thoughts in the comments section. Until next time…

Happy Crafting!

2019 – Year of the Pig

Year of the Pig
This week is special for two reasons:

One year ago the Crafts Inspire Me blog was launched! I can’t believe a year has gone by so quickly. Thank you to everyone who has made this possible. You inspire me every day! Secondly, February 5th marks the beginning of the Chinese New Year. The Year of the Pig 2019, is believed to bring joy and prosperity in all areas of life.

In honor of the Year of the Pig, this week’s craft is silly and very easy to make. You will never look at office supplies the same way again, and there is a funny story to go with it.

It all started with an extreme case of boredom. My brother had just graduated from college, and was hired by an international technology company. As you can imagine, working in a field like technology requires security clearances, and the approval process can be a lengthy one. All of the new hires were placed in a large room, sitting in individual workstations, with nothing to do but read. Because no one had been cleared to view company documentation, each person had to bring his or her own magazines and books to read to pass the time. Cell phones and computer use were not allowed. How much reading can you do before falling asleep?

Disinterested in his reading material, my brother noticed an office supply cabinet, and an idea struck. With a handful of pushpins and a pink pencil eraser, he set to work on his creation.

And here it is…

The Eraser Pig
The Eraser Pig
The Eraser Pig was born! Pleased with the results, he made another trip to the cabinet and in no time he had created enough to form two teams for a five-on-five “basketball game.” Curiosity brought a few of the candidates over and the fear of dying from boredom made them stay to watch the “game.” When my brother’s clearance came through, he passed the eraser pigs on to others. For all we know, those pigs may still be making the rounds, bringing smiles and sparking imagination.

Pushpin Placement
Pushpin Placement
If you would like to make one, you will need a pink eraser, and 6 pushpins (4 legs, the tail and snout).

Have you ever created something out of boredom? What did you make? Please share your story.

Happy Year of the Pig & Happy Crafting!

Color Selection 101

Artist's Paint Palette
Choosing colors is one of the most difficult parts of any project. Fortunately the ultimate artist, Mother Nature, has already done most of the work for us. Below are assorted nature photos to inspire your exploration of the infinite possibilities of color.

The Color Wheel
The Color Wheel
A Color Wheel – all the colors of the visible spectrum, that is, visible to the human eye.

Primary Colors
Primary Colors - Parrot
Primary Colors: Red, Blue, & Yellow – base colors found in nature.

Secondary Colors
Secondary Colors-Butterflies
Secondary Colors: Green, Orange, & Purple – are made by mixing two primary colors together.

Black & White
Black & White - Whale
White & Black – produce shades of color from light to dark. Black and white is a classic combo often used in the textile and interior design industries. Turn the ordinary to extraordinary by adding brilliant jewel tone colors, such as sapphire blue, emerald green or ruby red.

Complementary Colors
Complementary Colors: Opposites on the color wheel (red & green; purple & yellow; blue & orange). When used together, they produce the highest contrasts.

Rainbow
Rainbow
All the colors of the spectrum – Red, Orange, Yellow, Green, Blue & Violet – in that exact order can be seen in this rainbow. If you want to create a realistic rainbow effect, be sure to get the color order correct.

Fresh Picked Fruit
Fresh Picked Fruit
Pastel Red, Green, Fuchsia & Orange – These are great spring and summer colors.

Tropical Fish
Tropical Fish
Golden & Reddish Browns with White, set against a Green background – Brown & White are another classic combo, which look great with jewel tones.

Hibiscus Bloom
Hibiscus Bloom
Red, Orange, Yellow & touches of Pink & White – Warm pastels with a dramatic red center attract attention.

Molten Lava
Molten Lava
Black, Orange, & Yellow – These colors remind me of my favorite holiday, Halloween.

Floating Lotus Blossom
Pure White & Yellow offset by Green, Blue & Black – White is such a cool, crisp color in summer, and coordinates with any colors in warm or cool tones.

Field of Tulips
Field of Tulips
Orange, Green, & Yellow contrast with Blue – Pastels come alive with a punch of color.

Peacock Feathers
Peacock Feathers
Blue, Green, Gold, & Black – Exotic & luxurious is the vibe created by these colors. The electric blue set against the black makes a bold statement with the naturally shimmering gold and green.

Cherry Blossoms
Cherry Blossoms
Pink & Blue – In the case of these cherry blossoms, bold colors would be overpowering. Such tiny, delicate blooms call for gentle, soft colors. Is it any wonder these colors are often used for baby nurseries?

Pansies
Pansies
Purple, White & Yellow – The frilled purple petals resemble watercolors, while the yellow centers look like they were hand painted in this striking palette.

Rainbow Lorakeets
Rainbow Lorakeets
It’s hard to believe that one animal could have all the colors of the rainbow, except purple, and yet here it is in two small parrots. If Mother Nature can come with this, imagine what you can do.

Spiral Stained Glass Windows
Blue & Red with Green, Orange, Purple & Yellow accents – The spiral draws your eye toward the center, while the blended colors move you along one frame at a time.

Sunset #1
Sunset - Cool tones
Purple, Yellow, & Blue – Cool colors of evening (blues & purples) provide the dramatic backdrop for the vibrant yellow sun setting at the distant horizon. This palette has a dreamy, relaxing quality.

Sunset #2
Sunset - Warm tones
Red, Yellow, & Orange with touches of Pink & Purple – Blended warm colors have an energetic, motivational effect.

The next time you are looking for some color inspiration for your next project, take a look outside. Mother Nature has provided a feast for the eyes. Don’t be afraid to experiment. You’ll be pleasantly surprised.  To learn more about color, please read “World of Color – Part 1” and “World of Color- Part 2.”

Happy Crafting!

Thank You!

Fireworks
I just wanted to thank all of my followers and readers. Your support is so very much appreciated. We inspire each other to explore the world and express our creativity in new and exciting ways.  All the best to you and your families in 2019!

Happy Crafting!

Creative Holiday Gift Wrapping

Whats in the Box?It’s the night before Christmas, and little feet tiptoe toward the tree for a sneak peek at the presents. We may not have done this, but we thought about it a lot. It’s human nature to wonder -What’s inside the box?

Whether you are celebrating Christmas, Hanukkah, Kwanzaa, etc., you’re going to give gifts to lots of people, and those gifts need to be boxed, bagged, or wrapped in an attractive fashion.

Last Minute Checking All the Details

Colors & PatternsIf your name is Mrs. Claus, you probably don’t need help wrapping gifts.

Santa’s Secret Gift Stash

All Wrapped UpIn fact, Mrs. Claus probably has a gift-giving closet that looks like this one. For the rest of us, there’s still a lot of shopping to be done and presents to be wrapped. Department stores typically offer gift wrap, but it can be pricey. Many retailers have eliminated this service and the gift boxes as well. Shopping malls offer gift wrapping, but the lines can be very long. Fortunately there are lots of solutions to make your gifts look beautiful.

Gift Bags & Boxes

Gift BagsGift bags are probably one of the best inventions of all time. They’re sold just about everywhere, including the food stores, so when you’re running around last minute a gift bag is easily on hand.

Accessorized Cloth Gift Bags

Cloth Gift BagsThese burlap bags are dressed up with the addition of berries and glitzy red ornaments.

Red & White Fabric Gift Bag

Cloth Gift BagThis red and white gift bag has a built-in drawstring.

Fabric Gift Bags with Metallic Polka Dot Patterns

Amazon Gift BagsAmazon provided these festive gift bags, which my family passes back and forth for various occasions all year long. Unfortunately there’s no way of knowing which color you might receive, and some items are wrapped in paper instead of a bag.

Velvet-Lined Metal Box

Metal BoxA metal box is an intriguing way to package a gift.

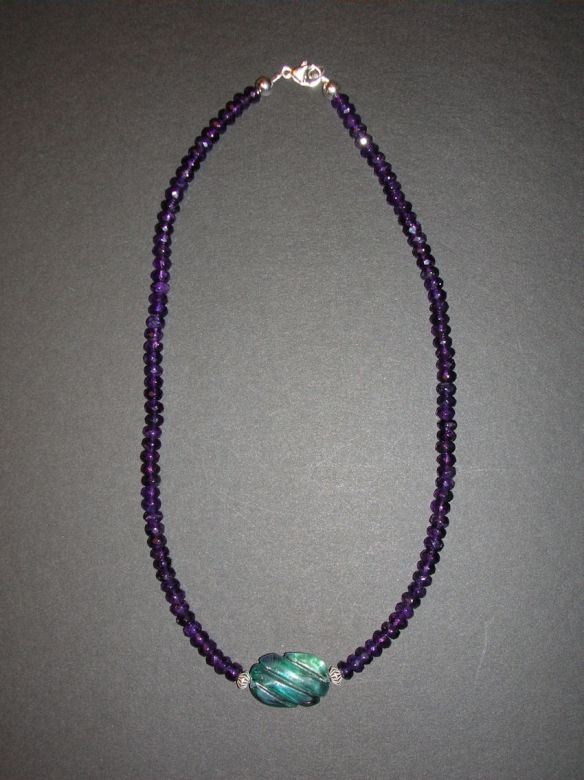
Collectible Porcelain Box

Porcelain BoxPorcelain boxes come in a variety of shapes and colors for every occasion. These are perfect for jewelry or other small items, and can also be used to conceal a cash gift.

Glass Jar Adorned with Silver Heart

Glass JarFor the baker in the family, this fluted glass jar and lid will hold your gift now, and will be perfect for holding baking ingredients in the future. It could also be used as cookie jar.

Bath & Body Gift Basket

Gift BasketGift baskets filled with the recipient’s favorites is always a welcome surprise. You can purchase a roll of colored cellophane wrap or use regular plastic wrap to cover the entire basket, and tie a bow on top.

Gift Box Tower

Stacking Printed BoxesSome stores provide colorfully printed boxes, which are suitable for gifts any time of year, and can be stacked and tied with a pretty ribbon.

Gift Boxes – Lids Wrapped Separately

Wrapped LidsWhen using standard wrapping paper, you can always wrap the lid separately. By doing so, the box can be reused for years to come.

Accessorized Gold Box

Floral StemA floral pine cone stem and some ribbon were all that was needed to complete this package.

Matching Gift Tags

Gift TagsDon’t forget to add a gift tag. Some people save the pictures, from last year’s holiday cards, and use them as gift tags on this year’s presents.

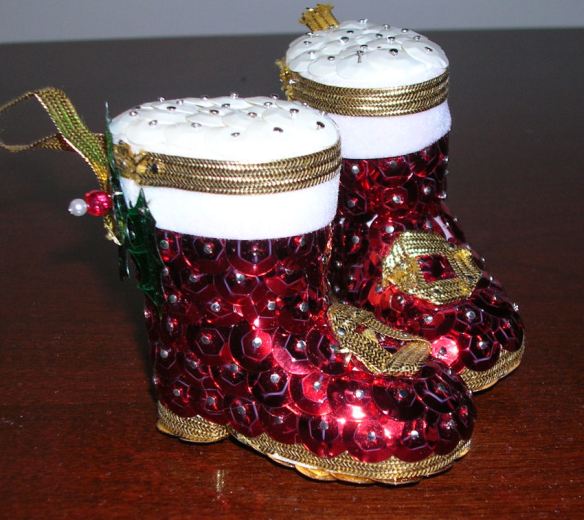
Dress up Gift Wrap with Ornaments

Ornaments
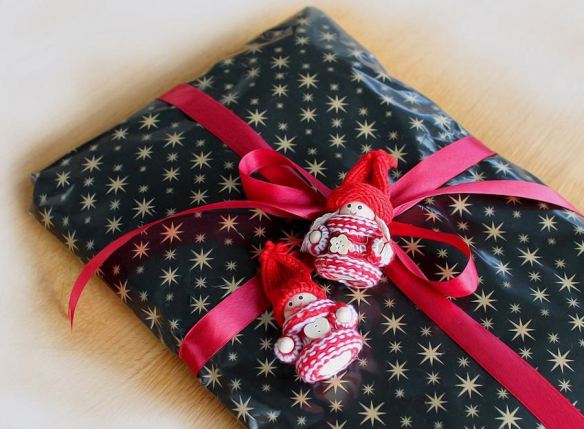
Standard green wrapping paper perks up with the addition of bright red ribbon and two adorable ornaments.

Recycled Paper with Greens from the Backyard

Pine Cone GreensFor an all-natural look, recycled paper can be used, with twine instead of ribbon, some evergreen and a pine cone from your backyard.

Fancy Metallic Paper & Coordinating Ribbon

Silver BowA silver bow makes a statement on this aqua and silver wrapped gift.

Fanciful Paper with a Statement Bow

Big BowA glittering gold bow makes the perfect topper for this dancing reindeer package.

Metallic Paper with a Pom Pom Bow

Specialty BowsA 3-dimensional snowflake has sprung to life from this pretty wrapping paper.

Glittering Paper, Ribbon & Bow

BlingFor a glamorous look, combine sparkling red paper, gold studded ribbon, and a shiny gold bow.

Coordinated Paper & Ribbon

Matching Ribbon & PaperThis perfectly coordinated metallic ribbon and paper is suitable for gifts any time of year.

Pretty Paper with Flower-Shaped Bow

Floral Paper & BowSometimes a really great topper steals the show. A bow like this one will be appreciated for sure, with its petal-like layers in full bloom and wisps of green ribbon leaves peeking out beneath. There’s a very interesting pattern of wildlife, holly sprigs, and guitars intertwined among the curvilinear vines.

As they say, it’s the thought that counts. With a few creative choices, gift wrapping can be a pleasure, instead of a chore.

Happy Holidays & Happy Crafting!

Baking for the Holidays

Cookie Cutters & Dough
As the weather turns colder, my thoughts turn to baking. The scent of home baked cookies wafting through the air is sure to be followed by the thumping footfalls of my family as they bound down the stairs in search of something sweet from the oven. I have to admit I love it too and have sampled more than a few of my own creations.

In addition to satisfying your family, baked goods make great gifts for guests, neighbors, co-workers, and friends. Below are several ideas for inspiration.

Gingerbread Cookies
Gingerbread Cookies
These charming gingerbread cookies are served on an equally adorable pinwheel candy plate. They’re easy to make, or you can buy plain ones and apply your own colorful candy and icing decorations.

Gingerbread Houses
Gingerbread Houses
Everyone loves home baked goods. How about baked goods that require no baking at all (at least on your part)? Gingerbread kits come in a number of varieties, such as cookies, houses, and villages, and include all the necessary candies, icing, and yes the baked gingerbread too. The whole family will enjoy building and eating their creations.

Traditional Christmas Cookies
Decorated Christmas Cookies
Decked out in green, red and white icing, these cookies celebrate Christmas in the sweetest possible way.  If you have a long list of people to bake for, get the whole family involved with the decorating to speed up the process in this fun activity.

Assorted Butter Cookies
Gourmet Butter Cookies
Butter cookies are finger licking good. If you are pressed for time, many bakeries offer ready-made cookie platters to share with your friends and family or give as gifts.

Fancy Cookie Cut Outs
Fancy Jelly Filled Cookie
This elegant cookie looks professionally made, but it’s actually quite easy to make yourself. All you need are two cookie cutters – one large round with scalloped edges, and the second in the shape of a swan or any design you prefer. Layer two large cookies on top of each other, with strawberry or raspberry filling, to make this sandwich cookie. The bottom cookie is solid, while the top cookie has a swan cut out in the center. Shake powdered sugar on top for a beautiful bakery finish.

Iced Snowman Cookies
Snowmen are seasonal favorites. These individually wrapped cookies would make great party favors for your guests. If you have extra, they’re popular items at the school bake sales. Of course that assumes your family doesn’t finish them off first. (lol)

Holiday Cookie & Candy Platter
Homemade cookies & candy go hand in hand. This creative assortment tantalizes the taste buds. Should I have a cookie first or dive into the chocolates? There are plenty of candy mold designs suitable for any occasion, and new flavors in candy melts will please the most adventuresome candy aficionados.

Assorted Homemade Breads
Breads are delicious any time of year. With so many recipes and the ease of baking, anyone can make homemade bread in less than an hour. Crafter Tip: Many types of bread need to be fully cooled, and sometimes refrigerated before slicing. To prevent crumbling, be sure to follow the recipe instructions.

Christmas Petits Fours
Christmas Petit Fours
Petits Fours are the perfect marriage of cake and candy. Fondant icing is actually candy used to cover bite size cubes of yellow, sponge or pound cake. While the fondant is still wet, decorations can be applied using piped icing, or a sprinkling of either candy or nuts. As an added burst of flavor, jelly or butter cream can be spread over the cake prior to applying the fondant.

Snowman Cupcakes
Snowman Cupcakes
These snowman and snowlady cupcakes are almost too cute to eat. The bodies are standard size cupcakes, and the heads are mini cupcakes. Coconut is the perfect substitute for snow. Oreos become top hats for the gentlemen, and piped icing details create all the smiling faces and earmuffs for the ladies.

Hanukkah Donuts
Hanukkah Donuts
It wouldn’t be Hanukkah without deep-fried jelly donuts sprinkled with granulated sugar.

Cranberry Rhubarb Pie
Cranberries play a large part in many holidays. There’s cranberry sauce as a side item with your meal, cranberry garlands and sprigs as decorative touches, and cranberry muffins and pies.

Whether you bake everything from scratch, or supplement your desserts with store-bought items, the holidays are a time of sharing, especially at mealtime. Enjoying the seasonal flavors with loved ones is something we all have in common. Please read “Holiday Food Presentation” for ideas on displaying your culinary creations.

Happy Holidays & Happy Crafting!

Chocolate – How Sweet It Is

I have a confession to make – researching this article made my mouth water, and I realized it should probably contain a warning, so here it is: If you don’t have a craving for chocolate right now, you will by the time you finish reading this post. You might want to have some chocolate on hand before you continue reading. Grab some Hershey’s kisses, or break open a bag of chocolate chips – anything will do – just in case!

Assorted Chocolates
Assorted Chocolates
Chocolate is a worldwide obsession. Everybody has a favorite. The purists prefer their chocolate free of any added ingredients. Some crave nuts, caramel, or coconut with chocolate, but others passionately insist peanut butter and chocolate make the ultimate combo. While the debate continues, candy makers tantalize the chocolate-loving public with their latest creations. It all starts with a seed…

Seeds Growing upon Cacao Trees
Cacao
Turning cacao seeds into the delicious chocolate treats, we have come to adore, is time consuming. For the DIY candy makers, manufacturers have simplified the process by creating small chocolate wafers called candy melts, which are available in milk chocolate, dark chocolate, white chocolate, and assorted flavors, such as peppermint and strawberry.

Milk Chocolate Candy Melts

Melted Milk Chocolate
Chocolate is melted in a double boiler. When it reaches a smooth, creamy consistency, it can be poured into molds similar to the one shown below.

Milk Chocolate Hearts
After refrigeration, the chocolates are unmolded and ready to eat. The solid milk chocolate hearts in the above photo are the easiest, beginner-level of chocolate candy making.

Assorted Gourmet Chocolates
With practice and a little creativity, you can graduate to the next level.

Chocolate Truffles
Chocolate Truffles
Do you have a gourmet sweet tooth? Chocolatiers, such as Lindt, and Godiva, are excellent choices, but can be expensive. Making these decadent truffles takes a little more effort, but it’s still an easy process. Instead of filling the mold all at once, it is done in layers. The first layer forms the outer chocolate shell. Coat the mold with chocolate. Next the filling is added. Popular favorites are hazelnuts, butter cream, peanut butter, caramels, chocolate liqueurs and cream fillings. A piping bag can be used to make filling easier. Refrigerate the mold to allow the filling and chocolate to solidify. The last step is adding another layer of chocolate to fill any remaining voids and seal the top of the mold. Refrigerate and carefully un-mold. Your candy making skills will be the envy of all your friends and family.

If gourmet chocolate isn’t your style, there are simpler options…

Chocolate & Vanilla Fudge

Assorted Chocolate Barks

Crispy Chocolate Caramel Bar
Have you ever eaten a 100Grand candy bar? It’s a delicious combination of crispy chocolate with a gooey caramel center. Making your own is simple: Melt milk chocolate wafers and stir in Rice Krispies. Spread half the mixture in an 8×8 pan. Pour caramel sauce over the top, and then cover with the remaining chocolate mixture. Refrigerate to harden the chocolate and cut into bars. Don’t be surprised if the pan magically empties.

Chocolate Covered Cookie

Chocolate Covered Marshmallows
Chocolate Marshmallow

Chocolate Covered Cake Pops
Undecided whether to have chocolate or cake? Have both with chocolate cake pops.

Chocolate Covered Apples
If soft, gooey, caramel and decadent chocolate were people, they would be best friends. For gourmet apples, dip fruit in caramel first, followed by chocolate, and roll in sprinkles, crushed nuts, or anything else your taste buds desire.

Chocolate Caramel Popcorn
What more do you need on movie night?

Hot Chocolate & Red Velvet Cake
Perhaps beverages are more to your liking? There’s no need to wait for cold weather. Crank up the air conditioner, we’re having hot chocolate!

Chocolate Fudge Pie
Chocolate Fudge Pie

Chocolate Mousse
Chocolate Mousse
Who could resist the rich, creamy taste of chocolate mousse?

Brownie a la Mode
Brownie a la Mode

Solid Chocolate Cell Phone
No phone plan is needed here. Hold all my calls! This is going to take a while.

Happy Crafting!!

Designing with Mosaic Tile

Multicolor Tile Wall
They say “Good things come in small packages,” and mosaic tiles are perfect examples. So many options and so little time – Deciding where to begin is the biggest challenge. Mosaics are so versatile for use in every day items, such as tabletops, picture frames, flooring, and artwork. The process is fairly straightforward, and no specialized skills are required. Below are a few ideas for inspiration:

Choose Your Design:

Geometric Mosaic
Geometric Mosaic

Abstract Mosaic Floor
Multi Color Floor

Choose Your Mosaic Material & Colors:

Ceramic Mosaic Salamander
Mosaic Lizard

River Rock Mosaic
River Rock
Many types of mosaic tiles are available in pre-cut sheets to make installation a breeze.

Glass Mosaic Tray
Glass Mosaic Tray
Crafter Tips: To cut costs, some manufacturers make clear glass tiles with solid color or patterned foil backings. The savings are passed onto the consumer – the beauty of vibrantly colored glass without the expense. When using transparent glass tiles, be sure to use white mortar to avoid an unwanted color change.  Coordinate grout color with design.

Apply Mortar Over Strong Substrate:
Wood or any clean smooth surface will do. Using your design as a guide, press the mosaic tiles firmly into the mortar and allow drying time. If required, apply a sealant per manufacturer’s instructions. Crafter Tip: You might want to wear disposable gloves while working with mortar. A friend had gray hands and fingernails for weeks after completing a project. The mortar itself washed off, but the pigments had real staying power.

Blue Glass Mosaic Table
Glass Mosaic Table

Tropical Glass Mosaic Table
Glass Mosaic Table

Apply Grout:

Glass & Beaded Mosaic
Glass Mosaic Geometric
Crafter Tip: The color of your grout will affect the color of the mosaics. Consider your color scheme carefully before choosing the grout.

Challenge Yourself:

Complex Geometric
Geometric Fans

Floral Mosaic Mural
Mosaic Roses

Mosaic Water Fountain
Water Fountain

Mosaic Sun
Sun

Cinderella & Her Fairy Godmother
Cinderellas Castle

Mosaic Horse
Horse Mirror Tiles
World-renowned glass artist, Dale Chihuly, designed this beautiful mirror tiled statue. Thousands of mosaic tiles follow the muscular contours of the horse’s body, complicating an already challenging project, with stunning results.

Happy Crafting!

Crafter of the Month – June 2018

Crafter of the Month
Our June Crafter of the Month is Sally, from Cherry Hill, NJ. Her eclectic mix of interests revolves around two lifelong passions: gardening and animals. Tending her flower garden and feeding local wildlife requires daily attention. Sally takes the same approach with her crafting, as she lovingly nurtures each project to completion. Below is a small sampling of her work.

Ceramic Pumpkins
Ceramic Pumpkins
Ceramics
One of the best things about autumn is the availability of pumpkins. This cute pair of ceramic pumpkins looks beautiful in any season. The orange paint was applied following the contours of the outer shells. Darker ridges add depth and dimension. The interiors have been painted yellow with an additional clear glaze to make them food safe. Crafter Tip: The pumpkin stems were coated with a specialty paint, which blends green and brown colors together during the firing process. No two are exactly alike and it produces a more realistic appearance.

Valley Forge Memorial Arch
Vally Forge Arch
Photography
This beautiful arch, located in Valley Forge National Historical Park in Pennsylvania, is a memorial to General George Washington and the Continental Army. Taking this photo at an angle adds visual interest, and beautifully showcases the carved stonework and massive structure of this architectural icon. The cool, light gray stone sharply contrasts with the robin’s egg blue sky.

Amethyst & Fluorite Necklace
Beaded Jewelry
Ever since the first precious gems were discovered, people have crafted jewelry to showcase their finds. Wearing beautiful gemstones against your skin is such a luxurious, decadent experience. This faceted, deep purple amethyst necklace has a carved fluorite center stone and sterling silver accents. Crafter Tips: Genuine gemstone beads are available in many varieties, shapes, and colors at a fraction of the cost of cut gemstones. Be sure to purchase gemstones from reputable sources, such as Fire Mountain Gems.

Christmas Boots Ornaments
DIY Kits
If you haven’t visited a craft store recently, you’ll be amazed at the selection of DIY kits to make anything from stepping stones and suncatchers to pillows and toys. This is a great opportunity to do a creative project with the convenience of having all the necessary supplies in one box, and the simplicity of easy to follow instructions for adults and kids of all ages. This Christmas ornament kit included all the sequins, straight pins, and ribbons needed to make two boots. Crafter Tip: Before selecting a project to make with your kids, be sure to check the recommended ages – kits often include small parts and pieces.

Jaguar Needlepoint
Jaguar Needlepoint
Needlepoint
The gaze of this predator meets the viewer eye to eye. Large paws hint at superior physical strength and agility. In the blink of an eye, he could disappear into the jungle, blending perfectly among the foliage with his spotted fur coat. Intricate details in this needlepoint were created using a single style stitch, which relies upon color, light and shadow to define the subject. The dark stained, distressed wood frame coordinates perfectly with the abstract jungle foliage. Crafter Tip: For best results, needlepoint should be professionally blocked and framed.

Footprints Matted Photo
Semi-Custom Picture Framing
During childhood, some of our best friends are pets. Through every adventure, real or imagined, your faithful companion is always at your side. This adorable photo has a very special customized two-tone double matt. The artist traced her dog’s foot and then transferred it onto the tan matt board. Each print was cut out using an Exacto knife, revealing the dark brown layer beneath, creating the footprint pattern. Crafter Tip: For maximum impact, use two high-contrast matt board colors.

Happy Crafting!