Dashing through the Snow

Santa's Sleigh

“Dashing through the Snow” calls to mind sleigh rides and Santa Claus on his gift giving journey.  With a wooden sleigh and a few accessories, you can create a wonderful holiday centerpiece.  Before we begin, let’s look at color schemes and designs of several sleighs to get your creative ideas flowing: 

Antique Sleigh
Antique Sleigh

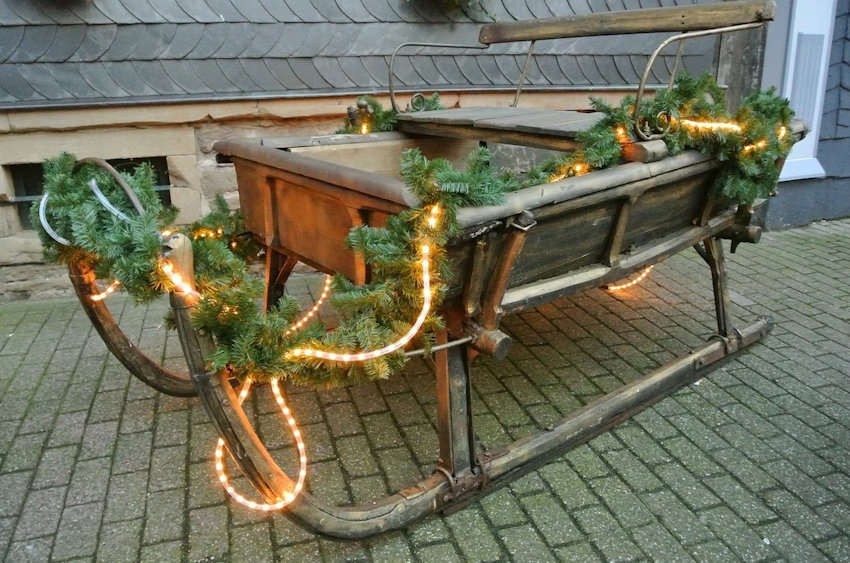
Although this sleigh needs some love, wood in its natural state is attractive.  With a little polish, the brass runners will shine again.  The lights and evergreen garland are great seasonal details. 

Stained Wood Sleigh
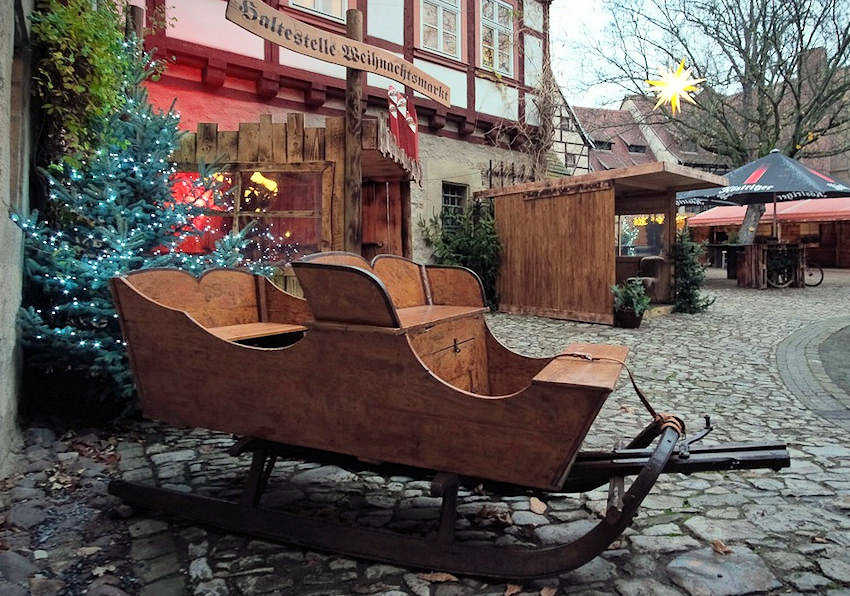
Brown Wood Sleigh

The beauty of natural wood grain may not require color.  A clear sealant coat helps preserve wood for years to come.  Wood stain is optional. 

Green, Gold & White Sleigh

Green & Gold Sleigh

Green and gold are nice alternatives to the standard red and green Christmas colors. 

One Horse Open Sleigh
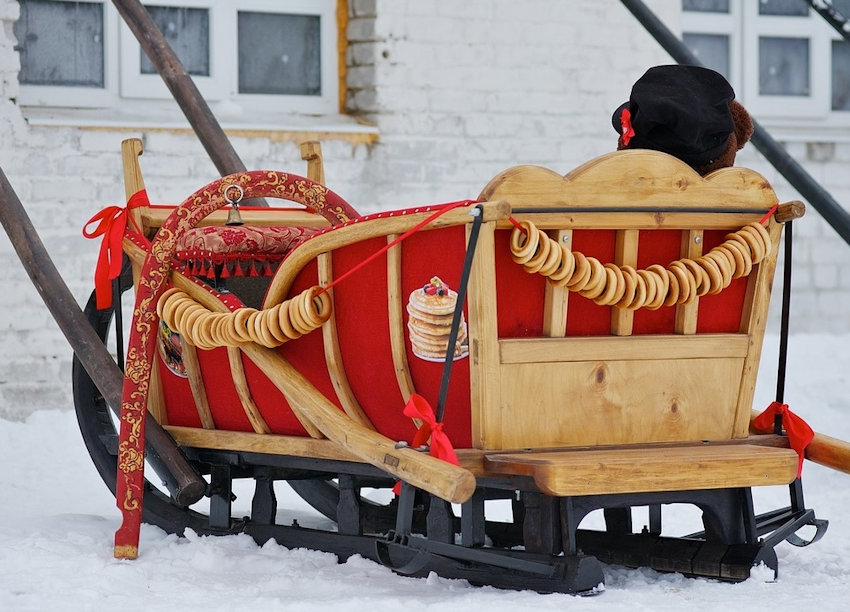
Natural Wood & Red Sleigh

A clear finish protects the natural wood color, while the open sides provide decorative opportunities for colorful pillows and blankets to keep riders warm on a cold winter day. 

Formula 1 Sleigh?
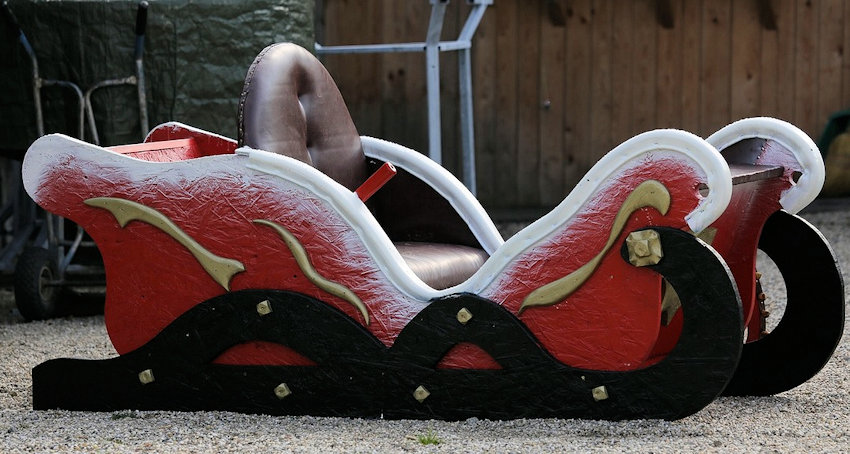
Red & White Sleigh

If Ferrari built sleighs, this would be the one.  This sleek aerodynamic design would allow Santa Claus to complete his rounds in half the time. 

Red & Gold Sleigh

Red & Gold Sleigh

The brilliant red and shiny gold trim are popular choices for Santa’s sleigh.

Red & Gold Sleigh with Lights

Red & Gold Sleigh with Lights

Dazzling string lights create a magical ambiance, day or night. 

How to Paint a Wooden Sleigh:

Unpainted Sleigh

Raw Wood Sleigh

There are many wooden sleighs available through craft stores or online. 

Supplies

Paints

Supplies:
Wooden Sleigh (10-1/2” high x 14” long x 6” wide)
Acrylic Paints – red, black, metallic gold, & white
1) Bottle fabric paint: white
Paintbrushes

Sleigh Painted Red
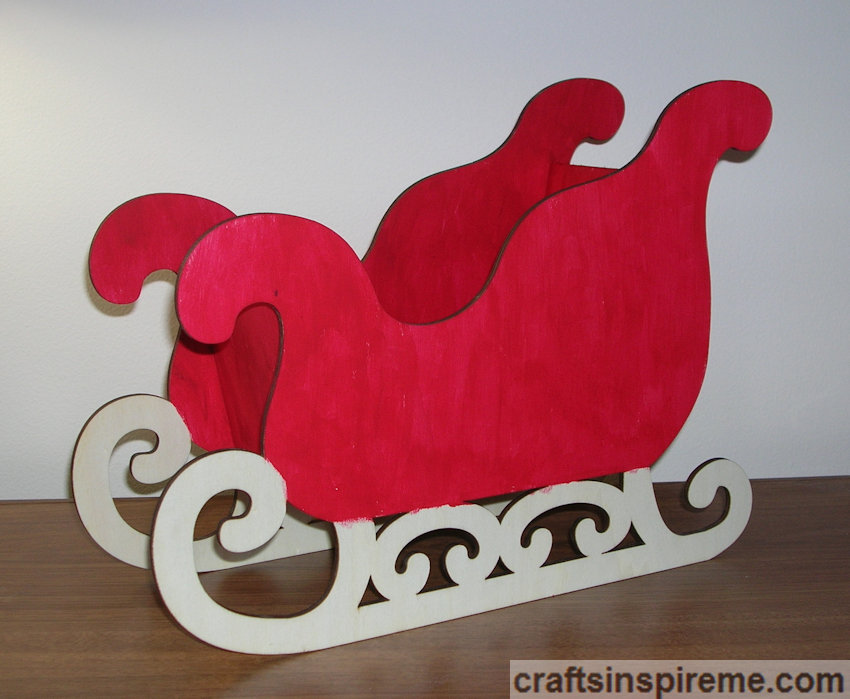
Sleigh Painted Red

Paint the sleigh with red acrylic paint.  It may take a couple coats to ensure smooth, even color. 

Black Painted Rails

Sleigh with Painted Rails

Paint the rails black on both sides and all edges. 

Painted Snow & Gold Trim

Sleigh with White Details

Draw snowflakes on all four sides and paint each with white acrylic paint.  To enhance the designs, go over each snowflake with white dimensional fabric paint.  Paint the edges of the sleigh with metallic gold paint.  This will most likely require two coats. 

This completes the sleigh.  Now it is time to think about making it the focal point of a new centerpiece.  Your next decision is: Who will pull the sleigh? 

Dog Sledding

Dog Sled

Dog sledding teams compete every year in an Alaskan race called the Iditarod Trail Sled Dog Race. 

Horse Drawn Sleigh
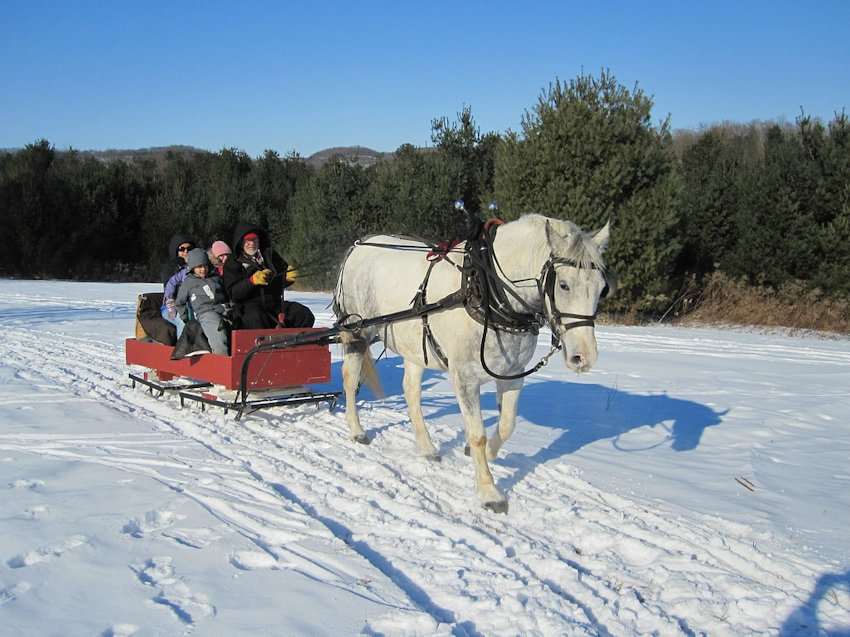
Horse Drawn Sleigh

Riding in a horse drawn sleigh has been a tradition for centuries.  In warmer seasons the sleighs are swapped out with carriages for year-round enjoyment. 

Reindeer Drawn Sleigh

Reindeer Drawn Sleigh

Santa isn’t the only one using reindeer to guide his sleigh. 

A perfect 10 on the Cuteness Scale

Yorkie Sled

Holding the reins securely in his paws, this adorable yorkie steers a course straight into the hearts of viewers in this moose drawn sleigh. 

With your selections in mind, it is time to complete this project.  There are no wrong answers.  You may already have everything you need.

Christmas Sleigh Centerpiece

Finished Centerpiece

I chose a pig to pull the sleigh.  His hat is a floral pick, without the stick.  Fabric ribbon serves as reins, and I made a collar with a few jingle bells.  Tuck one end of the reins into the collar, and the other is held by a squirrel, wearing a red crocheted hat. 

Christmas Sleigh Centerpiece

Finished Centerpiece

A floral garland fills the sleigh with a harvest of red berries and green leaves.  It looks like this cute little squirrel is stocking up for the winter.  A male cardinal hitches a ride on the sleigh.  All the red accents unify this design, while the pig provides a bit of whimsy. 

Who will pull your sleigh and who will ride?  Please let me know in the comments. 

Thanks for Reading & Happy Crafting!

Abracadabra – Harry & Hermione’s Magic Wands

Hermione and Harry never go anywhere without their magic wands. 

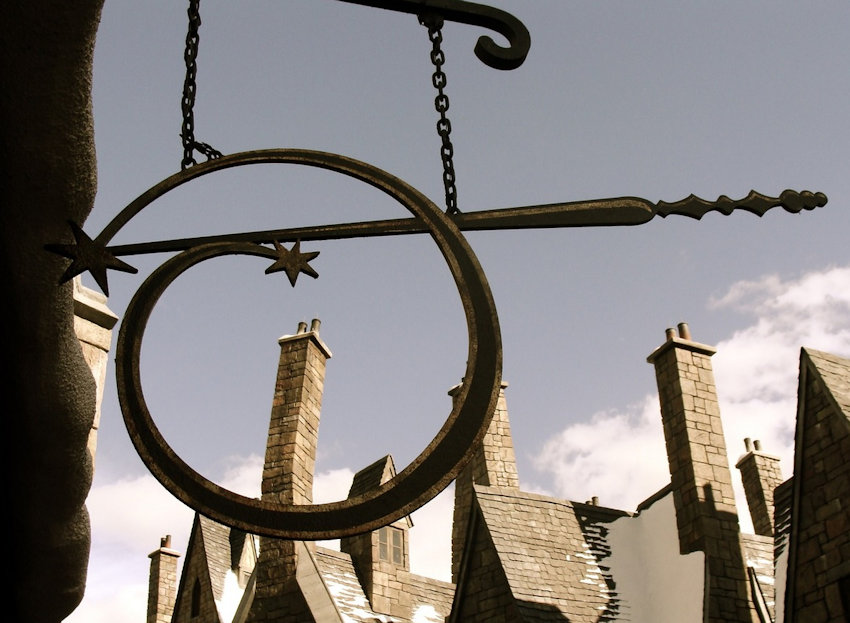
Logo/Sign at Ollivander’s Wand Store, Universal Studios

Every Hogwarts’ wizard goes to Ollivander’s to choose his or her magic wand. 

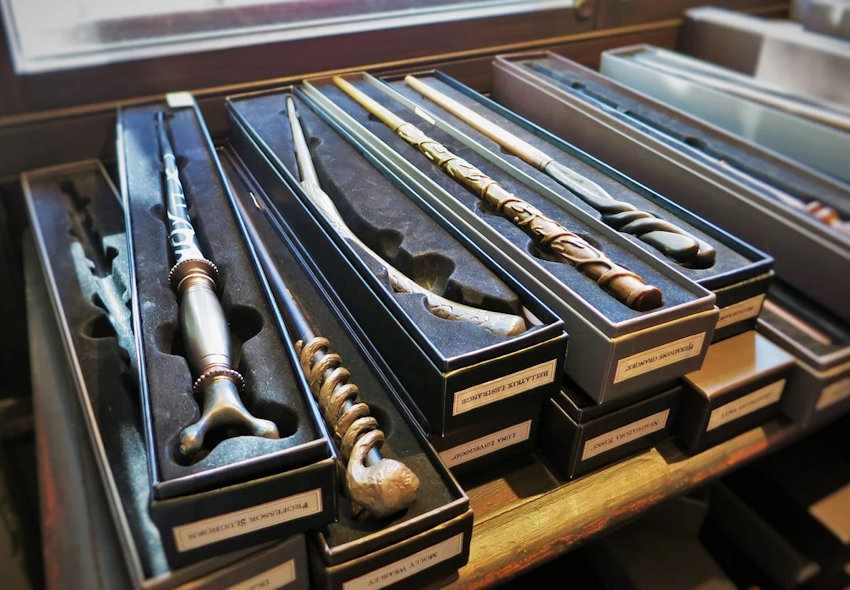
Magic Wands at Ollivander’s Wand Store

While doing research, I was surprised to see that many of the wands in the Harry Potter series were rather lackluster.  I expected wizards to have exquisite, highly personalized wands to express their personalities as well as their power. 

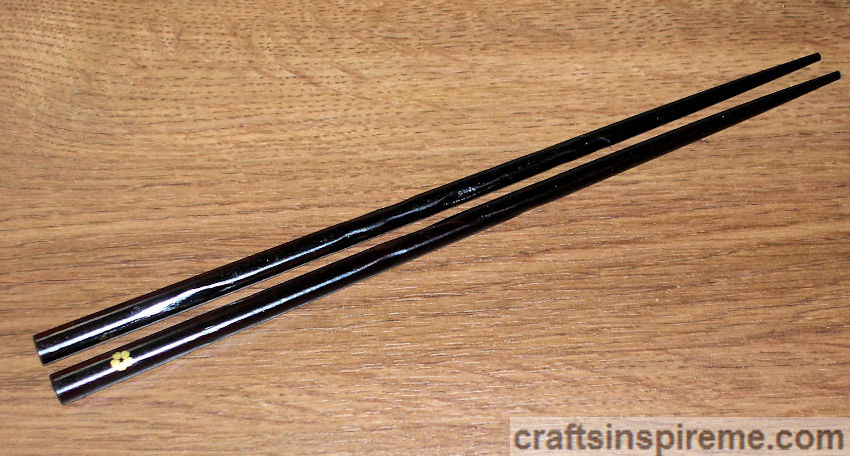
Wooden Chopsticks

For this project, we will transform wooden chopsticks into magic wands for Hermione Grainger and Harry Potter.  Use these techniques to create a wand for any character and add whatever embellishments feel right to you. 

How to Make Hermione’s Magic Wand:

Inspiration

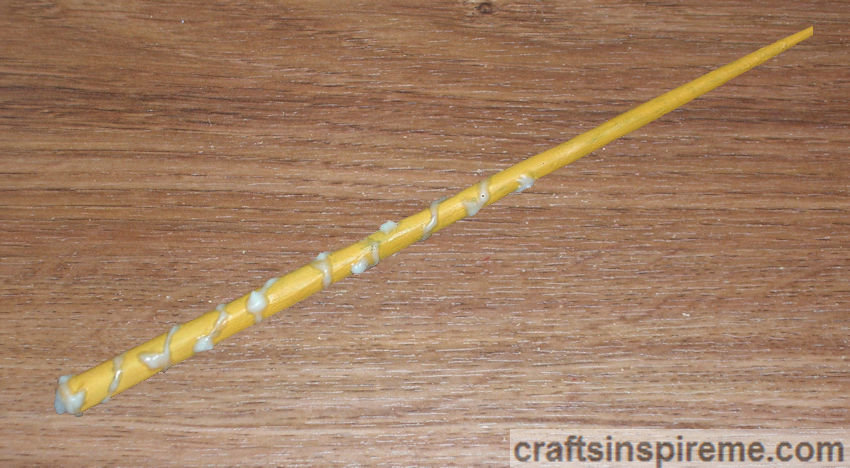
Hermione’s wand has a fairly simple design, consisting of English ivy wrapped around a monotone magic wand. 

Supplies

Supplies:
Wooden Chopstick (9” long x 3/8” thick)
Acrylic Paint: yellow ochre
Bottle fabric paint: glow-in-the-dark white
Paintbrushes
Clear Spray Paint: Matte Finish
Optional 1) Faceted rhinestone & Acrylic Paint: metallic peridot.  See “Advanced Painting” below.

Painting Chopstick

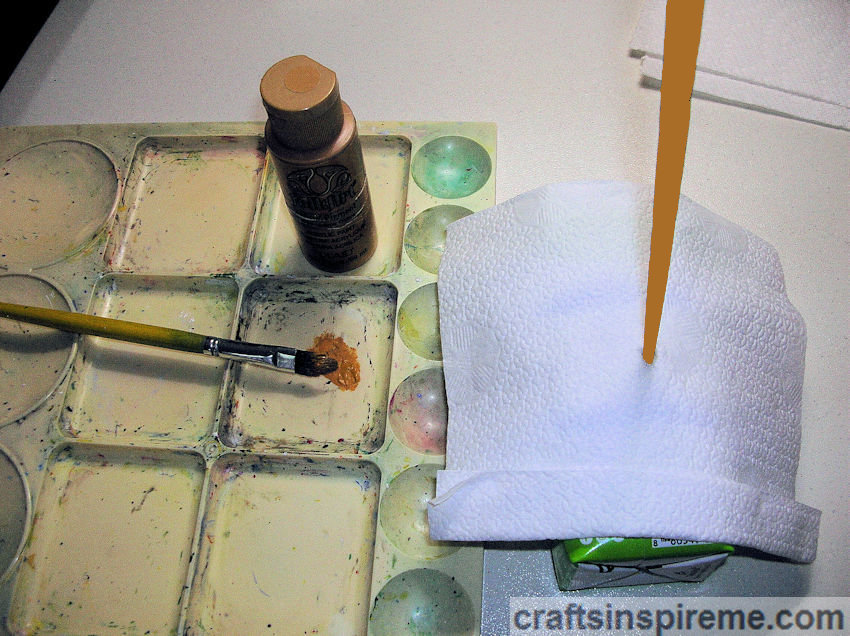
Step 1 – If the chopsticks are lacquer-coated, you may need to prime the surface first, and then apply two coats of acrylic paint.  Puncture a hole in a box to hold the wand upright for drying, but don’t forget to paint the tip later.  To prevent fingerprints and scratches, handle with a tissue. 

Painting Vines & Leaves

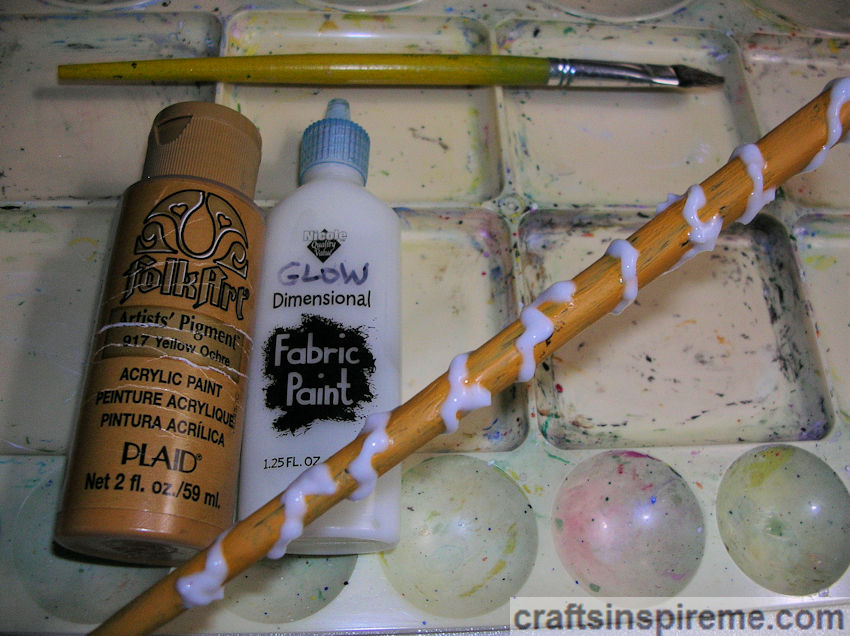
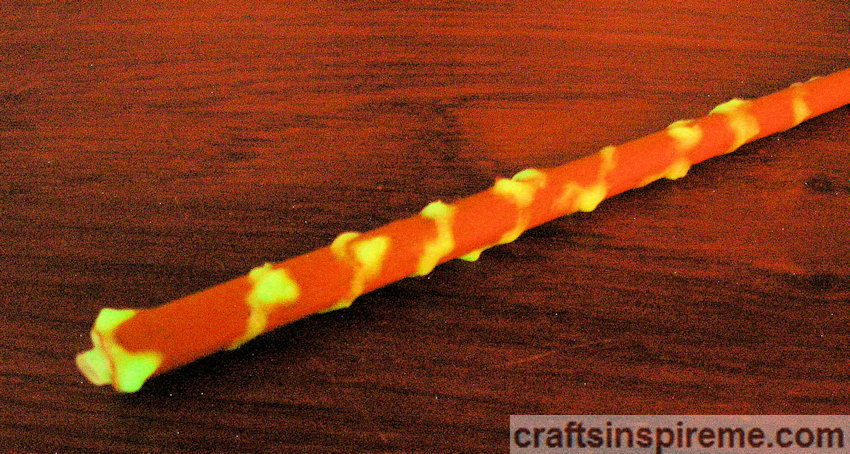
Step 2 – Starting at the top, use three-dimensional paint to create an ivy vine wrapping around the wand.  Add an interesting twist by using glow in the dark white paint, but if you prefer, you can use plain white.  If you want to be true to Hermione’s original wand design, wait until the 3D paint dries, and then paint the vines with yellow ochre to match the rest of the wand. 

Hermione’s Finished Wand

To seal the paints, spray the wand with clear spray paint.  At this point, the wand is complete.  If you have been following this blog for a while, you know there is usually an enhanced version, which is shown below in the “Advanced Painting” section. 

How to Make Harry’s Magic Wand:

Inspiration

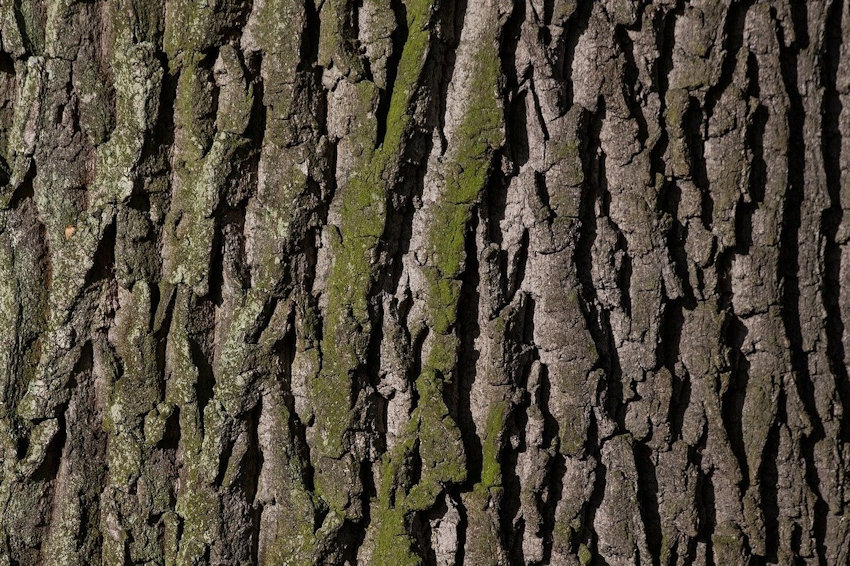
Harry’s wand has a textured, two-tone design.  Rough “tree bark” at the top serves as a handgrip, and the rest is smooth wood. 

Supplies

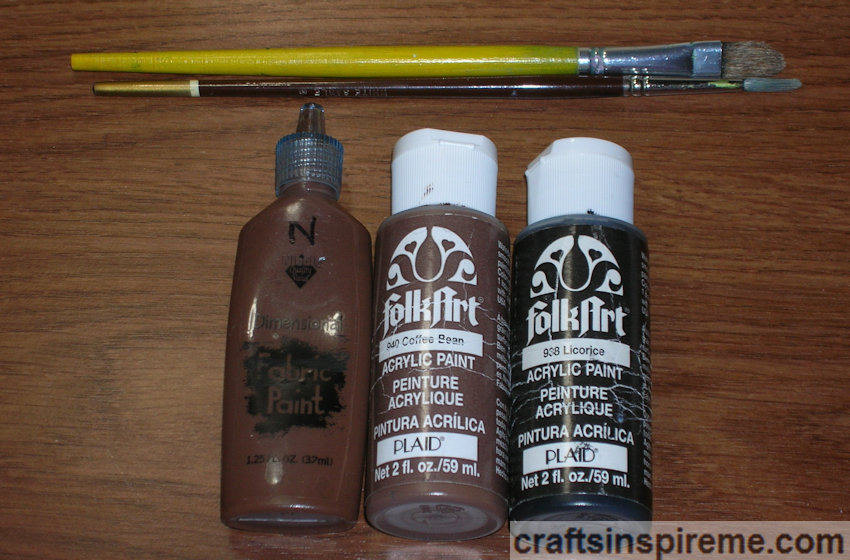
Supplies:
Wooden Chopstick (9” long x 3/8” thick)
Acrylic Paint – licorice black, coffee bean brown
1) Bottle fabric paint – brown
Paintbrushes
Clear Spray Paint: Matte Finish
Optional – Glue gun & 1) Faceted rhinestone. See “Advanced Painting” below.

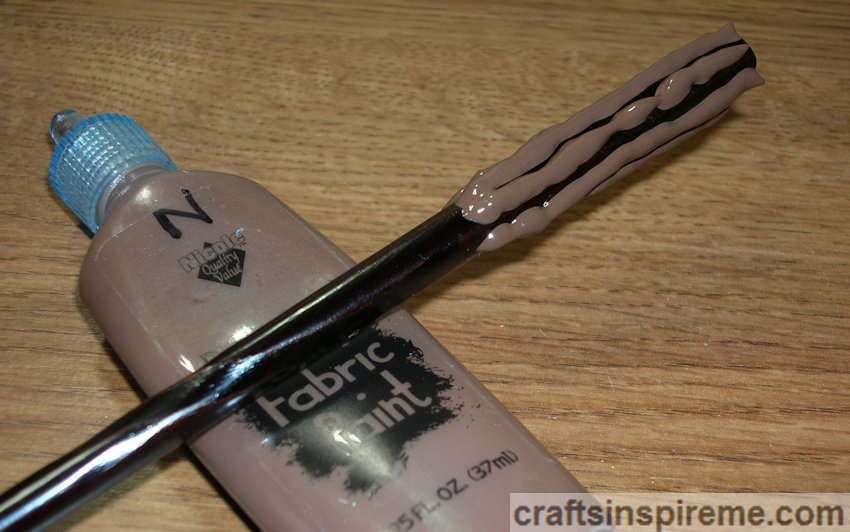
Creating Texture

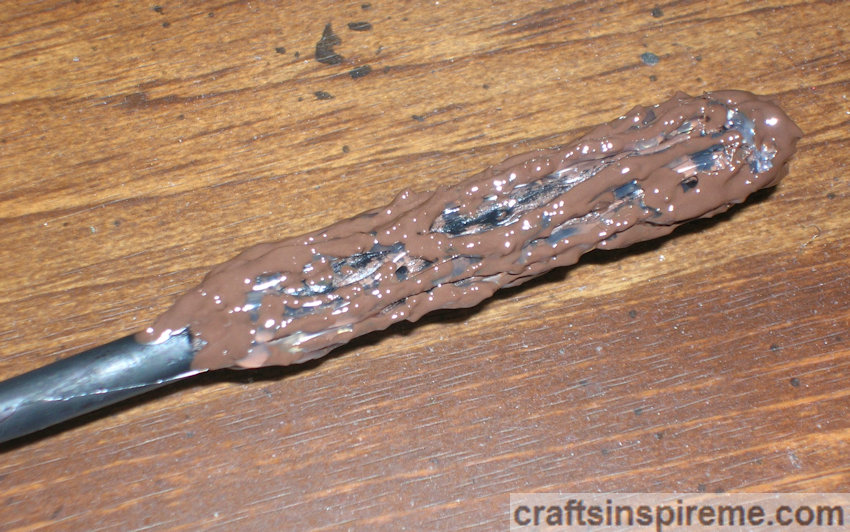
Step 1 – Using three-dimensional paint, draw long lines at top to create the basic texture as shown above. 

Adding More Texture

Step 2 – Fill in with more texture, to create a rough tree bark appearance, including pointed edges across the top of the wand.  Allow paint to dry overnight. 

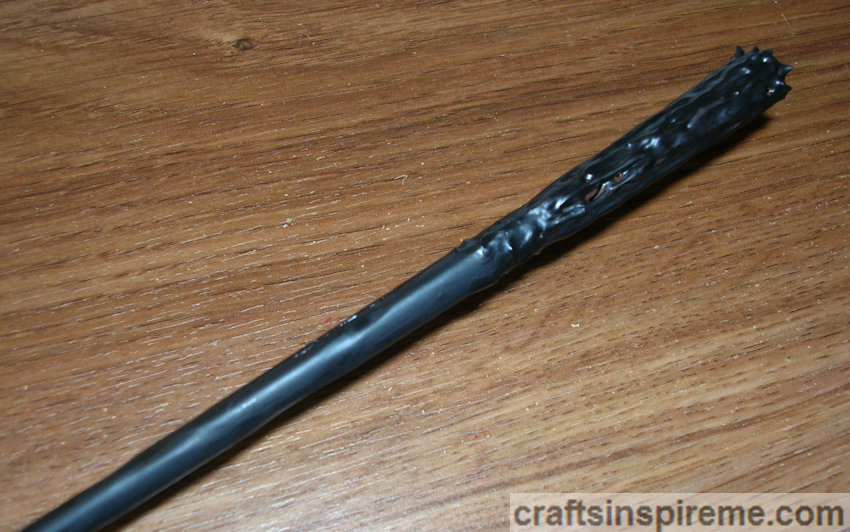
Painting Black

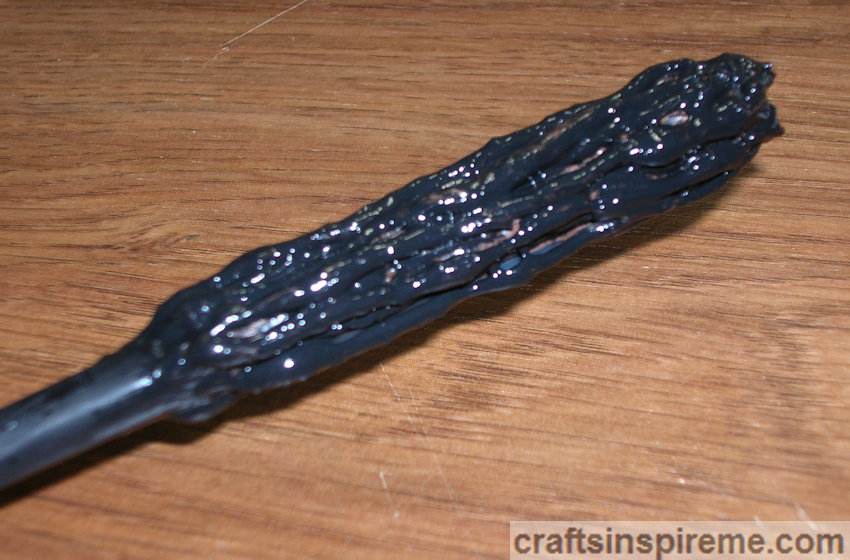
Step 3 – Paint the entire wand with black acrylic.

Dry Brushing Brown

Step 4 – Dry brush the rough bark with brown acrylic paint, allowing the black recessed areas to show through, as they do with real bark.  Seal the paints with clear spray paint. 

Harry & Hermione’s Finished Wands

This photo shows the two completed wands side by side.  I wanted to take this project to the next level by creating more texture on Harry’s wand and more visual interest for Hermione’s. 

Advanced Painting:

Hermione’s Wand – Defining the Leaves

Step 1 – Make the leaves more prominent by applying a thicker coat of the same three-dimensional glow in the dark paint on each individual leaf. 

Close-Up Vines & Rhinestone

Step 2 – Create a glowing cap on the end of the wand and place a rhinestone in the center as shown.  In case you didn’t know, fabric paint can be used in place of glue. 

Glowing Wand

Step 3 – After being exposed to light, the vines, and leaves glow in the dark.  You can test the glow by holding the wand under a bright light for several seconds and then switch off the lamp.  Adjust the paint as needed. 

Accent Painting the Leaves

Step 4 – Something still needed to be added, but I didn’t know what it was.  Finally, I decided to apply a soft pastel green to the leaves, providing color as well as a subtle shimmer.  Seal paints with clear spray paint.  By day or night, this wand has stylish and surprisingly powerful. 

Harry’s Wand – Creating Thicker Tree Bark

Step 1 – Using a glue gun, add long lines for more texture upon the handgrip. 

Roughening the Texture

Step 2 – Use brown three-dimensional paint to roughen up the smooth lines of glue, to resemble tree bark more closely. 

Painting Black

Step 3 – Paint the entire wand with black acrylic.

Dry Brushing Brown

Step 4 – Dry brush only the rough bark handle with brown acrylic paint, allowing the black recessed areas to show through, as they do with real bark.  Use glow in the dark fabric paint to attach a rhinestone to the end of the wand as shown above.  Seal paints with clear spray paint. 

Harry’s Finished Wand

The thickened “tree bark” looks better, and the sleek black wand is the perfect choice for a powerful wizard. 

Harry & Hermione’s Finished Wands

These two wands work well together, just like Harry and Hermione. 

Close-Up – Both Finished Wands

I hope you have found a few inspirational ideas to create your own wands.  Do you have a favorite wizard, or a favorite magical literary character?  What kind of magic wand do you think that character would choose?  Please let me know in the comments section.  Enjoy the creative process, and let your ideas run wild. 

For more Harry Potter crafts, please check out this post: “Harry Potter’s Magical Creatures.”

Thanks for Reading & Happy Crafting!
The Bunny Hop – Painted Wooden Rabbit

Before we begin this Easter-themed project, we’ll need a little inspiration. Let’s take a look at a few of Mother Nature’s color scheme choices in the adorable bunny photos below:

Tan Baby Bunny
Baby bunnies are just so cute! That’s a lot of love wrapped in a soft tan and cream coat.

Gray & White Bunny
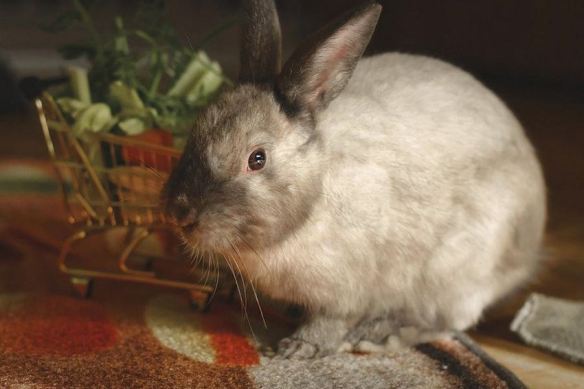
This stylish rabbit is modeling the very popular gray and white color combo.

Tan & Brown Bunny
Wild rabbits often have a blended fur coat of brown, tan and black to help camouflage them from predators. The one pictured above looks perfectly content to nap where he is without a care in the world.

Black & White Bunny
Last but not least is this precious black and white baby. His delicate features, including his button nose, inner ears and the outline of his eyes, are a soft pink.

Now that we’ve seen a few ideas, let’s get started painting!

How to Paint a Wooden Rabbit:

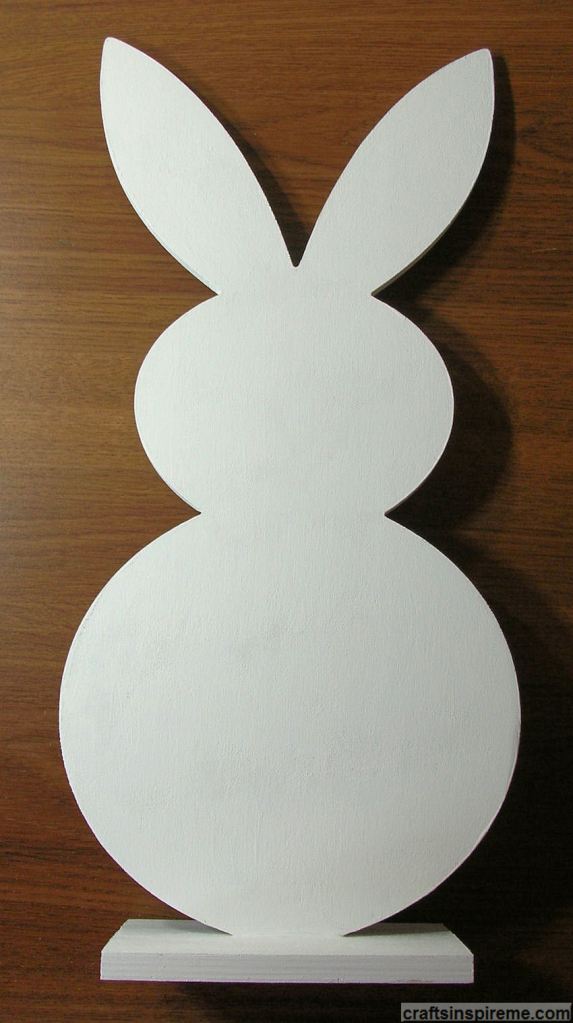
Raw Wood Bunny
Thick wood has been cut out in the shape of a rabbit and has the advantage of strong, rectangular base. Both sides and all the edges will need to be painted. Due to the raw nature of the wood, it may require a little sanding, especially along the edges.

Bunny Supplies
Supplies:
Wooden Rabbit (17” high x 8” wide x 1/4” thick) (Base is 5-3/4” wide x 4”deep)
Acrylic Paints – brown, black, gray, tan, green & white
Fan paintbrush, small detail paintbrush and thicker brush for base coats
Sandpaper
Optional: Fabric paints – black, brown, white (Refer to Advanced section below)

Painted White Bunny
Step 1 – Paint the rabbit with 2) coats of white acrylic paint, including both sides and all edges.

Painted Back Bunny
Step 2 – Start painting the fur on the back. Experiment with colors and brush techniques. I poured black, brown and gray paint onto an artist’s palette. Dip a fan brush into each color and then apply to wood surface to create a fur-like effect. Because the paints have not been mixed, each new brush stroke will have a slightly different combination of colors, just like real fur. Repeat thus process until the back is completed. The white tail will be added later.

Layout Details Front Bunny
Step 3 – On the front, draw the face (eyes, eyelids, eyelashes, muzzle with nose, mouth, whiskers), ears and feet with a pencil. Paint the inside of the ears and eyelids tan.

Painted Front Bunny
Step 4 – Create the fur by repeating the procedures in Step 2. Be sure to make long brush strokes along the edges of the ears to resemble thick fur. You can leave the eyes, muzzle, and feet white for now. These areas will be detailed in the next step.

Bunny Closeup1
Step 5 – Paint the facial details. I painted the eyes, eyelashes, nose, mouth and whiskers black.

Bunny Closeup 2
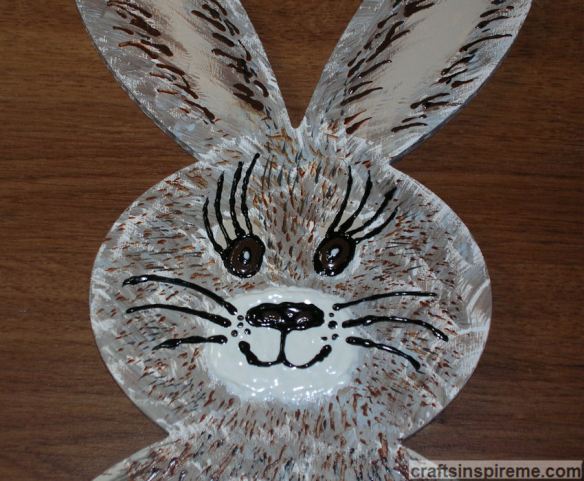
Step 5A – This is an alternate version for the eyes and nose. A brown iris has been added to each eye, the eyelashes have been extended, and brown nostrils define the nose. For a more lively expression, don’t forget to put a dot of white in the pupil of each eye.

Finished Bunny
Step 6 – The finished rabbit has white feet with black lines to define the toes. The base was painted with two coats of green.

Finished Bunny Tail
Step 7 – Paint a big, white fluffy tail on the back.

At this point your project is finished and ready to display. If you would like to take this design to the next level, please follow the steps below.

Advanced Rabbit in 3D
Followers of this blog know how much I love creating 3D details on wood projects using fabric paints. If you appreciate three-dimensional effects, this section is for you! Unless otherwise noted, all paints listed below are dimensional fabric paints.

3D Bunny Face
Start by painting 2 thick coats of white fabric paint on the muzzle, and brown paint for the eyes.

3D Bunny Feet
Next paint the feet with 2 thick coats of white paint.

3D Face Details
To complete the face, use black paint for the nose, mouth, whiskers, eyelashes, and the outline around the eyes. Add a black pupil in each eye. Paint a white dot in the center of each pupil, and use brown paint in each nostril.

3D Body Details
Add long brown fur along the inner edges of both ears and define the two front legs using the same paint. Add the black lines to define the toes on each foot.

Detail Facial Fur
Using short strokes, bring the black and brown fur mixture up into the face.

Detail Legs and Feet
Layer additional black and brown fur to define the body, and add the two back feet.

Finished 3D Bunny Front
Because the rear legs are in the background, keep the paint lighter by using tiny strokes with just the brown paint in an upward direction. If you want additional fur texture, you could use acrylic paints and a brush to thicken the fur coat with highlights and lowlights.

Finished 3D Bunny Back
The last step is painting the tail with 3 coats of white fabric paint.

Mission accomplished! This cute little guy is ready to be displayed in your home, bringing joy to your life for years to come.

Happy Easter and Happy Crafting!

Gifts from the Heart

Frog with Heart
As Valentine’s Day approaches, it’s a nice reminder to show appreciation for those who share our lives, including family, friends, and yes even our pets.  It doesn’t have to cost a lot.  In fact, you may already have what you need for the perfect gift.   Here are a few creative ideas to get you started:

Sweets for the Sweet
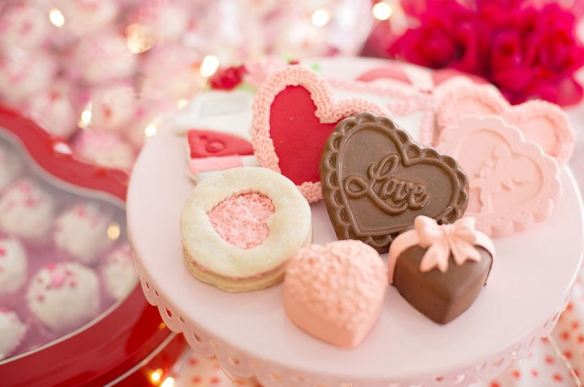
Homemade Candy & Cookies
Homemade cookies and candy will satisfy any sweet tooth.

Nature Lover
Fruit Hearts
This edible art is delicious & nutritious.

Heart of the Vineyard
Wine Corks Heart
Connoisseurs will appreciate shared memories celebrated with a nice glass of wine.

The Personal Touch
Clay Heart Vase
Gifts made by hand are always the best way to show your love.

Two Hearts Beat as One
Metal & Wood Hearts
Whether you prefer working with wood or metal, this universal symbol of love says it all.

Love is in the Details
Mosaic Heart
Glass, tile, and stones can be used to create mosaic jewelry, tabletops, wall art, etc.

A Rose by Any Other Name
Paper Roses
As timeless symbols of love, these paper roses will forever be in bloom.

Big Bear Hugs
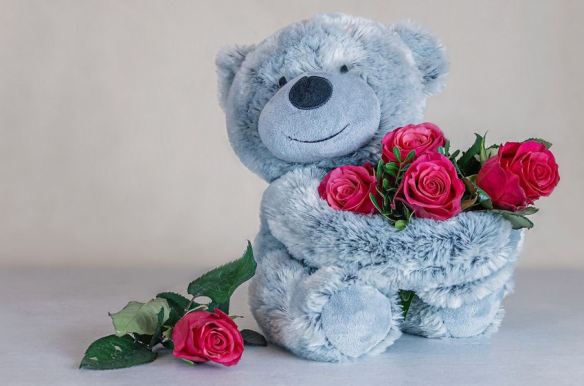
Teddy Bear & Flowers
Everyone could use a hug.  Teddy bears can be sewn, crocheted, or knitted.  If you don’t have those skills, buy one and add a personal touch, such as a bunch of silk flowers or homemade chocolates.

Soft & Dreamy
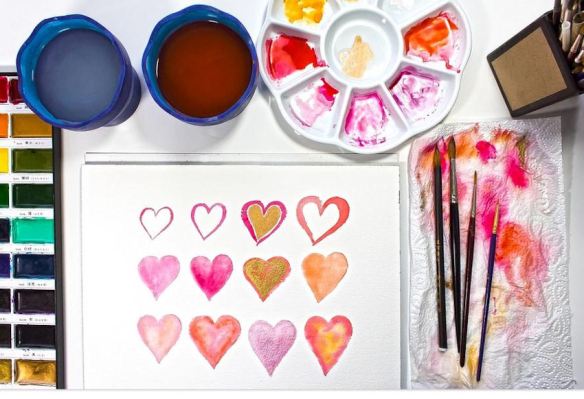
Watercolor Painting
Watercolor, acrylic or oil paints are the perfect choice for creating beautiful artwork to be treasured for years to come.

Heartfelt Adventure
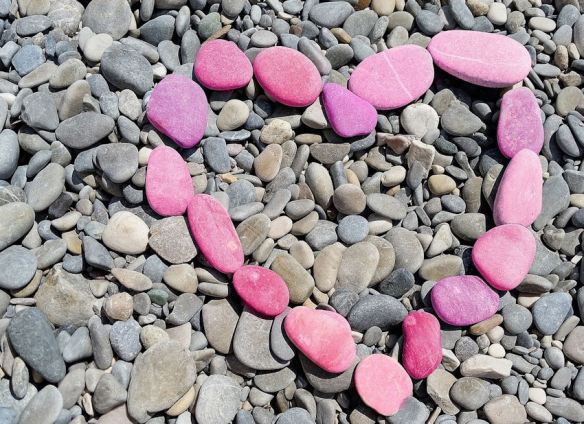
Pink Stone Heart
Outdoor enthusiasts will enjoy taking a romantic walk along a beach or trail on a “treasure” hunt, consisting of well-placed hearts made from stones, shells, or flowers.

Presentation is Everything
Heart Earrings
At the end of the treasure hunt mentioned above, surprise your companion with a little gift, such as a bouquet of wildflowers or handmade jewelry.

Reflective Photography
Black Swan
At first glance, you might only notice the beauty of this black swan but look closer and you will see the perfect heart shape created by his reflection.

Just the Two of Us
Romantic Silhouettes
A sunset photo of a couple is a nice keepsake and posing just right forms a heart.

Your BFF
Dog Wearing Scarf
Our best friends are always looking for affection.  A new scarf or a heart charm for the collar are nice options, but the best way to show your love is by giving them your time and attention.  Works for people too!

Thanks for reading.

Happy Valentine’s Day & Happy Crafting!

Countdown – Top Six Posts of 2020

Time Travel
In the movie, “Back to the Future”, Michael J. Fox traveled back in time.  As a new year begins, it’s interesting to review the best moments from the previous year.  As voted by you, the readers, below is a list of the Top Six posts of 2020, in ascending order:

Number 6: Say It with Flowers
Creative Flower Arranging
Flowers have been used for centuries to decorate, commemorate and celebrate the moments of our lives.  Whether you choose fresh cut or silk flowers, the artfully arranged blooms are both a challenge and a triumph for the dedicated crafter.  To read more, please click here.

Number 5: Celebrating 100th Post
100th Post
Today marks a very important milestone – my 100th post!  It has been a wonderful experience, and I thank all my readers and followers.  To read more, please click here.

Number 4: The Beauty of Wood Crafts
Beauty Wood Crafts
Wood crafts are a fun and inexpensive way to express your creativity.  From birdhouses to toys and home décor, there’s something for everyone and these projects are great activities to do with the kids.  To read more, please click here.

Number 3: Tropical Splendor
Tropical Leaves
Ah the tropics!  I’m sure we all wish we could be basking in the sun on a tropical island -sand under your feet, a soft ocean breeze, and a cool fruity drink within reach.  Our travel plans may be on hold for now, but we can dream.  A tropical project may be just what we need to brighten the day and lift our spirits.  To read more, please click here.

Number 2: Thank You
400 Followers
With many thanks to all of you, I have reached an important milestone: 400 Followers.  Thank you to all my readers and followers for liking, commenting, and sharing this creative journey with me.  I am so grateful for each and every one of you.  To read more, please click here.

Number 1: Fun with Photo Editing
Photo Editing
Wouldn’t it be cool if you could simply change a gloomy sky to a gorgeous day with a wave of your arm?  We might not have that ability now, but we can certainly achieve this monumental task through the power of photo editing.  To read more, please click here.

Future Projects
Art Supplies
And there you have it – the top 6 posts of 2020.  Now we have a new year, a clean slate, and together we shall explore the world of creativity.  There are always new ideas, new mediums for experimenting, and I’ll be sure to include more of your favorites.  Your opinions are greatly appreciated, and I look forward to so much more this year.  If you have any suggestions for future posts, please let me know.  Thanks for reading!

All the best in 2021 and Happy Crafting!

The Beauty of Woodcrafting

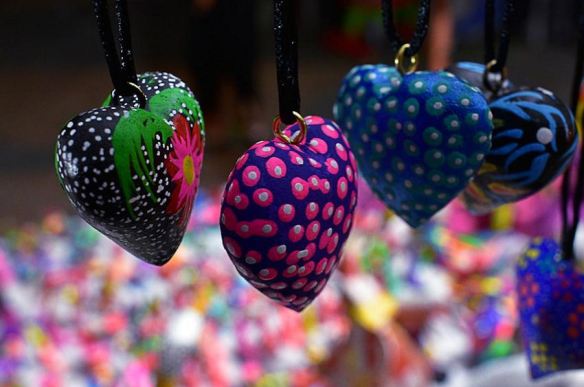
Wooden Heart Pendants
Painted Wood Hearts
Woodcrafts are a fun and inexpensive way to express your creativity. From birdhouses to toys and home décor, there’s something for everyone and these projects are great activities to do with the kids. With a few craft supplies and a little inspiration, you’ll be ready to create your next masterpiece. Here are a few ideas to get you started:

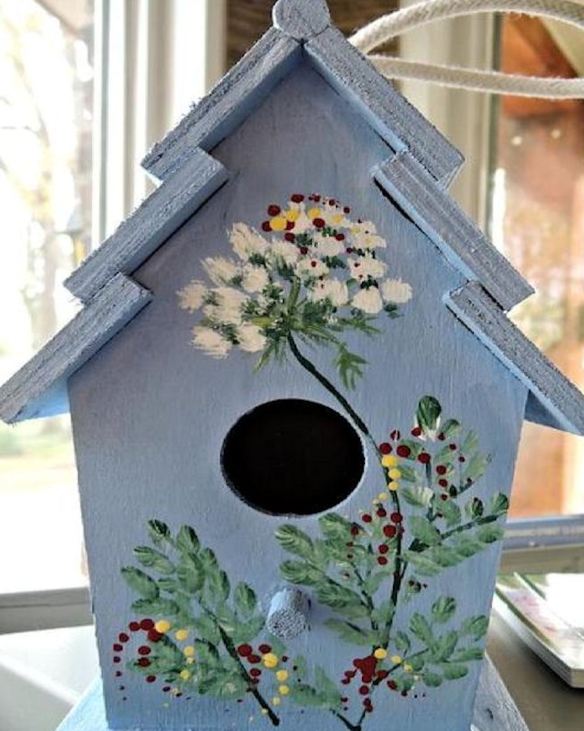
Blue Floral Birdhouse
Floral Birdhouse
Birdhouses are very popular, easy to complete woodcrafts. A quick coat of paint and a few freehand leaves and flowers were all that was needed to complete this project. A realistic looking feathered bird perched in front of the entrance would be a cute addition to this indoor decoration. Crafter Tip: For outdoor use, choose a birdhouse with an access door for easy cleaning.

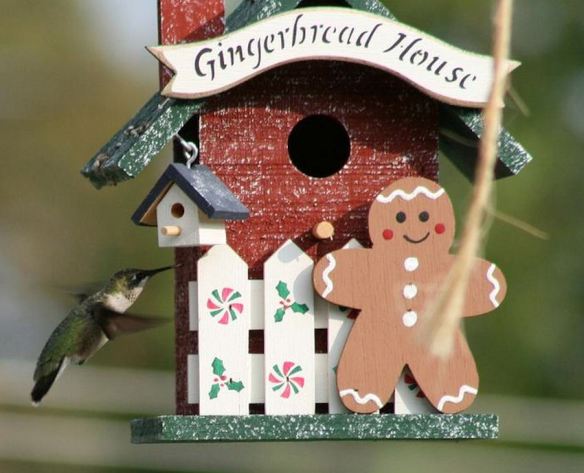
Accessorizing A Birdhouse
Gingerbread Birdhouse
This artist took woodcrafting to the next level by layering multiple wood decorations, upon a simple birdhouse frame, including a gingerbread man, festive white picket fence, signage, and a miniature birdhouse hanging from the roof. Enhancing a ready-made item adds personality, and unique design flare. Crafter Tip: It is helpful to keep sandpaper on hand. Most woodcrafts are ready to be painted or stained, but sometimes rough edges need a little attention before additional finishes can be applied.

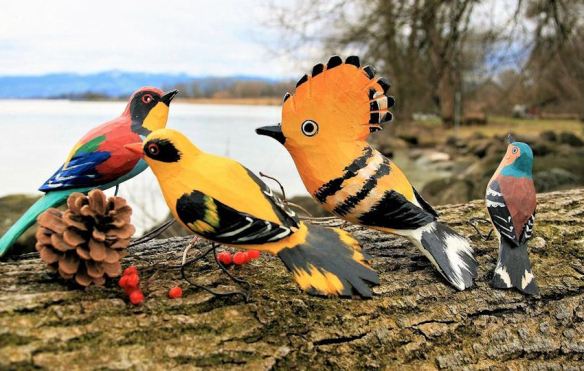
Painted Carved Wood Birds
These colorful fellows have wire attached to their feet for easy attachment on branches, or stakes. Be sure to always use the appropriate type of paint (indoor versus outdoor) depending upon where you choose to display your creations.

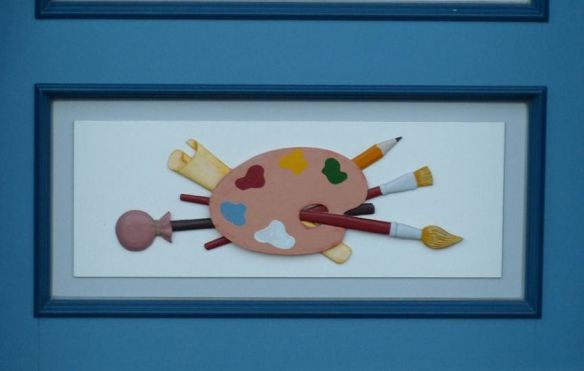
Painted Wood Relief Plaque
Wood Relief Plaque
This three-dimensional plaque proudly adorns a two-tone raised panel on an exterior door. Similar plaques would be a great way for kids to express their personalities on their bedroom doors.

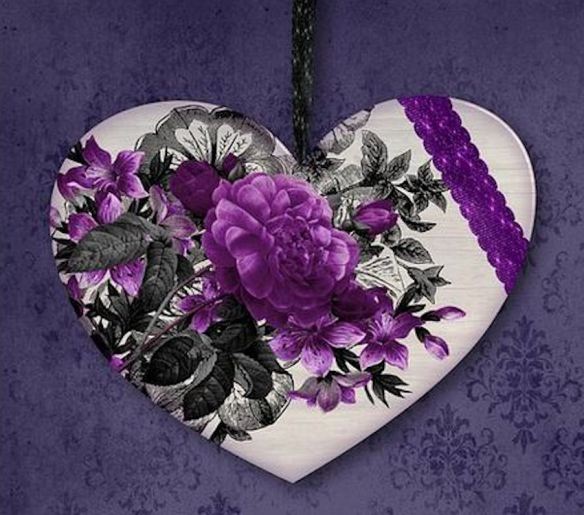
Purple & White Heart Wall Hanging
Purple & White Heart
Hearts are a favorite décor item. Instead of using the usual red or pink color scheme, this crafter chose a pretty purple and black floral scrapbooking paper with a touch of lace. Although they can’t be seen in this photo, be sure to paint the edges to match the background color prior to attaching the paper. Crafter Tip: As a more romantic alternative, the edges could be wrapped with coordinating ribbon or lace.

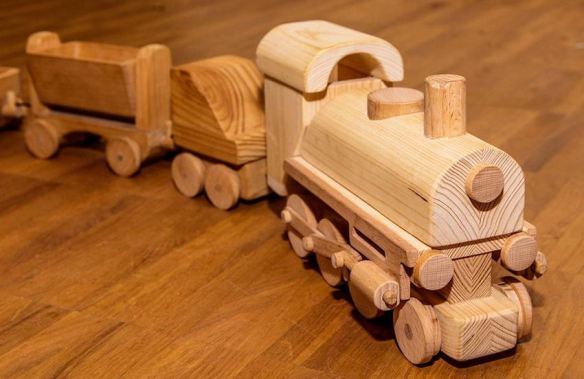
Toy Train
Toy Train
If you are looking for an absolutely effortless craft store project, you could purchase a few train cars, set it up at home and call it done. Natural wood grain is beautiful just the way it is. There’s really no need to do any painting, but if you feel you want to add just a little color, stickers from the scrapbooking department will work just fine. Crafter Tip: Or let your kids handle it and everyone wins.

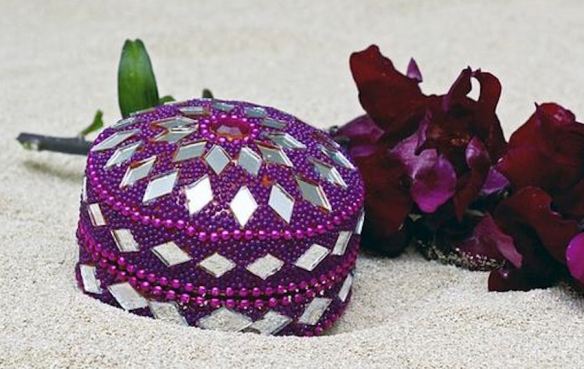
Jeweled Box
Jeweled Box
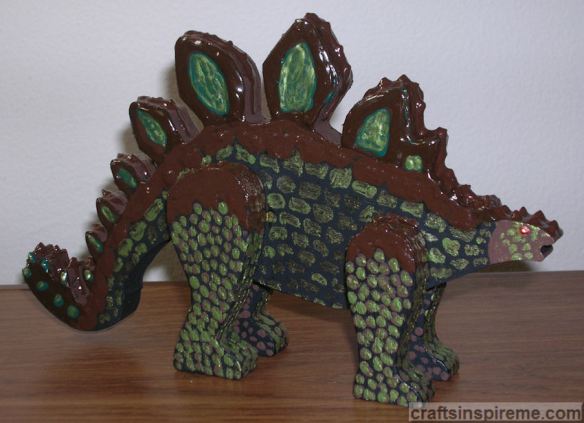
To create this jeweled box, start by painting the exterior iridescent purple, which will peek through the beads. Apply large mirrored pieces first and establish mid-size purple beaded borders. Fill in the remainder with tiny seed beads. The inside could be lined with velvet or satin fabric. Crafter Tips: Use full strands of beads for borders to make the gluing process easier, and ensure they are glued firmly in place at the edges of the lid because they may loosen over time with wear and tear.

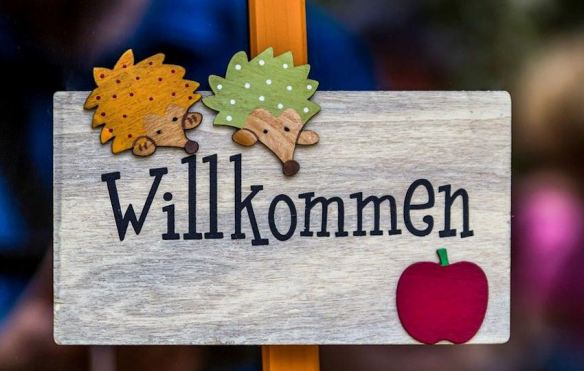
Welcome Sign & Lawn Decor
Welcome Sign
Part of your exterior décor may include “Welcome” signs, house number plaques, and humorous lawn ornaments such as garden gnomes and sheep. Large-scale seasonal items are also ready to paint, such as pumpkins and reindeer.

Personalized Wall Clock
Wall Clock
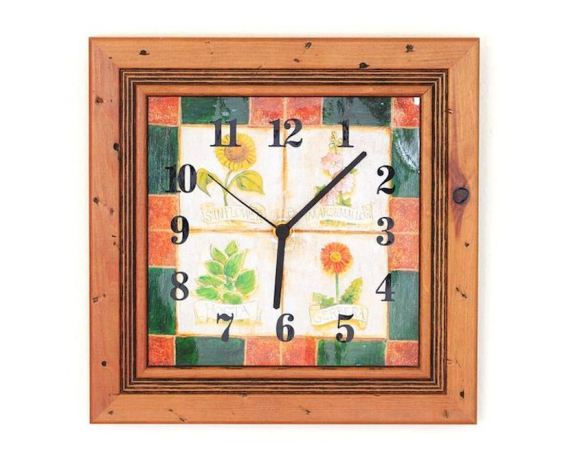
After staining this wall clock, a floral and checkerboard scrapbooking paper was applied along with self-stick black numbers. Craft stores carry kits, which include clock hands and the battery operated mechanism for the back. The unfinished clocks in several shapes and sizes are sold separately.

Floral Letters Wall Art
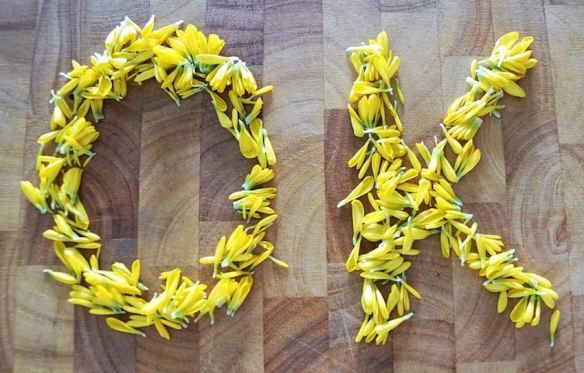
Letters have become popular wall art. Simply use your initials, or any words you like. In this photo, silk flower petals were glued on the top and sides of each letter. It’s super easy to do and ready to hang up. Crafter Tip: As alternatives, you could use mini pom poms, glass marbles, or self-stick gemstones.

Decorated “Home” Wall Art
A distressed paint finish in four different colors, a few sprigs of silk foliage, and a butterfly create a casual, welcoming message. Hanging an antique key enhances the warm feelings associated with “Home.” Crafter Tip: To achieve this distressed look, allow the paint to dry, and then use sand paper to “age” the letters.

Freestanding Inspirational Art
Wooden Owls
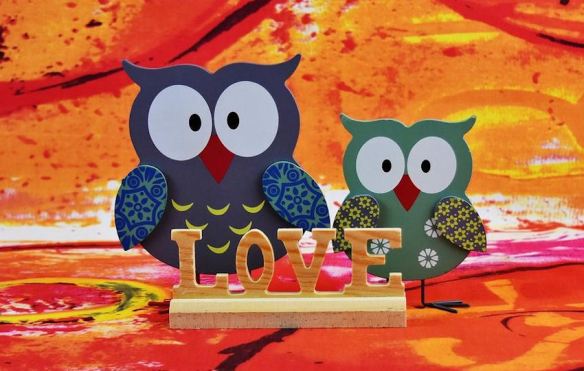
Whether you work in an office or from home, it never hurts to have a little inspiration to lift you spirits and bring a smile to your face. These cute little owls fit the bill, along with an empowering message too.

Wooden Serving Tray
Wooden Serving Tray
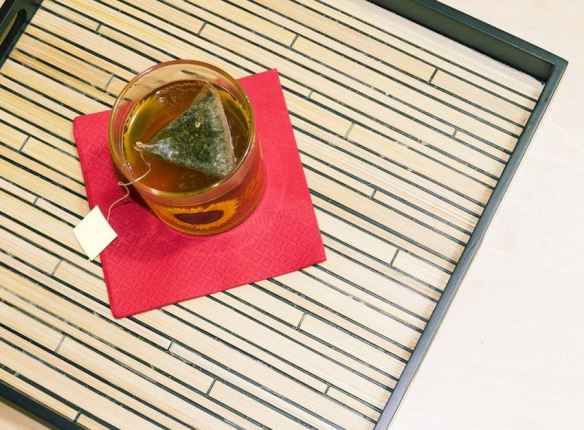
A plain wooden serving tray was spruced up with some spray paint, and lined with a bamboo placemat. If necessary, trim the bamboo to fit. The dark gray paint, which peeks through the wood slats, contrasts nicely with the light color bamboo. Crafter Tip: Pier 1 has a large variety of unusual placemats, which can be used for many crafting projects.

Please stay tuned for next week’s post featuring detailed instructions for painting woodcrafts.

Thanks for reading & Happy Crafting!

Celebrating 100th Post

100th Post
Today marks a very important milestone – my 100th post! It has been a wonderful experience, and I thank all my readers and followers for taking this journey with me. Below are photos and links to each category of arts and crafts covered to date. Please take a few minutes to peruse your favorites.

Baking & Candy Making

Beaded Jewelry & Gemstones

Color Theory
Color Theory

Floral & Home Decor
Floral & Home Decor

“How To” Projects
How-to Projects

Inspiration
Inspiration

Miscellaneous Crafts

Painting – Decorative Techniques
Decorative Painting

Seasons & Holidays
Seasons & Holidays

Wood Crafts
Wood Crafts

Please let me know, in the comments section, if you have any suggestions for future arts and crafts topics. I am looking forward to the next 100 posts. This achievement would not be possible without all of you! Thank you!!

Thanks for reading & Happy Crafting!
Countdown – Top Six Posts of 2019

Clock
Where does the time go? There’s always another post to be written, another project to develop, and another inspiration to explore. I thought it would be interesting to take a look at the 2019 Top Six posts, in ascending order, based upon Likes. Without further ado, here are your favorites:

Number 6: Daily Dose of Color
Beautiful Sunset
Color plays an integral role in our daily lives. It affects our moods, decisions and actions. Let’s take a look at our activities on a typical day to observe how influential color can be. To read more, please click here.

Number 5: Walk on the Wild Side
Stegosaurus
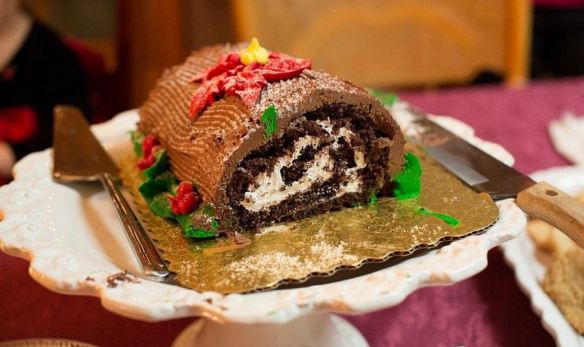
We love dinosaurs. Want proof? Look at all the books, movies, television shows, and merchandise. At some point, every kid draws and colors his or her favorite dinosaur. Here’s your chance to feel like a kid again. Grab some paints and brushes and let’s go! To read more, please click here.

Number 4: The Beauty of Yarn Crafts
Yarn Crafts
Yarn has come a long way over the years, from single color wool skeins to multicolored, textured fibers, made from manmade and natural sources, suitable for clothing, home décor and accessories. Let’s look at a few of the types of crafts made with yarn. To read more, please click here.

Number 3: Baking for the Holidays
Holiday Baking
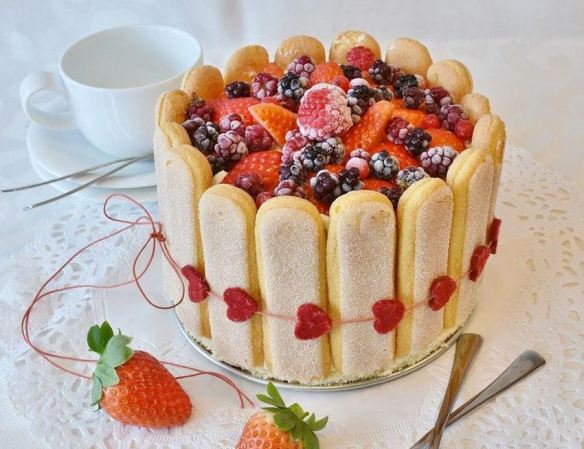
Santa Claus isn’t the only one hoping for some holiday goodies. We all love dessert. If you get a head start on your baking, you’ll have plenty to share with your family and friends throughout the long holiday season. Baked goods make great gifts too. To read more, please click here.

Number 2: Birds of a Feather
Flamingo
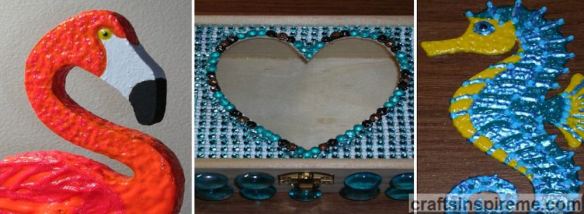
For some reason, I often find myself drawn to the wood crafts aisle at my local hobby store. Maybe it’s the quick reward for very little effort at an inexpensive cost. Who doesn’t enjoy a little instant gratification? There’s always something new to discover. Learn how to make this adorable flamingo. He may not take flight, but the bright colors and cheerful expression are sure to make you smile. To read more, please click here.

Number 1: Creative Stress Relief
Computer Stress
With such fast-paced lives, we all need a break from our daily stresses. These demands have physical, mental, emotional and spiritual effects. The best solution is a vacation, but that may not be possible. Instead, indulge in a hobby or two to take your mind and body to a happy place. Every day you do things for everyone else. It’s time to put yourself first! You’ll be so glad you did, and you’ll have a lot of fun while doing it. To read more, please click here.

Word Press Blogging
Upcoming posts will include new projects and crafting inspirations. I’ll be sure to include additional articles based upon the above interests, as voted by you, the readers. Your opinions are greatly appreciated, and I look forward to so much more this year. If you have any suggestions for future posts, please let me know? Thanks for reading!

All the best in 2020 and Happy Crafting!

Crafts of Love – Valentine’s Day Gifts

Frogs in Love
Valentine’s Day is the perfect time to show your appreciation for the people you love.

Valentine's Cake
Celebrate with a Lady Finger Torte, Layer Cake, Cherry Cheesecake, Cupcakes, or Cake pops. Anything homemade is always appreciated. And if baking is not your specialty, buy one at the bakery, put it on your own serving dish and it will be our little secret! (lol)

Homemade Candy
Candy making is an easy process for everyone, even beginners. Start by melting chocolate wafers, called candy melts, which come in a variety of colors and flavors. Pour the chocolate into molds and refrigerate according to directions. You might also consider chocolate covering strawberries, nuts, graham crackers, or marshmallows. Present the finished pieces in a heart-shaped box or container.

Decorated Valentine's Cookies
Decorated cookies are eye-catching as well as delicious. Whether you choose homemade cookies or plain store-bought, add icing details, candy, or sprinkles to complete your festive designs.

Roses
Fresh-cut or silk flowers can be arranged in a bouquet, vase, or heart-shaped wreath. You don’t have to go to the expense of buying roses because any type of flowers will be appreciated.

Bleeding Hearts Flowers
Live flowers in a hanging basket or pot are not only beautiful, but long lasting as well. The flowers shown have not been photo shopped. They really are heart shaped, hence the name “bleeding hearts.”

Glass Heart
A glass paperweight, suncatcher, or pendant is a beautiful option.

Heart Charm
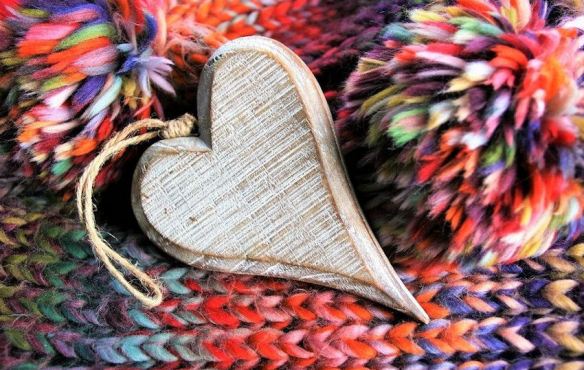
You could also paint a wooden heart to be hung on a wall, included on a wreath, or as a charm on a gift package or handbag.

Jewelry
Beaded jewelry is easy to create. If you don’t have those skills, you can buy a readymade chain or cord and string over-size beads without the need for any tools.

Winged Heart
You could also buy a heart-shaped pendant and add it to an existing chain or choose a new one.

Love Song or Poem
If you have a gift with words, write a song or poem on specialty paper to suit the occasion.

Painting
Artwork, such as painting, drawing, and photography, is a personal way to share your talent and show your affection at the same time.

Photo Album
A scrapbook is a thoughtful way to commemorate family memories and special events.

Vision Board
Create a vision board or photo album with inspirational travel brochures, activities and scenic pictures to build excitement for an upcoming vacation.

Candle Making
Candle making is simplified using a kit. There are multiple options including colors, shapes, sizes, and essential oils scents.

Romantic Dinner
You can’t go wrong with dinner for two. This is the perfect venue for candles, printed napkins on a pink or red tablecloth, and creative place settings to set the mood for a romantic evening.

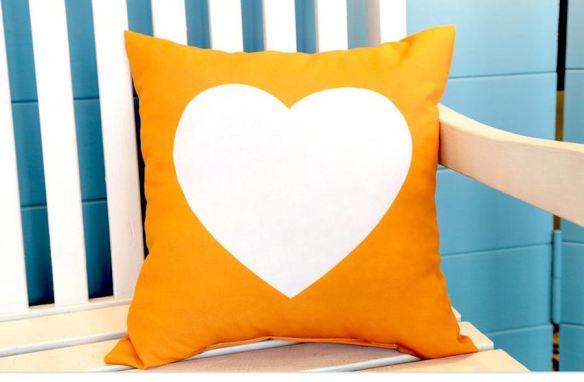
Heart Pillow
Sewing a pillow is a quick colorful project to coordinate with any décor.

Knitting
A knitted scarf, hat, gloves, or sweater will keep that special someone warm and cozy on a cold winter day, and it will be enjoyed for years to come.

Stuffed Animals
Who doesn’t love cuddly stuffed animals, especially teddy bears? If you are skilled with a needle and thread, you could make a bear with faux fur or buy one. There’s nothing like a big bear hug to brighten your day and chase away the blues.

Sunset at the Beach
It is said, “The best things in life are free.” Go to the beach, the mountains, a nearby park, or your own backyard. Any place will do to spend time together watching the sunset, enjoying a picnic or barbecue, or simply going for a walk hand in hand. Expressions of love don’t need to cost a lot, just a little creativity and a heartfelt message.

Happy Valentine’s Day and Happy Crafting!

How to Make a Painted Wooden Snowman

Snowman Closeup Photo

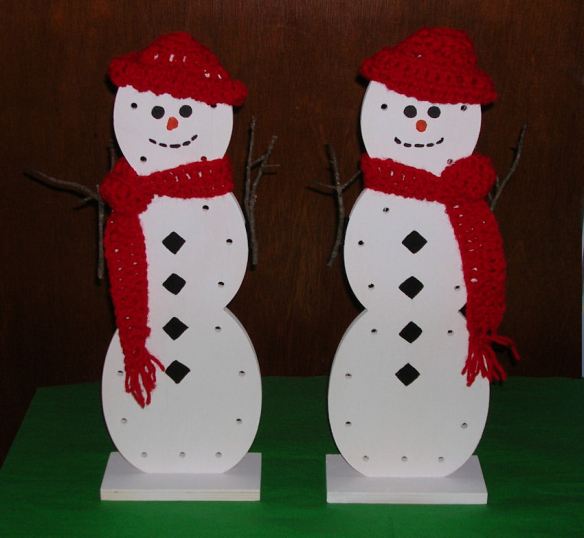
The solstice officially marked the start of winter. The long range forecast here in the northeastern U.S. calls for cold temperatures, but less snow. That could be a problem for those outdoor-enthusiasts, who love cross-country skiing, ice skating or simply building a snow fort in the backyard. It wouldn’t be winter without a snowman or two. Why not build a snowman that will never melt? This is a simple, inexpensive project for the whole family. I made two snowmen to display in my living room windows.

Unfinished Wood
It all starts with unfinished wood snowmen, purchased at AC Moore.  The perimeter holes are for lights in a later step.

Snowmen Painted White
Spray paint all sides, edges and base with white paint.

Painted Details
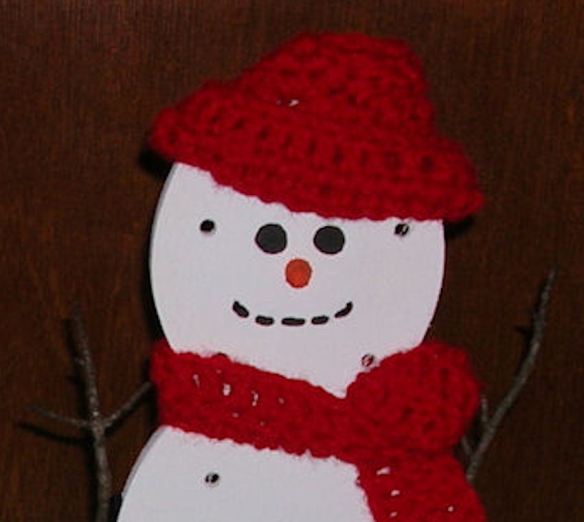
With an artist’s paintbrush, add the details (buttons, eyes, and a smile) with black paint.  Instead of painting the details, you could hot glue round and square plastic buttons, and draw the smile with a Sharpie marker.

Hats Scarves & Carrots
Accessorize with hats and scarves. If you enjoy crocheting, you can quickly create this fashionable look with whatever color yarn you have on hand. Bright red is a great seasonal color, and reads well from a distance. If needlework is not your thing, craft stores have snowman building kits and accessories. For the nose, I created the look of a carrot by squeezing a foam, packing peanut into the correct shape, and painting it with bright orange acrylic paint.  Use hot glue to attach carrot nose.

Stick Arms
Making the arms is as easy as collecting a few sticks from your yard, and attaching them to the sides. You could glue them in place. I decided to use self-stick Velcro instead, because I wanted the arms to be removable for easy storage.

White Lights
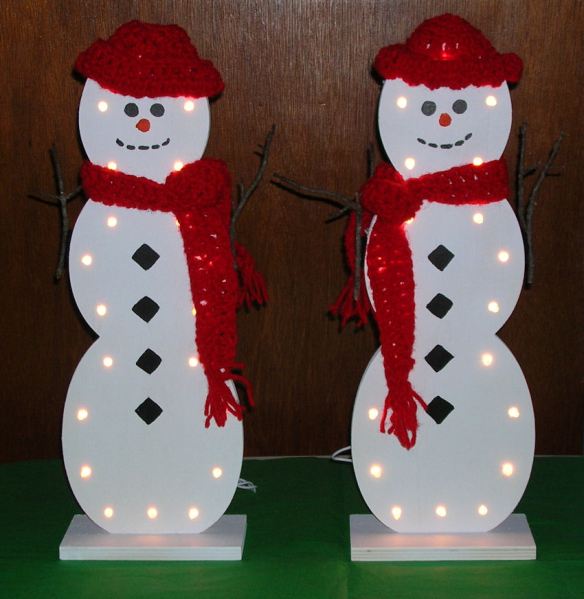
Those pre-drilled holes around the perimeter were made to hold a strand of twenty white lights, also available at AC Moore. Crafter Tip: The lights can only be pushed through from one side of the wood frame. You may need to secure the last light at the bottom with a piece of tape to keep it from pulling out from the weight of the electrical cord.

Lights at night
I turned off the flash on my camera to give you an idea of how these cute little snowmen look when lit at night. When the holidays are over, these snowmen can remain on display throughout the winter to bring a little whimsy to your home’s decor. The lights are very bright, and can be easily seen by passersby.

As an additional aside, I made these snowmen two-sided. Because they are standing on a windowsill, they can be seen from inside and outside. The lights can only be seen from the front, but seeing that smiling face when I walk by the window makes me smile too.

Happy Crafting!